Monday, June 28, 2021

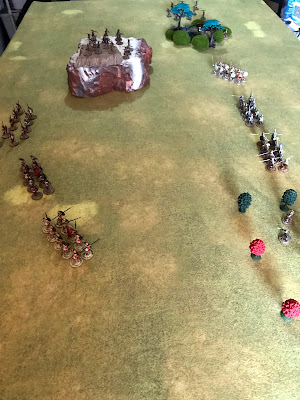
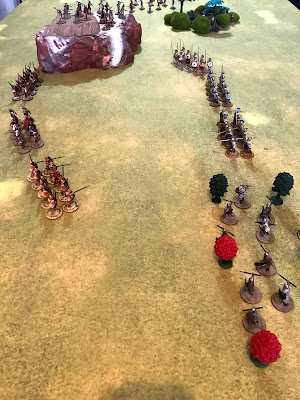
On The Painting Desk: Republican Romans are done! For now......


In 2021, I have been on an epic quest to complete painting Republican Roman armies to help support the Wars of the Republic release from Osprey.  My first pass, was painting up an Early Republican Roman force circa the transition of the Second Samnite War.  This was the classic Triplex Acies army, but with less uniformity and no Hamata!  The second step was a Mid-Republican Army that still used the Triplex Acies but had a much more uniform appearance as the State took over providing equipment. 

All on the shelf....

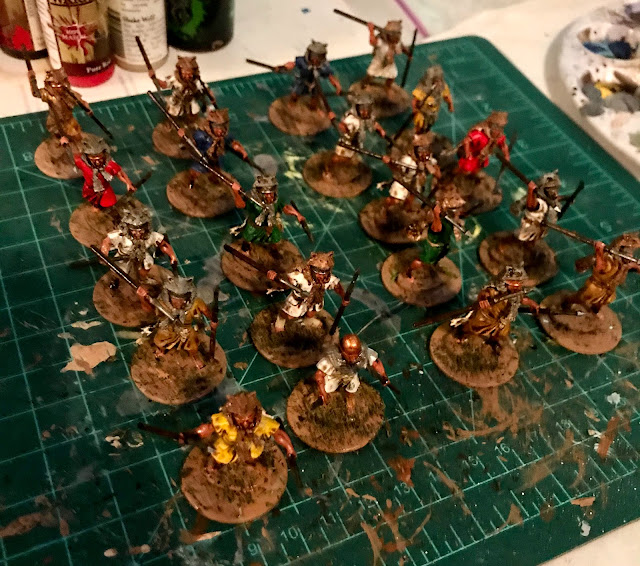
After finishing up the Mid-Republican Army in Lorica Hamata (Chain Mail) I knew I needed to bulk up my Roman Light Infantry.  I wanted to paint up some actual Velites with wolf pelts and all to supplement my Early Roman Skirmishers.  With the kits I had, I was able to put together 2 units of Velites.  


As you can see, I used a variety of tunic colors, roman sandal colors, shield covers, and even varied up the colors of the wolf pelts.  One of the velites I had to make a wolf pelt out of green stuff since I ran out of the pelts from my Victrix kits.  


  I felt comfortable calling these guys done and ready to fight on the table.  

That led me to the next stage of painting up models.  I wanted to paint up some more Lorica Hamata clad Romans.  However, these guys were to be used as a Late Republican Roman army such as that fought in the Civil Wars or even against Spartacus.  At this point, the Romans were phasing out the Velites and Cavalry from Roman sources.  Instead they were using more mercenaries and tribute troops to fill out these roles.  

The heart of Heavy Infantry remained Roman citizens though.  The ranks were opened to even the poorest classes of citizens and equipment was provided by the state.  They no longer fought in the venerable Triplex Acies.  However, as we see in the Third Servile War, lower ranking politicians would still recruit local, Militia legions or as Crassus showed more senior and Veteran legionaries could be called up as well.  


I used the Lorica Hamata equipped Republican Romans kit from Victrix as the base.  I used the same visualization standards as I did on the other forces.  The Militia Legions all were throwing their Pilums, the Legion Regulars have their Gladius out.  However, the late Republican Legions no longer used spear armed Triarri so I replaced them with Veteran Legions marching with their pilums.  Finally, I also put together another unit of basic Skirmishers that are useful in helping round out the points on a Line of Battle AND protecting the flanks.  

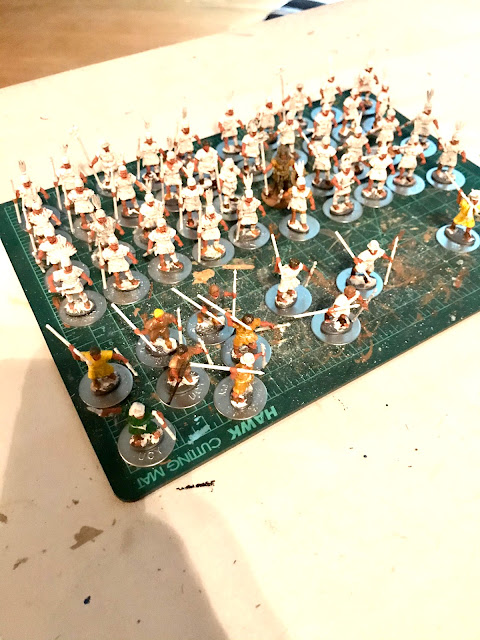
From there, I followed my normal approach to undercoating in white, batch painting the flesh, painting the sandals in 3-4 different brown colors.  From there, I broke them out into units and started painting.  


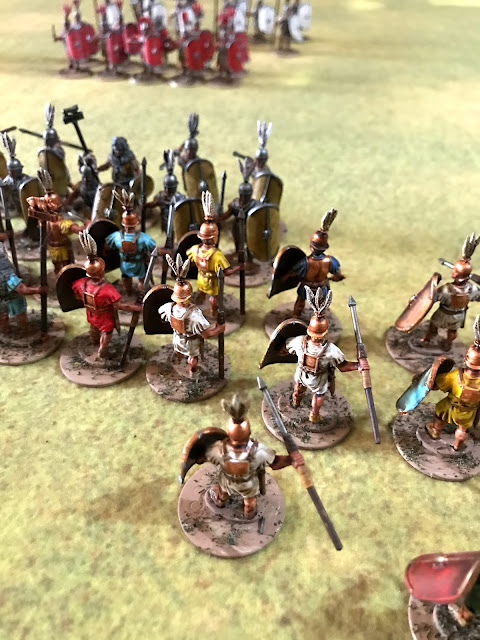
The Skirmishers were again painted with various tunic colors to represent their varied, poor, and "bring what you have" nature.  The Militia Legion I painted in the same colors as the Hastati so I can use them to bulk out my Mid-Republican army if I wanted.  Legion regulars were red to be able to mix with Principes as needed.  Finally, the Veterans I painted with the dark plumes of the Triarri from my Mid-Republican force.    


Then, I based all the models with brown paint and scatter lichen.  I painted their shields as the Mid-Republican forces on the sprue.  Once done, I took them off the sprue and placed them on the models. 


Viola!  A Late Republican Roman Force to fight against the enemies of the Senate or for their own General.  I look forward to using these guys to help test out my Revolt! The Third Servile War which will be my first supplement for Wars of the Republic and providing a more detailed campaign for fighting the war against Spartacus from beginning to end. 


With these guys done, I can move onto my next project.... Vikings for my Fury of the Northman project.  I have all ready started building some, so here is a quick preview.....

I am also using left over parts from my Greek, Vikings, and Roman armies to start to assemble an Etruscan force to face off against my Men of Bronze Greeks and Wars of the Republic Early Romans.  

Remember, your support makes this all possible!  Thank you for your help!  Every purchase of a Blood and Spectacles product from the Wargame Vault or Osprey lets me keep building games for you to play! 


You can follow Blood and Spectacles Facebook page for more fun: https://m.facebook.com/pg/BloodandSpectacles/posts/?ref=bookmarks&mt_nav=0

Or our website:

Or our Messageboard:

Or our Wargames Vault Page:

Blood and Spectacles Wargames Vault Page      


Monday, June 21, 2021

Review: Dracula's America Supplements- Osprey Games


I was lucky enough to pick-up the Core Rules for Dracula's America as well as all the supplements in one go.  I was able to read through and review the core rules a few months ago, but had not been able to look into the supplements too extensively.  I liked what I saw in the Core Rules and am eager to look at the next two soft cover books.  

The supplements are called: 

  • Hunting Grounds
  • Forbidden Powers  
I believe Hunting Grounds came out first, but if I recall correctly there was not a big gap between publications.  They probably had them all done around the same time, but needed to stagger the print dates.  

On the back cover of Hunting Grounds has the following additions: 

  • Two new Factions: Tong and Forsaken
  • New Weapons
  • New Powers
  • New rules for the Hunting Grounds
  • A Narrative Campaign
Forbidden Powers claims to cover the following: 

  • Two new factions: Church of Dagon and Salem Sisterhood
  • Stealth rules
  • Expanded Arcane Powers and Insanity
  • New Scenarios
  • Hired Guns
  • Monsters
  • Skills
  • Gear
Seems like a lot of good content.  I am not sure my usual process of reviews will work, but we will see what I can do.....

The Manitou! 

The Hunting Grounds
The Hunting Grounds are a spirit realm that can over lay the board.  Scenarios and locations impacted by the Hunting Grounds allow models to move between the physical and the spiritual realms.  This reminds me of the Astral plane in Shadowrun, the Warp in 40K, or even the Grid in Reality's Edge

Models can move into this realm and access objectives there.  When in the Hunting Grounds, models can only be impacted by others in the Hunting Grounds.  However, using magic and summoning while in the Hunting Grounds is much more dangerous and prone to summon abyssal beasties.  In addition, these creatures could also follow you OUT of the Hunting Grounds while you depart!  I was very pleased to see some classic American critters like Manitou, Wendigo, Thunderbirds, and Mothman on the new Bestiary related to the Hunting Grounds.  Some of these creatures are VERY lethal.  

Some new weapons are also added that probably should have been in the original rules.  Weapons like a Musket, Tomahawk (Thrown weapon), sword, and spear.  The original book had a Native American faction and a Confederate Faction so I am surprised these did not make the first cut.  Must have been space limitations.  However, when adding the 7th Cavalry you must have swords (sabres), and Tongs often make use of melee weapons.  

New arcane powers also come into play.  Each seems to get some form of teleportation, which I am not a huge fan.  Those caused some balance issues in Frostgrave so I am not sure how they will play out here.  There is less of a focus on "Treasure gathering" even though it is a component of some scenarios.  Including ones in the Hunting Grounds.  

The game comes with two new factions, the 7th Cavalry Forsaken, and the Shadow Dragon Tong.  In addition, there are rules to further personalize a Skinwalker tribe as well.  Finally, there are some rules for Outlaw gangs for the campaign.  The Forsaken have beast-mode members, while the Tong have Shadow-walkers.  Both add some flavor and additional muscle to the gang.  The Skinwalker Tribes allow some customization of the Tribe to better fit what "tribe" they are from and some limited benefits such as access to horses, different totem animals, and other features.  The Outlaw rules remind me a lot of the ones from the old Necromunda.  

Half of the book is new campaign rules.  This includes adding Riding and Leadership skills.  Then, there is also new gear including the Gatling Gun!  There are more Hired Guns, like the Medium that can help with gangs not set-up for the Hunting Grounds. There are also new territories and events for game set in the Indian Territories and Deadwood City where the Hunting Grounds are most prevalent.  The rules also add Hide-out upgrades which were not in the first book.  Finally, the added rules include adding some additional ways to acquire money in the campaign stage of the game via Bounty Hunting.  

There are 7 new scenarios in the game.  These revolve around the Hunting Grounds and making use of the special abilities of the campaign setting.  However, they are structured as part of a narrative campaign.  Therefore, you can play them in order or use them as stand-alones.  This section also has some rules for how to incorporate the Hunting Grounds into other scenarios from the main book.  

I always appreciate a Tong faction!


Forbidden Powers
This book moves the action away from the Wild West and Indian Territory and to the Deep South.  In addition, the new Eldritch Horrors have begun to stir.  The story links the Salem Witch trials, Benedict Arnold, the Necronomicon, Betsy Ross, George Washington, and the Masons, Cyclopean Ruins in the Bayou, Vodoo, and the Confederacy all into a tale.  Wow!  That is a big lift, and it does a great job setting the scene in a few short paragraphs.  

Since we are now in the Swamps, the book adds some rules for the new environment.  This includes swimming, deep water, treacherous conditions, and Swamp events.  There is also a new bestiary for the region.  These creatures include regional favorites such as the Dire Gator, Ragman, and Skunk-Apes.  
To add to the Deep South setting, they unleash new equipment, Eldritch Relics, and Swamp encounter tables.    

From there, the rules for Stealth Missions are unveiled.  These cover sentries and how to raise the alarm.  When a sentry is activated, there is an opposed roll to see if the Attacker or Defender moves the model.  In addition, the Stealth section has 4 scenarios for use with the rules.  

Since this supplement is adding the Mythos to the game, it must add rules for Madness!  This takes the form of a token pool on the side of the table, I would imagine poker chips would do nicely and fit the theme of the game.  There is a new phase where the Madness pool can go up or down.  As the pool gets too high, various Eldritch events may occur.  An entity may be manifested, a Model might need to check for insanity, or other factors.  The rules add a new Insanity table for individual models who lose their minds as well.  

Of course, when dealing with the Mythos, that means there needs to be new Eldritch Horrors in a bestiary.  There is also Eldritch magic that is added to the game.  Both are tied to the Madness pool.  Eldritch entities increase it, while spells can only be cast up to the Madness Level at that point in the game.  Also, if you Miscast an Eldritch spell, guess who gets to roll on the insanity table? They also add some Vodoo and Necromancy powers to fit the theme of the Deep South.  

Two new Factions join the ranks of Dracula's America.  The first is the Church of Dagon.  Naturally, this one allows you to use Eldritch magic, and also gives you two hybrids with random mutations in your posse.  The second is the Salem Sisterhood, who are a group of white witches trying to protect the arcane balance.  Interestingly, this group allows access to 3 Arcanists and they grant benefits to each other when they are within 3 inches.  They also get a Bodyguard type model.  This one seems like it would be tough to play since there is a huge incentive to keep most of the group in a big "clump".  

New hired guns are also present to tie into the Mythos, add to the Dark Confederacy, and provide benefits in Stealth missions.  One interesting one is the Hog Tamer who is basically a beast master of a wild boar.  They also introduce some named Mercenary's for the setting.    

The book is wrapped up with a 7 scenario narrative campaign.  There are also some rules for running more generic encounters in the Swamps and having Eldritch encounters.  Oddly enough, none of the Narrative scenarios appear to be "Stealth" missions that I could see.  

What is that distant call?

Final Thoughts
These two books contain about what you would expect from a good supplement.  There are new factions, gear, powers, and beasts.  They introduce new "settings" and how to use the settings in your games.  They seem to deliver the goods on expanding your Dracula's America experience.  

That said, it feels a bit bloated if you included everything from all three books in one game, you would have the core rules, Bystanders, the Spirit realms, and Madness Tokens all in play!  That is a lot going on in a skirmish game.  It seems like a group might best move through a specific location or time period at a time, or tailor their local campaign in a particular part of Dracula's America instead of trying to take it all in at once.      

These books do not cover solo-play.  However, the author came out with some options for that in a supplement online called: Rough Night at Red Rock (Which is a clever play at the classic Western Bad Day at Black Rock that may or may not feature a vampire) Perhaps it is a sign that a 3rd supplement maybe on the horizon?  Only Dracula may know. 

Salem Sisterhood artwork


Monday, June 14, 2021

Battle Report White Star/Red Star- CAP in MIG Alley


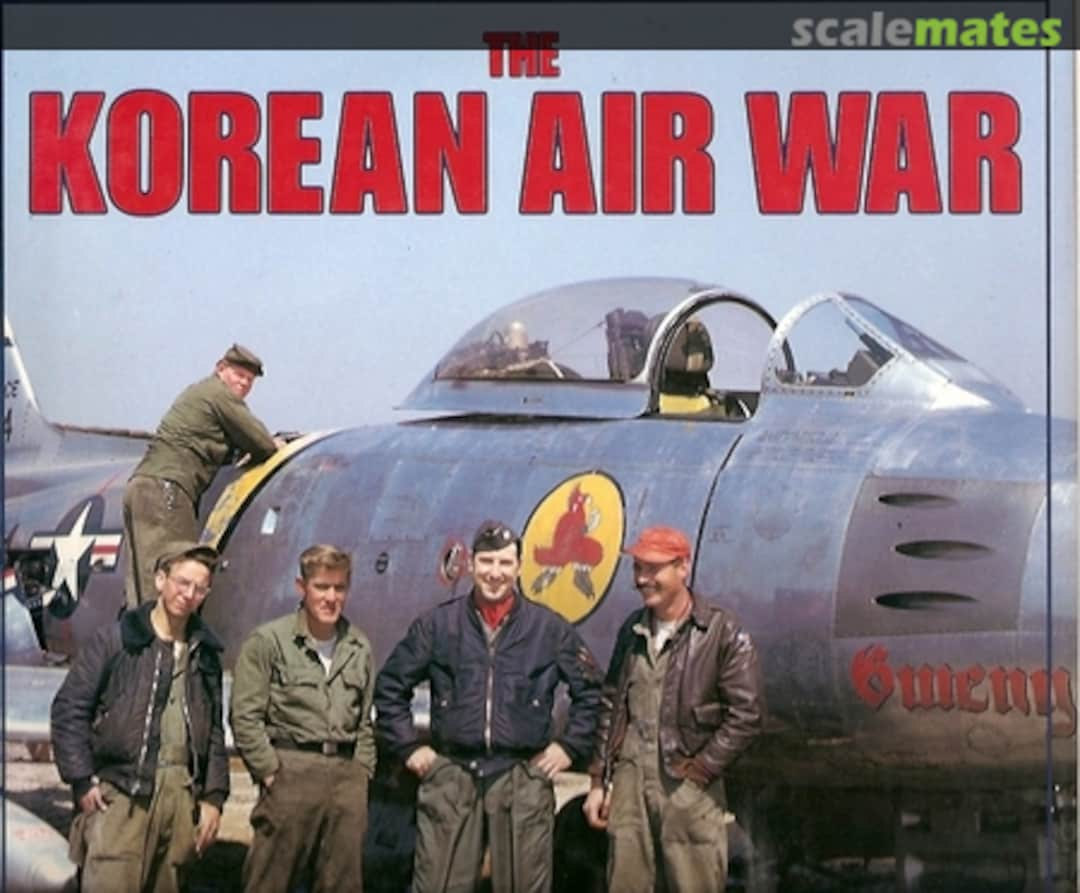
MIG Alley was the nickname for the Northwest corner of Korea, where the Yalu River enters into the Yellow Sea.  This was the area where Communist MIG-15s tended to scrap with USAF Sabres for control of the skies.  Here, high above Korea was the site of many of the first Jet-vs-Jet battles in history.

The Korean War officially began June 25th, 1950.  The initial air battles were fought between the North Korean Air Force using old WWII era planes, and the South and their allies.  The USAF used later WWI propeller driven aircraft and some early Jet aircraft.  

On November 1st, 1950 the first MIG-15 jet fighters attacked a flight of USAF F-51 Mustang fighter-bombers.  Later that day, the first jet vs. jet combat took place between the MIg-15 and the F-80 Shooting Star.  The USAF's early jets were inadequate for the task, and soon the USAF was resupplying and using the new F-86 Sabre to counter the Communist threat.  

The MIG-15's during the early phase of the war were secretly being operated by the Soviet Unions highly skilled 64th Fighter Aviation Corp.  While the Soviet pilots were engaging in the air, they were also starting to build up the North Korean and Chinese pilots to eventually rotate in and replace them.  

As the F-86 began to appear in the skies over North Korea Mid-December the stage was set for a clash for control of the Skies over North Korea between the MIG-15 and the F-86 Sabre.  

Sortie: 

We randomly determined who the Attacker/Defender was and UN forces decided to be the attackers.  The Sortie was also randomly determined to be a Combat Air Patrol.    

Set-up: 

We used the standard rules to create the set-up for this sortie.  The weather was determined to be clear.  

Since this is a standard Combat Air Patrol in MIG Alley, no additional terrain is needed.  However, we add some hills on the edges of the board, ad determine them to be difficult terrain at Low Altitude. 

The board is 48MU by 48 MU and an MU equals 1 inch.  

Forces:

Today's battle will be using my (in)famous Paper Templates

USAF

4 F-86 Sabres- Experienced Pilots

Soviets

4 Mig-15s- Experienced Pilots

This will be a straight up dogfight between the two sides of equal points and aircraft.  

Turn 1: 

Detection Phase: 

Things start out with both sides rolling very well for detection.  The Mig-15's and the F-86's are both detected by the enemies radar systems.  Since the USAF are the attackers, they choose to have the MIG-15's place first. 

Since the MIG-15 is an excellent climber, the Soviets decide to place themselves at Low altitude to start with.  The MIGS deploy with their Leader out front on the east side, and the rest deployed within 12 MU in echelon.  


The F-86 Sabres decide to deploy at High Altitude as they are better at diving on their foes.  They deploy with their leader in the center of the board, and use a tight "Finger Four" formation.  Since they are at high altitude, I put two dice under each template.  The MIGS at low altitude need no height markers.  There are only Low, Combat, and High Altitudes in the game, and I use dice under the template/base to represent height changes.    


When deploying, all aircraft of the same type need to deploy at the same altitude and within 12 MU of another craft of the same type.  This represents the aircraft working together as part of a squadron at deployment.  

Rookie:

All the pilots in this battle are experienced Pilots.  Therefore, they will be able to move and act in the Rookie Phase and the Experienced Phase, but not the ACE phase.  

MIG #3 and #4 take 20 degree turns and head towards the hills.  Meanwhile the Sabres press ahead, as do MIG #1 and #2.  No one is close enough for any shooting..... yet. 

Experienced:

MIG #4 needs to go up 1 altitude to avoid any issues with the hills.  Otherwise, he and MIG #3 stay on course to the outside edge of the oncoming furball.  The Sabres all keep moving straight.  MIG #1 and #2 do the same.  

The distance is still too great for shooting.  Timing your Dives/climbs and turns for maximum effect is not easy.  


Turn 2: 

Detection: All Planes are detected and deployed. 

Rookie: 

MIG #3 stays on course to the western hills.  

The lead Sabre dives on MIG #2 and opens fire at long range.  The .50 Cal machine guns in the nose of the Sabre open fire with a burst at long range, but the MIG evades it with a successful maneuver test.  

MIG #2 moves closer to the lead Sabre and opens fire with their cannons.  He scores 2 hits, and the Sabre only scores 1 Maneuver success.  The wing leader is shot from the sky!  MIG #2 still has ammo for the next Sabre.  

Sabre #3 stays at High Altitude, judging the Dive would not get a MIG in his fire arc.  MIG #4 breaks back towards the furball with a 45 degree turn.  Planes can turn OR change altitude, but not both in a turn.  

Sabre #2 turns towards the western hills and MIG #3.  MIG #2 turns at low altitude to fall in behind MIG #2.  Sabre #4 dives down to low altitude now as well.  


Experienced:

MIG #3 turns back into the furball in the valley.  Sabre #2 swoops down at him, but misses the angle and overshoots!  MIG #2 makes a sharp turn and gets the angle on Sabre #2, but it will be a Deflection shot.  He opens fire with his cannon and gets 2 successes.  The Sabre only gets 1 Maneuver save and his taken down by the MIG!  However, MIG #2 is out of ammo!  

Sabre #3 swoops from high altitude to low altitude and opens fire on MIG #1.  He scores 1 hit, and the MIG pilot scores 0 Maneuver saves.  Scratch 1 MIG!  However, Sabre #3 runs out of ammo due to the long burst he used.  

MIG #3 goes up altitude, while Sabre #4 turns in to the attack.  He gets a bead on Mig #2 and opens fire with long bursts from his nose machine guns.  However, the MIG maneuvers away from the shots as the Sabres guns run dry.  

With 2 Sabres down and the rest Out-of-Ammo, we move into the Disengagement Turn. 


Turn 3- Disengagement Turn

Detection: All planes detected and deployed. 

Rookie:

MIG #4 turns into the dogfight and gets a bead on Sabre #4.  he opens fire at combat range, but the Sabre avoids the cannon fire.  The MIG is out of ammo.  Sabre #4 takes a hard, high-G turn and tries to bug out.  He flies in low over the hills with a successful Maneuver check.  

MIG #3 sees no shot, and decides to get to safety.  He climbs to high Altitude to avoid contact.  Sabre #3 goes guns the throttle to get out of there and tries to break contact.  

MIG #2 and MIG #4 break contact by climbing to High Altitude.  


Experienced

No one wishes to engage further and the game is called.  

Conclusion

The Soviets win with 2 Kills to 1 Kill.  When the last remaining Sabres ran out of ammo, it was all over but the crying! 

As the Soviet player, I was lucky that the Wing Leader's swooping attack failed to stick.  From there, I had the USAF on the back foot and I was able to concentrate firepower more effectively.  As always, my daughter did a better job of keeping her forces and firepower together, but this time my flanking maneuver to attack in echelon paid off.  

Here are some high level thoughts on the game: 

  • That was quick, quick, quick! 
  • The rules were super easy to play.
  • Timing your dives, climbs, and turns is harder than you would think.
  • Timing is critical as the engagement window is small with straight fire arcs on 1 altitude band
  • Turning vs Altitude change is a big decision point
  • Choosing when to shoot matters as you WILL run out of ammo, so make every shot as high percentage as possible!
  • Detection played no part in this battle.          
Overall, that was quick and fun.  There was decision making, but no one was agonizing over the mechanics of flying.  Instead, it was about how and when to engage and shoot.  So, it worked well as a game and met my design goals.  

The next question is how historically accurate is it?  Traditionally, Mig patrols were looking for B-29's to take out.  They would often fly low and then quickly climb to attack them.  Sabres would fly high and then dive in to the attack, while the Migs would scatter and try to out climb the USAF to get away from danger.  The USAF valued enemy aircraft kills, while Soviet pilots were less focused on dogfighting and more focused on interception.  My daughter doesn't know any of  that, but naturally adopted the "swooping" tactic based on her reading of the aircraft profile.  

In the end, much of this dog fight was vertical vs. horizontal which is pretty accurate.  The "shooting" only lasted a few moments and there was no protracted "dogfighting" like in WWII.  It ended with the USAF running out of ammo, which was not uncommon.  Then, the Migs going high to get away from danger which was a common tactic.  It matched a "typical" encounter of the period with one glaring exception.  The Soviets won and drove the Sabres off.  Usually, the Migs were the ones to bug out from an USAF CAP!  


You can follow Blood and Spectacles Facebook page for more fun: https://m.facebook.com/pg/BloodandSpectacles/posts/?ref=bookmarks&mt_nav=0

Or our website:

Or our Messageboard:

Or our Wargames Vault Page:


Monday, June 7, 2021

Battle Report: Men of Bronze- The Corinthian War II


The Corinthian War was a conflict between the city-states of Sparta and a coalition of rival states that lasted from 395BC to 387 BC.  The alliance included Thebes, Athens, Argos and Corinth.  The alliance was displeased with Sparta’s aggressive expansionism in Ionian, and Greece.  The majority of the conflict on land revolved around major battles near Thebes and Corinth. 

The Battle below is between Sparta and the Corinthian allies.  Many of the battles were recorded by Greek historians, but todays has been lost to the shrouded mists of time.  This was a battle that took place after the Battle of Nemea in 394 BCE.  The Spartans won at Nemea and began to march towards Corinth to try and enter Boetia.  However, Argive Hoplites managed to link up with Corinthian survivors of Nemea to try and block them prior to meeting at the Isthmus of Corinth. 

The Forces

Corinthians
2 Drilled Hoplites              
1 Militia Hoplite                 
1 Psiloi                                
1 Archers                            
1 Peltast                               
-Total                    38 Points


Spartans
2 Elite Hoplites                 
1 Drilled Hoplites              
2 Psiloi                               
-Total                    38 Points 

 
These two lists are the lists straight from the Men of Bronze sample army lists.  In addition, this battle will be a re-match from the first shared Men of Bronze battle report using the same armies.  The major difference this time is that they are all painted miniatures! 

Set-up

We use the terrain set-up rules straight from the rulebook.  We are using a 72BW x 48BW where each BW is equal to 1 inch.  Therefore I will be using a 6 x 4 foot board.    

We divided the board into 6 segments and rolled for terrain.  We got the following, and placed them on the board per the rules. 1-3 is the North side where the Corinthians will be.  4-6 is the South side where the Spartans are.     

1. Swamp
2. No terrain
3. Grove of Trees
4. No terrain
5. 2 Level Hill
6. No terrain

The Spartans have an interesting deployment with their Phalanxes on the East side of the hill with their flanks anchored by the edge of the board and the hill itself, and their Psiloi units are on the opposite side of the board, across from the swamp area.  
Spartans in loose formation stare across at the Corinthian Hoplites ranked up


The Corinthians have their Peltasts in the grove, then their 2 Drilled and Militia Hoplite units in the center, and then the Archers and Psiloi moving towards the swamp.  Their Drilled Phalanx are in formation all ready.    

Corinthian Psiloi on the right flank observe the Spartan line 

 
Mission

This is a pitched battle.  Each side is attempting to collapse the enemy army.  No fancy mission objectives or complications in this battle.  

Let us begin! 

Turn 1: 
Both sides collect their Arete Points, Spartans have 6 and the Corinthians 7.  The Spartans bid 6 and so do the Corinthians.  After the roll-off, the Corinthians win to go first.  

They first spend their last Arete Point so their Peltasts can Skirmish through the grove.  The rest of the army moves forward.  The Drilled Hoplites started in Phalanx and stayed in it, while the Militia Hoplites were in loose formation.  The Archers moved up by the swamp, and the Psiloi also moved forward to get around the terrain and towards the enemy flank.


The Spartans had used all their Arete Points, so they could not try to interrupt.  Their Psiloi moved up to the hill, and prepared for the ascent.  Meanwhile, the Hoplites stayed in loose formation and started to advance in echelon, with the Spartiates near the board edge moving 6, then 4, and the Perikoi drilled unit moving only 2 base widths up.  


Turn 2:
The two forces collect their Arete Points again.  This time, the Corinthians bid 6 again.  The Spartans bid 0, as they want them all to form into Phalanx or Skirmish.  

The Peltasts again use an Arete Point to skirmish through the grove, and stay in cover there.  The two Drilled Phalanxes push up.  The Militia Hoplites move up and form into Phalanx at an angle to their companions approach.  The Archers struggle through the swamp and line up along the banks of the pond, ready to rains arrows down on the Spartan Psiloi.  Meanwhile, the Corinthian lights continue to aggressively advance forward to get around the swamp edge.  


The Spartans do not try to interrupt any of the Corinthian moves.  Instead, both Spartan Psiloi use Skirmishing to climb up to the top of the hill in the center of the board rapidly.  The Spartan Perikoi (Drilled Hoplites) inch up a few base widths, but stay in loose formation.  Meanwhile, the Spartiates move up in echelon, turn and form into phalanx.  This puts their battle line at an angle to the approaching Corinthians.  

Spartans on the left side


Turn 3: 
The two forces gather their Arete Points and plan their strategy for the turn.  The Corinthians bid 5, and the Spartans bid none.  The Corinthians go first and move their Peltasts in the grove and spend an Arete Point to skirmish with them.  The Spartans try to interrupt, but fail.  


Next, the Corinthians move their Psiloi up on the opposite flank.  Then, the Corinthian archers fire at the Spartan lights on the hill, but their shots fall short!  The Corinthian Militia Hoplites move up to take position at the Corinthian flank at the base of the hill.  The Spartans try to interrupt again, and this time they succeed!  The Psiloi on the hill try to throw their Javelins at the Militia hoplites below, but the distance is too great.  


Spartans in the distance, Corinthians in the Foreground


The Perikoi (Drilled Hoplites) form into Phalanx and move up to use the hill to protect their flank.  The Spartiates move up and form an angled line to the Corinthians.  With all Spartan units moved, play turns back over to the Corinthians.  The remaining Drilled Hoplites move up, but keep their flank protected by the Grove and the Peltasts found there.  


It looks like the big clash will start next turn, as both battle lines look like they have drawn themselves up into the formations they want.


Turn 4:
The two sides collect their Arete Points.  No one has lost a unit, so both sides have their full points to start with.  The Corinthians bid 2 Arete to gain initiative while the Spartans hold onto all of theirs for Counter-charges, re-rolls, etc.  

The turn begins with the Corinthian Drilled Hoplite on the left, near the grove declaring a charge on the Spartiates on the edge.  Of course, the Spartans choose to counter-charge.  Both sides get 4 hits, and both sides lose 1 Courage.  The Corinthians are pushed back 3 Base Widths. 

Spartans are closest to the camera

The Corinthian Peltasts decide to join in on the melee, and charge out of the Grove and attack the Spartan flank there.  The peltasts hit hard, and reduce the Spartans another 2 Courage!  The Spartans are down to 2 Courage now.  This pushes the Spartans backwards 2 Base widths.  The Spartans must make a Courage test, which they fail and start to Waver.  Ouch! 

From there, the Corinthians decided they could not make further charges and hit the Spartans, unless they played along and counter-charged.  The Archers tried to move out from around the swamp, but the difficult ground hindered them.  Finally, their Psiloi on the flank ran towards the hill.  They ceded the rest of the turn to the Spartans.  

For their part, the Spartans not in combat continued to march forward.  One of the Psiloi units on the hill moved up a bit, and tossed their javelins with an Arete point at the Militia Hoplites.  With a re-roll, they were able to cause them to lose 1 Courage.  

Turn 5: 
Despite the mauling the Spartiates on the Spartan right took, they are still in the fight.  All sides still have full Arete Points.  The Spartans decide to bid 0 this time, while the Corinthians bid 4.  The Corinthians go first. 

They start by resolving the melee at the left of their line between the Spartiates and the Drilled Hoplites with Peltast support on the flank.  The Spartiates reduce the Corinthians 1 more Courage, but it is not nearly enough as the Spartiates are routed, with all their Courage spent.  Their commander is turned about as the unit is pushed back an base width.  


The Corinthians then have their other Drilled Hoplite unit charge into the Perikoi who gamely counter-charge.  The Spartan Perikoi inflict 2 Courage loss, but only lose 1 in return.  They push back the Corinthians 1 base width. 


At this point, the Spartans try to grab the initiative with an Arete Point and they win the roll-off.  Both Psiloi units come charging down the hill and into the exposed flank of the Militia Hoplites from Corinth's allies.  They had lost Courage due to a Javelin barrage previously.  The Psiloi, with the help of some re-rolls; manage to score enough hits to rout the Hoplites!  


The last Spartiate unit shuffles around using their Drilled trait to go sideways away from the victorious Corinthians.  Play turns over back to the Corinthians as the Spartans have no more units.  

The Corinthian Psiloi charge into the rear of the Spartan Psiloi.  Their charge is well timed, as the combined unit was weakened from the fight with the Militia Hoplites.  All the Spartan Psiloi are routed.  Meanwhile, the archers maneuver their way free of the swamp. 


End:
In the end phase, the Spartans have three of their 5 units flee.  The Spartans that see the fleeing troops keep their cool.  On the Corinthian side, the Archers and the Psiloi see the Militia Hoplites flee, and both start wavering.  The Psiloi are on the brink of routing. 

The Spartans have to make some Collapse tests as their General was lost, and they have lost over 25% of their army.  The Perikoi decide to Collapse and flee, leaving only the Spartiates left on the field.  

Turn 6
The Spartans only collect 1 Arete Point, and they sit on it.  The Corinthians collect 7 and spend 2 to ensure the Spartans can not go first.  

The Corinthian Drilled Hoplites break into loose formation, pivot, and re-form.  Using 1 Arete Point.  They then charge in with the Peltasts supporting them.  The Spartans receive them on the flank.  Despite all the reasons in the world for the Spartans to lose, they manage to remove 1 Courage from the Corinthians and reduce them to 2 Courage, and lose only 1 in return. 


The second Drilled Hoplite unit then declares a charge and joins the melee, reducing the Spartans a further 1.  


Turn 7- Final Turn
The Spartiates managed to hang on.  If they can defeat the main Drilled Hoplite force with 2 Courage left, they will sweep all the support units off the field as well.  They only need to inflict 2 Courage loss. 

The Spartans again sit on their 1 Arete for re-rolls.  The Corinthians also sit on their Arete Points for Re-rolls.  The Initiative roll-off does not matter, and the two sides go to resolve the huge melee between the last Spartiates and the Corinthian Hoplites.  

The determine if attack dice begins, and the Corinthians get a lot of attack dice and re-rolls.  They easily blow away the last 3 Courage of the Spartiates.  However, the Spartans could manage a draw if they can remove those last two hits.  They roll their dice, and count up their successes.  They use their last re-roll and..... 


The Spartans flee the field, their courage spent!  The Corinthians hold the field of Mars.  The survivors begin grimly gathering up the Spartan panoplies to construct a trophy.  The Spartan incursion into the isthmus of Corinth has been thwarted yet again by Argive and Corinthian arms.  

Conclusion: 
As the Spartan player, my defeat lay in my deployment.  I let my Spartiates' flank hang-out exposed and that is something you can NOT do in a Hoplite battle.  In retrospect, I should not have thought that the board edge would be sufficient, since my plan was always to pivot and fight it out under my Psiloi on the hill raining down Javelins and flank charges.  Once I saw Peltasts in the Grove, I should have re-thought my plan and put some Psiloi on the right, and left 1 to go on the hill.  

I was surprised on how fast the Corinthian Drilled Hoplites and flanking Peltasts ripped through my Spartan Elites.  However, the Peltast flank charge roll was spectacularly good!  

I planned on using my Psiloi to harass the Militia with Javelins and Flank attacks.  That worked as intended, but the Corinthian Psiloi were able to get around the swamp quicker than I anticipated.  They rear charged my light troops into oblivion.  

My loss here, and the loss of the Spartans; was pretty decisive.  No wonder they decided to turn to the sea (with Persian support) to continue the war.  The first time these two forces met, the Spartans hung on for a win.  This time, the Corinthian victory was decisive.  Ouch!  
 
For those who own Men of Bronze, Thanks!  Secondly, the first supplement is available on the Wargame Vault called Hercules Abroad.  It includes new lines of battle for areas outside of Greece, Campaign rules for linked games, and an FAQ.  You can find it here.     


You can follow Blood and Spectacles Facebook page for more fun: https://m.facebook.com/pg/BloodandSpectacles/posts/?ref=bookmarks&mt_nav=0

Or our website:

Or our Messageboard:

Or our Wargames Vault Page:

Blood and Spectacles Wargames Vault Page