Monday, September 27, 2021

Battle Report: Heirs of Empire- Battle of Kretopolis


After Perdiccas' death at the Nile, the remaining Successors met to divide the empire once more. At Triparadisus in 321 BCE Antipater was made the new Regent.  Perdiccan loyalists were cut out of the agreement entirely and became rebels against the regent overnight.  Antigonus was put in charge to root out these rebels as Strategos of Asia.  At the command of the Royal Army, Antigonus marched into Asia and forced Eumenes of Cardia to withdraw into a mountain fortress and out of the political game.  

Eumenes of Cardia was not the only remaining Perdiccan loyalist though.  There was a group of Perdiccas' relatives and hold-outs.  They gathered an army of their own and prepared to face Antigonus at a pass near Kretopolis in Asia-Minor.  They had recruited a phalanx, peltasts, cavalry; a true Macedonian style combined arms force.  

Antigonus Monopthalamos left the siege of Eumenes and force marched his troops 300+ miles to get the drop on the Perdiccans.  This caught the 4 loyalist generals by surprise and they rushed to rally their troops.  A battle between the Royalists and the Perdiccan rebels ensued for control of Asia Minor. 

Forces

Again, we know very little of each army, except the following.  1 Perdiccan General was busy raising and forming the Phalanx units.  A second one led the Peltasts and Cavalry in a delaying attack on Antigonus' troops.  Meanwhile, Antigonus also had a strong cavalry component to his army.  There was also a reference to the trumpeting of Antigonus' elephants.  Otherwise, we will use the Minor Successor list for the Perdiccan Loyalists Line of Battle and the Antigonus list from the rules for his forces.   

Antigonus
Center:
2 Bronze Shields 
Elephant

Left:
2 Asphracts Cavalry

Right:
Companion Cavalry- Antigonus (General) 

Perdiccan Loyalists
Center:
Bronze Shield - Dokimos (General)
2 White Shields- Attolos

Left:
1 Asphract (Javelins)- Alketas
1 Asphract (Javelins)

Right:
1 Archer
1 Thureophoroi- Polemon
1 Skirmisher

You can read about how I built and painted these armies here

Mission
To fit the historical situation, today's battle will be a surprise assault fought on a 48MU by 48MU board.  In the Surprise Assault, the Attacker can deploy on any board edge, while the defender sets-up in the center of the board.  The Defender wins if they can escape the board with up to 15 points of models.  

Set-up
After reading up on the battle, we decide to place it on a 48MU x 48MU board with each MU being 1 inch.    

The board is a long pass with dangerous mountains on the west side of the board, with large ones being impassable.  The east side has hills running along the edge with various clear areas.  The Hills themselves are difficult terrain.  North and South are the entrances and exits to the pass. 

The Perdiccan Loyalists are placed in the center of the board, in column of march heading to the North Side of the Pass.  That means they are deployed with their Right Wing in front, Center in the center, and Left wing in the rearguard.  

Antigonus places his Right Wing coming down the North side of the pass, the Center threading the hills on the East side of the board, and his left wing coming from the South up the pass.       

The Heirs of Empire: Wars of the Diadochi rules are available on the Blood And Spectacles Wargame Vault page.  Let's begin! 

Perdiccan Loyalists on the left, Antigonid forces everywhere else! 
Turn 1:
Both sides roll up the Commander's Gaze for their respective wings and get ready to fight.  The Perdiccans roll was very poor, only generating 4 Commander's Gaze between them all!  Antigonus ended up with 8.  Antigonus bids 3, and the Perdiccans bid 0 to use them to try and interrupt.

One of the Antigonid Asphracts declares a charge on the Perdiccan Asphracts in the rear.  They do not try to evade at all.  The Antigonids hit hard enough to cause their foes to Waver and be pushed back 2 MU.  They are reduced to 2 Courage, and the Antigonids also lose 1 Courage in the fight.   

The Perdiccans try to interrupt!  They fail the dice roll.  The second Antigonid Asphract charges into the second Perdiccan Asphracts as well.  Their charge is enough to cause the enemy to rout, but they also lose 1 Courage in the fight.  


The Perdiccans again try to interrupt, but this time they succeed!  The skirmishers at the front of the column move forward and barrage the Companion Cavalry with Javelins.  They are reduced 1 Courage.  

This time Antigonus Interrupts, and succeeds.  His Companion Cavalry charges forward at the Skirmishers.  With the use of their last Commander's Gaze, they rout the Skirmishers in their charge, pushing them back 1 MU.  


The Center of Antigonus' army marches forward.  With all of Antigonus' army activated, play turns back to the rest of the Perdiccan troops. The archers fire a barrage into Antigonus and his cavalry, and cause them to lose 1 Courage and to start to Waver. 

There is not much they can do about the Asphracts to their rear, so the main units start to march towards the only units blocking their escape.  

End:
Several Perdiccan units see the Skirmishers flee.  The Theurophoroi see they are next in line and to get hit, and they start to waver.  The Wavering Asphract unit sees their fellows flee but stays strong, they are too busy fighting for their lives! 

The Perdiccans are down two units all ready. 


Turn 2: 
The two sides determined their Commander's gaze, and again Antigonus has the advantage by only 1; 7 to 6.  This is a bit more of a decision as Antigonus' Companion cavalry is in a dangerous position if they can not rally and get moving.  Both sides bid 3.....but Antigonus ups his bid 1 to go first.  

Antigonus Rallies his Companions and then charges into the wavering Theurophoroi in front of his troops.  Unsurprisingly, the light infantry are blown away by the charge.  However, the Companions lose another 1 Courage.  


The Perdiccans manage to successfully take over the initiative.  The Perdiccan Bronze Shields declare a charge at the Antigonid Bronze shields, who eagerly counter-charge.  Bang!  The Antigonids lose 1 courage and are pushed back 2 MU.  Plus, the Antigonids are out of Commander's Gaze.  

The rest of the Perdiccan troops try to get out of the valley using the gaps in the Antigonid line.  Play turns back to the Antigonids.  

The Antigonid Asphracts engaged with the Perdiccan cavalry easily rout them, but are reduced 1 courage and start to Waver themselves.  The rest of the Antigonid army tries to close the noose on the fleeing Perdiccans.  

End:
The second Perdiccan Asphract unit is removed from play, but no one sees them flee.  They were an isolated rear guard.  The Perdiccan light infantry Theurophoroi also flees the field and a White Shield unit sees them leg it.  However, they pass a discipline check.  

The Perdiccans have lost over 25% of their force, so Collapse tests are called for.  The trailing White Shield unit disintegrates into chaos as the soldiers start to surrender en masse to the Antigonid forces.  The unit is removed from the board.  Ouch! 

Turn 3: 
The Perdiccans are in a tough place.  They have lost their rear guard, and much of their advanced guard.  The Perdiccans get 5, to the Antigonid 7.  The Perdiccans have two units close to escaping, so really need to go first.  They bid 5 Commander's Gaze.  Antigonus bids 3 as he needs Gaze to maneuver and charge! The Perdiccans go first.  

The Archer vanguard manages to flee the board.  The Antigonids try to interrupt.  However, they fail to do so.  The Perdiccan White Shield unit just falls short of getting off the board.  


The Bronze Shields continue to push at each other, and the Perdiccans push back the Antigonids 1 MU, and reduce them 1 Courage.  However, they do not Waver.  

The War Elephants charge into the rear of the Perdiccan Bronze Shields with a trumpet like blast.  The rear attack is largely ineffective as the Perdiccans carefully re-position their troops to defend against it!  

The Antigonid Rear Guard tries to maneuver up to the fight, while the last Bronze Shields tries to close off any escape back to the rear.  

Antigonus himself has his tired Companions break into open order, wheel about, reform and then trot into combat with the fleeing White Shields to hold them up.  The White Shields easily hold the cavalry men off, but now they are caught in combat.  

End:
The Archers escaped for 4 points out of the 15 needed to escape.  Things look bad for the Perdiccans.


Turn 4: 
The Perdiccans roll up 3 Gaze to Antigonus' 6.  Neither side bids since all the Perdiccan troops are tied up in combat.  The roll-off let's the Perdiccan loyalists go first.

They start with the White Shields vs. Antigonus.  If they can rout the Companions they might be able to get some of Antigonus' army to collapse.  Re-rolls flash, and Antigonus' men are successful at reducing the White Shields 2 Courage, and causing them to waver.  However, they exert themselves  mightily and decide to retire from the field, taking their Diadochi with them!


The Bronze Shields battle have the Perdiccans putting up stiff resistance despite being out-numbered and attacked in the rear by War Elephants!  They lose 1 Courage and are pushed back 1 MU in good order.  

The forward Asphract unit went too far and is disordered.  They are too far away from their fellows.  The second unit catches up, while the first uses a Commander's Gaze to rally.  

The last Bronze Shield Unit charges into the big melee in the middle with the Perdiccan Bronze Shields.  This manages to knock the Perdiccans down two more courage.  They still have two left to the enemy 3.  


End: 
Antigonus retires from the field to observe the rest of the battle from a distance.  The rear attacking Bronze Shields see this and start to Waver. 

The entire Antigonid army now needs to make Collapse tests as their Diadochi has left, and they are below 25%.  As Antigonus withdraws, an Asphract and the War Elephants also decide to pull back.  

Turn 5: 
This time, the Commander's Gaze for both sides is limited.  Antigonus' vanguard has withdrawn, along with him!  This leaves him with 3 Commander's Gaze to the Perdiccans 2.  Both sides bid it all to go first!  Antigonus wins.  

The last Asphract unit goes as fast as possible towards the White Shields.  However, they do not have the distance without the charge.  They fail to make contact. 

This leads to the battle with the Bronze Shields.  The Perdiccans pinned on both sides are reduced to 1 Courage! However, they are still in the fight!  

The White Shields pass a Discipline check and move out off the board disordered, but escaping!  That is 12 of the points needed.  If they can break the bronze Shields, they can still win. 


End: 
No Collapse or Waver tests are needed.  

Turn 6 - Final Turn: 
The Antigonids get 6 to the Perdiccan 3 Gaze.  Neither side bids any, saving them for the big melee.  Perdiccans win the roll-off and decide to start with the big Bronze Shield battle! 

Again, re-rolls flash as both sides put their all into the fight!  The Antigonids get hammered and lose 2 Courage down to 1 left.  They do not waver.  This time, the Antigonids give it a big final push and crush the last of the Perdiccans.  Their general Dokimos is captured as the Perdiccan phalanx is over-run.         
End: 
Only a handful of Antigonid troops are left.  A heavily battered Bronze Shield unit, a disordered Bronze Shield unit, and a battered Asphract unit.  However, it is enough.  


Conclusion:
12 of the 15 points needed to escape managed to make it off the board.  Plus, the Perdiccan Bronze Shields put up an amazingly fierce resistance! They even caused Antigonus to retire.  A hard fought battle, but ultimately, it was not enough.  The Perdiccans are routed after an unexpectedly hard fought battle! 

In the actual battle, Alketas took the Peltasts and cavalry to try and slow down the approaching Antigonid forces in the hills.  His co-general's tried to get the Phalanx together and ready to fight.  Alketas' diversionary attack did not go well and was repulsed with heavy losses.  In addition, Antigonid cavalry came charging down the pass and managed to flank the assembling phalangites.  Instead of fighting, they surrendered!  Only Alketas managed to escape but it did not last long and he committed suicide in a nearby fortified city.  

This battle did not play out that way exactly.  The Antigonids were the ones to launch the attacks, and Alketas didn't even get time to maneuver any of his units out of formation.  Instead, the Phalanx formed up and gave the Antigonids a hard fight!  The cavalry charge down the pass routed two enemy units, but was too costly to maintain momentum and saw Antigonus himself routed!  That is a big difference from the history books!  The battle ended up going down to the wire and was surprisingly close.     

The Heirs of Empire: Wars of the Diadochi rules are available on the Blood And Spectacles Wargame Vault page.  Pick them up and give them try!                     


Become a Patron and get access to all the cool stuff, a peak behind the curtain of Blood and Spectacles, and early-access to playtest games!  


You can follow Blood and Spectacles Facebook page or Instagram for more fun! 

Check out the latest publications and contact me at our Blood and Spectacles website

Or purchase all out games at the Blood and Spectacles Publishing Wargames Vault Page!

Monday, September 20, 2021

Review: Gamma Wolves- Osprey Games


My order of Ash Barker's Gamma Wolves got caught up in the Brexit Blockade, which delayed its delivery to my mailbox.  It is here, and I have taken some time to read it, designed some frames, and run a few simulations to get a feel for how it all works together.  This game is foremost about big robots and their pilots, and the setting is intentionally designed to strip out any other support units.  It is all about building Mecha suits and using them to bash each other.    

Ash did a great job on Designer Notes in his previous game; Last Days.  I recommend fellow designers check it out just for that.  Therefore, I was a bit sad that this game only had a paragraph or two buried in the Acknowledgements section that I almost missed.  However, the few paragraphs and the introduction section sets-out pretty clearly what type of game this is.  The setting is there to explain why other forces are not involved more than anything else and give you some context for your big robot brawls.

In 2291, the Earth is a blasted wasteland split between Arcologies and Free Stations.  Humans can no longer live on the surface of this polluted and irradiated world.  All that is left is to strip the carcass of the previous civilizations.  The Gamma Wolves are operators of mechs who go into this wasteland to gather loot and scrap, and return to civilization to trade it in and power their own crumbling Arcologies.  Pretty dystopian and Mad Maxx, but with stompy robots instead of cars.  

So, let's head into the wastelands and see what we can uncover! 

This looks like a scrap Mecha to me! 

Things I Liked

The game is scale and model agnostic with some tweaks.  Sizes of mecha are based on some rudimentary base sizes, which were bigger than I expected.  However, easy tweaks could make smaller scales work, and even let you play on smaller boards!  Plus, if you build it, you can bring it! I like that idea.  

The game uses a dice pool looking for target numbers and number of successes as the primary mechanic.  So, for an attack you roll 3d6 base + the benefits of the weapon.  Opposed tests between pilots is also a key mechanic where the player with the most successes wins.  I am a huge fan of this mechanic as it is simple and elegant.  It is my preferred dice mechanic for most of my own games as well.  It also uses fluctuating Target Numbers for the dice pool, which allows even greater variety of results.    

After the introduction, the first chapter lays out the basic "key ideas" of the game right away.  It does not go into the specifics, but gives you definitions so you can tackle the rules and know what the rules short hand is telling you.  More games should start with the "Key concepts" up front.  

Building your crew of Gamma Wolves and their frames is one of the key elements of Gamma Wolves and is a classic example of Strategic Decision Making in a game.  All of these key choices occur before a game even begins, and can be talked about endlessly before or after any particular game.  This helps allow for a lot of replayability and out-of-game discussion about the game itself.  This includes things like propulsion systems, load-outs, and pilots.  

Initiative is determined by the number of Frames out of Line-of-Sight.  The force with the fewest models in Line-of-Sight gains initiative and therefore can "surprise" the enemy by acting first.  It is a bit wordy to explain, but intuitively it also makes sense.  The player that is doing a better job "hiding" his units has the advantage of action.  However, beyond activating and using 1 Frame first, the game uses Alternate Activation. 

Shooting is an opposed test between your Weapon Systems firepower + Pilot ability vs your opponents ability to evade.  If the Evading unit gets more successes, they avoid the firepower.  If failed, additional success past the first to hit can be used to add damage or adjust where the shot is hitting.  I am always a fan of opposed test, as no one likes to get shot at and do nothing.    

Each side has a "War Clock" that is the amount of resources they have to keep their frames fighting away from their carriers.  This represents power, fuel, ammo, and even oxygen.  As you remove Reactor stress from your units at the end of a turn, it also reduces your War Clock.  When your War Clock hits 0, your forces immediately disengage and the game is over.  Your Gamma Wolves are headed for home base with whatever they can carry.  This was a clever way to create an "end" scenario instead of just killing all your foes!  Some missions even give different sides different War Clocks, so the game potential ends at different points for the forces involved.      

Terrain is simplified into easy categories to make it easy to assign and know what it does.  I am a big fan of simplified terrain rules. 

Things I Did Not Like

The firefights are intended to be up close and personal, but the range to maneuver distances seem to be a bit off.  The game feels like it emphasizes firepower, and it is easy to get the mix of terrain to board size wrong.  This makes the "blind" deployment seem sort of pointless and some of the decision making feels a lot easier at these knife fight ranges.     

I like the blind deployment system IN THEORY, but what I have seen of it in practice makes it look like a non-value added component of the game.  Granted, this can be influenced a great deal by terrain selection, scale, and models being used.  In theory, it adds some uncertainty to deployment and initial tactical thinking and decision making.  However as I have seen it in use it does not appear to add too much to the game beyond complication.  Your mileage may vary on this one. 

One of the core tenants of the game is adding Stress to both Pilots and Reactors.  This puts a cap and limits on what a Frame can do in a turn.  It can lead to overloading your Frame, or injuring your Pilot.  I like these ideas BUT I am not sure they are punishing enough!  I had a similar problem when I played BattletechSure, Heat and Stress are things you need to track and COULD cause an issue.  However, in actual practice they were never seemed punishing enough to actually effect my decision making in a significant way.  I am probably in the minority, but the Stress factors do not seem to come into play enough to really be a "Friction" that I need to overcome or to change my decision making.  Therefore, it can become needless tracking instead.  Again, your mileage may vary on this one depending on how your games go with the mechanics.  I love the idea IN THEORY but I am not convinced it is punishing enough in practice.       


Meh and Other Uncertainties

The game allows you to have 8 different pilots and 6 different frames.  Therefore, you can have cards of pilots and frames that you swap around prior to battle.  This acts as your "roster" for any given mission.  This allows you to make some strategic choices prior to any given battle in a campaign and allows you to take some pilot casualties and do some RPG-lite with your crews.  Pilot Level is used as a balancing metric in the game as well.  

Maneuvering and moving about is a bit finnicky in this game as it is based on weight, propulsion, arcs moved through etc.  This is mostly due to the wording.  Typically, once you have calculated the speed of a Frame and written it down it won't be a factor.  However, picking up salvage COULD cause your weight to increase and your Frame to move at a different speed during game.

The main game revolves/defaults to a "Loot" style scenario.  However, it is just as effective to kill all the bad guys before they kill you to get all the loot.  There are 5 other scenarios that put a twist on the basic Loot framework.  This style of game has some of the same critiques I had of Frostgrave and I personally think it hurts the games replayability.     

The images and photos of the Frames in game are good.  However, I am less excited about the Frame artwork as they are static images on a white back drop.  These did almost nothing to excite me into playing the game.  Petty I know, but I was disappointed as I really liked the artwork and styles in Last Days and the mecha art in Horizon Wars.  

The game contains several pages for a campaign in the Sea of Destruction.  It includes things like pilot injury, experience advances, finding lost tech, and returning back to the arcology/Free Station.  As frames get damaged, they do not always get repaired and will degrade over the course of the campaign.  The campaign uses the tried and true Games Workshop Specialist Games model, and I tend to like this style of campaign.  The Campaign has a recommended end point as well.  

There are a couple pages of optimal rules that detail how to play a multi-player game.  However, there do not appear to be any solo or co-op rules in the book.  I have not seen any rules/writing on the Net on this subject either.   


Final Thoughts
         

This book had a lot of ideas that I liked.  I get the feeling they had a number of cool models, and then they sat down to build a game to use those models in.  That is an approach I have used myself, and an approach I recommend.  I also get the feeling that the author was not a stranger to stompy robot style games.

That said, I am not 100% convinced on the execution of the game itself.  Some parts seemed more fiddly than they needed such as Contact markers, some of the wording in the maneuver phase, and Movement rates.  Meanwhile, other parts felt like they did not quite reflect the level of decision points the designer intended such as the reactor and pilot stress.  However, it was still a book full of good ideas such as Mech construction, dice pools, opposed tests, and the War Clock.  

I think the people who like this game the most will be those who are looking for a reason to kit-bash some big stompy robots of their own design, or use some of those cool mecha kits out there from non-game lines.  I do not think it is crunchy enough to really attract the Heavy Gear or Battletech fans, and it might be too crunchy to attract the streamlined, indie, skirmish player to regularly.  However, I think a game group interested in building some Mecha of their own will find this game really useful and it will provide a fun campaign experience most other games can not provide.      


Become a Patron and get access to all the cool stuff, a peak behind the curtain of Blood and Spectacles, and early-access to playtest games!  


You can follow Blood and Spectacles Facebook page or Instagram for more fun! 

Check out the latest publications and contact me at our Blood and Spectacles website

Or purchase all out games at the Blood and Spectacles Publishing Wargames Vault Page!

Monday, September 13, 2021

Wargame Design: Designing Against Type


Long time readers of the blog know that I have a few "maxims" that I espouse as a game designer.  Basic ideas like: 

  1. Choice is good
  2. Firepower vs. maneuver
  3. Innovation is over-rate
  4. Choose the best tool for the job
  5. Game designers must create games 

There are others, but those are the ones that come to mind off the top of my head.  

Now that I have a few games under my belt, I am starting to run across a bit of a unique issue.  How do you design against your own "Type" of game?  What do I mean?  

Joseph A. McCullough had a great deal of success with FrostgraveThis was a well-received game that has received a lot of attention.  It has a few core design elements that make the game, the game that it is.  However, it was so successful that it spawned a variety of alternate games using the same basic ideas and structures to it.  In a sense, Mr. McCullough now had a game "Type" 


Everyone knows I am a huge fan of Daniel Mersey's games such as Lion Rampant.  It also received a lot of player attention.  Some of the core ideas would continue to be mined in games like Dragon Rampant, Pikeman's Lament, Rebels and Patriots, and The Men Who Would Be King.  Each had some unique elements, but the core game play mechanics were often the same.  Daniel Mersey now has a "Type".  


I am sure we can all think of other designers and games that have a certain 'Type" to their games.  A Type is certain core game play elements that they focus on or re-use.  In a way, you can think about it as a "brand" or audience expectation that is designer X is involved then the buyer's have a certain expectation of what is "in" the game.  

Therefore, I suppose we can refer to a Designer's Type as the following: 
  • Core game mechanics that are applied across various game genres by a single designer
I myself have a "type" of game as well.  I have found I can make a variety of "Ancient" games using the bones of the Men of Bronze system.  I can make fun, flavorful, and interesting games using the core rules with some flavor tweaks around the edges.  The logic of using a Type is inescapable.  


The Type offers the following: 
  1. Pre-packaged solutions to common wargame issues
  2. Core mechanics you know work
  3. Tools you all ready felt were the "best tool" for a job
  4. Easier playtesting
  5. Removes the "grunt work" of churning out basic rules
  6. People have all ready responded positively to what you have built
Those are some pretty compelling reasons to keep building on your Type as a designer.  Removing the "Grunt Work" of churning out basic rules is a HUGE bonus!  I do not want to have to re-write the rules for LOS fresh every time UNLESS I am bringing something very new to the table.

However, always writing and designing to your Type is a trap!  Using your Type too much and it becomes a crutch.  Soon, you have a hard time designing beyond your crutch.  That leads to stagnation and soon you have no more fresh or interesting ideas to bring to the table.  You are trapped in your own Type.  

So, the question becomes; how do you design outside of your own Type?    

Here are some tricks that help me:    
  1. Exposure to new Rule Sets
  2. Talk about Wargames with other people
  3. Mine your concept folder
  4. Write, write, and write some more
Exposure to New Rule Sets

What a surprise.  I am always talking about making sure that you are reading and playing a lot of different rule sets.  This always gets the juices flowing as you decide how or if you would utilize the various mechanics ideas and mechanisms you find for yourself.  

For example, I was reading the Dracula's America rules, and the simple and tiny mechanic of being able to push some one back in close combat instead of trying to damage them triggered me to write Homer's Heroes: Bronze Age Bad Boys over the space of a week.  The game is very different from my usual solution to "gang-based" games.  Homer's Heroes is nothing like The Games: Blood and Spectacles or Men of Bronze even though in theory they could be almost identical to either of those.  
 

Therefore, you need to constantly be exposing yourself to new rules to trigger your own creativity.  Even deciding if you like a rules mechanic forces you to think about why a designer would use the tool they chose.  Then, you gain insight into its strengths and weaknesses.  From there, you can decide it it is something you yourself want to try.  That gives you a way to break Type. 

Talk About Wargames with Other People

My poor suffering wife gets to hear me talk about wargame design.  She dabbles, but is by no means a "wargamer".  However, she can tell me if that is something she would "like" or "not like".  This is an invaluable resource!  I do the same with my poor gaming group.  This gives me insight into the topic and helps me understand how it will be perceived by someone other than me.

Social Media is also a good place to engage with others about Wargames.  I have no idea what other people like to play, but hearing them explain WHY they like or do not like certain things gives me insight.  It makes me think.... uh?  Can I make use of this or something like it myself?  What if I put this spin on it?  

Frequently, other people will give you a seed of an idea.  It is up to you to plant that seed and grow it.  In an online discussion I had about pre-measuring; the idea of using Line-of-Sight as a resource came up.  Certain activities would give or reduce your line-of-sight.  This triggered the idea of using Line-of-Sight like a modifier that applied to your ability to engage a target rather than using a dice rolling modifier.  Hence, it is a new form of "friction" to add to a game.  This became the basis for my work on a modern "horror" themed game. 

Speaking of which..... 

Mine Your Concept Folder   

Pull out the old concept folder and start poking at it.  There are nuggets of ideas in there, see if you can start stringing them together into something.  It is like playing with blocks.  You start stacking some blocks together, until you see a shape that you are interested in.  Then, you start adding and taking away until it all falls over!  The intention isn't to come out the other side with a game, the intention is to get your brain in the right place, to start putting things together that didn't fit before, and see things that are outside of your normal Type.  

Your Concept Folder is full of ideas that you either haven't finished, never really started, or struck you at one point; but the inspiration left.  These could be a great premise, some bit of rules mechanics, or snippet of back story that is a hook for a future project.  By tacking them up together you begin to look for and see ideas and patterns that weren't obvious before because you were seeing them in isolation, instead of in a big Concept Jumble.  

This often gives you a starting point, a starting point to just write.....


Write, Write, Write, Write..... and then Write

How many times have you pulled out a sheet of blank paper and just stared at it?  Opened a new File on your computer and just looked at it with your hands on the keyboard?  Nothing comes out, because you are out of ideas, not in the right head space, or have a block.  What is the best way to get over this?

Write anyway!  Just start writing.  It doesn't need to be good!  Just start putting ideas to paper.  At worst, you can throw it in your Concept Folder for later.  At best, you are starting to create a game.  If your lucky, you won't stop until you have the rough draft of a game done.  If you are unlucky, you have more fodder for the Concept Folder that you can tinker on later.  

Despite my busy corporate job, side hustle, family, and LIFE I make sure to set aside at least two hours a week to write!  Most of it is hot, steaming garbage..... but some of it?  Some of it is birthed into a game against Type.  

Final Thoughts
  
Wargamer Designers can fall into repeating habits of thoughts and mechanics that they try to apply across games and genres.  There are benefits to such a process, but it is also a trap!  It can lead to stagnation and the misapplication of ideas.  Worse, it can lead to games you never finish or want to play!  

Breaking out of your Type is important to refresh your creative energy.  To do this, you need to expose yourself to new ideas constantly, and then you have to give yourself the space to think and apply them for yourself.  Through this method, you will uncover new ideas and concepts to keep you fresh as a designer AND help you break Type when you want to.  


Become a Patron and get access to all the cool stuff, a peak behind the curtain of Blood and Spectacles, and early-access to playtest games!  


You can follow Blood and Spectacles Facebook page or Instagram for more fun! 

Check out the latest publications and contact me at our Blood and Spectacles website

Or purchase all out games at the Blood and Spectacles Publishing Wargames Vault Page!

Monday, September 6, 2021

Battle Report: Homer's Heroes- Clash at the Spring


Achilleion: The Triumph of Achilles by Frantz von Matsch

Eugene Romanenko - https://www.flickr.com/photos/eugene-r/50204929608/


Today is a test run of my Work-in-Progress game; Homer's Heroes: Bronze Age Bad Boys. The game is a model vs model skirmish game to represent heroic retinue's fighting against each other in Homeric -inspired combat.  As such, the heroes are the main focus with a retinue of soldiers attracted by their fame.    

The hero Adonis and his faithful friend Butes and their retinue have been traveling, looking for adventure near the Bospherus.  After a long days march, they grew weary.  With the aid of a young woman they met travelling, they were directed to a nearby spring to refresh themselves.  Little did they know that this young woman was, in fact, the nymph who inhabited the spring who had been smitten by Adonis' good looks.  

As Adonis and his men bathed and refreshed themselves they were approached by another band of  warriors.  They were led by Diomedes and his fellow Euryalus and his band.  They had followed the flight path of an owl and arrived at the same spring.  They too were thirsty and tired from a long journey cross-country.   

Diomedes as the favored of Athena demanded access to the spring.  Adonis had heard of this fellow Diomedes, and knew he was no friend of his patron, Aphrodite.  At first, he seemed to acquiesce to Diomedes demand.  However, it was only a ruse to give him and his men enough space to arm themselves.  

Adonis and his retinue soon returned.  Diomedes and Euryalus had not yet stripped themselves of their war gear.  Instead, they turned to face off against the interlopers who dared challenge them.  

Forces: 

In Homer's Heroes both sides always have 1 Hero, 1 Second, and then 8 soldiers of varying gear.  Some can be traded in for a chariot as well.  Then, each Hero also has a Patron Greek god or goddess that offers them special bonuses.  

Adonis and his retinue have the following composition: 

  • Adonis- Hero
    • Aphrodite
    • Sneaky- The Hero can re-roll a single dice in an Opposed "Hide" test
    • Armor, Shield, Hand Weapon
  • Butes- Second
    • Two-Handed Weapon, Armor
  • 4 Soldiers
    • Spear and Shield
  • 2 Soldiers
    • Javelin, dagger, shield
  • 2 Soldiers
    • Bow, dagger
Diomedes of Thrace and his retinue looks like this: 
  • Diomedes- Hero
    • Athena
    • Glare- The hero can use a "glare" action to freeze an enemy in place with an opposed roll.  The model loses any unused activations.  
    • Spear, Shield, Armor
  • Euryales- Second
    • Spear, armor, shield
  • Chariot
    • Driver- Dagger
    • Soldier- Spear, Shield
  • 4 Soldiers
    • Spear and Shield
Mission

The game lasts until 1 retinue Runs Away, turn 8 ends, or 1 hour of play has elapsed.  The retinue with the most models within 6 MU of the Spring at the end of the Disengagement turn is the winner.  

1 MU = 1 inch in today' game

Set-up

Today's game will be played on a 36 x 36MU board.  


The spring is set up in the center of the board.  We divide the board into 4 sections and determine the following: 
  1. Grove- Difficult, Hard
  2. Field- Soft
  3. Ruined building - Obstacles, Hard
  4. Open    
Diomedes retinue is set up anywhere within 6 MU of the spring.  Adonis is placed on any two adjoining board edges, he chose the south and west. 


Turn 1: 
Adonis and his warband have the most models, so they choose to activate a model first.  One of his bow armed soldiers fires a shot at the Chariot.  The driver of the chariot ducks aside as the arrow flies past.  

Euryales goes next and moves from the ruined building to in between two of his closests soldiers.  He does not want to be caught out by Adonis.  

The second of Adonis' bow armed soldiers fires at the chariot but his arrow falls short.  

The rest trade off moving towards the fight as Diomedes goes to his friend Eurylas' side.  Adonis slips into the ruined building and hides.  

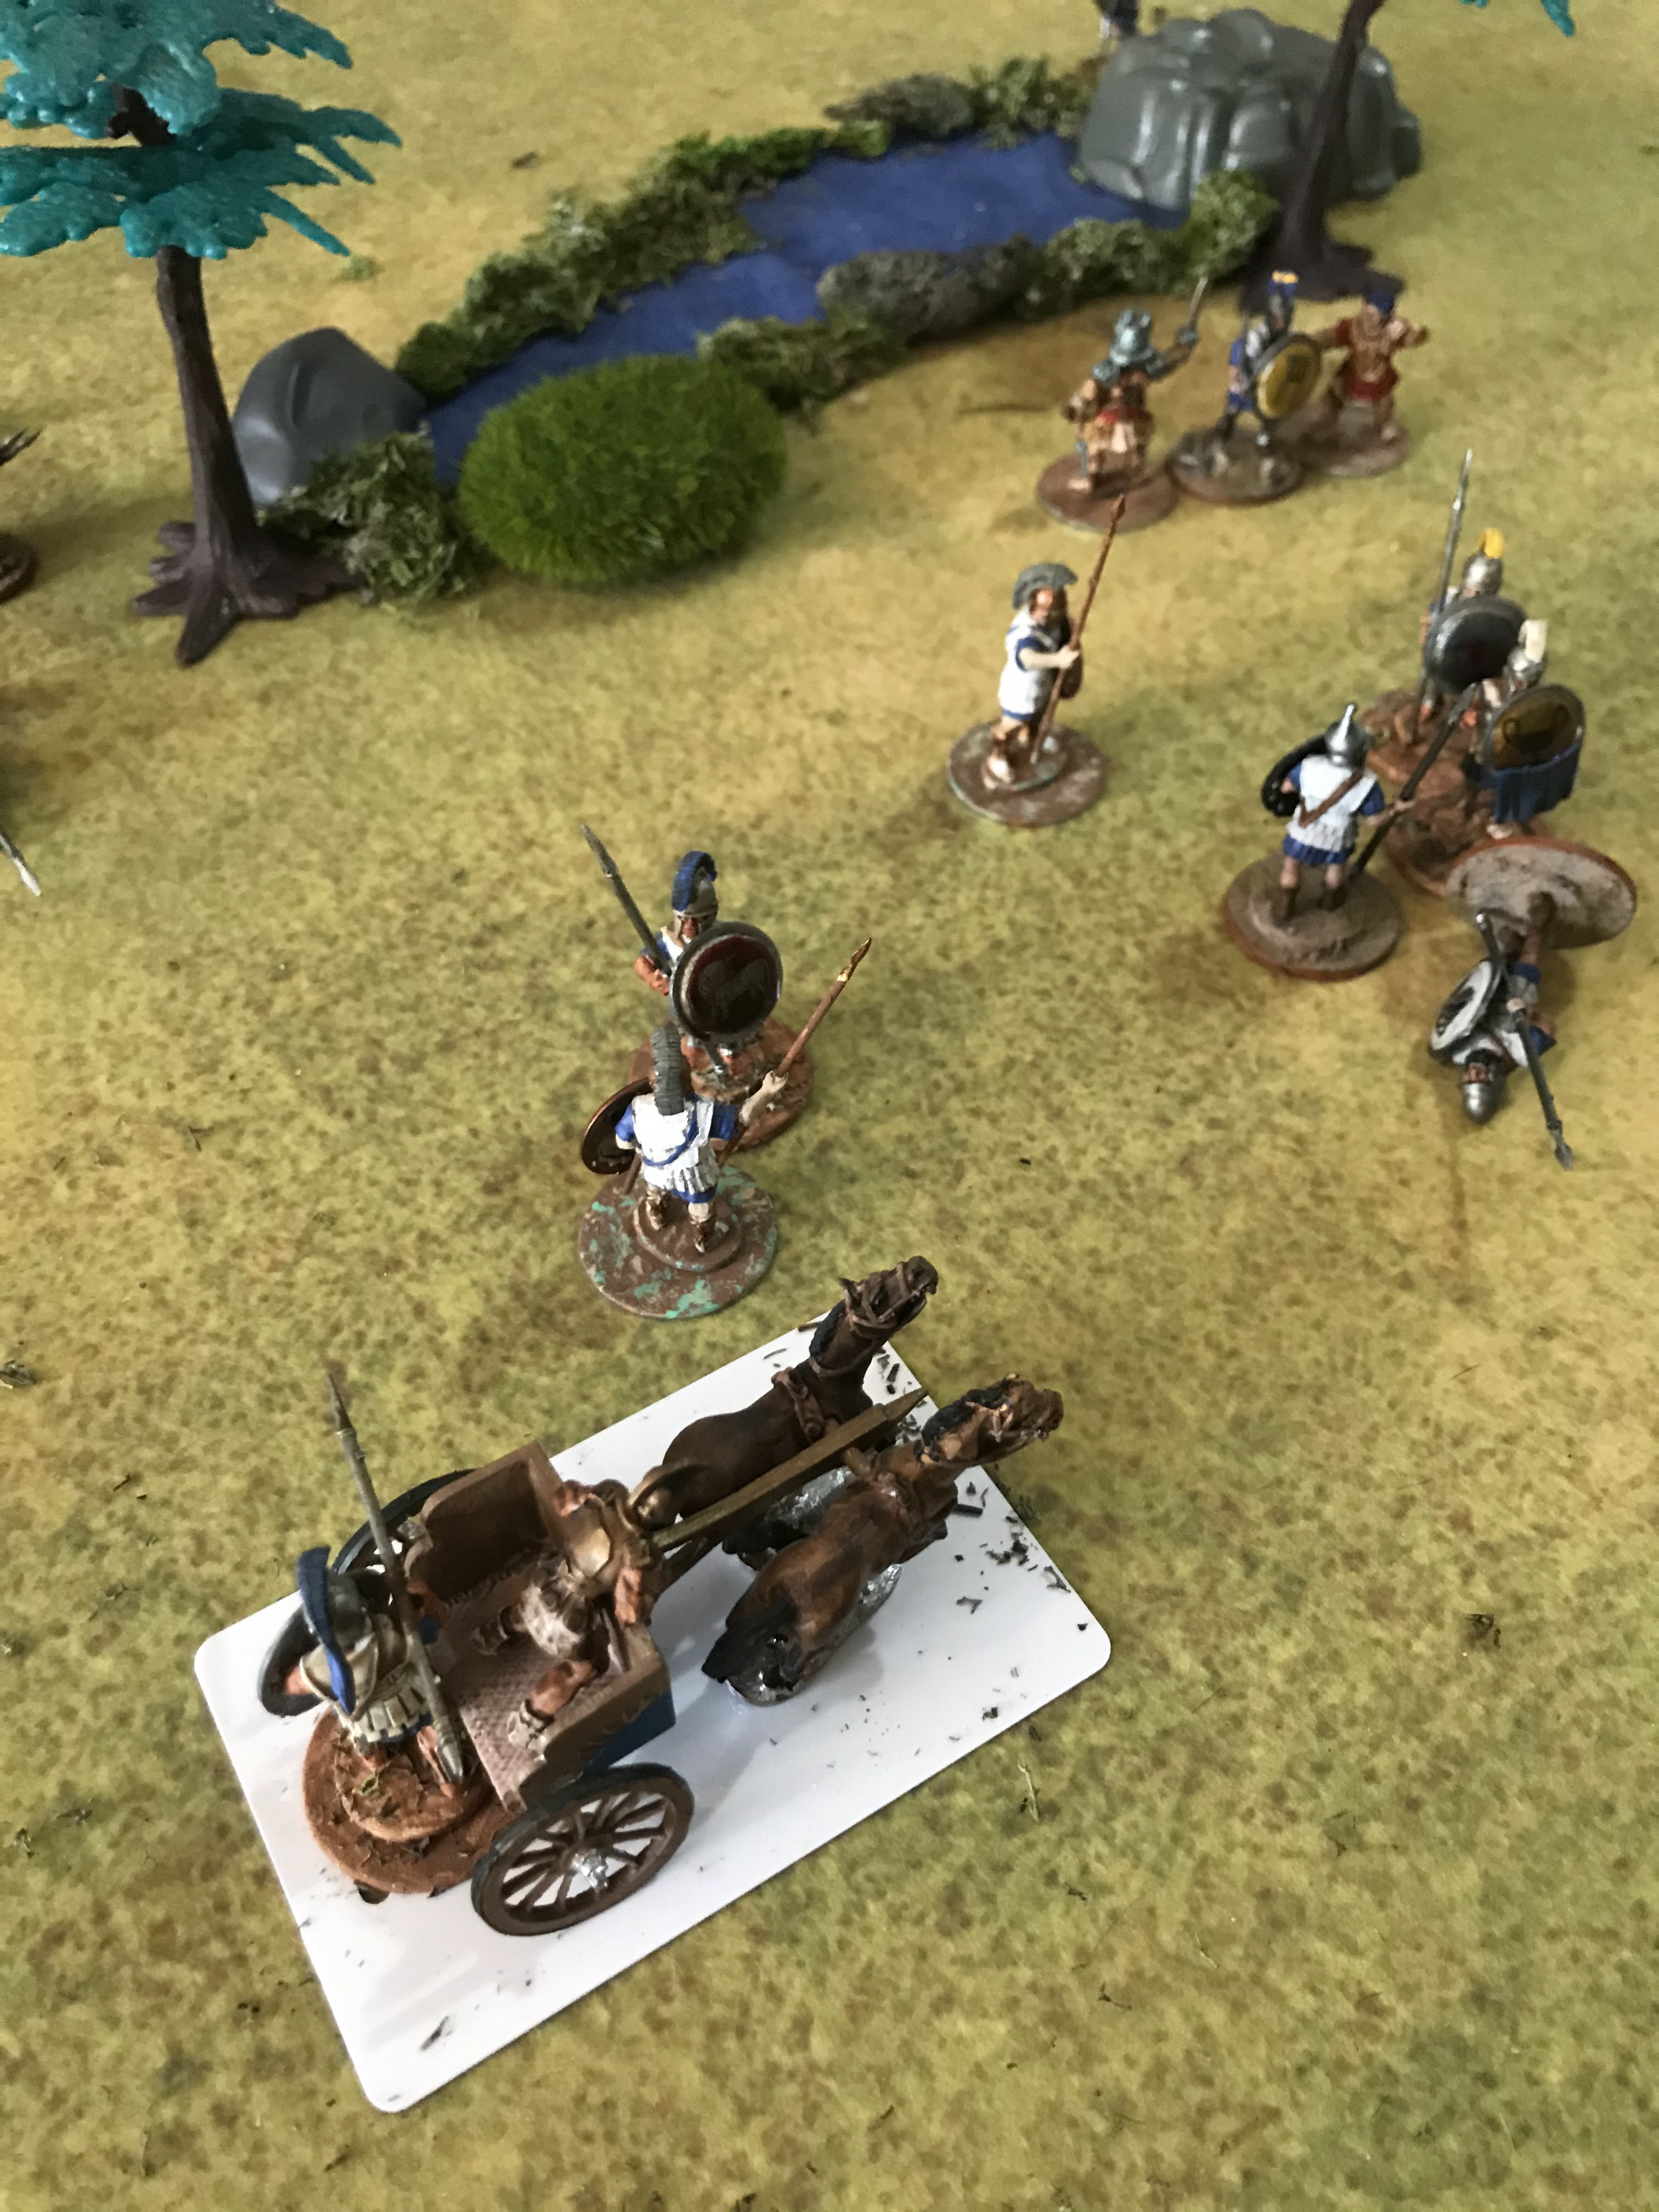
The Chariots races forward and the soldier riding in it attacks one of Adonis' Javelin armed soldiers.  His spear thrust catches the man in the leg, and he begins to fall back. 


Turn 2: 
Adonis still has more soldiers, so gets to go first.  

Butes takes a mighty swing at the soldier he is facing with his two-handed weapon.  The soldiers is downed by Butes, the favor of Aphrodite must be with him! 


Diomedes charges into the nearby line of Adonis' spearmen and attacks ferociously, injuring the man's leg exposed below his shield.  However, the soldier passes the Fear check and stays in the fight.  Diomedes chooses to use Glare to avoid a counter-attack.  He glowers at the lesser man.  The man is frozen in fear! A fellow soldiers jumps into help the stricken man.  

More soldiers jump into the combat swirling around Diomedes, both to help and attack.  

Seeing his chance, Adonis leaps from cover and attacks Euryales.  His sword is true, and Euryales is hit in the arm, but does not flee. 


Adonis' bow and javelin armed soldiers move towards the spring.  Meanwhile, a loan Diomedian soldier falls back to the spring to defend it.  

Turn 3: 
Adonis' retinue gets to activate first.   

One of the soldiers fighting Diomedes activates and attacks with a soldier assisting him.  Diomedes also has an assist.  Diomedes manages to just fend off the thrusts with his shield.  He decides to fight back.  He pushes one of the soldiers back out of combat with his first attack.  He then attacks the frozen one again.  This time, his spear is true and he downs his foe!  He uses his last activation to attack the last soldier he is facing.  However, the soldier blocks with his spear. 


Butes sprints for the spring, and uses his last activation to help Adonis in his fight with Euryales.  

Two soldiers slug at each other with no effect.  The chariot swings around and moves in on the fight between the two soldiers.  The soldier in the chariot lashes out.  Thankfully, the soldiers spear gives him a 360 combat arc and he is able to block the thrust.  


The last Diomedian soldier falls back to the Spring as Adonis' Bow and Javelin armed troops spring towards it.  

Adonis continues his attack on Euryales with Butes support.  Despite the injury to his arm, Euryales puts up a stunning defense using his shield, armor, and spear in a masterclass of defense work.  He bats away or deflects all of Adonis' attacks.  

Turn 4: 
Both sides have lost a model, but Adonis still has more.  His retinue goes first.  

The pushed back soldier rushes back into help his friend deal with Diomedes.  Diomedes activates next to try and clear them all out.  He injures the soldier's leg, but he does not run away.  Diomedes injures the second soldiers leg as well.  He also stands his ground.  This time, he downs the initial soldier with a spear butt to the helmet!  Clunk!  Adonis' soldier and Diomedes soldier fail to do much other then make a lot of noise in the fight.  

Adonis activates next against Euryales.  This time, Adonis downs noble Euryales with a swing of his sword!  He uses his next action to engage the soldier helping Diomedes.  However, he fails as the soldier's spear whirls around him to protect himself.  

Diomedes chariot rushes up, and the soldier attacks Adonis from the rear.  The spear tip glances off the hero, and he makes a successful Fear test to avoid running away.  

Butes rushes forward and attacks the soldier in the chariot, but the man is ready and blocks the attack with his shield.  


A Diomedian soldier climbs to the spring to defend it.  The bow armed soldiers of Adonis fire on this lone defender, but he knocks the arrows aside with his shield.  


Turn 5: 
Both sides have two men down.  Adonis gets to go first.  

Butes attacks the Chariot once more.  Butes manages to hit the soldier hard enough with his two-handed weapon, that he is knocked from the chariot!  However, he quickly springs to his feet and is ready to fight again.  The chariot itself rumbles away.  


The soldier helping Diomedes attacks the last of Adonis' soldier in their melee.  To no effect.  Adonis' soldier attacks back.  The Adonis' soldier pushes Diomedes' fellow soldier back and out of the combat!  

The soldier from the chariot charges forward and locks Adonis up into combat separate from Diomedes.  Adonis attacks him for his impudence.  It takes a flurry of sword thrusts and shield bashes, but eventually the soldier is taken down by Adonis. 

Diomedes is also left alone with a single enemy soldier, and attacks with everything he has.  However, Adonis' soldier manages to fend off the hero with his shield.  


The Diomedian soldier on the spring sees the approaching Chariot and mounts up.  The rest of Adonis' retinue sprint towards the spring.    
  

Turn 6: 
Adonis still has the initiative.  

Butes charges into a Diomedian soldier, his two-handed weapon swinging. The soldier's shield catches the blow easily.  

Diomedes tries to finish off the soldier he is fighting.  However, he again fails to finish the man.  Perhaps he should Glare at him next time?  

This time, Adonis leaps into the fight with Diomedes.  However, the Theban hero is ready and blocks the attacks.  

The injured Javelin armed soldier clambers up onto the spring.  The Chariot rumbles away.  The archers fire arrows at it, but they stick useless into the car wall.  

Turn 7: 
Adonis still has more soldiers.  

Adonis himself starts the turn battling with Diomedes.  This time, Adonis slashes Diomedes spear arm.  Then, a clever feint allows him to slash the Heroes leg as well.  

The soldier fighting Butes attacks him.  To no avail.  

The Javelin armed soldier on the spring throws one at the Chariot, but also only sticks it into the side of the car.  

Diomedes attacks the soldier fighting with Adonis first.  The soldier deftly blocks again and whirls away from the heroes spear.... again! 

Butes manages to injure the leg of the soldier he is fighting.  However, he stays in the fight and passes his fear test. 

Archers again miss the chariot.  It rumbles up and the soldier inside spear outward with his weapon.  The archer nimbly steps aside.  The last Javelin armed soldier throws and misses.  


Turn 8- Disengagement Turn
Both sides are growing very tired.  Adonis' troops go first.  

Butes attacks the soldier he is facing, but the man stumbles out of reach.

Diomedes attacks the soldier in his battle again.  Again, with help from Adonis, he avoids any serious issues.  However, his counter-attacks are also insufficient.  Adonis continues the assault.  Another arm injury reduces Diomedes further.  He also gets another slash to the legs, but he is still standing.  


The Chariot soldier strikes out at the archer, but misses.  The chariot turns to try and pick-up their boss.

Meanwhile, Adonis' ranged soldiers rush to the springs and take up position on it.  


Conclusion
      
Adonis and his retinue win as they have four soldiers standing on the Spring to Diomedes 0.

An omen from Olympus stops the fighting.  An owl is startled from the trees near the spring and flies away.  Diomedes and Adonis see this and immediately recognize it as a sign!  Athena has signaled that Diomedes has lost the skirmish, and her favor has left the spring.  

Adonis calls a halt to the fighting, as Diomedes does the same.  The soldiers take a step back, and eye each other with hostility.  

Diomedes grounds his spear haft into the ground.  He leans on the weapon heavily, his wounds bleeding openly.  "Your skill with your sword is a match for your handsome locks Adonis," Diomedes pants.

Adonis shakes the blood from his blade before sheathing it, "And you are a fearsome opponent.  Come, take a moment to rest at the spring, drink up, and tend to your men's wounds.  You and your men can leave before nightfall, and leave the Spring to us for the evening."  

"You are indeed a hero worthy of Aphrodite." 

Adonis narrowed his eyes at the wounded Theban, and decided to take his words with sincerity, "You are too kind.  Come let us help our comrades!"  

I finally got Homer's Heroes on the table, after having the draft rules done for about a year now.  That gives you an idea of the game design process and what the pipeline looks like.  When I finished writing the game, I even had minis painted I could use with it!  I have been too busy getting the finishing touches on Wars of the Republic and Castles in the Sky for Osprey to do much else.       

When I wrote Homer's Heroes I had a few goals in mind: 
  • Differentiate between Heroes, Seconds, and Soldiers

  • Weapons and Armor matters

  • Model vs Model skirmish

  • Scale and Model Agnostic

  • Homeric Greek Veneer

  • Simple and Quick Gameplay 

Well, did I do it?  Maybe?  

Heroes and Seconds get to use more dice then Soldiers, therefore increasing their chances to "do" something.  In addition, they get a matching number of activations.  In theory, a Hero should make short work of a Soldier.  In this game, we saw Diomedes take on a group of soldiers and survive; but he could not finish off the last one!  Why?  Because a group of soldiers adds dice to their own pool allowing them to be the equal of a hero if they are supported! In addition, Seconds and Heroes were the ones most reliable in taking out opponents. Heroes and Seconds are also able to land more than 1 potential hit that can escalate damage to Downed or Unconscious and Possibly Dead much faster.    

Weapons and Armor matter.... did they?  Yes for the most part weapons and armor played a big part in the battle.  Diomedes and most of his crew were using Spears.  This gave them a 360 degree combat arc which they used to good effect when they got bushwacked by multiple soldiers or Adonis himself in the side/rear outside of their normal combat arc.  However, their shields were not useful outside of the combat arc.  Therefore, melee placement mattered and a model could maximize/minimize attack and defense benefits from good placement.  We also saw that the extra dice from Butes two-handed weapon was useful to finish off foes with more potential hits giving him the chance to down foes rather than injure them.  
      
As for a Homeric veneer, I can add more of that when I bolt on the campaign system.  However, for initial flavor we do have Heroes doing most of the work of killing.  However, it was the soldiers who actually won the game for Adonis.  Close combat is more important than missile weapons which is also a Homeric idea.  Finally, duels between Heroes and Seconds carried the majority of the action today.  Plus, there was that fun chariot racing around and that was pretty Homeric.  Perhaps it is too early to tell, but it seems like the Homeric veneer is there and ready to be reinforced via campaign elements.  We did use the Favor of the Gods for both Heroes, even though I think Diomedes should have tried his a few more times.    

Simple and Quick Gameplay?  Well, I did uncover a few places where the rules needed some tweaking.  It is unclear that this is an alternate activation game.  There are also some ambiguities around when a rival retinue should try to run away or withdraw.  The winner of the Melee gets a lot of choices to push people back, pin them, rotate facing, break-off, etc.  However, you have to win the Melee before you can do those things and most of the time it was just better to try and deal damage.  The same can be said with shooting. Once you get into hand-to-hand, it can become a bit of a game of Yahtze, but I am unsure how to approach this yet as there are a lot of simple nuances that add tactical depths to Melee such as support attacks, combat arcs, pushing foes around the board, etc. but in the heat of the moment it just seems to come down to a dice roll-off.  However, game play was quick with a surprising amount of nuance for such a simple and easy to play game.  

Scale and Model agnostic is a yes.  I use my standard bag of tricks that I have been applying to all my games lately for that.   

Overall, not bad for a WIP set of rules.  There are some pieces to be clarified and re-written, and I still have not cracked the code completely on Melee yet.  I think adding campaign elements and some scenarios will really cement the Homeric veneer too.  More work to be done on this one before it is ready for publishing though.  


Become a Patron and get access to all the cool stuff, a peak behind the curtain of Blood and Spectacles, and early-access to playtest games!  


You can follow Blood and Spectacles Facebook page or Instagram for more fun! 

Check out the latest publications and contact me at our Blood and Spectacles website

Or purchase all out games at the Blood and Spectacles Publishing Wargames Vault Page!