Monday, April 25, 2022

Wargame Design- Castles in the Sky


I am sure many of you have noticed that the Osprey Wargaming Series has another title coming out in June.  This one is called, Castles in the Sky- A Game of Flying Battleships.  This book was 5 or 6 years in the making, and has been one of my most difficult games to get "right".  There are a couple of things you will need to know about it right away: 


  • This game is 80 pages long, longer than a typical Osprey Blue Book
  • All the art in this book is new and unique, never before seen in any Osprey book
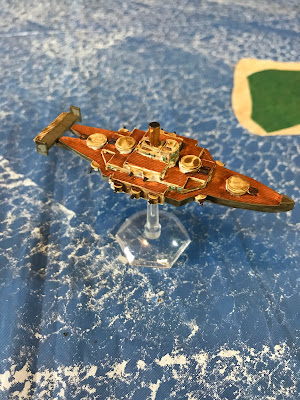
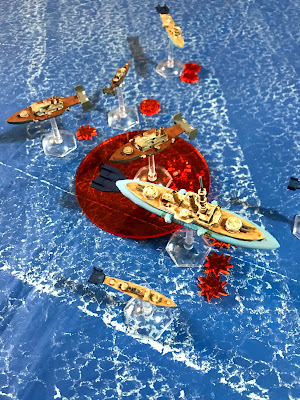
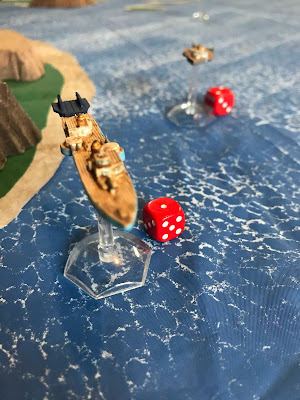
  • All the model shots are new from Brigade Models taken just for this book
  • This book is V5.2 of the rules, and took many people's help and assistance to get this far.  This one was a community project just as much as something I wrote.  Big thanks to all those who helped along the way, there are too many Usernames, names, and handles to document without getting into trouble for missing one, but you know who you are!  Huge thanks.
As many of you know, the first game I made from scratch was a 40K wet-navy wargame, and I see my efforts here as a return to my "roots".  This is a game that sprang from a few different sources of inspiration: 

  • Castles of Steel and Dreadnought by Massie.  Two works about the naval arms race prior to World War I between Britain and Germany.  They are the sources of the name for this book. 
  • My studies in college about naval warfare and work on pre-WWI diplomatic history
  • The Aeronef genre of games such as Aeronef, Imperial Skies, Leviathans, Sky Galleons of Mars, Dystopian Wars, and many more
  • Musings on the Delta Vector blog 
  • A variety of wargames from oceans to space and beyond

As I approached Castles in the Sky, I had a few key design elements that I wanted to be sure to capture in the rules.  I will let you read them and decide if I was successful in my goals.  My design notes did not make it to the final book for space reasons, so you will have to read them here instead.  I hope you enjoy or gain some insights.  

Castles in the Sky had the following design goals: 
  1. Scale and Model agnostic
  2. 3D battlespace
  3. Meaningful choices to be made
  4. Ships that can take a pounding, until they can't
  5. Battleship > Cruiser > Escort > Battleship
  6. Maneuver matters
  7. Some relationship to naval warfare of the period..... but flying
Scale and Model Agnostic

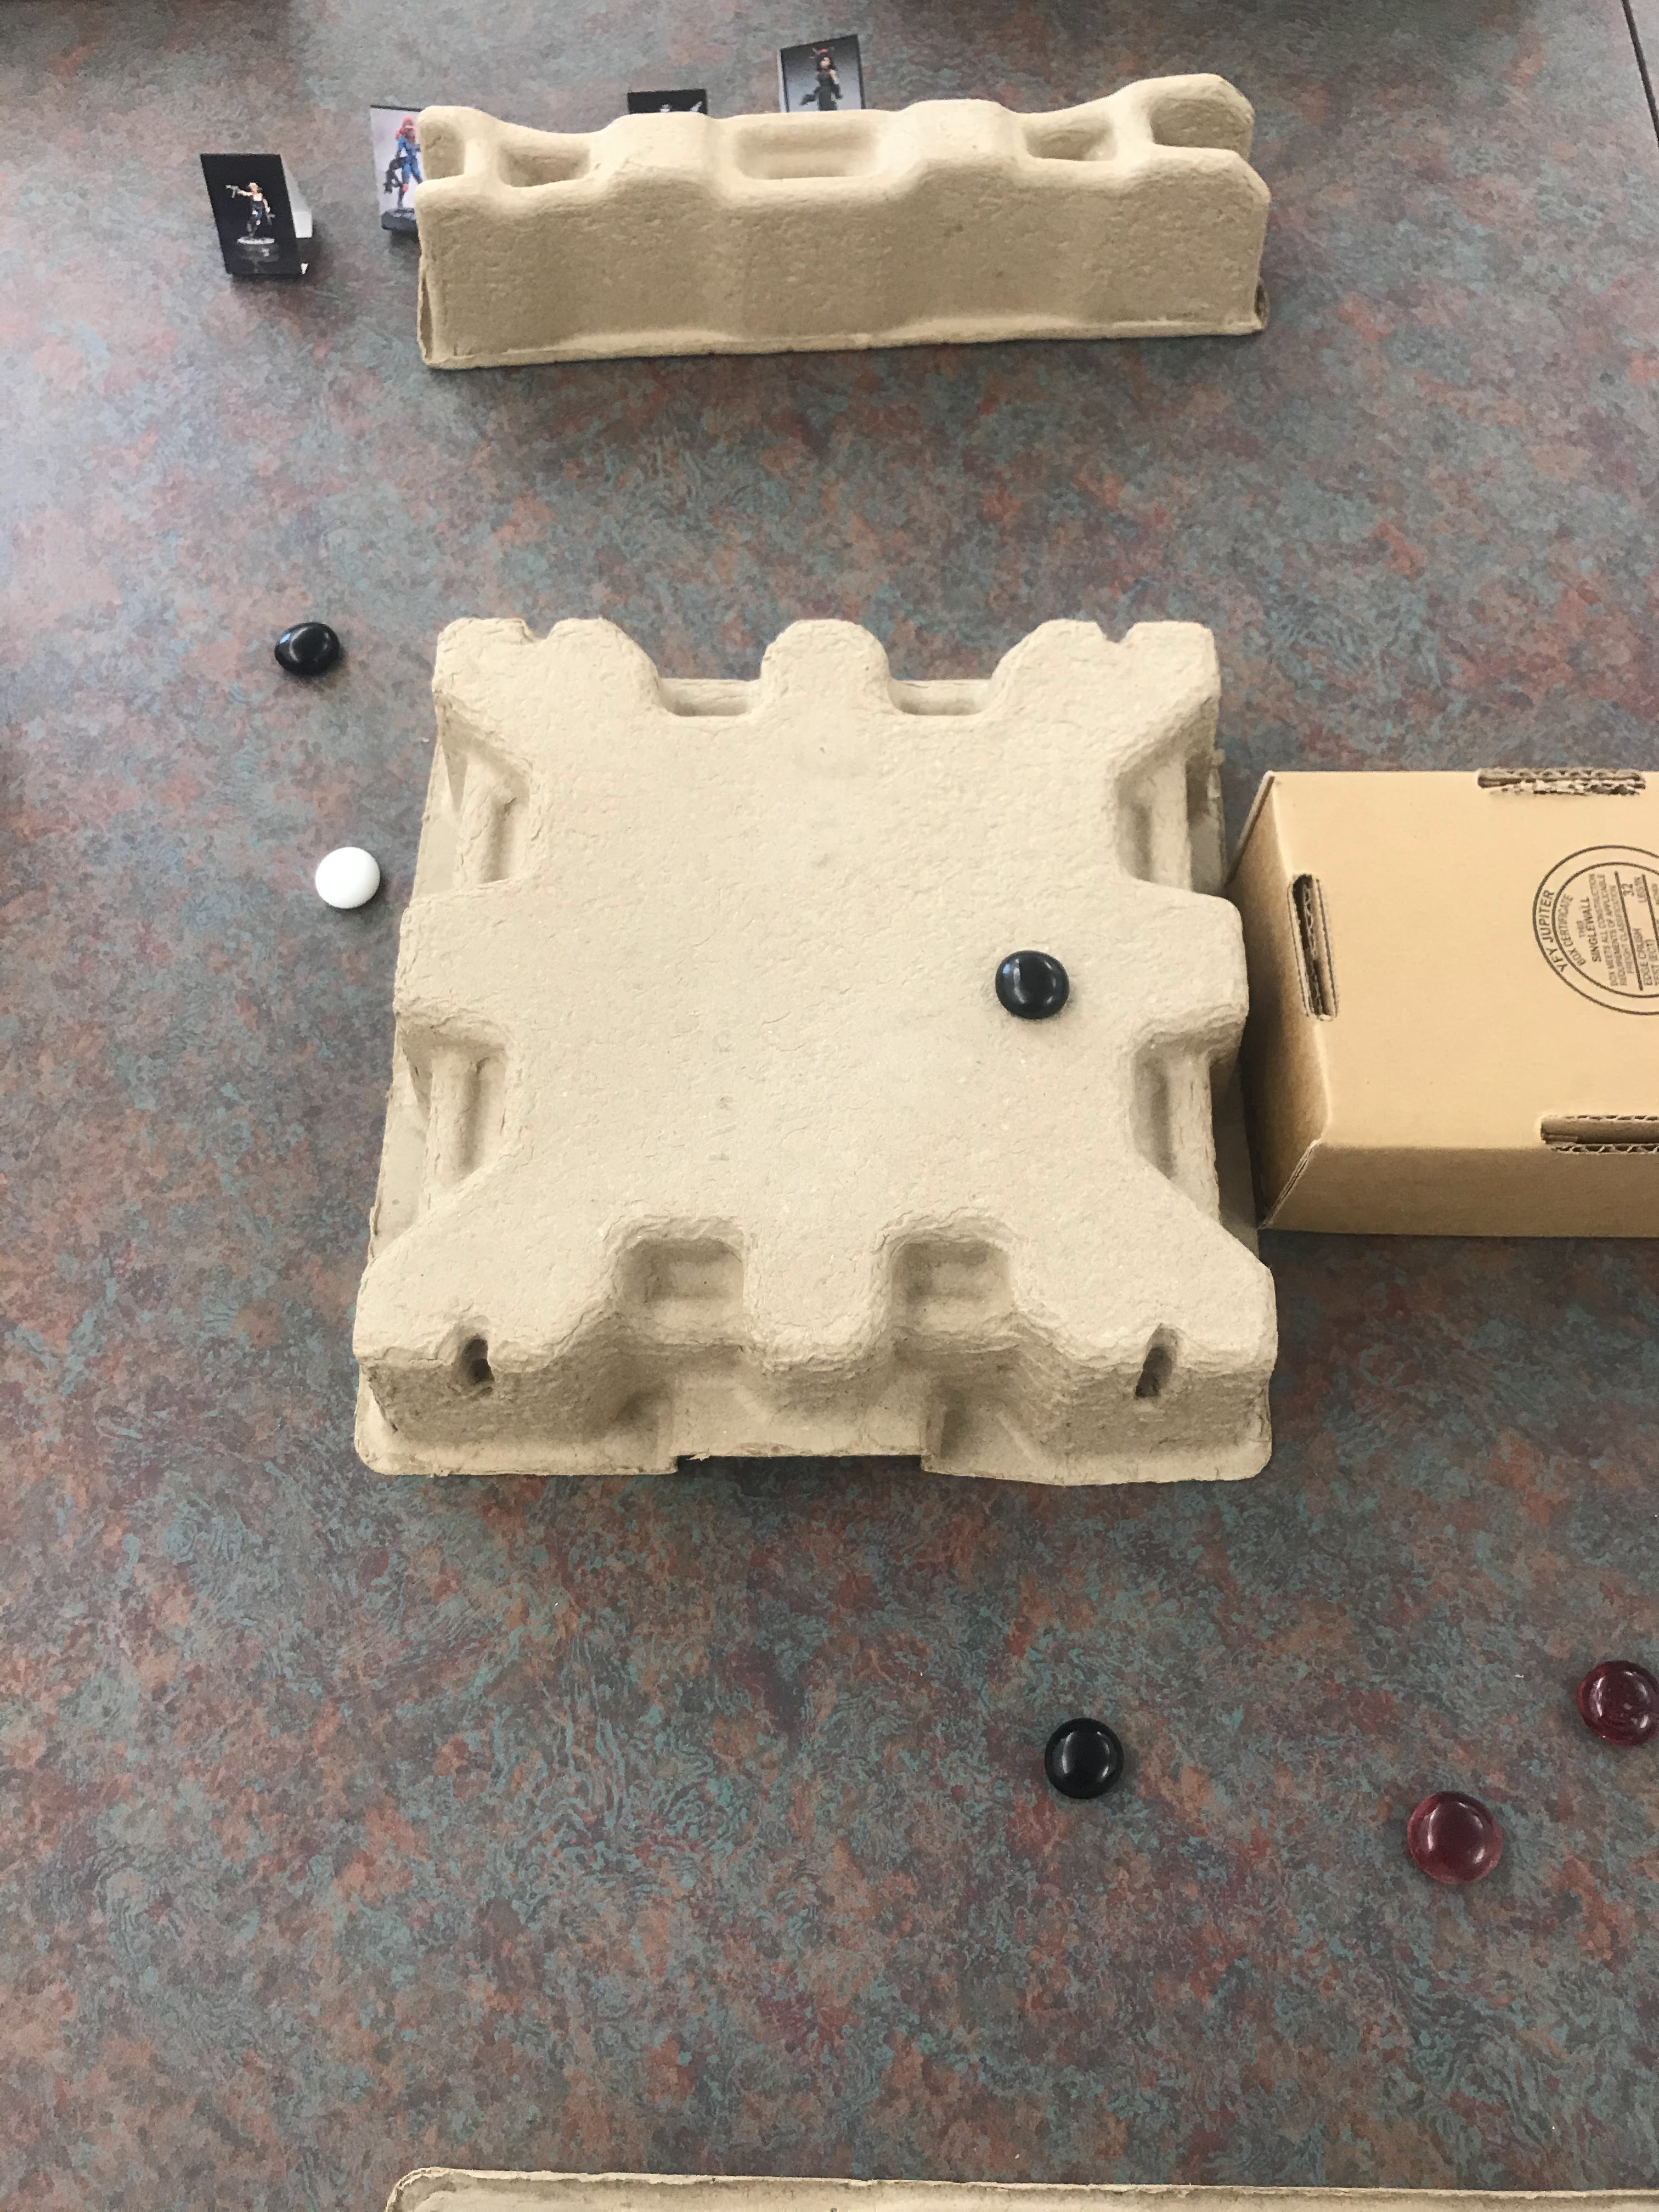
If you have played any of my other Osprey Wargames, you will have a pretty good idea of how I accomplished this task.  I used generic measurement units called MU instead of a specific distance for the game.  I also made the "center of mass" (often the peg-stand) the focus for all measurements.  This means that any sized model on any sized table can be used.  Most of the scenarios use either 36MU by 36MU or larger.  

3D Battlespace

One thing that makes air combat unique, is that it is 3D.  Therefore, I wanted to add altitude as a key component and differentiator in the rules.  Therefore, a ship's altitude is a key part for targeting, adjusting speed, and sinking too.  It is possible in the rules to cause a ship to crash, and never actually penetrate its armor! 

The rules have 9 altitude bands, with ships being able to go up and down in height.  As they gain height, they loose speed, and as they go down they gain it.  If you go too fast, too slow, too low, or too high you can cause your air ship to stall.  That's bad, because if you stall you could literally fall out of the sky!   

In addition, targeting opponents at different altitudes can reduce your ship's firepower.  This can make your shots ineffective or even impossible if the difference in altitude between ships is too great.  Air ships will have to maneuver into the proper position to trade fire for advantage.  In addition, ships can use altitude changes to maneuver away from combat just as well as they can maneuver into combat.     


Meaningful Choices

This game creates meaningful choices at a tactical (on the table) and the Strategic (off the table) level.  On the table, maneuver is critical as you determine how and when to engage with enemy ships and align them to your advantage.  There is also a strong command and control element with a limited ability to give special commands that allow your ships to exceed their normal limits, turn sharper, accelerate faster, fire more accurately, take more hits, etc.    

A simple example of choices in the game is the Ammo roll.  Essentially, if you do not roll any hits while shooting you have to test for a malfunction in your guns that can put them out of commission in future turns.  As a target gains distance, altitude, category differences the number of firepower dice you roll gets reduced.  Therefore, if you are only rolling one or two dice, the chance to jam your weapons increases!  Therefore, you have to decide if it is worth it to "fish for a crit" with a low probability shot at the expense of potentially losing your firepower for when the probabilities of a hit are much better.     

Off the table, choices about fleet composition are crucial to performance on the table.  Different weapon systems provide benefits, different ship classes fit different roles, and the right mix of warships is needed to achieve your objectives.  In addition, adding escorts to your fleet provides command and control or initiative benefits.  Every ship has a role to play from the smallest torpedo boat to the largest battleship.  What will be the right mix?    

Ships That Can Take a Pounding..... Until They Can't

World War I battleships had an amazing amount of armor plate and endurance even against the powerful shells and weapons aligned against them.  In Jutland, you can read about dreadnoughts taking shell after shell with very little impact.  Then, they suddenly and decisively can no longer hold up and explode, get crippled, or sink.  It happens quickly and with little warning.  

This is captured in Castles in the Sky with a set of mechanics that include firepower vs armor, friction, and determining damage after the shooting stops.  This allows the warships to shrug off a surprising amount of shells and explosions and still operate.  However, death can come shockingly quick as armor is peeled away, the next shell is just that much more likely to cause critical damage. 

Every weapon has a Firepower rating which is the number of dice you roll to hit.  Typically, the closer you are to a target, the type of target, altitude, etc will impact the number of dice you roll.  For every hit, you cause Friction that can impact the ship as shells explode and cause various issues with command and control.  Weapons also have a power rating, so every hit is then re-rolled and add the Power rating.  If the result exceeds the target's Armor, then a damaging hit is caused.  

However, the results of a damaging hit are not recorded until the End of the turn.  This most likely causes a ship's armor to go down by 1.  This makes the next hits more likely to cause damage in the future.  There can also be other special effects like lighting a fire, damaging the rudder, destroying a weapon system, etc.  Therefore, an airship can take multiple hits and fly away unscathed, but once that first one penetrates; a ship's ability to resist drops rapidly.       


Battleship > Cruiser > Escort > Battleship

World War I naval combat had a peculiar paper, rock, scissors logic to it.  Battleships could beat cruisers with cannons, cruisers could outgun escorts, while escorts could be a major threat to battleships with torpedoes and mines. Castles in the Sky emulates this as different classes of air ships have distinct advantages and benefits.  For example, a light battery can roll its full firepower against an escort, but loses two against a battleship due to the size difference.  The same applies the other way as well, so battleships have a tougher time making hits stick on an escort.  This is largely due to how different guns and weapons have maximum effect against different targets, therefore a battleship's guns may not always be the best answer to a threat.  

The Firepower vs Armor rating also creates mismatches where the power of a gun maybe insufficient to penetrate the armor of an enemy ship...especially at range.  It is entirely possible for a ship's gun to fail to scratch a heavily armored ship.  However, even ineffective hits can still cause Friction which impacts a ship's speed, command and control, and ability to return fire.  As mentioned, if you put enough Friction on an enemy ship; you could cause it to stall and crash; and never penetrate its armor at all!         

Ships can use altitude or speed to avoid enemy firepower easily.  Escorts can move quickly and nimbly and can often choose when and how to engage.  Meanwhile, Battleships are slower and less maneuverable so rely on their enemies choosing to engage them.  Therefore, no fleet can be made of single ship types as the enemy will be able to exploit the mismatch to avoid or engage as needed.  Battleships struggle against escorts, and escorts struggle against Battleships, while Cruisers can bridge the gap between both with some limitations.      

Maneuver Matters
Many of the mechanics and systems overlap into this simple maxim; maneuver matters.  The way the altitude, firepower vs armor, damage systems, and weapons interact means that a commander can not simply rely on firepower to win the day.  They have to maneuver the right tools for the right job into the right place at the right time to gain victory.  Plus the interaction between unit speed and firepower range also make maneuver vital for maximum penetrative power. 

The game uses fixed weapon ranges in bands of 8MU.  Airships of various types have a maximum speed of 6-12 MU.  The further away, the more difficult it is to hit and penetrate an enemy ship.  This was a deliberate move away from historical precedent in order to encourage enemy ships to maneuver for close action, rather than standing apart at maximum range and shelling each other.  

Some Semblance of Naval Warfare of the Period..... Only Flying!
Of course, there is always someone who has a different perspective or knows more about the subject than I do.  This subject is no different.  Obviously, the rules are not a 1:1 match of historical naval warfare as this is NOT a historical game.  It is not intended to recreate historical naval battles.  After all, I am pretty sure that there were no aerial battleships in World War I!

That said, I wanted the ideas of naval combat from the period to apply to these rules at a basic level.  Correctly timing your naval turn, using line of battle, broadsides provide the most shots, light ships can screen larger ships, etc. to apply to these flying battleships like they would at Jutland, Heligoland Blight, Dogger Bank, etc.  These rules are intended to have the right feel to them.  

Ship classes and designs are loosely based on existing naval ship designs of the Powers and the periods.  Again, some abstraction and lines needed to be drawn and where they were drawn will be a matter of conjecture and debate.  However, a 16 inch gun is still a heavy battery.  A torpedo tube is a torpedo tube.  Top speed is top speed.  These features were put into the designs in the book.     


Final Thoughts:

Well, there you go.  A high level overview of Castles in the Sky.  

Like I said, this game has been through a lot of versions, with some big changes and some small changes.  I have been working on this game for 5+ years, and have shared it out to the community multiple times.  However, only some of that is what you will find in this book.  The core mechanics have changed a lot over the versions as I tested, updated, and play tested some more.  This is the best and most complete version of the game I have made yet.  

Plus, the book looks amazing!  Osprey did a great job on this one.  Great new art.  Great new photos.  New 80 page length.  Fantastic.  

I hope you like it.  


Become a Patron and get access to all the cool stuff, a peak behind the curtain of Blood and Spectacles, and early-access to playtest games!  


You can follow Blood and Spectacles Facebook page or Instagram for more fun! 

Check out the latest publications and contact me at our Blood and Spectacles website

Or purchase all out games at the Blood and Spectacles Publishing Wargames Vault Page!  


Monday, April 18, 2022

Battle Report: Wars of the Republic - Ambush on Cossinius


Today's scenario idea is based on a scenario from the Revolt! supplement for Wars of the Republic found on the Wargame Vault.  

Praetor Glaber underestimated Spartacus and his slave forces at Vesuvius.  Glaber paid the ultimate price for his error.  However, his error was soon compounded.  A new praetor raised a new set of recruits to put down the slave uprising.  The Praetor was named Varinius, and he kept as his aid a man named Cossinius.  

Spartacus and his troops managed to get the drop on their Roman oppressor's yet again!  According to the story, Cossinius was ambushed by Spartacus while he was bathing in a Roman villa.  The ambush was successful, and the aid was killed and his troops routed.  

Today's battle will be re-fighting this action.  Will Spartacus be able to slay Cossinius this time?  Will the Roman forces be able to put down the slaves?  Let's find out! 

Forces: 

Cossinius' Levy  
1 Militia Legion
2 Irregular Infantry
1 Light Infantry

Cossinius will lead the unit that is placed in the Villa at the start of the battle.

Spartacus' Slaves
1 Elite Infantry- Spartacus
1 Drilled Infantry
1 Irregular Infantry

The Drilled Infantry represent the Gallic/Germanic contingent of Spartacus' force.  They were probably warriors captured and sold into slavery.  I like to think they were led by Crixus.  The Irregular Infantry represents the other slaves that would have been attracted to Spartacus' escaped band, who were looking to escape their bonds, but with little military skill.  

Set-up:
Today we will be using a 48MU by 48MU board.  The center of the board is a Roman Villa or similar terrain feature.  For the rest of the board we have: 

1- Stream- Dangerous
2- Stream- Dangerous
3- 1-level hill- Difficult
4- Hedge- Blocking

The Villa can hold one unit, and it counts as Difficult terrain, and units inside must be in open order.  1 Roman unit must start within the Villa.  This unit will be led by Cossinius.  All other units are set-up with a leader within 6MU of the Villa. 

The Romans choose to put their Light Infantry in the Villa as Cossinius' escorts.  The Militia Legion is deployed near the hedge, and the irregular infantry is closer to the 1-level hill.   

The Slaves can be set-up on any board edge with the focal point up to 6 MU in from the edge.  Spartacus is aimed at the Militia Legion.  The Drilled Infantry are on the hill.  The Irregulars are positioned to cross the stream.    


Mission:
The Slaves are trying to destroy the unit that has Cossinius in it.  Meanwhile, Cossinius is trying to survive the battle or escape from any board edge within 6 turns.  

This is a variant mission from the one actually found in the Revolt! supplement for Wars of the Republic found on the Wargame VaultI am interested to see how the different win conditions impact how the game is played.    


Turn 1: 
Spartacus and his troops have 4 Commander's Gaze, while Cossinius has 5.  The Romans bid 3, but with time being of the essence, the Slaves bid them all.  This seems risky as they will not be able to charge first turn!  However, Spartacus wins.   

Move: 
Crixus leads the drilled infantry forward straight at the villa, but can not reach it.  Spartacus also closes in, but is halted at the hedge.  Meanwhile, the escaped slaves fan out to try and block their edge off.  Cossinius does not try to interrupt at all.  Once all the slaves have made their move, his forces take action.  

The Romans start by spending a Commander's Gaze to get their Militia Legion into formation.  They take up a defensive position, content to let Spartacus and his troops come to them.  The Irregulars in front shuffle over to block Crixus and his troops.  Meanwhile, the other irregulars move to stop escaped slaves.  Finally, Cossinius leads his skirmishing light infantry out the back of the villa, and towards the streams.      

Melee:
None


Turn 2: 
Both sides get their Gaze, and decide on bids.  This time the Slaves bid 2, and the Romans bid 4.  The Romans go first.  Romans win. 

Move: 
The Militia Legion shuffles side-ways to cover Cossinius' flight.  Seeing their prey escaping, the slaves try to win back initiative with a Gaze, and the Slaves win.  

The Escaped Slaves see the fleeing Roman, and charge into the Roman irregulars blocking them.  The slaves have used all of their Gaze.  In front of the Villa, Crixus and his troops walk into combat with the Irregular's in front of them, perhaps not a wise move.  Finally, Spartacus tries to get around the Militia, but they effectively block his path.  

With the Romans regaining activation, Cossinius and his troops light troops use a point to skirmish and begin crossing the stream.  They pass a Discipline check, and avoid taking Courage loss.  

Melee: 
The Slaves elect to begin with the Escaped Slaves vs the Roman Irregulars.  Not great rolls for the slaves, and both sides lose two Courage and start to Waver.  

The irregulars facing Crixus' drilled infantry just bounce of his men's looted shields and armor.  


Turn 3: 
No one has lost a unit yet, so both sides have full Commander's Gaze.  The Slaves bid, 0, and the Romans bid 2 to go first.  Romans go first again.  

Move: 
Cossinius use 1 Commander's Gaze to urge his bodyguards forward across the streams.  They again pass their discipline check and rush across the stream.  It looks like they will escape next turn, as they are at the edge of the board.

The Militia Legion again slide sideways to block Spartacus and his men from advancing on their fleeing commander.  

In frustration, Spartacus charges into the Militia Legion, determined to make them pay for their impertinence.  The Legion spends a Commander's Gaze to throw pilums at the attacking slaves.  

Melee: 
The Romans decide to start with Crixus vs. the Irregulars, probably trying to get the Slaves to burn re-rolls.  As expected, the Slaves drive the Romans back and cause them to start to waver with two courage loss.  


Next, the Romans choose to complete Spartacus vs. the Legion.  The Pilum make the difference as the Militia pushes Spartacus back 1, and reduce them to 2 Courage, only losing one in return.  

Finally, the Escaped Slaves fight the Irregular Romans by the stream.  The two sides fight hard, but both are ultimately routed from the field as their courage shatters!  


End:
The Irregular Infantry and the Escaped Slaves are removed.  No one can really see them, so no Discipline checks are needed.          

Turn 4: - Final Turn 
Both sides collect their Commander's Gaze, minus the loss of one unit.  The Romans bid all of their Gaze to guarantee going first.  Spartacus, does not bid any.  

Move: 
The Romans activate Cossinius and his escorts and they run off the table and to safety.  That's pretty much the game at this point.  However, we decide to finish off the rest of the turn to see what happens.  The rest of the units are all stuck in melee.  


Melee: 
The Romans choose to determine the results of Crixus' fight, looking to force the slaves to burn re-rolls before the fight with Spartacus.  The effort works, as Crixus uses one of their 3 gaze for it.  However, it is enough to rout his foes, with no losses to his own unit.  

In the fight with Spartacus and the Militia Legion, the two sides fight fiercely, but both are reduced to 1 Courage left.  No one pushes anyone back.  


End: 
With the Romans units routed or fled, the Militia make a Collapse test.  They fail, and flee the field leaving Spartacus and his troops in control of the battlefield.  

Conclusion:    
Spartacus failed to kill Cossinius, but the escaped Slaves hold the field by causing the Roman forces to collapse.  A strategic loss but a tactical victory, and a result that did not mirror the history books.  

My defeat (As Spartacus) lay in two factors: 

1. My deployment was a T, when I really needed a Y deployment.  I foolishly thought that the Romans would not try to flee towards the Dangerous terrain, and I thought it would hinder them enough for me to catch up if they did.  

2. My opponent choosing to garrison the Villa with his Light Infantry and choosing to flee rather than trying to defend the Villa.  This was an especially wise move as the Skirmisher ability of the Light Infantry would allow them to easily traverse the streams.  

Overall, a fun and quick scenario that varies a bit from the Revolt! supplement for Wars of the Republic found on the Wargame VaultIt did lead to a different approach to the tactics on the table and how the victory was won.    


Become a Patron and get access to all the cool stuff, a peak behind the curtain of Blood and Spectacles, and early-access to playtest games!  


You can follow Blood and Spectacles Facebook page or Instagram for more fun! 

Check out the latest publications and contact me at our Blood and Spectacles website

Or purchase all out games at the Blood and Spectacles Publishing Wargames Vault Page!

Monday, April 11, 2022

On The Painting Desk- It was a Dark Time


Welcome back to the Painting Desk.  

Last time we were at the Painting Deck, I was primarily building and painting up Korean War aircraft for White Star/Red Star.  Those are all done now.  I have enough aircraft for the Communists and the USAF.  I had a good time painting up the Tumbling Dice 1/600 aircraft so if I manage to finish off my other goals this year, maybe I will add on with some British Commonwealth or USN/USMC birds as well to complete my collection.  They are affordable and easy enough to paint.  

However, that will be posts for another day.  Today we will focus on the Dark Age Irish.  These are from Wargame Atlantic's Dark Age Irish range.  I used my traditional bases of metal 1 inch washers.  They went together easy, even if I felt like some of the sprue connection points were in hard to reach places.  


This army is the sample Line of Battle from my soon to be Wargame Vault released set of rules; Fury of the Northman.  This army is 60 miniatures; 20 warriors, 20 skirmishers, and 20 slingers.  The Dark Age Irish are a lighter, more mobile, and more ranged force than their Viking foes will be.  I am interested in seeing how they fare against each other.  However, before I can do that we will need to paint them up.

The first thing I tackled was the Irish Wolfhounds.  They painted up really quick, so I also started working on the Skirmishers that went with them.  This is a big change to how I approached the Vikings.  


This time I was painting by unit type rather than bulk painting the entire force.  I undercoat them all white using cheap acrylic paints, then I switched to my Armypainter paints and went to work.  I used the following: 

1. Barbarian Flesh as the primary flesh tone
2. I used a selection of Desert Yellow, Daemonic Yellow, Mummy Robes, Leather Brown, Fur Brown, Monster Brown, Leather Brown, Skeleton Bone, and Ash Grey as the primary colors.  Maybe the leader or wealthier units may have some Ultramarine Blue, Jungle Green, Matte White, or Pure Red for their tunics.
3. Weapons use Oak Brown and Skeleton Bone for hafts and Gunmetal for blades
3. Hair colors are typically Daemonic Yellow, Sunburst Orange, Fur brown, Monster Brown, and Dark Stone
4. Then I use Daemonic Yellow, various Metallics, and contrasting Browns for details like belts, buckles, sheathes, etc.  
5. Then, I typically give them a strong tone wash depending on the end result I want

I will base them with Territorial Brown from big box acrylic paints with a spattering of lichen.  I typically do that at the end of the process.  Normally, this will be where I put on the shields, but I think these skirmishers will not have them.  

I used the same basic process as I proceeded onto the next units of the army; slingers.  Now, I only had ten slinger arms and I needed two units of 10!  That could be an issue.  However, the Wargame Atlantic sprue also made use of models throwing rocks. I sprinkled these guys into the unit, and it really helps give them that "non-professional" look to them.  That gave me enough models for the two units.  

Preparing them and painting them went pretty much the same as the skirmishers.  I made use of the same color palette too.  Since they don't have shields, slingers and skirmishers go together relatively quickly compared to warrior units.  Here is what they ended up looking like.  


These units without shields can go pretty fast.  Once I have the army all painted up, I will base them.  For now, they get bare washers.  

In addition to getting started on my Dark Age Irish, I also painted a Fantasy miniature!  We had a new player join our D&D circle.  They bought a miniature for their character, but had no idea how to paint it.  I stepped in a painted it for them to help out, as they do not need to learn how to paint for one model!  This is a Reaper metal model that the player had purchased from somewhere..... 


So, that's where we are at on the Dark Age Irish.  At this rate, it won't take long to finish off the whole army.  I hope I can keep up the pace!

Check out the Blood and Spectacles Wargame Vault page to find Fury of the Northman    


Monday, April 4, 2022

Battle Report: Darkest Knight - Secure the Artifact


I have been working on a solo/co-op/versus game tentatively called Darkest Knights.  I have always liked the idea of doing a horror themed game, and have many starts and stops at this goal.  After a lot of work, I finally got to the point with a game where it is ready to hit the table and get tested.  However, there were a few design goals and hooks I wanted to put into the game.  

  1. RPG Light elements
  2. LOS as a resource due to darkness
  3. Solo/Co-op/Versus playable
  4. Escalating tension/difficulty
  5. Lot's of choices
  6. Scale and Model Agnostic
  7. Modern horror veneer
So, here we are with a Playtest of Darkest Knight on the table using my infamous Paper Templates!  The Paper Templates were made using random images of models on the internet.  The heroes are mostly images of Reaper Models I was eyeing up for this project.  

The concept is simple.  Each player gets a team of 4 models that are their team of "Knights" to go on missions against the forces of "Darkness".  Each of the 4 models can be customized by choosing their attributes and a template that applies starting gear and special abilities.  The game itself uses dice shifting and a target number of 4+.  Monsters also have an escalating level of dice based on the level of Fear on the board that accumulates from player actions.  The last hook is that the board is considered to be constantly shrouded in darkness, and LOS is limited.  Therefore, the use of sources of light and illumination are critical for success.  All "monsters" spawn randomly through out the game.  

Lt. Wulf adjusted the comms to clear the static to better hear her instructions, "The unknown artifact is located somewhere in your search parameters.  Locate it and bring it home."

She double clicked the communicator to indicate she had received the signal and understood the teams instructions.  Lt. Wulf and her team of "Knights" was ready and prepared to head out into the darkness once again.  

She glanced over at Liu Xujiang, and reached over to adjust her gear, "Don't worry.  Things will go better this time.  We know what to expect." The nervous psychic nodded slowly, but didn't make eye contact.

Lt. Wulf next went and checked Sister Winifred's gear.  She was a big, experienced woman.  She was strapped down tight, with her crucifix secured at her collar.  Lt Wulf whispered to her, "Keep an eye on Xujiang this time out.  Last time shook her a bit." 

Finally, she came to Heidi Kroft, who was busy re-assembling her SMG, making sure it was clean and ready.  To her she said, "It will be your job to scout ahead to find this thing, the rest of us will try to cover you.  You are the fastest, so you get point." Kroft nodded in acknowledgement as she finished re-assembling her weapon.  

The Knights were silent until their APC rumbled to a halt.  The back door dropped with a clang, and the internal lights went red.  Lt. Wulf signaled and the team sprung out of the back of the APC.  They were immediately surrounded by darkness.  The only light was coming from the open rear of the APC.

Lt. Wulf grimaced.  That was going to make things much more interesting.   

I made a few Mods to the rules since the last time we tested out the game.  I updated the activation process so it is a choice.  Activate with a 6 MU LOS, or make an Awareness check to activate to try and gain additional LOS.  Success can add 1 MU per success over a 4+ to LOS.  Failure leads to a failure to act as you squint into the darkness.  

The rules for generating Threats were also updated to try and skew the result to more, lesser threats; and fewer hard threats.  I also cleaned up the order of operations to be IGOUGO and removed Threat Markers starting on the board immediately.  As the game progresses though, the threats spawned will tend to be more often based on the number of Fear tokens.  Let's see how it goes?      

Forces:
Our heroes are a team of "Knights" that have been gathered together and trained by a wealthy patron.  Exactly who this mysterious benefactor is is unclear, but they are loyal to each other and the mission of halting the spread of the Darkness across the land.  Our cast of heroes are:  

Lt. Ilsa Vulf
Shoot                  Fight                   Brawn                Brains                 Awareness
d12                      d4                        d6                        d8                        d10
Archetype: Leader                                                                  Keyword: Awareness
Starting Equipment: Battle rifle, Low-light goggles, pistol
Power: Re-roll failed Rally tests, Can activate another model rather than themselves on Activation

 
Sister Winifred
Shoot                  Fight                   Brawn                Brains                 Awareness
d4                        d6                        d10                      d8                        d12
Archetype: Devoted                                                              Keyword: Brains
Starting Equipment: Pistol, Holy Symbol, Flashlight
Power: Repulse Undead, Spectral, and Occult.  Use Occult texts with a Brains test
 
Heidi Kroft
Shoot                  Fight                   Brawn                Brains                 Awareness
D8                       d6                        d10                      d4                        d10
Archetype: Freerunner                                                         Keyword: Brawn
Starting Equipment: SMG, Knife, Satchel
Power:  Re-roll failed Brawn test for Dynamic Movement

Lui Xijiang
Shoot                  Fight                   Brawn                Brains                 Awareness
D8                       d6                        d4                      d10                        d8
Archetype: Psyhic                                                        Keyword: Brains
Starting Equipment: Pistol, Flashlight, Knife
Power: Freeze Target- Successful Brains test, the target is pinned


Mission:
 For this test run, the team needs to "locate an artifact".  They need to locate it, secure it, and take it off the board.  

Set-up: 
The game is played on a 36MU by 36MU board with 1 MU = 1 inch. 

The board has a variety of LOS blocking terrain in the form of walls and buildings.  There are 4 Shadowpoint markers starting on the board.  The Shadowpoints are placed randomly around the board.  There are no illumination points.  The artifact is a white marker, that was randomly placed per the scenario.  

Shadowpoints= Black Tokens
Threats= Red Tokens  
Artifact= White Tokens

The "Knights" all deploy along the top edge of the board as the Infil point, this same location will also be their Exfil point.  


Turn 1:
Sister Winifred auto-activates and moves to the ShadowPoint closest to her.  Xijiang also auto-activates and moves up next to Sister Winifred.  Lt. Wulf also auto-activates and moves to the edge of a wall, and levels her rifle.  Heidi follows-up and moves to make for the objective.  

Two Threat markers appear at the furthest Shadowpoint, and then move away towards the edge of the table.  

Fear Token: 2
Threat Marker: 2
Shadowpoints: 4

Turn 2: 
Heidi decides to try a traditional activation and barely succeeds.  She moves up to the second ShadowPoint just shy of the artifact.  Xijiang tries to shut down the Shadowpoint next to her, but fails miserably.  Since this is her key attribute a new Fear token gets added.  

Lt. Wulf gives her activation to Heidi, who grabs the objective.  Sister Winifred tries to shutdown the Shadowpoint, and succeeds!  The Shadowpoint is shut down through a special incantation.  

No new threats spawn.  However, the existing Threat markers move back towards the center of the board.  

Fear Token: 2
Threat Marker: 2
Shadowpoints: 3


Turn 3: 
Heidi runs back toward the Exfil point with the artifact.  Sister Winifred and Xijiang move into cover positions.  Lt. Wulf then gives her activation to Heidi who continues to move to the board edge.  

No new threats generate.  The Threat Markers move towards the center of the board.  

Turn 4: 
Heidi leaves the board with the artifact easily.  The rest of the Knights fall back to the Exfil points.  

No new threat markers appear.  The Threat markers on the board, one moves towards the Knights, while the other one moves back to ShadowPoint 1. 


Conclusion: 
Well, that was too easy!  Why would I even share this with you?  Boring! 

I am sharing it with you to illustrate a point.  Playtesting the changes I made were critical to "balancing" the action and the danger.  The Auto-activations coupled with no Threat Markers starting on the board meant that their was no danger.  Now, add in the new way to generate monsters and the clarified Order of Actions and this game was a snooze fest!

So, let's change it up again!  This time, I have made a simple change.  All ShadowPoints begin with a single Threat Marker next to them.  I will keep the auto-activation option..... for now.  I also modified the Order of Operations to be Alternate Activation between the Player and the AI.  Let's see how these simple changes impacts the scenario and adventure.  

The set-up is exactly the same: 


Turn 1:
Immediately, when Xijiang activates she can spot the Threat at the ShadowPoint.  It is resolved to be a Zombie!  She opens fire with her pistol at it, but misses!  Ouch! Seeing the threat also causes 1 Fear Token to be added.   

The Zombie goes next and charges into the Psychic!  It attacks her, but fails to injure her.  Sister Winifred activates next, and lays into the beast!  Since Xijiang is there, Sister Winifred's fight goes up +1 dice to a d8.  She manages to slay the beast by crushing its skull.   


Lt. Wulf, auto-activates and moves up to the edge of the wall.  A Threat moves closer, near the objective, but is not revealed.  Heidi rolls for Activation and gets 2 extra MU of LOS.  She moves up next to Lt. Wulf.  

However, two new threats appeared near the Artifact and ShadowPoint #3.  The new threats can be seen by Heidi, so they are revealed.  However, they are just shadows and strange noises in the area.  

Fear Tokens: 3
Threat Tokens: 3
Enemies: 0
ShadowPoints: 4 


Turn 2: 
Sister Winifred moved up to ShadowPoint #4.  Xijiang also moves up with Sister Winifred.  The Threats move around.  Lt. Wulf activates Heidi and she moves up.  This reveals two Threat Markers, one is nothing but a rat scurrying around.  The other is a Zombie!  

Seeing the Zombie, Heidi auto-activates her own activation and fired her sub-machine gun in a burst at it.  It is enough and the Zombies is killed.  

No new Threats spawn.  

Fear Tokens: 4
Threat Tokens: 1
Enemies: 0
ShadowPoints: 4

Turn 3:
Xijiang tries to shut down the ShadowPoint, which she does easily.  The last Threat marker comes up into Heidi's LOS and generates a Zombie with a Chainsaw!  

Heidi activates and tries to burst fire on the Zombie with the Machine Gun.  She also manages to behead the Zombie with several bullets to its face!  Lt. Wulf then encourages Heidi to move up and get the Artifact.  Sister Winifred goes to the opposite edge of the wall.  

A new Threat Marker is spawned at the ShadowPoint #2.  

Fear Tokens: 6
Threat Tokens: 1
Enemies: 0
ShadowPoints: 3          

Turn 4: 
Heidi activates and runs back towards the Exfil point.  The Threat Marker moves closer to the edge of the building.  Lt. Wulf also encourages Heidi to keep moving.  

Sister Winifred moved forward to unveil the Threat Marker.  It turns into a zombie riflemen, who fires at Sister Winifred.  He fires at her and misses, but forces a Suppression test, which she passes.  


Xijiang falls back to the Exfil point, and covers Heidi with her pistol.  

No new Threats generate.  

Fear Tokens: 7
Threat Tokens: 0
Enemies: 1
ShadowPoints: 3
 
Turn 5: 
Heidi activates and exits the board.  The zombie fires at Sister Winifred again, but misses her again.  She again avoids suppression.  She ducks back into cover. Xijiang moves through the Exfil point.  Lt. Wulf falls back to the Exfil point.  

No new Threats    

Fear Tokens: 7
Threat Tokens: 0
Enemies: 1
ShadowPoints: 3


Turn 6: Doomsday Turn
Lt. Wulf drops back off the board out of the Exfil location.  The Zombie rifleman fails a Dynamic movement test and falls to his death trying to pursue Sister Winifred. She falls back to the Exfil Point edge, but does not get off the board. 

A pair of Threats appear in the center of the board.  

Fear Tokens: 9
Threat Tokens: 2
Enemies: 0
ShadowPoints: 3


Conclusion: 
The end result of securing the Artifact still happened, but this time the danger was much higher.  I only had to Fear 12, and got to 9.  Plus, I had to deal with several enemy threats.  We ended up dealing with 2 d4 Zombies and 2 d6 zombies.  However, despite the more difficult scenario, I suffered no real damage.  Therefore, we see an improvement, but I still need to tweak the threat levels.  

All of this information and tweaks came from about two hours of playtesting with the rules.  I detail my system for Playtesting in a different post.  From that post, we are still at the  "Just You and the Table" stage of testing.  The focus here is on tweaking and streamlining the core mechanics before adding in all the Chrome of campaign elements to the game.  

So far, the game is moving along nicely but there is still a lot of work to do before it is ready for prime time.  I am not sure about the activation process yet.  It seems too limiting, and I have had little need to use "Illumination" actions yet.  Plus, there is still more work to do on tweaking the threat levels.         

Watch this space as the game develops. 


Become a Patron and get access to all the cool stuff, a peak behind the curtain of Blood and Spectacles, and early-access to playtest games!  


You can follow Blood and Spectacles Facebook page or Instagram for more fun! 

Check out the latest publications and contact me at our Blood and Spectacles website

Or purchase all out games at the Blood and Spectacles Publishing Wargames Vault Page!