Monday, June 27, 2022

Castles in the Sky: Indo-China VI - French vs British


Welcome back to the Indo-China campaign for Castles in the Sky from Osprey Games.  Last game, the British defeated the French attempt to mine the airway to Laem Chebang.  The failure of the French to secure the smuggler's depot and mine the airways gave the Siamese government the space they needed to secure the Kra Isthmus back from the rebels.  

The British took the lead in the campaign again, 5 to 4.  The first side to 7 and leading by 2 will allow them to trigger the Final Battle.  The first to 7 get to set the scenario and choose to be the attacker or defender. 

The French cruiser the Tourane was so severely damaged that she went into port in Saigon for refit.  The British cruiser the HMS Achilles in Laem Chebang after taking heavy damage in a previous engagement.  The French destroyer Tromblom took serious damage last battle, and still has 2 armor peeled away going into this engagement.  

Commodore Duckworth went on the offensive.  He immediately gathered what remained of his fleet and set sail for Indo-china, Saigon.  Of course, ground observers quickly relayed the sightings of the British fleet to Commodore Aubre who set sail to meet him with the fleet he had available. The two were patrolling to find each other and engage.  

Forces: 

L'Aire National

Camot- Commodore Aubre- Command 4
Charles Martel Class Heavy Cruiser (Battleship)   

Cuchinchina - Captain Gourdon- Command 2
Gloire Armored Cruiser

Tonkin- Captain de Vence- Command 2 - Drilled Crew
D'Iberville Class Cruiser

Fantassin- Captain Valjean  - Command 4
Chasseur Class Destroyer- Torpedo  

The Royal Navy (of Siam) 

HMS Malaya- Commodore Duckworth- Command 2 - Stoke the Engines, Veteran Airman
Queen Elizabeth Class Battleship

HMS Archeron- Captain Manby- Command 3
Duke of Edinburgh Class Cruiser

HMS Medusa- Captain Butler- Command 2
Active Class Light Cruiser

HMS Corsair- Commander Montgomery- Command 4
Bull Finch Class Destroyer- Torpedo 

Mission:
The French are the defenders and the British are the attackers in this scenario.  This is a patrol mission, so it uses standard armor loss for victory conditions.  

There were no complications rolled up for our battle today.

Set-up:
The battle will be played on a 48MU by 48MU board.  We used a grid system to determine the terrain per the standard rules.  

1= Mountain at Alt 1
2= Two clouds at Alt  
3= Cloud at Alt 4
4= Cloud at Alt 

The British can deploy up to 6 MU in on the Grid 1 and 2. They decide to deploy in a familiar formation on the edge of Grid 1.  The HMS Malayan supported by the Medusa, followed by the Archeron at a higher altitude supported by the Corsair.  They are all at Altitude 3 and speed 4.


The French deploy on the edge of Grid 3, putting them on the same side of the board as the British.  They are being led by the Fantassin who is escorting the Camot, then the Cuchinchina, with the Tonkin steaming at the rear of the group.  They are at Altitude 5-7, and speed 5.  


Turn 1: 
Initiative: The British get 2 Commands to the French 0.  The British elect to go first this turn.  

Move: 
The HMS Malayan uses a Stoke the Engines command and speeds up to max speed and turns towards the French fleet.  She is eager to come to grips with the enemy.  The Medusa speeds up to stay with her.  


The French dutifully stay on course, with only the Tonkin accelerating and moving to the outside edge of the fleet. 

The Archeron slowly turns but does not accelerate, the HMS Corsair needs to speed up to stay in formation with the Archeron. 

Battle: 
None

End:
None


Turn 2: 
Initiative: The British get 1 Command and the French get 0!  The British again decide to go first.  

Move: 
The HMS Archeron goes first and decides to raise up to get over the mountain between the two fleets, with the Corsair following suit.  

The French, maintain course and altitude for now.  The Tonkin continues to pull ahead of the rest of the fleet.  

The Malayan stays on course and at the present height with her escort.... for now.  

Battle: 
None

End:
None

Turn 3: 
Initiative: This time, it is the British with 0 Commands, and the French have all three.  They elect to go first.  

Move:
 The French Fantassin begins a turn towards the gap between the cloud banks.  The British keep pressing in, with no change to altitude or speed.  The French ships follow the lead of the destroyer, except for the Tonkin.  She drops to 6 and speeds up to 8, ready to use her torpedoes to try and break up the oncoming British force.  

Battle: 
With the altitude difference and class differences, the two columns are just out of range of each other.  

End: 
None


Turn 4: 
Initiative: Both sides score 2 Commands, to initiative stays with the French.  They elect to go first, confident they know what the British are planning to do. 

Move: 
The Fantassin quickly and aggressively moves to attack the incoming British with some acceleration, altitude drop, and quick turns that only escorts can manage.  Meanwhile, the HMS Archeron crests the mountain top in pursuit of the French line, speeding up as she goes.

The Cuchinchina also speeds up and turns slowly towards the larger level 4 cloud, setting up a run to safety after a exchange of fire with the British?  The HMS Corsair gains some altitude to avoid anti-escort fire and moves to make an attack run on the French column.

The Tonkin also turns aggressively to try and turn into the flank of the advancing British forces.  The HMS Malayan turns into the attackers and gain altitude to engage. 

The Camot stays in tight formation with the Cuchinchina as she turns to put her broadsides on the British.  The Captain considers blowing smoke, but decides against it.  This will be the turn of decisive action, and he wants his full firepower! 

The Medusa stays with her escort.  


Battle:
Commodore Aubre makes a Fire for Effect Command for the Camot, and her turrets swing into action. The Heavy batteries put two friction on the British battleship, while the port Medium batteries fail to fire due to a technical issue.  

The HMS Corsair fires Torps at the Cuchinchina, who goes on a Prepare for Impact command.  The Point Defense scratch two inbound, but the last two manage to hit.  One manages to to hit hard enough to cause damage!  

The Fantassin fires her light battery and torpedoes at the Medusa, but the point defense easily swat the torpedoes out of the sky.  Plus, the Fantassin's forward battery runs out of ammo.  

The Malayan fires her bow heavy battery at the Cuchinchina, and causes one friction. The TOnkin decides to hold fire, her angle is not great, and the Point Defense of the Medusa will make short work of her barrage. 


End:
The Cuchinchina loses some armor to the hit.  

The Fantassin and the Camot prepare their jammed weaponry for next turn. 

There is only 10 Friction on the board.  The French clear the five on the Cuchinchina, while the British are able to clear the five on their two vessels. 

Turn 5: 
Initiative: The French and the British both only score 1 Command, so the French maintain initiative.  They choose to go first, as getting friction on the enemy battleship was critical to avoiding a worse pounding last turn. 

Move:
The Tonkin races around behind the British main ships, gaining altitude and maintaining her rapid speed.  The Medusa gain height and turns to starboard 45 degrees as she goes.  

The Fantassin climbs to altitude 6, and maintains her speed,  She dashes around and is now in formation with the Tonkin. The HMS Malayan stays in formation with her escort and turns to bring the French into her broadsides.  


The Camot races away from the HMS Malayan, gaining altitude as she goes, her screw churning the air roughly as she races ahead! The HMS Corasir gives chase, eager to fire her torpedoes again, but has not yet re-loaded them.  

The Cuchinchina also races away gaining height, however she turns to get tot he starboard side of the French battleship instead of the port side.  The HMS Archeron sees the French torpedo ships coming and turns away from them and drops altitude.  


Battle:
The stern heavy battery manages to land a telling hit on the HMS Medusa.  Return fire misses.  The Camot's stern battery also hits the Medusa for 1 friction. 

Commodore Duckworth makes a Fore for Effect command, using the British's only command on the HMS Malayan.  Her heavy battery broadsides open up.  Two shells hit the French battleship, and one causes damage.  

The French use their last command to reload torpedoes on the Fantassin.  He fires at range, with the HMS Archeron's Point Defense knocking out two.  However, the last one strikes home and causes damage.


End:
The Medusa, Camot, and Archeron all lose 1 point of armor.  

No ships need to repair damage, no one is sinking, and no one needs to test for a strike your colors test.

There is 7 friction on the board.  The French remove two off their battleship, and one off the Medusa.  The British get more than enough to remove the last 4 off their ships.  

Turn 6: Final Turn
Initiative: Both sides score 1 command, and this time the French elect to go second! 

Move: 
The Medusa moves ahead and turns to port, heralding the position of the Malayan later in the turn.  The Camot stays at speed and moves away as fast as possible, going to altitude 7! 

The HMS Corsair wishes to pursue and easily does.  She goes to reload torpedoes', and fails!  That was the British one command this turn.  The Cuchinchina stays with her larger sister ship.  

The HMS Malayan also goes up one altitude to pursue the fleeing French, and puts them in her broadsides.  The Fantassin goes lower, and slows in pursuit of the HMS Archeron. 

The Captain of the Archeron is sick of fleeing, and turns to port and goes up altitude in an attempt to get his light batteries into action against the French destroyer.  It might have been enough?  The Tonkin also comes up into formation with the Destroyer to target the Archeron.  

Battle: 
The HMS Archeron is going to fire first.  The Tonkin is in her stern arc, but the Fantassin is in the port arc.  The Medium Battery and Light Battery open fire and cause 4 friction on the French destroyer.  The French commander is glad they did not waste their last command to reload torpedoes on it yet.              
          
The Cuchinchina and Canot measure and adjust, but determine they do not have any shots at the British.  The only shots left are the Tonkin vs. the Archeron.  The make a Fire for Effect command and let loose with a full spread of torpedoes.  One gets blasted in bound, and one outright miss.  Two manages to cause damage while the other two detonate harmlessly on the armored belt.  That might swing the game to the French! 


The HMS Malayan has the Cuchinchina in medium range in her broadside.  The heavy guns each get 1 dice to hit them.  They both need to hit and damage to tie the game.  The shots ring out, and they both hit the fleeing armored cruiser.  They need 4+ to penetrate the damaged ship and......


Neither manage to sink home!  The French look like they may have squeaked the win with their Fabian style tactics.  

End:
The Archeron loses two armor and has her Rudder Jammed.  However, her rudder is easily fixed by the crew.  

There is 7 Friction on the board, The British manage to clear it all on their own.   

Conclusion: 
The French managed to pull a squeaker win with some Fabian tactics to avoid losing.  It worked!  The British were intend on knocking them out of the campaign, but their aggressiveness ended up costing them as one of their cruisers became isolated and out of position, and easy prey for the D'Iberville and Chasseur Destroyer.  That brings the campaign back to 5 vs 5.    

This time, Captain Montgomery took the blame for the defeat graciously.  Commodore Duckworth called him into his office and reamed the destroyer captain out for an hour.  If Montgomery had not rushed away to hunt down enemy ships, he would have been in position to provide point defense support for the Archeron.  Ultimately, he wasn't and the badly damaged ship forced the British to re-group and escort it home while the French scampered back to their ports in Indo-china.  

Despite the loss, Duckworth had little else he could do besides dress down Captain Montgomery.  He had been the darling and hero of the last battle.  His dedication to duty and heroism was legendary with the crew.  Therefore, he left it at that and no other formal charges or reports were made.  He had to turn is attention to the French fleet, and not waste his time on internal politics.  

Commodore Aubre and the Camot had yet again faced the the power of a Queen Elizabeth class dreadnought and come away with a victory.  The French officer wondered how long until his luck ran out.  He knew his pre-dreadnought battleship was no match for the British ship one-on-one.  He knew he would need to keep playing defensively and with cunning to pry Siam away from the British.            

As the warships head home, the HMS Archeron manages to repair two of her three armor loss.  The Medusa fails to fix her losses.  The French ships manage to repair their damage as well.  

The Hue ends her training exercises and returns to the French fleet with 3 more experience.  That was not really worth having her out of the line-up for three games, but it was a risk I took and lost.  The HMS Achilles also returns to the British fleet after being refitted at Phra Nakron.  The Tromblom also completes repairs in Saigon and is back to full strength.  

Now, it is time to hand out Experience: 

Malayan: 25 + 2 = 27
Medusa: 8 + 1 = 9
Corsair: 10 + 2 = 12
Archeron: 10 + 2 = 12

Camot: 13 + 2 = 15
Cuchinchina:  4 + 3 = 7 
Tonkin: 17 + 4 = 21
Fantassin: 8 + 3 = 11     
Hue: 7 + 3 = 10 

That gives a new level to the Corsair, who gains Cross-Trained which allows it to re-roll a Command Check!  That would have been handy this time around! The Archeron gets Disciplined Crew which allows it to remove Friction itself, not just from the Commodore.   

The Fantassin gets Drilled Crew which will help reload Torps.  The Tonkin gets Marksmen, which allows +1 dice for Fire for Effect commands! That will also be useful!

The British use Laem Chebang to repair the last armor on the HMS Archeron.  They convert the Kra Isthmus into a re-roll next game.  The French used Hanoi to finish work on the Tromblom.  The other two cities are also converted into Re-rolls.  

You can pick up the rules for Castles in the Sky at the link from Osprey. 


Become a Patron and get access to all the cool stuff, a peak behind the curtain of Blood and Spectacles, and early-access to playtest games!  


You can follow Blood and Spectacles Facebook page or Instagram for more fun! 

Check out the latest publications and contact me at our Blood and Spectacles website

Or purchase all out games at the Blood and Spectacles Publishing Wargames Vault Page! 

Monday, June 20, 2022

Battle Report: Castles in the Sky- A Pseudo-War II - French vs American


I went down to Gestalt Studios in Powell, WY to face off against my friends Americans one more time with my French fleet. 

French airships had been on maneuvers off the coast of South America with the permission of the local government.  However, the United States saw the region as their sphere of interests, and invoked the Monroe Doctrine as a pre-text for interrupting the French maneuvers.  Things quickly escalated.

Forces: 

I brought the French.

L'Aire National
Bouvet- Charles Martel class Battleship- Command 3
Gloire- Gloire class Armored Cruiser- Command 3
Cassini- D'Iberville class Cruiser- Command 4
Voltaire- Descartes class Cruiser - Command 
Epee- Chasseur class Destroyer - Air Torpedoes- Command 1

My friend Marc from The Painted Dwarf brought the US, and he was still painting them up for the game.   

US Navy
USS Murphy's Law- Michigan class Battleship - Command 4
USS Poe's Law - Connecticut class Heavy Cruiser- Command 1
USS Thomas - Bainbridge class Destroyer- Command 2
USS Smith - Bainbridge class Destroyer- Command 2

Mission: 
This was played on a 36 x 36 MU board as a standard Patrol mission.  We played 6 turns and victory was determined by armor value.  This was a straight forward Patrol mission with the US as the attacker.  

We opted for no complications. 

Set-up: 
We divided the table into 4 quadrants and generated some terrain.  

Grid 1 = Cloud at 3
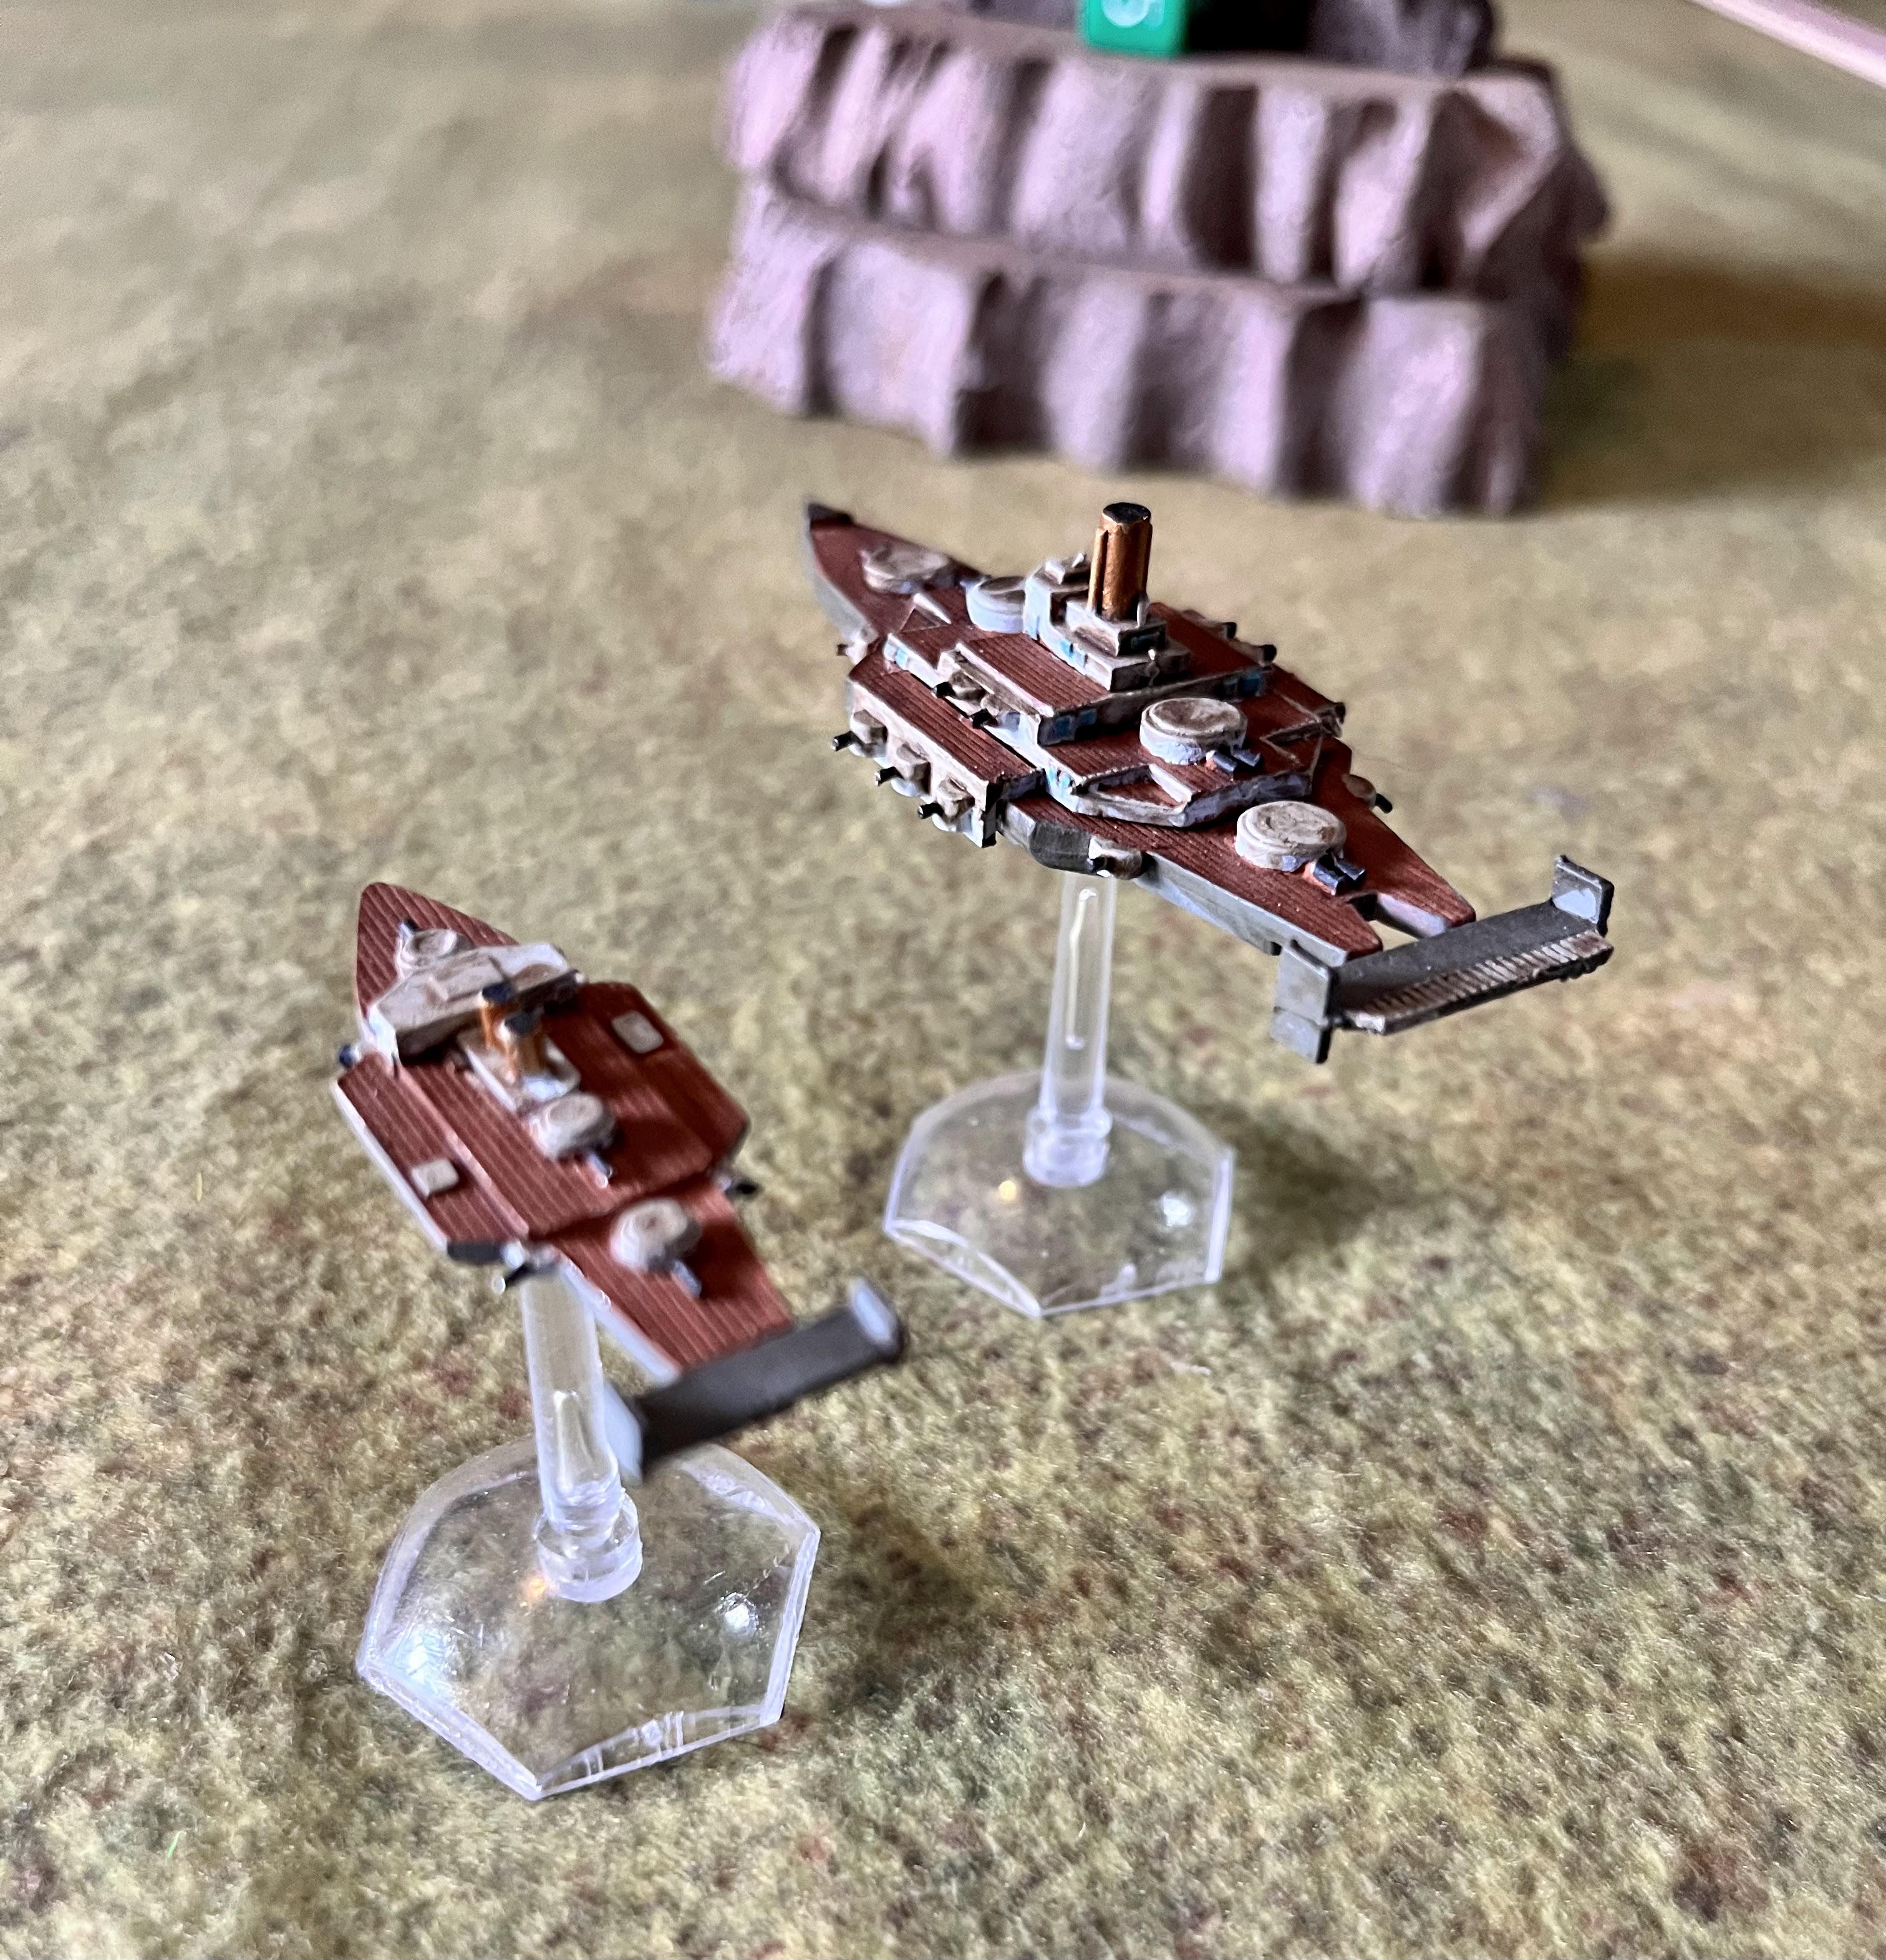
Grid 2 = Mountain to 3
Grid 3 = Mountain 3 and cloud 5
Grid 4 = Cloud 8

The Americans spread across the board at mid-range and height spread out across the board.  The Americans are relatively evenly spaced.  

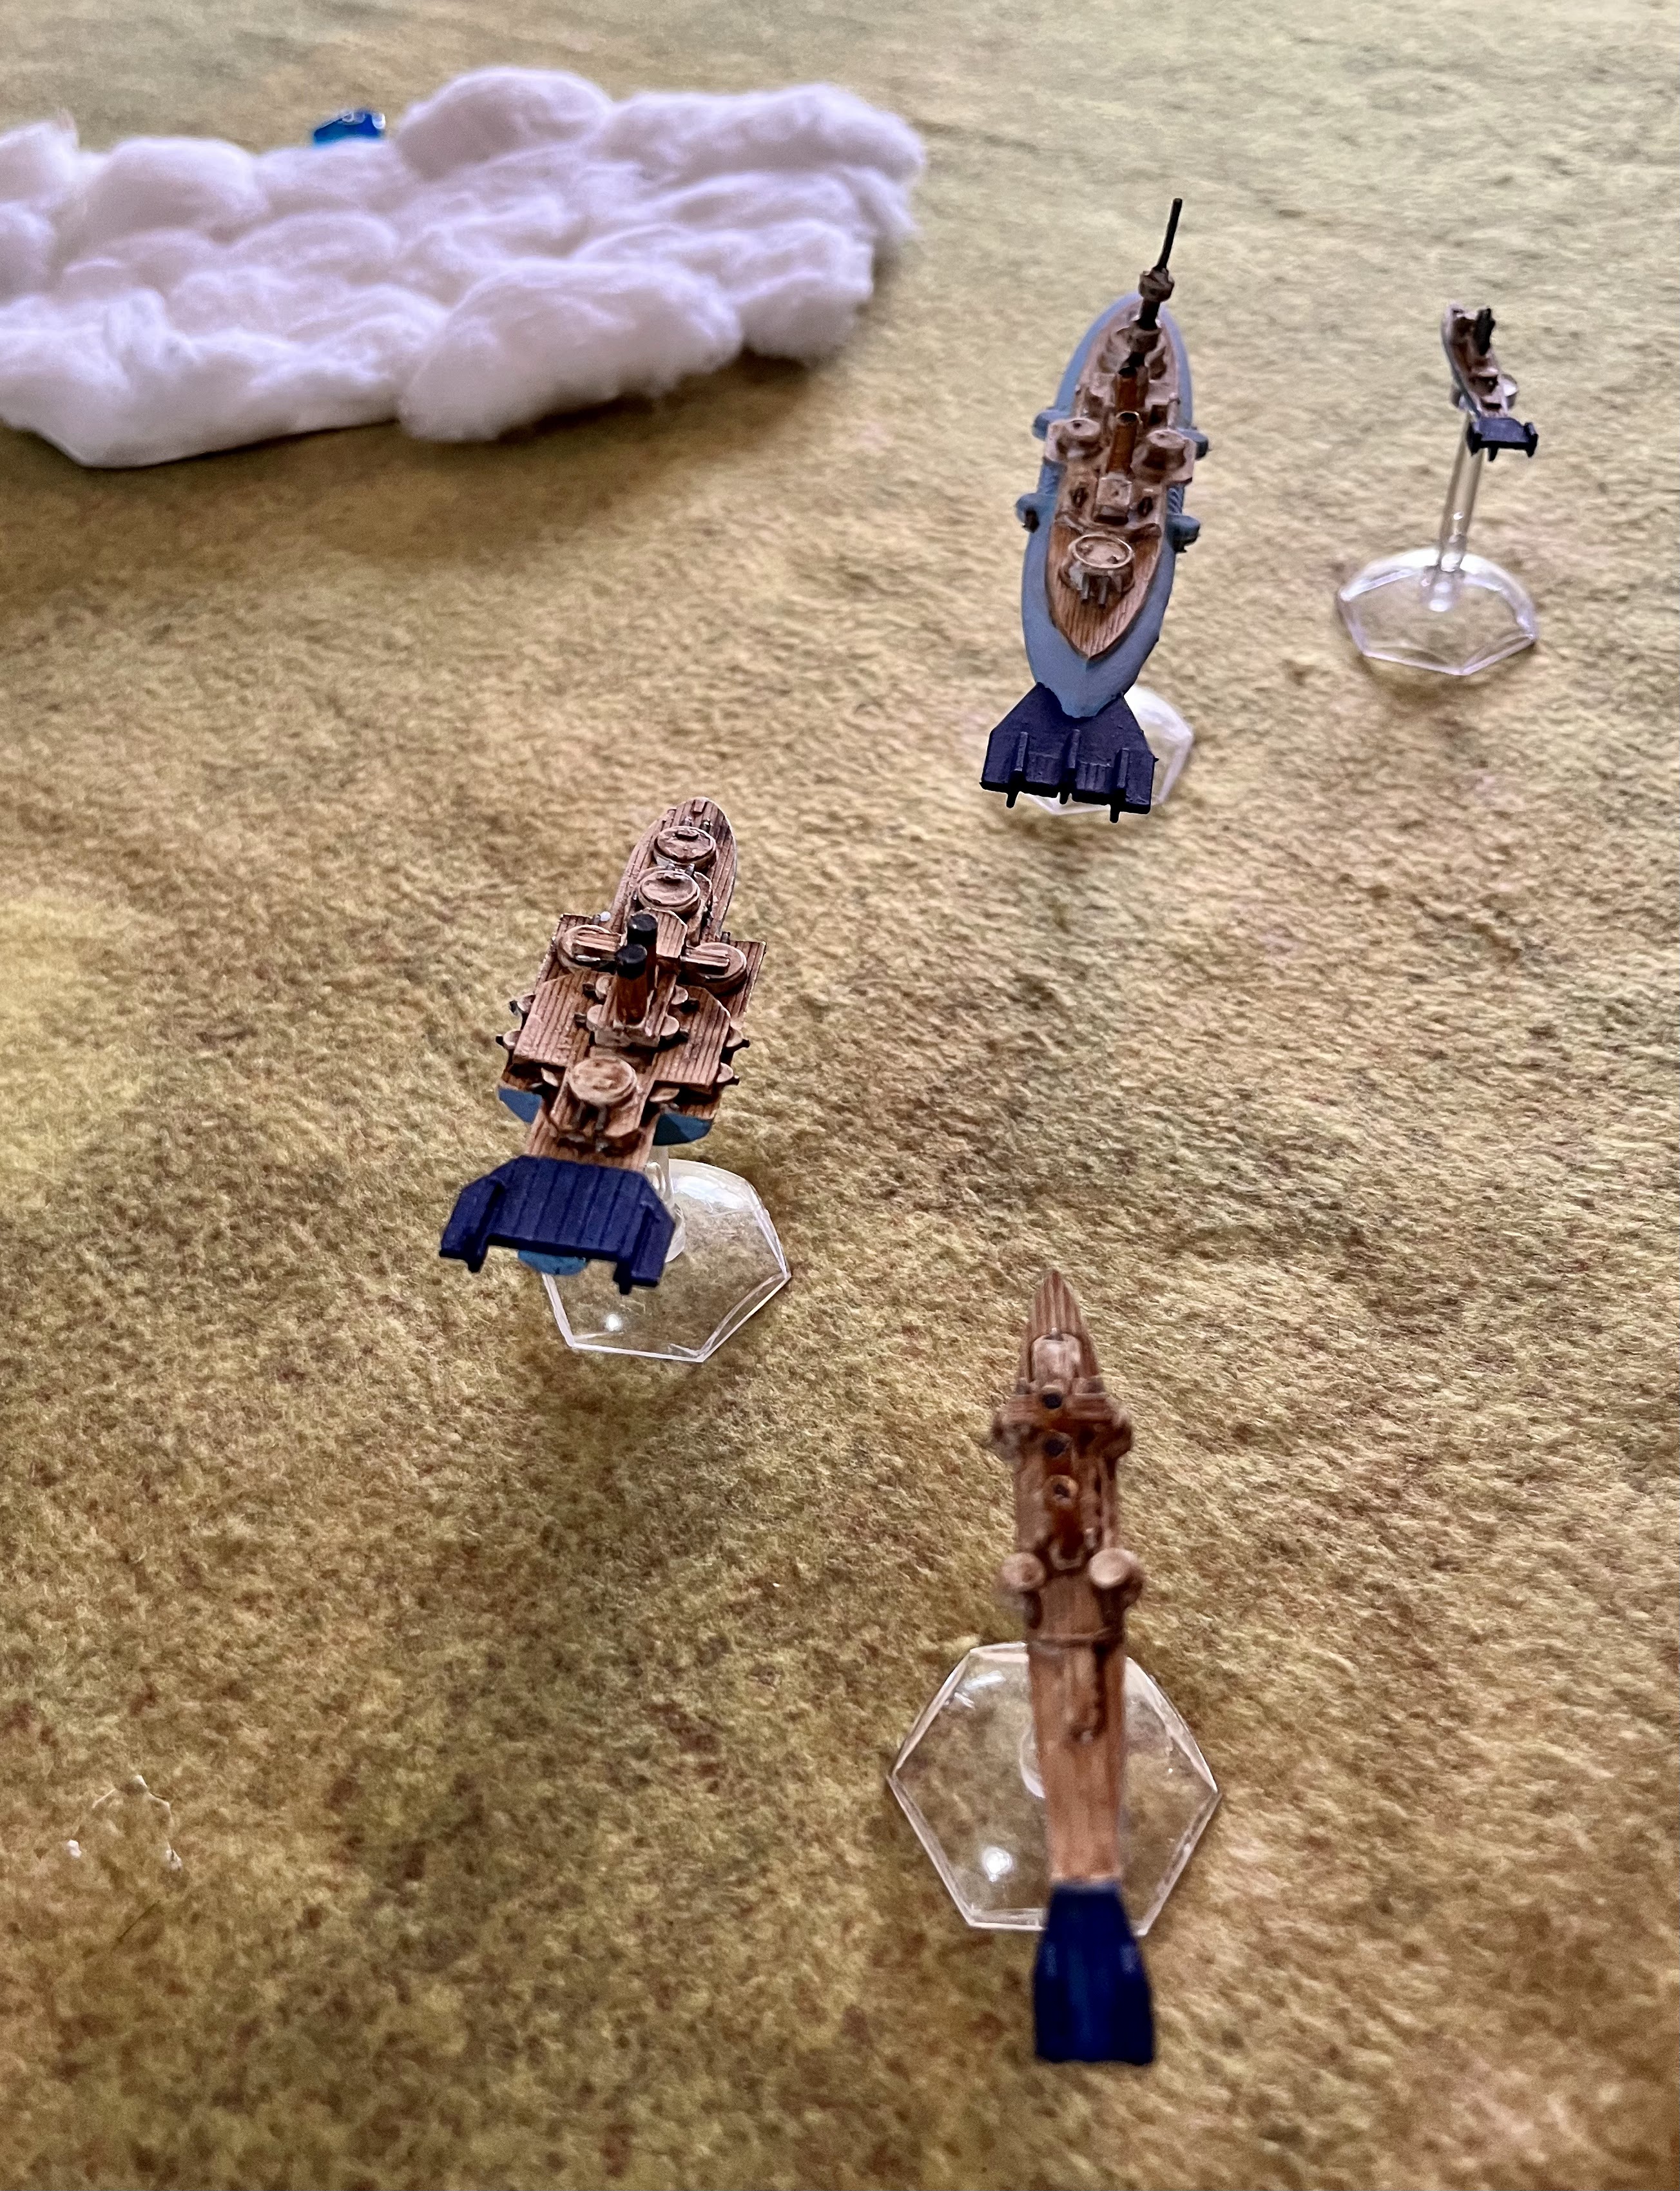
The French are on the left side of their deployment zone set-up to move at an angle across the board.  The battleship is leading the way.  with the following cruisers at various heights.  

Turn 1: 
Initiative: French 1 versus American 3

Move: The USS Thomas bolts ahead high and fast, going full speed as they dash into the clouds for cover.  The USS Smith goes low on the opposite side, as it the two destroyers plan to sweep around the French and catch them on the far side.   


The French stay in line a stern and move across the board at a leisurely pace, letting the Americans come to them.  However, the Voltaire and the Cassini begin to split off from the main force, as the Gloire speeds up to fill the gap in the line. 

Battle:
None

Turn 2: 
Initiative: We tied at 2, but the Americans retain the control of the initiative.

Move: 
The American Destroyers go wide.  The USS Thomas goes high and fast on the outside, at max speed and height.  The Epee rises up to get them in range for a torpedo attack, and the Bouvet and Gloire move to this area of the board and begin their turns in.  The USS Murphy's Law is near the center mountain, but well above it.  The Cassini and Voltaire are separating from the main French fleet into their own attack element, seeming to be interested in the USS Poe's Law.    The other destroyer, USS Smith, goes low on the opposite side.    

Battle:
None

End:
None

Turn 3: 
Initiative: Americans, who go first with 5 vs. 3 in Commands.  

Move: 
The USS Thomas again goes first and makes full speed to circle around the French vanguard, but is caught in front of it.  The Bouvet is not high enough, but the Epee is.  The USS Murphy's Law turns to bring their broadside to bear on the Bouvet, but the range looks to be extreme.  The Voltaire turns towards the USS Murphy's Law bow.  The USS Poe's Law is on the other side of the mountain her sister ship and is approaching the rear elements of the French.  The Cassini breaks away suddenly and moves across the bow of the US Heavy Cruiser and chases down the low altitude USS Smith, who dives further away out of torpedo range.  


Battle: 
The USS Murphy's Law takes some long range shots at the Bouvet, but fails to find its mark.  The distance is too great, and she manages to jam up her Medium battery in the process. 

The USS Poe's Law saves the USS Smith from a torpedo barrage by putting friction on the Cassini with some forward firepower.  The Voltaire also manages to cause friction with a torpedo attack on the USS Murphy's Law.  

However, the Epee manages to launch a Torpedo barrage into the USS Thomas, with one of the birds striking home.  

End:
The USS Thomas loses a point of armor.  

The USS Murphy's Law easily repairs her Medium battery.  With a Command of 4, repairs come easy! 

Both commander's are skilled enough to clear all Friction.  This becomes a theme during the End phase.  

Turn 4:
Initiative: The French win with 2 Commands to 1, and choose to go first.  

Move: 
The Bouvet makes for the cover of a cloud bank to avoid the firepower of the USS Murphy's Law.  She doesn't make it, and tries to blow smoke, but fails!  This leaves them vulnerable.  The USS Murphy's Law tries to close the range while keeping the French in their broadside.  The Epee does not pursue the USS Thomas, and stays with her charge as the US destroyer rockets past the French line.  

The Voltaire turns and accelerate away from the USS Murphy's Law, but the USS Poe's Law is moves to intercept them.  The Cassini turns to engage the USS Poe's Law with a torpedo broadside.  Meanwhile, the USS Smith gets behind the French and gets a bead on the trailing Gloire.  
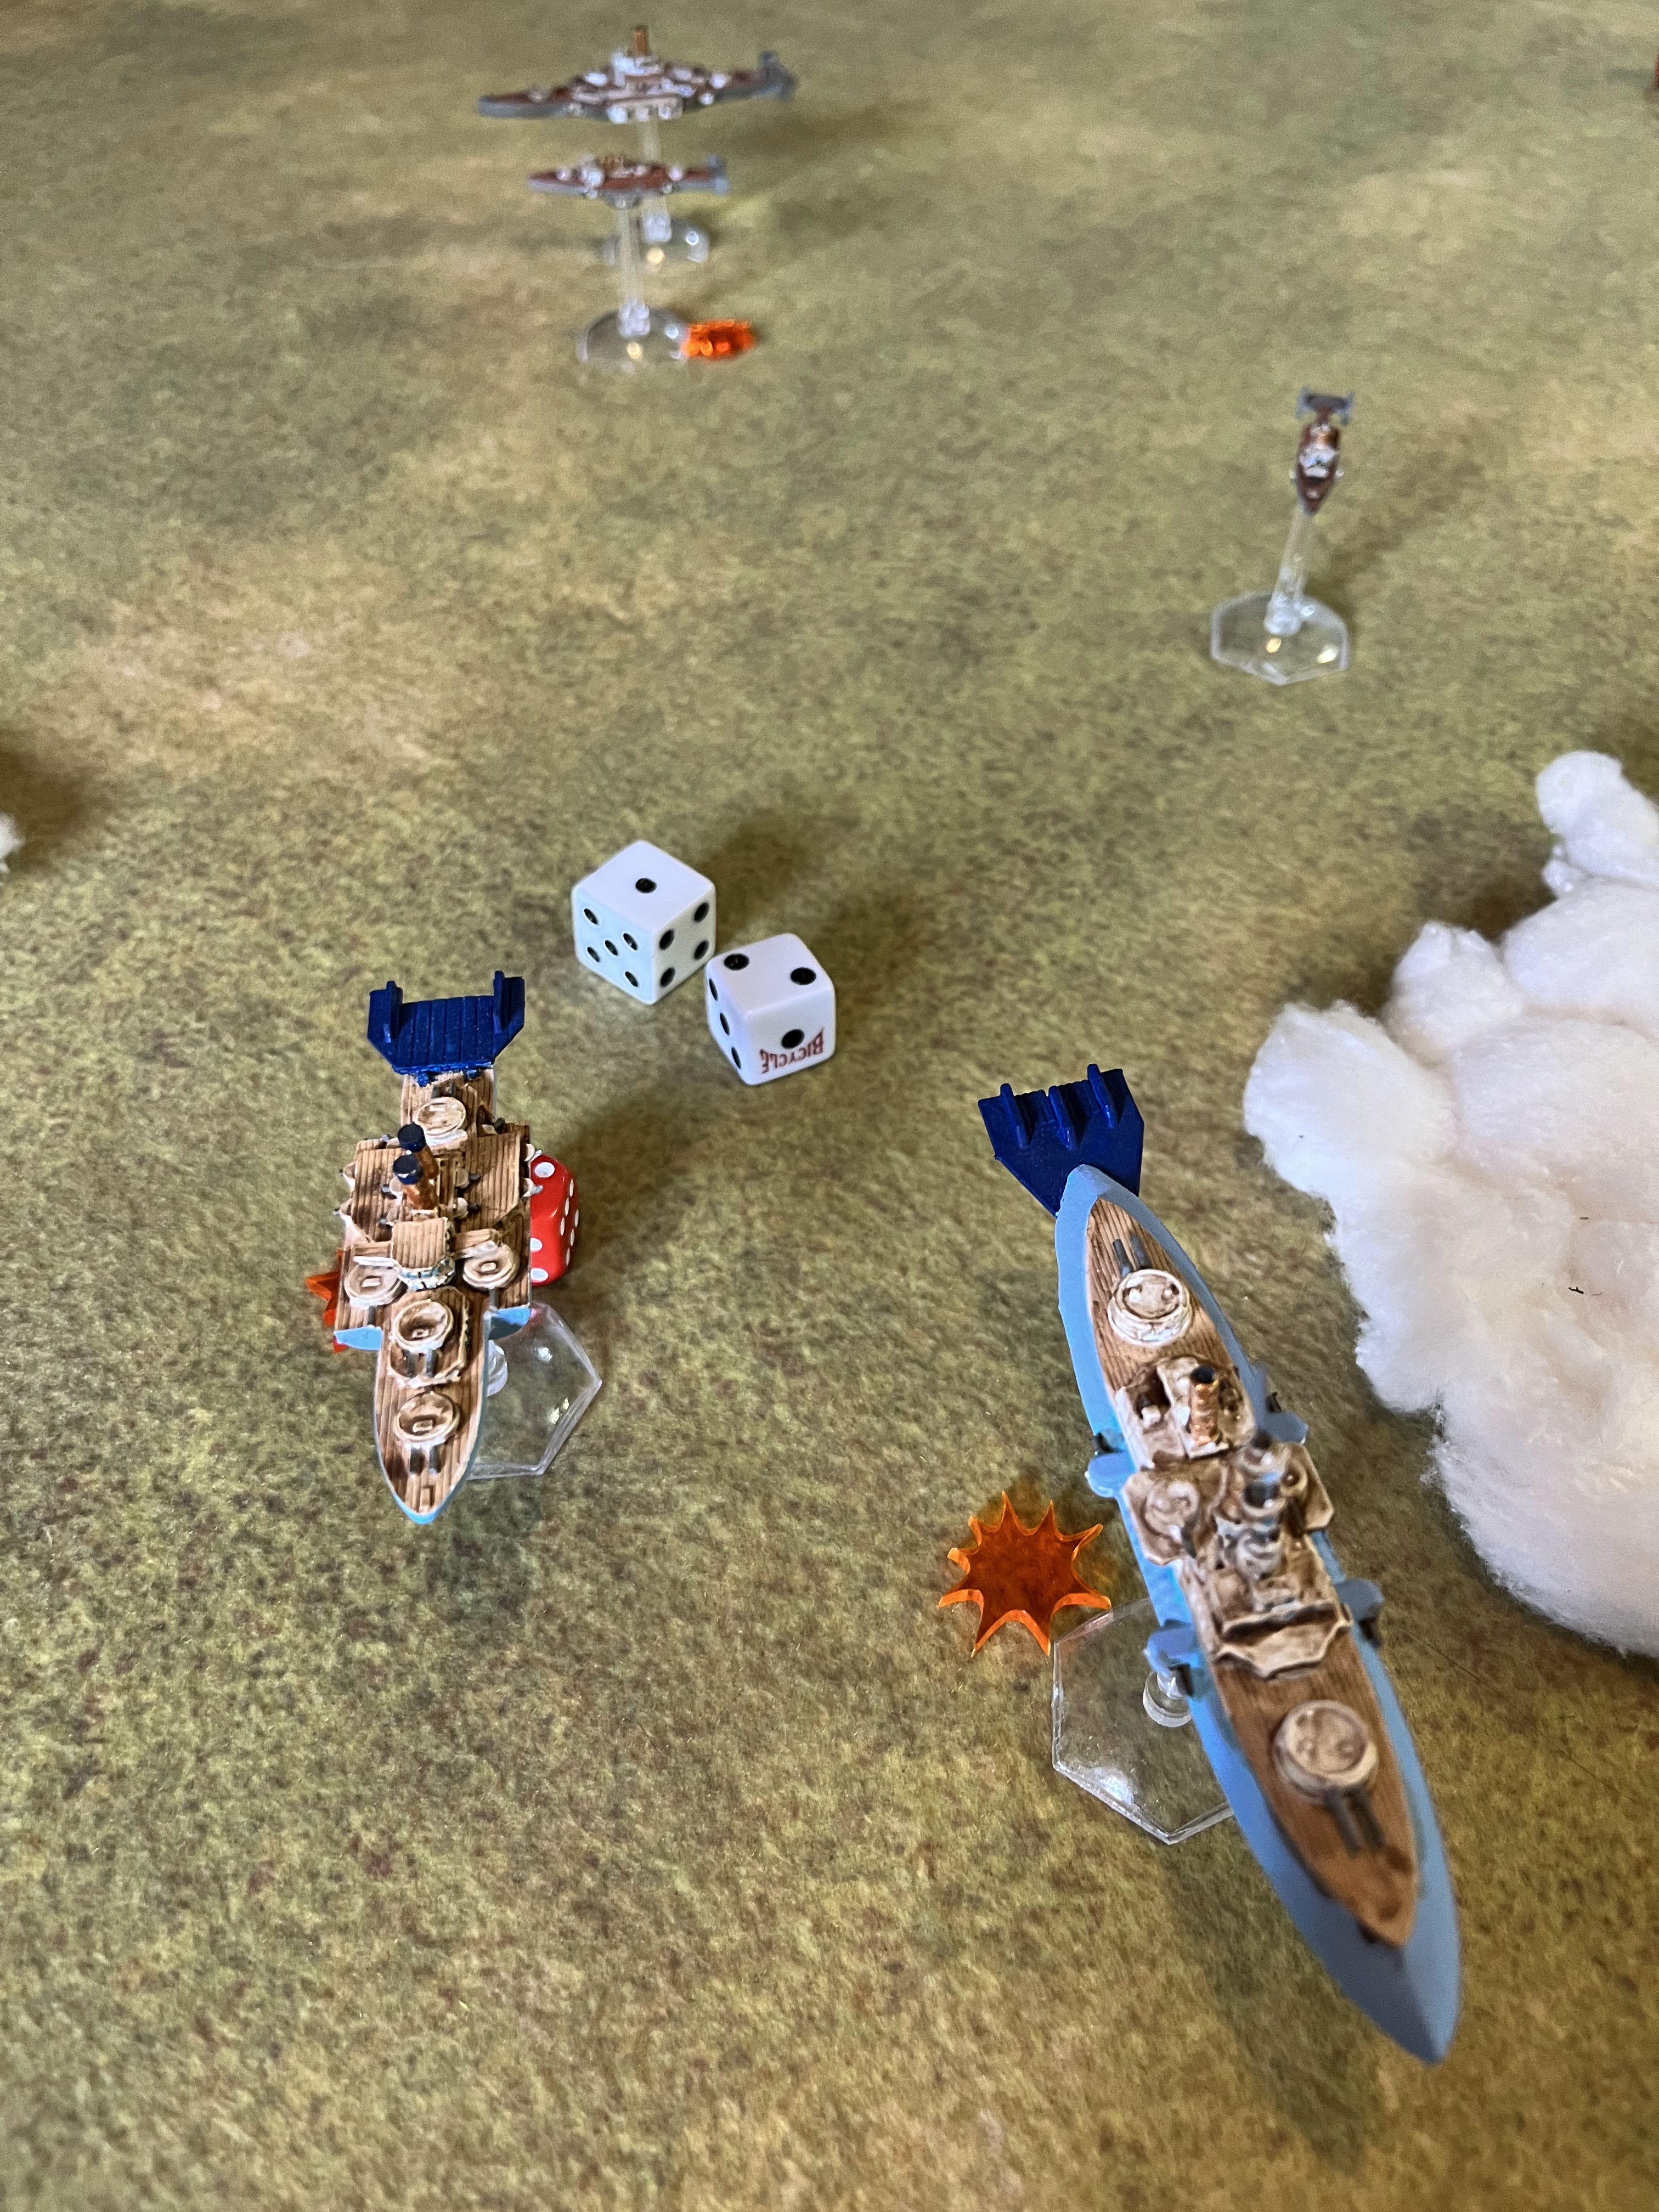
Battle: 
The Bouvet manages to fire first, and puts some Friction on the USS Murphy's Law.  This proves critical as despite a Fire for Effect command, the shots from the US battleship ring off the French ship's armored plate.  

The Cassini manages to fire a barrage of torpedoes into the USS Poe's Law as they race past each other.  One manages to find a weak spot in the Heavy Cruiser's armor and cause a hit.  Fire from the USS Poe's Law fails to scratch the Voltaire or the Cassini.  Her main bow heavy battery gets jammed in the process. 

The USS Smith fires her torpedoes on the Gloire, and several manage to get past her Point Defense.  However, they clang or explode harmlessly on her armored belt.

End: 
The USS Poe's Law loses 1 armor. 

Again, the two fleet commanders easily remove all friction.             

Turn 5:
Initiative: The Americans win 4 to 1 Commands, and the Americans elect to go second. 

Move: 
This time the Bouvet manages to take cover in the clouds, along with the Epee.  The USS Murphy's Law changes course to work with the USS Poe's Law to try to capture the Voltaire in a crossfire.  However, the Voltaire gains altitude and goes to full speed, while blowing smoke to avoid their fire.  The USS Smith supports the effort to box in the French cruiser.  

The Cassini circles around and also takes cover in a cloud bank behind the American fleet.  The USS Thomas continue to circle around the back of the French.  The Gloire follows the Bouvet, but is not in cover.  

Battle: 
The Voltaire uses limited firepower on the USS Poe's Law, and it is enough to cause Friction.  However, despite the smoke and Friction, the return fire from the USS Poe's Law and USS Murphy's Law tears two holes into the French cruiser.  However, the USS Smith manages to also jam up her forward light battery.  

The Gloire fires her Heavy Batteries at the USS Murphy's Law.  She manages to jam both of her heavy batteries!  


End: 
The Voltaire loses armor only.  

The USS Smith fails to fix their light battery.
The USS Poe's Law fails to fix either of their jammed Heavy Batteries.   

All Friction is removed.  

Turn 6- Final Turn
Initiative: The French win with 2 commands to 1.  They elect to go first! 

Move: 
The Bouvet comes out of the clouds along with her escort, ready to duel with the USS Murphy's Law.  The Americans are game and move to engage.  The Gloire also moves up ready to support in the firefight.  

The USS Thomas and USS Smith turn in and race at the French battleships with a load of torpedoes.  The US use their command to load torpedoes.  

The Voltaire manages to escape away from the USS Poe's Law, while the Cassini comes up on her stern with a fully loaded torpedo spread ready.    

Battle: 
The French use their last command to Fire for Effect on the Bouvet.  They open fire on the USS Murphy's Law with their main guns, and the USS Thomas with their light batteries.  However, none of them manage to stick, and cause friction on the enemy battleship instead. 

The USS Thomas opens up with a spread of torpedoes on the Bouvet.  The Epee and her own Point Defense swat away 2, but two hit the ship.  However, American torpedoes are not very strong and fail to cause damage.  

The Gloire also opens fire on the USS Murphy's Law and USS Smith.  They fail to cause damage as well, but cause friction that stops the USS Smith from their torpedo run.  

The USS Murphy's Law returns fire on the Gloire, and manages to cause 2 damage to her with the heavy batteries.  

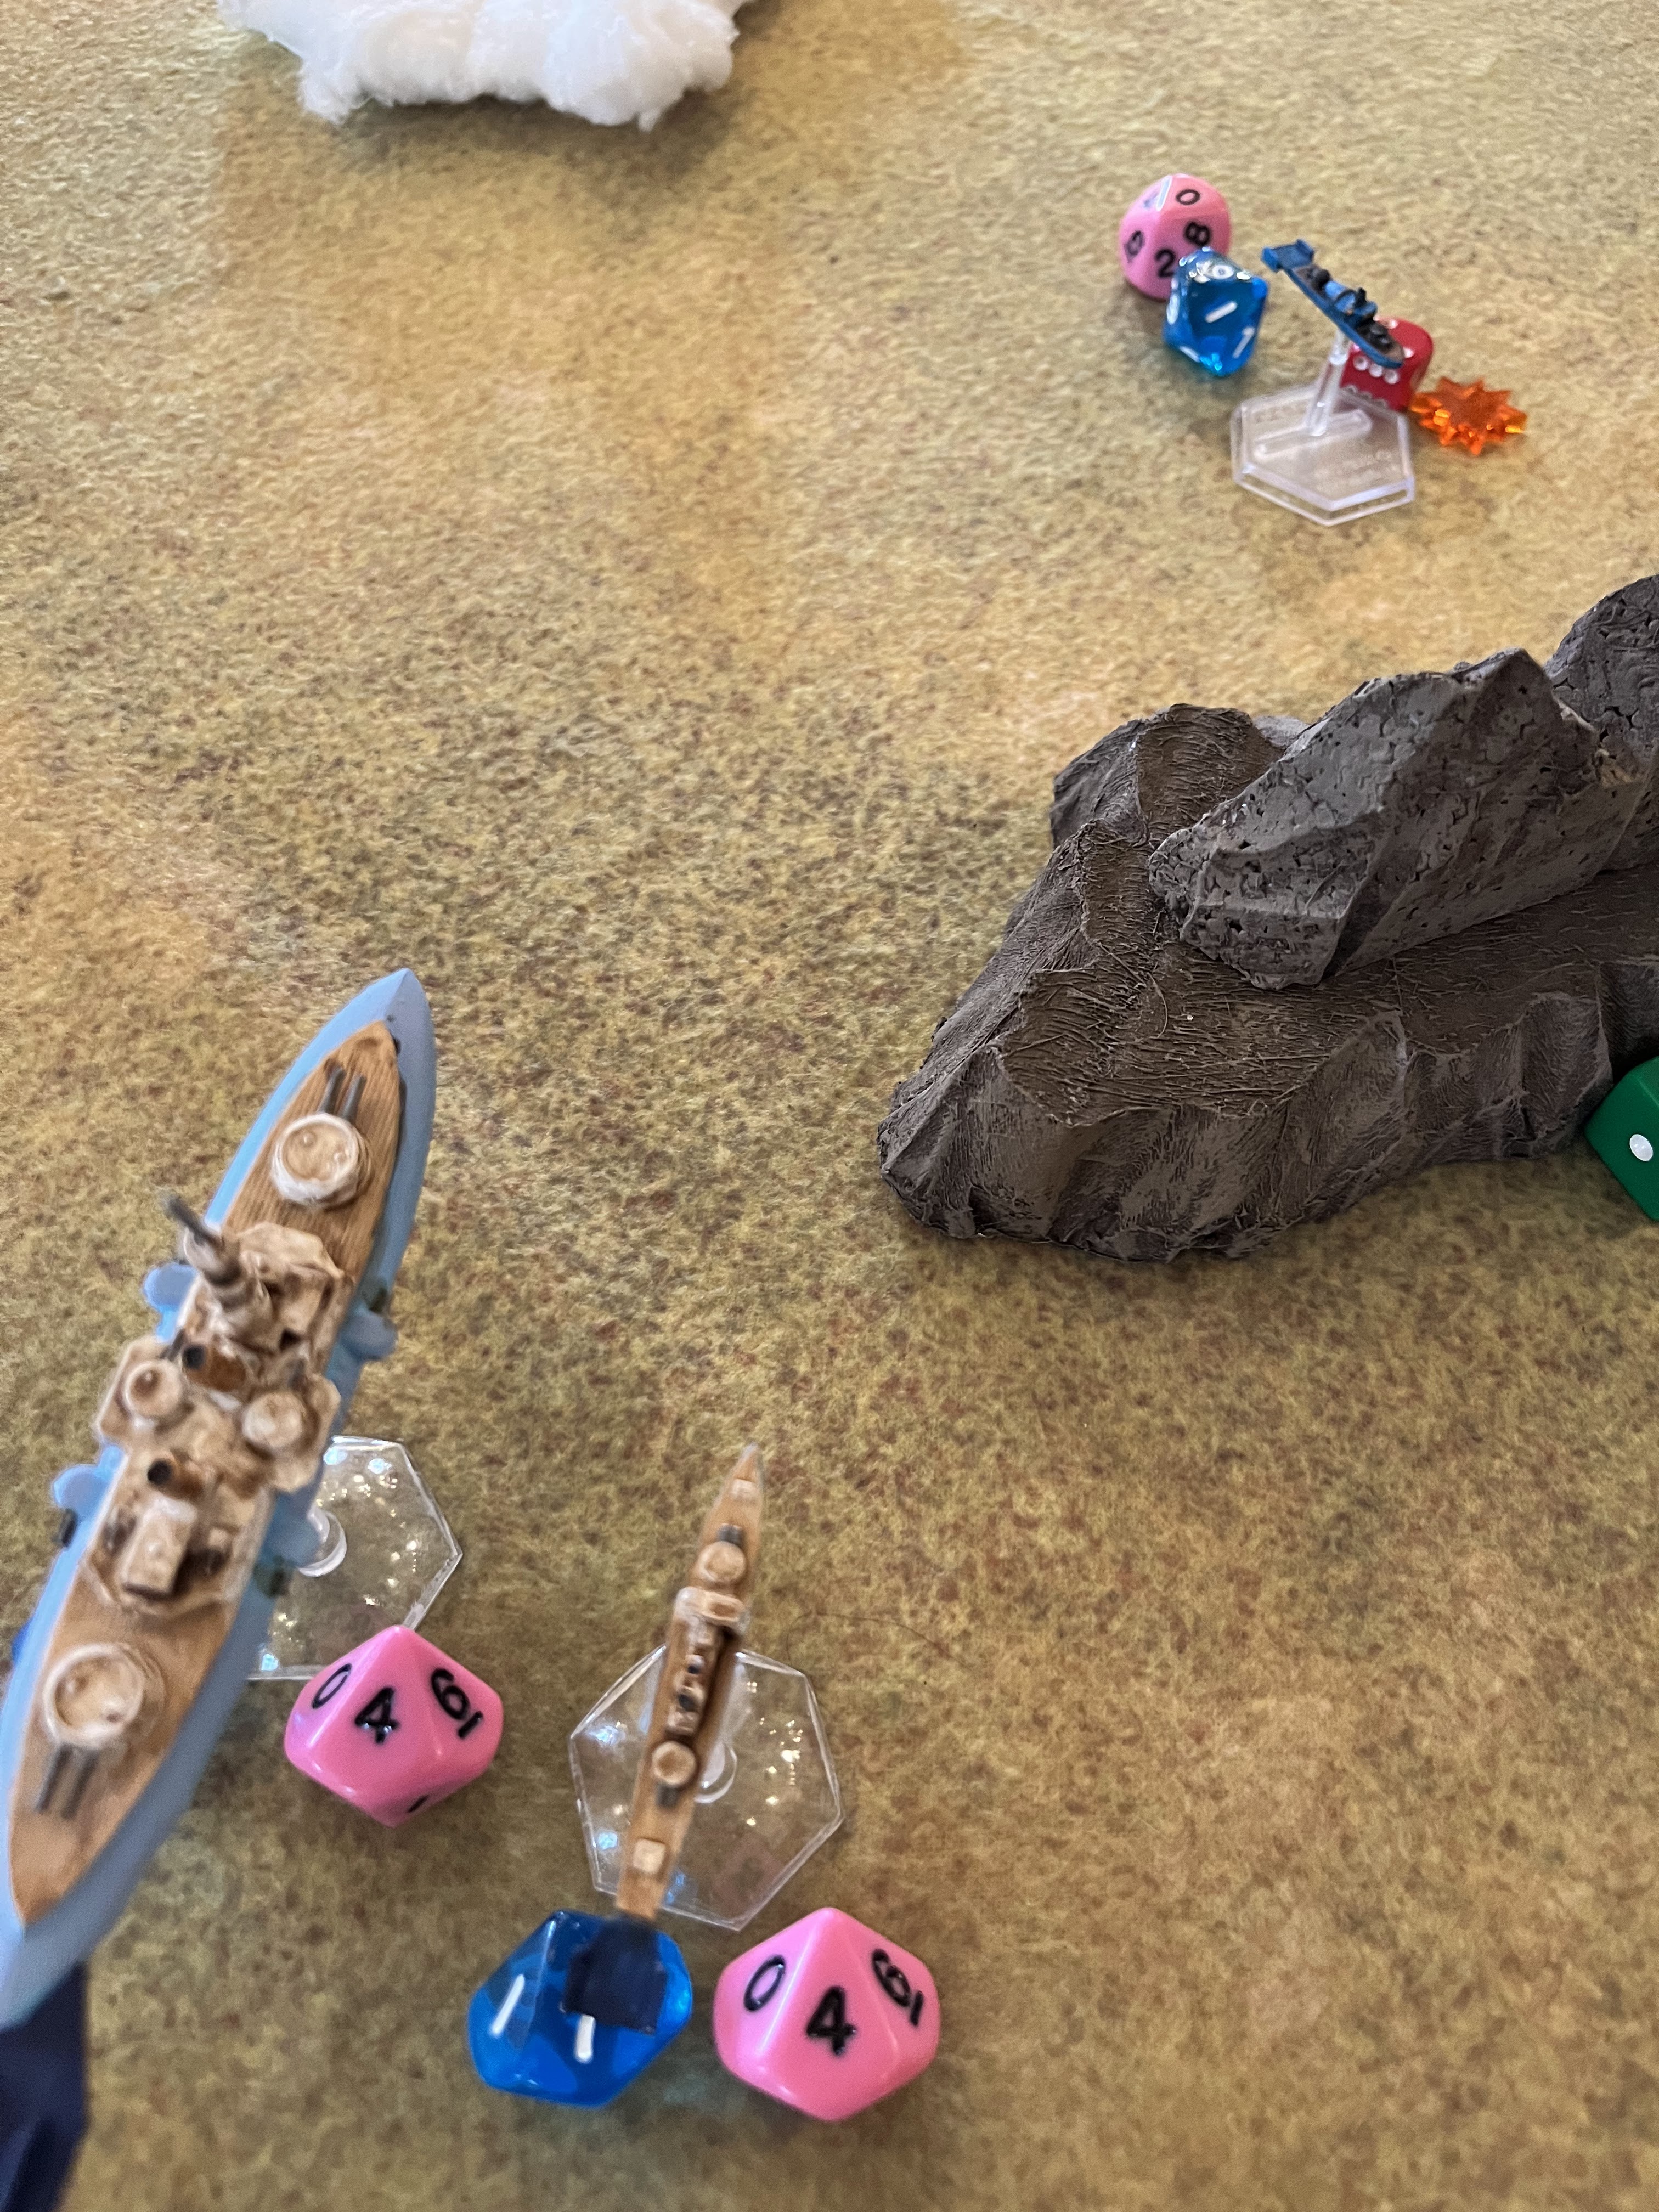
Finally, the Cassini manages to Fire for Effect on the USS Poe's Law and fills her stern with torpedoes.  Her damage makes the torpedo attack stick, and she takes 4 damage.  Ouch.  

End:
The Gloire has her screw fouled, and drops two speed immediately, she also loses two armor.  
The USS Poe's Law loses 4 armor, has their screw fouled twice, and the captain is killed in the attack!  This leaves the USS Poe's Law at Command 0 and leaderless.  

The Gloire fails to repair her screw.  
The USS Poe's Law can not repair any damage.  
The USS Smith repairs her light battery. 

The USS Poe's Law strikes her colors.

Friction is removed.  

Conclusion:
The French win the engagement with 4 armor loss to 9.  Plus, the USS Poe's Law is essentially dead in the sky.  

With the Poe's Law seriously and heavily damaged, the American forces signal for an end to the action.  The French are satisfied with the results, and agree to the ceasefire.  This allows time for the Americans to try to recover their floundering airship, rescue crew, and begin to attend to the dead and wounded.  The French withdraw back to neutral ports while the Americans go about their macabre business. 

 Well, last time the Americans beat me in the last round when the Bouvet struck her colors after getting shredded by the USS Murphy's Law.  This game I did a better job keeping the Americans at arm's length and then slashing in to attack with my torpedoes, and then running away!  I dangled my battleship as a juicy target that the Americans kept attacking, but at sub-optimal ranges.  

Meanwhile, my cruisers did the work by mobbing up on the other flank.  After several battles, my D'Iberville finally proved to be a decisive element in the battle instead of just an annoyance to the enemy.  Torpedoes proved to be the key weapon against these American gunboats.    

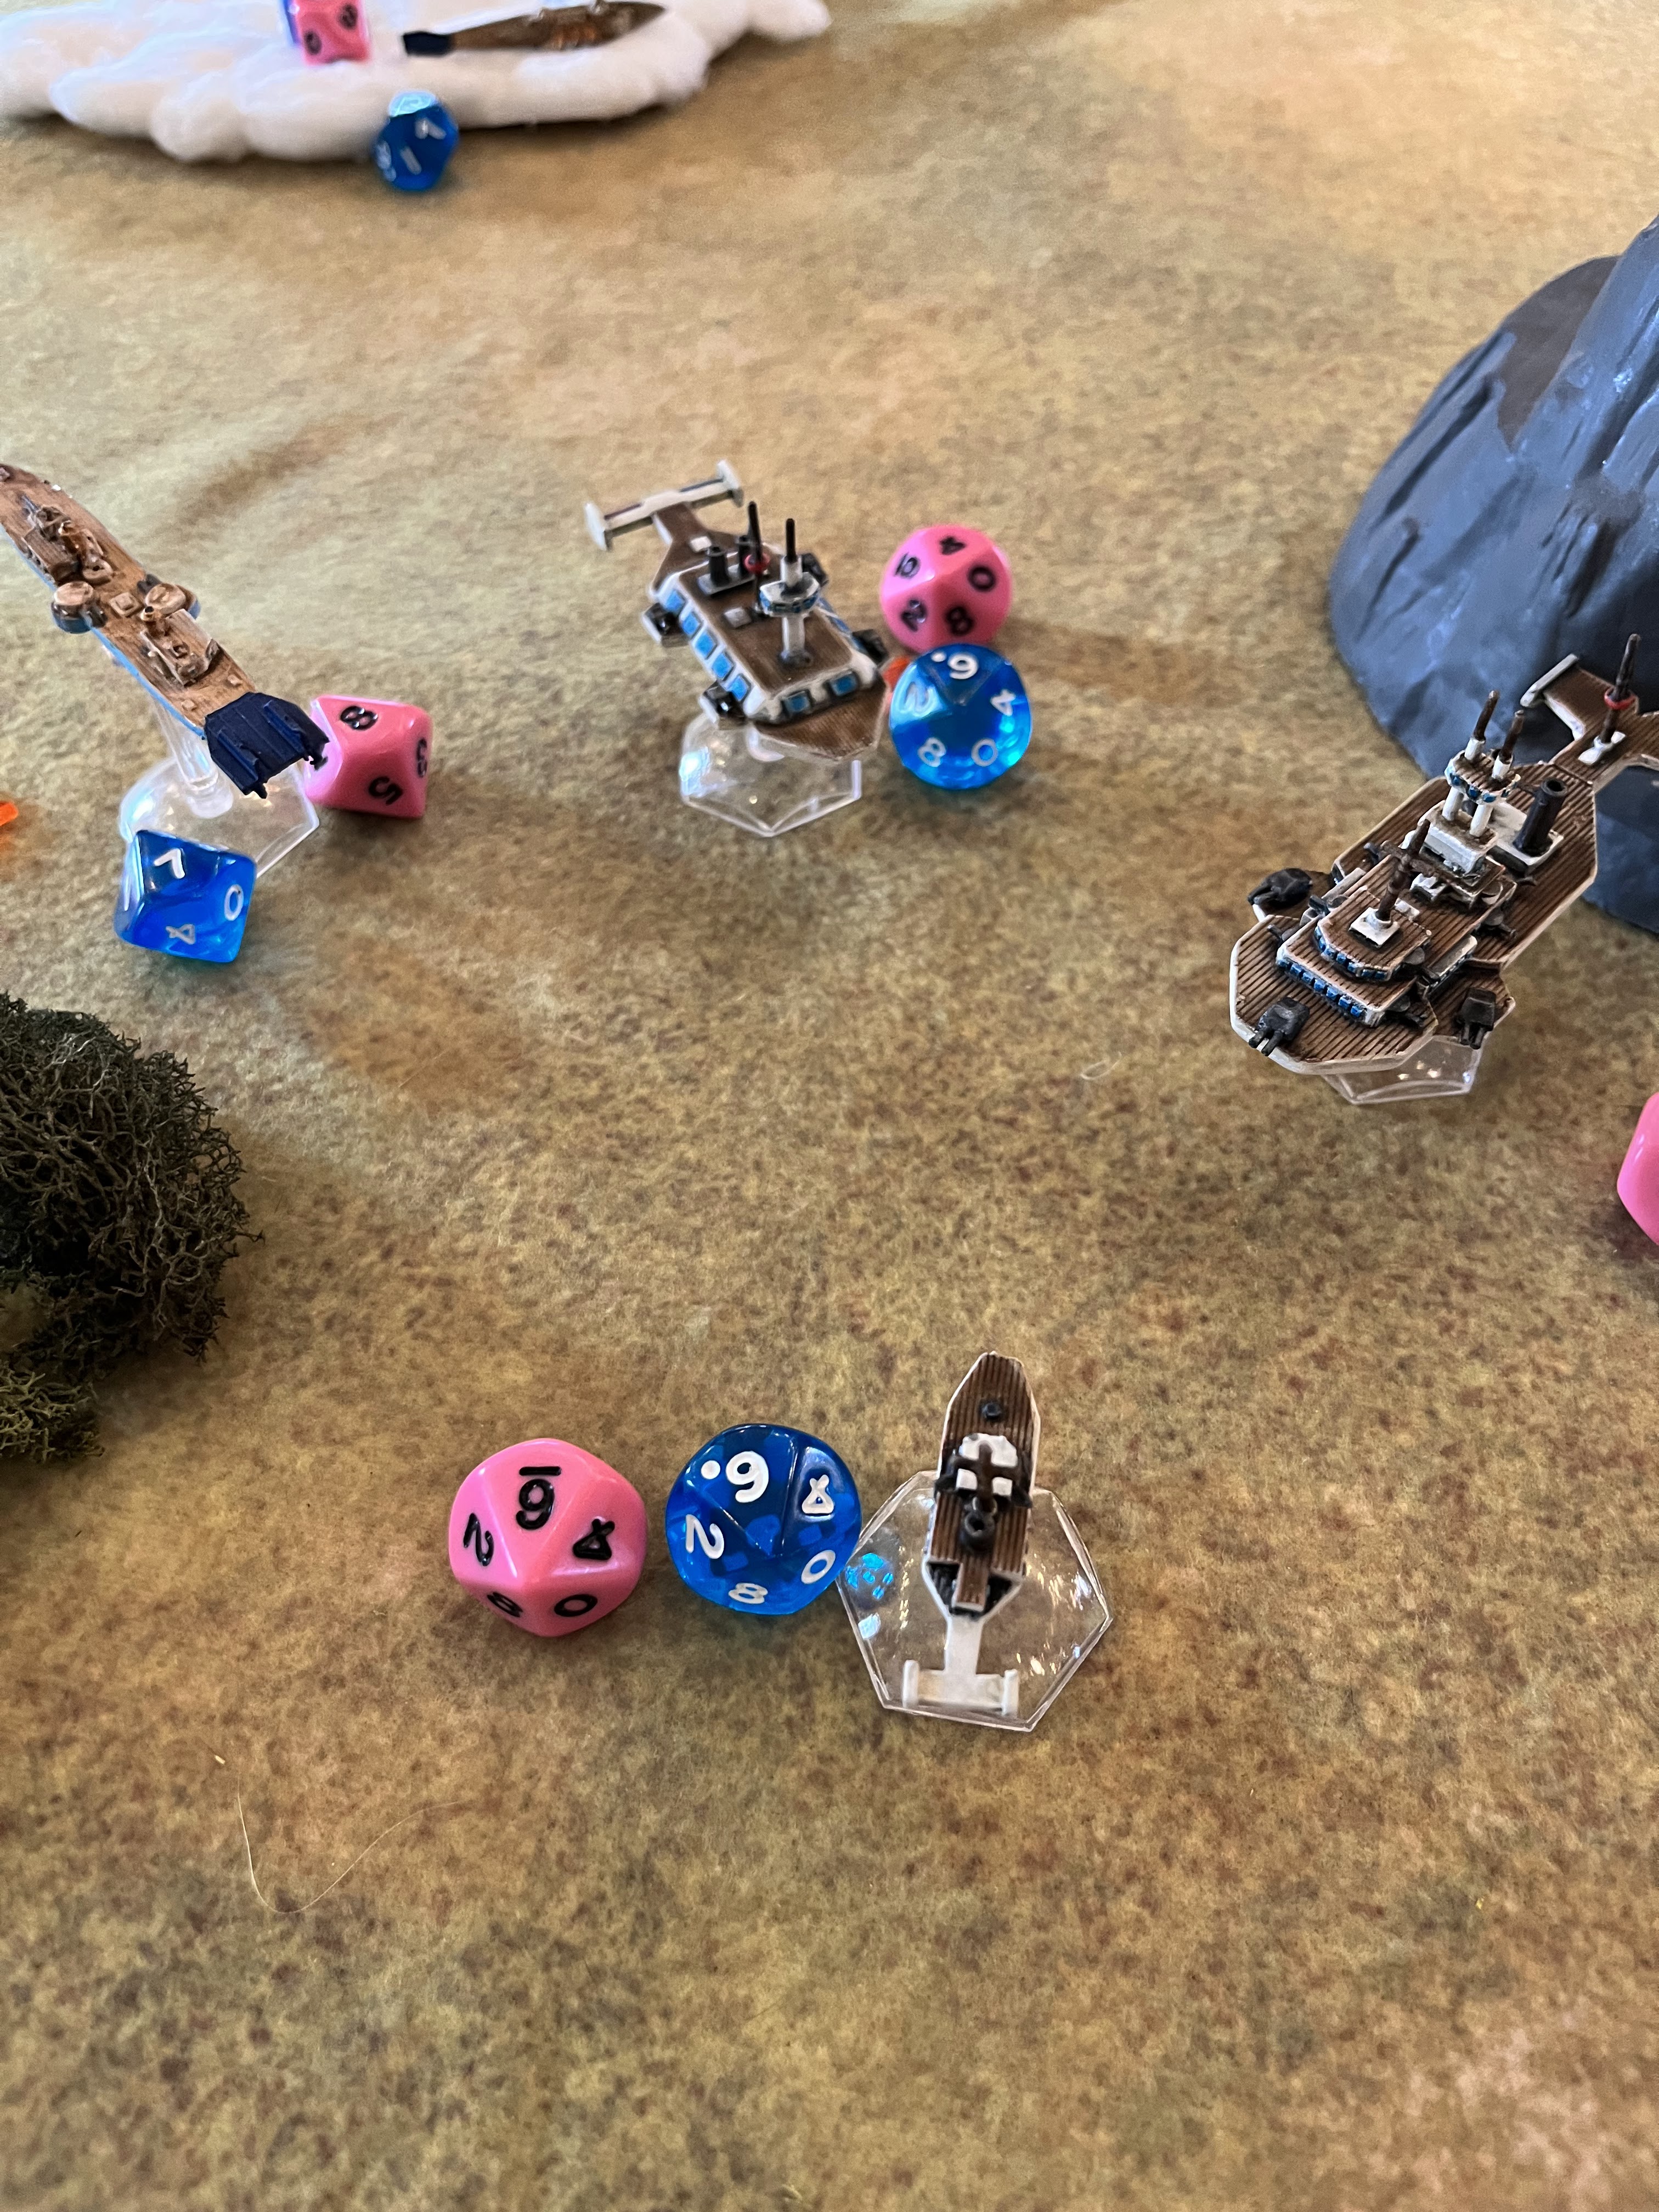
Cloud terrain also was a key factor in this battle.  Several times during this engagement ships took cover in the clouds.  I used it to shield my Battleship during a key turn, and to hide my D'Iberville before its final attack run.  The Americans used them to shield their destroyers on their encirclement approach.  This was the most impact I have seen terrain play in a game yet.  I think I will want to add more clouds! 

You can pick up the rules for Castles in the Sky at the link from Osprey. 


Become a Patron and get access to all the cool stuff, a peak behind the curtain of Blood and Spectacles, and early-access to playtest games!  


You can follow Blood and Spectacles Facebook page or Instagram for more fun! 

Check out the latest publications and contact me at our Blood and Spectacles website

Or purchase all out games at the Blood and Spectacles Publishing Wargames Vault Page! 


Monday, June 13, 2022

Castles in the Sky: Indo-China Campaign V - French vs British


Welcome back to the Indo-China campaign for Castles in the Sky from Osprey Games.  Previously in the campaign the British lost control of the Kra Isthmus to French backed rebels.  This caused issues with the British's proxy the Kingdom of Siam.  Therefore, the British attempted to bombard and destroy a rebel smuggling base where arms and supplies were being funneled to the rebels on the isthmus.  Commodore Duckworth was successful in his mission and bombarded the depot into scrap with the heavy batteries of the HMS Malayan.  However, it was not enough to quell the unrest.  

The French are leading the campaign 4 to 3.  The Final Battle scenario is triggered at 7 points and the leader must be ahead by 2.    

In addition, the French armored cruiser the Cuchinchina finished refit and repairs at Saigon and has re-entered the French fleet.  This is a needed boost to the French fleet as the Hue is still on training maneuvers off Tourane.  The British cruiser HMS Achilles is still undergoing repair work in Laem Chabang from the pounding it took against the French earlier.  In addition, the HMS Corsair comes into today's battle down 1 armor point if it gets used at all.  

Unlike the British, the French naval doctrine is reliant on the indirect approach.  For many decades, there officers have focused on a school of thought known as the Juene Ecol.  This approach focuses on less direct confrontation between ships, and more of a strategy of speed, maneuver, and sharp attacks by lighter forces.  The French were pioneers of the destroyer, air torpedo, and the sky mine.  With the British on the backfoot, Commodore Aubre has decide to continue to raise the stakes on the British commander.  

Earlier, the British had tried to blockade repair parts from reaching the Cuchinchina in Saigon.  With the HMS Achilles in port at Laem Chabang, Commodore Aubre has decided to return the favor.  However, after the failure of the British blockade, the French officer chooses a different path.  Instead of trying to actively blockade the area with his ships, he intends to mine the main trade routes into the port.  

Commodore Aubre waits until the right time.  A cloudy, moonless night is when he decides to strike for maximum surprise on the British.  Of course, Laem Chabang and the HMS Achilles are important assets for the Royal Navy of Siam.  Therefore, much of the British force is active in the area as well.  

Forces: 

L'Aire National

Camot- Commodore Aubre- Command 4
Charles Martel Class Heavy Cruiser (Battleship)   

Cuchinchina - Captain Gourdon- Command 2
Gloire Armored Cruiser

Tourane- Captain de Genouilily- Command 2
Descartes Class Cruiser

Tromblom- Commander Morice- Command 2 
Chasseur Class Destroyer - Sky Mines   

The Royal Navy (of Siam) 

HMS Malaya- Commodore Duckworth- Command 2
Queen Elizabeth Class Battleship

HMS Arrogant- Captain Knowles- Command 2
Arethusa Class Light Cruiser

HMS Medusa- Captain Butler- Command 2
Active Class Light Cruiser

HMS Corsair- Commander Montgomery- Command 4
Bull Finch Class Destroyer- Torpedo

Mission:
The French are the attackers and the British are the defenders in this scenario.  The French are trying to lay as many sky mines as possible within 6MU of the center of the board at Alt 3.  

However, there was a complication determined for this battle.  This battle will take place at night, which reduces Line-of-Sight.  In addition, there is also a layer of cloud cover at altitude 4 which also restricts visibility.    

Set-up:
The battle will be played on a 48MU by 48MU board.  We used a grid system to determine the terrain per the standard rules.  

1= No impacting terrain
2= Mountain alt 3
3= No impacting terrain
4= No impacting terrain

However, the complications will be more than enough cover for this battle!  It is going to get up close and personal.  Both sides can deploy up to 6 MU in from their board edge at any speed of height.

The British are divided into two groups, the Malayan and the Medusa are heading for the drop zone at Altitude 3, while the Arrogant and Corsair are in a flanking force at Altitude 4 and 5.  The Altitude 4 clouds will make this a tough battle to get line-of-sight.  


The French are coming in on a corner edge, led by the Camot at altitude 4with the Tromblom flanking it.  The Cuchinchina and the Tourane are also in formation but at altitude 5.  They are making use of the cover of the clouds.   


Turn 1: 
Initiative: Both sides score two successes, and since the French are the attackers, they win.  They decide to go first this time.  

Move:
The Medusa, Arrogant, and Corsair all increase speed to 6 as they probe for the French ships.  Ground observers spotted and reported the French ships moving into the area, and their target is clear to the British command.  The HMS Malayan makes for the center of the trade route to protect it.  

The French Camot and Tromblom stay in the cover of the clouds as they approach.  The Tourane and Cuchinchina are following, but taking top cover and searching for enemy ships.  

Battle:
None.  No one has the range or line-of-sight.  It is night time after all.    

End:
None

Turn 2: 
Initiative: The French get three commands to the British 1.  They elect to go first again. 

Move: 
All force continue on target.  The Arrogant and the Corsair are rocketing through the night at speed 8, while the Medusa slows to stay with the Malayan. 

Battle: 
No one can get a target at night and with the clouds.  This will be a short, and intense firefight up close and personal when it happens!   

End:
None


Turn 3:
Initiative: This time the British win three to 1, and decide to go first to get to the target zone before the French.... maybe?  

Move:
The Malayan moves up and turns slightly to put the majority of the trade route under the guns of their broadside at Altitude 3.  The Cuchinchina breaks off from the French fleet at Altitude 5, and turns towards the mountain and the reports of British ships in the area.  

The Medusa moves up with its charge, as the Tourane stays high at Altitude 5 on the opposite flank of the French fleet.  

The Arrogant drops to altitude 3, and into cruise's into the target area, hoping to get the jump on the French destroyer.  However, she is taken by surprise as the Camot drops out of the cloud bank and blows smoke as she approaches the Light Cruiser rapidly!  The Corsair stays high at altitude 5, but stays with the Arrogant.  The Tromblom also speeds up and drops altitude to stay with the Camot, and begin her attack run on the target! 

Battle:
The Camot is just out of range of the HMS Malayan thanks to the darkness of the night!  However, the Arrogant quickly opens fire on the French pre-Dreadnought.  However, the smokescreen does it's job and renders the Arrogant's weapons useless.  A snapshot from the Camot's bow heavy battery also goes wide of the Arrogant.  

End:
None.


Turn 4:
Initiative: ! command to 1, and the British maintain initiative.  However, this time, they opt to let the French go first, so they can get position on them.        

Move:
The Cuchinchina drops altitude and speeds up to 6.  They are in the cloud bank.  The Arrogant, spooked by the run in with the French battleship, gains height and races past the drop zone.  

The Tourane keeps going ahead, confident their path will cross that of the Arrogant or Corsair.  The Corsair keeps skimming the top of the cloud bank, reluctant to get stuck in too close due to their weakened armor.        
 
The Camot drives back up into the cloud bank, and blows smoke with a Command.  The British do not take the bait, and continue to cover the trade route, knowing the Tromblom will need to appear to drop her mines.  

However, the Tromblom dives into the trade area, but maneuvers frantically to curve out of the area, and keep her Mine Launchers in position to mine the area.  The destroyer is trying desperately to avoid the British fire.  


Battle: 
The French go first a begin with the Tromblom popping Sky Mines into the target area!  4 counters are in the drop zone.  Despite the Tromblom's efforts, she is in sight of the Malayan who makes a Fire for Effect order.  The little French Destroyer is hit with 4 friction and 2 hits from the Malayan's Light Batteries.  

The Tourane and the Arrogant exchange fire through the clouds.  The Tourane takes the worst of it with 4 Friction and 2 hits, to the Arrogant's 4 friction.  However, the Camot can also see the Arrogant, and fires with an obscured line-of-sight through their own smoke.  The Camot's starboard light battery jams, but the Heavy and Mediums manage to add 4 more friction and 2 solid hits on the Arrogant! 


End: 
The Tromblom loses 2 armor from the Malayan's fire.  
The Tourane has her screw fouled and rudder jammed by the Arrogant, while losing two armor.
The Arrogant's rudder is jammed and she lose 2 armor. 

The Arrogant and the Tourane manage to unjam their rudders.  However, the Tourane still has a fouled screw.  The Camot repairs its starboard light battery 

There is 16 Friction on the board.  The two commandore's clear 18 total, so no friction remains in play.  

Turn 5:
Initiative: Two commands to two, so the British maintain.  This time, they want to shoot first, so go first.  

Move: 
The Corsair bravely turns about, and drops to altitude 3, heading straight towards the minefield in an attempt to clear it with PD.  However, the Destroyer's plan may be thwarted as the Cuchinchina drops out of the clouds to cover the Mines.  

The Malayan turns to bring the Cuchinchina under fire, while the Camot flies over her bow and continues to blow smoke.  Meanwhile, the brave Tromblom turns back into the danger zone, and reloads more sky mines! 

The Arrogant turns about to try to catch the Tourane, but she breaks contact by diving below the cloud bank, and breaking Line-of-sight.  However, that maybe a bad idea as the Medusa and Malayan are also in the area.  

Battle: 
The HMS Malayan makes another Fire for Effect order, and opens up on the Tromblom with her light batteries.  However, her gunnery is far less effective and only inflict 2 friction.  However, her bow Heavy Batteries plaster the damaged Tourane!   

The Cuchinchina fires on the Corsair, but only causes 2 friction.  The Medusa's bow battery manages to hit the Tourane for 1 more hit, taking it down to 1 armor point left! 

The Tromblom and Corsair exchange fire, with the Tromblom taking a hit and jamming her bow gun.      
End:
The Tromblom lost 1 more armor.  
The Tourane lost 4 armor and was crippled! 

The captain of the Tourane chooses to strike his colors before losing the ship completely.  


The Tromblom unjams the forward guns.  

There is 10 Friction on the board.  The combined commodore's can remove 14, so no friction remains.  

Turn 6: Final Turn
Initiative: Both sides score 1 Command, so the British maintain the initiative and decide to shoot first.  

Move: 
The Arrogant circles the drop zone and goes below the cloud cover.  The Toruane tries to disengage and drops to Altitude 2.

The HMS Malayan moves to cut off the Tromblom, with the Medusa in support.  The Camot steals away in the cloud bank, while the Cuchinchina stays in the drop zone to exchange fire and support the Tromblom.  

The Corsair races through the minefield in an attempt to clear the mines.  The plan works as the Point defense blows up 1 mine, the other 3 attack and explode.  However, the destroyer takes 3 hits passing through! 

The Tromblom cuts across the drop zone, and stays in the Malayans stern arc to reduce incoming fire.  However, she is still in position to drop her mines.  


Battle:
The Malayan Fires for Effect one more time.  3 hits from the Malayan light batteries strike the destroyer, and the Captain orders her to Brace.  She shrugs off all three hits.  However, she can not drop any Mines due to the command.  The Malayan's stern heavy batteries also bounce off the Cuchinchina, causing 2 friction.  The French armored cruiser cause two friction in return.

The Medusa's stern battery also fires on the Tromblom, who shrugs the hit.  

End:
The Corsair loses 3 armor and has her screw fouled.  

The Tourane and the Corsair are unable to repair their critical damage.  


Conclusion   
The British win the battle decisively, scoring two campaign points!  Thanks to the Corsair's efforts, all the mines were cleared.  The British then won the armor loss battle, losing 5 to the French 10.  The Tourane's miscalculation to avoid the Arrogant, and stumbling into the front of the Malayan was a costly tactical error!  This puts the British up 5 to 4 in the campaign! 

The damaged ships try to repair what they can as they head for home.  The HMS Arrogant is successful and manages to repair both armor losses.  The Corsair also manages to repair the damage done by the Sky Mines, but is still down 1 armor point overall.  The Tromblom fails to repair any of her damage, and limps back to French territory with 3 damage.  The Tourane also fails to repair any of her damage en route, ship is in rough shape! 

The Siamese government also manages to crush the rebels in the Kra Isthmus and reclaim authority in the region.  The French backed rebels are forced back into hiding, and the Isthmus is back in the Royal Navy of Siam's strategic asset column.  

Participants gain the following Experience:

Malayan: 15 + 10 = 25
Arrogant: 1 + 4 = 5
Corsair: 6 + 4 = 10
Medusa: 6 + 2 = 8

Camot: 10 + 3 = 13
Tromblom: 5 + 4 = 9
Tourane: 12 + 1 = 12
Cushinchina: 3 + 1 = 4

Tonkin and Tourane had both previously received experienced crew upgrades, and the Malayan gained a Stoke the Engines to help it gain speed in previous battles.  This time, The Malayan gains Veteran Aircrew so they gain +1 on Evasive Maneuver checks.  The Camot earns Disciplined Crew which allows them to remove their own Friction markers in the End Phase.  

The British use the Phrae Nakron to complete repairs on the Achilles, which will take 1 more campaign turn.  They use the recently freed Kra Isthmus to complete repairs on the Corsair.  They convert Laem Chebang into a re-roll for next game.  

The Hue has one more turn off Tourane to complete training.  That leaves Hanoi and Saigon.  Saigon takes in the Tourane for a complete refit and repair which will take 2 campaign turns.  Hanoi begins work on the Tromblom and repairs 1 armor, leaving her down 2 into the next turn.  

The government of Siam crushing the rebels in the Kra Isthmus and regain control of the territory was a set back to Commodore Aubre's plans.  This put control of the region back into the balance, and the French forces failure to mine the airway left them on the back foot against an aggressive British commodore.  Worse, the Tourane took serious damage and would have to refit.  Despite the losses, the French embassy was comfortable with the situation.... for now.  

The British and Commodore Duckworth were buoyed by their string of victories, and ready to go back on the attack.  The critics in London of the Commodore were silenced.  Captain Montgomery was treated as a hero for his brave mine run, and was content to let his differences with Commodore Duckworth be settled.  The British were ready to attack.  

You can pick up the rules for Castles in the Sky at the link from Osprey. 


Become a Patron and get access to all the cool stuff, a peak behind the curtain of Blood and Spectacles, and early-access to playtest games!  


You can follow Blood and Spectacles Facebook page or Instagram for more fun! 

Check out the latest publications and contact me at our Blood and Spectacles website

Or purchase all out games at the Blood and Spectacles Publishing Wargames Vault Page!       

Monday, June 6, 2022

Battle Report: Castles in the Sky- A Pseudo-War between the French and US


This was a pick-up game I arranged with a local player in my area.  We decided ahead of time to play a simple Patrol mission.  We then proceeded to Gestalt Studios in Powell Wyoming to play!  

French airships had been on maneuvers off the coast of South America with the permission of the local government.  However, the United States saw the region as their sphere of interests, and invoked the Monroe Doctrine as a pre-text for interrupting the French maneuvers.  Things quickly escalated as the two commanders refused to backdown, and a clash became inevitable.    

Forces: 

I brought the French.

L'Aire National
Bouvet- Charles Martel class Battleship- Command 3
Cassini- D'Iberville class Cruiser- Command 4
Epee- Chasseur class Destroyer - Air Torpedoes- Command 1

My friend Marc from The Painted Dwarf brought the US, and he was still painting them up for the game.   

US Navy
USS Murphy's Law- Michigan class Battleship - Command 4
USS Thomas - Bainbridge class Destroyer- Command 2

Mission: 
This was played on a 36 x 36 MU board as a standard Patrol mission.  We played 6 turns and victory was determined by armor value.  This was a straight forward Raid mission with the US as the attacker.  

We opted for no complications. 

Set-up: 
We divided the table into 4 quadrants and generated some terrain.  

Grid 1 = Mountains Altitude 3
Grid 2 = Mountains Altitude 3
Grid 3 = Two cloud banks at 7 and 3
Grid 4 = No Terrain

The United States choose sides and began to deploy up to 6MU in from the board edge with Grid 2 and 3 in them.  The French had the opposite side of the board.  The Bainbridge was close to the Michigan class to act as cover, and they were roughly in the center of the board at altitude 4, going 4.  

The French were in the corner, with the Charles Martel at Altitude 4, going 4.  It was escorted by the Chasseur at altitude 5.  The D'Iberville anchored the line at altitude 6.     

I am going to try to cover this turn by turn, but as it was a teaching game I am sure I missed a few things while also monitoring the game and the rules a bit.  

Turn 1: 
Initiative: The Command 4 and an escort really helped the Americans, as they won 4 commands to 2.  

Move:
The Americans opted to let the French go first.  The D'Iberville sped ahead and went to Altitude 6.  The Bainbridge also went high and sped up.  The Martel moved up, while the Michigan moved between the cloud banks.  The Chasseur stayed with her charge.  

Battle:
Nothing no one had the range.  

End:
None

Turn 2: 
Initiative: The Americans win again.  

Move: 
The Michigan uses crash dive and dives down to get even with the lower cloud bank and to use it to block line of sight.  The D'iberville continues to the center of the board.  Meanwhile, the Bainbridge goes even higher and speeds up, going to max altitude.  The Martel and Chasseur move forward. 

Battle: 
They all hold fire.  

End:
None

Turn 3: 
Initiative: The Americans win again.

Move:
The Bainbridge races ahead at high altitude and moves in on the French fleet.  The D'Iberville has crossed towards the mountain range, and stayed at Altitude 6 to try and target the Bainbridge approaching.  

The Michigan turns into the cloud bank and away from enemy fire.  


The French battleship continues forward, while her escort goes up to Altitude 6 to try and target the Bainbridge with a torp attack.  

Battle: 
The destroyers exchange torpedo and gunfire, but only cause friction.  

End:
Friction is easily removed when both commanders have a combined 7 command dice!  

Turn 4:
Initiative: The Americans win, but opt to let the French go first.  

Move: 
The Martel moves to try and get a broadside for when the Michigan emerges from the clouds.  

The Bainbridge moves to get the drop on the battleship, but is still at high altitude.  The Chasseur and D'Iberville move to box it in with torpedo fire.  The Michigan comes out of the cloud bank, and presents her broadside.  

Battle: 
The Martel opens fire with her broadside, trying to cause some friction to dampen the Michigan's fire.  The plan works, and causes 1 friction.  However, the Michigan's return fire is powerful, and causes 4 friction and lands one solid hit!  

The Chassuer and D'Iberville blast the Bainbridge with a flurry of air torpedoes that riddle the American Destroyer.    


End: 
The Martel's screw is fouled, and she loses speed.  

The Bainbridge also loses her deck gun and armor.  The Captain is also temporarily knocked out, but is quickly revived.  

Turn 5: 
Initiative: The Americans win and again let the French go first.  However, the Americans get 3 commands and the French get none.    

Move: 
The two battleships jockey around for position.  Meanwhile, the damaged Bainbridge tries to get out of the box, and is pursued by the Chasseur.  The D'Iberviller cross across and prepares to use her opposite sides torpedoes on the Michigan.  

Battle: 
The Martel again tries to pound the Michigan, and with all of her batteries firing, causes 13 friction and 0 hits.  The Americans use a Fire for Effect command and pummel the Martel with three hits!  The Medium bow battery of the Michigan fails to hit the D'Iberville at range and height.  

The Chasseur chases down the Bainbridge and riddles it with its deck gun.  The Bainbridge is reduced to 0 armor.  

However, D'Iberville uses her torpedoes and manages to hit the Michigan with some more friction and 1 actual hit.  

End:
The Michigan has her rudder jammed.  The Martel loses armor.  

Meanwhile, the Bainbridge strikes her colors and starts to sink.  

The board has 20+ friction, and the commanders barely manage to clear it all.  


Turn 6- Final Turn
Initiative: The Americans win again, and this time choose to go first. 

Move: 
The Michigan tries to circle behind the Martel.  The Martel speed up and drops altitude and starts to blow smoke as a screen to avoid getting pummeled again.  

The Bainbridge is dropping altitude rapidly as she is sinking, but has enough momentum to almost hit a mountain!    

The D'iberville and Chasseur begin to turn about, and go near the lower cloud bank for cover.  

Battle: 
Despite the cover, the Michigan uses a Fire for Effect command and still manage to bring two hits on the Martel with her heavy batteries.  

No one else has the range or loaded torpedoes to return fire.  


End: 
The Martel loses two more armor.  However, more importantly, the commander decides to Strike Her Colors as she has taken heavy damage still has a fouled screw!  

Conclusion: 
The Americans win with 7 armor loss, to the French losing 8!  The Michigan pounding the Martel and forcing her to strike her colors was the difference in this game!  So close, down to the last dice roll again!  

In some of the key turns, I had terrible Initiative rolls which left me with no Commands.  These would have helped me mitigate the Fire for Effect commands with some Brace for Impact commands of my own.  There were also several times where I did not have enough Commands to Reload Ordinance.  This battle also illuminated how a Pre-dreadnought battleship like the Charles Martel class struggles against a Dreadnought class battleship like the Michigan class.  There is a big difference between how much firepower they can dish out and absorb.  I guess I have been wise in the Indo-china campaign to avoid going toe-to-toe with the Queen Elizabeth class battleship!  

Overall, the game was a success and another date to play again was set!  A successful demo and test run of the game for some of the locals.  This was a run through and prep for the big book launch event we are planning at Gestalt Studios on July 23rd in Powell Wyoming.  Join us there if you can!  More information will be coming out soon! 


Become a Patron and get access to all the cool stuff, a peak behind the curtain of Blood and Spectacles, and early-access to playtest games!  


You can follow Blood and Spectacles Facebook page or Instagram for more fun! 

Check out the latest publications and contact me at our Blood and Spectacles website

Or purchase all out games at the Blood and Spectacles Publishing Wargames Vault Page!