Monday, October 30, 2017

Random: Big News for Blood and Spectacles

This is a blog about playing and designing wargames.  Most of my posts fall into the playing category, but a few of them go into the design category too.  I have had a very productive year on the playing and design front so far, and I hope to finish the year out strong.  We will see. 

Today, I want to focus more on the design side of things than the playing.  I have a couple of big pieces of news and I wanted to share them with you, my gentle and kindly readers.  I am pretty excited about them and hopefully you will be too.


The first announcement is that Rampant Hordes is now available on the Wargames Vault for purchase.  After reading Daniel Mersey’s DuxBellorum and Lion/Dragon Rampant I always hoped he would go back and mash the two up for a Fantasy Mass Battles game.  Instead, he created something completely different with The Men WhoWould Be Kings and Pikeman’sLamentFair play to him and that forced me to get off my backside and do my own dirty work for a change. 

Rampant Hordes is inspired by Dan’s works regarding Leadership Points as a command resource, generic units augmented by Fantasy traits, and being a scale/model agnostic rules system.  Plus, I peppered in some of my own not-so secret sauce.  You know I find Innovation to be over-rated anyway.  It also took some ideas from other works such as Warmaster, Warmaster Ancients, Hail Caesar, Sword and Spear, Swordpoint, and good old DBA/DBM. 

Rampant Hordes is intended to scratch the itch that 3mm-15mm Fantasy Mass Battle itch.  The mechanics are relatively simple and straight forward.  Measurements and terrain are fairly abstract to fit a variety of battlefields from green, rolling fields, to the volcanic slopes of Mt. Ing Dredd.  Combat resolution is quick and easy with pushback mechanics moving the battle line to and fro.  In addition, you use Command Points as a resource to activate special orders, buff your troops, and keep them in the fight.  Generic units are augmented by fantasy traits to give them their own unique flavor.  Lastly, there is a battle generator and campaign to go with the game.  I find it much more fun to link a series of battles together. 

If you give the game a try, feel free to discuss it in our Messageboard.  I would love to hear about your adventures and travails.


The astute observer will notice that two other Wargames works are no longer available on the blog.  The two works in question are Menof Bronze: Ancient Greek Hoplite Battles and Heirs to Empire: Wars of the DiadochiBoth of these games were finished works.  Other astute observers will probably also notice that typically, works in the completed state that do not rely on other people’s IP typically go to the WargamesVault however neither of these works are there.  What’s up with that?  

Well, I am delighted to announce that both of these works are slated for potential release by Osprey Games.  Due to their publishing schedule it most likely will not publish until late 2019 for Men of Bronze and late 2020 for Heirs to Empire.  It may seem like a long time, but I am thankful for the delay as I must procure, paint and photograph a large number of Greek Hoplites, Macedonian Phalangites, and other fun tidbits prior to publication.  I will need that time to get all of that together and photographed to a high-standard.  I guess these Iphone photos in my basement of paper templates just won’t do! 


That wraps up the big news for today.  If you managed to snag a copy of these rules before I removed them from the Blog feel free to drop my some comments or feedback on the Messageboard.  If you have high-quality photographs of Greeks fighting Greeks that you are willing to give-up the rights to and see published drop me a comment there too. 


Thanks for all of your support and help on this journey.  As I get closer to the big day, I will probably post again about the process and a few insights gleaned here and there.            

Thursday, October 26, 2017

Random: Necromunda Pictures

This post is brought to you by two major events.  The first is found photos from my Photobucket Bail-out project.  The second is the supposed re-release of necromunda in the end of November. 

When necromunda was first released, my group of teenage misfits jumped on it right away.  We all had okay sized 40K armies, but this looked really cool and different.  I do not know how we initially got the boxset, but we did.  From there, players were picking up gangs left and right.  Some of us even had multiple gangs.  It was not uncommon for us to play multiple games in a single night with multiple gangs engaged.   

I had Cawdor as a main gang, and Eschers as a back-up.  However, it wasn't long until we had all the gangs, and multiples of some.  We even had Outlander gangs.  We diligently recorded all of our battles into an ugly blue covered notebook affectionately called in our best Space Hulk Vidoe Game voice; the Archive Record Viewer.  That was where we reviewed who had done what in a scenario, what gangers leveled up with what, and who earned what loot from the Trading Post.  It also had a list of which players ran what gangs and who were rivals of who. 

Looking back, it was this "campaign" or linked series of battles with results that carried over from one game to the next; that sealed my love of wargaming.  I still play Necromunda occassionally and look forward to the reboot.  However, I do not look forward to getting new gangers that are bigger than my old ones.  The same thing happened to me in Blood Bowl and it still makes me a bit sad. 

I have used my old Necromunda gangs for all sorts of games including Rampant Stars, Inquisitor, Da Deff Island Skirmish, Tomorrow's War, and other fun games.     

Enough rambling.  Here are some pictures of Necromunda games I found in my old Photobucket account:


I hope you enjoyed these found photos.  As you can see I have Goliaths, Orlocks, Escher, Cawdor, but I also have some Redemptionists and Scavvies too.  I also have some Demonblade Ratskin proxies too.   

Monday, October 23, 2017

Aquanautica Imperialis: Battle Report- Sea Swarm ambushes the North Ammoriss Naval PDF

The Tyranid Fleet was one of the first ones I sculpted.  I had a pretty good idea of how I wanted to approach it after struggling with the Ammoriss Naval PDF.  I had learned a few tricks of the trade and as I got better at sculpting I learned that the organic shapes of the Tyranids were actually easier to make then the hard edges of the Imperium. 

This was also one of the first forces were I tried using simple push molds and Resin casting.  Overall, I was not super pleased with the results, but as you see the fleet in battle check to see if you can find the recasts. 

Despite being one of the first fleets I had built, this will be the first time I have used it on the board.  I have no idea how it will play since I never even used it in Template form.  This should be interesting!

You can find all the rules and stuff to try it for yourself here: 

The Forces:
Ammoriss Naval PDF
AN Sovereign
Reliable Class Cruiser- 250 Points

Harpoon Squadron 486 Alpha
2 Constant Class Escorts- 150 Points

Dagger Squadron 245 Beta
2 Assured Class Escorts- 100 Points

Total= 500 Points

Tyranid Sea Swarm
Bait-
3 Atrocities- 120 Points

Reserves-
2 Abominations- 90 Points
-          Scything Talons

2 Adherrations- 150 Points
-          Submerge

1 Gruesome- 255 Points
-          Scything Talons
-          Synapse Link

Total= 615 Points


Scenario:
Today’s scenario is an Ambush mission.  In this situation, the Tyranids are using the Atrocities to lure the Human prey into chasing them into the remainder of the Sea Swarm.  The bulk of the Sea Swarm is deployed off table and in reserve.  The trick for the Ammoriss Naval PDF will be to destroy the Atrocities before being driven off by the rest of the Tyranid fleet.

********
Local fishing ships near the Alset Range had been disappearing and the locals reported it to NavComm North.  In these dark times, such reports had to be taken seriously and followed up on.  Taskforce: Divine Light had been sent to scout the area and destroy any potential threats.  NavComm feared pirates or Orks.  

Upon arriving on station, the officers began to receive troubling reports of sea monsters.  At first, it was hard to take them seriously.  However, when they were reported to the NavComm Office of Strategic Intelligence liaison the blanching of his face had to be taken seriously. 

In a private meeting with the Captain, XO, and Squadron Commanders the Liaison briefed them on the threat they faced.  After hearing about the Tyranid menace and the true danger it posed the other officers took the fisherman’s tales very, very seriously. 

A few days later, the watch officer aboard the Sovereign reported a sighting.  The flotilla changed course and gave chase.  Their spotters were able to confirm the worst as they closed in.  The Tyranids were active off the shores of North Ammoriss.
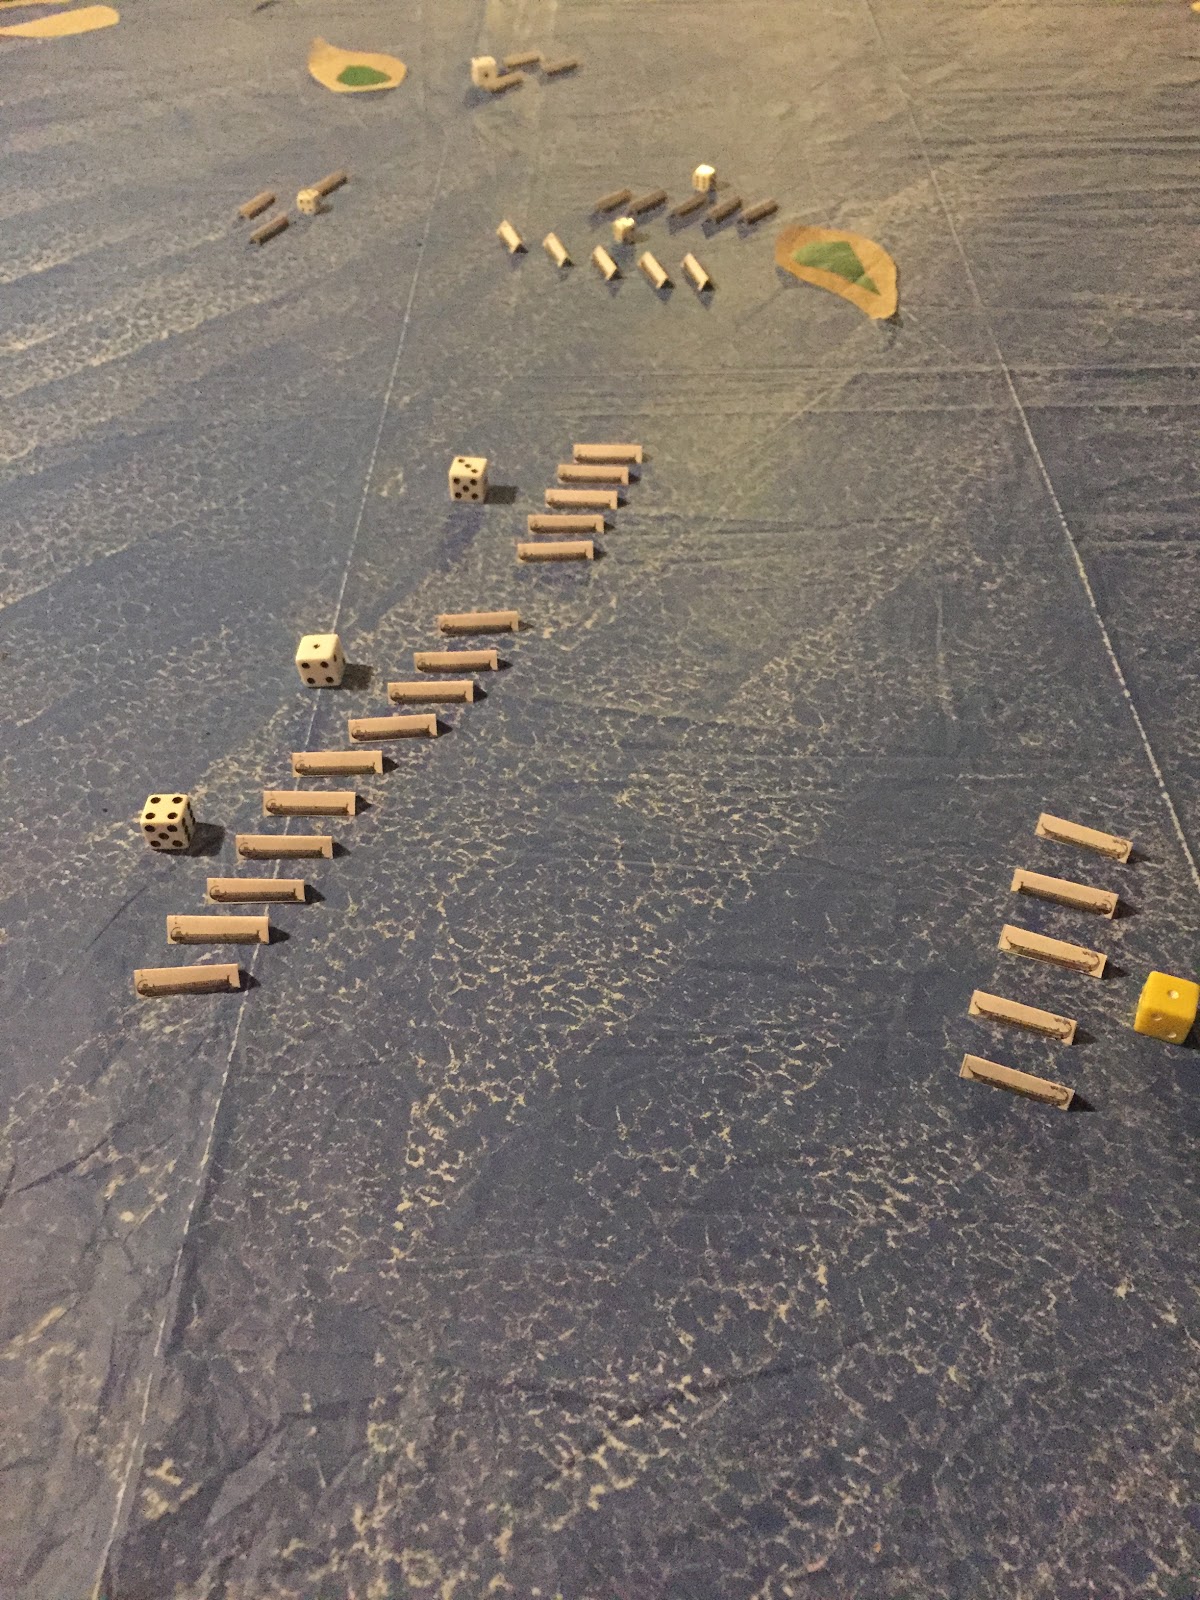
************

Set-up:
This battle will be played on a 4x4 table.  A large island is to the center north.  The Tyranid’s are in the center of the board per the scenario.  They are headed east.  The PDF are on the west side of the board along the board edge. 


Turn 1:
Initiative: Tyranids  

Move:
The Atrocities move away from the Imperial ships at full speed.  The Assureds give pursuit, while the Reliable and Constants move to go out a bit wide.  The Reliable is hoping to get them in his broadside. 

Battle:
The Atrocities spit out a screen of Gargoyles behind them who race towards the Assureds. 

The Reliable’s broadsides open up at range and through the screen at the Atrocities.  A difficult shot.  However, one shell forces the Tyranids to brace and it manages to avoid causing damage.  The Assured gunboats fire on the approaching swarm and knock one from the sky.  The Constants fire a spread of Torpedoes at the retreating Tyranid ships. 

End:
The Gargoyles move to swarm the Assureds, and the little boats will have to move through them next turn.  Meanwhile, the Torpedoes fail to lock-on to the Tyranids bio-signatures and go past. 
The only Wake marker is removed. 


Turn 2:
Initiative: PDF

Move:
The Constants change course to try and catch–up to the Atrocities  and re-load ordinance.  The Assureds also give chase.  They blast their way through the Gargoyle swarms, downing one swarm and avoiding getting damaged in return.  That was a close run thing! The Reliable continues on course to get a firing arc on the fleeing creatures. 

Meanwhile, the Tyranid reserves of a Gruesome and 2 Abominations arrive on board. 

As they flee, the Atrocities are targeted by a pair of Torpedoes again, but they fail to detonate.  The new arrivals make a bead for the human craft. 

Battle:
The Assured gunboats open fire on the Atrocities.  This time, the Atrocities fail to Brace despite the Synapse on the Gruesome.  Two of the creatures killed, and they begin to drift.  A blast of shells from the Constants sends the last creature to the bottom!

The Reliable then targets the Gruesome with a forward barrage, and two shells connect.  Will the Gruesome Brace?  It chooses not too. Two hits penetrate its shell and reduce it to 6 DP.

In return, the Gruesome launches its bio-torpedoes into the fray. 

End:
The Gargoyles turn and swarm the Assured gunboats once more.  The Point Defense splashes one, but three more attack the trailing Assured. However, the crew takes shelter and avoids the Gargoyle’s attacks. 

The Gruesome’s torpedoes get to the Constat’s but PD destroys one.  The rest flash by underneath missing their targets. 

One of the Atrocities sinks, while the other continues to drift. 

All wake is removed.


Turn 3:
Initiative: Tyranids

Move:  
The Abherrations fail to arrive.

The Gruesome goes all ahead full and smashes into a Constant.  He smashes the little ship into small pieces and sends it to the bottom.  He takes two hits in return though, sending him down to 4 DP and crippling him!  The smaller atrocities move to support the Gruesome’s attack. 

The other Constant unintentionally collides with the beast and is also sent to the bottom, but causes 1 more DP loss to the Tyranid beast.  

 The Assureds close in on the smaller Tyranid beasts and fight off the Gargoyle swarms again.  Meanwhile the Reliable stays on course and gets the Gruesome in his broadsides. 

Battle:
The abominations fire on the Reliable, and cause 1 hit.  The Captain chooses not to Brace, and the armor takes the hit.

The Reliable locks-on and opens fire on the Gruesome to finish it off.  The creature braces for the salvo, but 8 hits blast into it!  The end result after Bracing and armor is 3 DP, reducing it to a lifeless mass! 

The Assureds flank the Abominations and open fire, killing one with gunfire. 

End:
Stray PDF torpedoes hit and sink the drifting Atrocity.  The Gargoyle swarms fail to catch-up with the Assureds. 

An Abomination and the Gruesome corpses drift.


Turn 4:
Initiative: PDF

Move:
The last Abomination rams the Reliable.  They all Brace.  The Reliable ends up taking a hit, while the Abomination is destroyed in the attack. 

However, Aberrations enter play and move to a firing depth on the Assureds. 

Battle:
The only firing available is the Abherration torpedo attacks.  However, they fail their instinctive behavior checks and decide to drift instead. 

End:
The Gargoyles can not reach a target. 

The Gruesome explodes, but no one is injured.    

One abomination drifts, but the other in entangled. 


Conclusion:
The Tyranids decide to call it a battle, and that they lost.  The Abherrations would be ineffective due to the loss of their Synapse Creature with the Gruesome and would be unlikely to swing the battle in their favor.  The North Ammoriss Naval PDF would have a tough time eliminating the last two vessels so it would have been a frustrating couple of turns.     

This was the first time I have used the Tyranids so I have some observations.  This fleet plays very differently than the ones I have used in the past.  The Gruesome was surprisingly fragile!  The 6+ armor was very weak and it was no match for the PDF cruiser’s guns.  Plus, its weapons are forward firing so you need to maneuver it more carefully than I was expecting.  In addition, the poor armor made ramming not as effective as I would have hoped. 

Gargoyle Swarms are also a “go big or go home” unit.  The few I had on the board were not enough.  Also, due to their speed they can not keep up with some of the escorts they would be best at killing.  I should have kept the swarms closer to the escort bait ships in this battle to keep them as a protective screen and make them harder to hit.  That was a key learning. 

Ultimately, my lack of a Battleship class Tyranid vessel was a big weakness.  If I had used a Submerged Gruesome instead of Abherrations as it would have been more effective.  However, the improved armor and Hull of a Gargantuan or Monstrosity would have been the most effective. 

It was really fun to ram stuff!  I don’t normally do that.  Using some of the smaller Tyranid escorts as disposable rams against enemy cruisers and battleships would be great fun! I am unsure how effective such a swarm backed up by a Battleship would be, but I think it would be immensely satisfying to play.

Ultimately, the Tyranids are a very different play style than I normally play.  Next time I will have a better feel for the fleet and its playstyle.  Therefore, I will be better next time.  Maybe I can get some new Tyranid bio-ships built for it too?        
**************************************

Taskforce: Divine Light’s vox transmission came in late in the afternoon.  Like all such reports, it was processed through the enormous bureaucracy of NavComm.  Servitors and scribes transcribed it, annotated it, and data-stamped it.  It was carried by hand from adepts desk to adepts desk. 

By early evening, it had arrived at the desk for a Startego in the Office of Strategic Intelligence, deep within the bowels of NavComm North.  He read the report, and was disquieted.  The taskforce had been successful, but where there was one Tyranid bio-ship there were more.  He turned to his keypad and began typing furiously. 


Taskforce: Divine Lights job was just beginning.    

Friday, October 20, 2017

Wargame Design: Innovation is Over-rated

Yup.  I said it.  Innovation is over-rated.  I feel this is especially true in the field of wargames design.  Too many people are trying way too hard, to be way too clever.  Most of the people I see try to re-invent the wheel end up stalling their project and never getting anything to a playable state.  There is no reason to try and make games if you never have anything to play. 

 
Alternatively, they get something to a playable state, but it comes out way to different and complicated that no one wants to play it.  The players can’t wrap their heads around it, or it requires a lot of tracking, or there is too much table clutter, etc.  People read the rules, scratch their heads and never look back.  Most of the time I see someone trying to innovate a mechanic or system they spiral into If This/Then That style of rules.  Instead, keep it simple.  If you use a method to roll over a target number to resolve an action, use that same model for everything else that requires a test.  Use the same core mechanics over and over in the rules.            
 
Once, a long time ago I took a class on screen writing.  The professor shared something that stuck with me for a long time and I recognize the truth of.  He said that if you want to actually sell manuscripts for movies and books do not try to be innovative.  Many people are afraid of that which they do not understand or feel comfortable with.  Innovative ideas are not comfortable and therefore lead to a lack of buying.  Instead, take an existing model and re-skin it.  Change the setting, a plot point, or a character around.  The skeleton is the familiar, the innovation or uniqueness is how you combine the pieces.    
 
My young ears were shocked by this notion.  Then, I actually started to look around at what the entertainment industry was offering me and realized with horror that he was right.  That was exactly what was happening for the most part.  Let’s look at “arguably” the first Blockbuster movie and nerd classic; Star Wars.  There is nothing new in Star Wars.  In fact, it is very “traditional” in its narrative.  The big change was simply placing it in a new setting.  How many times has the Seven Samurai been re-done?  The innovation is putting a new spin or use on a classic idea.  People do not feel alienated by the innovation and instead embrace the subtle change or re-use. 
        

Therefore, if you want to make games that you can play don’t try to re-invent the wheel.  Innovation is over-rated.  Instead focus on what you are trying to accomplish with your game and look at what other games do to achieve it.  Do they roll to beat a target number, cross-reference a chart, use opposed rolls, use an interrupt system?  Instead of trying to invent a whole new method, use one that works and apply it to your game.  Always remember what you are trying to accomplish and you will not go wrong.
 
Someone else probably thought of it somewhere first.  That is why it is so important to stay current with new systems and games.  You will slowly create an “inventory” of mechanics that you can then apply to the design problems you face.  These ideas become your “Tool box” where you apply these mechanics together into new and interesting ways.  It is this re-combination of mechanics and how you apply them to new or different problems where you will find innovation.  It is not creating something new from whole cloth.  It is something new from the sum of its parts.
 
 
If you read the rules for Castles in the Sky, you will find that it takes liberally from several games systems.  This includes Battlefleet Gothic, Aeronautica Imperialis, Battletech, All Quiet on the Martian Front, Dystopian Wars, and a few other game systems.  In fact, if you are familiar with all of these games then you can probably tell me exactly what mechanics came from which game.  However, how they all work together is what gives the game a unique feel and play style.  Plus, it is a complete and playable game system! 
 
Too many designers focus on creating the perfect mechanic, instead of just getting on with it and making the game.  Innovation is over-rated if it stops you from completing your wargame project.  Instead, remember what you are trying to accomplish and use the existing mechanics that will allow you to get there.  The innovation will come with how the mechanics integrate together to make the sum of the game.                   


Monday, October 16, 2017

Poseidon's Warriors: Battle Report- Spartan Breakout: The Corinthian War

The Corinthian War was a conflict between an expansionist Sparta and her allies and the combined alliance of Athens, Corinth, Thebes, and Argos.  The war took place between 395 to 387 BC and involved forces on land and sea.  The land warfare mostly took place near Corinth and Thebes while the ocean battles took place around the Aegean. 

Corinth and Athens were the second and largest fleet in Ancient Greece respectively.  They were well established naval powers.  Sparta on the other hand was attempting to build their Naval power to align with their abilities on land.  Most of the Spartan ships were tribute from allied city-states from the Aegean.

Not all battles of these ancient wars were properly recorded and many were lost to the mists of time.  The action below is one such battle. 


This will be a Trireme fight between the forces of Sparta and the Alliance using Poseidon's Warriors from Osprey.  YOu can see previous Corinthian War battle reports here and here.    

The Forces

Spartans    
 1 Slow Trireme unit with Commander, Elite Marines- 210 pts
4 Slow Trireme units- 150 pts each
Total= 810 points

Alliance
1 Fast Athenian Trireme with Admiral- 200 pts
3 Slow Corinthian Triremes units- 150 pts each
1 Fast Athenian Trireme deploying in reserve- 150 points
Total= 800 Points

Set-up
On the west coast is a difficult shoreline with access to a bay.  The Spartans are leaving the bay.  They need to get their fleet into the Aegean and secure their allies.  The Alliance is closing in from both opposite sides of the bay and trying to cut them off from heading into the Aegean.  If the Alliance can keep the Spartans away from their allied islands, they might be able to deprive them of growing their own fleet.    

Mission
Add caption
Add caption
Add caption

The Spartans are trying to smash their way past the Alliance ships and move out into the open Aegean.  The Alliance is trying to stop their advance. 
The Spartan Fleet emerges from the bay
Turn 1:
The Alliance wins and proceeds to move in and try to cut off the Spartans escape.  The Spartans begin to leave the bay, but turn towards the Athenian Fast triremes. 

Turn 2:
Despite the aggressive Spartan turn towards them, the Athenians press forward.  The Corinthians are also unimpressed and continue to press ahead at full speed.

The Spartan admiral and two other squadrons continue to head for the Athenians, while the other two squadrons head for the Aegean.  However, it seems unlikely they will be able to get past the closing Corinthians without a fight.


Turn 3:
The Athenians turn in to face the oncoming Spartan fleet.  The outer most Corinthian vessels do the same. 

The Spartan fleet realizes it will not be able to escape, and begins to set-up a battle line.
 

Turn 4:
The Spartan admiral moves most of his fleet to face off against the Athenians, hoping to overwhelm the Alliance forces there with numbers.  His Second squadron is left with the impossible task of holding the Corinthians flank alone. 

The Athenians begin to play coy, seeing that they need to play for time so the Corinthians can fall on the exposed Spartan flank before they are overwhelmed.  The Corinthians rush forward as rapidly as they can, but they must still be wary of the Spartan Second Squadron.


Turn 5:
The Spartans do not have time to wait, and they surge forward with most of the fleet.  Only Second Squadron waits patiently for the Corinthians to come around a small island to attack.  They know that this will allow the Athenians to attack, but they cannot wait.  The Spartans hope that the initial contact will give them gaps to counter-attack and escape through the Athenian line. 

The Athenians do not take the Spartan bait, and instead back away with the Second Squadron and move to reinforce them with the first.  Meanwhile, the first Corinthian Triremes pass the island into the Spartan kill zone.  The rest of the Alliance ships rush towards the exposed Spartan flank. 


Turn 6:
The Spartans close on the Athenians and open fire with their artillery, archers, and slingers from the Fifth Squadron.  The fire kills the marines on two galleys.  However, they are still too far to engage. 

On the Corinthian side, the Spartan Second Squadron leaps forward and lands two strikes on Corinthian Triremes.  Somehow, both Triremes survive the ram with box car saving rolls!  One of the Corinthian ships is grappled and boarded with the Spartan Hoplites killing the Corinthian defenders and sinking the ship.  First blood to the Spartans!

The Corinthian Fifth Squadron and the Spartan Second get into a tangle!  Two Galleys from each side collide head-to-head.  Btoh Spartan ships are sunk, but one of the Corinthian manages to survive!  They then exchange missile fire which removes the marines from 1 of the Spartan ships.   

However, the rest of the Corinthian fleet ignores the Spartan forlorn hope, and heads for the exposed fleet. 

The Athenian Second Squadron is forced to commit head-to-head attacks on the Spartan Fifth squadron.  Both squadrons are essentially destroyed in the ensuing melee. 


Turn 7:
The Spartan fleet sees its chance and makes a break for open water.  If they are swift, the Spartan triremes maybe able to avoid the Corinthians closing in on the flank.  Meanwhile, the Spartan Second Squadron disengages from the Corinthian Fifth and makes for the Aegean. 

The Corinthians may have miscalculated the approach and are hampered by an island.  Meanwhile, the last Athenian squadron backs water to avoid engaging the Spartans. 


Turn 8:
The Spartans continue their hell-bent race to the Aegean.  They pepper the Athenians with missile fire, and destroy the archers on two ships and the marines on the other three.   

The Athenians finally see their chance, and race forward.  It is now or never! A hard turn on the approach allows them to avoid Head-to-head ramming.  5 Spartan ships are hulled and destroyed in the attack! The Spartan Admiral’s ship was the only one to be spared from the First Squadron. 


Turn 9:
Spartan ships from Squadron Four and One counter-attack the Athenians that are up-close and personal.  Two from the Athenian First Squadron are sunk.  Another loses their marines to missile fire.  However, Spartan Third and Second Squadron seem to be breaking out!  Can anyone from the Alliance stop them? 

The Athenian Fast Triremes ram the Spartan Admiral’s galley and sink it.  The Admiral is killed in the attack.  However, his plan seems to have worked as the Corinthians do not look like they can catch the Third Squadron before it escapes. 

Turn 10:
With an unexpected surge of speed, the Corinthian Fourth and Third squadron race ahead and engage the fleeing Spartan Third Squadron.  The Alliance won initiative which allowed them to catch the fleeing Spartans.  Two galleys are rammed and sunk!  The rest are depopulated of marines and archers by missile fire.  Ouch!

The Spartans continue to row madly away for the Aegean. 


Turn 11:
The Spartan Second and Third Squadron make it to the Aegean for a total of 6 ships so far.  The Fourth must row around and island while the Corinthians pursue them.

Missile fire from the Corinthian ships kills archers and marines in the Spartan Fourth Squadron. 

Turn 12:
The Corinthians smell blood in the water and surged ahead one more time (Thanks to winning Initiative again) and catch the last of the Spartan Fourth Squadron.  They manage to send two more to the bottom of the Sea.  However, the last two ships escape into the Aegean. 


Conclusion:
8 Spartan ships out of 25 escaped into the Aegean.  It was a tactical victory for the Alliance, but the Spartans were able to reach their Aegean allies and force them to supply aid.  Therefore, a Strategic win for the Spartans.

The Alliance lost 9 out of 25 ships.  However, the Athenians took the brunt of the fighting and lost 7 out of 10 fast Triremes.  The Corinthians might be the dominant naval power in the Aegean now.  Hopefully Persian will pay for more Athenian Triremes and rowers!


The Corinthian War will continue…  

Thursday, October 12, 2017

Aquanautica Imperialis: Battle Report- Raid on the Pirate Fleets

It has been a long time since I have played a game of this.  I decided to break it out again for two major reasons.  First, the death of Dystopian Wars as Spartan Games and their re-birth as Warcradle Games gave me a bit of a hankering for make believe Naval warfare.  The second was reading some of my old battle and looking at some of my old homemade models made me feel a bit nostalgic.  Therefore, I decided to bust out some of the old templates and give it a go again. 

As I go back into the archives, I think I started making this game in 2007.  That means this game is 10 years old, give or take.  I haven’t personally played it since 2012 or so.  Therefore, I will be a bit rusty on the rules and probably make a mistake or two.  I find this funny since I wrote the game!  No one should know it better than me right? 

To get started I decided to use two relatively basic fleets.  I decided to use the Ammoriss Naval PDF versus a Pirate force.  It seemed somewhat thematic.  Before the rebellion of South Ammoriss, much of the Naval PDFs job was to hunt down and eliminate Pirates that preyed on the convoys that criss-crossed Greater Ammoriss.  Even though I have ships made for the Ammoriss PDF but I decided to just use the templates for this game since I do not have any Pirate ships made up.  Let’s see what happens.     

You can find all the rules and stuff to try it for yourself here

The Forces:

Ammoriss Naval PDF
AN Saint Invictus
Dependable Class Cruiser- 250 points

Spear Group 46Delta
2 Assured Escorts- 100 Points

Total= 350 Points

Ammoriss Pirate Fleet
Jolly Roberts- LD 8
Pirate class frigate- 250 points

Sally (LD 8) and Bess (LD 6)
2 Monitors- 150 points

Jackie Tarrow  (LD 8) and Sparrow Hawk (LD 6)
2 Pillager class escort- 200 points

Swift Roe (LD 7) and Sea Nixie (LD 7)
Skiff Escort- 100 points

Total= 700 Points

Scenario:

The Ammoriss Naval PDF is raiding the Pirate Fleet.  In a Raiders mission, the attacker can only use half the points of the defender.  Both sides are trying to inflict Damage Points on the enemy fleet, while limiting damage to their own.  If the Attackers inflict more damage than the Defenders, they win. 

We are using a 4 by 4 board.  The Pirates are placed on the board edge closest to shore 12 inches away.  The Ammoriss Naval PDF is deployed moving across the table from the Pirate fleet from North to South. 


**************
The sunrise was beautiful.  The sea danced under the delicate touch of the sun, and an array of yellow, orange, and red danced and shimmered.  The glow of daylight cut through the sea mist, and a purple haze surrounded the bright ball as it crested the waves.

Captain Smythe-Browne sipped his tea and savored the bitter tang.  This was why he had signed up for the Naval PDF.  Few people got to see the sunrise like this. 

“Augurs have detected unidentified readings at bearing Delta- 456,” one of the crew chirped. 

The Captain placed his tea cup back in its saucer.  The XO had taken charge and began issue the agreed upon orders.  Smythe-Browne handed the tea cup back to his steward, who quickly tidied it away and scampered to his battle station.  The alert klaxon began to sound.

NavComm had been right.  Captain Smythe-Browne didn’t know how they knew and he didn’t care.  That pirate scum was right where they were supposed to be when his force got here.  Now, he was going to smash them.   
****************

Turn 1:
The Raiders automatically start with the initiative.

 Move:
The Assureds raced around the back side of the small island.  Meanwhile, the Pirate fleet moved out.  The Skiffs and Pillagers stayed in formation and approached the lighthouse.  The Dependable had to turn towards the Pirates to bypass the island as well.  The Jolly Roberts turned to meet the Ammoriss navy ship while the Monitors tucked in behind the other Pirate escorts. 

Battle:
The Dependable opens fire.  The front turret fires on the Pirate escorts but misses due to range and size.  The Las-batteries arc out at the Pirate Frigate, but a Brace by the Jolly Roberts keeps them from serious damage. 

The Pirate frigate returns fire with her port batteries and manage to knock a DP off the Dependable!  The other ships are out of range. 

End:
None

Turn 2:
AN wins initiative.   

Move:
The Saint Invictus moves to cut-off the escape of the Pirate escorts and cross their T.  However, they are speedy, and one manages to get in front of her. The Assureds turn in to finish them off.  The rest break to the Saint Invictus’ port side.  The Pirate Frigate moves to get behind the AN cruiser. 

Battle:
The Assureds open fire on the Pillager in front of the Cruiser.  Their combined fire is enough to turn her into a lifeless hulk, despite Bracing.  The second Pillager (Sparrow Hawk) fires on the Saint Invictus, and another shell finds a weak spot and reduces her another DP.  Captain Smythe-Browne may want to try Bracing one of these days?

Instead, the Amoriss Naval PDF Captain orders his crew to Lock-on, but they are unable to.  Instead, the Las-batteris fire on the Pillager, the front turret at the Skiff, and the rear at the Pirate Frigate.  The skiff avoids the heavy shells.  The Pillager is hit once and takes damage.  The Jolly Roberts also braces, but still takes a hit!  The shell manages to strike and destroy the ship’s screw, which is now fouled!

The Monitors also fire on the Dependable, but the shells ring off the Cruiser’s armored belt.  The Jolly Roberts has reduced firepower from Bracing, and only pings a shell off the AN Cruiser’s armor. 

End:
The Jackie Tarrow continues to drift on its last course even after being struck lifeless by the Assured attacks. 

The Jolly Roberts engineers manage to repair the Fouled Screw on their ship. 


Turn 3:
AN Wins

Battle:
The Saint Invictus sets course for the lighthouse eager to try and keep the pirates in his broadside arc.  However, the Pirates are fast and most manage to scatter past.  The Sparrow Hawk and a Skiff move towards the small atoll island.  The Assureds try to move to pursue, but they are set-up by one of the Skiffs!  It crashes into the lead escort and both sink to the bottom.  The Jolly Roberts moves up to pursue the damaged AN Cruiser. 

Battle:
Captain Smythe-Brown has the crew lock-on to the Jolly Roberts that is closing and opens fire.  When the smoke clears, all the batteries hit.  The Jolly Roberts braces.  However, it is not enough and the ship takes two hits bringing it down to 2 DP left and crippling her.  In addition, the shells caused massive crew casualties!  The remaining Assured joins in and hits the Jolly Roberts for another point of damage. 

The rest of the Pirate shooting is ineffective.

End:
The Jackie Tarrow continues to drift. 
Both wake markers are removed. 


Turn 4:
Pirates with the Initiative.

Move:
The desperate Jolly Roberts manages to All Ahead Full and ram the Saint Invictus, who braces for Impact!  Unfortunately for the Pirates, the Ram causes enough damage to reduce them to 0, and the AN Cruiser is unharmed due to bracing and armor!  However, they are now entangled. 

The Monitors split to go around the entangled ships.  The Assured moves after the Pillager and Skiff.  The Skiff rockets off the board and to safety.  Meanwhile, the Pillager comes around to fire on the Saint Invictus. 

Battle:
The Saint Invictus fires on the Monitors with his bow and stern weapons.  They both Brace.  However, the Las-batteries cut the front Monitor into shreds.  The rear Monitor fires on the Assured and misses.  The Sparrow Hawk fires on the Saint Invictus and manages to take one more DP off despite him bracing. 

End:
The hulks of the Pillager and Monitor drift as does the tangled Saint Invictus and Jolly Roberts.


Turn 5:
Pirates win Initiative

Move:
The Pirates scatter to escape, but the PDF pursues where possible. 

Battle:
The last fleeing Monitor fires a point blank shot into the pursuing Assured and reduces him to a lifeless hulk.  Long range stern fire from the Saint Invictus overkills the last Monitor and sinks it.  Trailing fire on the Sparrowhawk misses as well.

The parting stern shot from the Sparrow Hawk pings loudly off the Saint Invictus’ armor. 

End:
The other Monitor explodes and sinks.  The Jackie Tarrow drifts, as does the Saint Invictus and the Jolly Roberts.


Turn 6:
Initiative:
Pirates

Move:
The last pirate ship escapes the board. 

Battle:
None

End:
The Assured sinks. 

The Jolly Roberts also slips from the entangled wreckage and sinks beneath the waves.

Conclusion:
The Pirates inflicted 5 Damage Points, and the Ammoriss Naval PDF inflicted 10 DP.  The Amoriss Naval PDF wins the Raid scenario.

**************

The XO finished briefing him on the repairs underway on his ship.  He sipped at his tea and savored the bitter flavor.  Then set his cup back into the saucer.   

“Has NavComm been informed?”
  
His XO nodded curtly, “They send their regards for a job well done.”


It was indeed a fine time to be in the Navy.