Showing posts with label Skirmish. Show all posts

Monday, August 3, 2026

Review: Pillage- Victrix


I was buying a lot of miniatures, so I figured I might as well pick-up this set of rules to go with them.  I all ready have a large Viking, Anglo-saxon, and Dark Age Irish army so I had more than enough miniatures for a dozen or so figure, model-vs-model skirmish game.  I also have cattle and loot markers.  Therefore, this one seemed like a low-cost investment for me to pick up! 

This would not be my first raid into the Viking Age.  I myself have a few rulesets related to Vikings; Fury of the Northman and Odin's Ravens.  Therefore, I know my way around a Viking based game.  I was curious what this brought that could be new to my table.  

This one has a very nice forward where the author is very clear that this game is about "forging the narrative".  I.e. the focus is on telling stories on the tabletop and revolves around scenarios and scenario play.  This is not intended to be a competitive, tournament ready ruleset.  

So, don your hauberk, heft your shield, and hoist your spear arm for now is the time to loot this rulebook of ideas!  

Things I Liked

This is a gorgeous looking book.  It has very high production values, great photos, great miniature pictures, and really nice terrain lay-outs.  This reminded me of what separated early GW books from the competition.  Rules are detailed with images and diagrams over laid on the photos.  This is a sumptuous looking book with great, hard cover, artwork.  Just really top-drawer production values all around. 

This book is pitched at beginner wargamers.  It is written like the reader is unfamiliar with the hobby of wargaming.  In addition it has a short history section, timeline, historical sidebars, etc.  There is also a Hobby section about collecting miniatures, making terrain, and painting.  There are some fun little tutorials about painting miniatures and making nice looking terrain.    Again, it reminds me of early GW rules as an introduction to wargaming.  I do not need this section, but I unironically LOVE this section.  

There are a few charge reactions a model can make when they are the target of a charge.  If you have a missile weapon you can shoot, you can run away, or you can stand and accept the charge.  Nothing super hard to do, but gives some options for melee early on.  

Armor is similarly simple with unarmored, some armor, and fully armored.  Of note, armor dictates how fast you can move as well.  That is a good idea, and everyone basically moves the same.    

This game is called Pillage, and there are several chapters on looting and another on setting things on fire.  That matches the theme of the game and ties into several scenarios.  Interesting, there is also rules for ship-to-ship combat!  Nice!


Things I Did Not Like

The game does not use frontage or combat arcs.  Weapons and line-of-sight is 360 degrees.  This reduces some of the tactical gameplay. There is some detail about shooting from windows or other constricted spaces, but that is a niche rather than the standard.   

Charging into combat is an extra 1d3 of movement leading to contact.  I am not a huge fan of random charging typically.  No real reason, but for such a critical action I like a bit more certainty in the action.  Melee is pretty quick and brutal by design but still is a bit of Melee Yahtzee coming down mostly to dice rolls based on a table with different weapons hitting better or worse based on armor type. Pretty basic.  Thankfully, the advanced weapon rules add some more nuance to the weapons and melee about supporting allies.  

There are 5 scenarios.  Nothing that you have not seen before.  The game explicitly recommends you to design and make your own scenarios.  However, I think the game could have provided a few more guidelines on alternate deployment zones, objectives, and perhaps some complications.  


Meh and Other Uncertainties

Of note, this game does not allow pre-measuring.  If you grab a tape measure, it is assumed that you are committed to the action.  I.e. you do not measure until you are all ready going to shoot at that target, move to that place, or charge that model, etc.  

Of note, this game only uses d6 to resolve all actions.  It uses simple modifiers and rules for rolling above a 6.    

It also uses WYSIWYG for simply determining who is armed with what.  

The game itself is for 4x4 tables or even 3x3 tables.  This makes it just a bit too large for a Kitchen Table game.  However, it is a good size for a convention or club game.     

The game turn is broken down into the usual of Initiative, Move, Shoot, Melee, and End.  This gives you all the basic 4Ms.  Of note, games use alternating Phases, so it is not IGOUGO but not alternate activation either.       

Army lists include Vikings, Anglo-saxons, Normans, Irish/Scots/Picts, Carolingian Franks, Bretons, Welsh, and Generic.   

Final Thoughts

This is a solid, well-produced product.  It is a basic wargame, but comes into its own with the Advanced Rules.  Here is where it shines allowing some period specific and unique activities to add some tactical depths.  However, it is still relatively straight forward and easy to teach.  That is its strength.  

This is not for Competitive play because there is a fair amount of randomness in the rules.  It is not intended for that.  It is intended for a beer-and-pretzels experience focusing on story-telling, social interactions, and narrative fun.  This is explicit in the foreword and in the rules themselves.

For a first rulebook product from Victrix, this is a slick product!  It is intentionally designed to get people into playing the period and folks that are new to wargaming.  I applaud this approach BUT I am not sure that it is a good strategy.  I think they are simply following the GW template of a rulebook, but I am not convinced that people get into Dark Age Wargaming cold by buying a rulebook.  However, I really do not know how people get into Historical Wargaming anymore.  

Anyway, a great introductory product but not a great wargame.  It is very serviceable but old hands to the period will find it wanting.  To veterans the big adds are the pillaging and ship-to-ship combat ideas.  

Until next time! 


Become a Patron and get access to all the cool stuff, a peak behind the curtain of Blood and Spectacles, and early-access to playtest games!  


You can follow Blood and Spectacles Facebook page or Instagram for more fun! 

Check out the latest publications and contact me at our Blood and Spectacles website

Or purchase all out games at the Blood and Spectacles Publishing Wargames Vault Page!                   

Monday, June 9, 2025

Battle Report: Odin's Ravens - Into the Lair of the Beasts


Today we are going to be taking a closer look at these rules for recreating Viking Sagas on the tabletop.  We are going to be using a Norse hero versus a group of game-controlled monsters.  We will also be using one of the Mythic scenarios from the rules.  

You can find those rules here: 

Erik Greybeard was attempting to build up his legend.  He was planning an expedition across the ocean, and to do that he needed to gather followers.  The Jarl's were not taking him seriously and he knew he needed to prove himself.  Therefore, he gathered his kin and out to face the horrors in the Shieldlands above Geatland.  He had heard rumors of an Ogre and his kin band terrorizing the people of the area.  Erik was determined to track them down.

Forces: 

Vikings:
Erik Greybeard - Hero - Chain Mail, Shield Hand Weapon - Patron: Heimdal- Disengage

Gunnar Erikson - Second- Spear, Armor, Shield

8 Kin - Soldiers- Shield, Mix of spears and hand weapons

These will be my Victrix models.  


Monsters:
Ogre - Monster- Chain Mail, Two-Handed weapon

Winter Wolf - Beast- Shield, Fast 

7 Black Elves - Creatures- Hand weapons, shields, armor

1 Wolf- Creature- Fast 

I will be using my Heroquest models to represent the Monsters! 


Mission: 

For this game, we will be using the Into the Lair of the Beasts scenario found in the main rulebook.  We will be using 1 MU = 1 inch on a 36 x 36 MU board.  

We also rolled up two complications!  The first is Long Shadows and the second was Bad Omens!  Let's see if I recall them during game play.  These make it easier for the Hide action and more likely for things to fail Fear tests.  

The Vikings are trying to get into the Lair of the Beasts. 

Set-up: 
We set-up terrain per the rules in the main rulebook.  However, we also needed 1 terrain piece to act as the entrance to the monster's lair!  This time I used two frozen ponds to represent the entrance, similar to the lair for Grendel's Mother.   


We rolled up Connected Edges for deployment and then followed the rules for deployment and the scenario.  These can be found in the main rulebook. 

As normal, I will not be covering each action and dice roll.  I will only discuss those if they are relevant to the game, or to help you understand the basic rules.  However, I will be breaking the game up into the Maneuver phase, Battle Phase, and End Phase.  Normally turn 1 and 2 is the Maneuver portion, 3-6 is the Battle, and 7-8 is the End phase.  This game lasts 8 turns or until the Heroes break.   

Maneuver Phase
   
One soldier bravely leaves the woods and soon draws the attention of all the beasts!  They quickly close in on him, while his comrades are hampered by the woods behind him.  The soldier bravely steps forward to face the Winter Wolf, but has his head knocked off for his audacity!   


Gunnar bravely challenges the Winter Wolf next, and their fight is inconclusive.  however, it gets crazier as the Ogre and another Viking charge in as well.  Meanwhile, as the Vikings emerge from the woods, they are engaged by the Dark Elves.  A beast manages to bludgeon another Viking to death.  

Battle Phase
Things start poorly for the Vikings as Gunnar is downed by the Ogre right off the bat!  However, Erik manages to slay a Dark Elf in return and charges into the next!  Fighting across the slowly forming front is inconclusive as the last of the Vikings start leaving the woods.  


The Viking fighting the Winter Wolf and the Ogre sees the long odds and the bad omens and runs away back into the woods.  The Ogre finishes poor Gunnar off.  The Ogre than charges into the next melee, and quickly smacks another Viking to the ground!  


Things are looking bad for the Vikings as the Ogre wades in and kills another Viking with the help of his minions.  However, Erik finally finishes off his Dark Elf and runs towards the objective.  However, he is intercepted by the Winter Wolf.  

End Phase
Things look bleak for our Viking Heroes as they have been whittled down by the beasts.  The ogre lumbers into a melee and swings wildly, giving that viking the opening, and he dashes away from the wolf, a Dark Elf, and the Ogre.  The Wolf chases him down, but is unable to injure him.  However, another Viking is brought down by the Dark Elves.  

Erik Greybeard manages to twist away from the fangs of the Winter Wolf and sprints to the Lair entrance and ducks inside.  With Erik getting to the lair, the rest of his kin decide it is better to flee and live to fight another day!  


Conclusion
That was ugly!  Somehow, the Vikings held on long enough for their Hero to get to the lair and secure the win.  However, they had to pass a few Runaway checks to do it.   They needed 3 VP to win, and Greybeard making it to the Lair gave them 3.  However, he lost 3 killled kin, and 2 Missing after the fight.  Those two would eventually make their way home to fight again.  Thankfully, Greybeard's son would also manage to survive the engagement, with a nasty scar.  In return, they barely managed to injure the Beast, downing only 2 Dark Elves in the fight.  

Some thoughts.  The terrain really hampered my Vikings ability to coordinate.  Plus, moving one of my soldiers out of the woods allowed all the beasts to move towards my deployment zone early, that was  a big mistake.  The Woods played a big part in this battle.  

My Vikings also had a hard time getting past the Beasts armor and shields.  The beasts also came for blood today, often choosing to Deal Damage whenever they could.  Ouch.  That Three Dice Ogre was cutting through Vikings like a hot knife through butter, especially when he was getting help from Dark Elf friends.  Being Outnumbered is no joke in this game!

Ultimately, my victory came when I won a couple key fights and chose to disengage and then move with extra activations rather than Deal Damage.  Heimdall's Gifts paid off in spades in this scenario.  If I would have focused on killing enemies, I would have lost.  I guess you have to keep your eyes on the prize and tactical movement paid off in this game.  It is hard to recall sometimes that you are not locked in combat, but to unlock you have to win a combat.  It is a bit counter to a lot of games I have played in that way. 

You can find Odin's Ravens: Viking Age Bad Boys on the Blood and Spectacles Wargame Vault page. 

Until next time!    


Become a Patron and get access to all the cool stuff, a peak behind the curtain of Blood and Spectacles, and early-access to playtest games!  


You can follow Blood and Spectacles Facebook page or Instagram for more fun! 

Check out the latest publications and contact me at our Blood and Spectacles website

Or purchase all out games at the Blood and Spectacles Publishing Wargames Vault Page!     


Monday, June 10, 2024

Review: Five Parsecs from Home: 3rd Edition - Modiphius

 For a site that is about Wargame Design, where the writer talks about having a wide and deep breadth of knowledge about existing games on the market; there sure haven't been a lot of reviews lately!  There are a couple reasons for this: 

  1. I try to get my new games via my FLGS and their distributor has been giving them a bit of a problem getting in the books I want.  Therefore, I am a bit behind.  
  2. I generally only try to grab games I either have minis for, really want to play anyway, or am working in the genre now-a-days.  Honestly, not a lot has been grabbing my attention even though a lot of cool stuff has been coming out.  I have been overwhelmed by the sheer quantity of it all lately!    
  3. I have been working my backlog of Kill Teams, Kadesh, and Heroquest.  Therefore, no time to add new projects right now. 
  4. I have been contemplating what my next Blood and Spectacles Project needs for post-production and been putting money towards that instead of new game rules. 
So, those are my excuses.  Therefore, I did manage to pick-up a set of rules that I have been meaning to get my hands on for a bit.  I know, I know I am very late to the party on this one.  The year 2020, during the Pandemic; the history we are all trying to forget and move on from; saw a huge boom in the solo-wargaming realm.  I think the reasons were pretty obvious.  


One of the "stand-outs' from this period was Ivan Sorenson's Five Parsecs from Home.  This is explicitly designed to be a solo-wargaming experience.  It is a sci-fi, skirmish game where you create a "crew" of folks and go have adventures!  This game (and others similar to it) from Mr. Sorenson pre-dates the Pandemic and definitely pre-dates Modiphius picking it up to publish.  Ivan Sorenson had been very active in the Indie Wargaming world as Nordic Weasel Games for a long time now, and helped blaze the way for Indie Wargame designers and self-publishing games.    

I will gladly admit that I have been slow to get on this bandwagon.  However, I figured it was about time for me to check it out for myself.  Grab your jump bag, gear up, and get ready to dust-off on my mark.  3....2......1....


Things I Liked

This is an Indie wargame and is therefore scale and model agnostic.  You can grab any mini you want form your collection and plug it into this game.  In addition, it is intended for small model-count games.  As a player you can control a 4-6 man crew to go out on adventures.  For adversaries, you probably want 6 aliens, 6 non-military baddies, and 6 military looking foes.  So, to play a campaign you might only need about 24 models?  The rules quickly touch on how to play in different scales as well.    

This is a campaign game by design, so there is a lot of material for the campaign.  However, there are two things that I want to point out.  First, you can select the victory conditions for your own campaign ranging from relatively short to utter slogs.  That means your solo-adventures can have a definitive "end" point to strive for.  That is good as many campaigns seem to be never ending!  

The game is not afraid to break the fourth wall for the player.  For example, there are guidelines for making them easier for a beginner and much harder for very experienced players.  Finally, there was something called "Elite Ranks" which are rewards that you give yourself for completing campaigns, rewards for YOU the solo-player.  In addition, if you own three of the creators games (or more), you also gain in-game benefits!  I liked this idea and it amused me to no end.  

Enemies have different play styles that are randomly generated.  This impacts the actions they are likely to take, the way they deploy, and how they operate on the table.  That allows for a lot of different combat encounters and various enemy actions.  


Things I Did Not Like

The game is based heavily on dice rolls.  Some players will not like this level of randomization and wish to control the flow of the story a bit more.  There are mechanics and mechanisms to off-set this to some degree,  However, some players will just prefer more "decision" making in their campaigns.  

Like a lot of individual, sci-fi skirmished based games there is not a lot of tactical game play.  The game wants to lean into the cinematics, and the focus is more on the adventure storyline, with the actual battle being a component in telling the larger story.  This is pretty common in campaign focused, skirmish games.  Again, the replayability comes from what happens off-the-table as much or more than what happens on-the-table.  That doesn't mean there are not decisions to be made, but there as just as much off-table Strategic Decisions, as there are Tactical Decisions.  This book is 175 pages long, and the combat rules are about 7-10 pages of it.    

There is a lot of work you have to put in prior to and after a battle.  That is half the fun of this game, but there is a lot of homework a player has to do to get table ready.  


Meh and Other Uncertainties

The basic mechanics, rules, and other details are nothing really new to the skirmish, warband , campaign genre.  You get injuries, deaths, recruiting, upgrades to your ship/hideout, etc.  If you have been following the skirmish game evolution in wargaming, none of this is particularly new or innovative; but it has been required.  Where this stands-out is the variety of randomized events that can happen to your crew along the way.  There is a ton of replayability thanks to all the charts and randomization of adventures, enemies, objectives, etc.  This reminds me a lot of Outremer and Rogue Stars both from Osprey Games.  The game is worth picking up just for those parts alone. 

There are several great Appendixes that give guidelines for ways to expand the game in a lot of different ways.  Things like scenario design, making story lines, rivals, etc.  This has a lot of great content for those who really want to dive into the world building of their games.  In many ways, this game really epitomizes the idea of RPG-lite in wargames.  


Final Thoughts

If you want a solo-campaign that fits in with the Firefly ethos of "Keep on Flying".  This game matches that better than any other game I have seen out there, with the caveat that it is ONLY for solo-play.  The closest comparison is Stargrave, but that was intended for Versus play.  The game leans pretty hard on the Strategic element and RPG-lite.  There is a ton of opportunity for replayability and making the enemy actions unknown.  This is probably the gold standard of solo-play I have seen in a game BUT the player has to push-a-lot of buttons to make this game work.  That means, the player is operating the game more than they are actually "playing" the game.  However, in a solo-game that is somewhat expected and this one provides a lot of off-table decision making.         


Become a Patron and get access to all the cool stuff, a peak behind the curtain of Blood and Spectacles, and early-access to playtest games!  


You can follow Blood and Spectacles Facebook page or Instagram for more fun! 

Check out the latest publications and contact me at our Blood and Spectacles website

Or purchase all out games at the Blood and Spectacles Publishing Wargames Vault Page!   

Thursday, February 1, 2024

On The Painting Desk- 5-Day Challenge- Day 4


 Day 4.  

Day 4.  

Day 4.  

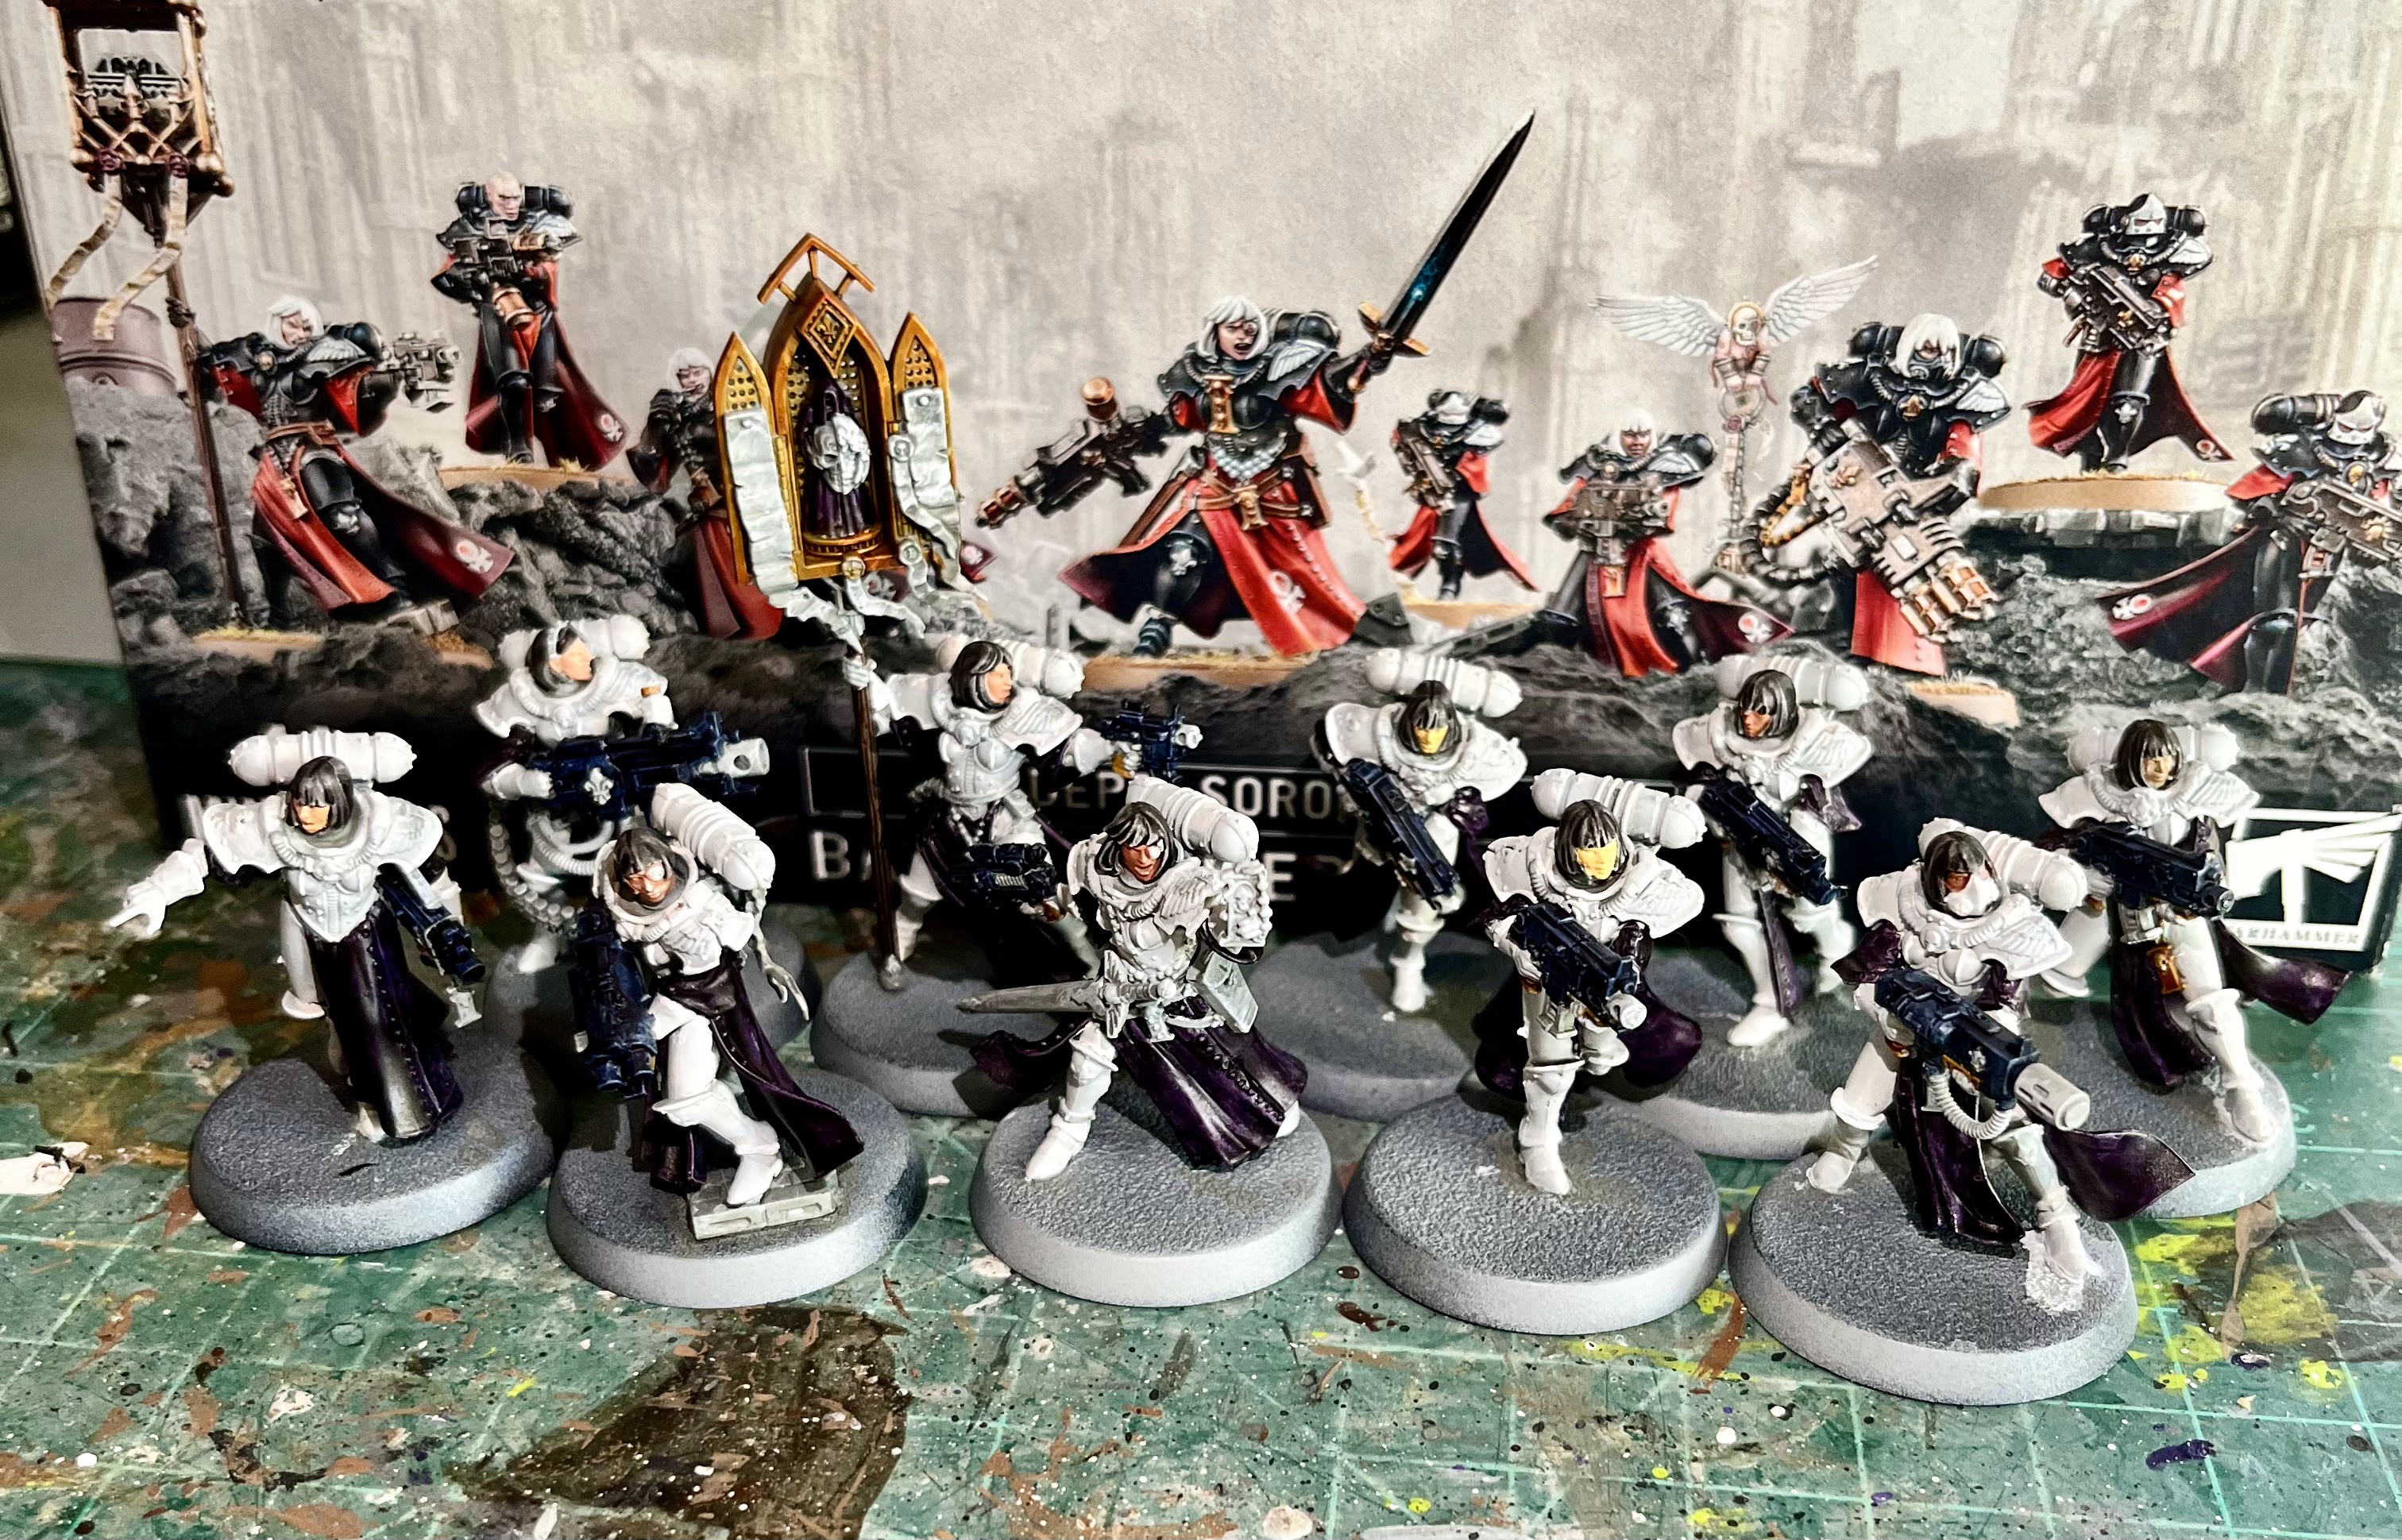
Wow, only 1 day left to get these Sisters done!  I have a lot to do!  Yesterday, I managed to block in the main colors beyond the armor.  The purple tabard and the dark blue weaponry.  Those three pieces are the bulk of the models.


That leaves today for the detailing.  I used a mix of regular Armypainter and  Speedpaints to finish off the detail work.  The Speedpaints are great for larger areas, but for really detailed work the regular paints are helpful.  The Speedpaints tend to go where you put them, even though they are pretty liquid.  However, if you want to make sure the paint goes exactly where you want it, there is no substitute for regular acrylics.  

I decided to go ahead an use my Melta-gunner and a regular Sister as my "testers" and started doing some detail work on them.  These two troopers were going to lead the charge on the detail work!  Thankfully, I found that the standard troopers were not as detailed as I had feared!  The detail work on them went relatively quick.  At this point, I still had a bit more to do, but you get the general idea. 


However, the biggest challenges were still going to be the Sister Superior and the Icon Bearer.  The were followed closely by the Heavy Bolter sister.  They had the most detail and the most hard to reach detail.    


With the basics defined I got to work.  However, I did not have a great system for applying the colors and I kept having to go back to colors.  Not a very efficient use of my paints or time.  At this stage, miniatures start to take on a bit of their own personalities.  Sometimes, I think it would be better to paint them all individually at this stage.  However, I try to paint all the colors on all the squad at the same time.  I was not doing a very good job of it today.  

At the end of the Day 4, this is what I had done. 


I would say the detailing stage is NOT complete for these minis.  I have to do the tubes around the neck area for most of the team.  The Icon is not completely done.  A few bits and bobs are still unfinished.   

This puts me somewhat off schedule. On Day 5 I was intending to do washes, basing, and sealing.  Thankfully, that shouldn't take too much time.  I will probably have time to finish up my detailing before I do those finishing steps.  Time is getting tight, but I think I am very close to getting this Kill Team done in 5-days.   


Tomorrow is a big day.  It is the make or break day.  The final day.  

See you tomorrow for the final day of the challenge!


Become a Patron and get access to all the cool stuff, a peak behind the curtain of Blood and Spectacles, and early-access to playtest games!  


You can follow Blood and Spectacles Facebook page or Instagram for more fun! 

Check out the latest publications and contact me at our Blood and Spectacles website

Or purchase all out games at the Blood and Spectacles Publishing Wargames Vault Page!    


Monday, June 26, 2023

Battle Report: Restless Sun - Raid on Drill Rig Oscar 678-H


Restless Sun is my model vs model skirmish using the general rules of the "Restless" series of games.  They are designed so each each model is an individual combatant.  Therefore, results are determined on a model-by-model basis.  

Submarine insertions were exactly what they had been trained for.  Lt. Meyers watched with a diligent eye as his North Ammoriss Naval PDF Commandoes prepared.  Unlike most of the North Ammoriss PDF, his men weren't a bunch of conscripts.  They had been recruited and chosen from some of the best soldier in the PDF and were considered to be the best native troops on Ammoriss.  A raid on a drill rig from a submarine deployment was exactly the type of mission his troops had been trained for.

Taskforce: Thorn under Vice-Admiral Travers had done their job and mostly wiped the Ork forces from the sea lanes, and put in a over-the-horizon blockade of the Deff Islands.  However, despite the set back in the Approaches, they didn't know how to quit.  They counter-attacked with a series of air assaults that managed to re-take several of the Drill Rigs in the Approaches.  Using these stations as staging points they had successfully managed to harass the supply lines the Imperial forces were sending from North Ammoriss to the Warzone.  That put the entire campaign in jeopardy.  

It was up to Lt. Meyers, and similar troops across the Approaches to put an end to these staging points.  Their mission was to re-take the Drill Rig Oscar678-H.  It was a simple mission to sweep the target, kill any greenskin that gets in the way, and re-take the control room of the drill rig.  From there the commandoes could de-activate the power plant running the Ork defenses and allow follow-on troops to take the rig.  Simple, but not easy. 

Forces:

North Ammoriss Naval Commando    

Lt. Meyers - Trained Infantry
- Combat Weapons, Commander, Enhanced Senses

1 Specialist - Trained Infantry
-  Indirect Fire, Blast, Enhanced Senses

1 Specialist- Trained Infantry
- Squad Support Weapon, Blast, Enhanced Senses

5 Commandoes- Trained Infantry
- Enhanced Senses

Ork Mob

1 Nob- Regular Infantry
-- Combat Weapon, Fierce, Armored, Commander

4 Boyz-- Irregular Infantry
-- Fierce, Combat Weapons

2 Boyz- Irregular Infantry
-- Fierce, 

5 Grotz- Irregular Infantry      

Mission: 
We are using the Forced Entry scenario from the main rulebook.  The objective is a control room for the drill rig.  The Commandoes have 8 turns to get a single unshaken model into the control room for the Rig. 

As a complication, this battle is taking place at night.  However, the North Ammoriss Naval Commandoes came prepared with some Enhanced Senses.  They are immune to the darkness, but the Orks are not.  

Set-up: 
This battle is being played  out on a 36x36 MU board to represent the drill rig's main command platform. 1MU with equal 1 inch.   The terrain is being placed by the defender, but the attacker gets to choose the board edge to deploy from.  Therefore, it is in the defenders best interest to make it work.  Once the terrain and sides are picked, the objective is placed and the terrain adjusted as needed.  

The Orks are placed within 6 MU of their board edge.  The Commandoes are placed anywhere, but must be at least 12 MU away from any defender. 


You can see the Orks using their Gretchin to pushback the attackers by deploying as far away from the objective as they can.  They are then using the Combat oriented Boyz and Nob as a reserve force behind the objective.  Meanwhile, the Imperial Attackers seem like they are stacking up to go down the center, with the Flamer leading the way, and the Grenade Launcher as support on the North edge of the board. 

For this battle, I won't be going over it turn-by-turn.  I have found this method to be too time consuming and difficult to play and record.  Instead, I will break it down into three sections; the Maneuvers, the Battle, and the End Game.  The Maneuver section is the opening parts of the battle, the Battle phase is when the main engagement is taking place, the End Game is the final key parts of the game.  I will wrap up the game with a conclusion and some thoughts on how the game went.  Let me know what you think of this approach.  I know it is easier on me!  :) 

Maneuver Phase:
The battle opens with a volley of aimed fire coming from the darkness and blasting the Gretchin in front of the main building in the head.  This catches the Orks off guard, and they mostly fail to respond to the attack!  Lt. Meyers makes for the objective in the confusion.

An Ork and a Gretchin round a corner and come face-to-face with a Commando, but they are all too stunned to act. The Ork Nob comes running out from his position bellowing orders, but aimed fire from Lt. Meyers sends him scurrying back into cover. 

The Orks are starting to shake off their surprise and respond.  However, their shooting and the Imperial shooting is largely ineffective this turn.  However, Lt. Meyers assaults and kills a Gretchin up-close and personal.  


Battle Phase:
We are entering Turn 4, and half-way to the end of the battle.  Lt. Meyers is attacked by a Choppa Boy, and barely manages to fend him off.  A nearby trooper than blasts into pushed back Ork and causes him to rout from the battle.  Lt. Meyers than assaults and Ork near the entrance to the control building, and forces him back with close range pistol fire and wildly swinging his chainsword.  This victory is short lived, as a slugga boy pops out from behind the bunker and the shooting forces Lt. Meyers back.  The Ork Nob gets himself in front of the control building.  


Lt. Meyers shakes off being shot at, just in time for the Ork Nob to charge into him swinging his choppa and shooting.  However, the impetuous charge causes the Ork to lodge his Choppa into some machinery, leaving him wide open for the Lt.  This forces the Ork back away from Lt. Meyers.  


A Commando gets the doorway to the Control Center amidst a hail of enemy shooting.  However, he stays in place and ready to go in next turn.  A precise shot from a commando kills another Gretchin. 


A Commando makes it into the control center, but an Ork boy chases him inside and kills him with a choppa swing.  Seeing his trooper go down, Lt. Meyers rushes in and finishes the Ork that killed his friend. Another nearby Ork rushes in, and the Lt. and the Ork come tumbling out in a rolling, spitting fight.  An Ork Shoota boy manages to gun down one of the flanking commandoes.  Finally, the Grenadier gets his gun going, and an indirect shot forces a Gretchin and an Ork Shoota boy into the drink with its blast wave.  


The Commandoes are down 2, and the Orks have lost 4 Gretchin, 2 Slugga boys, and a shoota boy.  

The End Game: 
The Ork Nob picks up a Choppa from a fallen boy, and rushes the shaken Lt. Meyers.  This time, his aim is true and the Commando officer is killed. The death of their leader stuns the Commandoes, and they seem unable to respond.  

A Flamer blast forces back the Ork Nob, and a trooper runs for the Control Room, however he is flying tackled by an Ork Slugga boy and the two bash each others brains out.  The Grenadier forces the Ork Nob off the side of the rig (Forced a retreat off the board edge) with a well placed grenade shot.  


With that, the automated defenses open fire in the approaching Imperial aircraft, and they are forced to abort from their attack runs.  The Commandoes failed to secure the objective in time. 


Conclusion: 
Orks win in a squeaker.  

The Imperials managed to get into the control room but they couldn't stay in it.  Then, after the death of Lt. Meyer, they had a tough time activating on their own.  This was late in the game, so that left that too far away to get there in the end.  Of course, the Orks only had an Ork and 2 Grots left to oppose them. 

Vice Admiral Travers saluted General Kurtz as the Cadian marched into the command center on Admiral Traver's flagship.  He and several aides marched crisply in behind him.  The off-worlder looked comfortable onboard ship, even though he was an Imperial Guardsmen.  General Kurtz returned the salute with the precision that Vice-Admiral Travers had learned to expect.  

"Our Naval Commandoes were unable to secure the defense, so the follow-on attacks were aborted General," Vice-Admiral Travers reported matter-of-factly.  The commander of Taskforce: Thorn was pretty sure that the General was well aware of what had happened. "Perhaps, if your connections in the Panther's Claws Space Marine Chapter would have better luck?" 

The General waved off the suggestion, "No need for that.  The Drill Rigs are just a diversion from the main theatre.  The challenge is the Ork air assets.  Therefore, if Battlegroup Hemlock is going to succeed we will need to put a dent in their air power."

Vice-admiral Travers nodded, "I see.  Well, I am sure Commodore Miles has a plan of action."

"You have read the reports. Taskforce: Chalice is struggling and the air crews are reaching a breaking point.  The pilots are not the issue, but I have doubts that the mainline PDF aircraft are a match for the Ork Fighta, and there are not enough Imperial Navy can't be everywhere. 

Taskforce: Thorn has been successful in sweeping the seas clear of the Ork fleets.  They have been bottled up and pose little threat.  Therefore, if we want to make a dent in the Ork air power we need to leverage the successes you have had Vice-admiral Travers."   

Vice-admiral Travers kept a stern military face on the outside, but on the inside he was reeling, "I will do what is necessary, General Kurtz." 

Before playing this game, My skumgrod and I had a long talk about which game system we wanted to use.  We had been playing a lot of Kill Team and this seemed like a perfect mission for the system.  However, we ultimately dismissed it because we had been playing it a lot at the club so decided to try something different.  We also considered Black Ops but ultimately decided that the board space might not work out for this mission.  We also dismissed Stargrave and Rogue Stars quickly.  The first was ill-suited for what we wanted, and the second took too long to stat up the models. 

We settled on Restless Suns because my Skumgrod was confident that there would be no rules questions, or if their were, we could at least comfortably make them up on the fly.  Overall, I think it worked well enough BUT the arbitrary time limit ended up with a bit of an abrupt ending.  Secondly, Ork ferociousness in hand-to-hand does not translate 1:1 in the system.  The game also introduces a lot of friction for a commander, as troops often do not do what they are supposed to be doing.  It can also be tough to outright kill a foe, and indeed about 4 of the casualties in this game were due to retreat moves. Still, quick fun with plenty of killy-ness and some a lot of surprises during game play! 


Become a Patron and get access to all the cool stuff, a peak behind the curtain of Blood and Spectacles, and early-access to playtest games!  


You can follow Blood and Spectacles Facebook page or Instagram for more fun! 

Check out the latest publications and contact me at our Blood and Spectacles website

Or purchase all out games at the Blood and Spectacles Publishing Wargames Vault Page!          


Monday, May 22, 2023

Battle Report: Darkest Knights- Breakthrough!


This will be a playtest of the most recent solo/Co-op/Versus game I have been working on tentatively called Darkest Knights.  The game is based on a group of specialist agents assembled to face off-against the growing threat of monster incursions across the globe.  The key ideas of this game is that it is completely scale and model agnostic, all games happen at night or dark places of the world, escalating tension, and players do not have a clear vision of what they will encounter until the game is being played.  That means a lot of blinds and random components as you play.

So with that preamble out of the way, this playtest features our brave monster hunters trying to get one side of the 36MU board to the other side before the Terror Rating hits 12.  I'm not sure if it can be done, so let's see how it goes? 

The Darkest Knights
Today's group of heroes features 4 models: 

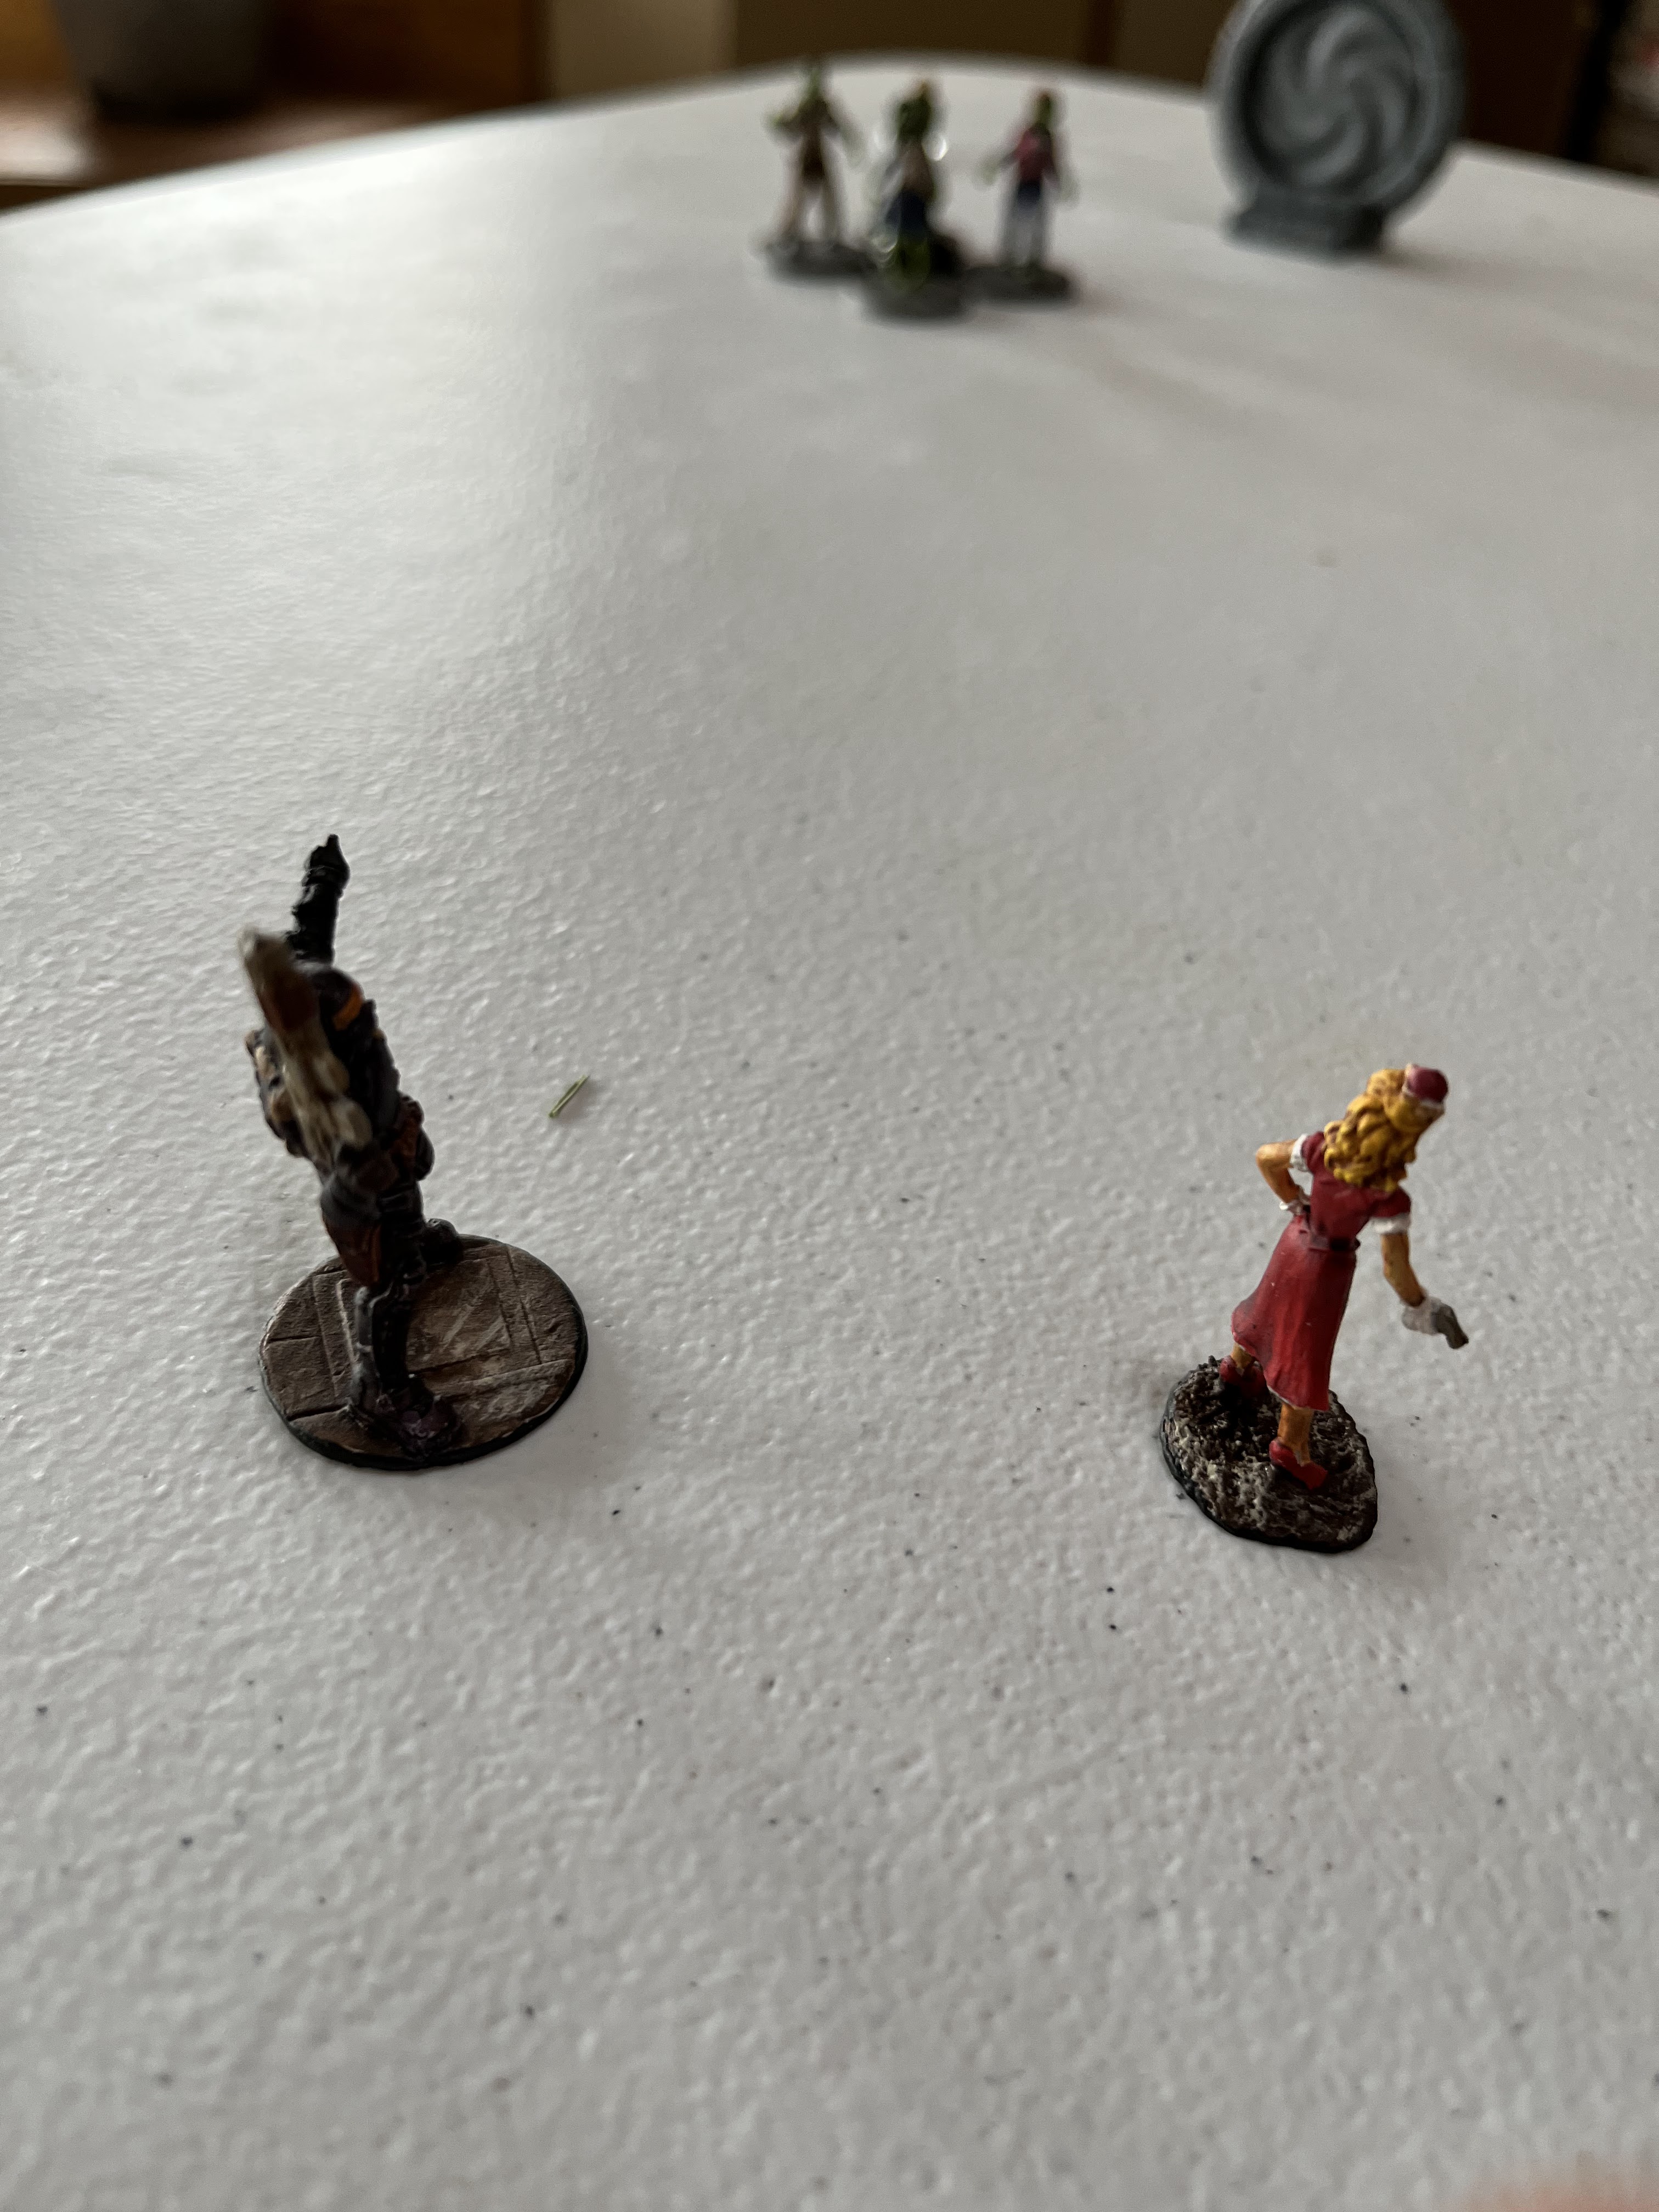
Officer Dan Friendly 
Shoot                  Fight                   Brawn                Brains                Awareness
d12                      d4                        d6                        d8                        d10
Archetype: Leader                                                                  Keyword: Awareness
Starting Equipment: Battle rifle, Low-light goggles, pistol

Professor Stan Ellsing
Shoot                  Fight                   Brawn                Brains                Awareness
d6                         d8                        d4                        d12                        d10
Archetype: Magician                                                                  Keyword: Awareness
Starting Equipment: Magic Tome, Occult Hand Weapon, Pistol

Agent Red
Shoot                  Fight                   Brawn                Brains                Awareness
d10                       d8                        d4                      d12                        d6
Archetype: Face                                                        Keyword: Brains
Starting Equipment: Pistol/Suppressor

Ms. Jones
Shoot                  Fight                   Brawn                Brains                Awareness
d4                       d12                        d10                      d6                        d8
Archetype: Warrior                                                        Keyword: Fight
Starting Equipment: Hand weapon, Pistol, Light Body Armor

First three are Reaper Bones, last is Reaper Metal


The Foes
The Foes are a series of Deep One style opponents using models from a variety of sources: 

D4- Frog Swarms- Horde
D6- Mutants- Aggressive
D8- Deep Ones - Stalkers
D10- Savage Ones- Beast, Aggressive
D12- Magus- Occult or Tentacle Beast - Beast

These are from Mantic, Hell Boy Board Game and Blood Bowl

Set-up
In this game, the board develops during play.  I am using a 36MU by 30MU table, with 1 MU = 1 inch. 

In addition, I grabbed 3 large pieces of terrain, and 6 small ones.  The large ones are a big mountain, a building, and a barn.  The smaller terrain is rocks, destroyed walls, and some other low walls. There are also 4 shadowpoints to start with. 

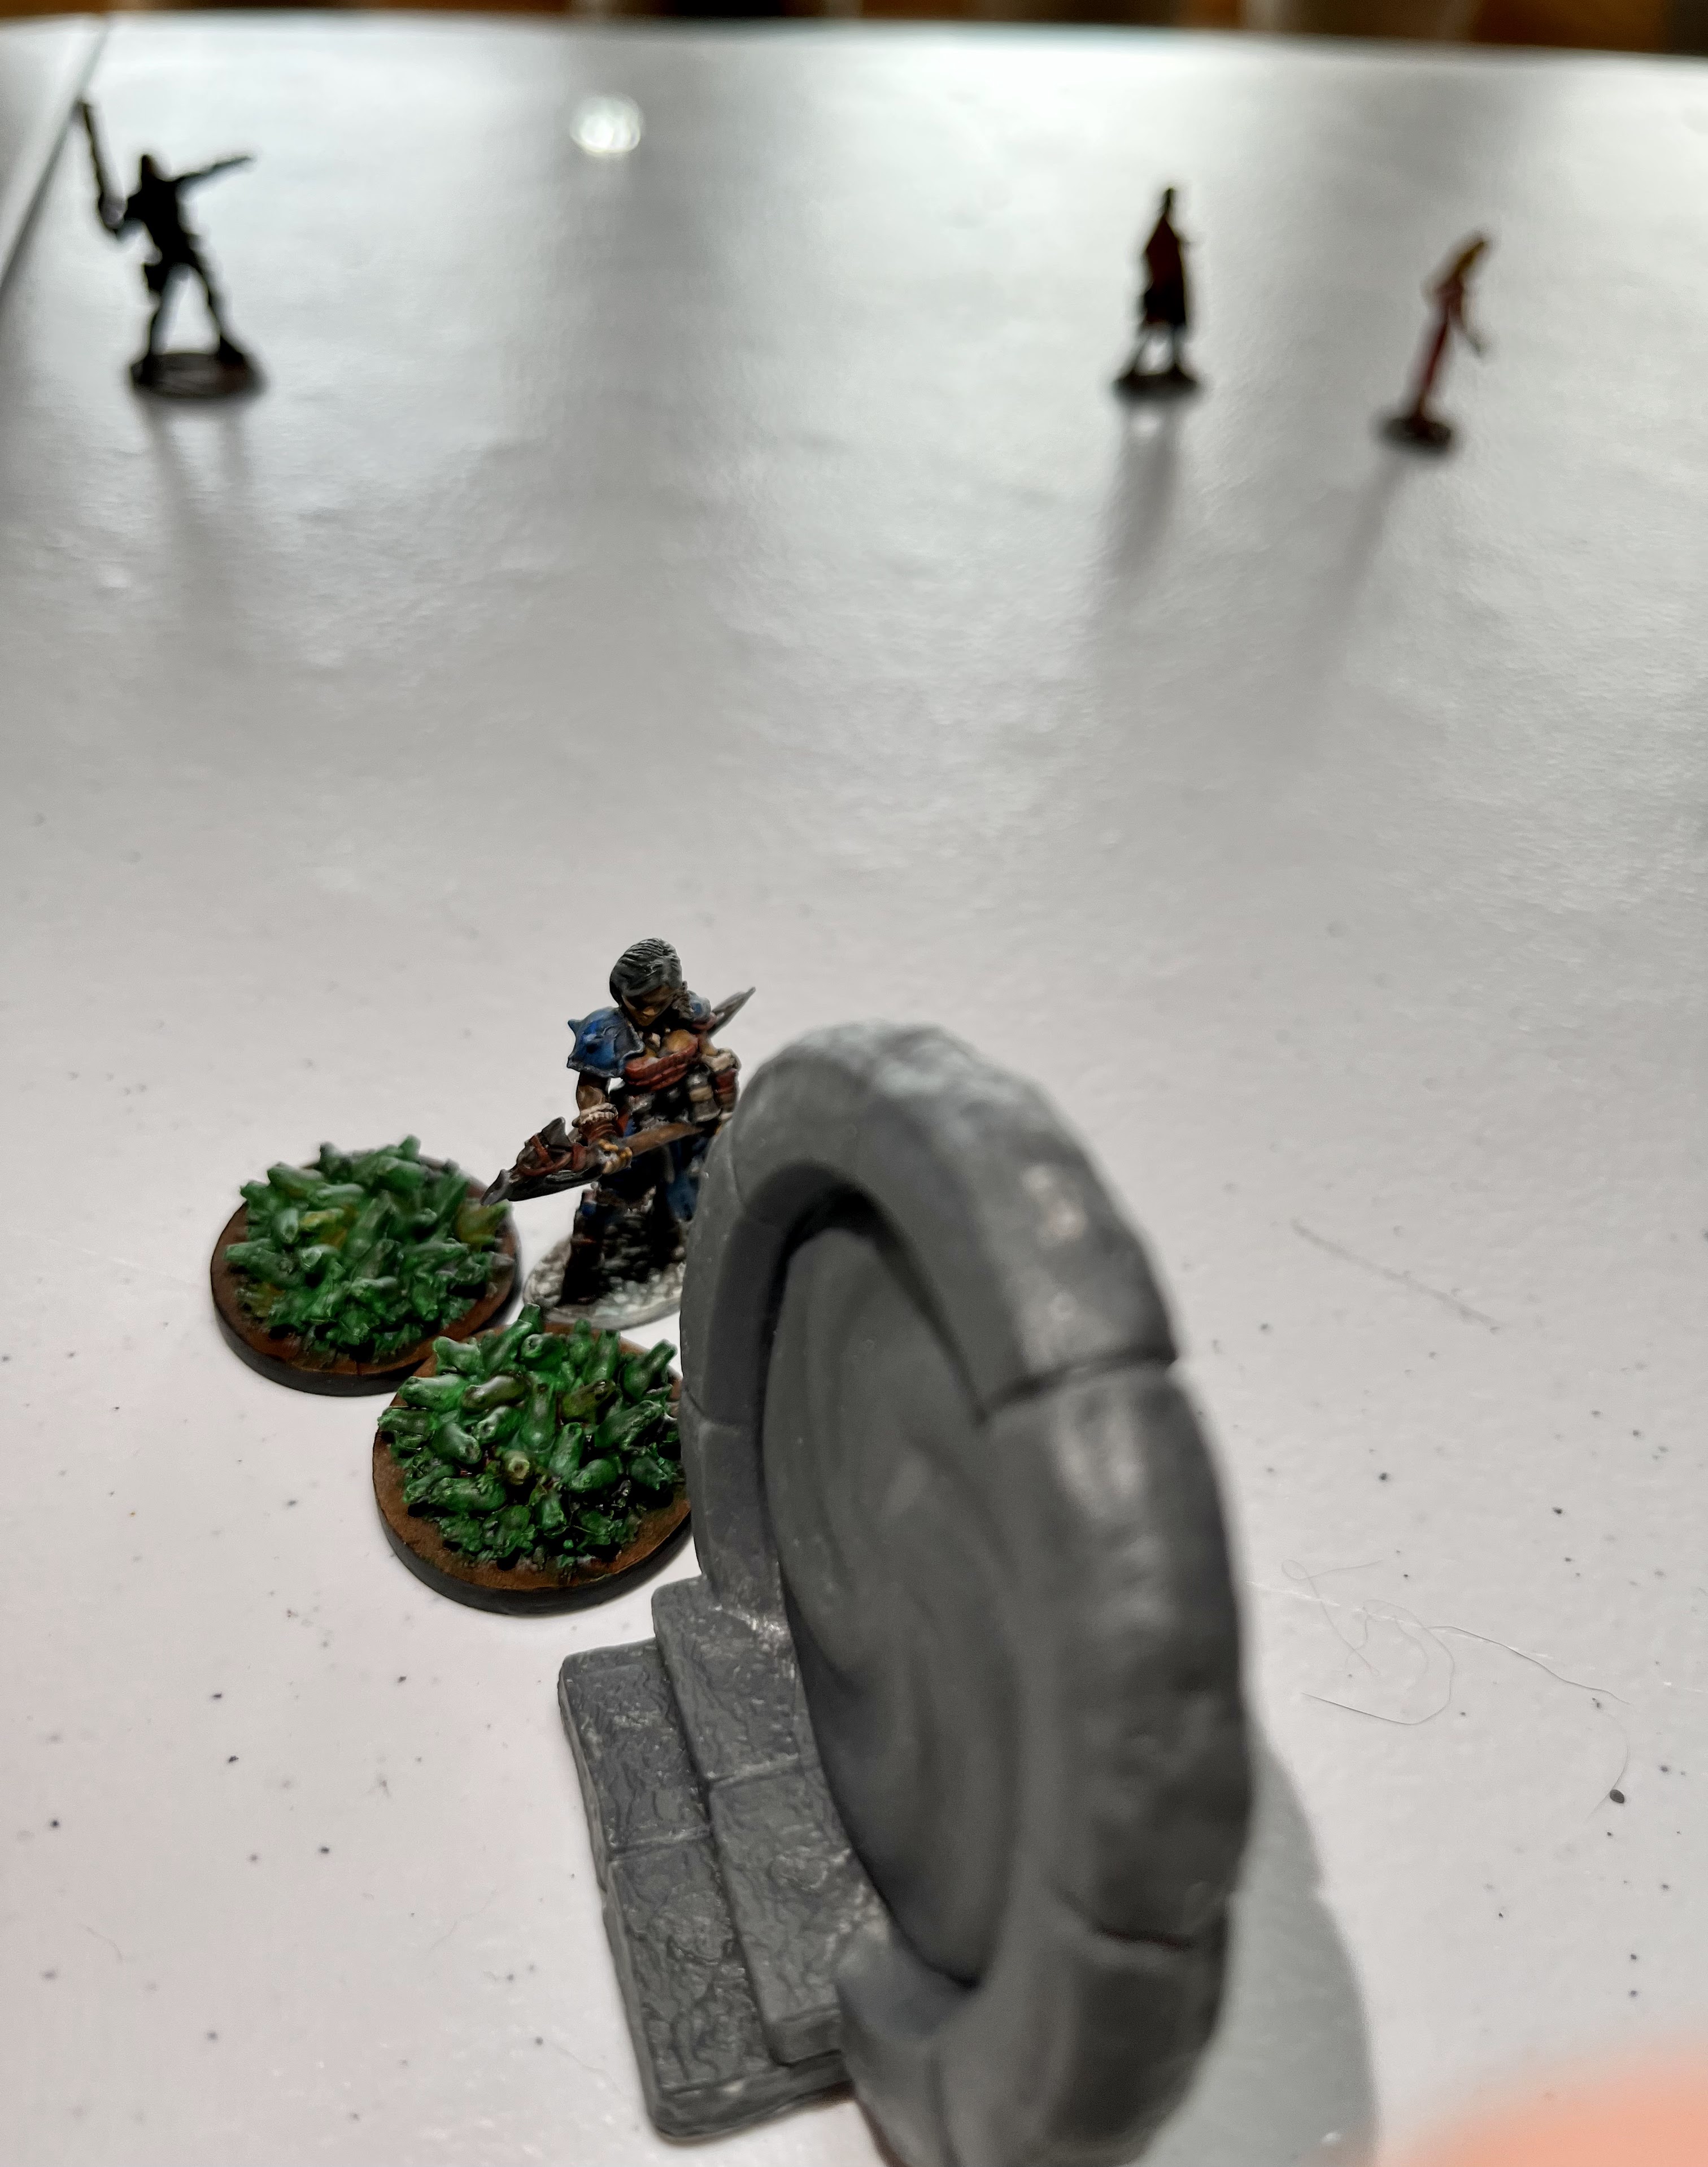
The Shadowpoints are gate looking models from the Hellboy board game.  Threat markers are black,  and the Terrain markers are clear.  The white markers are used to track Fear on the side board.  I wish I had brought my Cigar Box Battles mat for this game.  

It looks like there are a lot of Shadowpoints where the team needs to Exfiltrate from the board. <Gulp!>


Turn 1- 0 Terror Markers
Ms. Jones is activated first.  The first question is if I want to try to get LOS farther than her normal 6 with an activation test.  However, I decide not to risk it, and just move towards the closest threat marker to see what it is.  Not a good start as it spawns 2 Frog Swarms, and that causes 1 Terror token! 

Officer Friendly activates next, and chooses to use his Command ability to have Ms. Jones attack the Frog Swarms.  She rushes forward and attacks.  Things do not go well, and she fails to cause any damage to the hordes of frogs with her axe.  That was her Primary ability, so another Terror token is added, bringing us to 2. 

Agent Red rushes forward her full move to the center of the board.  She is followed by the Professor.  

The Monsters go next, as the Knights did not fail any activation checks. The Frog Swarms successfully lock Ms. Jones into combat, so she can not disengage, but fail to cause any injury.  However, Ms. Jones is not rolling well as she is now suppressed. 


The remaining Threat Markers move around the board.  No new Threats are spawned..... this time. 

Turn 2- 2 Terror Tokens
The Players can activate first.  Professor Ellsing tries to activate special so he can get a further view forward in the dark.  However, he fails and is paralyzed by fear.  The Terror tokens go up 1 level.  

This also allows the Monsters to take over.  This time, the Frog Swarms attacking Ms. Jones manage to score a hit, and I must choose an attribute to reduce by 1.  I choose her Brawn to go to d8.  However, now she can try to disengage in her turn and is no longer locked.  

Instead, Ms. Jones chooses to attack again, but another terrible roll leaves her in a bad place.  Terror goes up another level due to the flub!  It was in her primary attribute!  

Officer Friendly moves forward and goes "Eyes On" with his low-light goggles.  However, no markers are in range.  Agent Red rushes forward.  

Despite now having 4 Terror Tokens, no new Threats are spawned.  The remaining markers move about the board randomly but none enough to reveal any markers.  


Turn 3 - 4 Terror Tokens
Officer Friendly moves forward, and his "Eyes On" status reveals 4 Mutants coming in.  That adds another 1 Terror token, up to 5.  After the reveal, Agent Red moves forward to the closest Shadowpoint, and prepares to seal it with the arcane rituals she was taught before the mission started. 


This time Ms. Jones manages to pull herself together and manages to smash several of the frogs and scatter 1 of the swarms!  Yippee.  Finally, Professor Ellsing casts a Teleport spell and successfully moves up next to the Shadowpoint with Agent Red. 

The Shadowpoint near Agent Red and Professor Ellsing ripples and swirls, putting the two nearby on edge.  However, it is a false alarm and no new enemies come through.  However, the Terror level is now 6.  

The Mutants move forward aggressively, with half heading towards Officer Friendly, and the other half going towards Agent Red.  One of the Threat Markers reveals 2 Deep One stalkers which adds 1 more Terror Token.     

Turn 4- 6 Terror Tokens
Agent Red tries to seal off the Shadowpoint in front of her, but she fails using her primary keyword.  That raises the Terror Tokens to 7.  Officer Friendly opens fire on the mutants with his battle rifle. With burst fire, he easily takes out one of the mutants.  However, he is now considered "lit up" and easily seen. 

Ms. Jones finishes off the last Frog Swarm she is facing.  She prepares to seal the Shadowpoint before her with the arcane words she was taught prior to the mission, but they are hard to remember.  Professor Ellsing uses a Fireblast spell and toasts one of the Deep One Stalkers, with the other skittering out of sight. 


The Mutants race forwards, with two attacking Officer Friendly.  He takes two wounds and his Awareness and Shooting both go down 1 level to D10 and D6 accordingly.  The last one attacks Agent Red, but fails to hit her and causes her to be suppressed. 

Two more threat markers are spawned.  The one near Ms. Jones spews out and reveals 2 Stalkers and 1 Savage One.  The other spawns near the second Shadowpoint.  


Turn 5- 9 Terror Tokens out of 12! 
Officer Friendly tries to break-off, but the mutants thwart his efforts.  Agent Red fails to fight off the Mutant attacking her.  Professor Ellsing fails to cast a Hold spell on the mutant, raising the Terror Tokens to 10!  Ms. Jones sprints away from the enemies by Shadowpoint 1. 

Officer Friendly fends off the two mutants attacking him.  Agent Red is hit by the mutant and has her Brains reduced by 1 to d8.  

A Deep One Stalker manages to jump the sprinting Ms. Jones and attacks. However, it fails to hit her.  The Shadowpoint 4 spawns two new Savage Ones right on top of Professor Ellsing and Agent Red.  Another threat appears near Shadowpoint 3.  


Turn 6 - Terror Token 10 out of 12! 
Well, we better get moving as a unit!   

Professor Ellsing casts teleport and moves 7 MU away from the Shadowpoint.  He ends up right next to a wall.  This also spawns an Occult Leader!  Ms. Jones tries to break past the Stalker attacking her, but fails and is pinned in combat.  Officer Friendly also failed to break way and got pinned fighting with the mutants.  Agent Red killed the Mutant fighting her, but is about to be swamped by Savage Ones! 


The two Savage Ones easily team up on Agent Red and make her Unconscious and Possibly Dead.  The Mutants on Officer Friendly hit him and reduce his Brawn by 1.  Professor Ellsing is hit by a Firebolt from the Cult leader and is reduced by 5 stats, which brings him down across the board 1 level, and Awareness 2.  The Stalker also reduces Ms. Jones another level in Brawn. 


A new Threat appeared outside of Shadowpoint 4, near where Agent Red went down.  

Turn 7- 11 out of 12 Terror Tokens! 
A battered and bruised Professor Ellsing casts teleport again and gets to the edge of the board, but will need one more move to get off completely! Ms. Jones manages to pushback the Deep One Stalker and turn to face the oncoming threats.  Things look pretty bad.  Officer Friendly manages to kill one of the Mutants fighting with him up-close.  


The Savage One attacks, while the Stalkers scatter into the shadows to try and get around Ms. Jones' flanks.  It manages to cause 1 wound on the warrior, thanks to her armor she is still up and fighting.  The mutant on Officer Friendly fails to hit him.  

The monsters move around, and one of the threats turns out to be the Tentacle beast, near Ms. Jones. Two more threats are generated by Shadowpoint 2, and that puts us over 12 Terror Tokens.  There is one last disengagement turn. 

Turn 8- Disengagement Turn
Professor Ellsing manages to walk off the opposite board edge, clutching at his wounds.  Ms. Jones manages to pushback the Savage One attacking her.  However, it is only a small reprieve.  Officer Friendly is not so lucky, and the mutant stays on him.  

Ms. Jones is charged by a Savage One, a Stalker, and the Tentacled Beast and quickly dispatched to Unconscious and Possibly Dead. The Stalker and Mutant on Officer Friendly fail to injure him. 

Not a good result for our heroes! 

Conclusion
With that, Dawn breaks and the monsters flee back into the Shadowpoints while the portals themselves shimmer and dissipate.  A new day shines as Professor Ellsing stumbles to his destination beyond the monstrous guardians. It was a minor victory, as two of his companions have fallen.  

Now, let's talk about how the game played, then I will talk about what I did wrong as a player.  First off, the game really needs a battle mat, or the board just looks bare.  The idea that terrain spawns as you approach it seems fun and interesting, but in practice it takes away from the spectacle of the game a lot.  This may be a compromise I am not willing to make.  

This game will absolutely need a QRS to play.  The different rolls for running the randomization can be hard to recall.  However, there is a clear "escalation of threat" as the monsters appear more frequently and are harder to kill as you move on.  I also failed a surprising number of 4+ rolls on d12s and 10s this game which caused me to rack up Terror Tokens fast in the early going.  It will also help to have Character Stat cards handy when you play, as damage is attritional and can be hard to track without a small character sheet.  This makes the game feel much more RPG-lite as each Knight is a very unique character with their own skills and abilities.  

The game is intended to be a solo/co-op game and the mechanics are built around this premise.  There are a few Hooks including escalating terror and constant darkness where managing LOS is critical.  For a Solo game like this to work the key factors are, does it force me to make decisions, did it surprise me, and was I playing the game more than operating the game?  

1. Did it force me to make decisions? 
Yes.  There were a few decisions that derailed my efforts to accomplish the mission as I had to decide between movement, shooting, or fighting.  In the end, I got bogged down by the monsters and closing Shadowpoints instead of getting to the opposite board edge.  These decisions were made complicated by a combination of action options, limited number of actions to take, balancing mission vs. approaching threats, and time as the Terror Tokens stacked up.  This part of the game was successful. 

2. Did it surprise me? 
Maybe?  I am not sure it counts as surprise when monsters spawn out of the Shadowpoint you are standing on!  However, when I did generate monsters, it was normally a lot of them!  I am not sure that is typical, as there were a few times where a threat ended up being nothing, instead of monsters.  The monsters also ended up being much tougher than I expected.  However, the LOS/Darkness aspects hampered me less than I expected, and the terrain generation never really came into play.  However, the escalating Terror really forced me to change how I was operating as it stacked up really fast and things got more and more dangerous quicker than I expected!  

3.  Did I spend too much time operating the game?
This was the biggest pain point and failure of the game in my mind.  I spent too much time generating the board, generating and moving threats, and then operating the threats that had become monsters.  I spent more time doing that than running the Knights that were my characters!  There was also a lot of dice rolling for little or no result such as moving Threat markers around than were not factors in the game, or making failed monster attacks.  I am not sure how I am going to streamline this aspect of the game yet as these elements are also a key part of the experience right now.  I am open to suggestions in the comments. 

Final Thoughts
Close, but not ready for post-production yet.  The central darkness conceit needs work.  Perhaps allowing players to place d3 light sources in the set-up phase?  Maybe remove the random terrain generation? Change how Threat Markers operate on the board?  Still a lot of things to think about.  

However, there were also things that worked!  Each Knight felt like a unique character with their own special powers and abilities.  The escalating Terror worked as well, and the increasing monster difficulty was good.  The core mechanics for fighting and shooting worked well too, and gave the Knights some resiliency, but they were not unstoppable. 

In addition to working out some of the chrome, I still need to add some campaign play elements and finalize the missions.  Missions are particularly important in a game like this.  Otherwise, it loses a lot of replayability.  Plus, missions are what adds that extra level of tension and decision making.  

Overall, the game continues to progress but still needs some more TLC before it is ready for prime time. Probably another 2 years work at the rate I am going!  


Become a Patron and get access to all the cool stuff, a peak behind the curtain of Blood and Spectacles, and early-access to playtest games!  


You can follow Blood and Spectacles Facebook page or Instagram for more fun! 

Check out the latest publications and contact me at our Blood and Spectacles website

Or purchase all out games at the Blood and Spectacles Publishing Wargames Vault Page!