Monday, March 29, 2021

On The Painting Desk: Early Republican Romans- Down to the Triarri!


You may recall from my 2021 Goals that I was going to paint a fully functional Republican Roman army for Wars of the Republic by November of this year.  I wanted it to feature in some battle reports and other advertising for the new game from Osprey.  Therefore, I had to get it done to a deadline.  

When we left off last time, I had finished batch painting all of their skin, sandals, and tunics.  I had also finished a unit of skirmishers and the command elements of the units.  However, none of them had shields as I paint them last and separately.  It looked something like this.....


The army I was building was a standard 38 point force that was 5 Roman units for a game.  This was the size of the sample army lists in the rules, and the size of army I had used for play testing.  You may recall it had 5 units: 

  • Skirmishers
  • 2 Hastati
  • 1 Principe
  • 1 Triarri
Of course, I had enough Victrix limited minis to go bigger if I wanted too.  However this was the starting size I was looking for.  Since then, I also got some Romans in Hamata (chain mail) in the mail so my initial plan to have Principes and Triarri in Hamata was back on the table as a potential upgrade.  


But first I wanted to finish this army in pectoral armor before I started an upgraded Lorica Hamata version of it!  

It is pretty well known that the Roman army deployed in a three line battle line called the Triplex Acies.  The least experienced (and typically youngest and poorest) were the Hastati.  Since all Romans in the Triplex Acies supplied their own equipment, they had the basic gear to fight as a heavy infantryman.  They formed the first line.  The more experienced (and theoretically older and slightly more wealthy from booty) were the Principes who formed the second line of battle.  If the Hastati were wavering or getting tired, the Principes could step in and relieve them.  

The third line was the oldest and most experienced troops.  They were called the Triarri, and were typically older and most veteran.  Instead of the usual short sword, big shield, and heavy javelins they were armed with spears and shields.  They fought closer to Hoplites than the rest of the Roman army.  There was a Roman saying that if you had just gotten through a tough spot that it had, "Gone down to the Triarri!".  Meaning it took your last line of defense to get you by!  

With having completed all the batch painting I wanted to do, I decided to start painting unit by unit to finish each unit off before going to the next one.  Like a Roman Counsel deploying his force, I decided to start with my Hastati!  To differentiate them from the more experienced troops, I decided on two cosmetic aspects when assembling them.  

  1. Hastati were all using their Pilums
  2. Hastati had standard helmets as opposed to the "Corinthian" style.  Only their leaders got those
This was intended to apply a visual short-hand on the battlefield to easily distinguish who was who.  After all the units were going to have a variety of tunic colors within their ranks.  All Romans brought their own tunics after all. 

Here they are.... 


Unlike most times, I actually based them as part of the process instead of waiting to base all the army at once.  

After that, I decided to paint up my Principe troopers.  They were the second line, so it seemed appropriate to paint them up next.  For visually short hand, I gave them all one helmet type and they were going to be using their gladius.  At this point, I also decided that the entire army was going to be using "white" feathers for their head gear.  I did a small bit of research and I guess ancient writers referred to them mostly as Red or Black.  Those tended to blend in with the models too much and the white feathers after a wash looked ace, so I stuck with that color instead.  


Once they get their shields, they will look ready to stomp some face!  

Finally, that led me to the final unit..... the Triarri.  This army painting was getting down to the Triarri.  For this unit, I almost wanted a more traditional Hoplite feel with a few bronze cuirasses in there.  I also decided to use the Aspis/Hoplon shields for these guys instead of the Scutum.  Since this is very Early Republic I felt it would help it look more like a transition from the old Roman Phalanx into the new Roman Legion.  The obvious visual shorthand for these guys was spear and round hoplite shields.  You may also notice that they all have two greaves instead of one!  I did still kept the white crests, plumes, and feathers even though I was tempted to switch to a darker color.  


Well, that's it!  That is where we stand now.  All that is left is painting up the shields, getting shield transfers for them, and sticking them on.  That could be an issue since I have not even ordered any transfers for them yet!  Since these are Victrix kits, I think I will go with Little Big Man Studios transfers, but with Brexit I have no idea how long it will take for me to get them over here.  Even without the transfers, I can still get the shields painted up and put on for a usable force.  Then I will decide if I want the transfers or not.   


This is a pretty Early Republic force, probably circa the Second Samnite War around 326 to 304 BCE.  Most people paint the Romans with matching shields by unit.  However, I am not sure that would be the case during this time frame.  After all, each trooper was expected to provide their own gear.  I imagine that it was NOT uniform due to this.  Therefore, I am undecided if I want to paint the shields by unit or ad-hoc variations through out the unit.  Let me know your opinion in comments.  

Hopefully, the next update will be to show the finishing steps for the army and to get it on the table for an army shot!  Then, I can move on to painting my next project..... more Romans but in Chain Mail?  I think I am going to make pretty much the same army but in Lorica Hamata this time......  

In the meantime, you can pre-order your copy of Wars of the Republic here


You can follow Blood and Spectacles Facebook page for more fun: https://m.facebook.com/pg/BloodandSpectacles/posts/?ref=bookmarks&mt_nav=0

Or our website:

Or our Messageboard:

Or our Wargames Vault Page:


Monday, March 22, 2021

Battle Report: Blucher- Prussians vs French


I know nothing about the Napoleonic Wars.  If it wasn't in a Sharpe book then I really know nothing about it!  However, as a Wargamer it is the 600 pound gorilla in the room.  I have always had some interest in the big battles, the tactics, the pageantry and the big hats!  However, that has easily been countered by the historical details, the many rule sets, basing, and the lack of a Nappie mentor.  

Therefore, to help me get a feel for the world of Nappies, I bought the Blucher and 100 Days game late in 2018, and played in early 2019.  I really liked the ability to use cards instead of models, and it gave me a high level introduction to the period without getting bogged down in the minutiae of it.  Plus, the rule set itself was very user friendly and gave a good balanced game.  Therefore, I broke it out again for some more gaming this year as a palette cleanser and to do something completely different.

Prussian forces are maneuvering to try and enter France and bring the war "home" to their enemies.  However, French commanders have been alerted and have moved 3 Corps to intercept them.  The two forces meet and a battle is fought near the border.   

Forces: 

Since I know nothing about the period, I decided to go completely "ahistorical" for our outing today.  I took the cards from the 100 Days box for the Prussians and the French.  I shuffled them, and I drew 18 cards for each army, 6 into each Corp.  

Prussians

1st Corp

  1. Foot artillery 
  2. Landwehr Cavalry
  3. 4th Silesian Landwehr
  4. Infantry regiment #11
  5. 2nd Elbe Landwehr
  6. Foot artillery
2nd Corp

  1. Infantry Regiment #15
  2. Horse Artillery
  3. Infantry Regiment #9
  4. 2nd Silesian Landwehr
  5. 1st Pommern Landwehr
  6. Heavy Artillery
 3rd Corp

  1. Heavy Artillery
  2. Infantry Regiment #29
  3. Infantry Regiment #27
  4. 1st Silesian Landwehr
  5. Infantry Regiment #14
  6. 3rd Kurmark Landwehr           

An infantry heavy force with a decent amount of artillery support.  A mixed bag of units for sure.  The Third Corp seems like the Prussian heavy hitter.....

French

1st Corp

  1. 1/12 Rome
  2. 2/11 Logarde
  3. 2/Grenadiers
  4. 2/7 Piat
  5. 2/9 Jamin
  6. Heavy artillery
2nd Corp
  1. 1/10 Grengoult
  2. 2/10 Dupeyroux
  3. Maurin Light Cavalry
  4. 1/1 Quiot
  5. 1/4 Pegot
  6. 2/2/ Aulard
3rd Corp
  1. 4 Soult Light Cavalry
  2. 1/19 Bellair
  3. 1/14 Hulot
  4. 2/8 Corsin
  5. 1/ Chassuers- Old Guard
  6. Heavy Artillery

The French came with plenty of line infantry as well!  However, it looks like the French have the cavalry advantage, even if it is only one unit.  

I am not using any personality cards for this game. 

Mission

Both armies have 2 Objectives placed on the field.  This will just be a straight up battle with both forces trying to break each other OR secure their objectives behind their enemy lines.  

Set-up

The board is a 6 foot by 4 foot board.  The French and the Prussians both have some heights on their side of the board.  The French are on the West, and the Prussians are on the East.  There is a small pond and swampy region on the northern side of the center line of the board.  Other than that, there was very little terrain of interest.    

One interesting thing in Blucher is that both sides set-up using blinds!  You place the cards face down, and they are not revealed unless they shoot, or move into view.  Therefore, when we look at the board we see 18 cards per side with their national flag on the back.  


The Prussians have the 3rd Corp deployed on their right, then the 2nd and the 1st is on their left.  The French have the 2nd on their right, then the 1st in the center, and 3rd Corp on their left.  


The Battle

The French are on the offensive so will begin turn 1, as both armies are ready to engage in the morning.  Each turn the one player takes all actions, but is limited by their Momentum, as tracked by the opponent who secretly rolls the momentum dice.  Since the game has 30 turns using an I-GO-U-GO system, I will not detail out each turn.  That will get boring! Instead, I will just try to share the flow of the battle as it evolves and key moments.  

Prussian Right early in the battle

By mid-morning, the Prussian left and the French right had moved to engagement range.  However, most of the rest of both armies seemed stalled.  They both seemed to be deploying in echelon into the fight.  The Prussian 1st Corp and the French 2nd Corp seemed eager for a fight.  Meanwhile the Corps in the center were a bit more sluggish, with the other Corps still having units as blinds and still at the base line.  The Prussian Horse Artillery of the 1st Corp start the battle by shelling the French 2/10 Dupeyroux regiment at the forefront of the French advance.  

Prussian Left and French Right engage at mid-morning

Scattered firing breaks out as the various Infantry units on the south side of the battlefield begin to find the range.  Skirmishers are deployed and attack.  As Morning wanes into Mid-day, the Prussian Infantry Regiment #15 makes contact with the French 1/10 Grengoult and are bloodily repulsed.  The Prussian Heavy and Foot artillery also manages to fire on the French center Corps Heavy artillery and cause some damage.  However, the strong French battle line is able to deliver effective firepower on the leading Prussian units.  
Prussian Left

Skirmishing and volley fire breaks out across the front, with the main action still concentrated on the South side of the battlefield (Prussian left and French right).  Both the Prussian and French forces are grinding it out with short range firepower punctuated with hand-to-hand assaults.  Meanwhile, to the North the French artillery has taken a beating but has forced the 2nd Elbe landwehr to withdraw from the battle.  Just as French line infantry have begun to engage on that flank with skirmishers.  

Prussian Right

At the mid-day point, the first French unit is broken by firepower on the French right.  The 1/4 Pegot regiment on the hillside is forced to fall back.  Meanwhile, one of the French Heavy batteries is also withdrawn, their ammo spent.  Despite the loss, the French forces are on the attack, and are in good position!  The Prussians had to withdraw their Heavy battery and Foot artillery in the Center, and a Landwehr regiment on the Prussian left.

Prussian Left, will the Prussians be able to turn the flank?
  
French troops manage to smash through Prussian Infantry Regiments #15, #9, and #27 at the main point of attack on the French right.  This leaves only Landwehr to hold the line, while the French have a reserve of Line Infantry moving up!  In desperation, Prussian Heavy and Foot artillery come out of reserve to fill the gap in the Center.  Prussian counter-attacks on their Right flank are repulsed, while on the left at the foot of the heights they push back the French.  

The French repulse the Prussian attack on the Prussian Left!

The Prussian counter-attack on the French right is short lived as the reserve Line Infantry units destroy the Prussian Infantry Regiment #14 in combat.  The last French Heavy Artillery battery withdraws from the field as the French line infantry push their assault. On the French Left a light cavalry unit moves up from reserves to threaten the far flank.  Prussian Landwehr Cavalry comes out of reserve and counter-attacks the French light Cavalry on the Prussian right, but to no avail.  The newly arrived Prussian artillery punishes the 2/9 Jamin in the Center.  The battle for the heights on the Prussian left is easily pushed back by the light cavalry on higher ground.  However, the Prussians do manage to break another French Line Infantry unit!  
The Prussian Right is also crumbling under the French attack

As dinner time approaches, the French seem to have broken through on the Prussian right, only the de-moralized Infantry Regiment #11 still stands to stop them, after the Grenadiers obliterate the 4th Silesian landwehr, and Soult's cavalry finishes off Sydow's Landwehr cavalry. The Prussians have lost 7 units, with a break point of 9.  The French have only lost 3.  

The 1st Silesian was badly injured by the French cavalry and withdraws, as does the Infantry regiment #11.  An assault on the Prussian left is easily dealt with by the French Line infantry there.  However, the Prussian cannons in the Center do manage to rout another French unit.

The Prussian Right crumbles

As evening settles in, the battle is all but over.  The French push manages to sweep up the Prussian foot artillery, taking them to 8 units broken.  Despite the French's best efforts, they can not completely break the Prussian army.  Seeing all hope lost, the remnants of the Prussian force withdraw with their tails between their legs, thoroughly beaten.  Meanwhile, the French still had the Old Guard Chasseurs in reserve.    
French victory as the remaining Prussians withdraw

Conclusion
The French force the Prussians back across the border and into their own territory.  The Empire was safe again, and the drumming they gave the Prussians would hopefully keep them away for the weeks to come. 

As the Prussian player, I knew I had an uphill battle.  Landwehr were no match against the Grenadiers and Line Infantry of the French.  I had hoped to turn the Prussian left flank, and things looked promising when I broke the French line infantry on the edge, however, I just couldn't sweep the French light cavalry off the top of the heights, and my opponent was able to shore it up with more Line units.  

I knew my Right and center would be vulnerable, so I tried to delay there as long as I could.  It actually lasted longer than I expected, but when the French broke through my line Infantry on the South Side of the battle, I knew it was pretty much all over but the crying.

Final tally:

French
Withdrew- 2
Broken- 4

Prussians 
Withdrew- 5
Broken- 8

Ouch!  The way we "picked" armies led to a somewhat lopsided game.  However, that is war!  You do not always get to fight with the units you want, but the units you have!  Overall, I found it a fun challenge and Blucher always plays differently than most games I play.  The short ranges and movement make it especially interesting since you are coordinating armies.  I look forward to trying it again soon!          


Monday, March 15, 2021

On The Painting Desk- Friends, Romans, Countrymen! Led me your paint!


The goal was to build a Roman army by November.  That is when Osprey's Wars of the Republic is due to come out.  I had been busy playtesting with Paper Templates but for the release and general play going forward I wanted to migrate to actual models!  

When we last left off, I had assembled the basic army using Victrix Republican Romans in Pectoral Armor.  This allowed me to put together enough models for the baseline army list I wanted.  This included the following units: 

  • Skirmishers
  • 2 Hastati
  • 1 Principes
  • 1 Triarri
However, I also had more than enough models for additional units further down the line.  However, these units were my initial goals by November. 

I had assembled all the units and undercoated them white.  I then painted their flesh.  Here is what it looked like...


One of the big questions I had for myself was how soon to switch to painting individual units versus painting them all together in a batch.  During the early Republic, Roman troops were levied and they had to supply their own equipment.  That meant each troop would have some level of uniqueness to them, even though they tended to get similar equipment.  How to paint efficiently while capturing some of this uniqueness was going to be critical.  

I looked across the troops, and looked for some things they all had in common.  They were all wearing sandals, they all had tunics, and they all had similar armor.  Therefore, if all their armor was bronze, I could paint all the Bronze at once.... in theory.  I also like to paint from the lowest level of a model i.e. skin; and then layer upwards to clothes, then armor, and finally weapons.  So I started by looking for batch painting opportunities first.  

I started with their Roman sandals....


I used three different colors to paint the Romans sandals.  I divided them into small groups, so the first two rows across the units got color 1, the second two rows got color 2, and the remainders got the final color.  I was using army painter paints.  I have to admit, after painting 100 sandals..... I was starting to question my life choices.  

You may have noticed that none of these Romans have any shields yet.  I always paint the shields separately and last.  Therefore, I tackle painting all the troopers and then switch over to their shields.  That being said, the easiest unit to "complete" was going to be the Skirmishers since they did not have shields at all!  After batch painting all those sandals I decided it was time to break into the individual units for a bit. 


 The eagle eyed amongst you may notice that these guys do not have the traditional Wolf pelts associated with Roman Velites.  The reason is simple.  These guys are not Velites.  Prior to Velites the Romans used standard Skirmishers.  The main difference is that Velites had javelins, long daggers, and small shields.  Skirmishers skip the shields and wolf pelts.  They are even lighter troops.  In the rules, Velites are treated like Light Infantry such as Peltasts and other Javelin and Shield armed soldiers.  

From there, I was going into a weekend where I did not think I had much time to paint, so I decided to paint just the 4 banner bearers.  Signifiers I think they are called.  


Then, after finishing those guys, I dug into the "leader" models.  In Wars of the Republic the leader model acts as the focal point of the unit.  The unit forms up around the leader, uses the leader for measuring distances, and uses them for Line-of-Sight purposes.  Therefore, you want to be able to see who the leader of the unit is at a glance.  I wanted to paint them individually.  


The guy on the left kind of looks like a thin, small Roman Thanos.  LOL.  

After completing these guys, I decided to go back to do some batch painting on tunics.  Like before, I just put paint pots next to lines of troopers and went from there.  I used two colors of blue, red, yellow, green, and white as my tunic colors.  The bulk of my troops I wanted in white robes as once I washed them they tended to look very impressive. 


 At this point, each unit only had 8 men to paint at a go.  That left me in a very manageable position to finish individual units 1 weekend at a time.  Then, once all the troops were done I could finish the shields in 1 weekend as well.  That meant I had about 5 weekends of work left to finish off the initial batch of Romans.  

While I was painting these guys, I did have some helpers along the way.  


My cat Oreo helped me decide on colors to use for sandals and tunics.  


My other cat Blink was less than impressed with my progress.  He felt we should have wrapped up and put everything away much sooner.  He wanted to lay in the sun but my table was in the way.  Hummphf. 


 As I finished up the tunics, Oreo wanted to remind me NOT to drink the paint water.  She wanted it and considered it a special treat.  Especially before bedtime! 

Maybe next time my dog and third cat will give me a hand.... errr..... paw too?  


Monday, March 8, 2021

Men of Bronze: Hercules Abroad - Supplement


Men of Bronze is part of the Osprey Wargaming Series (OWG 24) and focuses on Ancient Greek Hoplite battles.  The focus was on Hoplite battles in the Archaic through Classic period of Greece from the rise of the City-State until Alexander taking the throne in Macedon.  Therefore, it encompassed a great deal of military innovation and development.  

The focus was on Greece, and as Nick at the Irregular Warfare blog rightly pointed out at the time, there was a great deal of the Greek world of the time that was not covered in much detail.  I set about rectifying this situation with a series of Blog posts with expanded Lines-of-battle, scenarios, and campaign rules to allow Men of Bronze to expand beyond the famous Greco-Persian Wars, Peloponnesian Wars, and outside of Greece.  These expansions took us to Thessaly, Thrace, Sicily, Egypt, and beyond.     


In addition, the original rules for Men of Bronze did not include any rules for fighting linked series of battles.  I am always a fan of campaign rules, so this was a big pain point for me.  Therefore, I also wrote and added Campaign rules for the system.  

Finally, after publication a few folks had some good points that needed clarification.  Like all games, a FAQ was needed.  Based on these questions, I put together a FAQ.  

All of this extra detail allowed me to put together the first supplement to Men of BronzeIt is called Hercules Abroad and I have placed it on the Blood and Spectacles Wargame Vault page for purchase.  


The name derives from the Greek practice of attributing their colonization efforts to the travels of Hercules during his 12 Labors.  These mythological foundations were used as justification to claim lands and create colonies outside of Greece proper.  In these outlying regions, the Greeks would often come into conflict with other indigenous or colonizing peoples such as the Carthaginians, Egyptians, and more.  Warfare in these colonies, often called "Greater Greece" or Magna Graecia; were often less orthodox than "traditional" Greek war fighting.   

Inside the book, you will find new foes and Lines-of-Battle that expand the range of opponents found in the Men of Bronze rules.  These include some basic history, sample army lists, and each list also includes a new Historical Scenario to play to help catch the flavor of the list.  There are 8 new factions, some with multiple Lines-of-Battle to better reflect their evolving military structures.  

Etruscan Warriors with Axemen and Javelin Throwers

In addition, the booklet contains rules for running multi-player campaigns for Men of Bronze.  This allows players to link their games together into a larger narrative or campaign.  They are designed to be loose so that players can create their own narratives in their own spaces of the Greek world.  Thucydides and Herodotus do not cover ever battle or ever campaign that occurred in then Greek world.  These rules give you space to run "What If", ahistorical, and free-flowing campaigns of your own.  The can be used with or without a map, and can be used with any number of factions/players in the campaign.  

The campaign rules are an element I try to add to all of my games.  However, space restrictions in Men of Bronze led to them being trimmed.  However, now with Hercules Abroad they are back in the game!  


Of course, this is only the first supplement for Men of Bronze.  There is still room for a few more supplements with new Lines-of-Battle, Historical Scenarios and Campaigns, more "What If" content, and potentially adding "Mythical" battles as well.  If there is a particular Line-of-Battle, Historical battle, Historical campaign, or other content you want to see for the rules, let me know in comments!  You can help shape the future releases and content for the rules.

If you want to expand your Men of Bronze experience, I suggest you head on over to the Wargame Vault and pick up your copy of Hercules Abroad.  


You can follow Blood and Spectacles Facebook page for more fun: https://m.facebook.com/pg/BloodandSpectacles/posts/?ref=bookmarks&mt_nav=0

Or our website:

Or our Messageboard:

Or our Wargames Vault Page:

https://www.wargamevault.com/browse.php?keywords=blood+and+spectacles&x=0&y=0&author=&artist=&pfrom=&pto=  

Monday, March 1, 2021

Battle Report: Castles in the Sky- Off the Gold Coast


By 1901, the British had established a colony in the Gold Coast after fighting a number of wars against the indigenous Ashanti/Asante peoples.  The British had built a number of railways across the region in order to transport gold and other resources to the coast for export to Britain.  This proved to be a lucrative trade route.  

At this point, West Africa had been gobbled up by a number of European colonial powers including the Portuguese, Belgians, Germans, and the French.  That made control of the air and sea lanes from West Africa back to their colonial overseers a matter of National importance.  It was in such regions that Great Power politics tended to rear their head. 

Mission: 

Again, we used the random scenario and complication generator to determine today's mission.  We rolled up the Convoy Raid scenario.  The British were determine to be the defenders, while the French were going to be the Attackers.  

The Complications table determined that Cloud Cover was going to be in effect.  At Altitude 7, and clouds covered the entire board.  That means shots in, out and through the cloud bank can not be made.  You can only target ships at Altitude 7 if you are also at Altitude 7 and short range.    

Forces: 

L'Aire National

Pascal- Commodore Murat

-1 Descartes Cruiser- Command 2

Tangiers- Captain Guy-Victor

-1 D'iberville Cruiser- Command 3

Casablanca- Captain Bayard 

-1 Chasseur Destroyer- Command 1

Durandal- Captain Valjean

-1 Voltiguer Destroyer- Command 3

Arc- Captain Danjou

-1 Voltiguer Destroyer- Command 3


British:

HMS Blake- Commodore Boyle 

-1 Warrior Cruiser- Command 2

HMS Theseus- Captain Franklin

-1 Active Class Light Cruiser- Command 4

HMS Banshee- Captain Malden

-1 Bull Finch Destroyer- Command 4

HMS Pitt- Captain Horton

-1 Shah Frigate- Command 4


2 Merchant Men- Command 1

- Marie of Liverpool

- African Princess

Set-up:

As usual, we are using a 48MU by 48MU board.  1 MU equals 1 inch in this battle.  

We randomly determined terrain using the chart in the book.  We rolled up Altitude 1 hills x2, and a land feature that plays no impact.  Therefore, we set-up a hilly coastline on the west side of the board, the flank of the fleets.  This will represent the coast of West Africa near the Gold Coast.  

We also rolled up a Cloud Bank which we placed towards the centerline on the East side of the board.  It was at altitude 3.  Of course, the complication also places cloud cover across the whole board at Alt 7.    

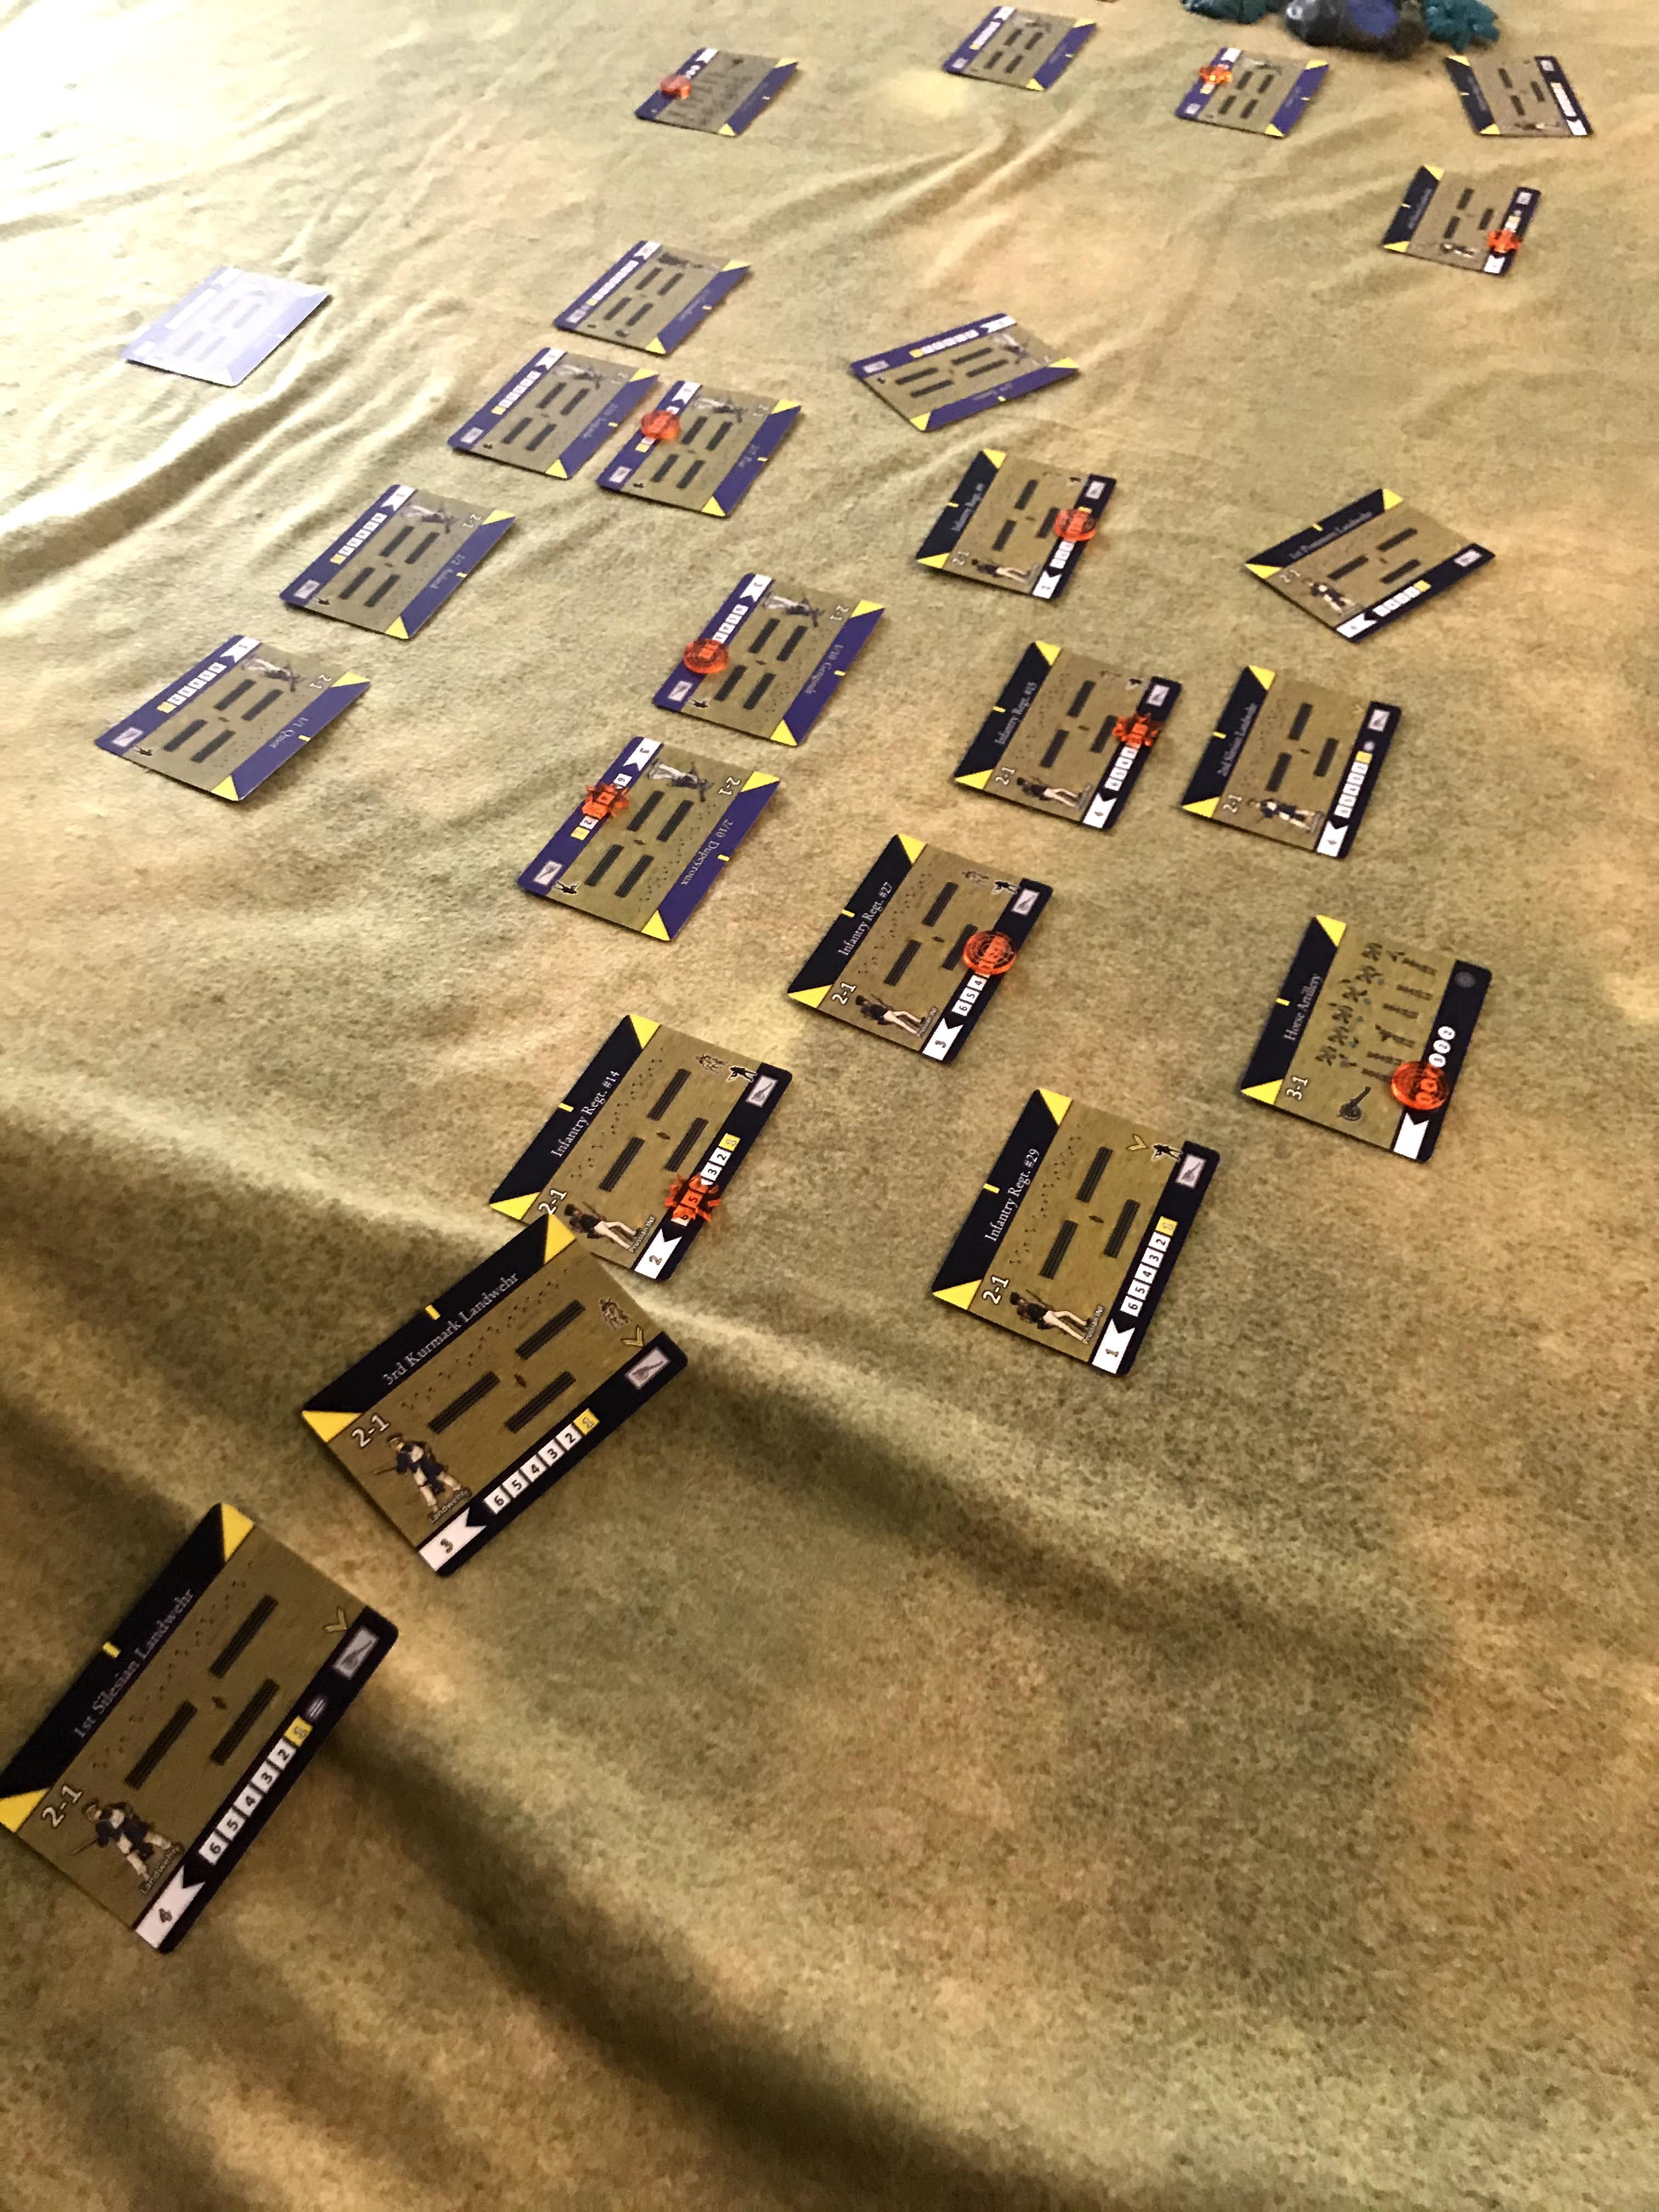
The Marie of Liverpool is placed in the center of the board.  For the merchant men I am using Dystopian War airships, I believe they were from the American fleet.  


Merchant Men airships

The rest of the Convoy is placed within 12 MU and all facing the North.  The HMS Blake is in the lead of the convoy, and the HMS Theseus is in the rear.  The Destroyer is on the East side, with the Frigate on the West side of the convoy.  The Merchants are at Altitude 4, and the escorts are at Altitude 3-5 depending on the ship.  They are at speed 4.    


The French ships are coming from the Northeast corner of the board.  The Pascal is leading the attack, with the D'iberville on the flank.  The Destroyers are grouped together as well into a battle group, coming on the Northern edge of the attack.  The French Destroyers are coming in fast and high at Alt 7 and Speed 7.  The Cruisers are at Speed 5 and Altitude 5.     


Turn 1: 

The French have 2 Command dice + 3 for escorts.  The British have 2 Command and + 2 for escorts.  The French get max successes at 5, to the British 3.  The French elect to go first this turn. 

Move:

The French fleet begins to break formation as they close in on the Convoy.  The Destroyers move quickly and up high to try and cut off the Merchant ships path.  Meanwhile, the HMS Blake turns towards the attackers and challenges them head-on.  The Cruisers move in much slower than their Destroyer brothers and try to get the angle for future shots, and to challenge the British Cruiser.  Meanwhile, the British escorts try to close in with their charges, so they can provide over-lapping Point Defense fire for the inevitable Torpedo attacks.  


Battle:

The battle starts proper with the Pascal firing her Air Torpedoes into the oncoming British cruiser.  However, the Point Defense looks lively and destroys them, causing 2 friction.  

Commodore Boyle sees the danger from the French destroyers and uses their batteries on them, but fails to hit the darting craft with light and medium batteries. 

Despite taking fire from the HMS Blake, the Casablance fires air torpedoes at the lead Merchant man, the Marie of Liverpool.  There are no British escorts close enough to provide Point defense support, but the Torpedoes miss! 

The HMS Pitt fires a torpedo at the oncoming Durandal French destroyer, but Point defense blasts one out of the sky, while the second misses.  1 friction on the Destroyer.

The D'iberville Torpedo Cruiser targets the HMS Blake, and unloads.  The British point defenses fail to hit any of the oncoming torpedoes. The Commodore commands all hands to Brace!  However, his orders come too late as two torpedoes smash into the ships super-structure and detonate for two hits! 

The Bull Finch destroyer fires a burst of Air Torpedoes at the French destroyer, Durandal.  Point defense destroys two of the oncoming torpedoes, and the other two streak by and miss. 

End:

Both hits the HMS Blake just remove Hull armor.  She is down to 5 all ready!   

The French have 3 Friction and the British have 4.  The respective commanders roll more than enough to remove all Friction this early in the game. 

Turn 2: 

French roll 1 to the British 2 successes.  The British decide to go first this time. 

Move: 

 The French Destroyers try to disrupt the path of the convoy and get intermixed up close.  Perhaps their light batteries can even play a part in the battle?  The HMS Theseus and the HMS Banshee try to stay close to the Merchants to provide support with their Point Defense and guns.  Meanwhile, the HMS Pit moves to engage the French.  The HMS Blake blows smoke for protection, and continues its duel with the Descartes, despite being damaged.  The Tangiers tries to skirt past as she re-loads her torpedo tubes.  Her target is the Merchants. 


Battle: 

The shooting starts with the British HMS Banshee attacking the Casablanca up close and personal! Destroyer on Destroyer action! Hot! The Casablanca destroys an incoming Torpedo with Point Defense, but one gets through and causes a hit! 

The French Voltigeur Destoyer Arc launches a screen of Sky Mines in her wake at altitude 4.

The HMS Theseus uses her Medium Batteries to pound on the Durandal!  Captain Valjean decides to Brace from the heavy shells using the last French command.  It was a wise move!  As he saves 1 of 3 potential hits. 1 bounces off her armor, but 1 strikes home! 

The Durandal unloads a screen of Sky Mines behind her at Altitude 5.  This is a danger to many ships in the area!   Including the Casablanca!  

Due to the Smoke screen and altitude differences, the HMS Blake can not fire on the Tangiers or Pascal.  However., Commodore Murat decides not to fire a low probability shot in return and risk a battery jam either.  The Smoke screen worked.  

The Tangiers targets the African Princess, but this time the HMS Theseus is there to provide extensive point defense support. The British captain also calls on his gunners to fire for effect using the last British command.  It works, and destroys 5 incoming torps! The last one misses the African Princess, but hits the Theseus instead!  It is absorbed by her armor, and only causes 1 friction instead! 


End:

The Durandal has her Bridge damaged, while the Casablanca loses 1 armor due to a Hull breach.  

The French have 4 friction, and the British have 6.  The British roll to remove 8 and the French 9.  All friction is removed. 

Turn 3:

The French score 3 successes to the British 3.  Since the British had the initiative, they maintain it, but decide to go second this time! 

Move: 

The British Convoy tries to power through the French swarm!  However, the French cruisers are closing in on one side, the Destroyers on the other, and the Merchants are forced to dive under a screen of Sky Mines.  Their approaches are getting clogged up!  The HMS Blake fails to Come About with a Command, while the Pascal makes a Crash Dive to altitude 3.  The Tangiers also re-loads her torpedo tubes successfully.  


Battle:

Arc fires her light battery at the African Princess, but fails to damage her! In exchange, the Medium battery on the HMS Thesues cause 1 hit on the Arc!  

The Tangiers fires her forward Torpedoes at the African Princess again,  The HMS Thesues again uses her point defense to fire for effect, but fails the Command.  They still take out 3 torps.  However, two strike home on the Merchant Man!  The Tangiers Bow Battery also fails to fire due to a loading malfunction.  1 torp missed the merchant, and went after the Arc, but her PD crew swatted it down. 

The HMS Blake fires her stern turrets at the Pascal.  Commodore Murat fails to Brace, and two shells strike home!  The French are also out of Commands.

The Durandahl fires on the HMS banshee, but she uses the last British command to Brace! That was enough to ward off two hits from the French ship. 

The Pascal fires at a variety of targets, including the Marie of Liverpool and the African Princess.  The lead merchant takes a hit, as the starboard battery jams!  The bow light battery also targets the HMS Banshee, but her Brace absorbs the hit!  


End:

The Pascal was hit right in the Magazine and explodes in a 3MU radius!  No other ships are hit by it.  Commodore Murat is killed and the ship is destroyed!  The Arc also has her rudder jammed!    

Meanwhile, the Marie of Liverpool has her screw fouled, and the African Princess is damaged and on fire! 

The Tangiers manages to repair her forward battery. 

The French have 1 Friction, and the British have 5.  The new French officer is Captain Guy-Victor of the Tangiers, who clears with 12, and the British clears with 9 as well.   

Turn 4:

Demoralized by the loss of their Commodore, the French get 0 successes, to the British 2.  The British decide to go first.  

Move:

The Marie of Liverpool stalls as her screw is fouled and she was going too fast!  Her escort the HMS Pitt leaves the board safely. As the Casablanca closes in on her.  

The HMS Blake trundles up to support the Marie of Liverpool, while the HMS Banshee targets and closes on the Casablanca.  

The Durandal and Arc try to give chase, but need to avoid the mines.  Tangiers has to break off of her pursuit of the African princess as she drops below the mines and the HMS Theseus stays with her.   


Battle:

The HMS Banshee fires at very close range into the Casablanca.  However the destroyer weathers the storm with 1 hit and 1 friction.  

The Casablanca's light battery pepper the Marie of Liverpool with 3 hits and taking her to armor 0! 

The HMS Blake blows a smoke screen.  Meanwhile, HMS Theseus manages to tag the Durandal with a medium battery shot! 1 hit!

End:

The Marie of Liverpool explodes in a 2 MU radius! No other ships are hit.  

The Casablanca has her rudder jammed!  The Durandal is Crippled and chooses to Strike her colors.  

The Arc fixes her Rudder Jam which left her out of the fight earlier.  

The African Princess manages to put out her fire. She is badly damaged! 

The French lose their 1 Friction on the board. 


Turn 5:

The French score 1 success to the British 2.  The brits decide to go second. 

Move: 

Due to her jammed rudder, the Casablanca leaves the board! The HMS Blake also leaves the board. 

With her colors struck, the Durandal leaves the board too.  

The African Queen limps towards safety, but the Arc moves to get a shot at her.  However, the HMS Theseus moves directly between the two ships!  They will block any attacks on the Merchant Man with their own ship.  Such bravery! 

Meanwhile, the HMS Banshee circles back to fight off the Tangiers.  However, she bypasses them, but fails to Re-load! 

Looks like the French will not be able to finish the African Queen off this turn! 


Battle: 

The Arc is forced to shoot at the HMS Theseus, and causes 1 hit! Despite Theseus deciding to Brace! However, the HMS Theseus manages to get 2 hits back on the Arc. 

The Banshee and Tangiers have no shots. 

End: 

Both the Theseus and the Arc only have armor loss.  


Turn 6: Final turn!

2 French successes to the British 1.  French choose to go first.  

Move:    

The Tangiers re-loads torps and chases the African Queen, but to no avail.  She escapes as does the HMS Theseus.  The Arc Also leaves the board.  

The HMS banshee re-loads and chases down the Tangiers for a parting shot!


Battle: 

The Tangiers stern light battery hits the Banshee as she approaches.  In exchange, the Banshees torpedoes also cause a single hit and 4 friction,  

End:

Both ships simply take an armor loss.  


Conclusion:

Well, that was pretty brutal!  Two ships flat out exploded in this game!  So, let's see who won....

British lost- 10 armor loss total.  2 the HMS Blake, 1 on the HMS Banshee, 1 on the HMS Theseus, 2 on the African Queen, and 4 on the Marie of Liverpool which was a total loss.  

French lost- 14 armor loss total.  7 on the Pascal, 1 on the Tangier, 2 on the Arc, 2 on the Durandal, and 2 on the Casablanca.  If the Pascal had not blown up.... we might have won!        

British victory!  

The French simply disavowed Commodore Murat's actions off the Gold Coast.  It was even easier to do than usual, considering that the man himself was dead!  He couldn't defend himself.  Lord Grey of the British Foreign Office demanded that the French compensate them for the loss of their cargo, but the French simply countered with demands for the British to pay for their lost Cruiser.  The whole incident was referred to as the Pascal Affair, but since neither country did not wish to escalate too far; the whole thing was soon swept under the rug and forgotten. Events moved on quickly.

This was a new scenario and the first time we used Sky Mines.  This seemed like a good scenario for them, since as the French commander I could be relatively sure "where" the British convoy was going.  Therefore, I could put the Sky Mines in their path.  So, that is what I did!  To really make them work, I think you would need to deploy them on top of the enemy ship.  Today, they were just able to maneuver around them, and I was not in a good enough position to capitalize on their detours. 

The escorts being able to provide Point Defense support when within 2 inches of another ship came in VERY handy this game.  The Active single handedly kept the African Queen alive.  Perhaps it was the star of the game.  Meanwhile, the early damage the Warrior took kept her from getting too crazy and wanting to mix it up.    

Finally, Air Torpedoes proved their worth again.  However, at a few key times Commands were either unavailable OR the Command Test was failed.  This made sure that they did not dominate the battle space.  The D'Iberville Torpedo Cruiser is really good BUT it has not managed to be the decisive game winner yet.  At best, it is an annoyance.  

Interestingly the complications of the cloud cover and the cloud bank terrain played no part in this battle.  I thought maybe the Convoy would try to break up high to avoid fire, but they dropped to gain speed instead.  It ended up being a relatively low altitude battle. 

Overall, a fun game that turned into a close range slug fest!


You can follow Blood and Spectacles Facebook page for more fun: https://m.facebook.com/pg/BloodandSpectacles/posts/?ref=bookmarks&mt_nav=0

Or our website:

Or our Messageboard:

Or our Wargames Vault Page: