Or purchase all out games at the Blood and Spectacles Publishing Wargames Vault Page!

Or purchase all out games at the Blood and Spectacles Publishing Wargames Vault Page!
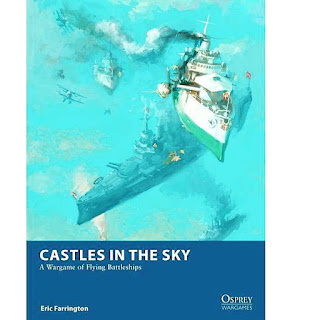
The Austro-Hungarians are back and looking to blow-up some more British ships! Their last face off had the Austro-Hungarians defend their borders against a British attack. I am not sure they still count as freshly painted, but the Dual Monarchy is looking to see what their bigger ships can manage!
After the Sudova Riviera Incident, the Royal Navy still had a bad taste left in their British mouths. They had paid reparations, but it was the HMS New Zealand that had been lost with all hands. This distaste made some captains in the Air Navy Service look for the chances to make the Austro-Hungarians pay.
The Austro-Hungarian fleet was on maneuvers above the Mediterranean, clearly in international airspace, far enough away from any shores. They had been careful to chart their path to avoid any international incidents. However, the British Navy heard about these maneuvers and moved to shadow the Hapsburg fleet.
On the third week of maneuvers, the British used a squall as cover to move close to the Austrian fleet. The British ignored all attempts to communicate, and their ensigns signaled that they were intent on battle. The Austrian admiral decided to indulge them.
The Forces
The British
Queen Elizabeth class- Battleship - HMS Valiant- Comm 4
Duke of Edinburgh class - Cruiser - HMS Black Prince - Comm 4
Warrior class - Cruiser - HMS Ajax the Greater - Comm 3 (Green Die)
Shah Class - Escort - HMS Trout - Comm 2
Austro-Hungarians
Erzhog Karl Class - Battleship- SMS Kaiser Max - Comm 3
Novarra Class - Cruiser - SMS Custoza - Comm 4
Novarra Class - Cruiser - SMS Schwartzenberg - Comm 3 (Red Die)
Zenta Class - Cruiser - SMS Spalato - Comm 4
Huszar Class - Escort - SMS Leopard - Comm 1
Huszar Class - Escort - SMS Panther - Comm 3 (Red Die)
Mission
This is a standard Patrol mission from the main rulebook. Therefore, it will be 6 turns and use Armor Loss as the victory conditions.
Set-up
The table is a 48 x 48 MU board with 1 MU equal to 1 inch. This battle takes place far out over the Mediterranean. Therefore, there is no ground-based terrain. However, there is one large cloud bank, a left-over from the squall between the two fleets at Altitude 6.
The Dual Monarchy is moving at an angle across the board in a general Line Astern formation between 3-6 altitude and 4 speed. The British are coming in Line Abreast in the center of their deployment at Altitude 6 and Speed 5.
As usual, I will be splitting the battle report into three broad sections to give an overview of the game, and not every detail and altitude and speed change. This division will be the Maneuver Phase, the Combat Phase, and the End Phase of the overall battle.
In addition, this will be my first game using my snazzy new Cigar Box Battles mat #105 Ocean. I have 1-inch hexes put on it in case I use it for other games that may need them. However, this game does NOT use the hexes for play. This is my fourth mat I have gotten from Cigar Box Battles and I really love my fleece mats. I have a general ground mat, a space mat, and an urban mat. They are easy to fold up and store, light for easy transport, and stand-up to wear and tear really well. Plus, I am in a cold region and in a pinch you can use these fleece mats as an emergency blanket!
Maneuver Phase
The Austro-Hungarian fleet had solid command and control. They were able to dictate the operational pace during this phase of the battle.
The Royal Navy eschewed subtlety in their approach and barreled forward just under the cloud heights. The HMS Trout moved to try and get in front of the Dual Monarchy battle line. The forward guns of the British fired at the enemy fleet ineffectively as they closed.
The Austro-Hungarians were less eager to mix it up and tried to get the British to close into their broadsides. However, return fire from the SMS Kaiser Max went catastrophically wrong when both main batteries jammed!
The SMS Schwartzenburg also rocked the HMS Ajax the Greater with a barrage of torpedoes early in the maneuver phase, causing two serious hits.
Battle Phase
The two fleets get to the action surprisingly quickly. The HMS Valiant manages to get the SMS Schwartzenburg into her port arc. The admiral gives the order to Fire for Effect, and the Austro-Hungarian cruiser is pounded by the big guns of the battleship for 1 hit and 5 friction.
This means the Schwartzenburg can not fire her Torpedoes. However, her sister ship the SMS Custoza has the HMS Ajax the Greater all lined up and fires away. The Warrior manages to avoid the worst of it, but still is hit by three, and one finds a home. Thankfully, they had prepared for impact and the damage was minor.
The British frigate blasted through the squall and fired her two torpedoes at the trailing SMS Spalato. Eagle-eyed gunners manage to take out one, while the armored belt absorbs the follow-up shot. In a similar fashion, the SMS Panther manages to hit the HMS Black Prince with a torpedo as the Austro-Hungarian escort manages to maneuver around the British fleet.
The SMS Spalato and the SMS Kaiser Max pour damage into the little HMS Trout causing the ship to rock and flounder from friction. In the exchange, her Rudder is jammed. The Kaiser Max manages to clear the jam from her main guns.
It is clear that the British are trying to cut-off the Austro-Hungarian command ship, so the admiral makes a decision and decides to Come About and plow into the Squall. However, the British ships are able to close the gap and get into short range and line-of-sight.
In desperation, the Kaiser Max splits her fire between the HMS Valiant and the HMS Black Prince. The Valiant absorbs the hits on her armor but takes Friction. The Black Prince tries to Prepare for Impact but fails! She takes friction and two more penetrating hits. The British Admiral smiles wickedly, but the grin is wiped away as his command ship is rocked by the desperate Austro-Hungarian fire. He can not Fire for Effect, but he is still confident his battleship outmatches his foe. The big guns roar out and riddle the Austro-Hungarian command ship causing 6 friction and 4 hits.
The SMS Leopard fires on the HMS Ajax the Greater, but the PD takes out two and the last torp misses. The Ajax adds more to the Kaiser Max damage with two more real hits and additional friction. The SMS Spalato targets the Ajax in retaliation but only causes friction. The Austro-Hungarian Air Torpedoes had trouble hitting anything due to the winds from the squall.
The fire from the Kaiser Max managed to unseat the forward Medium Battery of the HMS Black Prince, making the forward main gun inoperable. In return, the Kaiser Max blew-up completely from the furious firepower from the Valiant and Ajax the Greater! The detonation of her magazine is enough to engulf the three main British ships, and the SMS Leopard and Spalato. The HMS Black Prince is damaged from the blast and has her screw fouled, however her captain decides to stay in the fight. The HMS Ajax the Greater's bridge was destroyed in the blast as well. The SMS Leopard caught on fire, and her bridge was also destroyed. The HMS Valiant and SMS Spalato weather the blast unscathed.
The HMS Trout manages to repair her rudder. The Captain of the SMS Spalato takes command.
End Phase
Despite the loss of the command ship, it is still a close game based on Armor loss. However, the Austro-Hungarian fleet is out of position, while the British are still in a solid formation. Many of the Dual Monarchy's ships reload their Torpedoes, while the SMS Spalato Crash Dives to try and get out of the kill zone of the British fleet's guns.
The SMS Panther drives straight for the HMS Trout and fires its bow battery at it, causing a hit. Meanwhile, the British Admiral again fires for effect on the diving SMS Spalato and manages to tag it with a hit. The SMS Custoza manages to sink a few long range air torpedoes into the HMS Trout as well. However, the HMS Ajax the Greater also manages to hit the diving Spalato, but jammed her forward battery in the process.
The SMS Spalato had its screw fouled, slowing it in its sprint to escape. Meanwhile, the HMS Trout was crippled from the Torpedo and gunfire. The Captain strikes her colors to avoid destruction. The Leopard fails to put out the Fire on board.
The SMS Schwarzenburg and the Custoza decide they are not done with the British just yet, and line up for an Air Torpedo attack. The British HMS Valiant decides to Prepare for Impact. The two cruisers launch a withering barrage that manage to overwhelm the point defenses of the British and hit the Battleship and the Cruiser. The damage is enough for the HMS Ajax the Greater to Strike her Colors.
With that, the Captain of the SMS Spalato signals for his ships to scatter and return to base.
Conclusion
The British were left with the field of battle but took some serious damage in the process. Let's go to the big board. It looks like the British lost 17 Armor, to the Austro-Hungarian 13 Armor loss. Technically, a win for the Austro-Hungarian forces. However, the British can take some solace in destroying the Dual Monarchy Flagship and Battleship. The late "loss" of the HMS Ajax the Greater and HMS Trout shifted the balance.
Once again, the value of Air Torpedoes pays off. Their ability to snipe from lower or higher altitudes is great. The pair of Novarra class cruisers paid-off, and the Escorts were not bad either. Too bad the SMS Leopard had a command rating of 1, so I had them on Battleship escort duty. The SMS Panther worked great though. The rest of the ships in the Dual Monarchy did their job but were not nearly as useful.
The Queen Ellizabeth class battleship is terrifying to face. Those powerful main batteries combined with the almost automatic ability to Fire for Effect can ruin any ships day. It basically one-shotted the Kaiser Max! If the British have one, eventually it is going to get a powerful broadside off. It the HMS Ajax the Greater had not have struck their colors, it would have been a tie.
The Royal Navy sense of pride had been satisfied as they sent the Austro-Hungarian fleet scurrying back to port. Their control of the skies over the Mediterranean was confirmed for all to see. However, close analysis by the Admiralty after the fact revealed the truth. The Royal Navy had not covered itself in as much glory as they had hoped.
At the Concert of Europe, the other powers looked upon them as the aggressors. The Italians in particular were displeased with this show of forces in their desired sphere of influence. The Foreign Office had hoped to pry them from the Triple Alliance by humiliating their traditional foe the Austro-Hungarians, but doing so over the Mediterranean only made the Italians suspicious of British intentions in the region.
For the Austro-Hungarian point-of-view, this helped rally their balkanized people behind a united front. National pride had been hurt by the aggressive British moves towards them. The Dual Monarchy was more united than ever, and their ties with the Italians actually improved, despite territorial disputes between them. The loss of the Kaiser Max had been a terrible loss of life and air naval power, but the boost in unity may have been a fair trade. The crew became post-humous National heroes.
Until next time!
Or purchase all out games at the Blood and Spectacles Publishing Wargames Vault Page!
Oh boy, after painting up the Austro-Hungarian Fleet that I picked up from Scale Creep Miniatures, it was time for them to hit the table. Freshly painted miniatures are always a joy to take to the field, even if they often get hammered on the table.
The Dual Monarchy of the Austro-Hungarian Empire often treated the Balkans as their Sphere of Influence. The Dalmatian Coast and the Sudova Riviera in Montenegro were both claimed to be their own airspace. The Concert of Europe never officially agreed to this, but it was a defacto Fait Accompli. Therefore, it was not unusual for airships from the Dual Monarchy to be found patrolling the area.
However, the British Empire had been toying diplomatically with an Entente Alliance with Italy. The Italians and the Austrians were part of the Triple Alliance along with Germany. However, Italy craved the Dalmatian coast and the territory on the other side of the Adriatic. In order to curry favor and potentially cause a rift in the Triple Alliance, the British decided to test the Austrian resolve above the Sudova Riviera. This area is well known for its beaches and tourism, rather than its military importance.
The Forces:
Austro-Hungarian Empire
Kaiserin Class Armored Cruiser- SMS Maria Theresa - Command 3
Zenta Class Cruiser - SMS Aspern - Command 1
Novara Class Cruiser - SMS Saida - Command 3
Huzsar Destroyer- SMS Salamander - Command 2, Air Torpedo
British Empire
Indefatigable Battle Cruiser- HMS New Zealand - Command 4
Warrior Class Cruiser - HMS Armstrong - Command 3
Duke of Edinburgh Class Cruiser- HMS Regent - Command 2
Active Class Light Cruiser- HMS Antigone - Command 3
Today we will be playing a Patrol mission per the rules in the main rulebook. There will be no Complications.
Set-up
Today, we will be fighting on a 48 MU by 48 MU table. 1 MU will equal 1 inch.
The British are the Attackers and will be deploying approaching the coast. The Austro-Hungarians will deploy on the opposite board edge. Both sides are up to 12 MU in from their board edge.
The terrain is a coastline cutting across at an angle. The coastline has some cliffs and mountains of various heights of 1-3 at the coast, with two larger mountains at 4 and 6.
The British are coming in at an angle, looking to cut across from Southwest to the Northeast. They are at speed 5 and altitudes between 4-6. The Battle Cruiser is leading the way.
The Austro-Hungarians are coming in from the same edge but moving Northwest to Southeast. If no one changes course, the two sides will cross paths in the center of the board. They are at altitudes 5-7 and at speed 4 across the fleet.
As usual, I will be breaking the game down into three general phases to make it easier to document and follow the battle. I won't be detailing every ships movement or altitude change. The first two turns are the Maneuver phase, the middle turns are the Battle phase, and the final two turns are the End Phase. This is a 6-turn game.
Maneuver Phase
The HMS New Zealand picked up speed and moved to cut off the Austrian ships, while the rest of the squadron turned towards the enemy. The Austria-Hungarians turned away and stayed tight, with their Destroyer shooting out ahead and starting to turn back into the fray to snipe.
The HMS Regent opened the battle with some bow shots that rang off the hull off the SMS Maria Theresa, leaving three friction. The Maria Theresa returned fire and clanged a shell off the British cruiser as a warning.
Battle Phase
The British aggressively press forward, with the HMS New Zealand dropping to the same altitude as the Maria Theresa to attack. However, the Austro-Hungarians make an aggressive turn into the oncoming British and manage to Cross the T of the Cruiser squadron.
The HMS New Zealand and Regent Fire for Effect and rock the Austro-Hungarian flagship with 8 friction and 2 hits. The HMS Armstrong and Antigone fire at the SMS Saida, but their bow guns only manage to cause some friction. The Austrian command ship's rudder is jammed from the barrage.
The Austrians give as good as they get, with the Maria Theresa and Saida returning fire on the HMS Regent and landing two hits and some friction. The Regent's Air Screw is fouled and her Rudder jammed in the exchange. Air torpedoes from the Dual Monarchies flagship manage to strike home on the HMS New Zealand as well, causing a hit.
The shot was a lucky one as the New Zealand explodes in a cataclysmic chain of explosions! The explosion is so large that it hits the SMS Salamander and causes her screw to be fouled. It also further damages the HMS Regent! Promising careers are cut short as the New Zealand goes down with all hands!
The Captain of the HMS Regent takes command of the fleet, despite having his own issues.
With the British Flag gone, the battle quickly devolves into a general melee. The British elect the Austro-Hungarians to go first. The Maria Theresa is stricken and flies straight her rudder jammed. The SMS Saida uses a Command to Come About and turns to go straight down the throat of the British fleet, who scramble to get out of the way. Meanwhile, the Aspern and Salamander try to get into the fight. The HMS Regent is stricken to move slowly forward due to a jammed rudder of her own. The HMS Armstrong moves to engage the SMS Saida on equal terms.
The Captain of the Saida lets loose amongst the British cruisers with disappointing results. He manages to cause a hit on the HMS Regent, which damages the Bridge! Fire from the Aspern misses the Armstrong, but the Maria Theresa has better luck putting shells on target. The HMS Armstrong takes two hits and is Crippled in the exchange! The Captain calls for all hands to abandon ship as she starts to sink. The Salamander misses the HMS Antigone or has her Air Torpedoes swatted away.
Things look rough for the Brits, but it didn't go all the Austrians way as the Saida is pounded in her position between the two British ships. In return she is also Crippled and has her screw fouled. The SMS Saida is also sinking.
For their troubles, the SMS Saida and the HMS Regent strike their colors. They are too busy managing their damaged and sinking ships to keep going. However, the HMS Armstrong refuses to strike. At the end of the turn, their is still Friction on the HMS Armstrong and the HMS Antigone.
End Phase
In an attempt to cut-off the SMS Aspern, the HMS Antigone collides with the Austrian ship. the two ships become entangled. They are both stricken with 3 and 1 friction respectively. The Maria Theresa is content to gain altitude and try to move away from the battle, while the Salamander re-loads Torpedoes and moves in towards the last British ship.
Nobody has any shooting due to being entangled. Friction clears, but the HMS Armstrong was immobilized and stalled due to Friction last turn. This time, the captain strikes the Armstrong's colors.
The Antigone and the Aspern trade fire, with the Aspern getting the worst of it and losing some armor. However, the SMS Salamander manages to sink two Air Torpedoes into the stern of the HMS Antigone and causes her to lose armor and her rudder to jam. The Maria Theresa also fires a parting shot with her stern battery, but fails to cause further damage.
With that, the battle comes to an end.
Conclusion
Of course, the British Foreign Office quickly condemned the attack on the Sudova Riviera at the Concert of Europe. It was easy to blame it on a rogue Captain. Afterall, he was dead. He could not defend himself or claim otherwise. His ship and all its records were destroyed and lost.
The HMS Regent managed to limp back to British Egypt, but it was touch and go. The crew's effort was immortalized in harrowing ballad by some country wag. The crew of the HMS Armstrong were detained and the remains of the ship impounded by the Hapsburg government. However, SMS Saida ended up ditching in the Adriatic just off the coast, attempts to refloat it would be impossible. The crew of mixed ethnicities mostly survived, and the families of those who did not were given a pension in their post-humous honor. The Dual Monarchy pressed for the SMS Saida's replacement costs plus a ransom for their crew and the British gladly turned it over.
The Italians were not swayed to leave the Triple Alliance.
The Austro-Hungarians managed to defend their shores admirably. The British lost 21 Armor to the Austro-Hungarian 10. The British had their Flagship blow up, a Cruiser sink, and a second cruiser sent scurrying with her Colors struck. The Austro-Hungarians had 1 cruiser start to sink and strike her colors.
For the Austro-Hungarians, the star of the battle was the Maria Theresa who blew up the HMS New Zealand and did severe damage to the HMS Regent. The Saida deserves honorable mention as well. For the British? Well, something was wrong with their bloody ships today!
The key moment was when the Austrians managed to Cross the T of the British cruiser squadron while the New Zealand tried to cut them off. Instead, they turned into the attack at the last moment. Good show!
This battle had a lot of fun! Disentangling, Commands, Sinking, and Striking of Colors! There was so much Friction at a couple of points that it was not all cleared in the End Phase, which is unusual in a battle of this size.
Until next time.
Operation Hemlock has been a long running semi-narrative campaign m Skumgrod have been playing. It is set in our corner of the Warhammer 40K universe but uses a variety of games to play. Sometimes we use GW games, sometimes we use my games, and sometimes we use other, third party games. Today, we elected to play Restless Sun which is my model-vs-model sci-fi game.
Colonel Brusilov had Taskforce: Sword pounding the ork encampment for days now. He could hear the rhythmic cycle of the Earthshakers just outside of his command chimera. His command holo-display lit up with indications and assessments of where the great shells were striking in the Ork camp.
His artillery were running out of shells. Ork air attacks had weakened his supply lines back to North Ammoriss and his fellow Taskforce commanders had been unable to stop the greenskin raids. He was very close to breaking the Ork toe-hold on Grig's Rest, but his supplies had to hold out long enough for him to push them off the island once and for all.
Before he could launch his assault, he needed better intel. The Office of Strategic Intelligence was sending him streams of information but they were back at Northcomm, miles away. They couldn't tell him where the orks were hiding in their dug-outs, where they had hidden their traks, and where their gun emplacements were. Before he could order an assault into the ruins of the Ork camp he needed intel.
Brusilov tapped some controls, and a vox-channel opened to his adjunct at the front lines. The hiss of static filled the air, before it stabilized and toned clear.
"Major, gather scouts from each Company and send them forward. We need to know where to strike."
Forces:
Mission:
To match the situation, we decided to use the Control Terrain scenario for our battle report today. Models gain points for being in Difficult terrain at the end of the game.
For complications, we went with Minefield. Therefore, if you fail a movement roll you will lose Effectiveness from artillery, wild fire, or a mines. I mean, they are trying to scout an active warzone!
This scenario will last 8 turns.
Set-up:
We will be using a 36 x 36 inch board for this. Plus, since Difficult terrain is important, we will be putting 5 pieces of it out on the table. 1 near each deployment zone and three along the rough center line.
Both sides are deploying about 6 MU in from their own table edge.
As usual, this will not be a turn by turn break down of the game. This game went 8 turns. Instead, I will cover it in broad strokes for the Maneuver phases, the Battle, and the End Phases.
Maneuver Phase:
The Artillery barrage and mines made it hard to move forward. Some of the shells were landing dangerously close, disrupting maneuver by both sides. However, those that could pressed forward, with the two sides trading ineffective shots. The PDF troopers manage to force some of the leading elements of the Ork thrust with suppressive rifle fire.
However, an Ork manages to sneak around the edge and attack a pair of Guardsman, forcing them to retreat from the onslaught. The better training of the Troopers appears to be paying off!
Battle Phase:
A PDF Trooper with a support weapon flees from the board thanks to the ferocious Ork Assault. However, it does not go all the Orks way as concentrated rifle fire sees three Orks forced off the board and into retreat as well. The PDF have dug in at two buildings, while the Orks have 1 building and a Grot in a ruin.
The PDF Troopers manage to leap-frog forward, with mines hampering their movement. As a Guardsman makes the ruins, a startled Gretchin leaps out and forces him back with a flurry of vicious stabs. Meanwhile, fighting is house-to-house and at close range!
The Trooper with the Squad Support Plasma Gun manages to drive the Gretchin out of the cover of the ruins and forces him to retreat. The Orks manage to counter-attack and push the PDF troopers back, but it might not be enough as their momentum is quickly spent. Both sides still hold two objectives each.
The Ork assault is blunted by accurate rifle fire as the Ork Nob is forced back, as is an ork by the house. However, the Bomb squig re-orients itself and charges towards the PDF lines.
The PDF Sniper finally manages to outright kill an Ork with a shot to the head. Bam! Headshot!
However the Bomb Squig gets to the PDF positions and detonates. The blast outright kills 1 trooper and sends the other one scurrying away in shock.
A trooper scrambles into the ruins to contest it from the Ork hiding inside of it. With that, the Ork Nobs hears a distant horn blast, signaling for his Boyz to fall back and cover the final withdrawal back to the Green Zone from Grig's Island.
Conclusion
This was a hotly contested battle between the PDF and Orks. However, the PDF managed to score 2 objectives, while the Orks only had 1. The PDF lost 1 KIA and 2 MIA from the squad, while the Orks had 2 killed outright, while 3 Orks and a Grot were unaccounted for during the retreat.
It is hard to outright kill folks in this game, but you are constantly pushing them around the battlefield as they retreat, get Shaken, and Rally. Probably a bit more realistic in that sense, as you could see momentum shift when friction did its thing during game play.
I wanted to do one big Grig's Island showdown with Restless Galaxies, but I am not getting my Ork forces printed up for it. Challenges, challenges. Perhaps I will need to play a Aquanautica Imperialis Naval or even a Aeronautica Imperialis game to represent the Orks trying to flee the island, or even just a big Restless Stars or Xenos Rampant game instead?
It might be a while until my Skumgrod is available for another game. This one was on the books for a few months before we got it done. We will see what happens in Operation: Hemlock next!
Until next time!
Or purchase all out games at the Blood and Spectacles Publishing Wargames Vault Page!