Monday, February 28, 2022

Battle Report: In Strife and Conflict- Battle in the Levant


I have been doing on and off work on this "Biblical", "Chariot Wars", or "Early Iron Age" wargame for some time.  It is focused around the fearsome Assyrian Empire as the core of the game, and then their adversaries.  I have to admit, it is an area of interest and there are great resources out there.  However, it is also one of those areas where some one always knows betters than you do about it!  

The goal was pretty simple.  How do I modify the Men of Bronze system for this type of warfare? Some of the signature differences are the emphasis on mobility and firepower compared to Hoplite warfare.  There is also the difference between Iron and Bronze Age weapons.  How does a ruleset using the same system capture those pieces?  Below you can see some of my answers.               

The Assyrian Empire went through various phases of expansion and contraction.  The Near East and Fertile Crescent was full of powerful rivals, usurpers, and claimants to the throne of empires.  It was always fluctuating between a state of offensive and a position of defense.  

During a period of Assyrian contraction, the Egyptian Pharaoh's covetous eyes once again fell on the lands protected by Ashur.  This time, the rich trading posts of the Levant along the coast were deemed vulnerable.  Pharaoh gathered his army and set out across the Golan to claim these rich and wealthy cities for himself.  

Of course, the King of Assyria was not pleased.  He called upon his local Governor to raise a local army and repel the advance of the Pharaoh.  The King of Assyria was busy elsewhere, and the Royal army was engaged far away.  Therefore, it was up to the local governor to handle the crisis until the King himself could bring his own troops to bear.  

Like a thunderbolt, the Egyptians descended on the region.  Their arrows were soon blocking out the sun as the Pharaoh's forces sped from the desert.  However, the Assyrian forces were soon there to meet them as the Egyptians approached one of the regions many walled cities.  

Forces: 

I am using the Assyrian Force straight out of the In Strife and Conflict sample army lists.  

Assyrian Forces:

Heavy Chariots- General

- Composite Bow

- Iron Weapons

2 Archers

- Composite Bows

2 Auxilliary Troops

- Iron Weapons

2 Warband Infantry

1 Skirmisher

New Kingdom Egyptians:

3 Light Chariots

- Composite Bow

- 1 with General

2 Levy Infantry

- Bows

2 Archers

- Open Order

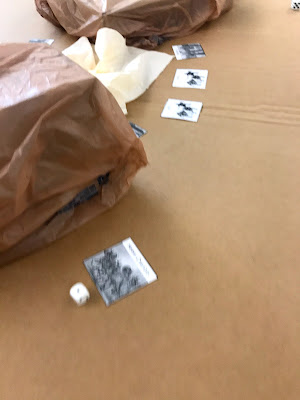
This battle will be using my famous paper templates for this battle, as I do not have suitable armies for this period yet.  I find I can create rules faster than I can source and paint figures for them! 

Mission: 

We randomly rolled a Secure and Control scenario with Delayed Units as the complication.  

In this case, we decided the objective would be a Watering Hole the armies need to secure to continue operating in the region.  We rolled up terrain as normal, and then placed the Watering Hole in the center of the board.  

The Egyptians are the attackers.

Set-up: 

We used the rules in the book to set-up the terrain.  We rolled up the following terrain: 2 Level hill, Swamp, 1 level hill, and the no additional terrain.  Per the Scenario description, The Assyrians set-up the terrain.  Unsurprisingly, the Assyrians put the hills on either side of the object, to limit the maneuverability of the Egyptian chariots around the objective.  

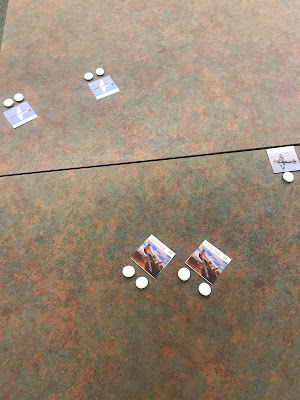
For this battle we are using a 48MU by 48MU board, with 1 MU being an inch.  For the table covering, I am using a cardboard box, and the two hills are more boxes with brown plastic coverings.  Why the low rent terrain?  Because that is what I had available at the moment! 

The Egyptians choose to take the South side of the board, while the Assyrians take the North.  It will matter little as the hills are across the center of the board, with the swamp in between around the watering hole.  

The Egyptians place the Levy in the center, with the archers on both flanks.  The light chariots are placed along right flank.  


The Assyrians place their Heavy Chariots in the center, flanked by the Auxiliary Troops as the spearhead of their assault on the watering hole.  Archers then are on the flank of each Auxiliary force.  Both flanks are then held by the Warbands.  Finally, the Skirmishers are placed to the fore of the force.


We then roll for Delayed Units and find the Assyrians are missing 1 Aux Infantry, 1 Archer, 1 Skirmisher, and 1 Warband.  There goes a flank! 

The Egyptians have two light chariots late for the battle.  Their speed should make it not an issue. 

Turn 1:

 Both sides get their King' Decree tokens to start the game.  The Assyrians get  4 and the Egyptians get 5.  Those Delayed units reduced the normal total.  The Assyrians go ahead and bid all 4 to get the ball rolling, while the Egyptians bid 2.  Assyrians go first.  

There is no fancy maneuvering here as the two forces move towards the Watering Hole.  Chariots from both forces turn to go around the edge of the two tier hill in an encircling maneuver.  They are all too far away for shooting or combat yet.  The second Assyrian Auxiliary Unit gets to the battlefield.  The two Egyptian Chariot units also appear.  

Turn 2: 

The Assyrians have 5 King's Decree while the Egyptians have all 7.  This time, the Pharaoh bids 4, and the Assyrians again bid all 5. 

The Assyrians seem focused on getting to the Objective and drive forward with their infantry and archers as fast as they can.  The Egyptians do not interrupt.  They seem content to wait for their chance to move.  Another Unit of Assyrian Archers and Skirmishers show up at the battlefield.  

The Egyptians also move forward.  The lead Chariot waits for his fellows to catch up.  No shooting occurs as the range is still to far.  


Turn 3: 

The Egyptians bid 5 again, to the Assyrian 0.  Looks like the Assyrians want to see how the Egyptian attack develops before committing to their response.  

The Egyptians move up across the center line, and the Assyrians let them.  As the Egyptians round the hill, they try to fire on the Assyrian charioteers, with Move and Shoot orders.  However, they are out of range still.  


The final Assyrian unit still does not show up at the battle.  Skins will be flayed for this!  The Heavy Chariots pull up and wait for the newly arrived Archers who move up to support their general.  They seem to be setting up a refused flank as the Egyptian Chariots race towards their edge of the battle.  The rest of the army continues to move to the objective. 


Turn 4: 

The Egyptians again bid 4, and the Assyrians bid 0.  The Assyrians seem content to now let the Egyptians move first to show their hands and avoid archery fire. 

Egyptian archers take up position at the edge of the swamp leading to the watering hole.  There they wait for their Levy Infantry to catch up.  The Light Chariots race around the hill and this time the lead chariot has a shot at the Assyrian General!  Arrows fly and have the range, but not enough to cause any serious injury yet.  

The Egyptian attack only helped the Assyrian Governor determine the range and call the charge.  His Heavy Chariot rumble forward.  The Egyptians use a Point to evade, while the Assyrians try to pursue. The momentum of the Assyrians is enough, and they slam into the wheeling Egyptian chariots.  The Assyrians roll a perfect attack with their iron weapons, and the Egyptian unit is obliterated! First blood to the Assyrians!  However, they also lose 1 Courage and begin to waver. 


The rest of the Assyrian army moves up.  One unit of Archers and the Skirmishers set up to support their general.  Meanwhile, the rest move to the watering hole, but are just out of range to fire.

Upon seeing one of their Chariot units plowed through by the Assyrians, one of the remaining light chariots begins to waver.   

Turn 5:

The Egyptians get 6 King's Decree compared to the Assyrian 6.  This time the Egyptians bid  2, while the Assyrians bid 3.  The Assyrians seem ready to go first now.  However, the Egyptians decide to throw in 1 more to force a roll off. The strategy worked as the Egyptians win it! 

Immediately, they rally their wavering Chariots.  The Pharaoh's chariot rushes ahead and charges at the Skirmishers, who try to evade.  The Pharaoh pursues and easily catches them.  The Chariots reduce them to 1 Courage left, but also lose 1 Courage of their own.  

The Assyrians try to interrupt with a King's Decree.  The roll-off goes to the Assyrians this time.  The archers in the Assyrian right open fire on the last Chariot, but are too far away; even with their Composite bows.  

The Assyrian Auxiliary Infantry move up to prepare to assault the watering hole next turn.   The warbands are ready to act as a reserve if needed.  


As the Assyrian player touches the Heavy Chariot, the Egyptian player decides to try to interrupt with their last King's Decree token.  In the ensuing roll-off, the Assyrians win.  The Assyrian General rallies his fellow charioteers and turns the corner and makes for the Egyptian infantry and ignores the other Light Chariot.  

The second Egyptian chariot moves up and supports the Pharaoh's in combat, and together they scatter the Assyrian skirmishers.  As the Skirmishers flee, a band of Assyrian Warband Infantry enter the battlefield nearby. 


 Turn 6: 

Both sides have 6 King's Decree, and there is a tense stand-off around the watering hole.  No one really wants to go in first and get shot to pieces by arrow fire.  However, the Assyrians bid 1 King's Decree for initiative, but the Egyptians bid 2! 

The Pharaoh's Chariots move between the newly arrived Warband and behind the Assyrian archers.  They fire their bows, and cause the Archers to lose 1 Courage and begin to Waver.  The Chariot is not maneuverable enough for them to get a charge off.  

However, the Assyrians see a chance and try to win Initiative with a King's Decree, and succeed.  The newly arrived Warband charges the Pharaoh's Chariot, but the Egyptians manage to successfully Evade with a King's Decree.  That was close for the Pharaoh! 


The Wavering Assyrian Archers fire at the other Egyptian Chariot unit and manage to reduce it down to two Courage.  However, it doesn't waver.  The rest of the Assyrian infantry closes in on the swamp edge.  Meanwhile, the Heavy Chariots move up menacingly on the Egyptian infantry's flank.  They fire their Bows at the Levy, but fail to cause any serious damage.  

The Egyptian archers fire at the closest Assyrian infantry and cause them to lose 1 Courage from their combined barrage.  The Levy infantry fires on the oncoming Chariots, and reduces it to 1 Courage with surprisingly accurate shooting.  The Assyrian General does not waver in his duty!   


The second Egyptian Chariot moves around the Assyrian Archers nearby and peppers them with arrows and reduces them to 1 Courage.  

Turn 7: 

Both sides still have 6 King's Decree despite a very active Turn 6.  The Egyptians bid 3 King's decree, while the Assyrians bid 2. The Egyptians look like they have won, but the Assyrians decide to throw in one more for a roll-off. The Assyrians win it! 

The Assyrian Warband infantry charges into the Pharaoh's chariot, and there is no chance to evade!  However, the second chariot is JUST close enough to offer support!  It devolves into a bloody melee.  Both units are reduced to 1 Courage and are Wavering.  


As the Assyrian touches the Heavy Chariots, the Egyptian again uses a King's Decree to contest the Initiative.  This time, the Egyptians win it.  The Egyptian Levy fires on the Heavy Chariots, and uses their last King's Decree for re-rolls, but fails to finish them off! 

The other Levy moves towards the watering Hole with the Archers firing in support.  The closest Assyrian infantry is reduce to 2 Courage but is not wavering.  The Egyptians have no more actions!  

Play goes to the Assyrians.  The Heavy Chariots charge into the closest Egyptian infantry.  The result is anti-climactic as the Levy lose 1 Courage, and route the Assyrians and their General!  This will force a Collapse test at the end of the turn. 

The injured Assyrian infantry declares a charge and shambles into the swamp.  however, they come up short and begin to waver!  The second infantry unit also moves in.  The Archers fire on the Egyptian archer unit and easily routs them with their firepower! 


The Egyptian units that see their Archers flee, stay strong.  However, the Assyrian warband and both archer units flee at the loss of their general!  Who will pay them?           

Turn 8: Final Turn

Last turn was tough for the Assyrians!  We hand out king's Decree and the Assyrians have 3 to the Egyptian 5.  However, the Egyptian Chariots are barely hanging on! The Assyrians bid 0 and the Egyptians bid 2.  

The Egyptians start by barraging the injured Assyrian Infantry with arrows from their archers.  It is enough to destroy the unit and send it packing!  The Levy moved up to cover the objective.     

 Finally, the Assyrian Warband is routed by the Egyptian chariots, but they do enough damage in return for the Pharaoh to call it quits too.  The Egyptians and the Assyrians will both need to make Collapse tests at the end of the turn! 

Finally, the last Assyrian infantry unit gets to grips with an Egyptian Levy unit in Close Combat in the swamps!  The Assyrians and Egyptians are hampered by the Terrain but Egyptian re-rolls means the Assyrian lose 1 Courage to the Egyptian loss of 2.  That leaves the Levy with 1 Courage left as they had been hit by the Heavy Chariots before.  However, neither side wavers!

The Assyrians neither waver nor Collapse as their fellow infantry unit routs from missile fire.  Meanwhile, the Egyptian Levy stay put in the swamp, while the Archers flee! 


Conclusion

Night falls, and neither side has decisively beat the other side.  The Egyptian Levy hold the Watering Hole, but the Assyrians are also there.  Both sides realize that the battle has been a costly draw, and withdraw back to their starting positions from the day before. 

The Assyrian Governor has the remaining troops disperse back to the local garrison's to defend the walled cities and to defend against treachery.  He knows the King's army will be marching to his aid soon, and he just needs to hang on long enough for the might of the full Assyrian army to arrive.  He urgently sends word to the king of his regional armies' defeat using a courier.

The Egyptians also find themselves in a bad position.  Their chariot forces were smashed in the fighting, and are in no position to continue without a re-organization.  With his striking force in shambles his chances of over-awing a local city and turning it is slim.  Without a base of operations in the Levant, the Egyptian supply situation looks tenuous at best.  Without the water hole, the Pharaoh's troops will soon become thirsty.  Worse, the regional army was broken, but the Assyrian main army could be arriving soon.  

After consulting with the gods of Egypt, the Pharaoh prudently withdraws back to the safety of his own realm.              

Well, that was good fun!  Neither side could rest the upper hand away decisively in the end.  As the Pharaoh, I had a blast racing around in my light chariots and shooting at stuff!  If only my third unit had not been obliterated by the Assyrian Heavy Chariots so early!  Ultimately, my archery platforms provided almost no help with the actual main objective, but it kept the Assyrians from massing their forces at the watering hole as they busily tried to shore up their flank and rear!  My Egyptians had worse bows and no Iron weapons, but they held their own. 

When the Assyrians connected with their Iron Weapons, they hit very hard.  Their improved bow range did not play too much of a part, nor did their slightly improved firepower.  My opponent did a great job deploying terrain to make for an exciting game and to limit my improved maneuverability.  They forced me to play their game around the objective, and it almost worked!  

Overall, I feel like the gameplay experience was a success!  It captured the right feel for these type of battles.  The chariots were fast, but the limit of the turn radius made a big difference.  One way I made the Chariots fast, was also slowing down non-chariot units.  

The main weapon of decision was the bow in this game.  It caused the most casualties over the course of the game.  Sometimes, a barrage of arrows was enough to rout an enemy unit completely!  That is one of the main differences between Greek style combat to the Eastern.  In Asia Minor, Turkey, Persia, etc. the bow was much more important in warfare. 

Finally, I made the Iron Weapons a special rule.  If a King's Decree token was used, it would allow bonuses in melee.  These extra dice made such units more effective than units without.  This feels right as Iron Weapons gave armies of this time period an advantage.  I feel the rules captured this well, and was not an overwhelming advantage.        

The key to making variant historical games using the Men of Bronze rules is the flavor rules.  Things like the Special Rules, Unit details, and the Upgrades can make the core rules fell very different even thought he basic mechanics of the game are basically unchanged.  I feel like this is a successful template for future historical rules.  

Anyway, enough blathering.  I had a lot of fun with this game, and I look forward to playing it again.  I will need to look around for some miniatures for this time frame.  I prefer 6mm so if you have any suggestions for ranges, please let me know! 


Become a Patron and get access to all the cool stuff, a peak behind the curtain of Blood and Spectacles, and early-access to playtest games!  


You can follow Blood and Spectacles Facebook page or Instagram for more fun! 

Check out the latest publications and contact me at our Blood and Spectacles website

Or purchase all out games at the Blood and Spectacles Publishing Wargames Vault Page!

Monday, February 21, 2022

Battle Report: Men of Bronze- Etruscans vs. Greeks


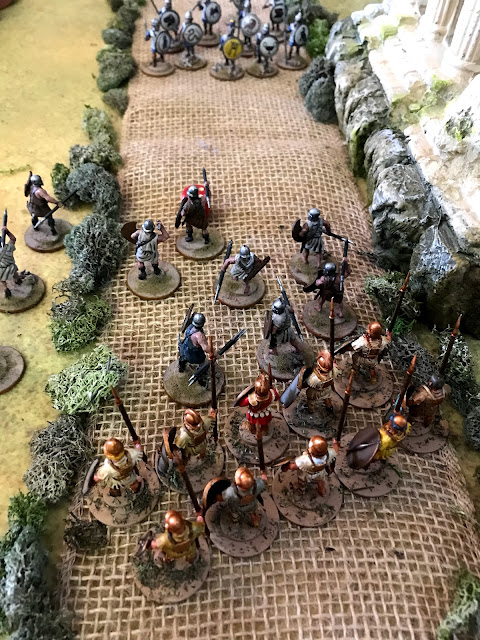
Today's battle report is a simple "What If" scenario.  This will take place on the island of Corsica as the Etruscans try to evict Greek settlers from the Island.  There is no indication that the Etruscan take over of the island in the 5th Century BCE was very bloody or violent.  However, after a few sea battles, the Greeks withdrew from the area and let the Etruscans take over.  You can find out more about this Corsican situation and the Etruscans in Hercules Abroad on the Wargame Vault.   

Forces
Today I am going to be using my Corinthian Greeks to represent the Ionian Greek settlers in Corsica.  This is a list straight from the Sample Armies section of the Men of Bronze rulebook.   

Greeks
2 Drilled Hoplites- 1 with General
1 Militia Hoplite
1 Archers
1 Psiloi
1 Peltast

The Etruscans will also be straight from the Sample Armies section of the Hercules Abroad supplement. 

 
Etruscans
1 Elite Hoplite- Disruption and General
1 Drilled Infantry- Disruption
2 Militia Hoplites
1 Psiloi

The Greeks generate 7 Arete Points, to the Etruscan 6.  


Mission
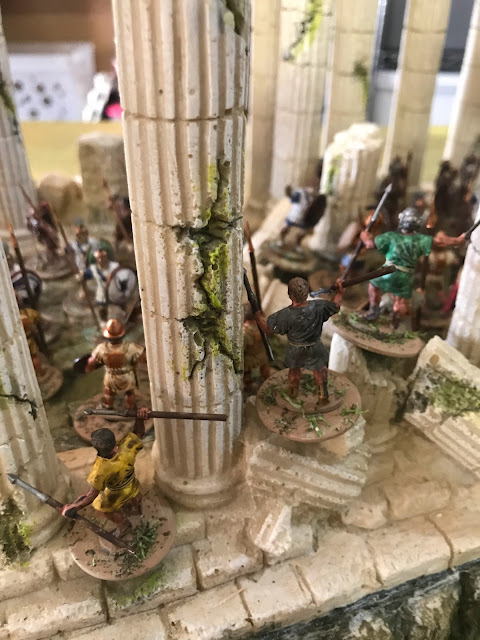
Today, the attackers are the Etruscans in a Desecrate the Sacred mission from the Men of Bronze rulebook.  The Greeks will put their Militia Hoplites in the Shrine, while the remaining army tries to come save them.  This represents the local farmers retreating to the shrine, and waiting for the city-state of Alalia to send back-up!  The Etruscans meanwhile have landed and are pressing inland, with this shrine between them and their destination.  Therefore, they have sent some troops forward to claim it. 

Set-up
Per the rules, a shrine is set-up in the center of the board, and it is manned by the Greek Militia Hoplites.  This battle is taking place on a 4ft x 4ft board.  Besides the shrine we will have a road leading by the shrine, and a nearby set of fields.  The Fields will be difficult terrain and the walls of he Shrine will be too.  Once inside, it is normal open terrain. 

We randomly rolled for Complications and got No Complications!   

The Greeks have one of their Drilled Hoplites moving up towards the shrine, with the other approaching on the other side of the shrine.  The Peltasts are anchoring their right flank, with the archers in the center, and the Psiloi on the left flank.  


The Etruscans are leaving the main assault in the center to their Militia Hoplites, supported with their Elite Hoplites to the place of honor on the right.  The Psiloi are covering the advance, with the Axeman on the left flank.  

Turn 1:
Both sides collect their Arete Points and decide how to spend them.  The Etruscans feel they have further to go, and bid 5.  The Greeks bid 4.  The Etruscans move out first.  


The Two generals largely seem willing to advance, and not try to interrupt each other as they press in.  The Corinthians seem willing to let the Shrine fill the center of their battle line.  


Turn 2: 
The Etruscans bid 0, the the Greek 3.  Greeks move first this time.  

The Greek Drilled Hoplites move up, while the Archers get to the base of the Shrine all ready.  The Etruscans interrupt and begin moving their Militia Hoplite attack force forward.  


The Greeks then take control back over.  The Psiloi on the far flank move up to support the Hoplites there, but stay in the field.  The Etruscans try to win back initiative, but fail.  The last Greek Peltasts move up the road.  

The Etruscans start to reshuffle their battle lines.  The second Militia Hoplite breaks into open order and heads for the road.  The Axemen shuffle to behind the main assault column, while the Elite Phalanx uses their Drilled ability to also shuffle to the side.  The Psiloi move up and toss Javelins at the defending Militia Holpites in the Shrine. There Javelin barrage fails to cause any Courage loss. 


Turn 3: 
The Greeks bid 3, to the Etruscan 2.  

The Greeks start by having their Peltasts charge up the road at the enemy Psiloi.  The Etruscan lights try to evade.  Which they do successfully!  These leaves the Peltasts wavering.  The Etruscans then try to interrupt, but fail!  

The Greek archers move into the shrine to support their countrymen there.  The Drilled Hoplites on the right flank break into open order and get on the road.  Meanwhile, the Drilled Hoplites on the left move up, with their Psiloi moving out of the fields in support of them.  

The Etruscans can move freely.  The Psiloi flow away from the oncoming Peltasts, while the Militia Hoplites snap into phalanx and charge into the Greek light troops.  There is no point trying to Evade, so they save their Arete Points for Re-rolls.  Despite the Re-rolls, the Militia Hoplites scatter the Peltasts with ease!  First Blood to the Etruscans!  


The Elite Phalanx move up tentatively, while the Axemen move up behind them to support, or drive off the enemy Psiloi.  The main Militia Hoplite attack waits patiently for the Etruscan maneuvers to unfold and holds steady. 


End:
In the End Phase, the Greek Peltasts are removed, but the Militia Hoplites, Archers, and Drilled Hoplites on the road all watch them flee.  They make Discipline tests.  The Hoplites pass easily, but the archers begin to Waver! 

Turn 4: 
The Greeks have lost a unit, so they are down to 5 Arete points, to  match the Etrsucans.  The Greeks bid 2, to the Etruscan 3.  

The Etruscans start by charging down the road in phalanx, into the Drilled Hoplites in open order.  The Etruscans manage to push them back 1 MU, and cause 1 courage loss.   


After this charge, the Greeks try to take over, but fail.  The Etruscan Psiloi and Axemen move up to support their hoplites.  The Etruscans cede control to the Greeks.  

The Greeks start by Rallying their archers with an Arete point.  They then use their last Arete point to skirmish their Psiloi into the field to flank the Elite Hoplites.  The rest of the army holds its position in the temple or at the edge.  


Turn 5: 
The Etruscans bid 2 and the Greeks bid 0.  

The Etruscans begin by launching their attack on the temple!  The Militia Hoplites charge in and barely make contact over the rough terrain.  They are supported by their Psiloi, while the Greeks are supported by their archers.  The fighting is inconclusive as both sides lose a Courage point. 

The Axemen try to charge through the fields to get to grips with the Psiloi, but the terrain is difficult and they fall short.  They are disordered!  


The Elite Hoplites move up towards the Drilled Hoplites, enough to protect the flank of the Militia trying to storm the temple.  With no more Etruscan movement available, the Drilled Hoplites charge the Elite Hoplites, but the Etruscans use their last Arete Point and counter-charge.  The Greeks are met with a hail of javelins as they close the distance due to the Etruscan "Disruption" rules.  The Etruscan Elite unit does its job and smashes the Greeks back with 3 courage loss, to losing 1 of their own! 


The Militia and Drilled Hoplites on the opposite flank of the board continue to grind on each other, the Etruscan farmers pushing the Hoplites back 2 MU and grinding up another point of Courage.  

Turn 6- Final Turn
Both sides have 5 Arete points.  The Greeks bid 1 to the Etruscan 0.  The Greeks go first.

After baiting the Axemen into the fields, the Psiloi use their improved maneuverability to charge into the flank of the Etruscan Elite vs. Drilled Hoplite battle.  The Axemen are too far out of position to catch up to them!  

The Greeks decide to start the melee on that flank.  Despite the clever Psiloi flank attack, it is not enough.  The Etruscans are reduce to 2 Courage, and pass their wavering test.  The Greeks are pushed back and begin to waver.  They have 1 Courage left! 

On the opposite side of the temple, the Etruscan Militia continues to push back the Greek hoplites.  However, they stay firm, with no sign of fleeing.  They are down to 2 Courage.  


The final battle is in the temple itself between the Greek Militia unit and the Etruscan Militia unit, both supported by other troops.  The Etruscans push their way into the temple and the fighting gets more intense.  The Militia Hoplites lose 1 Courage and are pushed back 3 MU, but it is not enough to rout them! 

Conclusion: 
Once in the temple, the Etruscan commanders is spooked by a sign from the gods!  He sees an owl wrestling with and killing a snake at the peak of the temple.  Such portents can only bode ill!  He orders his men to withdraw or risk facing the wrath of the gods!  

As the Etruscan troops fall back, the struggling Greeks give a ragged cheer!  The Etruscan advance on Aila has been checked.  There might still be hope to save their homes and farms after all!  

Well, as the Etruscan commander, I spent far too much time setting up my attack and not enough time executing it!  Another one or two turns and I would have been hosting a victory feast in the temple!  The Greeks were on the back foot.  However, time was of the essence and I let it slip away. 

I got the match-ups I wanted, but my opponent cleverly used their Psiloi to distract and hinder my advance.  They were a potential flanking force in being that could have scattered by best troops.  By the time I re-shuffled my battle line I had wasted 2 turns when I should have been attacking the temple itself.   


You can follow Blood and Spectacles Facebook page for more fun: https://m.facebook.com/pg/BloodandSpectacles/posts/?ref=bookmarks&mt_nav=0

Or our website:

Or our Messageboard:

Or our Wargames Vault Page:


Monday, February 14, 2022

Battle Report: White Star/Red Star - Combat Air Patrol during the Initial Invasion

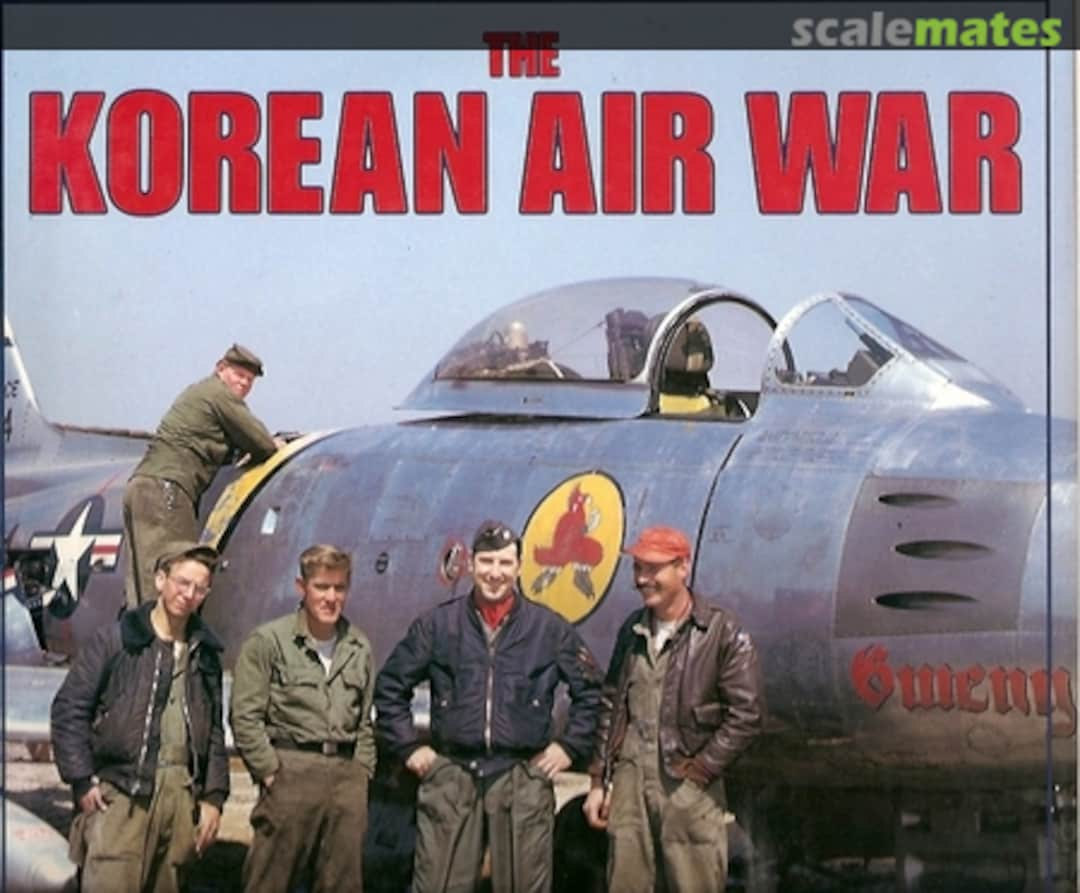
Image from here:
https://www.scalemates.com/books/the-korean-air-war-robert-f-dorr-warren-thompson--109961

Dateline: June 30th, 1950
Location: ON approach to Suwon Airfield

UN aligned countries were busily attempting to evacuate using the Suwon Airfield.  Meanwhile, North Korean forces were steadily advancing.  The Air Force strategy was to gain air superiority, interdict North Korean forces, and then engage in strategic bombing.  The North Koreans wished to support their ground advances.  

To this end, a CAP of Yak-9's and La-11 Fangs were loitering near the advance forces.  USAF on patrol to defend the Suwon Airfield were also in the area.  The North Koreans were routed to the area to try and drive the USAF aircraft off and clear the path for the ground forces to surge forward.  

I have been playing around with the core rules for Detection and the Action Economy for the game.  This is a V3 of the rules that I will be testing today.  The updates to Detection involve using the turn to influence the results of the detection.  The changes to the action economy are intended to keep game play dynamic like V1, but avoid the strange game play lags from that same version.  It also maintains the enhanced maneuverability and wingman rules from V2.  

As usual, I am using my paper templates again.  Altitude will be dictated by beads.  0= low, 1=combat altitude, and 2 = high altitude. 

Forces:

USAF
4 P-51 Mustangs- Experienced Pilots
2 P-80 Shooting Stars- Experienced Pilots

North Koreans
4 La-11 Fangs- Rookie Pilots
2 Yak-9 Fritz- Experienced Pilots

Sortie
This is a Combat Air Patrol. 

Set-up
The game uses Measurement Units instead of a fixed measurement system.  This allows players to match their models and boards.  Today I will be using a 48 x 48 MU board, with an MU being 1 inch.  We rolled for weather and found it to be clear. No terrain is placed. 

The North Korean forces are the attackers.    

The Sortie, Weather, and Attacker were all determined via the rules in the White Star/Red Star rules.   

Turn 1: 
Detection Phase: 
No one is detected, so we quickly move onto turn 2. 

Turn 2: 
Detection Phase: Again, no one is detected, so we move onto turn 3! 

Turn 3:
Detection Phase: This time, the Communist forces are detected.  Since it is Turn 3, they can deploy anywhere on the board up to 18 MU in.  The Fangs are placed in two groups as wingmen on each side of the board and angling in.  They have bad climb rates, so start at high altitude.  The Yaks are set up as separate planes in the center at combat altitude.  No USAF planes are detected yet.

Yes, that is a SPAM tape measure. 
I got it from the SPAM museum in Austin, MN


Rookie: 
The Fangs are all rookies.  They can turn or change altitude, but with no enemy targets, they stay on target for now and move straight.  The Yaks do the same.  

Experienced:
The Yaks can maneuver around if they wish, as they are experienced pilots they can maneuver, but opt to go straight.  The Fangs are rookies, so must go straight.  

Ace: 
Everyone must go straight.  The lead Yak hits the center line of the board.  


Turn 4:
Detection Phase: This time, the Communists detect the oncoming USAF Shooting Star jets!  They can deploy up to 24 MU in, and the USAF commander opts to keep them as singles.  They are at high altitude and are angling in on the rookie Fangs on the  communist left.  


Rookie:
The Communists have more planes, so can choose to go first.  The Rookies in the Fangs are set-up as wingmen so will move together.  

The Rookies bank hard into the oncoming Jets, which kills their speed.  However, they might get a shot off!  The lead plane opens fire, and futilely drains their ammo.  No hits.  The Shooting Star also fires as he closes, but fails to score any hits.  However, he still has ammo in the hoppers.  
  
The lead Yak #3, turns at 45 degrees towards the American planes, but is too low to engage.  The second Shooting Star closes in on the rookie Fangs, and his shots are true as he downs the wingman.  He also has ammo left.  

The remaining Yak and Fangs fly forward.  

Experienced: 
The Communists have more planes on the board so get to go first.  Fang #3 is out of ammo and lost his wingman, he elects to disengage as best as he can.  He flies into and past the USAF Jets, who try to turn back into the enemy formation.  Yak #3 tries to chase them down, but may not have the angle.  

Yak #4 turns away, while the two Fang rookies go straight.  

Ace: 
Everyone flies forward.  

Turn 5: 
Detection: This time, the Mustangs are also detected and they deploy anywhere up to 30 MU in on the board.  The Jets had done their job and distracted the Communists, and now the Mustangs buzzed into firing position on the Communist planes.  Now the USAF has the most planes.  


Rookie: 
Mustang #1 and #2 move in as a wingman pair up close to Fang #1 and #2.  They are very close and start peppering the Communist planes.  The lead Mustang misses, while the Fang evades from the second ones fire.  Neither Mustang is out of ammo.  

Yak #4 break away hard from his pursuers.  The maneuver helps him avoid one, but the lead Mustang opens fire.  The Communist pilot evades the incoming fire.  The USAF still has ammo left.  


Fang #1 and #2 dive away from their pursuers to Combat altitude.  

Shooting Star #2 drops altitude to Combat altitude.  Yak #3 turns to try to spin back into the dogfight with the Mustangs.  Shooting Star #1 also banks back towards the fight, but is too high.  Fang #1 goes straight trying to disengage.     

Experienced: 
Mustang #1 and #2 chase after their prey, right on their sixes.  Since they are tailing, Mustang #1 blows Fang #1 out of the sky.  However, Fang #2 manages to evade a similar fate!  The Mustangs still have ammo.  

Yak-9 #4 manages to bank away from his pursuers!  Instead, Mustang #3 and #4 try to set up to support their fellow Mustangs after Fang #2.  

Everyone else tries to maneuver back into combat, except Fang #3 who is still trying to bug out! 

Ace: 
Everyone goes straight.  This time, Fang #4 manages to disengage, which triggers the disengagement turn.  


Turn 6- Disengagement Turn
Rookie: 
Mustang #1 and #2 try to get the angle back on Fang #4.  However, Yak #3 gets the angle and distance on them and manages to snag Mustang #1 with a burst of machine guns!  He still has ammo left.

Blurry Gun Cam footage! 

Fang #4 drops to low altitude and flies towards cover beneath the Yak-9.  The other mustangs follow Mustang #2, hoping to turn in at the enemy and overwhelm them with firepower.  The Shooting Star #2 turns to stay in the fight, while the #1 flies above the communists at High altitude.  

Experienced: 
Shooting Star #1 stays high, while Fang #4 tries to get away at low altitude.  Mustang #3 and #4 turn into the Yak and the lead plane fires.  However, the Yak manages to evade.  

The Yak returns fire, and downs Mustang #3 with a barrage of machine guns!  However, this time he is out of ammo.  Shooting Star #2 turns into the scrap, but is probably out of position.  


Fang #4 disengages.        Mustang #2 also turns towards the Yak, but does not have the angle.  

Ace: 
Everyone goes straight.  However, Mustang #4 takes a closing head-to-head shot on Yak #3.  He peppers the plane, and it goes crashing down in flames!  


Conclusion: 
That one went down to the wire!  3 USAF kills to 2 Communist Kills.  USAF scrapes a win!  It ended up closer than I expected after the USAF got deadly positioning thanks to avoiding detection until late in the game!  

The new process provides the advantage to the more experienced pilots, and still keeps the action moving fast!  The previous V2 action economy seemed like everything was moving very slowly and sluggishly.  This new version feels pretty fast, even for the slower planes.  The jets were clearly faster!  

Shooting and evading still worked as intended.  Detection is better than it was before.  The Wingmen rules worked well, and provided an interesting decision point at deployment.  Later, there were clear advantages and disadvantages to being in a wingman formation.  That is good, as it gives more decision points.  

I think I need to go through a few more Bomber Intercept scenarios with the new V3, as well as a ground attack scenario or two and these rules will be ready for Post-production. 


Become a Patron and get access to all the cool stuff, a peak behind the curtain of Blood and Spectacles, and early-access to playtest games!  


You can follow Blood and Spectacles Facebook page or Instagram for more fun! 

Check out the latest publications and contact me at our Blood and Spectacles website

Or purchase all out games at the Blood and Spectacles Publishing Wargames Vault Page!


Monday, February 7, 2022

Wargame Design: Rules Lay-outs


Hold onto your hats folks, we are about to get into a riveting topic!  You can thank your buddy Evil Monkeigh over at the Delta Vector blog for this one!  I was sharing with him my Work-in-Progress design from Homer's HeroesAs always, he and the Google Group gave me some good feedback.  However, in the process he also recommended that I share some thoughts on rule book lay-out and design on my blog!  That was the spark for this post.   

You may notice that in my reviews, I rarely talk about how a book is laid-out or how the ideas are organized.  For the most part, I gloss over that.  I find reviews that tell me things about font size, white space, lay-out, page count, etc. to be adding words but not a lot of value there.  Yet, here I am about to talk about it.    

At first glance, how you lay-out your rules seems like an after thought for post-production.  After all, the key ideas are your cool new activation system, fluffing out your concept, or how to resolve an action.  Those are all very important, but are completely useless if no one can understand what you are trying to tell them. 

Remember, to be a game designer you need games for people to play.  In order for people to play your games, they have to be able to interpret your rules in a meaningful way.  


Homer's Heroes

The Rules Flow

The first thing to consider is what order to present your rules.  This is how you intend to introduce players to what they need to play.  There are a few ways to do this that I will outline below, and try to illustrate with a few examples.  

The 4Ms on the Page
With this method, the rules are laid out in the same order as the 4Ms of wargaming.  The first section is movement, the next is missiles, then melee, and then Morale.  The exact order may be different, but the core is there.  The game then moves to how to play a game and the scenarios.  

Examples include the venerable GW rulebooks of various editions, most Warlord releases, etc.  This has been the traditional approach to rulebook lay-out for decades.  

Pros: 
This is a very logical method of laying out your rules, and addresses all the major points of the game.  As a designer, you know you have hit all the basic elements of wargame design, as they are laid out right there in the rulebook! 

This method also works well if it also follows the turn structure of the game.  If a player's turn is move, missiles, melee, and morale then this method works really well.  The players is introduced to the concepts as they theoretically need them on their turn.  

Cons: 
Like all things, there is a wrong time to use this method as well.  Many games no longer follow the linear 4M approach to a player's turn.  Therefore, using this approach can lead to confusing or unclear rules interactions to develop.  In such a case, the rulebook themselves may have a chapter dedicated to "putting in all together" in order for a the player to see how the 4Ms actually flow together.  Games with action/re-actions and other less linear activation or turn structures can struggle using a 4M approach to lay-out.   

As You Play
This method of rulebook design focuses on introducing core concepts and ideas of the game, in the order you will encounter them during actual play.  The rules start with how you set-up your gaming table, how you recreate your minis to fight, and then progresses through to actually playing the game itself.  This is a more recent model of wargame design.  

The best example is the works of Joseph McCullough for Osprey such as Frostgrave and the like.  In these books, he start with gathering your toy soldiers and organizing them to play.  Then, he proceeds with how to use them on the table.  

Pros: 
This is a very intuitive way to approach rules lay-out and is especially helpful to someone new to wargaming.  Concepts and ideas are presented "just in time" to use them in the game.  Therefore, the way the rules interact is unveiled for the player in useful chronological order in bite-sized chunks.  They are not reading about rules not relevant to the situation they should be in on the table.  

Cons:
Most people do not read the rules as they play.  They read them before they start playing and then go back and try to apply them in game.   This approach can lead to big blocks of odd text in the center of your rules.  For example, you may have a lot of detail about warband generation, before players really know how the different warband stats connect to the game. 


Core Concepts
This approach starts with a brief description of all the "key ideas" or core concepts of the rules upfront, before going into the application in detail.  In this case, the first section will lay out the methods to roll dice, measure, and provide a definition of keywords.  The rules will then often refer back to these key concepts with simple phrases such as "Make a Morale Check" with the method of making a morale check outlined in the Core Concept section of the rules.  

Gamma Wolves is a great example of this approach.  The core concepts and glossary are dealt with early in the book.  As rules are introduced in the appropriate places, they refer back to these core concepts which the reader is all ready familiar with.  

Pros: 
This design approach gives the reader all the key ideas early and gives them a good grounding in the system before proceeding into the minutia.  It is also easy for players to reference these Core Concepts during play as they are all found in a single place, instead of scattered around the book.  

Cons: 
On the downside, you are introducing a lot of "upfront" work for the reader that maybe intimidating or off-putting.  Often, these core concepts can be technical in nature and can lead to confusion as there is no clear way to put an example to the concepts this early in the work.  That comes in the specific sections.  

Technical Writing
This format of rules writing is structured like a process document or formal writing style.  Frequently, the topics have a number, with various sub-numbers or bullets to indicate specific sub-sets of the header.  Each process or rule has its own heading and sub-heading that you can refer to.  This systems are often designed in as linear way as possible for the game system.    

This style was popular with game systems like De Bellis Antiquites (DBA) and Epic: Aramageddon.  

Pros: 
Everything has it place, and how it fits in relation to the rest of the rules is very clear.  How cover interacts with shooting is placed in a sub-heading.  If a player is familiar with the rules, they can easily find the sub-heading for any given situation.  They are also easy to place a table of contents and index to go along with such a rules system.  

Cons:
Such systems are often not fun to read.  It is like reading the Owner's Manual to reset the clock on your car stereo (is that still a thing that people do?).  

In addition, it can give a false sense of completeness and formality to the rules.  In my experience, their are just as many edge cases and rules gaps in these systems as any other.  However, the structure is designed to try and cover these gaps with formality and authority.  This can make interpreting the grey in the rules a bit harder.  

Hybrids
Every wargame designer has their own tastes and preferences in detailing rules.  It is often influenced by their own background and experiences with formal writing and wargame rules.  For example, my own preferences have been heavily influenced by a more laid back "English" style approach of the 4Ms with a dash of Core Concept thrown in for good measure.  Meanwhile, someone else may lean in Technical Writing with As You Play in spades.  A Hybrid method is simply mixing and matching the above styles into a unique package.  


Best Practices
No matter which lay-out style you prefer, there are a number of best practices you should consider when laying out your rules books.  These will help your reader interpret with clarity what you are trying to get across in your rules.  

Fluff and Rules Divide
You should never mix background and rules together.  There should be a clear divide between what is background/fluff material and what is actually rules.  That does not mean rules can not have thematic names or conventions, but the rules should clearly be rules.  Fluff or background should be separate by a visual or structural firewall. 

Signpost Asides and Examples
Be sure that when you are providing an example or an aside from the rules, it is clear.  This can be done with different fonts, text boxes, or a graphic.  It should be clear when something is a rule versus something that is there to illustrate writer intent.  

For example, I start all of my examples to rules with the phrase "For example" and usually make it Italics. 

Pictures and Diagrams
Where possible, use pictures and diagrams to illustrate key concepts in the rules.  This is not always possible, but if you can do it; do it. 

Images under Text
I am guilty of this one!  Looking at a wall of text can get boring and be intimidating.  It is tempting to put images, designs, and other thematic details under your text.  Don't do it!  It just makes the text hard to read and printing it out a nightmare.  

Fonts, Spacing, and White Space
We probably all learned about it in school, but stay relatively consistent with your format for when you use BOLD, Italics, and other font typesIn addition, be sure you are spacing appropriately or leaving white space around your columns.  Like I said, a wall of text can be intimidating but erratic walls of text are exasperating! 


Table of Contents and Index
If you can, help players out by giving them a table of contents with page numbers and an Index if possible.  Smarter people than I can even make the index into hypertext links!  If you can do that, please do it.  

Designer's Notes
I love Designer's Notes.  Here I get to show off how and why I made the decisions I did!  This gives the players an insight behind the curtain and a glimpse into Rules as Intended.  However, these should always be clearly separated from the main rules.  The two should not mix.  

Final Thoughts
You made it!  Congratulations!  

Not the most exciting Wargame Design topic but a necessary one.  The ability to get your ideas across in writing is important for a wargame designer at the moment.  Maybe someday, you will learn wargames by only watching the rules video, but this is not that day.  Therefore, thinking through and making decisions about your post-production work is critical for sharing your ideas.  

Once you have done it a few times, it starts to become second nature to you.  


Become a Patron and get access to all the cool stuff, a peak behind the curtain of Blood and Spectacles, and early-access to playtest games!  


You can follow Blood and Spectacles Facebook page or Instagram for more fun! 

Check out the latest publications and contact me at our Blood and Spectacles website

Or purchase all out games at the Blood and Spectacles Publishing Wargames Vault Page!