Showing posts with label etruscans. Show all posts

Monday, February 21, 2022

Battle Report: Men of Bronze- Etruscans vs. Greeks


Today's battle report is a simple "What If" scenario.  This will take place on the island of Corsica as the Etruscans try to evict Greek settlers from the Island.  There is no indication that the Etruscan take over of the island in the 5th Century BCE was very bloody or violent.  However, after a few sea battles, the Greeks withdrew from the area and let the Etruscans take over.  You can find out more about this Corsican situation and the Etruscans in Hercules Abroad on the Wargame Vault.   

Forces
Today I am going to be using my Corinthian Greeks to represent the Ionian Greek settlers in Corsica.  This is a list straight from the Sample Armies section of the Men of Bronze rulebook.   

Greeks
2 Drilled Hoplites- 1 with General
1 Militia Hoplite
1 Archers
1 Psiloi
1 Peltast

The Etruscans will also be straight from the Sample Armies section of the Hercules Abroad supplement. 

 
Etruscans
1 Elite Hoplite- Disruption and General
1 Drilled Infantry- Disruption
2 Militia Hoplites
1 Psiloi

The Greeks generate 7 Arete Points, to the Etruscan 6.  


Mission
Today, the attackers are the Etruscans in a Desecrate the Sacred mission from the Men of Bronze rulebook.  The Greeks will put their Militia Hoplites in the Shrine, while the remaining army tries to come save them.  This represents the local farmers retreating to the shrine, and waiting for the city-state of Alalia to send back-up!  The Etruscans meanwhile have landed and are pressing inland, with this shrine between them and their destination.  Therefore, they have sent some troops forward to claim it. 

Set-up
Per the rules, a shrine is set-up in the center of the board, and it is manned by the Greek Militia Hoplites.  This battle is taking place on a 4ft x 4ft board.  Besides the shrine we will have a road leading by the shrine, and a nearby set of fields.  The Fields will be difficult terrain and the walls of he Shrine will be too.  Once inside, it is normal open terrain. 

We randomly rolled for Complications and got No Complications!   

The Greeks have one of their Drilled Hoplites moving up towards the shrine, with the other approaching on the other side of the shrine.  The Peltasts are anchoring their right flank, with the archers in the center, and the Psiloi on the left flank.  


The Etruscans are leaving the main assault in the center to their Militia Hoplites, supported with their Elite Hoplites to the place of honor on the right.  The Psiloi are covering the advance, with the Axeman on the left flank.  

Turn 1:
Both sides collect their Arete Points and decide how to spend them.  The Etruscans feel they have further to go, and bid 5.  The Greeks bid 4.  The Etruscans move out first.  


The Two generals largely seem willing to advance, and not try to interrupt each other as they press in.  The Corinthians seem willing to let the Shrine fill the center of their battle line.  


Turn 2: 
The Etruscans bid 0, the the Greek 3.  Greeks move first this time.  

The Greek Drilled Hoplites move up, while the Archers get to the base of the Shrine all ready.  The Etruscans interrupt and begin moving their Militia Hoplite attack force forward.  


The Greeks then take control back over.  The Psiloi on the far flank move up to support the Hoplites there, but stay in the field.  The Etruscans try to win back initiative, but fail.  The last Greek Peltasts move up the road.  

The Etruscans start to reshuffle their battle lines.  The second Militia Hoplite breaks into open order and heads for the road.  The Axemen shuffle to behind the main assault column, while the Elite Phalanx uses their Drilled ability to also shuffle to the side.  The Psiloi move up and toss Javelins at the defending Militia Holpites in the Shrine. There Javelin barrage fails to cause any Courage loss. 


Turn 3: 
The Greeks bid 3, to the Etruscan 2.  

The Greeks start by having their Peltasts charge up the road at the enemy Psiloi.  The Etruscan lights try to evade.  Which they do successfully!  These leaves the Peltasts wavering.  The Etruscans then try to interrupt, but fail!  

The Greek archers move into the shrine to support their countrymen there.  The Drilled Hoplites on the right flank break into open order and get on the road.  Meanwhile, the Drilled Hoplites on the left move up, with their Psiloi moving out of the fields in support of them.  

The Etruscans can move freely.  The Psiloi flow away from the oncoming Peltasts, while the Militia Hoplites snap into phalanx and charge into the Greek light troops.  There is no point trying to Evade, so they save their Arete Points for Re-rolls.  Despite the Re-rolls, the Militia Hoplites scatter the Peltasts with ease!  First Blood to the Etruscans!  


The Elite Phalanx move up tentatively, while the Axemen move up behind them to support, or drive off the enemy Psiloi.  The main Militia Hoplite attack waits patiently for the Etruscan maneuvers to unfold and holds steady. 


End:
In the End Phase, the Greek Peltasts are removed, but the Militia Hoplites, Archers, and Drilled Hoplites on the road all watch them flee.  They make Discipline tests.  The Hoplites pass easily, but the archers begin to Waver! 

Turn 4: 
The Greeks have lost a unit, so they are down to 5 Arete points, to  match the Etrsucans.  The Greeks bid 2, to the Etruscan 3.  

The Etruscans start by charging down the road in phalanx, into the Drilled Hoplites in open order.  The Etruscans manage to push them back 1 MU, and cause 1 courage loss.   


After this charge, the Greeks try to take over, but fail.  The Etruscan Psiloi and Axemen move up to support their hoplites.  The Etruscans cede control to the Greeks.  

The Greeks start by Rallying their archers with an Arete point.  They then use their last Arete point to skirmish their Psiloi into the field to flank the Elite Hoplites.  The rest of the army holds its position in the temple or at the edge.  


Turn 5: 
The Etruscans bid 2 and the Greeks bid 0.  

The Etruscans begin by launching their attack on the temple!  The Militia Hoplites charge in and barely make contact over the rough terrain.  They are supported by their Psiloi, while the Greeks are supported by their archers.  The fighting is inconclusive as both sides lose a Courage point. 

The Axemen try to charge through the fields to get to grips with the Psiloi, but the terrain is difficult and they fall short.  They are disordered!  


The Elite Hoplites move up towards the Drilled Hoplites, enough to protect the flank of the Militia trying to storm the temple.  With no more Etruscan movement available, the Drilled Hoplites charge the Elite Hoplites, but the Etruscans use their last Arete Point and counter-charge.  The Greeks are met with a hail of javelins as they close the distance due to the Etruscan "Disruption" rules.  The Etruscan Elite unit does its job and smashes the Greeks back with 3 courage loss, to losing 1 of their own! 


The Militia and Drilled Hoplites on the opposite flank of the board continue to grind on each other, the Etruscan farmers pushing the Hoplites back 2 MU and grinding up another point of Courage.  

Turn 6- Final Turn
Both sides have 5 Arete points.  The Greeks bid 1 to the Etruscan 0.  The Greeks go first.

After baiting the Axemen into the fields, the Psiloi use their improved maneuverability to charge into the flank of the Etruscan Elite vs. Drilled Hoplite battle.  The Axemen are too far out of position to catch up to them!  

The Greeks decide to start the melee on that flank.  Despite the clever Psiloi flank attack, it is not enough.  The Etruscans are reduce to 2 Courage, and pass their wavering test.  The Greeks are pushed back and begin to waver.  They have 1 Courage left! 

On the opposite side of the temple, the Etruscan Militia continues to push back the Greek hoplites.  However, they stay firm, with no sign of fleeing.  They are down to 2 Courage.  


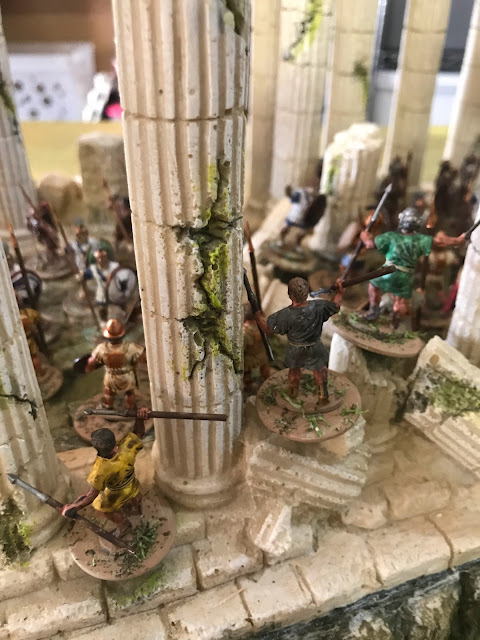
The final battle is in the temple itself between the Greek Militia unit and the Etruscan Militia unit, both supported by other troops.  The Etruscans push their way into the temple and the fighting gets more intense.  The Militia Hoplites lose 1 Courage and are pushed back 3 MU, but it is not enough to rout them! 
Conclusion: 
Once in the temple, the Etruscan commanders is spooked by a sign from the gods!  He sees an owl wrestling with and killing a snake at the peak of the temple.  Such portents can only bode ill!  He orders his men to withdraw or risk facing the wrath of the gods!  

As the Etruscan troops fall back, the struggling Greeks give a ragged cheer!  The Etruscan advance on Aila has been checked.  There might still be hope to save their homes and farms after all!  

Well, as the Etruscan commander, I spent far too much time setting up my attack and not enough time executing it!  Another one or two turns and I would have been hosting a victory feast in the temple!  The Greeks were on the back foot.  However, time was of the essence and I let it slip away. 

I got the match-ups I wanted, but my opponent cleverly used their Psiloi to distract and hinder my advance.  They were a potential flanking force in being that could have scattered by best troops.  By the time I re-shuffled my battle line I had wasted 2 turns when I should have been attacking the temple itself.   


You can follow Blood and Spectacles Facebook page for more fun: https://m.facebook.com/pg/BloodandSpectacles/posts/?ref=bookmarks&mt_nav=0

Or our website:

Or our Messageboard:

Or our Wargames Vault Page:


Monday, December 13, 2021

Battle Report: Wars of the Republic- Romans vs Etruscans


I initially started working on Wars of the Republic as a more focused set of rules called Conquest: Rome in Italy.  As part of that rule set, I was focused on getting armies and forces for the early period of Roman history.  There is not a lot of data on these early foes, but one of my favorites was the Etruscans.    

The Etruscans was a loose group of city-states to the North of Roman territory.  They shared a unified culture and a religious League, called the Etruscan League.  Legend has it that 12 cities were part of this League.  Despite the existence of the League, Etruscan cities were fierce rivals and were not above feuding and fighting amongst themselves.  

The Etruscans themselves have very little written evidence that remains of their civilization.  Instead, we must rely largely on Roman accounts from a legendary age.  The other main source of information is archeology.  The Etruscans may have been colonists from Anatolia, but had a complex relationship with their mostly Greek neighbors and trading partners.  They entered and conquered much of the Northern Italy around 510 BCE.  

It has been theorized that much of the early culture of the Roman military came from the warrior culture of the Etruscans.  Some have theorized Rome herself was a colony or vassal of the Etruscans in its early history.   Roman myth itself talks about how the Romans overthrew the Etruscan kings and replaced them with the Republic.

Despite expelling the Etruscan kings, the two groups remained rivals for control of North Central Italy for generations.  This led to various battle, sieges, raids, and more.  There are several major battles that history records.  However, for every major battle recorded, there were several smaller skirmishes or lesser encounters that led up to the big clashes.  Today, we will be playing one of those lesser engagements.  

You can order your copy of the Wars of the Republic rules here. 

Forces: 

The Etruscan list will come straight out of the Wars of the Republic rulebook.  

Etruscans

1 Elite Phalanx- Pila - General 
2 Militia Hoplites
1 Drilled Infantry- Axemen
1 Skirmisher


They will face off against an Early Roman Triplex Acies.  It would also make sense to have them fight a Early Roman hoplite army, but I want to use these guys instead to highlight the difference between the two fighting styles. 

Roman Triplex Acies

1 Skirmisher
2 Hastati
1 Principes- General
1 Triarri


Set-up
This was completed using the rules laid out by the rules in the booklet.  The board is 72 x 48 MU with an MU being 1 inch.  The board was divided into 6 grid spaces and terrain rolled and placed using the chart.  The Players took turns rolling and placing terrain, with the player being able to place the terrain anywhere they wished in the grid square.

This system led to the following set-up.

Grid 1 is the Roman right, 2 Roman center, and 3 is Roman left.  Grid 4 is Etruscan left, 5 is Etruscan center, and 6 is Etruscan right.

Grid 1- Swamp
Grid 2- Stone Wall
Grid 3- 2 Level Hill
Grid 4- 1 Level Hill
Grid 5- Stone Wall
Grid 6- Grove of Trees

The Romans deployed with the Triarri on the right flank by the 2-level hill.  Then Hastati on the road, then Hastati in the open leading to the shrine, then Principes on the left, and the flank is anchored by skirmishers.  


The Etruscans deployed with the Elite Hoplite on the right, then a Militia Hoplite, with the second militia hoplites behind the other two.  The Axemen are on the road.  The left flank is Skirmishers in a ruined building.  The Etruscans seem as if they want to fight the entire battle to the right side of the shrine.  


Mission
We set-up our scenario using the method found right in the main rules.  This is going to be a set-piece battle, so no fancy scenarios for this one.  Etruscans are the attackers.   

However, this battle will have Hungry and Thirsty complication.  Disappointingly, no unit is suffering the effects of this complication as they all passed their Discipline checks.  

With that, we are ready to start fighting! 

Turn 1:
Both sides collect their Commander's Gaze.  The Romans have 6, and the Etruscan 6.  Nice and even.  The Romans bid 6, the Etruscan 4.  The Romans go first. 

Move: 
The Romans are all in Open Order.  The Hastati behind the shrine move up first, followed by the Principes on their flank, and the skirmishers.  The Etruscans try to interrupt, but fail.  The rest of the Roman force moves up unopposed. 

The Etruscans move forward.  The Elite Hoplites and the leading Militia Phalanx are all ready in phalanx.  The second militia follows them up in open order.  The Axemen move up the road.  The Skirmishers use the last Commander's Gaze to skirmish and take up fortified positions on the ruins.       

Melee:
None

Turn 2:
Both sides still have full units, so have 6 Commander's Gaze each.  The Romans bid 0, to the Etruscan 2.  Etruscans activate first.     

Move:
The Elite Hoplites move up, but keep their flank screened by the woods.  The Militia move up, slightly ahead.  Meanwhile, the second Militia unit moves to fill a growing gap between the Hoplites and the Axemen.  Then, the Romans try to interrupt, but fail.

The Etruscan Axemen, move up.  The Romans try to interrupt again, but fail again.  The Etruscan skirmishers hold position and cede initiative to the Romans.   

The Roman line pushes forward.  The Hastati behind the shrine begin to clamber up into the shrine for protection.  On the outside, the Principes see the Hastati taking position and form into Legion.  The skirmishers fan out and try to secure the Legions flank. 

Melee:
None
Turn 3: 
Both sides consider their next moves, and the Etruscans bid 2, to the Roman 3.  Romans go first.  

Move:
Roman Hastati plant their standard in the shrine.  It is safely in Roman hands.  The Hastati on the road form Legion and block the roadway.  The Etruscans consider trying to interrupt, but pass on the chance.  The rest of the Romans shuffle around, they seem content to let the Shrine be a lynchpin of their battle line.  


The Etruscans seem content with their match-ups, and move forward aggressively, with their Elite Phalanx leading the way.  Their Militia Phalanx moves up in support, and the second Militia fills the gap but stays in open order.  The Axemen and Skirmishers hold for now.  

Melee: 
None


Turn 4:
This turn we might see some action as the two sides get into charge range.  Both also have 6 Commander's Gaze.  The Etruscans bid 3 to the Roman also bid 3.  After a tense stand -off, the Etrsucans bid 1 more.  To win the initiative.  

Move: 
The Etruscan Militia Phalanx charges, and the Roman Principes Counter-charge.  They crash into each other half way between.  The second Militia unit also charges in to support their fellow farmers.  The Romans then try to Interrupt.  Which they do successfully. 

The Roman Skirmishers manage a Flank charge into the growing Melee between the Etruscan Militia and the Principes.  The Hastati in the shrine move to the edge of the shrine, while the ones on the road move up and threaten the Axemen.  The Triarri also move forward.

Losing the Initiative there put a wrinkle in the Etruscan plan.  The Elite Phalanx goes into Open Order and tries to get around the melee, as their target became engaged, and they do not wish to enter the Melee as support.  The Axemen and Skirmishers shift to the side to protect the shrine side flank of the Melee, while the Elites re-deploy.  

Melee: 
There is about to be a lot of dice thrown!  Principes get 4 base, +2 for charging, +2 for support, +2 for a support charge, and +2 for a flank attack for 12 dice, versus the Etruscans Militia Phalanx that has 3 dice base + 2 for charging, +2 for Phalanx, +2 for support, and +2 for support charge for 11 dice.  The Principes can take more hits before losing Courage though.  After rolling, the Roman Pila barrage pays off, and reduces them 2 to 1.  

The Romans push the Etruscans back 3 MU!  That is enough to push them back into the Elite Hoplites, who now join the battle as support.  The Etruscan plan just went pear-shaped!  

Neither side is forced to Waver.


Turn 5: 
Both sides have full Commnder's Gaze.  The Etruscans bid 0 to the Roman 2.  The Etruscans want their re-rolls to try and put the Principes away for good.  

Move: 
The Roman Hastati on the road charge the skirmishers in front of them.  They try to flee, but a dismal roll allows the skirmishers to get caught.  Ouch.  

The Romans Hastati in the shrine throw a hail of Pila and charge out, where they are met by Counter-charging drilled Infantry axemen.  

The Triarri move to the edge of the road looking for a place to assist. 

Melee: 
The Romans decide to start with the Hastati vs. the Skirmishers.  The Romans just steamroll them backwards 2 MU, and reduce them 2 Courage.  However, they are not wavering and are sticking.  This could bog down the Romans enough.  

Next, the Romans want to complete the Hastati/Axemen battle.  The Pila take their toll, but the Axemen hold their own.  Both sides lose 2 Courage with no pushback.  

The final Melee is the big brawl between the Principes and the Etruscan Left flank!  It is a fierce battle with the Romans rolling 8 dice vs. 9.  However, the Etruscan strategy to hold onto Gaze for Re-rolls pays off as the Principes and the Roman Skirmishers are routed!  However, the Militia Hoplites held on by the skin of their teeth!  


End:
The Hastati fighting the axemen see the Principes flee, but pass their Wavering check.  

The loss of the Principes also triggers collapse tests as that unit had the Roman general!  All the Roman units left passed their Collapse tests.  

Turn 6: 
The Romans have 3 Commander's Gaze to the Etruscan 6.  The Etruscans bid 1 to the Roman 0.  Etruscans go first! 

Move: 
The Elite Hoplites move to help the Skirmishers, knowing they will not get there in time.  One Militia Hoplite unit falls back to become a reserve, while the other breaks into open order and pivots into the flank of the Hastati/Axemen fight.  

The Roman Triarri forms Phalanx and charges into the flank of the same fight.  


Melee: 
The Etruscans want to resolve the Hastati/Axemen Fight.  The two sides obliterate each other in an orgy of bloodshed and fighting.  

The Hastati on the road kill off all the remaining Skirmishers and force them to flee. The Romans elect not to follow them up.  

End: 
The last two Etruscan units, a Militia Hoplites and the Elite Hoplites both pass their Collapse tests.  

The last Roman unit makes a Collapse test and fails.  They withdraw to fight another day! 

Conclusion: 
The Etruscans win their premiere battle report!  

This time, my concentration of troops on the Etrsucan right seemed to work!  I got a big assist by the Principes when they decided to counter-charge.  If they had stayed put, I think my charge would have fallen short!  That would have left me out of Phalanx and very vulnerable.  It was also serendipity that I drove off the Roman Commander.  I thought they were with the Triarri.  The Roman strategy was sound, but my abrupt shift and consolidation of my flanks gave me the staying power I needed to pull off the win!       

You can pre-order the rules for Wars of the Republic from Osprey/Bloomsbury Publishing here.


Become a Patron and get access to all the cool stuff, a peak behind the curtain of Blood and Spectacles, and early-access to playtest games!  


You can follow Blood and Spectacles Facebook page or Instagram for more fun! 

Check out the latest publications and contact me at our Blood and Spectacles website

Or purchase all out games at the Blood and Spectacles Publishing Wargames Vault Page!


Monday, December 6, 2021

On The Painting Desk- Early Etruscans


Earlier, I posted up thoughts on how to use Etruscans with Men of Bronze and you can find that Line of Battle along with others in the Hercules Abroad supplement on the Wargame Vault.  You can also find the Etruscans in the Wars of the Republic book I wrote for Osprey.  Therefore, I have known for a while now that I wanted an Etruscan army.  However, I was not sure how I wanted to approach it.  A quick google search did not reveal to me a great set of 28mm Early Etruscans.  I did find Aventine's very nice range of Late Etruscans, and I believe Agema now has a line of Etruscans as well.  I knew right away that I wanted a unit of Etruscan warriors with Axes, and that was something I did not find well represented in the 28mm ranges.  


I had completed making a few Greek Hoplite armies from Victrix, a Macedonian army from Victrix, some Roman armies from Victrix, and a Viking army from Victrix.  Therefore, I had a lot of let-over bits from Victrix model kits lying around.  I decided to try to leave my left over parts of Victrix kits to make my Etruscan force.  

The first step was to try and get a feel for what Etruscan troops may have actually looked like!  For this, I had a hard time finding much detail.  I had a sketch in Warry's Warfare in the Classical World, Osprey's The Etruscans, and a few google image searches.  Of course, with google image searches you have to be really careful trying to make sure you are looking at an actual Etruscan and not a Samnite or Italiote, or something else.    

From Warry's Warfare in the Classical World

A couple things stand out when you think of an Etruscan army that make it unique on the tabletop: 

1. They had a core of elite hoplites that were the social elite of their civilization, so they had an aristocratic warrior tradition.  These warriors were well equipped. 

2. The use of the Axe and Javelins within the phalanx unit 

3. Etruscans used small breastplates of metal often with the three circle motif to their design, which was also widely used later by other Italic tribes and the Samnites. 

4. They used a variety of shield types ranging from the hoplon/aspis, to the scutum, to the pelte

5. They made use of a variety of helmet designs, but they are known for a unique style of "crest" 

All of these together can make a very evocative and unique looking force on the tabletop.  I wanted to try to capture some of these ideas in the models.  

From The Etruscans by Osprey Publishing
Artist is Giuseppe Rava

For my Etruscans, I was going to kit-bash parts from the following Victrix Kits: 

1. Republican Romans I 
2. Spartan Hoplites
3. Mercenary Hoplites
4. Greek Peltasts, Archers, and Slingers
5. Greek Light Cavalry
6. Vikings

The army itself was going to have the following elements added to it: 

1. Elite Hoplite unit
2. Fellowship of Axemen
3. Citizen Levy Hoplites
4. Slingers

The elite and axe men of the army was going to use Hoplite bodies in bell cuirasses and Roman bodies with square armored breastplates.  The militia would just be the breast plates.  Most weapons would be spears from the Triarri left-overs from the Romans, with a few Javelins from the Greek Light Cavalry thrown into the elites for flavor.  The axes would come from the Viking sprue and be 2-handed and single handed axes.  The heads and shields would come from a variety of sources.  However, to create the distinctive "crest" I decided to add a handful made out of green stuff on some of the Spartan helmeted heads.  For slingers, I just used regular slingers from the Greek box.  


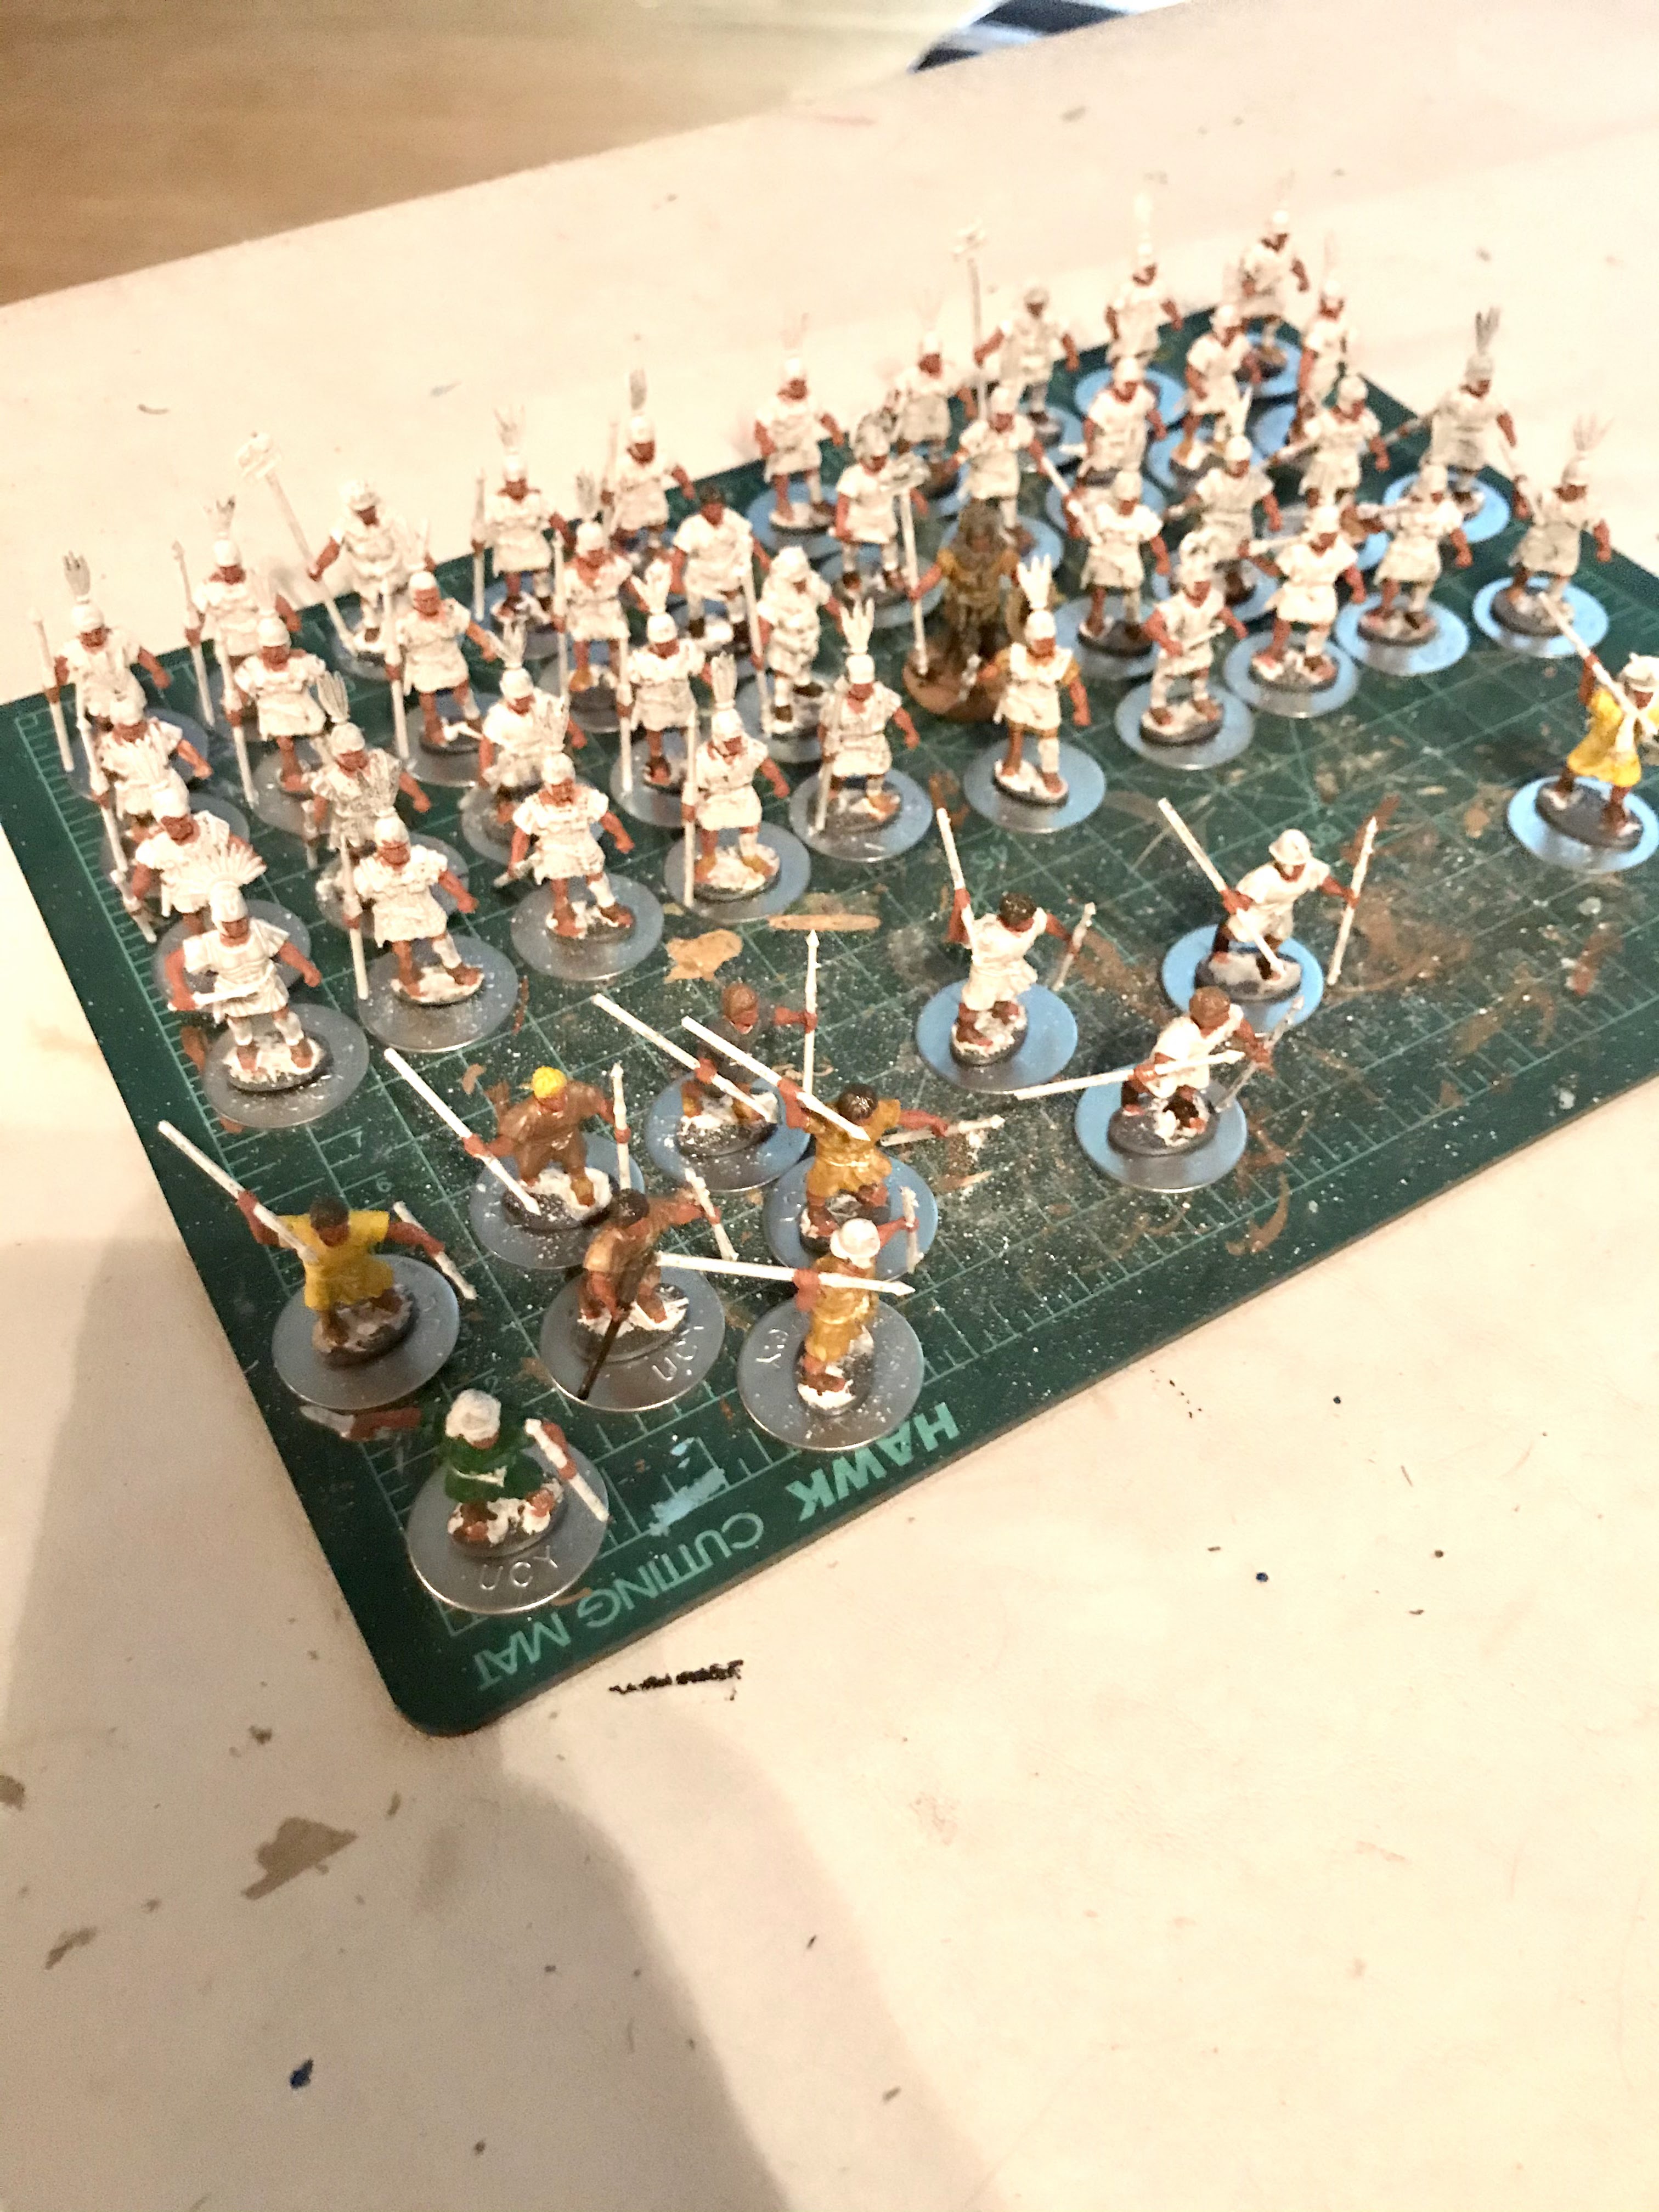
 Once assembled, I followed my usual process of undercoating everyone white.  This time, I did not try to batch paint them all at once.  Painting 60 Vikings in one batch put me off that idea.  Instead, I started working on them unit by unit.  Plus, I wanted to finish about 1 unit a weekend.  

The first unit done was the slingers, because they did not have a lot going on.  They were mostly just in tunics with no armor.  Therefore, once the flesh was on them, there was not much left to paint!  I gave them a couple drab colored tunic colors and finished off their kit.  Then I gave them an Army Painter light wash, based them and called it a day! 


From there, the Elite Hoplite unit was the next to complete.  I all ready had 4 painted up and ready to go.  I had painted them up when I did my Early Republican Roman force, the initial idea was to be able to swap the Roman Triarri out with a few Etruscans to make an Etruscan unit.  Thankfully, I had enough left-over Victrix bits to bulk out the entire army, so no swapping would be needed.  That will make it easier for my Etruscan force to fight my early Roman force. 


You can see that I gave them a variety of weapons such as spears, axes, and javelins.  In addition, they have all the helmet styles pictures in the Osprey artwork with a forward crest, side ways crests, horns, dual feathers, and even the metal crest on the back right one. They also use a mix of bell cuirasses, and chest plates.  Finally, they have a variety of shield types within the unit. I was lucky to run across a couple of left over shield transfers in my bitz box to help this unit's shield "pop".  

Elite hoplites with their militia allies

The next unit I decided to work on was the Etruscan signature weapon, the Axe.  This weapon was almost unique to the Etruscans in the region.  It is speculated that the Etruscan Axe Men used the weapon to pull down the shield of their Phalanx foes to leave them open to a comrades attack.  However, these weapons were phased out by the end of the 4th century. 


Again, I used a variety of helmets, armor, and shields to get the early nature of these guys across.  Even the axes are a combination of single hand and double handed weapons.  Sadly, I ran out of shield transfers, so maybe I will add some later after my next order?  

The last two units were the part-time soldiers.  Most of the time they were too busy tending their fields to train and worry about fighting.  However, they had enough income to get a chest plate, spear, armor, and shield, so they got to be in the Phalanx line.  These part time, middle income soldiers were probably on the flanks with the Elite Hoplite units in the center. 


These guys still have the variety of shields and headgear.  However, they are principally armed with the spear and chest plate.  No exotic mix of axes and javelins here.  These guys would not benefit from the Pila or Disruption rules and would act as Militia or Light hoplites to bulk out the force.  I tried to go back to the drab tunic colors to show their lower status.  They will not be getting any shield transfers.  


Here they are all together and ready to fight! 


Final Thoughts
That concludes my Etruscan army.  It cost me nothing additional to make this army as I all ready had enough left over Victrix bits to make it happen.  In an ideal world, I would of had some of the pectoral armor from the Italian Allies boxed set to make these guys look a bit more "authentic Etruscan" but I am happy with the mix of gear that I did have available.  The Viking axes integrated well with only a little bit of trimming and green stuff! 

What an amazing year for painting!  I managed to paint 270+ models now this year, and completed about 4 armies!  I think that is a record for me!  I will need to sit back and take stock of what I want to tackle next!   

Since I started looking into a wargame for the Conquest of Italy, I wanted an Etruscan force.  I can now cross that goal off my bucket list!

You can get everything you need for your Etruscan force and more in the Men of Bronze Supplement: Hercules Abroad.  You could also get the rules for Etruscans in the Osprey Wars of the Republic book as well. 


Become a Patron and get access to all the cool stuff, a peak behind the curtain of Blood and Spectacles, and early-access to playtest games!  


You can follow Blood and Spectacles Facebook page or Instagram for more fun! 

Check out the latest publications and contact me at our Blood and Spectacles website

Or purchase all out games at the Blood and Spectacles Publishing Wargames Vault Page!

Monday, June 28, 2021

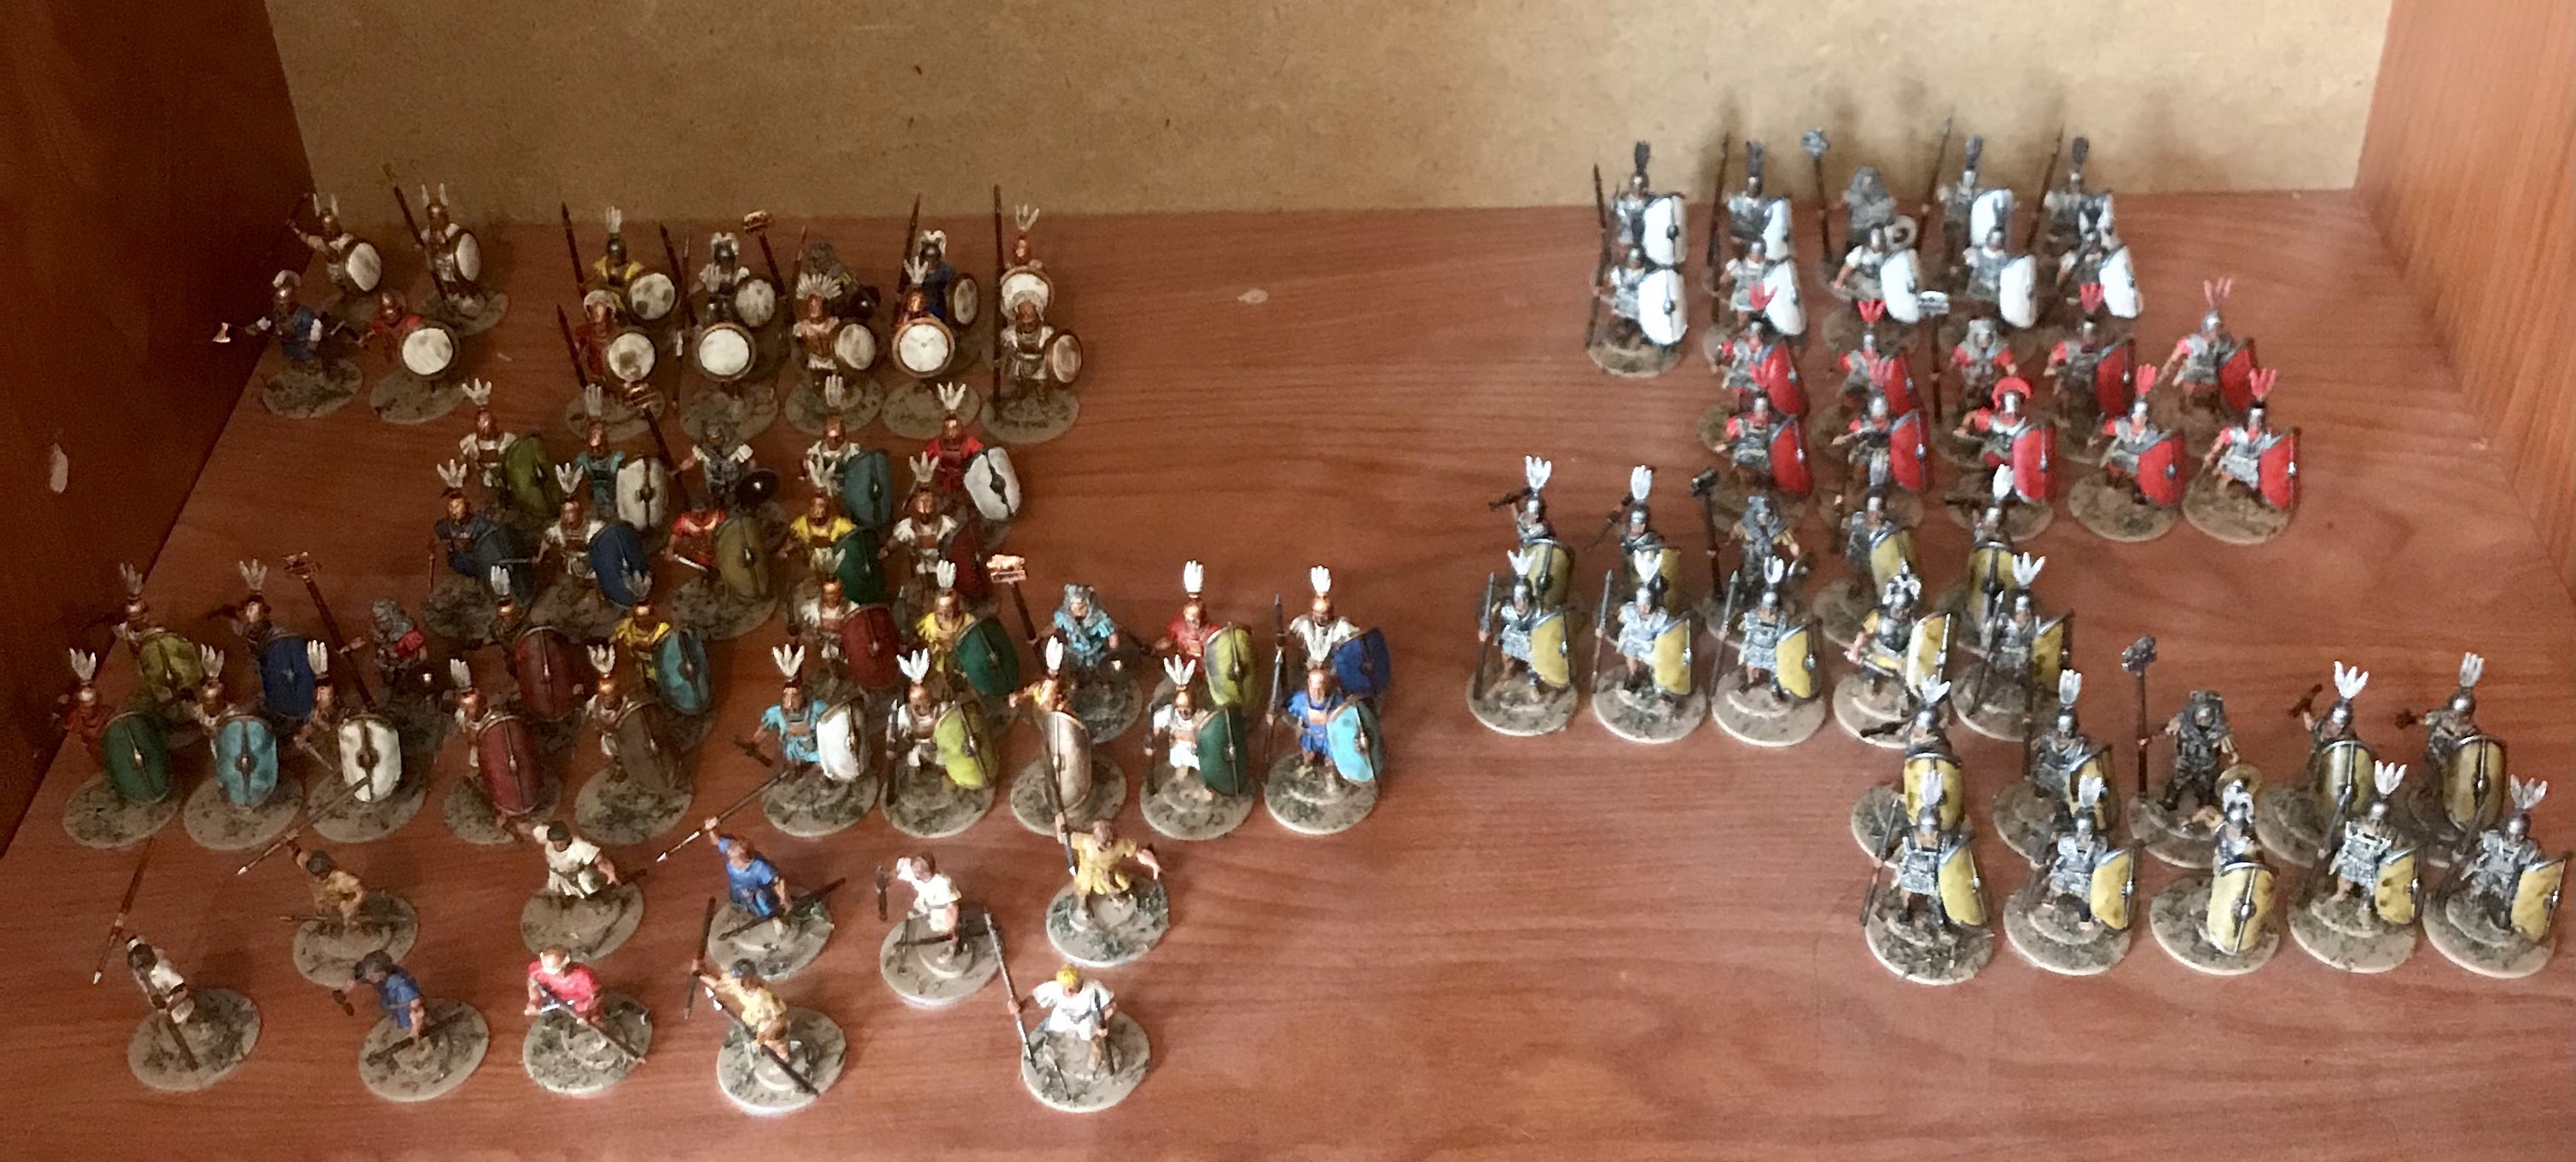
On The Painting Desk: Republican Romans are done! For now......


In 2021, I have been on an epic quest to complete painting Republican Roman armies to help support the Wars of the Republic release from Osprey.  My first pass, was painting up an Early Republican Roman force circa the transition of the Second Samnite War.  This was the classic Triplex Acies army, but with less uniformity and no Hamata!  The second step was a Mid-Republican Army that still used the Triplex Acies but had a much more uniform appearance as the State took over providing equipment. 

All on the shelf....

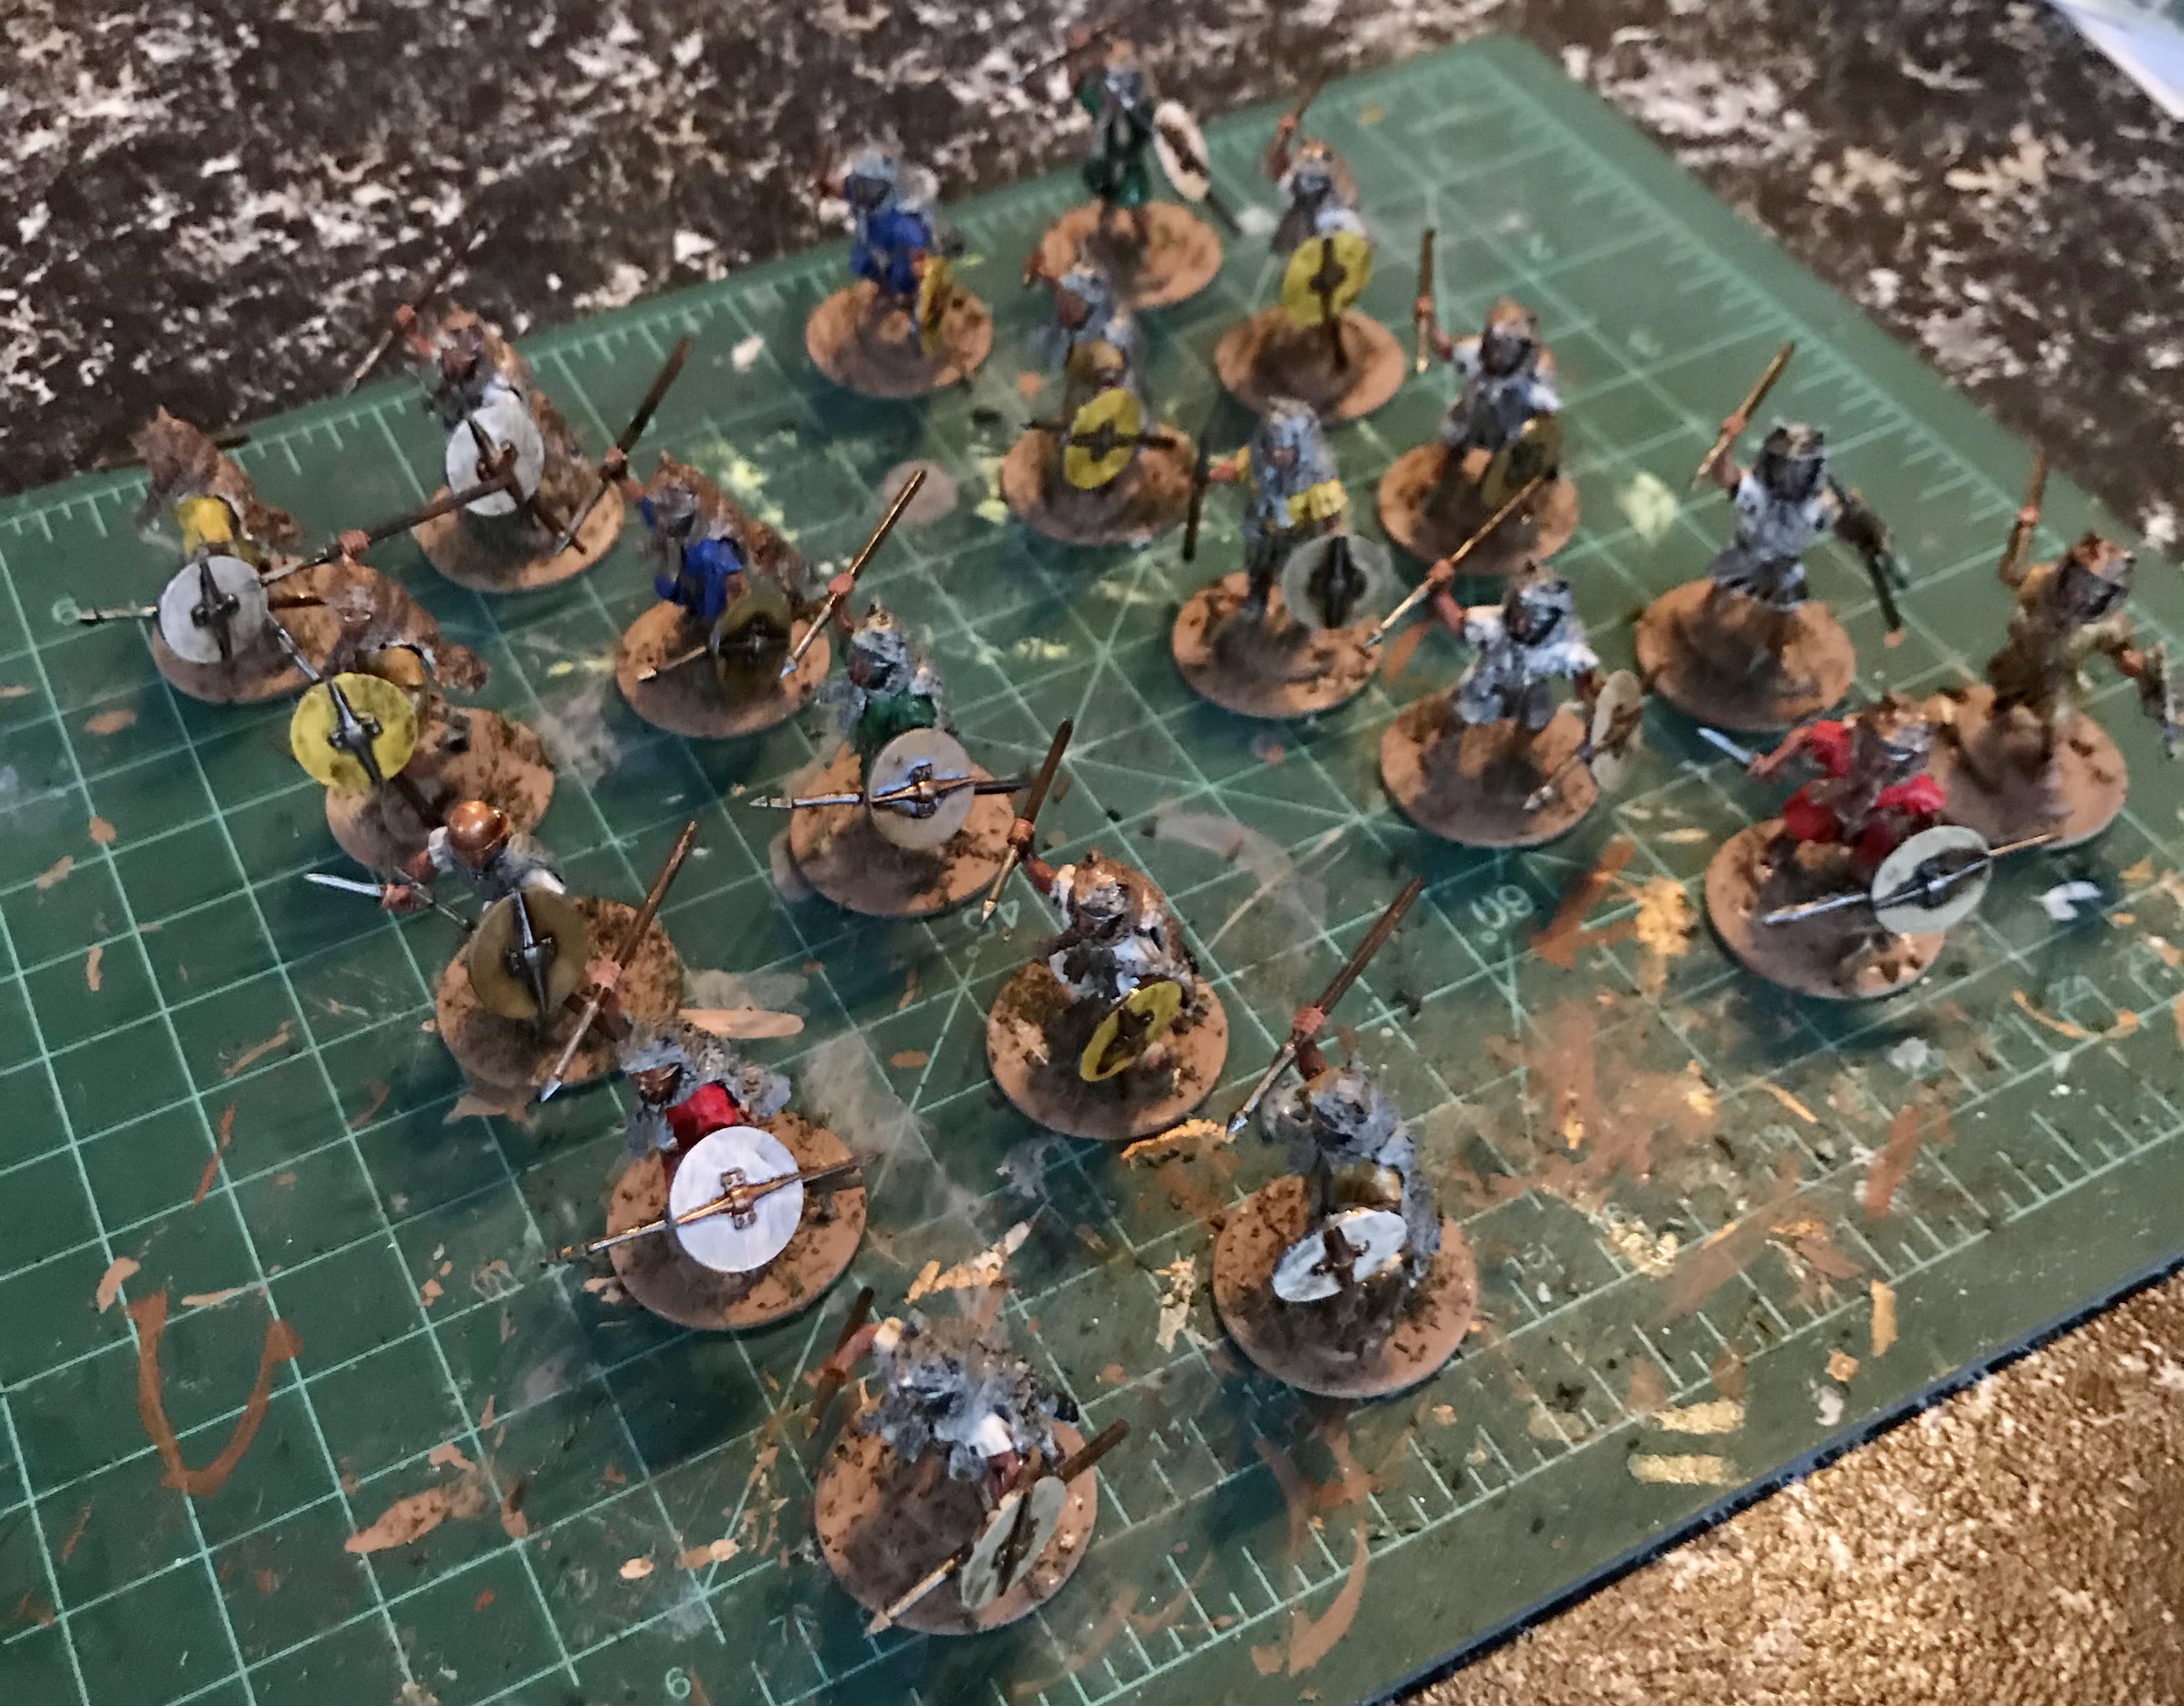
After finishing up the Mid-Republican Army in Lorica Hamata (Chain Mail) I knew I needed to bulk up my Roman Light Infantry.  I wanted to paint up some actual Velites with wolf pelts and all to supplement my Early Roman Skirmishers.  With the kits I had, I was able to put together 2 units of Velites.  


As you can see, I used a variety of tunic colors, roman sandal colors, shield covers, and even varied up the colors of the wolf pelts.  One of the velites I had to make a wolf pelt out of green stuff since I ran out of the pelts from my Victrix kits.  


  I felt comfortable calling these guys done and ready to fight on the table.  

That led me to the next stage of painting up models.  I wanted to paint up some more Lorica Hamata clad Romans.  However, these guys were to be used as a Late Republican Roman army such as that fought in the Civil Wars or even against Spartacus.  At this point, the Romans were phasing out the Velites and Cavalry from Roman sources.  Instead they were using more mercenaries and tribute troops to fill out these roles.  

The heart of Heavy Infantry remained Roman citizens though.  The ranks were opened to even the poorest classes of citizens and equipment was provided by the state.  They no longer fought in the venerable Triplex Acies.  However, as we see in the Third Servile War, lower ranking politicians would still recruit local, Militia legions or as Crassus showed more senior and Veteran legionaries could be called up as well.  


I used the Lorica Hamata equipped Republican Romans kit from Victrix as the base.  I used the same visualization standards as I did on the other forces.  The Militia Legions all were throwing their Pilums, the Legion Regulars have their Gladius out.  However, the late Republican Legions no longer used spear armed Triarri so I replaced them with Veteran Legions marching with their pilums.  Finally, I also put together another unit of basic Skirmishers that are useful in helping round out the points on a Line of Battle AND protecting the flanks.  

From there, I followed my normal approach to undercoating in white, batch painting the flesh, painting the sandals in 3-4 different brown colors.  From there, I broke them out into units and started painting.  


The Skirmishers were again painted with various tunic colors to represent their varied, poor, and "bring what you have" nature.  The Militia Legion I painted in the same colors as the Hastati so I can use them to bulk out my Mid-Republican army if I wanted.  Legion regulars were red to be able to mix with Principes as needed.  Finally, the Veterans I painted with the dark plumes of the Triarri from my Mid-Republican force.    


Then, I based all the models with brown paint and scatter lichen.  I painted their shields as the Mid-Republican forces on the sprue.  Once done, I took them off the sprue and placed them on the models. 


Viola!  A Late Republican Roman Force to fight against the enemies of the Senate or for their own General.  I look forward to using these guys to help test out my Revolt! The Third Servile War which will be my first supplement for Wars of the Republic and providing a more detailed campaign for fighting the war against Spartacus from beginning to end. 


With these guys done, I can move onto my next project.... Vikings for my Fury of the Northman project.  I have all ready started building some, so here is a quick preview.....

I am also using left over parts from my Greek, Vikings, and Roman armies to start to assemble an Etruscan force to face off against my Men of Bronze Greeks and Wars of the Republic Early Romans.  

Remember, your support makes this all possible!  Thank you for your help!  Every purchase of a Blood and Spectacles product from the Wargame Vault or Osprey lets me keep building games for you to play! 


You can follow Blood and Spectacles Facebook page for more fun: https://m.facebook.com/pg/BloodandSpectacles/posts/?ref=bookmarks&mt_nav=0

Or our website:

Or our Messageboard:

Or our Wargames Vault Page:

Blood and Spectacles Wargames Vault Page