Monday, August 31, 2020

Painting Desk: Heirs of Empire- 6mm Diadochi Army


Heirs of Empire is a Diadochi ruleset based on the Men of Bronze system.  For those unfamiliar with the period, the Wars of the Diadochi were the 40 or so years of constant warfare between the various successors and claimants to Alexander the Greats throne after his death.  This period is full of colorful characters, scheming, backstabbing, and armies clashing.  I really enjoy it, but it can be a difficult era to access as the sources are scattered and there are few popular histories of the period.

Heirs to Empire is built on the successful Men of Bronze rules chassis, but with some major differences.  The largest difference is the scale of the conflict.  Successor warfare was at a much grander scale than Classical Greek Hoplite battles.  In Greece, rival city-states were at odds.  During the Wars of the Diadochi the opponents were empires!  In addition, Diadochi warfare was much more focused on combined arms forces with the Pike Phalanx at the core and wings of cavalry and other troop types.  The Diadochi were all trying to emulate their hero, Alexander.  Therefore, their armies had similar components to the Macedonian war machine.

The game itself has no set scale or unit size.  Like Men of Bronze it uses generic troops types to represent the forces on the battlefield.  Units are abstracted an can be individual based models, multi-based units, or single based units.  There is no set standard as the game uses generic Measurement Units to align with any scale or basing strategy.  It is designed to allow people to bring the armies they have or want to have to the table.  Heirs to Empire is a game of units and armies and not individual soldiers.
28mm Phalanx vs 6mm Phalanx

For my Heirs to Empire forces I wanted to capture the feel of an army.  Therefore, I chose to use 6mm figures from Baccus Miniatures.  I was very pleased with their service and what I received.  For the price of an army in some other systems I was able to get all the Diadochi models and units I would need.  I decided to base my forces on 60mm x 60mm bases.  This was a game of units so I wanted to have big forces that together looked like an army!

Here is my full Diadochi force fielded together as one entire army.....


This army has all the classic elements.  It has a strong phalanx core, skirmishers, archers, light cavalry, heavy cavalry, and War Elephants.  Cavalry, skirmisher, and archer stands have about 32 models each.  Phalanx stands have 96 models.  Light Infantry have 54 or so models.  Together this looks like an army!

The picture above is actually enough to play two armies for Heirs to EmpireA standard size game typically has between 6 and 10 units.  Armies are split into three "wings" and chosen accordingly.  The Center wing is the core elements of the army.  The Left and Right wings are typically lighter or more mobile elements.  This is designed to mirror the deployments often seen in historical battles.

Here is the elite army of Eumenes of Cardia.  Eumenes was a skilled and wily general.  However, his army tended to be elite soldiers who had proven themselves on many battlefields.

  
A core of skilled Macedonian Phalanx, with a unit of Alexander's veterans.  Two units of lighter infantry, and heavy Cavalry and Companion Cavalry for the wings.  A small, compact, and formidable force.  However, not a typical army of the Diadochi wars.

For that we need to look at an army more like that of one of the Lesser Satraps or Successors such as Neoptolemus.  He was one of Alexander's inner circle and the Satrap of Armenia.


His army would face Eumnes in battle, and be defeated.  Here we see a less skilled center Phalanx, a unit of light Infantry, two units of Skirmishers for the center.  The wings are composed of Heavy Cavalry, and then light cavalry respectively.

Heirs to Empire emphasizes units working together as no single unit can carry the day alone.  The Phalanx is hard and tough, but immobile.  Skirmishers are quicker and have range attacked to disrupt an approaching foe.  Cavalry is the fastest, but can not hit as hard as a Phalanx.  However, their speed allows them to flank the foe.  Each unit has a role in the army, and understanding that role is the key to success.

Diadochi armies are famous for certain units.  Here are a few of them....


Skirmishers with Phalanx to the rear


  Skirmishers with archers supporting them to the rear.


In the wings, light cavalry lancers backed up by light cavalry skirmishers and war elephants.

 
In the wings, Companion Cavalry and heavy cavalry are ready to charge forth.


War elephants are backed up by members of the Phalanx. 


Light cavalry skirmishes ahead of the main advance.


One of the Diadochi leads their Companion Cavalry forward on the attack!

With my 6mm Diadochi forces complete, I expect to get a few games of Heirs to the Empire on the table soon.  There are so many great battles such as the big battles of Ipsus, Gabiene, and Gaza; to the lesser known nameless battles that are ready for you to explore.  The entire period is full of flavor, excitement, betrayal, and intersting match-ups.    You can also find the Heirs to Empire rules available on the Wargame Vault so you can recreate your own battles in this exciting period!

Monday, August 24, 2020

Battle Report: Operation Hemlock- Black Ops


After discovering the link between the Adaconite smugglers and the Red Tower of Ammoriss the Throne Agents were left with an important choice on what to do next.  They had three choices:

  1. Trigger the recall signal and retreat back to the pick-up point. Doing this would probably be the safest course of action, but they would be no closer to unraveling the mystery of the smuggled Adaconite.
  2. They could delve to the source of the mining operation and try to discover what all these rounded-up mutants are actually mining. They had been working under the assumption that the mutants were mining Adaconite, but that assumption may have been a false flag operation to cover something even more sinister.
  3. Infiltrate a Data-Shrine located near the sub-Head of one of the Mineheads and insert a Data-Demon to try and track down the link between the Adaconite Gangs and the Red Tower.  This is a risky infiltration mission.

The team decided to try and infiltrate and insert the Data-demon.  For this mission, instead of Strange Aeons, we decided to look outside the box and play a game of Osprey's Black Ops instead.  Yeah, a chance to try a different game system!  

Led by Sgt. Major Bathory, the team decided to attempt to infiltrate the one of the Red Towers Data-shrines.  From a hardwired data input point, they can use one of Inquisitor Xanatos little tricks to install a Data-Demon to try and crack the Ad-Mechs data-sarcophagi and find any hidden links to lead the investigation.  

After reviewing several potential target sites, the Team decided to focus on a Data-shrine installed at a sub-head of one of the more older Adaconite Mines.  Normally, these Data-shrines were used by Tech-Priest overseers the amounts of Adacontie mined, work rotations, and other operational data.  This location was lightly defended compared to the others, and saw relatively little traffic.  The very fact that it was still operational was in itself a bit suspicious.

The team designated Twist as the carrier of the Data-Demon, while Father Robertus and Sgt. Major Bathory were going to provide cover and muscle.  With their plan in place, the team left their safe house, moved through the service tunnels, and infiltrated the abandoned mine.  From there, they made their way back up to the sub-minehead where the Data-Shrine was housed along with other basic facility operations.  As they approached, they could see Skitarri sentries moving within the sites perimeter.  

Forces

Throne Agents (Counts as Professionals)
Leader- Red Ace- Sgt Major Bathory - 9
- Veteran, Battle Rifle, Light Armor, Tough

Specialist- Red Queens- Father Robertus- 8.5
- Veteran, Heavy Pistol, Two-Handed Melee/Breaching Equipment, Tough 

Specialist- Red Queens- Sebastian Twist- 6
- Trained, Knife, Tough, Data-Demon (Hack), Treated as a Civilian until attack/use abilities 


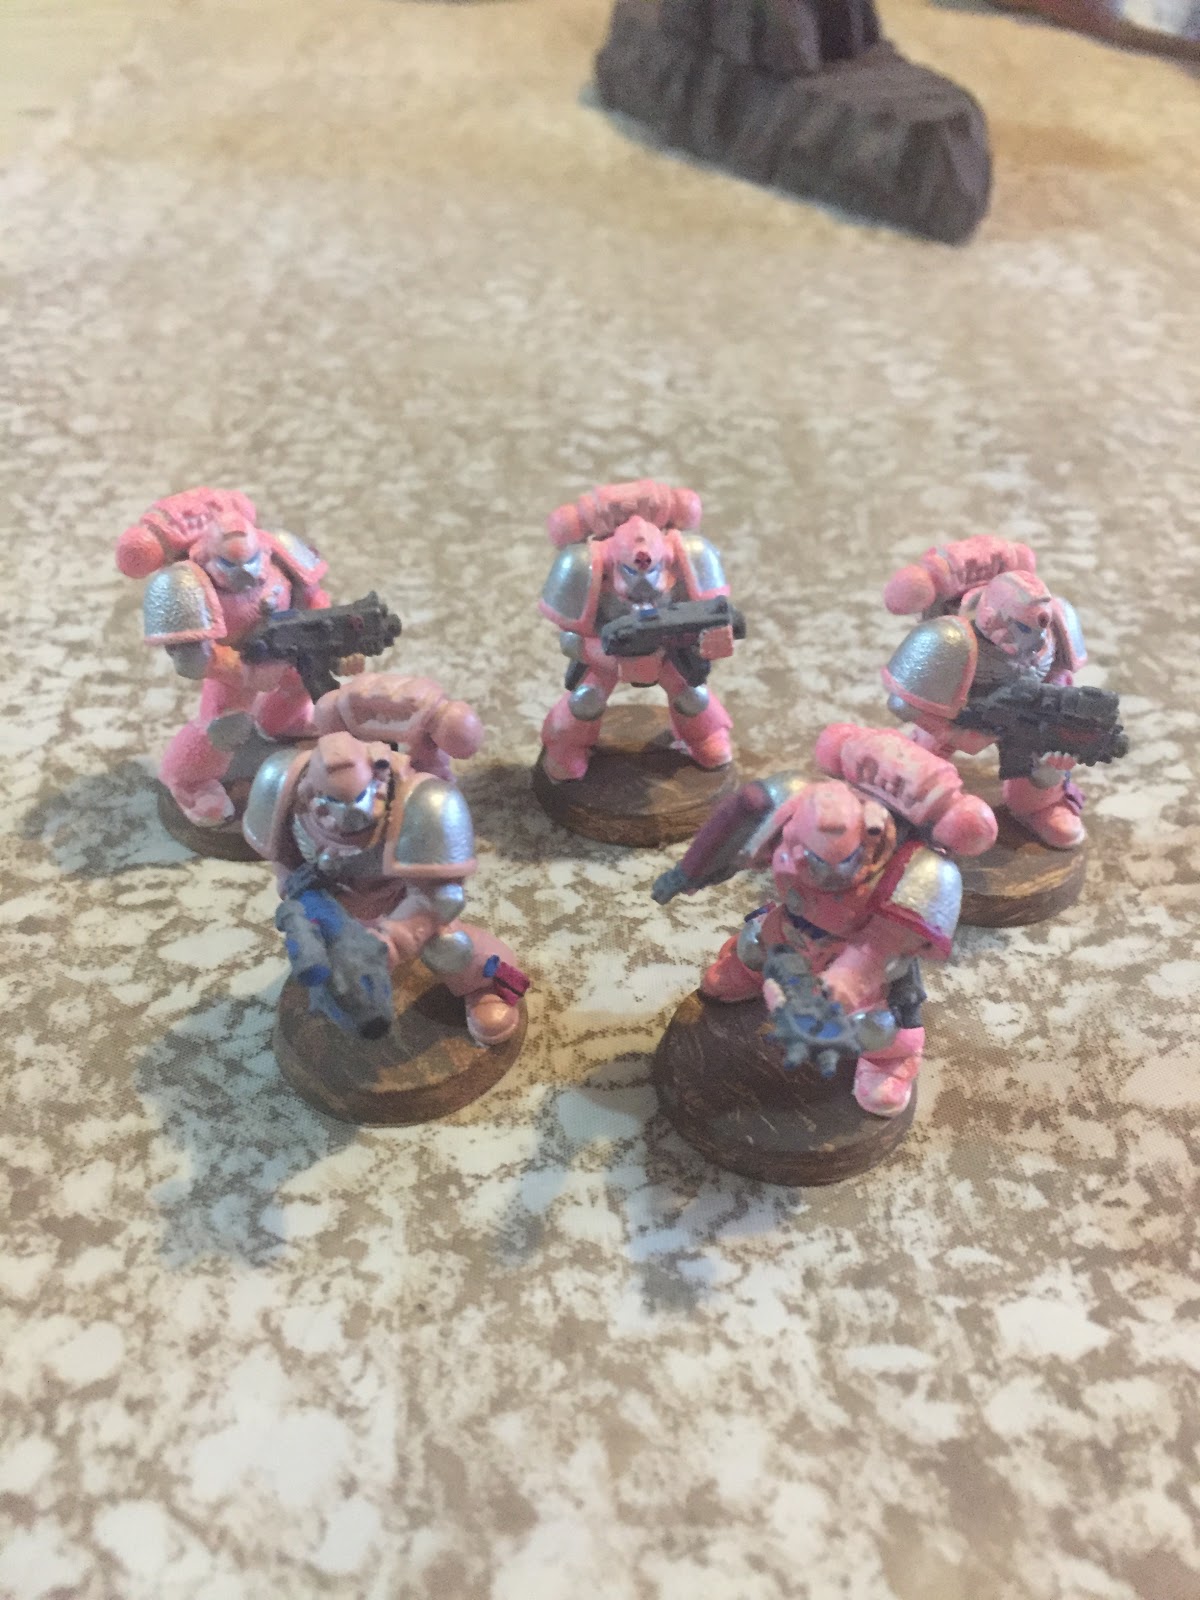
Skitarri of the Red Tower 
3 Skitarri Soldiers- Black Jacks -Conscript Soldiers- 18
- Body Armor, Assault Rifle

1 Combat Servitor- Black Kings- Conscript Heavy- 7
- Body Armor, RPG

Mission
Sebastian Twist must enter the data-shrine (blue building) to upload the Data-Demon and then the team needs to withdraw.  It is best if they can accomplish the task undetected.  A partial success can still be accomplished if they manage to unload the Data-demon but are detected.  They fail if they can not upload the Data-Demon to the shrine.

This is Stealth Mission 3 in the Black Ops book.

Set-up
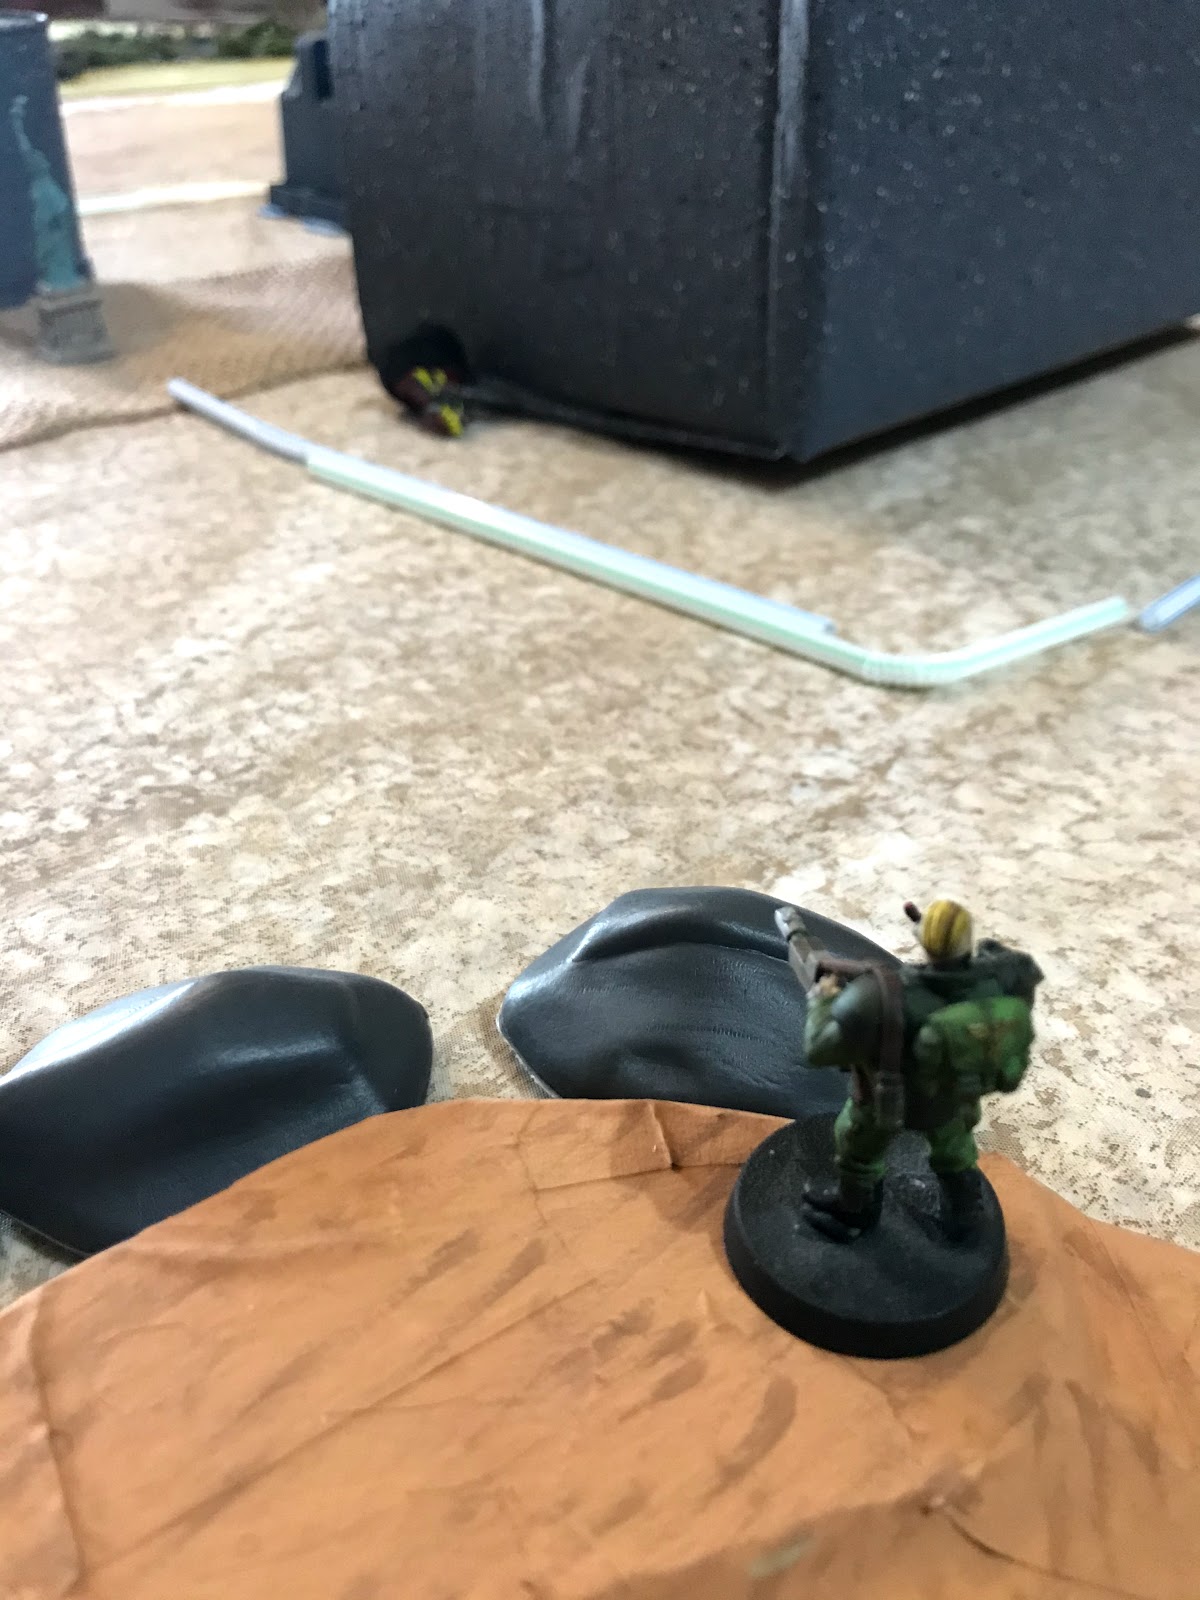
This mission uses "The Compound Map" from the rulebook and set-up.  This will be consider to take place in darkness, so areas outside of the compound are heavy cover.  All areas are assumed to be dark unless they are within three inches of an active Laser Fence.  Then, they are illuminated as normal.

The Compound is surrounded by slag heaps, mine pits, and rocky outcroppings to help aid in the approach.  They are hard cover and block LOS.   

In addition, he Defender has 6 pennies to act as blinds.  These may or may not be guards. 

The compound is surrounded by a laser fence which is represented by bendy straws.  The Laser Fence is impassable terrain while it is operational.  The Laser Fence blocks movement.  However, it can be de-activated in the guard house or by hacking the entry servitor at the front gate.  Hacking the entry servitor at the Front Gate causes +1 Noise but when the fence goes down it does not cause additional Noise.  De-activating the Laser Fence with any other method will cause +3 Noise.  A laser fence can also be brought down as if breaching a door as the delicate connections are destroyed.   

The doors to the key buildings are also locked, so can be picked or knocked down as normal for the rules. 

Father Robertus and Sebastian Twist are preparing to move to the front of the compound through the outcroppings and darkness.  Sgt Major Bathory is with them to give covering fire as needed, while Robertus could breach the Laser Fence if Twist fails to hack it. 


The blinds indicate their maybe a guard in the guard house by the access servitor, one in the main building, and several on patrol in the compound.  3 of the blinds are actual Skitarri while three are not.  The Servitor is in the main building in hibernation unless the alarm is raised.

Turn 1: 
I prep my card deck for activation per the rules, even though some of the relevant units are not active yet.   

The first card is the red Joker, so Aces can act or order someone within 6 inches to act.  Sgt-Major Bathory moves up into a firing position on top of a dune amongst some slag rocks.  The darkness covers his movements. 

Next, the guards get to move about.  None of them are within 12 inches of the models, so they either stay in position, but a couple on patrol drift around.  At least, their blinds do. 

Red Queen comes up next, so Specialists get to go.  Since he looks like a civilian, Twist moves up towards the main access Servitor to the gate.  Father Robertus stays int he darkness and moves around the rocky outcropping and proceeds closer to the laser fence under the Sgt-Major's watchful aim. 

Next, an Ace comes up and Sergeant-Major Bathory decides to take a shot at the target in the guard house.  There is some scurrying through the rulebook, but a single Las-shots rings out and blasts through the observation screen of the shack.  Their is a splatter of blood and a sickening thump as the target goes down.  The Sgt-major gains 1 noise token.  His card comes up again, and he decides to hold position instead of firing at a potentially patrolling guard.  He does not want to give away his position and cause additional suspicion. 

A red Queen comes up and the two Specialists approach the fence.  I decide to give the Father a noise token as his actions probably look suspicions.  Since Twist looks like a civilian, he goes without noise.  They are now in position to either Hack the Servitor or smash through the fence as needed.  Twist makes an observation test on one of the blinds and determines it is a guard on patrol in the compound. 


A black King, but the Servitor is still in hibernation. 

A black Jack, so the Skitarri guards get to try and observe the enemy.  The guard that has been IDed by Twist turns and walks back towards the fence away from the spy.  The blind outside the target building moves towards the main building entrance, while the other continues to patrol inside the fence and away from the Throne Agents. 

The last card is the black King for the hibernating Servitor. 

Turn 2: 
The activation deck is shuffled. 

We start with the black Jack for the Ad-Mech patrols.  The revealed guard turns and walks the fence line away from our heroes.  The guard inside the compound fails to see Twist and walks back towards the target building.  The last guard continues his patrol on the far side of the large building outside of detection distance.   

The Guards pull the black Jack again.  They are all out of range for an Observation Check, so instead they drift towards the entrance 3 inches.  The Throne Agents will be able to try and Observe a few of the blinds. 

The Joker is pulled.  Sgt-Major Bathory tries to Identify the patrolling guard, but fails to see if he is a threat or not.  He holds his position and waits, his sights lining up the potential target.

Black King of the Servitor, who stays hibernating until the Alarm is activated. 

The red Ace allows Bathory to activate.  He cautiously creeps towards the potential guard, but can't get a good view through the glow of the fence.

The red Queen allows Twist and Robertus to act.  Twist is at the gate Servitor that formally asks him for access.  This is 1 Noise.  Twist uses the data-demon on the Servitor to try and turn off the entrance gate.  He is successful, and the laser gate fizzles off at the roadway.   Father Robertus moves to the open gateway and both fail to Observe the blind/guard inside.

The red Ace comes up.  With the Gate open, Bathory tries to see the patrol again, but is foiled by the red glow.  It is a difficult shot, but not as hard as the guard in the shack.  He decides on recon by fire, and takes a shot.  His shot misses the mark, and he prays to the Emperor that the bolt's flash was covered by the glow of the fence. 

The red Queen, so the Specialists get to go.  Father Robertus moves quickly and purposefully into the compound, he is followed closely by Twist.  The Priest identifies one of the Skitarri guards and draws his pistol and fires at close range.  The shot is on target, but a lound "ping" indicates that the Skitarri's cyber body absorbed the shot! 


The black King is the last card.  He is still hibernating.  For how much longer is unclear! 

Turn 3: 
The activation deck is shuffled back up. 

The black jack comes up for the Ad-mech soldiers.  Immediately, the Skitarri that was fired on starts calling for an alarm to be raised in the harsh buzzing static, machine language of the Ad-mech.  With that, the guards all activate and can attack as normal.  This could be bad for the Throne Agents. 

The Skitarri on the edge fires at Bathory.  Thankfully, his shots bounce off the nearby rocks with a sizzling hiss.  One of the guards rounds a nearby corner and opens fire on Father Robertus along with his friend.  Shots fill the area with acrid, crackling bolts of energy and one hits the priest and forces him to stumble back.  Thankfully, it hit him in his armored chest plate beneath his robes. 


The stealth part of the mission is over!  Time to hack that Data-tomb before things get really crazy!

With a Joker, Bathory fires on his attacker and hits him squarely in the chest.  However, the ad-mech warrior refuses to go down! 

The soldiers are activated again.  The one on Bathory strafes right but fails to get anywhere close to the guardsmen.  The guard at the corner fires into the Priest , but this time his stout Holy Book absorbs the hits.  The last guard barrels into the Priest trying to take him out.  The Priest blocks the blow with his forearm, and delivers  righteous hail of shots into the attackers gut.  It is enough to finish him off. 

This time, the red Queen comes out.  They have to act fast before the Combat Servitor activates.  Twist runs to the Data-vault and prepares to insert the Data-demon.  However, he was too far away to do it yet. 

Father Robertus holsters his pistol and hefts his hammer as he charges the last skitarri in their path.  The combat is inconclusive as the two duck and weave.


The red Queen comes out again.  This time, Twist gets the Data-demon working.  It worms its way into the data-tomb and begins its task of burrowing into the Ad-mechs data-archives.  He shouts his success through his vox-bead to begin extract. 

Father Robertus smashes the arm off the Skitarri he is fighting, but fails to land a killing blow as he keeps fighting!

With that, the doors to the main building open and the Combat Servitor heaves its way into view.  its flesh is decayed and rancoress due to lack of use and age.  Its optical systems scan the area, and it quickly identifies Father Robertus as a threat.  It begins to heave itself forward and charges into the whirling melee. 

Father Robertus sees the great behemoth coming and times his spin just right.  With a shout of "For the Emperor!" he spins and smashes his hammer alongside the Combat Servitor's head and smashes it into a bloody pulp.  The servitor stands for a moment, shudders, and falls motionless to the ground!


The black King comes out again, but the Combat Servitor has been destroyed by Father Robertus.  He is one mean, mother..... shut your mouth!

The last two Aces allows Bathory to trade fire with his opponent.  Again, he hits but can not seem to finish off the Skitarri warrior, his shots failing to find the weak point in his mechanical body. 

Turn 4: 
I remove the Black Kings from the deck, and shuffle them up again.  With their mission accomplished, the Throne Agents just need to extract successfully. 

The Black jack is first, so the Skitarri attack.  The one fighting with Father Robertus continues to hang in on the fight.  This time, the Father knocks him into the wall, but the Skitarri will not stop coming back for him! 

The other continues to walk back towards his base, firing as he goes.  he forces Bathory to keep his head down.  However, a snapshot from the Sergeant-Major blasts through the Skitarri's head and finally downs the cybernetic warrior for good. 

The last Skitarri and Father Robertus continue to be tied up in combat. 

On the red Queen cards, Twist jumps into the frey and manages to slash the Skitarri warrior's achille's tendon.  This forces the Skitarri to fall where Father Robertus smashes him with his hammer.  The battle is over. 

Sgt- Major Bathory runs to the entrance and yells to his comrades to, "Finish the job!"


Conclusion:  
Throne Agent succeed in their mission.  The Data-Demon has been inserted into the Red Tower of Ammoriss' systems. 

With the last defenders down, the Throne Agents went to work covering their tracks.  They ransacked the administrative building, tagged it with local gang signs, and destroyed any other evidence of their presence.  They looted some choice items and tossed them into the slag pits to make it look like a gang smash and grab for turf.  

Then, they slunk back out of the mine head and back to their safe house.  It would be a few more days before the Data-demon would start to send them usable intel.  They holed up, watched and waited.  

Here I went back to the post-game for Strange Aeons and rolled for puzzle pieces.  Through this process, Twist will uncover the next piece of the puzzle.  That is, once I figure out what it is.  I will then give the Throne Agents their next options to pursue the investigation.

Now, let's talk about how Black Ops actually worked on the table.  At first, I was going to ditch the activation cards and use a different method.  One faction only had a few cards, and the other faction had completely opposite cards.  However, after playing I am glad I didn't.  They actually worked really good to enhance tension and keep play a bit less predictable. 

Mechanically, I would prefer if better characters got to roll more dice to make them succeed more often.  The combat felt a bit swingy, with my Ace consistently failing to wound his foe or missing.  This was made up a bit by the Joker card allowing him to use his abilities a bit more often.  CQC was also a bit weird, but it ultimately worked.

There were a few times where models felt ludicrously close, but couldn't observe each other due to poor Observation rolls.  Ultimately, I ended up putting 1 more Skitarri foe in the battle then I intended because of a mix up on the blinds.  You are supposed to use playing cards, but I thought those took up too much space on a tight board.  The blinds also added a lot of fun to the game as I was unsure exactly where the enemy was going to be. 

Finally, it is important to note that Noise from all models is cumulative and can build up quickly.  Therefore, the Guards went from not paying much attention to alert VERY quickly once the team entered the compound.  That was fine by me.  The mechanics actually had the guards roaming around in a some what believable patrol pattern, which was cool. 

Overall, I think Black Ops did what I wanted to do in this mission better than Strange Aeons would have.  However, I think Strange Aeons has a way better campaign system.  I am sure as I progress in the investigation I might even use other rule sets to get the right game feel I am after.                  

Once again, Father Robertus is a slaughterbot for the Emperor, and Sgt-Major Bathory is left feeling a bit wanting.  However, all the models played their role pretty well in this game, with Twist being a good spy/hacker, Bathory shooting it out with the enemy (including an ace sniper shot to start out), and Father Robertus laying down the law of the Emperor up close.  Good times!     


Monday, August 17, 2020

Operation: Hemlock- Rampant Sun- Raid on Look-Out Pointe


The comm-link clicked twice in their helms, and they froze.  They were motionless.... again.  Each had taken careful cover as they approached in the night.  The light of Bunkra II cast long, and deep shadows.  It was more than enough cover.  

The squad had landed from orbit via Storm Eagle less than 48 hours ago.  They quickly set off from Imperial territory and crossed Baron's Rest on foot.  They did not eat.  They did not sleep.  Their only focus was on avoiding the enemy, and closing on the target.  They had made the journey at an incredible and unbelievable pace.  Unbelievable to those who were not Astartes. 

They bypassed the wreckage and destruction of the Ork camps in the plains below.  They waited concealed until night fall, and they began their ascent.  The light of Bunkra II's rising had all ready found them half way to the top of the Pointe.    

Imperial Command had known for some time that Ork forces atop Look-out Pointe had been sighting and locating Imperial artillery, troop movements, air traffic, and naval traffic and reporting it back to their bosses.  Using this intel, the Orks had been able to respond to operations carried out by Imperial forces.  Their greatest successes being in countering anti-sub operations launched by Taskforce: Chalice.  General Kurtz could not tolerate this Ork location to stay in operation, especially as Imperial Forces of Taskforce: Sword prepared to push south on Baron's Rest and push the Orks off the island for good.  This early warning station had to be destroyed.  

General Kurtz needed the best.  General Kurtz had asked for Inquisitor Xanatos help, and together they petitioned the Adeptus Astartes, Space Marines; for aid.  The Chaptermaster of the Panther's Claws was a personal friend of the Inquistors.  A squad was assigned, deployed, and arrived within days.  They had studied the intel en route, they came prepared.  They deployed as soon as the Chartered Freighter carrying them arrived in Ammoriss near space.  

Now, they were approaching the Ork observation camp on Look-Out Pointe.  The squad took positions and waited.  The Sergeant had clicked his comm to Taskforce: Sword's command frequency, and signaled they were in position with a series of clicks and static bursts.  Within minutes, the reply came back in the same strange series of clicks and static.

"Execute."

This will be a game of Rampant Sun featuring the Imperial Space Marines vs. Skarbashz Boyz on Look-Out Pointe.  

Forces

Panther's Claws
Sergeant- Elite infantry 
--Combat Weapon, Enhanced Senses, Armored, Commander
4 Marines- Elite Infantry
--Enhanced Senses, Armored (1 w/Marksman, 1 w/Blast Weapon)


Ork Spotterz Mob
1 Nob- Regular Infantry
-- Combat Weapon, Fierce, Armored, Commander
4 Boyz-- Irregular Infantry
-- Fierce, Combat Weapons
2 Boyz- Irregular Infantry
-- Fierce, 
5 Grotz- Irregular Infantry      

Mission
This is an Ambush scenario.  The Panther's Claws are trying to eliminate the Ork Spotterz squad and secure the top of Look-Out Pointe.  The Orks are trying to get one or more of their number off the top of the Pointe and back to the Orks down below to raise the alarm.  

This scenario has the following complications: 
-Night Time
-Difficult Terrain- Moving between levels is Difficult Terrain
- Uphill Battle- To fire up at models above causes a -1 dice modifier to shoot.

Set-up
This battle is being fought on a 4x4 board.  The table features several different terrain heights.  The center is three layers of rocky terrain.  The base of the board is one level, then there is a large hill, a second level to it, and then finally a peak to Look-out Pointe.  Scattered rock outcropping dot the board.

The Panther's Claws can set-up on any table edge, and do so.  The Ork Mob is placed on the third and second level clustered around the top of Look-Out Pointe.


Turn 1:     
Keep in mind, it is night time.  The Space Marines have gear that off sets the night time disadvantage, but the Orks do not.  However, they have way more bodies.  

Brother-Sergeant Tumas moves forward toward the orks.  His auto-senses in his Power Armor easily illuminating them.  He is accompanied by Brother-Specialist Maxim with his Plasma Gun. Brother Lucas on the eastern flank has a garbled command to move up, and is shaken while he tries to clear the comms.  Play goes to the Orks. 

An Ork Choppa boy moves off the peak and towards the Sergeant.  However, his compatriot is confused in the darkness and is shaken.  Play goes back to the Panther's Claws.  However, it doesn't last long as Brother Cirus has comm issues as well and is shaken in the night.  The darkness is playing tricks on both forces as the Orks are shaken again as well.

Brother Cassius is a marksmen, and he moves forward and fires on the closest Ork.  The shots land close, but the Ork passes a morale check.  All Marines have gone, so the Orks take over, now alerted to the enemy nearby.

Despite their Nob shouting orders to head for the South path down Look-Out Pointe, most of the Grots and several Orks were to confused by the sudden attack and shouting to do much of anything.  Those that could tried to head south.  The darkness and difficult terrain made the going slow.


Turn 2: 
Both of the shaken Panther's Claws cleared their comms and readied themselves for battle.  Brother Cirus has the Orks coming towards his position.


Brother Cassius is the closest available to respond to the Ork threat.  He pivots and pulls the scope to his eye to make an aimed shot at the Slugga Boy moving towards Brother Cirus.  The shots are enough to drive the Ork boy into retreat and shake him.

A few other Orks manage to move towards the South path as well, but most remain disoriented in the night.  Even the bellowing Nob is momentarily confused.  In addition to Orks heading towards Brother Crius, a Slugga boy makes his way towards Sergeant Tumas and Maxim.  Maxim fires but fails to find the mark at the onrushing Ork.

Tumas pauses to decipher a garbled message from command.  It sounded like Ork aircraft would be entering the combat zone soon.  It was unclear if they had detected the attack as of yet.  Time was of the essence.

Turn 3
The Panther's Claws did not have much time left to act.  They needed to clean up the kill zone quickly.  Brother Lucas began to move closer to the Ork camp, even though his way was blocked by high cliffs.

Orks were closing in on Brother Crius so he opened fire with his Bolter.   His aim is true and the oncoming Ork boy is killed as a Bolter round explodes his head.


Sergeant Tumas relays the new orders to his troops, refocusing on the battle around him.  Maxim also fires at the onrushing Ork with his Plasma gun.  This time, the shots are enough to force the oncoming Ork to be shaken and forces him to retreat back towards his Mob. 

 
Brother Cassius begins to move in to support Brother Crius as the Orks are clearly going to be heading his way.

Since the Marines all passed their command checks, play never moved to the Orks.  It was their turn and they spent most of it re-organizing and pulling themselves together.  That included the Nob who had gotten confused in the darkness.  No one had a clear view of the attackers, so Orks started shooting wildly into the night.  Those that could moved towards the South board edge. 

Turn 4: 
Brother Crius, Brother Lucas, and Brother Cassius all moved up to tighten the noose.  That way, they would not be forced to retreat off the plateau due to enemy fire.

Brother Maxim finally took out Ork he had been shooting at with a direct hit.  Th Ork was brought low.  This gave Sergeant Tumas time to approach the base of the next cliff face to begin his assent towards the enemy commander.


Play did not revert to the Orks due to a Command failure, so they are all going now.  Several orks and Grots continue their rush towards the South side of Look-Out Pointe.  However, a few particularly stupid Grots are caught up on the top of the Pointe scurrying around for cover instead of following orders. 

One of the Sharp-eyed Shoota Boyz at the top of the Pointe catches sight of Sergeant Tumas moving in.  He yanks up his Shoota and unloads in a very bright and very noisy burst of shoota fire.  Enough lead falls around the Sergeant that he falls back into cover, shaken. 


Another Slugga Boy at the base of the rocks sees Brother Cassius and charges him with a ferocious roar.  He wildly swing his chainsaw like blade!


The Marine easily side steps it and slams the butt of his bolter into the Ork's face.  The Ork re-thinks his attack and stumbles back, shaken as well. 


Turn 5:
Brother Cassius quickly pulls his bolter back to his shoulder, aims and fires at the Slugga Boy that attacked him.  As he is a Marksman, the shots find their mark and splatter the Ork's head across the rocks behind him.  Another target down!


Heartened by the support on his flank, Brother Crius fires a hip burst at the oncoming Ork Shoota and forces him to scamp back into cover.  The Ork is shaken as he takes cover in the rock of the higher ledge. 

Brother Maxim sees Sergeant Tumas retreat from enemy fire, so he approaches the next rocky ridge of Look-Out Pointe intent on gaining position there.  Tumas readies himself to follow his comrade up to the rocky ridge line.  Finally, Brother Lucas makes for the South edge of the board, convinced that his area is secure. 

The Shaken Orks and Grots rally.  Satisfied, the Nob starts to climb down the Southern ridge line.  There he meets up with a shaken Slugga Boy and a grot.  Perhaps they can use the Grot and Slugga to shield his escape? 

The sharp eyed Shoota boy on the top of Looke-out Pointe sees Brother Maxim approach and sprays the area with more gunfire.  ONly a pair of Suppression hits, but Maxim rolls snake-eyes on his Morale roll!  That was close, 1 more Suppression hit and Maxim would have fallen back out of the battle.  For now he merely retreats his full move and is Shaken, just as his Sergeant had been the turn before. 

Turn 6: 
Seeing the Ork Shoota distracted by Maxim, Tumas sprints into cover at the base of the Ridge.  He is in cover, so is confident of his position. Maxim recovers and shoulders his weapon to provide covering fire. 

Brother Lucas comes around the edge of the Southern ridge to provide a bit of help to Brother Cassius and Crius.  He arrives in time to see Crius fire a burst at the Orks at the base of the ridge, but they seem unphased.  Cassius tries to take aim through his scope, but the capering of a grot gripped in fear eludes his aim. 

The Grots on the second ridge tremble in fear as the Shoota boy nearby opens fire on Crius.  His Nob shouting encouragement at him to blast that Beakie! However, the Marines doesn't even flinch as a few stray shots ricochet around him. 

With that cover fire, the Nob and one of the Grots  make a bee line for the Board edge.  They might make it to cover and escape next turn!


A Grot jumps down to the second ridge close as Brother Lucas approaches.  The last grot curls up in a ball at the top of the Pointe, shivering in fear!  The last Shoota boy who had held off Maxim and Tumas decides to change position and moves to Cover the South Side escape attempt from his perch atop Look-Out Pointe. 

Turn 7:
Crius turns and sprays fire at the running Ork Nob.  However, his bolter rounds explode rock and earth around the fast moving Ork.  His fire does not dissuade the Nob.  long range shooting from Lucas also fails to cause the Nob to re-think his wild rush. 

Tumas bolts up onto the first ridge line and moves to secure the Ork hut.  No xeno stands to oppose his rush, and he is not met by a spray of shots.  Maxim takes a long range potshot at the last Grot in view, nad forces him to retreat down into a better bolt hole. 


The Nob and his Grot screen run like the wind and easily get off the top of Look-out Pointe.  They do not stop running until they get all the way back to the rubble that is the Ork base below.  The marines have failed to stop the Orks from escaping and warning the troops below. 

With their boss off the board, the remaining Ork boys and Grots are unsure what to do.  They try to huddle up into their own cover and prepare for more boyz to show up.  You see, Orks are never beaten' in battle.  If you kill them, they are dead so that doesn't count.  If they run away, they are just going to get more boyz to come back and krump ya'! 

Turn 8:   Final Turn
For fun, we decide to complet ethe last turn to see what happens and who does what. 

Lucas and maxim decide to camp out and wait for further orders from Tumas.  Crius and Cassius open fire on Orks at the base of the Ridge line and force one of the Slugga Boyz back up into cover by the hut. 

Tumas enters the hut and places demolition charges to destroy the observation point once and for all. 

The Orks for the most part try to castle up and prepare to defend the area.  They are all rallying from being shaken in Turn 7.  1 Grot ventures down to the bottom of the ridge as a decoy/scout for the other boyz. 


Conclusion: 
Orks win!  The Marines fail to control the top of Look-out Pointe.

The radio squaled as Snaz Boomgod roared out fromt he speaker.  it was hard for the Ork pilots to believe, but Beakies had been sighted on the top of Looke-out Pointe.  Boss Boomgob was clear, drop every bomb they had on top of the observation post on the mountain.  A propa' Ork did not argue with his boss, so for the next hour or so the Ork pilots gleefully dropped bomb after bomb on the area!  Part way through, they were even joined by artillery from the remnants of the Ork camp at the Pointe's base.  When they Orks were done, they had taken the top of the mountain off!  It was doubtful anything could have survived such a barrage.  

*****************

Commander Brusilov received the news in his command bunker.  Taskforce: Swords Master of Logistics visibly blanched at the news.  Look-out Pointe had been leveled by the Orks.  The Office fo Strategic Intelligence estimated that no one could have survived.  He nodded in shock and cancelled the rest of the meeting, he had to report to General Kurtz.  

As the Vox line lit up Brusilov composed himself to deliver the horrifying news to the General.  The battle-scarred Cadian responded in his usual kurt tone, "Sir, I regret to inform you of the loss of the Panther's Claws squad on the summit of Look-out Pointe on Baron's Rest. However, their mission....."

General Kurtz cut him off, "Impossible.  I just had a debrief with Brother Sergeant Tumas himself minutes ago.  His squad will need to requisition a Valkyrie back to my command station for immediate evacuation off planet.  Give it to him.  His men are worse for wear, but expected to be on location in 5 hours.  Understood Commander?" 

Brusilov had a hard time masking his shock, "....but Look-out Pointe was bombed for hours..... I...." 

"You don;t know Space Marines like I do.  It is not only possible, it has happened.  Good day Commander.  i have pressing matters to attend to." 

With that the Vox channel clicked closed.  

************************

Orks win, and they will be ready for the Imperial assault to dislodge them from Baron's rest.  Sure, their camp was destroyed but the Observation Post can be remanned.  From there, they can see the oncoming Imperial counter-attack. 

As for the the game itself.  The marines only killed 3 Orks, but lost none in return.  However, the Orks did manage to slow them down and win the actual objective.  Therefore numbers paid off against skill in this battle.  We saw a similar outcome last time the Marines took the field in Rampant Sun.  They had no losses, but lost the battle.  The inferior skill force did well enough to force Shaken results and retreats to keep them at bay. 

The Darkness Complication also played a part as the Orks were able to focus on their objective.  Instead of wasting time shooting or trying to get into close combat, they could focus on activating and getting off the board.  This focus helps them use their numbers to good effect. 

A fun game that did not take long to complete.  I think all said and done it was done and documented in about 1 hour. That is exactly as the rules intended. 

Until next time in Operation: Hemlock.       


Monday, August 10, 2020

Wargame Design- Detection and Stealth in Miniature


As most of my readers know, I have been thinking a lot about some of the lesser observed parts of wargame design lately.  Things like movement, Terrain placement, Deployment, etc.  These are areas that are fundamental to game play but frequently get overlooked.  Today I want to dedicate some time to talk about detecting your enemy.

What is This All About Then
Many wargames take it for granted that if you can draw a Line-of-Sight to the target, that the model has detected them and can take action against them.  However, isn't one of the key aspects of fighting to see the enemy, but not let them see you?  Therefore, before you can take action against an enemy, you need to know they are there.

Detection is a process often taken for granted in miniature wargames.  In some genres it makes more sense than others.  Games that feature a restricted line of sight make a ton of sense.  For example, a game like Black Ops where everyone is sneaking around demands one.  A standard, sci-fi shoot-out may not as everyone has tech to highlight where everyone is.

In addition, something to consider is that "detection" is another element that adds a layer of complexity to a game.  Some game designs this complexity is needed to get the correct feel for the game, such as a submarine game.  In others, it is just additional mechanics.  Does a game of Greek Phalanxes crashing into each other head-to-head need detection?  No, it just adds complexity to the game that does not drive the theme or needs of the game.

Therefore, before deciding to include detection, the designer must review their goals and objectives for the game and decide if it is the right tool for the job.


The Problem with Stealth
Tabletop Games just do not have a great way to handle detection in an authentic way.  For true stealth situations, the opponent should have no idea where the enemy is until they attack or give away their position.  This is a problem for three main reasons:

1. No one likes to get "Alpha Striked" where they have limited options to respond, and instead just die.

2. Player's have come to expect a God's Eye view of the table.  They expect to see everything that is "in play" on the table.

3. It is hard to control of manage an asset that is not physically there.  Where are they, what is their facing, where are they going, can they attack now or later?  The stealth unit is like Shroedinger's Cat.

Typically, the easiest way you handle stealth is that you don't.  You assume that by the time a fight breaks out, stealth has been discarded and it is time to start fighting.  The Stealth was a pre-game element that has been discarded once the game begins.  However, this solution seems incredibly unsatisfying. 

With all that said, Stealth is not impossible.  It can be achieved despite the challenges that a designer faces.  That may be what makes a "stealth" focused game even more interesting from a design perspective.


What is in the Tool Box? 
Let's assume that you have decided that detection is a necessary and relevant mechanic for the game you are going to build.  Awesome!  How are you going to get it done?  There are several well worn methods to help you iron out detection.   

1. Blips/Blinds
The classic answer has been to use blips and blinds.  We have talked about those in my series on Solo-wargaming.  The blips are markers that represent the approximate location of the enemy forces.  They could be revealed by various actions initiated by the players or the opponent.  Once revealed, the blips are replaced with actual models nearby or at the exact same location or are false decoys and no enemy is there.

This is a good solution, BUT the opponent still has a general idea of "where" an enemy is and what it could be doing.  Plus, it can be a bit fiddly in execution.

Game Example: All Quiet on the Martian Front, Blucher


2. Unseen Units as Reserves
In this scenario, the undetected models are placed in reserves.  Once a detection check is passed, the unit is moved from reserves and deployed on the board.  This could be in a deployment zone, or a board edge.  Once detected the unit can act as normal.

The undetected unit can often just feel "late to the party" unless the deployment zone also changes as the game progresses.

Game Example: ???

3. Deployment Points
Deployment Points are placed or moved about the board.  When a Detection Check is passed, the model can then be deployed at or close to any deployment point on the board.

This allows some idea of how the enemy will arrive, and a canny player can mitigate their appearance and avoid an Alpha Strike.  In addition, the deployment of these Points themselves could be a decision point or game process that adds tactics to the game.

Game Example: Chain of Command


4. Detection Checks
A unit can not interact with another unit until a detection check has been passed.  They may then fire on the detected unit.  An added twist could be that various actions by the target or firer could augment the checks target numbers.

This is a very simple solution, but does not solve a true Stealth situation.  The model would still be available and move around the board.  It would be visible to the opponent and countered even though it is "undetected" in an unnatural way.

Game Example: Battlegroup, Battle for the Depths

5. Deep Strike
The model is left off the table.  Once it is detected, the player can choose to place the model anywhere they wish on the board.  Added variations may have some sort of deployment uncertainty with a scatter roll, or a similar randomizing mechanic.  The model could be revealed by either players actions.

This allows true "stealth" where an opponent can not react.  However, many players do not like to be potentially Alpha Striked in this manner.

Game Examples: Aquanautica Imperialis


6. Double Blinds
Both players are either set-up on opposite tables with a referee, third party, or mechanical system that determines when contact has been made.  models can only move models on their board, and they are not placed on the opponents boards until detected.

This obviously requires a great deal of set-up and work to create effectively.  However, it is the closest to true "stealth" with command and control retained by the players. 

Game Example: Battleship 

7. Fog of War
In this situation, a block is placed across the two players dividing the board.  Players only have a God's Eye view to their own models until action commences.  Then, parts of the board are revealed as their forces interact with them.

Again, a challenging situation to create on the game table that requires specialized components for game play.

Game Examples: Heroquest, Space Hulk, Various Dungeon Crawler games

Conclusion
Not every game needs detection or stealth elements to be successful.  However, it can provide a unique Hook, Chrome, or Soul to your game.  Some genres benefit more from these mechanical tricks than others.

The key point is that a designer needs to have a clear idea of what they are trying to achieve, and then pick the best tool for the job.


You can follow Blood and Spectacles Facebook page for more fun: https://m.facebook.com/pg/BloodandSpectacles/posts/?ref=bookmarks&mt_nav=0

Or our website:

Or our Messageboard:

Or our Wargames Vault Page: