Monday, December 25, 2023

Random: Recap of 2023


Well, look at the time.  It sure does fly by when you are having fun.... or something.  Another year in the books.  Yikes.  They keep going by faster and faster.  

When the year started, I had no real plan for what I was going to do.  This was a big change from my previous few years when I had very clear goals.  This one I came in a bit unsure where I wanted to go.  It was the first year in several where I did not have a book being published that I had to support.  In a way it was going to be a much more relaxed year!  This led to a rather unproductive year in a few categories, but success in other areas.  

Like most years, I try to break down my focus into a few areas: 
  • Purchases - Things I bought
  • Painting and Modeling - Things I built and finished off
  • Playing - The games that I played
  • Rules Writing - What I wrote
  • Miscellany - The stuff that doesn't fit anywhere else
So, let's get into it shall we?  


Purchases

Of course, I can not start off this section without giving YOU my loyal customers a big shout out.  Every time you purchase one of my games from Osprey, Wargames Vault, Drive-Thru RPG Page, follow me on Patreon or support me in other ways you help make this all possible.  It is your support that allows me to buy the minis, paints, artwork, web domains, and other supplies needed to keep Blood and Spectacles Publishing operational.  Therefore, I try to keep all the money earned in these endeavors going back into the business of Wargaming. Thank you!  

So, going into this year, I had not even settled on a "Big Project" for 2023.  I had a number of open projects that I could have chosen to complete, but I narrowed it down to two for 2023 and the purchases I would need to support it. This was a tough decision.  Ultimately, I decided that my "big project" for 2023 was going to be..... drumroll please......


Finally by the second half of the year I got my "Big Project for 2023" started.  I picked up two armies for the Battle of Kadesh; Egyptians and Hittites.  I ordered them from Baccus 6mm and also picked up 60mm x 60mm bases to go with them.  That was my "big" purchase for 2023.  

I also picked up something from Games Workshop (Boo-hiss) for Kill Team.  I grabbed the Hand of the Archon box.  I all ready had minis for the Craftworld Eldar, Harlequins, and Corsairs.  I all ready have Aspect Warriors for the future releases too.  I figured I would round out my Eldar collection for Kill Team.  That should give me a decent variety for my local club.  


I purchased two RPG games, the updated Legend of the 5 Rings game and the G.I. Joe RPG.  


A very limited year on purchases.  I didn't even buy any new wargaming rulesets for the year.  That is a big surprise to me, as I was interested in Strength and Honor, Saga, and other Osprey Books.  However, at the end of the day I was too busy and never got around to it.  

Painting and Modeling
I'm not going to recap what I did the first half of the year.  There wasn't that much as I finished off little bits here and there.  I had finished all my 2022 Pile of Shame, so I had nothing left.  Therefore, my chance to paint new stuff was mostly what I managed to print or scrounge up.  As we saw above, I didn't buy that much.  


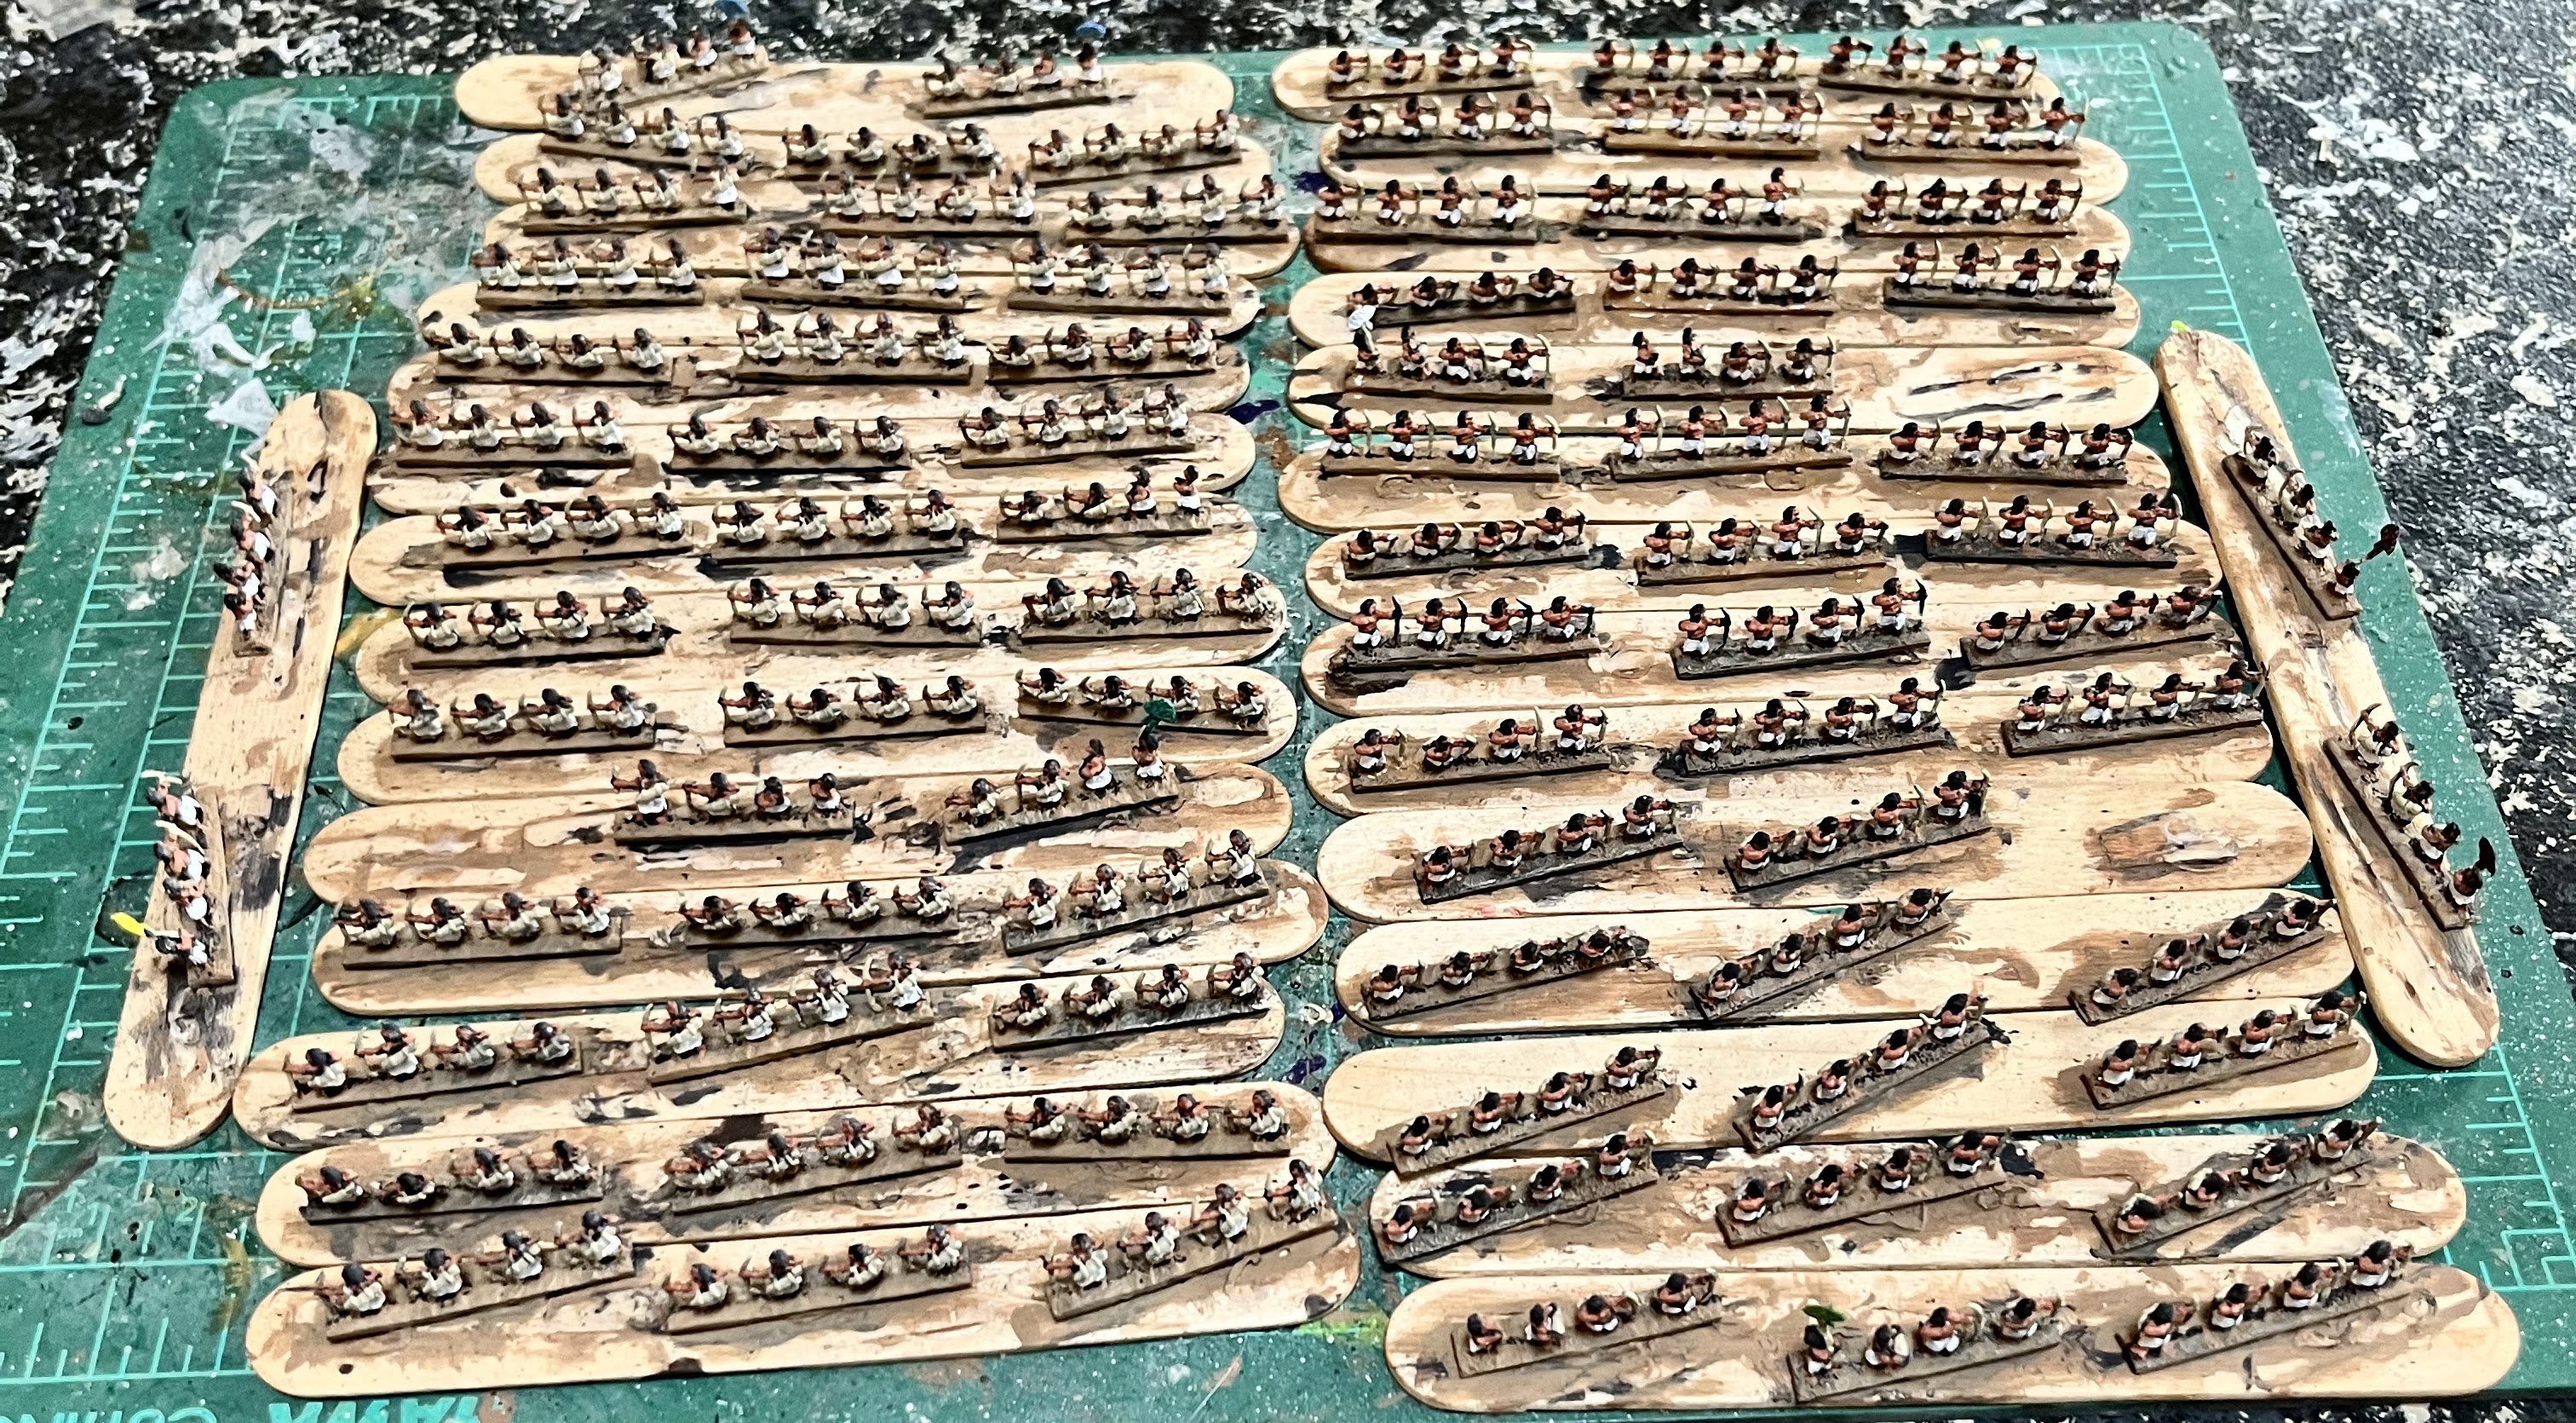
Most of my work the second half of the year has been focused on the Big Project.  Above you can see some of the progress on my Egyptian 6mm forces.  Looking back, I have painted a lot of 6mm this year.  Perhaps that was an unofficial theme for 2023?    

I also managed to re-paint my old 80's Harlequin models from Citadel.  They also managed to hit the table at the club this year as well! 


Overall, I painted 51 models of 28mm scale, and 34 bases of 6mm models. 

Gaming
This is the area where I have had the most success in 2023.  I have been growing a local gaming community.  This is a very rural area, and the population is relatively small.  Finding folks who are interested in sharing the miniature wargaming hobby is not easy, but that also makes us a relatively close-knit group.  You can find us at the True Crit Gaming Guild

The most popular miniature game at the local group is Games Workshop's Kill Team. I played over a dozen games of it there, and helped bring in several people to our group.  Kill Team has been great for grabbing eyeballs and bringing people in.  


I also got to play and complete a campaign for the Ionian Revolt.  That was a fun campaign where we used land and sea elements to follow along the historical campaign.  We used Osprey Poseidon's Warriors and Men of Bronze to play the games.  That gave my "historical" wargaming a nice boost for the year.  


The next big element of my gaming was playing more of the Operation: Hemlock campaign.  This is a campaign set in the Warhammer 40K universe, but my Skumgrod and I used a variety of games to play out the campaign.  This year was no exception as we used Aeronautica Imperialis, Restless Sun, Restless Stars, and Aquanautica Imperialis.     


I also was able to wrap-up the Castles in the Sky Indo-China campaign.  This was a campaign that we hit really hard just before the game came out from Osprey.  I played so much of it with the club and others that I burned out on it as it was coming out.  The second half of this year I was happy to come back to it and finish the campaign.  


Finally, I also got to start a loose White Star/Red Star campaign that will slowly cover the course of the Air War in Korea.  We have all ready played out some iconic engagements.  It has tempted me to pick up some more Tumbling Dice aircraft for the Commonwealth forces and for the US Navy.  They are relatively cheap and easy to paint.  However, that will have to wait for next year.    
  

Of course, there were also a few one-off games through-out the back half of the year as well.  This was a very productive year for me in the gaming space.  Usually, I shoot to play a game a month, but I blew that goal out of the water this year.  I am closer to three games a month.  

I played 20+ sci-fi/fantasy games, 12+ historical games, about 15 of my own games, and 20 games that I did not make.  A good mix for the year! 

Rules Writing
The first half of the year was relatively productive.    


Homer's Heroes: Bronze Age Bad Boys is a model-vs-model skirmish game, and my attempt to solve the problem of Melee Yahtzee with a Homeric veneer.  It has a campaign play mode and solo/co-op options.  You can find this one on the Blood and Spectacles Wargame Vault page.   

The second publication is something a bit different and it can be found on the Blood and Spectacles page on Drive Thru RPG


The second half of the year I also managed to get out something new.  I put out the Castles in the Sky: Addendum.  This work captures all the fleets and rules that I had to cut from the Osprey release of the game, a FAQ, and a Quick Reference Sheet.  


I also put out a free Episode pack for The Princes of the Universe Role-Playing Game.  This provides a 3-4 hour episode for 3-4 players.  It can be found on the Blood and Spectacles Publishing page on Drive Thru RPG.  


I also got a few new rulesets and adventure packs started.  However, nothing over the finish line or ready to show yet.  A lot of grinding and not finishing this year.  Hopefully that will make next year a very productive year in writing with lots of rules and campaigns hitting the shelf.  

Here are some things still in the pipeline: 
  • Late Roman 
  • Aztec Flower Wars 
  • Darkest Knights - Solo- Horror
  • Glittering Void - Space Mecha Combat and RPG
  • G.I. Joe RPG Campaign
  • Module for Flashlight: Tales of Terror
  • Another Year in Rokugan
Who knows what I will actually finish?  

Miscellaneous Stuff
This is assorted stuff I wanted to do, but doesn't fit into another category. 

  • Update Trackers on the blog for painting and playing?  Check
  • Get a game group going and expanding?  Check
  • Quarterly Wargaming events?  Ahhhh....... at least the group has been getting together bi-weekly.
  • Weekly RPG Campaign?  Mostly check! 
  • Charity Game?  Ahhhh....... 
  • Game Design content monthly on the blog?  Check
  • Patreon updates on a regular basis?  Check
  • Work on a local Con?  Hmmmm..... put it off mostly

One of my big challenges this year has been to decide exactly how much I want to lean into this Wargaming Identity?  It sounds weird to say it out loud, but I have to balance Wargaming with other parts of my life too.  I could lean all in, BUT I have held myself back a bit.  I am not 100% sure how much I want to lean in.  

I could do a lot of things differently if I went all in: 
  1. Start hitting the convention circuit
  2. Lean into more Podcasts, Interviews, etc. 
  3. Start doing talks and events about wargame design, publishing, history, etc. 
  4. Write more articles for magazines 
  5. Start a video series/Podcast
  6. Better tables
  7. Start that Con
At the end of the day, wargaming is my hobby.  If I lean into it too much it might become my job.  I have seen others do this, and been close to it myself; and I am not sure I want to make that transition.  Therefore, I have been kind of holding myself back a bit, and uncertain how much I want to lean-in.  Maybe that is something I can tackle a bit further in the coming year? 

So, until next year!  


Become a Patron and get access to all the cool stuff, a peak behind the curtain of Blood and Spectacles, and early-access to playtest games!  


You can follow Blood and Spectacles Facebook page or Instagram for more fun! 

Check out the latest publications and contact me at our Blood and Spectacles website

Or purchase all out games at the Blood and Spectacles Publishing Wargames Vault Page!       

Monday, December 18, 2023

Wargame Design: Sometimes I Just Get So Tired


 As we all know, the 4Ms of Wargame Design are Movement, Melee, Missiles, and Morale.  However, those broad categories cover a wide range of areas.  My recent look into Logistics and RPG-Lite spawned some great discussion on various places online, and those types of discussions help energize my thoughts.  The topic of exhaustion and fatigue came naturally came up in these discussion and I felt like that was an area I needed to spend some time thinking about.  Fatigue and Exhaustion probably fit into the Morale part of the 4Ms, but I wanted to take a deeper dive into modeling exhaustion in miniature wargaming. 

Tired Examples
There are a number of ways I have seen "exhaustion" covered in rules.  Not surprisingly, it various a bit on whether it is a Model vs Model, Unit vs. Unit, or Big Battle scale.  However, no matter the "scale of the battle" exhaustion can still be a key component to a wargames design.  

#1- Bushido
Bushido is a boutique skirmish game with named, bespoke characters making up your force.  Typically you are using 3-10 models and actions are resolved by model level interactions.   In Bushido, each model picks up "Fatigue" tokens that lead to modifiers on action rolls.  However, fatigue happens very easily in this game, and just moving around can cause fatigue to start to accumulate.  

#2 Bolt Action
Pin Markers represent a sort of escalating "Battle Shock" that accumulates on units that they have to try and shed.  Simply moving around does not generate fatigue, but their are a number of factors that can cause Pin Markers to accumulate.  The most common is taking fire from the enemy.  

#3 Blucher
At the start of a player's turn, their opponent rolls 3d6 to generate a number of Momentum points for the turn.  This is kept secret from the player.  As they activate and move units, it costs Momentum Points.  Once all Momentum Points have been spent, the player can no longer move anymore units.  

They then move to fighting.  Fighting causes a unit's Morale to be reduced.  Firing is easy, but hand-to-hand and charging reduces a units Morale.  It is possible to become "Blown" where the unit over-extends and no longer has the morale to keep going.  They are broken.  


Why Model Exhaustion in Miniature Games? 
Fatigue and Exhaustion add an element of friction that a player needs to manage to get the most out of their troops.  Adding these elements provides the following options for a game designer: 

1. Add Resource Management
2. Unit management
3. Add a tactical layer of decision making
4. Morale elements
5. Victory conditions

These elements are places where a designer can highlight their Point of View on the nature of the warfare being represented and how it plays out on the tabletop.  Some designs will emphasize a certain design goal or Point-of-View more than another.  

Resource Management
There are a couple ways to approach Fatigue as a resource.  The first is that Fatigue builds up and creates limitations, therefore managing the amount of Fatigue is the resource.  Similar to how Heat is used in Battletech.  Once you reach a certain limits, actions have negative modifiers until a unit is non-operational.  

The second is using a command resource to reduce or remove fatigue.  A simple way to think about it is using a Command Point (or the equivalent) to boost an abilities remaining ability to absorb hits or fatigue.  This could also be used to off-set a growing amount of Fatigue with additional actions.  

Unit Management
A key part of games with a Fatigue related mechanic is knowing how to add units to the conflict, and extract the ones that are all ready engaged.  This unit management adds decision making that a commander needs to make through out the game.  Often, this leads to decisions as early as the deployment phase, as you need lines of retreat and lines of advance available to your units.  Then, through out the game players will need to decide when to maneuver in and out of combat with depleted and fresh units.  

Tactical Decision Making
To me, when I think of tactical decision making; I am referring to decisions made while playing on the actual tabletop.  In this case, Fatigue can be a natural limiting decision point.  A player will think, "My unit can not break through here because they will acquire too much fatigue while doing so." This leads to a decision on what they should do instead or in addition to.  Even a victory can leave a unit so depleted to be "blown" for the rest of the game.  These kind of decisions are the heart of wargaming.    

Morale Elements
Fatigue can naturally been rolled into a Morale or even Hit system.  What is being lost by enemy action is not necessarily death and injury, it could just be soldiers getting to tired to continue.  This is an abstraction common to wargames.  Conversely, I have also seen it as its own "factor" in command and control. 

Victory Conditions
Causing Fatigue on an enemy is a good way to erode their will to fight.  Therefore, it makes a natural victory condition.  The most innovative often have a "trade-off" between combat results to gain VPs and Fatigue reducing VPs.  Therefore, the decision is how to cause as much damage as possible while limiting your own Fatigue in doing so. 

Thinking About It as a Designer? 
So, let's talk about how this concept of Fatigue plays into game design.  Often, it is not as obvious as a mechanic that is labelled fatigue.  

In ancient warfare, you will read accounts of soldiers getting tired, maneuvers designed to help relieve this fatigue, and battles that last hours and days.  We know that a person can only engage in hand-to-hand combat for a limited amount of time.  However, the ancient authors are not always as clear about how all of this works as we would like.  Therefore, a wargame designer has to think about this ties into their design.  Therefore, when designing for this period, it is a big element of ancient warfare. 

Of course, the first thing to do is to look at your Design Goals and see how Fatigue plays into them?  Often, these goals will also establish the "Scale of the Game", is it a Model-vs-Model, Unit-vs-Unit, or Army Group-vs-Army Group.  Finally, you need to determine where you want to abstract and what you want to track in the game.  All three of these elements will play into how you want to use the concept of Fatigue in your games.  

Let's use Wars of the Republic as an example.  This was a Unit-vs-Unit game that was designed to be played in about 1 hour with about 5-10 units on each side with a focus on abstracted units with minimal tracking.  Therefore, speed of resolution and reduced tracking was important.  Therefore, I chose to abstract Fatigue in the following ways: 

1. Fatigue was wrapped into the concept of Courage, and therefore was a Morale Element
2. Fatigue (Courage) could be managed with Commander's Gaze, adding Resource Management
3. Loss of Courage led to units fleeing, and units fleeing led to Collapse and loss of Resources.  Therefore, Fatigue played a role in Victory Conditions

I made a conscious choice to abstract Fatigue into the Damage process of the game, instead of making a separate process to maintain or track.  I made these decisions based on the design goals, scale, and what I wanted player's to track.  


Final Thoughts
Fatigue is a fact of life.  It is a fact of warfare and fighting.  Therefore, designers need to think about how they want to represent it in their games.  This decision should be based on the larger needs of the game and what the designer is trying to represent on the tabletop.  Thankfully, there are a number of ways Fatigue can be implemented into a game, and not all of them are as obvious as just creating a Fatigue stat or measure.  

As always, the designer needs to choose the best tool for what they are trying to accomplish on the tabletop.  This might make Fatigue an obvious and blatant part of the design.  Alternatively, it may handle Fatigue as part of a large mechanic in an abstract way.  However it is handled, Fatigue is a great way to add Friction and Meaningful Choice into a game.  

Well, this post has made me very tired.  

Second Wind Bonus Content! 
The True Crit Gaming Guild had a nice day of painting and then playing just before Thanksgiving.  There was a nice turn out, with several folks showing up to paint various models for various games.  A few 40K guys, a few D&D guys, some Holiday themed models, and just random bits and bobs.  I painted a Reaper Hillbilly model.  Why and for what?  Only time will tell.  

Undercoating a Hillybilly from Reaper

Then, after we all got some painting, we set up a few games of Kill Team to get going.  We had a few different tables, and more players than space.  Therefore, I participated in a 3-way game.  I took on some Chaos Legionaries and Grey Knights in the standard 3-player mission.  I was using my Voidscarred Corsairs for this game. 


I set-up a decent firebase as my more mobile troops moved up.  My standard tactic is to hang back a bit the first turning point or two, and try to time my rush to the objectives carefully once I have worn down my opponents.  


The Grey Knights managed to get on the objective early and we had a hard time dislodging them.  Here my Warlock bravely moves forward to try and use psychic powers, which he promptly failed the roll and fried his own brain!  I knew there was a reason I rarely used him for that. 
  

This time, they were wise to my tricks and I was whiddled down to just my Felarch left.  Of course, no one else was in a much better place.  The Grey Knight only had their leader left, and Chaos was the best off with 3 models.  I blew my final turning point and ended up getting cut out of the scoring all together this game.  The Chaos forces and Grey Knights tied, but since the Chaos models had more paint on them we awarded them the victory.  

I had a small morale victory when a heavily injured Chaos Champion attacked my Felarch and I ended up killing him in Hand-to-hand.  Normally, if my Felarch gets caught out he gets deleted pretty fast.  Not today Chaos!  Otherwise, not my best showing but I still had fun.  

Oh yeah, I took a picture of my finished Hillbilly when I got home too....


There he is on the painting table along with my 6mm Egyptians and some Dark Eldar in the background.  I did manage to get the Hand of the Archon box undercoated and ready for paint. 


Until next time! 


Become a Patron and get access to all the cool stuff, a peak behind the curtain of Blood and Spectacles, and early-access to playtest games!  


You can follow Blood and Spectacles Facebook page or Instagram for more fun! 

Check out the latest publications and contact me at our Blood and Spectacles website

Or purchase all out games at the Blood and Spectacles Publishing Wargames Vault Page!          
    

Monday, December 11, 2023

On the Painting Table: For the Glory of Ra- More Egyptians for Kadesh


Faithful readers, you know I have been working on a 6mm project for the Battle of Kadesh for sometime now.  This means I have been grinding out work on an Egyptian army first.  I have completed the following: 

  • 4 Bases of Skirmishers with Bows
  • 4 Bases of Auxiliary Infantry with Bows
  • 2 Bases of Levy Infantry with Bows
However, that still leaves a whole lot of bases left to paint.  I have started tackling the largest single unit of the force, the Archers.  There are 6 total units.  Each unit has 12 strips of 4 archers and two command strips also with 4 figures.  That means each unit will have 56 figures per base.  That's a lot of batch painting.  


Progress was very slow on these units.  Painting any single 6mm figure is pretty simple.  Undercoat black, use Bronzed Flesh for skin tone, add white on the skirt, and skeleton bone for the bow/quiver, brown on the base.  Easy.  However, batch painting all of of them..... not easy or fun.  

I actually decided to paint them by unit to break things up a bit.  I batched the undercoating, then skin tones.  Once I painted the flesh on 2 units worth I went back to unit #1 and painted the other colors.  Then, I flesh undercoated unit #3 and then went back to finishing off Unit #2.  I did this routine over a few week ends until they were all complete.  


From there, I went onto the basing.  I used the same method of gap filler spackle that I have been using.  The command elements were a bit more complicated because I had to "cut" them off the strips so I could arrange them to face the correct way.  However, it was nothing complicated.  The biggest danger was one of them flying off into space, but a closed hand around the piece solved this little issue. 


After letting the bases fully dry, I moved onto one of my least favorite parts.  I painted all the bases using a Territorial Brown dry brushed with a Khaki color.  Then, I used a Green wash to add some foliage look.  The last step was to re-edge the bases with pure black.  This helps the whole unit stand out a bit on the table and look finished.  


6 Units down.  That left 5 bases of Egyptian Infantry including a base of Sherden Guards, and 3 bases of chariots to call this army done.  The bulk units were now complete.  The race to finishing off the Egyptian army before the end of the year was on!  


Below you can see the 12 bases the army is right now.  This is a mix of Auxiliary infantry with bows, Levy infantry with bows, archers, and bow armed skirmishers.  You can see that firepower was a big part of this army.      


Until next time.  I hope I have the whole army done! 


Become a Patron and get access to all the cool stuff, a peak behind the curtain of Blood and Spectacles, and early-access to playtest games!  


You can follow Blood and Spectacles Facebook page or Instagram for more fun! 

Check out the latest publications and contact me at our Blood and Spectacles website

Or purchase all out games at the Blood and Spectacles Publishing Wargames Vault Page!       


Monday, December 4, 2023

Battle Report: White Star/Red Star - April 12th, 1951 "Black Thursday"


Dateline: April 12th, 1951
Location: Northwest Korea, MiG Alley

In early 1951, the Communist forces were able to dislodge UN forces out of the Kimpo area.  This success also led to an increase in Communist air activity in northwest Korea; MiG Alley.

April 12th, 1951 was nicknamed "Black Thursday" after 30 Mig-15s engaged and attacked 48 or so B-29 Bombers in MiG Alley.  The Bombers were escorted by F-80s and F-84s that were no match for the Soviet aircraft.  Several B-29s were lost or damaged.  No MIGs were lost.  This caused bomber operations to cease over North Korea for three months.

Today we will be playing another Bomber intercept mission similar to our last engagement.  However, this time we will be using a few more defenders and attackers and see if we get a different outcome from the historical, Black Thursday results.  

Forces:

USAF
3 B-29 Bombers - Experienced Pilots
4 F-84 Thunder Jets- Experienced Pilots
4 F-80 Shooting Stars- Experienced Pilots


Soviets
4 MiG-15s - Experienced Pilots
1 Mig-15- Ace Pilot


Mission: 
This will be a Bomber Intercept sortie with the USAF as the Attackers.  They gain a kill for each Bomber that makes it off the board. 

Set-up:
Today we are using 1 MU = 1 inch on a 72MU by 48MU across board. 

However, the sky is overcast at High Altitude, meaning that Detection is harder for aircraft at High Altitude and shooting is reduced to Combat range only. 

For fun and flavor, we scattered some Low Altitude terrain across the board at random.  These will only impact flying at Low Altitude.  


If an aircraft is off its base, it is at low altitude.  If it is on the base it is at Combat altitude.  If it has a dice behind it, the aircraft is at High-altitude.  As usual, I will be breaking the game down into three phases, Maneuver, Battle, and End phase.  I will not be tracking the turn-by-turn action as it makes recording the game and playing it easier.  

Maneuver Phase:
As normal for games of White Star/Red Star the table starts clear of any aircraft as none have been detected yet. A strong Soviet detection roll let them spot the B-29s and escorting Shooting Stars at High altitude, even with the Cloud Cover before they made it very far onto the board.  The following turn, the Thunderjets were also detected.  

Finally, the MIg-15s were spotted coming in low, along the hard deck.  They use their speed and low altitude to sneak beneath the F-80s in front.  


Battle Phase: 
The Soviet pilots use the amazing climbing ability of the Mig-15s to race up and engage the B-29s.  The Migs swarm the Bombers, and manage to take one down in a fire ball.  

1 Bomber Down!

However, it doesn't all go the MiGs way, as fire from one of the B-29's also takes out a passing MiG. The experienced MiG pilots race past, needing to reposition for another pass.  However, the Ace does a high-G turn and targets another bomber, but fails to bring it down. 

Scratch 1 MiG!

After frantically trying to shift position and get back into the fight, the MiGs manage to get in behind the second bomber and blast it from the sky.  The MiG on the outside runs out of ammo tangling with some F-80s, but no one goes down.  The Soviet Ace over-shoots the last Bomber, and has to break-off, pursued by USAF F-80s.  
2nd Bomber Down!

The pair of MiGs manage to be in a tailing position on the last bomber, after finishing off his companion, and they down the last B-29.  

The last Bomber just before getting shot down!

Disengagement Turn:
The USAF go back to High Altitude and turn for home.  The MiGs avoid any further engagements with their mission complete and break-off back across the Yalu river. 

F-84 Thunderjets flee for home.

Conclusion:
Soviets scored 3 Kills to the USAF 1.  A clear win to the Communists! 

A "Black Thursday" indeed.  The MiG-15s proved why they were so feared and effective at their job.  They easily out maneuvered the F-80s and F-84s and took the B-29s apart.  As the USAF player, I never had a chance as I was always out of position with my escorts.  I think I managed to fire with them twice.  Meanwhile, most of my shooting came from B-29s!  The Soviet Ace was all over me.  Being able to maneuver in all three phases is pretty good, but thankfully he couldn't hit the broadside of a B-29 or this would have been over much faster! 

I think next time we will have to put some Sabres up against some MiGs.  The Shooting Stars and Thunderjets are not up to the challenge! 


Become a Patron and get access to all the cool stuff, a peak behind the curtain of Blood and Spectacles, and early-access to playtest games!  


You can follow Blood and Spectacles Facebook page or Instagram for more fun! 

Check out the latest publications and contact me at our Blood and Spectacles website

Or purchase all out games at the Blood and Spectacles Publishing Wargames Vault Page!  


Monday, November 27, 2023

Castles in the Sky: The Indo-China Campaign - The Final Battle


Welcome to the final battle of the Indo-China campaign between the British and the French.  The French finally took the lead in the campaign at 7 to 5 points and have triggered the "Final Battle".  One thing about the "Final Battle" scenario in the rules is that it encourages the players to determine what that scenario is going to be!  

In an unfortunate stroke of bad luck, the British ambassador to Siam passed away.  This left the Foreign Office in a bit of a dilemma.  The deceased ambassador had a well-established and long running relationship with the King of Siam.  This untimely opening had to be filled, before the French could exploit the opening and insert themselves into a position of power in Siam.  Therefore, the Foreign Office dispatched a new Ambassador immediately via airship.  

Commodore Duckworth received the news and immediately deployed with what was left of the Royal Navy of Siam to rendezvous with the British airship.  However, Commodore Aubre also received word of the arriving diplomat from his own Foreign Service contacts.  He also left with his own fleet to intercept and stop the new British Ambassador from arriving on-station.  

Forces: 

L'Aire National

Camot- Commodore Aubre- Command 4
Charles Martel Class Heavy Cruiser (Battleship)   

Cuchinchina - Captain Gourdon- Command 2
Gloire Armored Cruiser

Tourane- Captain de Genouilily- Command 2
Descartes Class Cruiser

Tonkin- Captain de Vence- Command 2
D'Iberville Class Cruiser

Fantassin- Captain Valjean  - Command 4
Chasseur Class Destroyer- Torpedo  

Royal Navy of Siam

HMS Malaya- Commodore Duckworth- Command 2
Queen Elizabeth Class Battleship

HMS Medusa- Captain Butler- Command 2
Active Class Light Cruiser

HMS Corsair- Commander Montgomery- Command 4
Bull Finch Class Destroyer- Torpedo

The British will also have to protect the ambassador's airship:

HMS Wesley Anne - Command 2
Troop Transport Ship

Mission: 
This is the Final Battle, so there is no scenario from "the book".  Instead, we are going to use elements of other scenarios to make this custom scenario.  

The British ambassador in the HMS Wesley Anne is placed within 18 MU from the short table edge at any speed and altitude 24 MU in from the British edge.  In addition, a landing point is placed on the opposite short table edge 12 MU in, and 24 MU in from the British edge.  The landing zone is a box 6 MU x 6 MU and the center is represented by a terrain piece.  The British are attempting to land the Ambassador within the landing zone before the game ends.    

Then, both the British and the French can place up to 15 AV of picket ships on opposite sides of the board on the long table edges, but no closer than 12 MU from any short edge.  Non-Picket ships go into reserves.  All ships can be placed at any speed and altitude.  Reserves enter the board in the normal deployment zones and follows the normal rules for reserves.  

In addition, if the British Ambassador's ship is stricken with a Fire! from critical damage, it will also trigger a special rules that the Ambassador was killed in the attack and ensuing fire.  Any successful boarding actions on the Ambassador's ship can "take the Ambassador" prisoner instead of the normal effect.  

The game will last 8 turns. 

The outcome of the campaign is thus: 
1. The Ambassador lands successfully in the landing zone - British Major win and Siam becomes part of the Empire as a client state

2. The Ambassador's ship survives the battle and is not crippled or sunk and still on the board - British Minor win and Siam stays in the British Orbit

3. The Ambassador's ship is crippled or left the board - Draw, but Siam becomes independent

4. The Ambassador's ship is sunk/explodes or the Ambassador is killed - French Major win and Siam is out of British orbit

5. The Ambassador is captured - The French have broken Siam from British control and swung them to French orbit         

There are three cloud banks on the board at randomly assigned heights as terrain and complications.  They are at 3, 4, and 2 and their height is a die next to them.  


Set-up:  
The Final Battle will take place on a 72 MU by 48 MU board.  1 MU is equal to 1 inch.  

The British Picket ships are the HMS Corsair and the HMS Medusa.  The Medusa is set-up to try and catch up with and escort the Wesley Anne, while the Corsair will try to lead them towards the landing zone.  
The HMS Wesley Anne has the flag 

The French picket ships are the Fantassin and Tonkin.  They are coming across at an angle towards the HMS Wesley Anne, eager to sink some torpedoes into her.  


For this battle, we are using a standing white board to track the key details of the battle like ship speed, altitude, Command, damage, and special effects.     

In addition, I am not going to be detailing every move and shot like previous game reports. Instead, I am going to give some high level details.  The battle will be broken down by stage.  These will be the Maneuver Phase, Battle Phase, and the End Phase.   

Maneuver Phase:
The French get a good jump and aggressively move in on the Ambassador's ship.  The Fantassin hits her with a spread of torps at long-range, but thankfully the look-outs saw them coming in time to Brace and avoid any damage.  That was a wake-up call to the British to start maneuvering and get the lead-out! 


The Wesley Anne gets under the Medusa's protection as she desperately blows smoke and tries to dive out of the line of fire.  However, the French keep barreling in heedless of the Corsair bearing down on them.  The Medusa's Point Defense guns swat two torpedoes from the Tonkin out of the air, but three others slam into the transport ship.  The Corsair tries to drive off the French Destroyer with a burst of Torps, but fails to strike home.  


The Wesley Anne desperately makes for the Cloud Banks, while the HMS Medusa stays as her escort.  The HMS Malayan and Commodore Aubre and the rest of the French fleet also arrive on scene.  The HMS Medusa escort pays off as she swats incoming Air Torpedoes from the Fantassin out of the sky. 
 

Battle Phase: 
The Wesley Anne escapes into the cloud bank, with the Medusa staying just above it.  The Tonkin moves to get the angle for when the transport comes out, but is greeted by the Corsair unloading on her from the Stern and the HMS Malayan from the port bow with her heavy guns.  The Tonkin is rocked by Friction and a heavy shells penetrates her armor.  


The Tonkin found itself caught up in the middle of the British fleet.  Meanwhile, the HMS Corsair was in front of the French.  They were both going to take a pounding.  The Tonkin's Captain let rip on the Wesley Anne and Corsair from both sides, passing the Command check.  Despite the Medusa's best efforts a torpedo managed to strike the transport and detonate.  


The Corsair managed to sink a torp into the Tourane, but in return was shelled by the guns of the Camot at close range.  She came away worse off with two hits.  The Malayan and Medusa pounded on the Tonkin, who failed to Brace.  

The Corsair lost armor, but the Tonkin's bridge was smashed by the enemy shelling knocking the Captain out of the fight.  The Tourane also had her screw fouled.  However, things went really pear shaped for the Brits as the Wesley Anne exploded in mid-air!  

The end of British control of Siam
End Game: 
With the British Ambassador's ship blown up in a catastrophic explosion, we decided to play one last turn as the fleets tried to disengage or get revenge.  

I finally obliged the British player and took my inferior French Battleship broadside to broadside against the British Dreadnought.  I even brought my Gloire Heavy Cruiser to support and he brought a Light Cruiser.  The engagement proved the wisdom of avoiding such and encounter all campaign.  The British fired for effect, while I braced.  Once the smoke cleared, the French Battleship lost 4 armor, a fouled screw, and took 13 friction.  The British Dreadnought took 7 Friction but no damage.  Ouch!  


With that, we called it a campaign! 

Conclusion: 
Well, the British lost the campaign when the Ambassador's ship blew up!  He's super dead now.  However, the British also ended the campaign on a high note as they finally got to use the full power of their battleship and reduced the Camot to half armor in one volley.  That was pretty satisfying for them.  

Commodore Duckworth tried to fill the gap for the lost ambassador with the King of Siam.  His diplomatic skills were worse than his command skills.  The Foreign Office in London was unable to recruit a new ambassador after the fate of the last one.  

It was not long before the French had easily out-maneuvered Commodore Duckworth at court.  The King of Siam was also unimpressed by the British being unable to help quell rebels in the Kraa isthmus, and the high upkeeping cost of their Navy.  He expelled the British, and turned to the French in Indo-china for aid.  The French were quickly able to quell the rebellion, since they had been secretly funding it. 

It was not long before Siam and France signed a mutual aid pact.  This effectively brought Siam into the French orbit.  With French ships patrolling the region, the trade lines to and from Indo-china were secured.  A great diplomatic and strategic victory for the French. 

Now, to talk a bit about the battle and the campaign.  The British underestimated the range of the French torpedoes, and in the first turn failed to take evasive actions to avoid coming under fire.  This was a big problem as the little transport got pasted before reinforcements could show up.  However, the British had a tough climb in this scenario because their fleet had been decimated in the previous Fleet Battle, and they really didn't have enough ships to challenge the French.  The HMS Malayan was powerful, but not maneuverable or fast enough to get there in time.  The French discarded their usual Fabian tactics and just came pouring on with a single-minded determination to sink the Transport.  

This was the 7th or 8th  battle in the campaign.  The pool of ships and the post-battle repair sequences were fun and interesting.  Damaging or losing ships in battle turned out to be a big deal.  However, the experience side was not as useful.  We kept forgetting to use the experience benefits in the heat of the battles.  Plus, it was a bit of tracking during the battle for the gains.           

Overall, a good time with the scenario and the campaign in general.  


Become a Patron and get access to all the cool stuff, a peak behind the curtain of Blood and Spectacles, and early-access to playtest games!  


You can follow Blood and Spectacles Facebook page or Instagram for more fun! 

Check out the latest publications and contact me at our Blood and Spectacles website

Or purchase all out games at the Blood and Spectacles Publishing Wargames Vault Page!