Thursday, August 31, 2017

Random: Aquanautica Imperialis Picts

As I was rooting around in my old Photobucket accounts, I found these random photos.  These are homemade models for Aquanautica Imperialis.  It is a game of ocean navies in the Warhammer: 40K Universe.  The entire game was born out of the Battle for Ammoriss campaign.

Aquanautica Imperialis was one of my first games, and it wet my appetite for more.  This game had some success as other players online began to adopt it and make models for it.  It had a handful of vocal and enthusiastic fans for a couple of years and was my most downloaded game for a long time.  It's success spawned a submarine game called Aquanautica Imperialis: Battle for the Depths and I was working on another variant called Aquanatuica Imperialis: Terror of the Deep that I eventually abandoned work on.  

The game itself has ships and stats for all of the major factions in the Warhammer: 40K Universe plus a few more.  In addition, it has a few of the minor ones and former factions in the Experimental Rules section.  In addition, I had made an entire book of paper templates to be used in the game so it is a fully playable game.  However, I was not content to just use paper templates.  


I also did some work on vreating my own models for the game.  Above you can see the Ammoriss Naval Planetary Defense Force or the AN-PDF.  2 Cruisers, 1 light cruiser, and 4 escorts.    


Her you can see the Stalwart Light cruiser in operation with two Constant escorts off the coast of the Salvation Islands Archipelago near Angel's Landing.  


Of course, I didn;t just make models for the Imperial Planetary Defense Force.  I also made models for an Ork force.  Above you can see the AN-PDF facing off with and engaging an Ork Kill Fleet near Da' Deff Islands.  The force also included a number of submarines and a capital ships.  Ork ships were the easiest to make.    


I also made a force of Tyranid Bio-vessels.  Here you can see the AN-PDF giving chase to some of the smaller Tyranid constructs.  Some of them got very, very larger.  However, I will have to get in a game for some pictures of those.  

Aquanautica Imperialis plays like a mash-up of Battlefleet: Gothic, Man-o-War, and Dystopian Wars.  It has rules for submarines, flyers, torpedoes, mines, etc.  I even put together a set of Campaign rules and Scenarios, but those were never fully integrated into the main rulebook.  Instead, I moved onto other projects since I didn't want ot put too much time and energy into an aggressively copyrighted IP.  Instead, I branched out into other games.  However. Aquanautica Imperialis  was one of the first big game design projects that got me on the road to game design.  

If you try it out for yourself.  Please feel free to add an models, games, etc. to the Messageboard.  I always love to see what other people are up to.      


Monday, August 28, 2017

Aeronautica Imperialis- Battle Report: Air Raid!


This battle took place as part of the Cleansing of Grex Silex campaign in 2015.  It uses custom aircraft, factions and rules from the campaign that can be found in my Aeronautica Imperialis review here.

**********************************************************************************

After successfully repulsing most of the Varingyr's bombing fleet, Kor'O D'yanoi ordered her forces to go on the offensive. Using navigational trajectories and Gwaihaine Geld's knowledge of the system, Tau forces counter-attacked. Barracuda equipped with ground attack Smart Missiles and the dreaded Tigershark Ax-01 launched to take the fight to the Varingyr and their master Galahand Geld. 

After the last battle, my wife and I weren't sure what scenario to play. We actually decided to use the campaign rules in the AI rulebook. We rolled a dice to see who would be on the Offensive. 1-4 the Tau and 5-6 the Varingyr. The Tau won, and we randomly rolled up an Air Raid on an airbase. We decided to use the Asteroid Base rules as well. 

Air Raid!

Ironbound Frjal

1 Overlord Airship- 

2 Iron Eagles
+Additional Weapon Load – Fusion Lances

1 Multi-Launcher

The Graceful Hunters

4 Tau Barracudas
+2 with weapon loads

1 Tigershark Ax-01-01

Set-up

On the Varingyr side of the board we set-up an asteroid base. It was about 1 by 1. Using the rules, we randomly rolled it to be at height 4. We then put 1 bunker (4 hits) and 4 Drop Eagle targets scattered around the base. 


The Varingyr Multi-launcher was overlooking the base at height 4. The Overlord and 2 Iron Eagles came on behind the base at altitude 6 and full speed. 

The Graceful Hunters deployed on the opposite side. They were split into three groups generally with a fighter accompanying a ground attack ship. The Tigershark was in the middle. They were at various high altitudes and speed 5 for the most part. 

Turn 1
Initiative: Tau 

Movement:
The Tau are flying around all weird. They are not going straight for the target area. In fact, the interceptors are hanging back and letting the strike fighters go ahead of them.

The Varingyr bracket the airbase, and the Overlord hovers over it and slowly begins to turn its guns towards the enemy. 

Shooting:
None

Turn 2
Initiative: Tau

Movement:
The Tau are again doing some strange, crossing over pattern. None of them are looking straight at the targets, and I have no idea what my wife is doing. I hope she is feeling well? The interceptors are way in the back now. 

Well, the Tau aren;t the only ones who can do weird stuff. I am wary of the Barracudas forward firepower, so a split our wide with my Iron Eagles, and hope to use their maneuverability to swoop back in before the Tau can attack my ground targets. Now,except for the Multi-launcher and Overlord, their path is clear. 

Shooting:
None, everyone is still too far away.

Turn 3
Initiative: Tau

Movement:
The Tau Strike package with the Tigershark races past Iron Eagle 2 as it turns to engage them. The Varingyr are out-piloted by the Tau yet again! At least I made the Tigershark drop below the asteroid base in the process. 

Iron Eagle 1 forces the lone Strike fighter towards the target zone, while the Interceptor moves to engage. 

Shooting: 
Iron Eagle 1 misses Barracuda 1 with a long range Fusion Lance shot. Barracuda 1 returns the favor and misses the Varingyr with his Ion Cannon. Iron Eagle 2 and Barracuda 2 also trade-shots at long range, and also miss. 

The Overlord takes a mid-range broadside shot at Barracuda 4, but the altitude difference causes all the shots to miss. 

Turn 4
Initiative: Varingyr

Movement:
The Tau easily out maneuver the Iron Eagles, leaving them without any targets. Plus, the Tau strike package blasts past the overlord on overwatch, however, they don;t have a great angle to the target area yet. 


Shooting: 
The Varingyr Multi-Launcher opens up on Barracuda 4, but fails to hit it. 

Huh, we just realized that Burst Cannon Drones are All Around Down firing weapons only. Woops! We've been playing that wrong for how long now? 

Turn 6
Initiative: Varingyr

Movement:
The Tau move in on the base and there is very little that can be done to stop them at this point. Barracuda 3 narrowly escapes crashing into the side of the asteroid after an overly aggressive power dive, however some fancy flying by way of a pilot test saves his bacon and puts him in good strafing position. 

Shooting: 
The Multi-launcher sees Barracuda 4 race over it, and opens fire with a barrage. The crews timing was percfect, and they light up the strike fighter with an airburst. The pilot ejects just in the nick of time! Scratch one strike fighter! 


The crew's celebration is short lived as the Ax-1-0 lights up the Multi-laucher and destroys it. There went my most effective unit! 

I'm glad my wife went for the Ground Defense, as now Iron Eagle 1 has a chance to blast Barracuda 3 from the sky before it can fire. All of its shots hit, but only the Fusion Lance manages to make it count. The Strike Fighter begins to smoke. Plus, Iron Eagle 1 is now Tailing the fighter. 


Barracuda 3 opens fire on the Bunker complex, but its targeting system must be damaged. Only the Seeker missile hits the target, and it bounces off the Bunker's armor and deflects wide before detonating harmlessly! 

Along range Fusion Lance barrage from the Overlord fails to find the mark on the Tiger Shark. 

Turn 7
Initiative: Tau

Tailing Fire: Iron Eagle 1 fires on Barracuda 3. His Mag-cannons manage to catch the Tau flyer in the engine ports and cause them to flame out. Coming in so low to the crater, there is very little the pilot can do as hit craft crashes into the rock below. My first Iron Eagle kill!


Movement: 
The remaining Tau craft slow and get ready to bombard the base. If they lose one more craft they will have to disengage. The Varingy can't get the angle on them yet. 

Shooting: 
The Tiger Shark unloads on the bunker complex with its mighty Railguns and drone missiles. The Railguns plow up the crater the Bunker is housed in but fail to damage the bunker. Meanwhile, a drone missile hits the bunker and causes some damage. Only 3 hits left! 

A desperate long range Fusion Lance barrage from the Overlord managed to strike Barracuda 2 and cause it to blow smoke. However, it is still able to fly and fight. That was the last of the Overlord's long range firepower. 


Barracuda 1 and 2 try to strafe one of the grounded Drop Eagles, but miss the mark. 

Turn 8
Initiative: Tau

Movement: 
It has turned into a knife fight over the Varingyr base! The Tau are pressing the attack,and the Iron Eagles are in a position to contest them! 

Shooting: 
Barracuda 2 fires everything at the bunker complex in an attempt to soften it up! However, nothing sticks.

Iron Eagle 2 misses his shots on Barracuda 1. 

The Tigershark unloads everything it has on the base, but fails to even scratch it! The Varingyr must build things tough! 

Iron Eagle 1 fires Barracuda 2, and manages to strike something delicate. The pilot fails to eject as his bird is downed in the perimeter of the base. That will force a disengagement! 


Barracuda 1 also unloads on the Bunker to try and take it out. One of the smart missiles manages to hit something vital in the bunker. It has 2 hits left.

Turn 9- Disengagement Turn
Initiative: Varingyr

Movement: 
The Tau aren't giving up that easy, and move in for a last parting shot at the Varingyr base. 

Shooting: 
Iron Eagle 1 uses the last of his ammo on Barracuda 1, but fails to hit. 

The Tiger Shark uses the last of its missiles on the bunker, but fails to hit. Barracuda 1 also unloads. This time it is enough and the bunker is reduced to a smoking ruin from a barrage of close range Ion cannon fire! 


With that, the Tau engage their afterburners and bug out. 

Conclusion
This one is close! It will have to go down to the points! 

Tau- 4 Ground Hits and 1 destroyed Multi-Launcher = 52 Points
Varingyr- 3 Dwoned barracuds, 2 with Weapon Loads = 66 Points

Varingyr/Eldar win in Warzone 4

Wow, that was close, but the Stunties won! Things looked pretty bad early on, but the Multi-launcher turned the tide when it took out the Strike Barracuda before it could fire! Plus, that is when the Tau's maneuverability became limited as they were attempting to strafe ground targets. They lost their advantage in numbers, and it became a lot easier to get a bead on them as their attack pattern was locked in. 

Despite getting two kills, Iron Eagles still suck! The Tau got some pretty bad strafing rolls, and the Varingyr got lucky on a couple of hit/damage rolls. That is the way of the world. It was a nail-biter all the way down to the wire.

Thursday, August 24, 2017

Rampant Stars: Battle Report- Grav-Ball Championship Abduction

Welcome to my RAMPANT STARS battle report.  This is a generic ruleset for Sci-fi games that are miniature line agnostic, scale agnostic, and usable in any sci-fi setting from a grim dark universe, to Vietnam in space, to the war against the machines.  Rampant Stars uses relatively broad unit types and Sci-Fi traits to allow you to customize for the game you want.  In addition, Rampant Stars uses a three tiered scenario generator that allows for countless variations for the games you play.  Finally, it is designed to be played in one hour of game time.  


A band of Xeno Hooligans arrived on the planet to support their favorite Grav-Ball team in the semi-finals on the ice world of Toth.  However, after a questionable call on the field they stormed the arena and made off with the referee into the wilderness.  A garrison of Pink Spaz Marines was attending the games to cheer on the rival human team and they volunteered to rescue the referee before the game can resume.  

Pink Spaz Marines
Command Assault Unit= 10 points
Elite Mounted   Effectiveness Rating: 5                  Points: 6 (+3)= 9
Move    Command           Assault                 Defense               Shoot    Armor 
10”         2+                           2+                           3+                           2+           2
Traits:
Commander- 0 point= +1 Command Check to units in 12 inches
Jump gear- 2 pt= Unit can ignore difficult terrain and move over friendly units
Combat gear- 1 pt = Double assault, short range only shooting

Tactical Squad Alpha= 8 points
Elite Infantry      Effectiveness rating:  10                                Points: 4 (+4)
Move    Command           Assault                 Defense               Shoot    Armor 
6              2+                           2+                           3+                           2+           1(+1)
Traits:
Armored- 2 pts= Armor +1
Rapid Fire- 2 pts= Short range roll double shots, long 1.5 shots.  May not be used for move and shoot

Tactical Squad Beta= 6 points
Elite Infantry      Effectiveness rating:  10                                Points: 4 (+2)
Move    Command           Assault                 Defense               Shoot    Armor 
6              2+                           2+                           3+                           2+           1(+1)
Traits:
Armored- 2 pts= Armor +1

Total= 24 points


Xeno Hooligans
Regular Mounted Commander- Trukkerz
Regular Mounted            Effectiveness rating:  5(10)                          Points: 5 (9)
Move    Command           Assault                 Defense               Shoot    Armor 
10           3+                           4+                           5+                           4+           2
Traits:
Big Unit (+4)- Double Units initial Effectiveness Rating
Leader (Free)

Hooligan Band- Stomperz
Irregular Infantry             Effectiveness rating:  10                                Points: 2
Move    Command           Assault                 Defense               Shoot    Armor 
6              4+                           4+                           5+                           4+           1
Traits:
None

Hooligan Band- Romperz
Irregular Infantry             Effectiveness rating:  10                                Points: 2
Move    Command           Assault                 Defense               Shoot    Armor 
6              4+                           4+                           5+                           4+           1
Traits:
None

Hooligan Band- Basherz
Irregular Infantry             Effectiveness rating:  10                                Points: 2 (5)
Move    Command           Assault                 Defense               Shoot    Armor 
6              4+                           4+                           5+                           4+           1
Traits:
Fierce (+2)- Re-roll misses in an assault
Combat weapons (+1)- Shoot close only, double dice for assaults

Hooligan Band- Big Bang-Bang
Irregular Infantry             Effectiveness rating:  10                                Points: 2 (6)
Move    Command           Assault                 Defense               Shoot    Armor 
6              4+                           4+                           5+                           4+           1
Traits:
Armor Piercing (+2)- Shooting reduces armor rating of target by 1
Rapid Fire (+2)- Short range double shots, long 1.5. No move or shoot.

Total Points= 24


Mission
Missions are generated by rolling 3d6 three times and consulting a mission, complication, and Location chart.  Of course, you don’t have to roll any at all, but for a test game we might as well go for it!  

Rescue Mission
The attackers must secure the NPC.  They can take the NPC by eliminating the Unit accompanying it with shooting or assault and then moving the NPC into their Zone of Control.  The unit with the NPC may not leave the board and if they retreat/rout the NPC is left behind.  The NPC can be passed off between enemy units this way many times.  The attacker must then try to move the NPC off the board.  The gamelast 8 turns, one hour, or until one side is destroyed/routed.  If the attackers have moved the NPC off the board, they win. 

The Spaz Marines will be the attackers.

Night Fight
The battlefield is shrouded in darkness.  It is incredibly hard to see .  Before a unit shoot/assaults roll 3d6 as that is the total distance the unit can see to fire.  If the target is not in Line-of-Sight the order can not be completed.  However, the unit is not Shaken.   

Location
Outdoor, Desert (In this case an ice world)

You are fighting outdoors on a desert world.  It is covered in dunes, barren rocks, and scattered watering holes/oasis.  The terrain could be sand, snow, or worse!  Moving up and over dunes /hills is considered difficult terrain. 

Well then…. This should be something. 

Set-up
This board is 6x4 in size with two hills, a forest, and some walls. 

Set-up
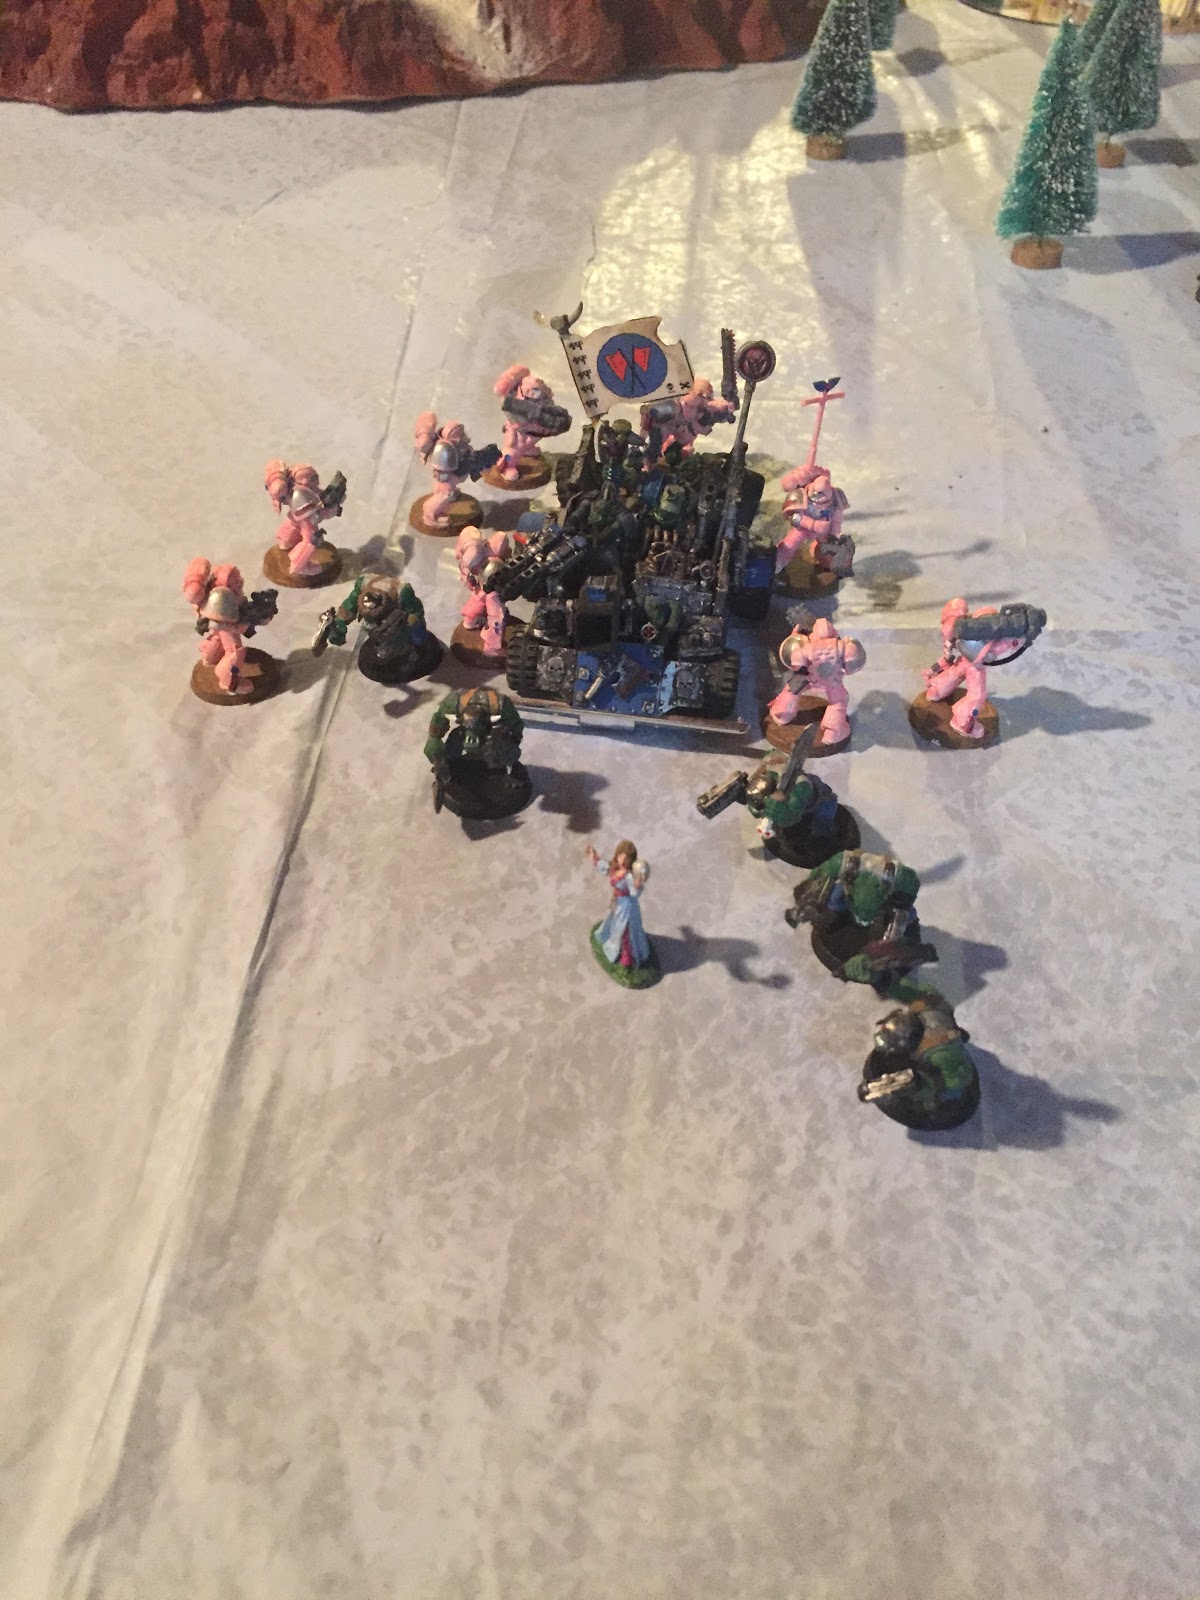
The Xeno Hooligans decide to set-up the Stomperz in the center of the board with the Referee.  Here the NPC is represented by a female wizard model.  They are ready to leg it to their end of the wintery battlefield. 

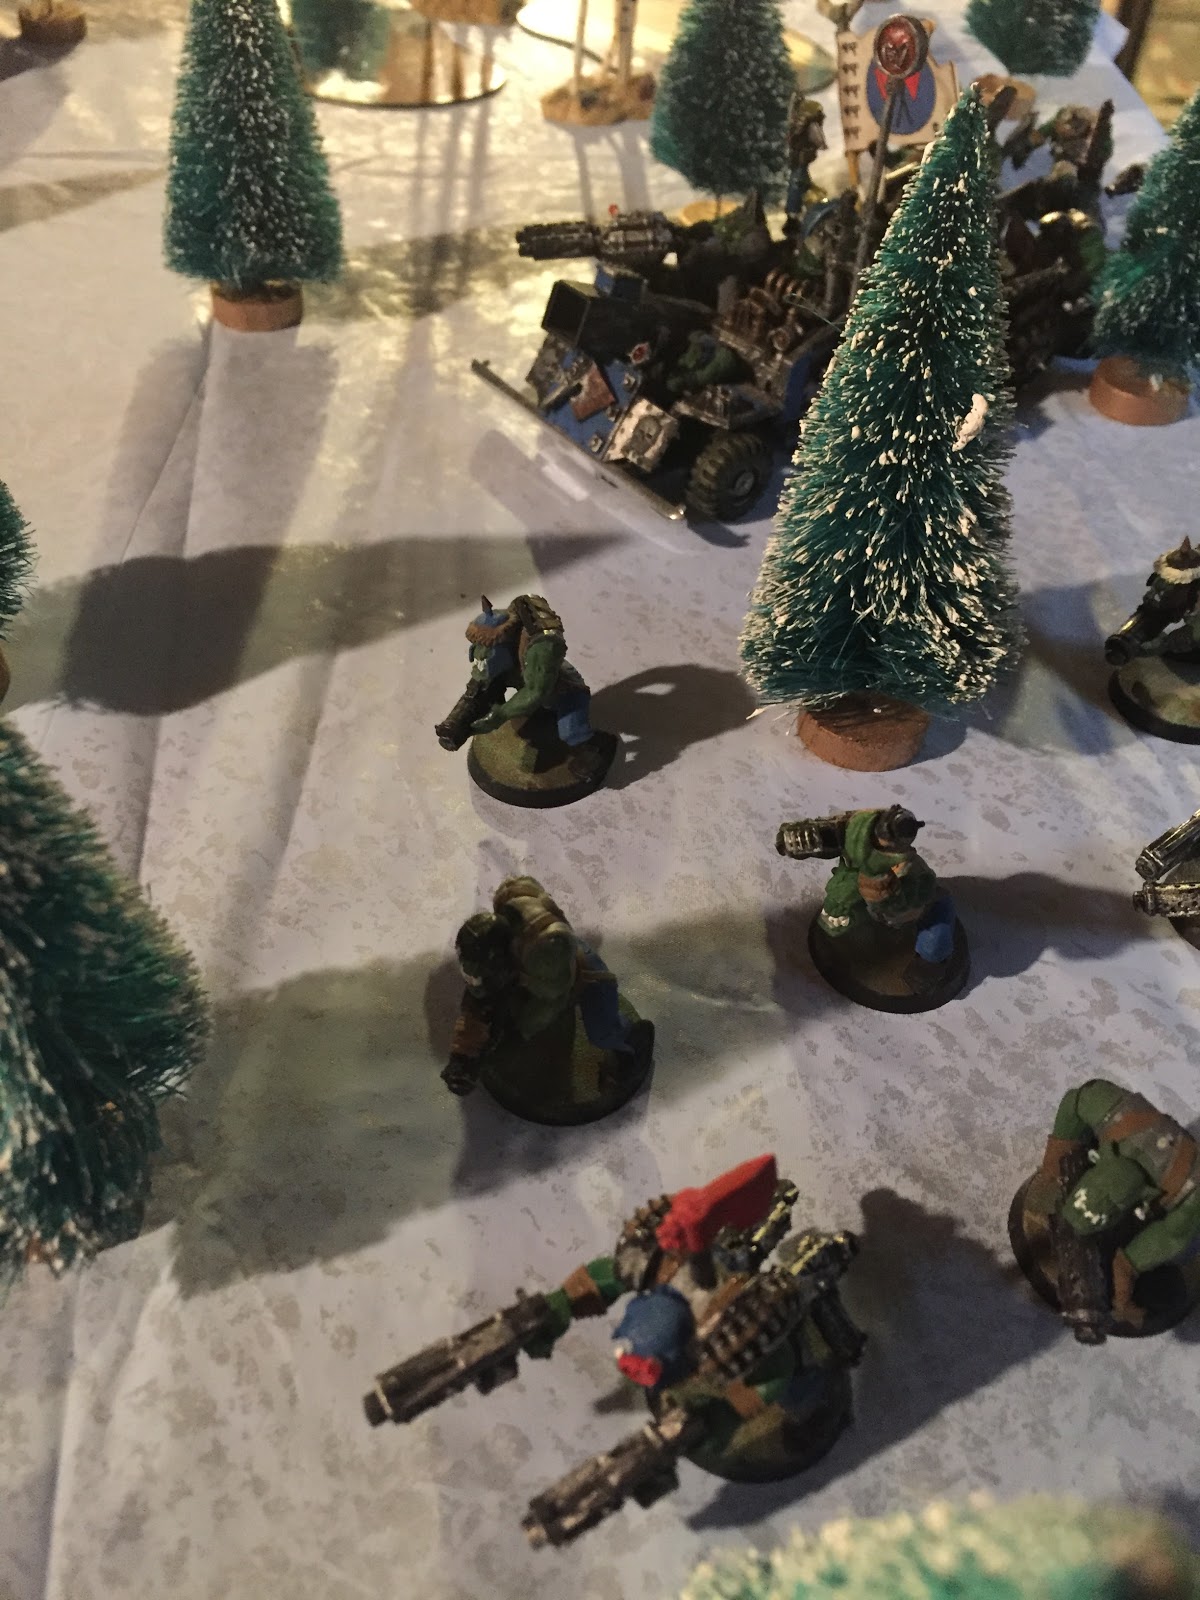
On the Xeno Hooligans side, the Ropmerz are ready to greet their fleeing friends.  They are flanked in the woods by the Basherz on one side, and the Big Bang-Bangs on the other.  Flanking the Bang-bangs is the Trukkerz.

The Pink Spaz marines are in pursuit.  The left is held by Tactical Squad Alpha, then Beta, and the Command Squad is ready to chase down the fleeing Stomperz. 


Turn 1:
The Xeno Hooligans go first.  The Ro,perz, Basherz and Trukkerz all race forward to secure the Ref.  However, the Stomperz are too busy arguing the merits of the game and are shaken, as are the Bang-Bangs. 

Beta and the Command squad pursue the Stomperz, making good ground.  However, Alpha takes long range rapid fire shots at the Stomperz and almost wipes them out.  The last Stomper fails his morale check and flees.  The Ref is left stranded to be picked up.


Turn 2:
The Big Bang-Bang rally and prepare to fire. The Romperz make for the Ref.  Meanwhile, the Trukkerz and Basherz are stunned by the loss of their comrade. 

Beta squad takes the lead and double times towards the objective.  The Command unit moves in behind to support, and Alpha holds to cover the advance. 


Turn 3:
The Xeno Hooligans have a tough round.  The Trukkerz fail to Rally, but the Basherz rally.  The Romperz try to double time, but fail their command check.  The Big Bangerz are out of range.

Tactical squad Beta tries to shoot the Romperz, but is unable to due to the darkness.  The Command unit moves out towards the Basherz.  Tactical squad Alpha goes to move but fails their command check and is shaken.  

Turn 4:
Trukkerz Rally this turn.  The Romperz rush forward and grab the referee!  The Basherz move up the flank to cover their allies.  Meanwhile, the Big Bangerz move from cover towards the action.

The Pink Spaz Marines have a decision, either shoot or charge.  Beta squad decides to shoot at the Romperz.  They take out 6 Hooligans and force the rest to rout off the board.  They leave the Ref.

The Command squad charges into the Basherz, and slays them to a man…. Er…. Xeno. 

Squad Alpha Rallies. 


Turn 5:
The Trukkerz move forward firing into the darkness.  However, due to the night, they fail to hit Squad Beta.  Meanwhile, the Big Bangerz are confused and fail to support the Trukker attack.      

The Pink Spaz Marine Command squad flies over and grabs the ref.  Meanwhile squad Beta moves forward to support them. 

Turn 6:
The Big Bangerz leader gets them sorted out.  Meanwhile, the boss and his Trukkerz attack the Pink Spaz Marines with the Ref in an assault.  The trukkerz wipe out the smaller command squad. 

However, Squad Beta counter-charges and reduces the Trukkerz by 4 effectiveness.  The Hooligans stay in the battle.  Squad Alpha moves forward to support their comrades. 


Turn 7:
The Trukkerz grapple with Beta Squad, but only manage to take out 1 more.  The Spaz Marines stay put.  The return attack kills 3 more Hooligans, but they stay in the fight.

Squad Alpha fires into the darkness, but can not see the Big Bangerz properly.      


Turn 8- Final Turn:
The Trukkerz fail to injure any of the Beta Squad Spaz Marines in combat.  The Big Bangerz move and shoot back at Alpha squad, but the darkness hampers them. 

Beta squad counter-attacks and finally pushes the Trukkerz away and slays them all.  Alpha squad sees the outlines of the Big Bangerz and opens fire using Rapid Fire.  The Hooligans are all killed! 


Conclusion:

The Pink Spaz Marines have won the day as all the Xeno Hooligans are dead and they have reclaimed the Ref!  Finally, the Gravball game can continue!  There is much rejoicing! 

I messed up the assault since the Hooligans lost and should have been forced to fall back their full move.  However, I kept them in the fight for next round accidentally.  That probably would not have changed the outcome, but there you go.  I also forgot the Night Fight rules in Turn 1, and that could have been a big change, but there you go.  Overall, the rules worked smoothly, quickly, and as intended.  You can give them a try yourself here.      

Monday, August 21, 2017

Aeronautica Imperialis- Battle Report- Stragglers over Silex Minoris


This battle took place as part of the Cleansing of Grex Silex campaign in 2015.  It uses custom aircraft, factions and rules from the campaign that can be found in my Aeronautica Imperialis review here.

************************************************************************************

Overlord airships were being used by Galahand Geld to seek out and destroy Tau aligned enclaves within Silex Minoris. Of course, Envoy T'Wa'La demanded that the Tau sympathizers be protected prior to their evacuation. Therefore, Tau hunter groups were dispatched to locate and destroy any Overlord airships they could track down.

After experiencing engine trouble, the Overlord Airship Miyago turned back to base. A flight of Iron Eagles was dispatched to escort her home. However, before they could return to The Shallows, they were detected and attacked by a roving squadron from the Graceful Hunters. 


Stragglers over Silex Minoris

Ironbound Frjal

1 Overlord Airship- Miyago

2 Iron Eagles
+Additional Weapon Load – Fusion Lances

The Graceful Hunters

3 Tau Barracudas

Set-up

The Miyago was set-up in the center of the short board edge at Alt 5 and moving the max of 2. One Iron Eagle was providing close support at Alt 6 while one was wide to the side at alt 6.

The Tau were spread across the opposite board edge. The one on the edge was at the highest altitude and descended from there. The far one was all the way down to alt 2. They were coming in at full speed. 

Turn 1
Initiative: Varingyr 

Movement:
Everyone moves straight ahead unwilling to blink. The3 Iron Eagles slowly speed up, while the center Barracuda flies up to the same altitude as the Overlord.

Shooting:
None. Everyone is too far away. 

Turn 2
Initiative: Varingyr

Movement:
The Miyago boldly powers forward, and rises up even higher. Being a zeppelin, this does not impact its speed. Its Iron Eagle escort flitters around it and tries to stay closest to the potential Tau attack path, but it is hard to tell as they are also all playing it catiously, matching heights and speed to make sure the Overlord doesn't get by. Meanwhile, Iron Eagle 2 flys wide and towards the long board edge. What is he doing? 

Shooting: 
Turn 2 and no one is in range! Madness! 

{b]Turn 3[/b]
Initiative: Varingyr 

Movement:
The Tau used the gap between Iron Eagle 1 and 2 to try and slip between and get to the Miyago. However, Iron Eagle spiraled back but mistimed the move and failed to get the right angle. The Miyago herself slowly turned to present her formidable broadsides to the attacking Tau fighters. Barracuda 3 overcompensated for the move and opened a potential escape route for the Varingyr. 

Shooting: 
The port broadside on the Miyago opened fire and the Tau hunters suddenly weren't so confident. A Fusion Lance sliced across Barracuda 2's fuselage and caused him to blow smoke and leak fluid. Only the altitude difference saved him from the formidable blast of firepower. 

Barracuda 1 was undetered and opened fire back. A Smart Missile struck home and the Overlord shook from the blast. 4 hits left! 

Turn 4
Initiative: Varingyr

Movement:
Iron Eagle 1 spirals to try and tag any Barracudas that try to turn in on the Miyago. Meanwhile, Barracuda 1 blasts through the Overlord's wake and past on the other side. Iron Eagle 2 swings in to provide top cover on the airship, and Barracuda 2 can;t quite get the angle. Meanwhile, Barracuda 3 does a wing-over to cut off the airships escape, but it may have just put it into the starboard broadside arc or the bomber. 

Shooting: 
The Barracuda is too close for the Fusion lances, but it gets sprayed down with Mag-cannon tracers. However, the Tau pilot deftly negotiates the fire and avoids any serious damage. He viffs slightly and fires back. The Tau's fusillade strikes home as his Ion cannon strikes true and reduces the Overlord to 3 hits! 

Iron Eagle 2 fires at the petulant Tau craft, but again the fancy flying of the Tau and the altitude difference allow him to avoid any serious damage. 

Barracuda 2's Burst Cannons fire away at the nearby Iron Eagle 2, but fail to hit anything. 

Turn 5
Initiative: Tau

Movement:
The Graceful Hunters quickly box in and pursue the Overlord. Their skill is clear as they easil outmaneuver and endanger the Varingyr escort gyrocopters. 


Shooting: 
Barracuda 3 takes aim at the lumbering airship and opens fire. A pair of Smart Missiles find their mark and blast into the Airship, it begins to smoke and list badly, but is still flying with one hit left! The damaged bomber returns fire, but its Mag-cannons only scratch the surface of the closely pursuing Barracuda. 

From Barracuda 2 a Smart Missile damages the turbo-fan of Iron Eagle 2, but he is still in the fight. 

Turn 5
Initiative: Varingyr

Movement: 
The Overlord Airship drops like a rock and plunges down just above the edge of the Grex Sielx asteroid disc. Amazingly, Barracuda 1 and 2 had anticipated this move, but failed to dive fast enough. Iron Eagle 1 barely misses Barracuda 1 as they dive past each other. However, Iron Eagle 2 gets into a Tailing position on Barracuda 1. 

Shooting: 
Iron Eagle 2 unloads his Mag-cannons on the Tau fighter, but despite getting a solid hit, fails to cause any damage. 

In return, Barracuda 1 peppers Iron Eagle 1 with burst cannons shells and despite 3 hits, fails to find a weak spot. 

Turn 6
Initiative: Varingyr

Tailing Fire: Iron Eagle 2 performs Tailing Fire at barracuda 1, but again fails to find the mark. Iron Eagle 2 fails his Advanced tailing check. 

Moving:
This time the Hunters overshoot their targets as they dive to try and engage them. The Miyago actual moves up a bit in an aggressive move to engage his foes. 

Shooting: 
The Miyago's forward mag-cannons spray Barracuda 1, but fail to cause any damage. Its port weapon's reach out to Barracuda 3, but fail to cause any real damage. 

Iron Eagle 1 fires on barracuda 2 but fails to hit. Too eager. 

Return fire from Burst Cannon drones fail to damage the Miyago Overlord. 

Turn 7
Initiative: Varingyr

Movement:
The Tau scramble around to try and bracket off all possible escape routes for the heavily damaged Miyago. Meanwhile, the airship's escorts again find themselves out of position to help her. 


Shooting:
The Overlord again battles valiantly to escape. Her forward mag-cannons hit Barrcuda 1 but fail to damage her. Her broadside Mag-cannons also fire on Barracuda 2, but fail to damage her despite 4 hits! 

Barracuda 1 opens fire and despite the altitude difference blasts the Miyago into dust. The Overlord Airship explode spectacularly from Smart Missile and Ion cannon blasts. The Miyago goes down with all hands.


Conclusion
After 7 years of playing Aeronautica Imperialis I had never played this mission. I had read about how hard it was for the Straggler player to win, but I thought if I had a chance, it was with a 5 hits Overlord Airship! I guess not! 

Once again, I learned that Mag-cannons suck eggs! Despite numerous hits, none of them stuck. The only damaging hit of the game was from a Fusion Lance, but the Tau stayed tight to their target, so I didn't get to use many more after the first one.

The Iron Eagles are pretty maneuverable, but even when they get in position they can't seem to finish off their target. I had equipped them with Fusion Lances for more hitting power, but I rarely got to use them as this battle was a knife fight. I guess I shouldn't bring a Lance to a knife fight. 

The Overlord was throwing out firepower left, right and center, in a very real sense. However, despite all the dice it didn't seem to help this time. I was pretty aggressive with my bomber, so maybe I exposed it to more danger that it needed to be in. Maybe next time I will just flee and use my ability as a Zeppelin to constantly stay 1 or 2 altitude bands away from my attacker instead of trying to engage them. However, my wife was all over me and seemed to have most of the altitude bands covered at all times so I am not sure if I could avoid her long enough to make a difference.

In summary, I still haven't figured out how to be successful with these guys yet. Maybe I need them to operate in pairs better so I can put even more firepower on a single target? Any else have any ideas? Cheesy, if you happen to reads this I would love your insight from the Blood and Irongard campaign.