Monday, February 22, 2021

Only the Strong Survive: Battle Report- Allosaurus vs. Stegosaurus Pod


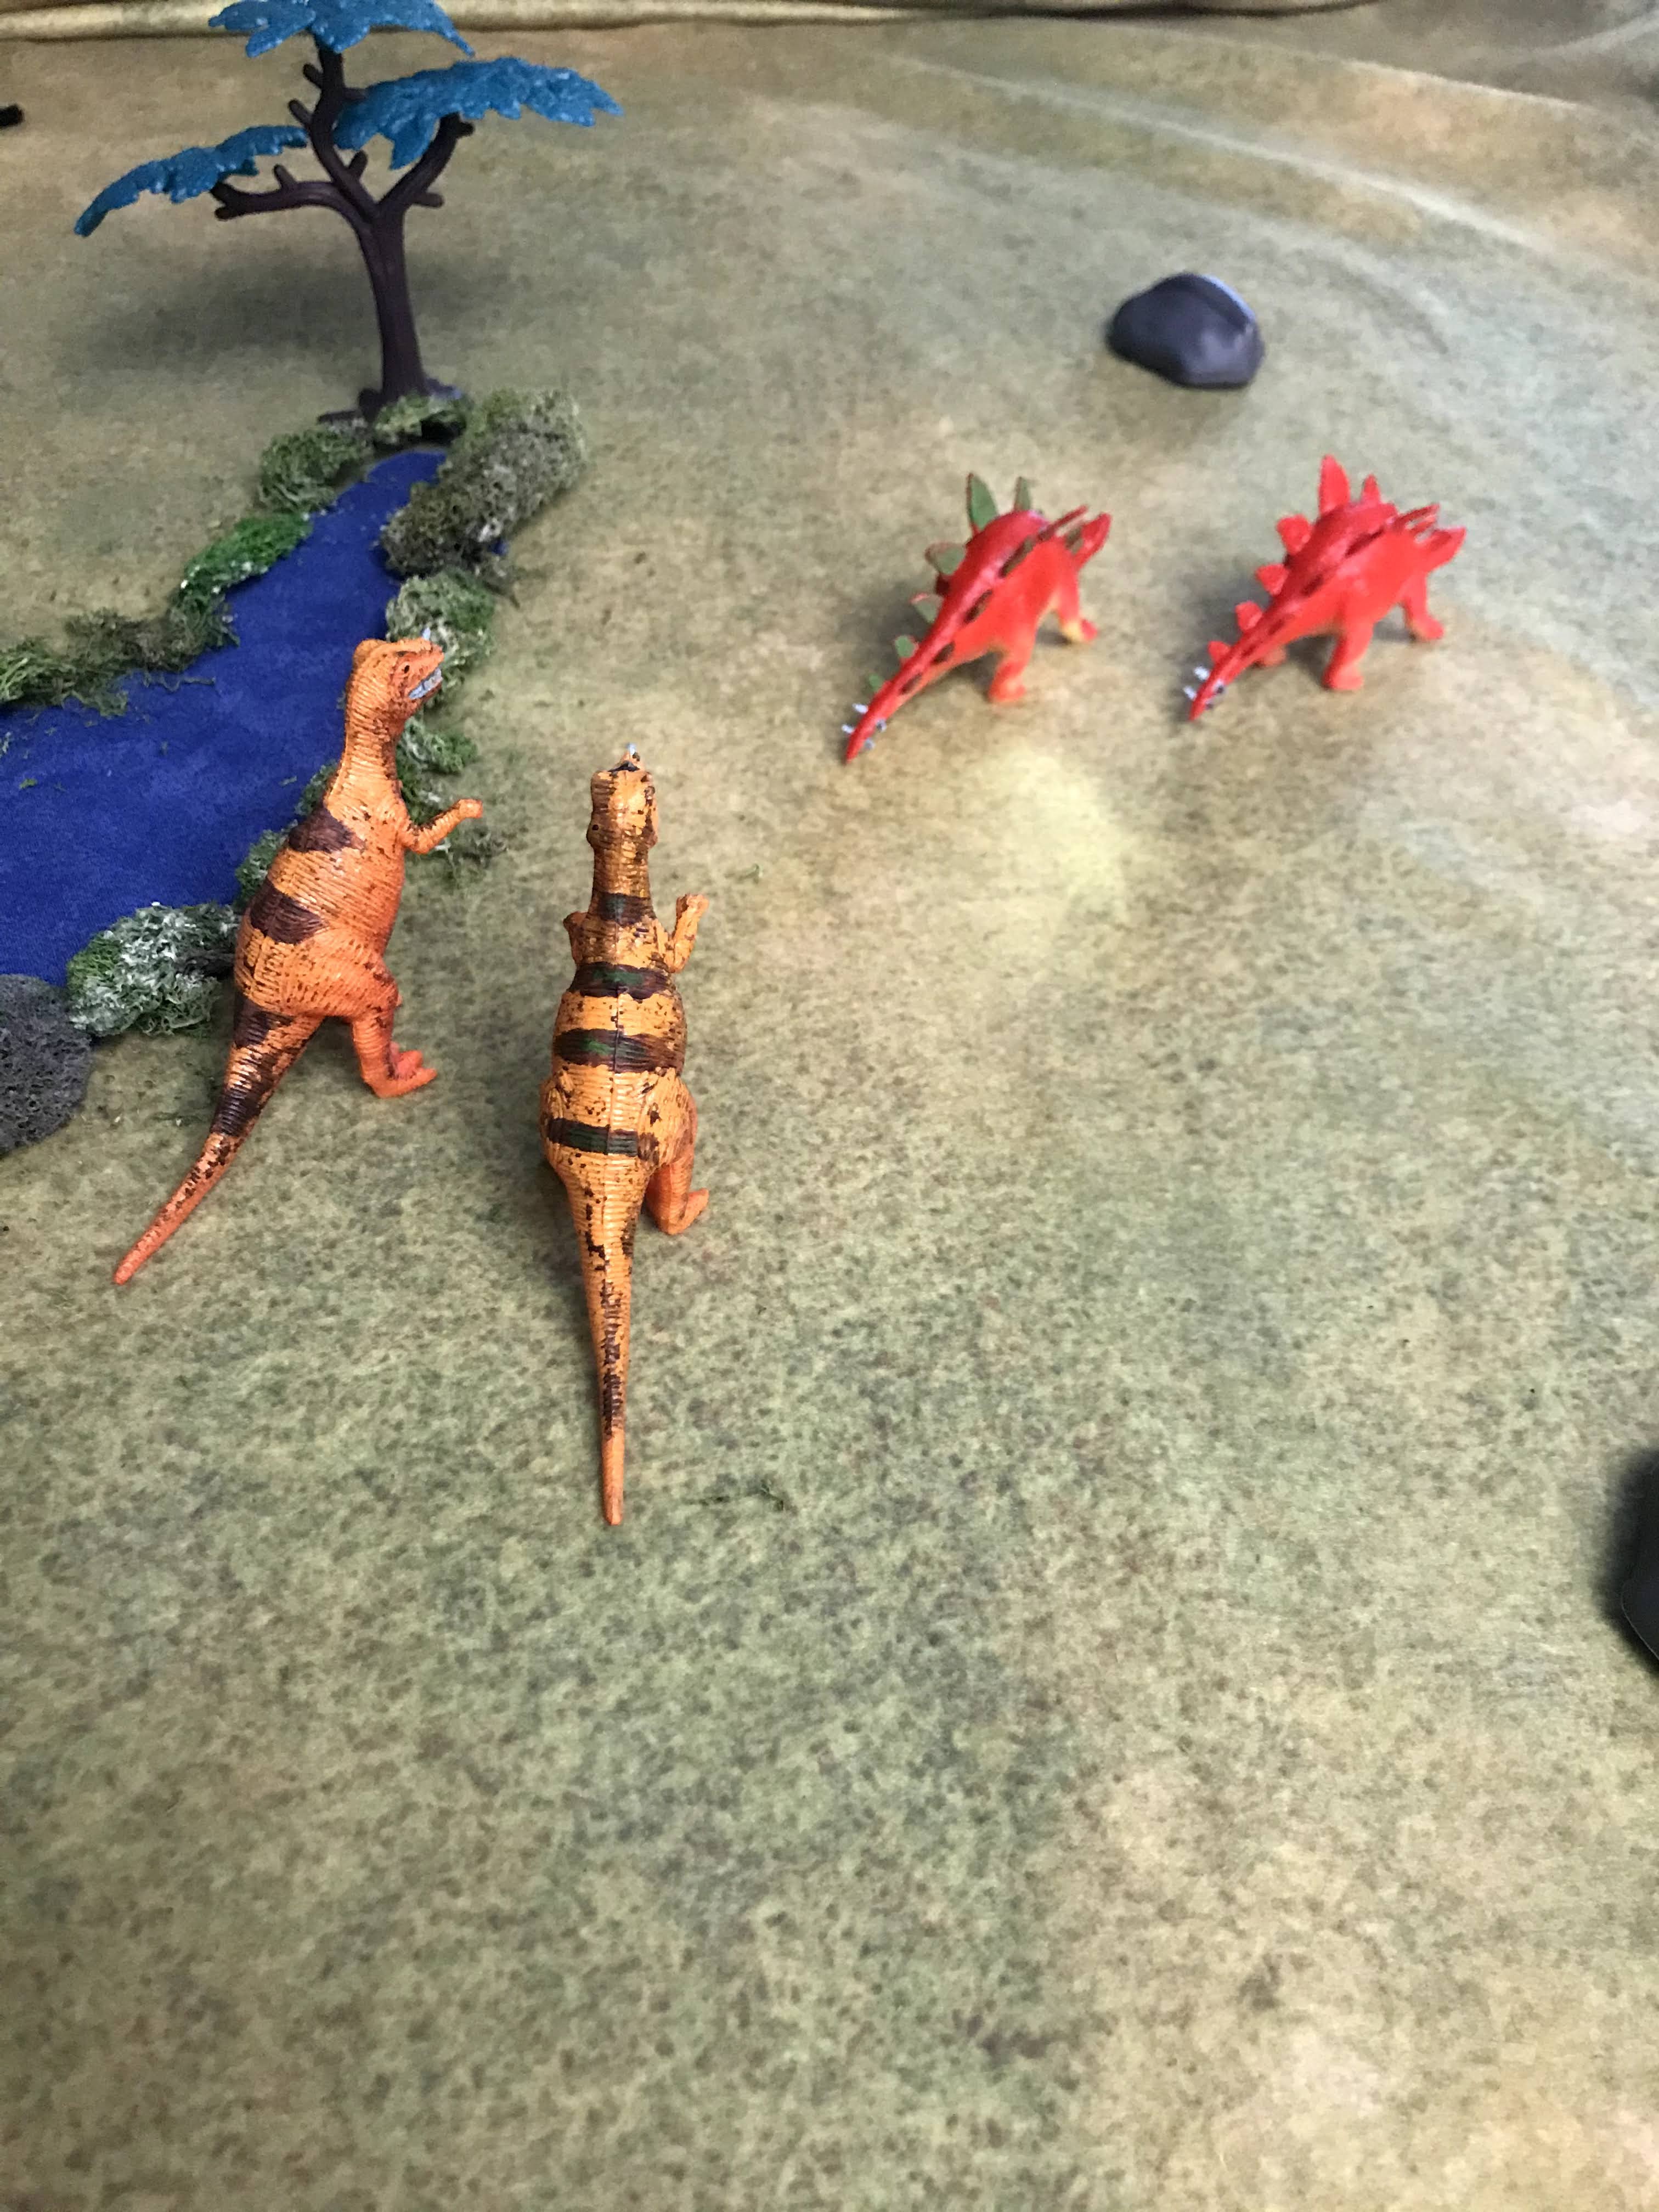
Big Al and his nest mate Alfonso were prowling the dusty plains.  Their stomachs growled as they gazed across the plains.  Sporadic trees dotted the savannah.  As they sniffed the air, they could smell water nearby.  That was a positive sign, as water meant that food could be nearby.

Big Al stretched his thick neck just high enough to peer over the tops of the tall grass.  In the distance, the grass swayed in the light breeze.  However, a something was not right.  As he strained his vision, there was movement counter to the movement of the grass.  It looked like armored plates, so that meant Stegosaurus were nearby.  

Alfonso's nostrils flared as he also caught their sent.  The two Allosaurus glanced at each other.  Their mouths began to water, and the grumbling of their stomachs subsided for a moment.  

The hunt was on.....

We are returning to the Pre-historic past as we expand to more Dinosaurs into our games.  Instead of 1-on-1 battle, we are getting a small hunting duo of Carnivores versus  a small pod of Stegosaurus near a watering hole.  

Set-up:

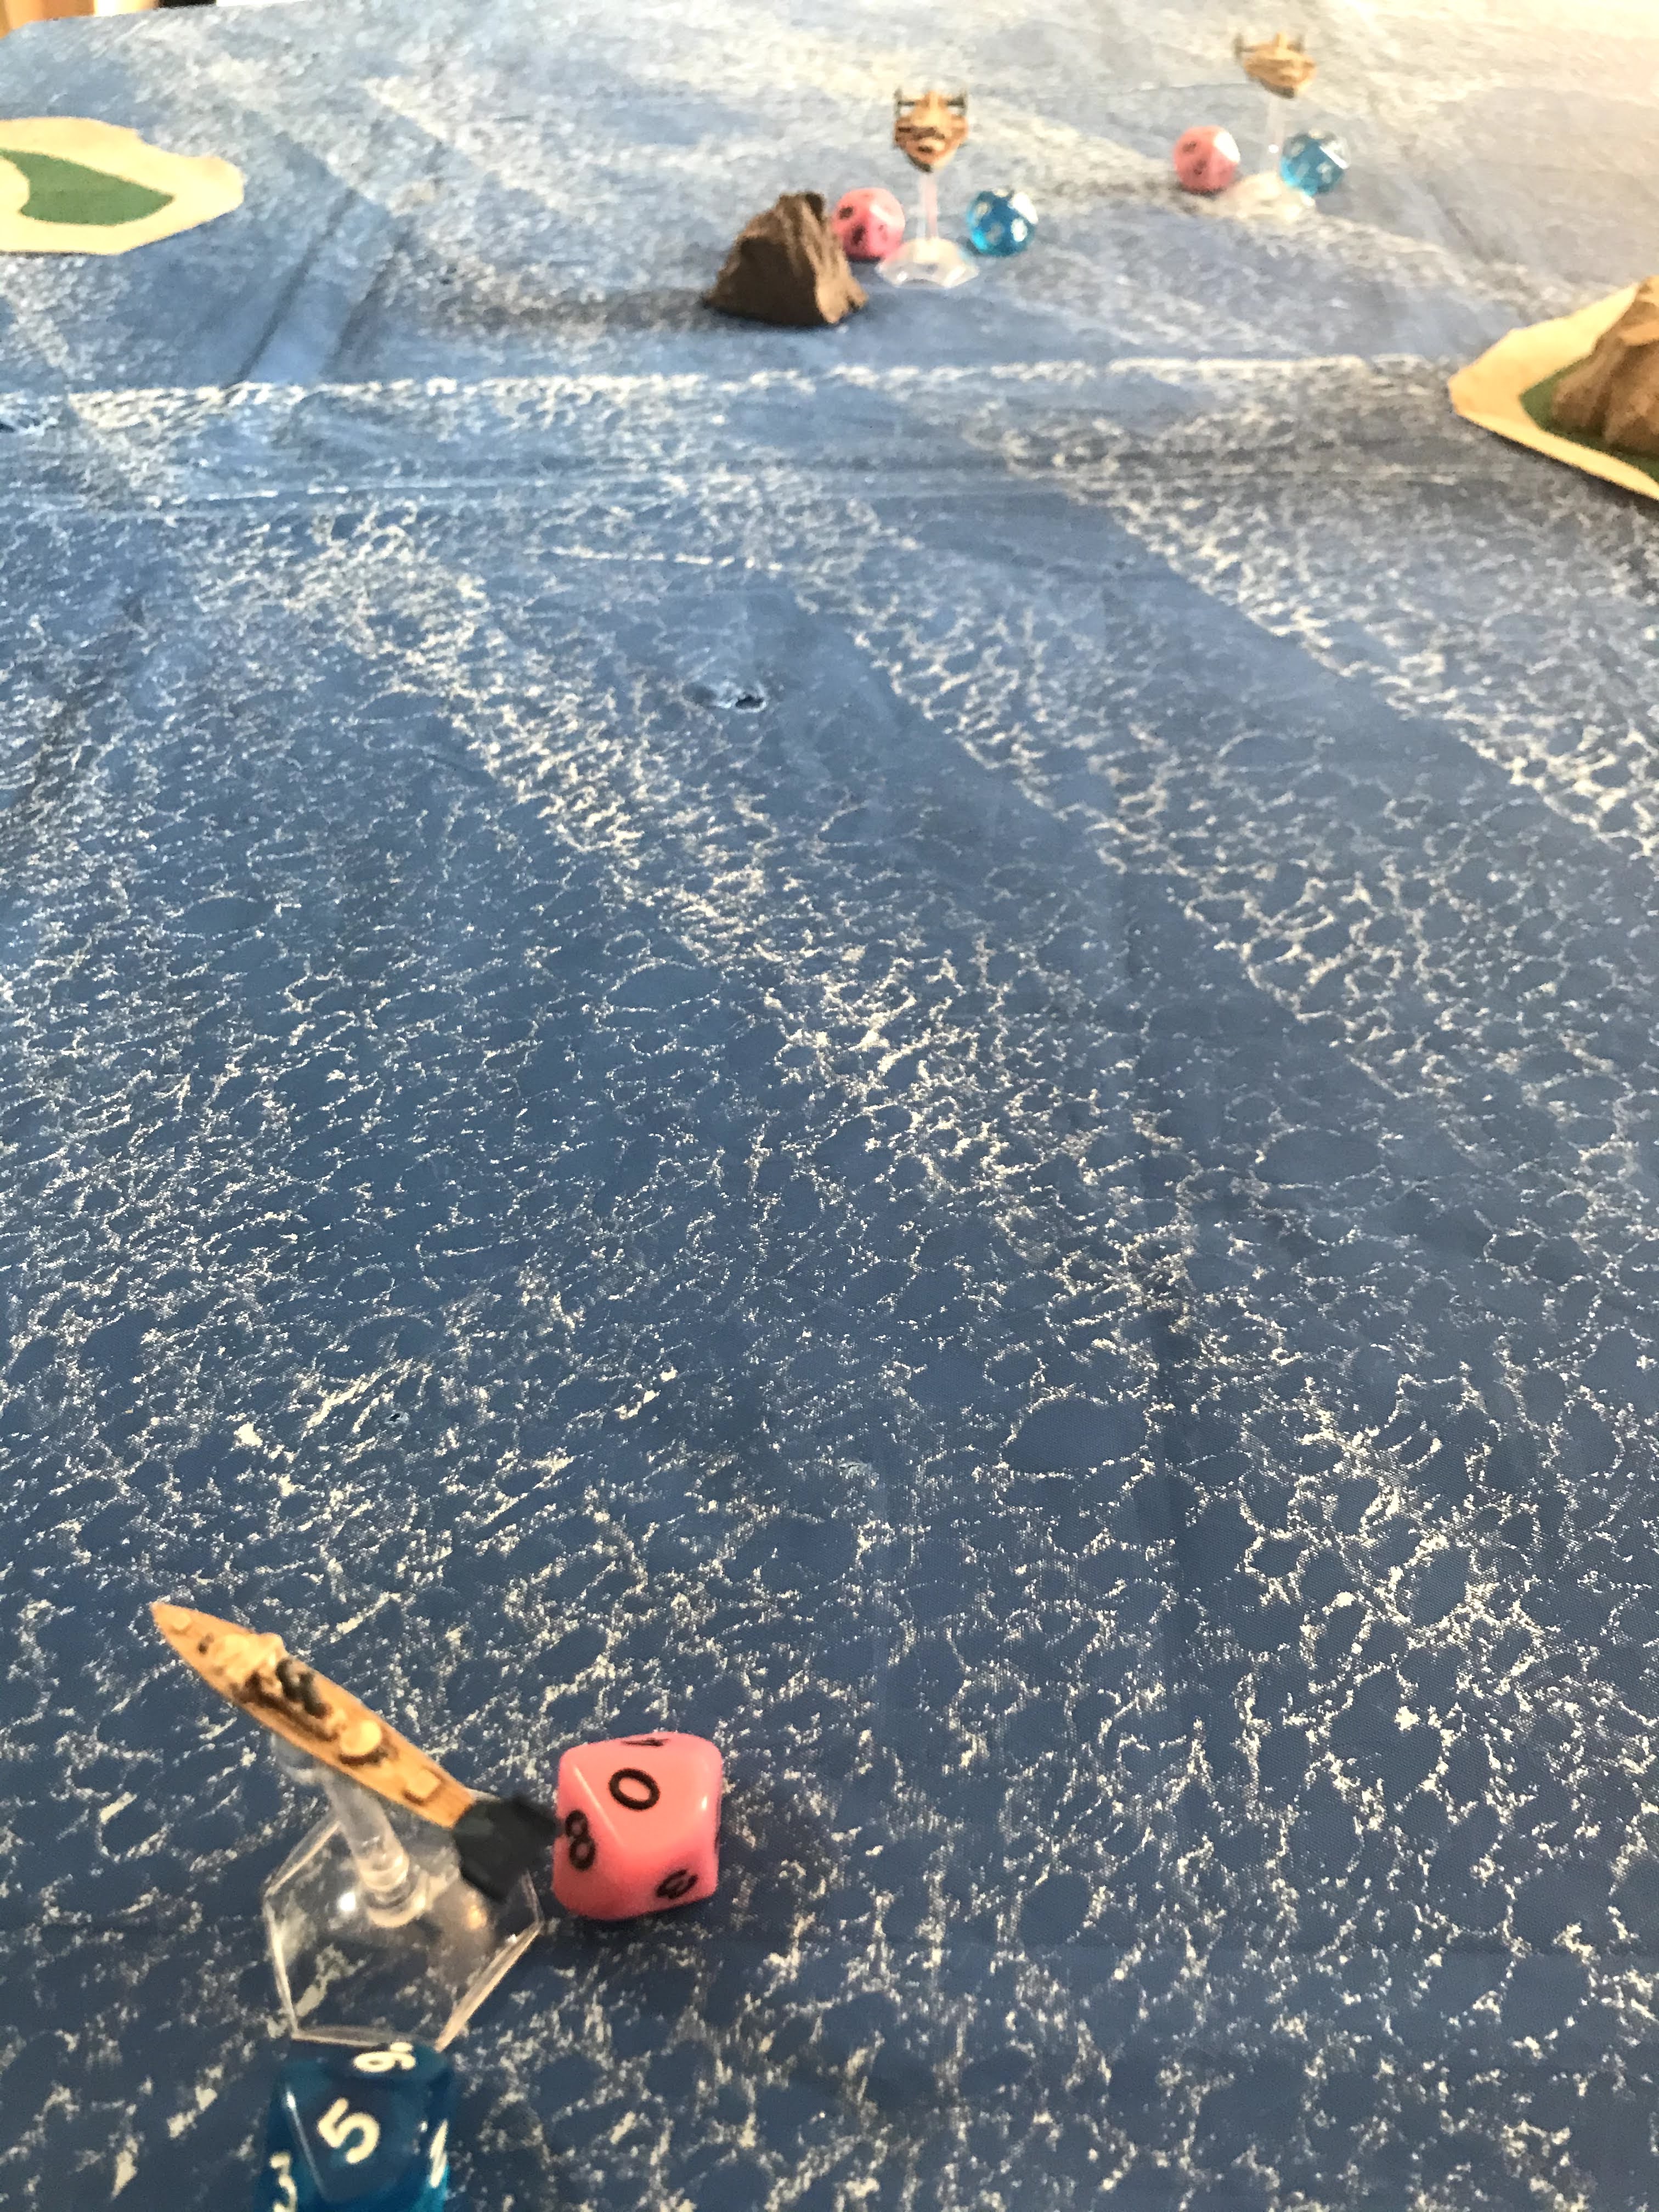
Today, we are using a 36in square board.  We have some trees scattered around, some large rocks, and a watering hole surrounded by shrubs in the center of the board.  

The Steggies are going to be deployed at the center of the board at the watering hole.  The Allosaurus can come in on any edge, but they choose to come in together on the South board edge.


Mission: 

Kill or be Killed!          

Forces: 

Carnivores

2 Allosaurus- 10 Instinct Dice each

- Big Al

- Alfonso

Herbivores

2 Stegosaurus- 9 Instinct Dice each

- Mario

- Luigi


Turn 1: 

Both sides grab their instinct dice and put them on their Dinosaur sheets.  Big Al bids 0 Instinct Dice, Alfonso bids 3, Mario bids 1 and Luigi bids 0.  

Alfonso goes first!  He uses a dice to move forward, but Mario tries to react.  Alfonso does not respond, but Big Al does.  Big Al gets 2 success to Mario's 1. So, Big Al also moves towards  big rock.  

Luigi tires to react and Big Al counters, bot rolling 1 Dice.  Luigi wins. Luigi moves away and by a tree, his tail towards his foes.  Big Al tries to react, as does Mario; both with 2 dice.  Big Al wins. 

Big Al uses 1 dice to charge Mario, and 3 to launch a Body block.  Mario resists with three, and manages to roll with the attack.  Both Big Al and Mario are out of Instinct Dice. 

Luigi sees his pal in trouble and reacts with 2 dice, to Alfonso's 1.  He wins.  Luigi decides to Roar at Big Al, which causes the Allosaurus to get "confused" as he has no dice to react.  However, this does not do too much since he all ready has no dice to react!  

This time, Alfonso reacts and gets the win.  He charges across and gets in close with Mario and attacks.  He chomps at the Steggie, but only gets a mouthful of back plate for his trouble.  That said, Mario is in trouble with two Allosaurus attacking him next turn.  

Luigi uses his last Instinct Dice to move back towards his friend, his slashing tail at the ready. 


Turn 2:

All the Dinos get their Instinct Dice pools back, and the players are ready to bid.  

Luigi knows he needs to get in there and help Mario, so he bids 3 dice.  Alfonso, bids 3 as well. Since the Carnivores had initiative last turn, they keep it.  

Alfonso starts by putting 6 Dice into a Hatchet attack, and Mario puts in Max dice to defend.  Mario manages to step aside by scoring more defensive successes.  Alfonso spends 2 to react, to Luigi's 1.  Alfonso wins.  

He decides to Roar at Mario with 2 dice, who chooses to react with 1.  The tactic confuses Mario, and successfully reduces him to 1 react dice.  Luigi uses 2 to react to Big Al's 1, and decides to go next.  

Luigi chares Alfonso and tries to Body Block with all the dice they have left.  However, Alfonso dodges using 2 Defense dice.  

Big Al reacts with 1, and no one can oppose him.  He attacks Mario with all the dice he has left.  Again, the armored plates on Mario's back are enough to protect him.  Alfonso uses the last dice he has left to try and Tail whip Luigi.  He hits the Steg in the face and knocks his head to the side for 1 damage. 


Turn 3:

The Dinos all get their Instinct Dice back up to normal.  The Steggies are tar pitted next tot he watering hole by the Allosuarus.  They need to break free, or the better Instinct Dice of the Carnivores will eventually wear them down.  

Big Al Bids 2, and Mario bids 4.  Mario uses 1 dice to turn and try to run.  Big Al reacts with 2 dice, and Luigi counters with 3.  Big Al wins and attacks Luigi as Mario lumber by.  Big Al throws a 6 dice Body Block, and he is resisted by 4 Defense Dice by Luigi.  Again, the Steggie manages to stand tall and absorb the shot.  

Luigi tries to react, but Alfonso is faster this time.  Alfonso's savage bit attack gets past Luigi's defense and takes off 2 more hits!  Mario steps back into the fight and swings his tail at Big Al!  He gouges a chunk of flesh off Big Al.  


Turn 4: 

All Instinct Dice are returned.  Luigi bids while Big Al bids 2.  

Big Al starts by launching a 6 dice hatchet attack on Luigi, who resists with 5 dice.  It is all for nothing as neither side gets a success! 

Mario manages to react with 1 success, and attacks Big Al with a Tail swipe.  Mario uses a max attack against a winded Big Al.  Ouch!  The Steggie gets 4 successes, but 3 of them are sixes.  His piercing tail mauls Big Al, who takes 6 hits!  That moves Big Al to the top of Medium damage, and reduces his armor 1 and Max React to 3!  

Alfonso hasn't attacked yet, and successfully does so.  He follows up Big Al's attack on Luigi with a Max Hatchet attack as well!  Luigi only has 2 dice to resist.  However, Alfonso is unable to make his attack stick!  No one tries to react, so Alfonso attacks again, and Luigi trusts in his plates, which is wise.  

Both Allosaurus have used all their instinct dice.  Luigi uses their last dice to move away!  Mario does the same, despite injuring Big Al badly with her tail! 

At the end of the turn, Big Al does not have any dice for a Survival Check!  He needs to rally right away or will try to flee. 


Turn 5:

All dinosaurs replenish their Instinct Pools.  Luigi bids 3, and Alfonso bids 2. Luigi wins and uses the chance to run away further.  

Big Al Reacts with 1, and no one opposes him.  He uses 4 Instinct dice for a Survival check. He needs two success to avoid fleeing, and gets them.  However, it ate into his Instinct Pool.  

Luigi tries to react, and Alfonso opposes.  No side gets a success, so Big Al keeps the initiative.  He runs forward and tries to Body Block Mario with 4 dice, and Mario resists with 4.  Mario absorbs the hit.

Mario tries to react, but Alfonso beats him.  Alfonso also charges forward and tries to Body Block Mario with 4 dice.  Mario trusts in his armor.  It doesn't work this time, as the Dinosaur is knocked down.  However, the Carnivores are out of Instinct Dice again.   


The cagey Mario kept 1 Instinct Dice, so gets up quickly from the attack. Luigi uses her last dice to drop back and swing her tail at Big Al.  Again, it is a devastating strike and the injured and tired Allosaurus.  This time, the tail spikes sink deep into the side of Big Al's head and knock him to the ground.  He is dead!  


Conclusion

With his brother down, Alfonso watches backs off and let's the Stegosaurus wander back to their herd. Alfonse snaps at the smaller dinosaurs that quickly rush to his brother's fresh corpse.  His body still twitching spasmodically.  Big Al and Alfonso had needed a meal, and now at least Alfonso had one.....

Well, that escalated quickly!  Once Big Al went down, that took the fight out of my opponent and they were willing to call it a game.  Theoretically, Alfonso may have been able to deal some more damage, but things looked rough after Big Al took a head shot full of spikes!  In multi-dino games, when a creature runs out of Instinct Dice it is in serious trouble.  Having to use Instinct Dice for survival checks drains that pool very quickly!  That leaves you vulnerable for attacks!  

The Piercing on the Steggie's tails paid big dividends in this game.  The Allosaurus hatchet attacks failed miserably due to some very poor rolling.  The Carnivores rarely got anything to stick this game.  However, the Carnivores were playing very aggressively.... too aggressively as they were burning their Instinct Dice too fast!  Plus, they consistently got stuck in the Steggie's rear arc, which is not someplace you really want to be!

A good game.  More terrain gave some more options for maneuver, but the aggressive play of the Carnivores made that a bit of a moot point.  More dinosaurs also adds more dimensions to the game play as you try to chain your reactions/attacks together in a way that synergizes.  Very fun!

I look forward to adding more Dinosaur types next time around!                          

Monday, February 15, 2021

Match Report: Blood Bowl- Lizardmen vs Orks


This year, to honor the Super Bowl my daughter and I sat down and played a game of Blood Bowl.  She prefers to play using the video game version as it does most of the work for you!  However, this time I insisted on using the miniatures I had painted up.  She relented since it was for the Super Bowl and because it had been over a year since we played with the Minis.  It had been so long, this was the first time the Lustria Revenge (Lizardmen) actually touched the pitch!  In addition, I used one of the alternate game boards, this time the "winter" themed board.  

Enough prelude, let's get to the Blood Bowl action.  I did not document every part of the game, so this might be a bit different than other match reports I have written.  

**                        **                            **                            **                            **            

Lord Summervale: Welcome to the Bludweiser Blood Bowl championship weekend events!  In addition to the "big game", this entire Blood Bowl weekend has skills competitions, exhibition games, and star players meet-and-greets.  It is the perfect way to Praise Nuffle and celebrate the institution that is Blood Bowl.  

You can tune into the big Blood Bowl Cup game tomorrow evening on CabalVision.  Today, on Cabalvision IV we will be highligthing some of the other events surrounding the Cup game.  Each conference and Division has sent some of their teams to put on a show for the fans gathering here in Altdorf for the Blood Bowl Cup game.   

Right now, we will be following the action of the Deep North- Southern Division exhibition teams, the Ork Skulsmash Reeverz led by their team captain Grimgrod Rotgut versus the .... umm....... <Shuffles Papers>.... Lustria's Revenge?  Led by...... ah....... <Long Pause> 

Anyway, as always I am joined in the Cabalvision IV booth with my colleague and great Blood Bowl mind, Mad Johan.  

Mad Johan: As always, great to be here with you again Lord Summervale.  The Southern Conference of the Deep North League has gone through a bit of a drought as plague, famine, war, and poverty has swept the region.  This has made it a challenging season for Blood Bowl.  However, where there is a will to play, Nuffle will provide!  Today is a great example of that! 

Lord Summervale: Obviously, the Skulsmash Reeverz have been one of the backbone teams of the Deep North League- Southern Conference.  We know what to expect from them....

Mad Johan: That's right.  They are not a finesse team.  They are going to bring the pain.  Their usual play style involves attrition and lot's of it.  You know what I always say Summervale.....

Lord Summervale and Mad Johan (In Unison): It is hard to win the game, when half your team is in the dug-out! 

Lord Summervale: So, what do we know about this new team, the Lustria's Revenge?  

Mad Johan: Never heard of them.  Probably just a bunch of stringer nobodies for the Skulsmsh Reeverz to beat up on.  

Lord Summervale: Oh.... ahhh...... okay then.  Let's get to the action!  The Lustria's Revenge is a team of Lizardmen apparently.  They win the toss, and choose to kick it to the Reeverz.  The Reeverz have their Back-up thrower in reserve, while the Revenge have placed some tiny lizardman with googly eyes in reserve.  Johan, can you make out who it is?  


Mad Johan: I see his number, but..... ah..... I have no idea how to pronounce that....... Let's just call him googly-eyed-little-guy-in-dugout?

Lord Summervale: Ok, but there is another one on the field.  Shouldn't we let the folks at home know who it is?  

Mad Johan: That's easy.  He's Googly-eyed-little-guy-on-the-field.  Easy!

Lord Summervale: You are indeed a great Blood Bowl mind.  With that, the kick is up!  It lands in the backfield and Rotgut scoops it up and the Orks go to work.  

Mad Johan: Do they ever.  The front line is working the line of scrimmage, but those big, scaly lizards are not push overs!  However, the Reeverz are using good team work.  

Boom!  The first of those big scalies goes down on the near side!  I think he's...... dead?  Our sideline Grot will need to confirm.  


That leaves a big hole on the Near side, and the Orks look like they intend to exploit it as Gobsmacka the Blitza leads the way.  

Lord Summervale: The Revenge do not look ready to fold up yet as they re-adjust to stop the Ork advance.  Smaller lizardmen and the big-scalies try to shift over and fill the gap.  


Lord Summervale: Gobsmacka lives up to his name and delivers a powerful hit to one of the smaller lizardmen. 

Mad Johan: The way he went down, that did not look good.  The Reeverz fans are loving it though! 

Lord Summervale:  The googly-eyed-little-guy-on-the-field and a fellow little guy get back behind and keep harassing Rotgut in the backfield.  Not enough to down him, but enough to slow his forward progress.  The ork Captain pump fakes to throw them off, but they stay with him 

Mad Johan: Not for long!  A pair of Ork Lineman show up and clear the area!  Boom!  More crushing hits from the Orks.   


Lord Summervale: This just in from our sideline Grot...... those last three big hits were all lethal Johan! 

Mad Johan: Lethal!  Wow, the Skulsmash Reeverz are bringing the pain today!

Lord Sumervale: Indeed, the Orks have managed to grind down the clock with ball control, and Rotgut is making a last sprint to the goal line.  However, a pair of small lizard safeties spring across the field and tanlge him up before he can get.  He goes down and the ball goes loose! 


Mad Johan: A tough break for the Reeverz. 

Lord Summervale: With that, time expires in the first half.  We will send you back to Cabalvision IV Blood Bowl desk for updates around the league on this Bludweiser Blood Bowl Cup weekend!  

**                        **                            **                            **                                **

Lord Summervale: Welcome back to the Bludweiser Blood Bowl Cup Weekend exhibition game for the Deep North League- Southern Conference between the Ork Skulsmash Reeverz and the Lizardmen of Lustria's Revenge.  The score is currently 0-0. 

Today's game is sponsored by the Lustria Tourism Commission and the Princess Owayonna Healing Spring Bottled Water.  Remember, "If you can't drink the water, drink Princess Owayonna's!"  

 Mad Johan: The Skulsmash Reeverz did what they needed to do in the first half.  They grinded the Revenge down by three players!  That makes it tough for them to mount a credible offense in this half.


Lord Summervale: Indeed, and the Revenge get the ball first.  

Mad Johan: Despite not scoring, the Reeverz have to feel confident going into this half. 

Lord Summervale: Both teams set up for the kick, with the Revenge putting their big Scalies up front and  their smaller guys in back to receive.  However, they only have three players on the line.  It looks like the Orks are planning to flood the edges with their Blitzers as they line up in the wings.  

With that, the kick goes up and the little lizards in the back quickly scamper over and scoop up the short kick.  

Mad Johan: Right away that Ork chainsaw line goes to work..... just to be clear.... I mean Chainsaw metaphorically in this case..... no one has pulled out an actual chainsaw.....

Lord Summervale: Much to the fans dismay!  The Lizards form a small cage and try to break across the line on the near side, but the orks are there to stop them.  

Mad Johan: The cage just melted under the Ork assault.  In fact, two of Lizards are in bad positions now by the sidelines.  

Lord Summervale: Indeed, the ball carrier shifts and moves between two of the Big Scalies in the center for protection.  

Mad Johan: It is a wise move as Boom!  Two more Revenge players are sent to the dug-out with sideline hits! 

Lord Summervale: Googly-eyed-little-guy manages to scamper through the Ork lines, dodging the Reeverz grasping hands.  This puts him in the back field.  His team mate sees him loose, and dumps him the ball from the line.  

Mad Johan: Slippery.  However, it isn't enough as Rotgut plays safety and rushes over and knocks the ball loose.  


Lord Summervale: A second little lizard rushes out to try and recover the ball, but fails spectacularly!  The Revenge were a few steps short of scoring on that drive.  

Mad Johan: A few steps short still loses you the game.  

Lord Summervale: The Reeverz pick it up.  The Revenge line is in tough shape.  The biggest threat to the Reeverz scoring drive is now the clock.     

The orks have whittled down and out positioned the Revenge so Gobsmacka easily runs to the backfield.  Rotgut moves up to the line, and sees him open.  He throws a strike that the Ork easily hauls in.  


Lord Summervale: No one is around to stop him, and he dances into the end zone for the go ahead score.  There are only a few minutes left on the clock and the two teams quickly set-up for a kick-off. 

Mad Johan: The revenge doesn't have much to set-up with.....


Lord Summervale: Indeed.  The kick is up, and drops into the Lizardman back field. 

Mad Johan: There is some confusion on the line, and one of the few players left on the Revenge, goes down in a pile.  Ouch! 

Lord Summervale: Before the Revenge can even scoop up the ball, time expires.  Another game of Blood Bowl hits the books.  Johan, what were the keys to this game and who was the MVPs?  


Mad Johan: Well, the Skulsmash Reeverz executed their game plan flawlessly.  Use attrition to wear down their opponent.  They had great success, even managing to take out a few of the big fellas from the Revenge line!  Once there was no one left to oppose them, it was a cake walk in.  

The MVP has to be the team Captain Grimgrod Rotgut as he moved the ball deep in the first half, played safety to stop the score, and used his arm to get the ball to the open man for the winning touch down.  

On the Revenge side...... I don't know.  Maybe the googly-eyed-little-guy that managed to get deep penetration to at least threaten a touchdown?  Honestly, they lost.  Who cares about their MVP?  

Lord Summervale:  There we have it folks.  The Skulsmash Reeverz defeat the Lustria's Revenge in the Bludweiser Blood Bowl Cup Weekend exhibition play for the <gasps for air> Deep North League- Southern Conference Exhibition Invitational. <Starts panting for breath> 

Mads Johan: We will send you back to the Cabalvision IV study for more great Blood Bowl coverage.  Until next time! 

Summervale, are you okay?  You are looking a bit paler than usual?  


You can follow Blood and Spectacles Facebook page for more fun: https://m.facebook.com/pg/BloodandSpectacles/posts/?ref=bookmarks&mt_nav=0

Or our website:

Or our Messageboard:

Or our Wargames Vault Page:

Blood and Spectacles Wargames Vault Page      


Monday, February 8, 2021

On The Painting Desk- Early Republican Romans for Wars of the Republic


For those who read my goals for 2021, it is no surprise that I am working on an Early Republican Roman force to use with the upcoming Wars of the Republic ruleset from Osprey.  I believe they are set to be published in November of 2021.  So far, I have been playtesting the rules using my famous Paper Templates, but for the release this year I will want a much better looking army so I can help advertise the game with Batreps and the like.  Therefore, I need to get a usable army up and running by September or so.  

The first step was to decide on the miniatures and get them ordered.  I won't lie, the Victrix line of Ancients inspired me to write Men of Bronze and Wars of the Republic  in the first place. I really wanted an excuse to use those models!  Victrix models are the base of my Macedonian, Corinthian, and Spartan armies for Men of BronzeLooking at their line I decided the Republican Roman boxes would be great!  They had one set with Hamata (Chain Mail) and one with Pectoral Armor.  Fantastic.  

I went ahead and ordered both sets.  Then disaster struck!  The US Distributor I initially order from could not get them!  They went on back order.  This was the same time I ordered my Greek light cavalry and elephants.  I got those just fine, and they have since been painted up!  However, after waiting I saw them on a different Distributors site and got antsy and ordered them again, but I had the same problem!  Curse you Pandemic!  

Finally, at Christmas I got two boxes of models, 1 from each distributor.  The big issue is...... I did not get a box of Hamata.  I got two boxes of Pectoral Armor.  I guess this is going to be a VERY early Roman Republic army!  I'm talking like during the early Samnite Wars right when the Triplex Acies became a thing.  Bummer.  However, I now had models to paint and assemble! 


I am sure at this point, you have two questions.  First, you probably want to know what kind of basing you need to have?  Secondly, how many models do I need for an army in Wars of the Republic? Those are great questions whenever you start a new project!  Let's take a closer look at each question: 

1. What kind of basing do I need to have? 

If you have purchased and read Men of Bronze (If you have, Thank you!) you know that I believe in scale and model agnostic game systems.  I do not have time or interest in basing and re-basing my armies.  I want to play games, not rip finished dudes off of bases and put them on different ones!  Ain't no one got time for that! 

The game as written, uses units of 10 -15 models that are individually based.  However, the way the rules are written as a unit-versus-unit game there is no reason to use this scale or basing type.  It works just as well with unit's that are multi-based at 6mm, or 15mm in units of 4 to 6 per base, or 54mm models based individually.  You can learn more about the system I used in Men of Bronze on a different blog post, as the details there apply to this game too.   

2. How many models do I need for an army?

If you have purchased and read Men of Bronze (If you have, Thank you!) you know that I subscribe to a theory of having BIG BATLLES with small model counts.  I do not have the time, energy, or money to build huge armies of models!  Instead, I want big Ancients action with a manageable number of troops to paint.  I can only paint about 100-150 models a year, therefore I prefer a game system where I can get two armies done a year!  

Typically an army in Wars of the Republic is about 5-8 units.  That means about 50 to 80 guys if you use the same conventions as I did.  However, there is no need to do that.  You may choose to have 4 separate bases of 4 15mm per base instead for a unit, so about 80 to 128 models.  Or you could get really big units of 28mm if you want too, like this hobbyist!    

However, a new feature of Wars of the Republic is rules for fielding armies in "Wings" if you wish.  Therefore, you could have 3 Wings of 5-8 units per wing for a really big battle!  This is great for multiple players on a side or for those of you who DO have time, energy, and money for BIG BATTLES with a BIG model count!  


So for the start of my army, I went for the example army of a Triplex Acies in the main rulebook.  It looks like the following: 

1 unit of Skirmishers
2 Units of Hastati
1 Unit of Principes
1 Unit of Triarri

This is the size of army each "example" army was built to.  There is plenty of room to scale my army up if I want to, but this gives me a good base.  It also matches the Roman army I was using in many of my playtest games.  I had more than enough models with two sets.  

I decided to assemble them all on metal washers as opposed to the plastic bases from Victrix (or others).  I had some Hoplites on washers and some on plastic bases, and I found I liked the greater "heft" of the ones on metal washers.  That made them easier for me to handle, transport, and avoided accidents.  I went to my local hardware store and bought a bunch for a couple of bucks.  

My first "issue" was how to differentiate the Hastati, Principes, and Triarri from each other if they were all wearing Pectoral Armor?  My initial plan was to have the Principes and Triarri in Hamata (chain) and the Hastati in Pectoral Armor.  That plan was out the window now!  

The Principes and Hastati was easy enough.  I decided all the Hastati would be wielding their Pila.  The Principes would be wielding their swords.  I also made sure all the Principes had the pushed back "Corinthian" style helm like they had enough money to get the better gear.  The Hastati used all the other helmets, only their leader had the pushed back, fully enclosed helmet.  Once I paint them, their shield colors and transfers will also help differentiate them.  

The last challenge was how to make the Triarri look like veteran warriors and differentiated from the others, besides just wielding a spear?  The Victrix sets come with enough parts to make all 4 unit types of the classic Triplex Acies, so I had plenty of spear arms.  

Since I had two sets of Republican Romans in Pectoral Armor, I had more than enough "command" sprue parts and other parts.  The sprue came with with legs with extra greaves to make musicians and officers with two greaves instead of only 1.  The command sprues also had some different helmets/headgear, some more muscled cuirasses, and I had left-over Greek Hoplites bodies I could use to get more muscled cuirasses as well.  Finally, I decided to use left over Greek hoplite shields on the Triarri instead of the Roman's Oval Scutum shields to further distinguish the unit.  These guys were veterans that still had their father's more Hoplite style gear from the pre-Triplex Acies days of the Roman phalanx.  


  I went with the philosophy that early Republican Roman forces everyone brought their own gear, so they will be a bit more eclectic overall.  Especially the more 'veteran" troopers who have had a chance to get more gear.  Suitably kit-bashed the Triarri were ready to join their Hastati and Principes comrades.  When I expand the army I might make another Triarri unit like this one as the two together could possibly double as the core of a pre-Triplex Acies Phalanx army or even other Non-Roman Italian rivals?  That will be useful, especially if I ever do get the guys in Hamata.   

The last unit I assembled was the skirmishers.  These guys are not even the wolf-pelt wearing velites typically associated with Roman armies.  These are the pre-velite skirmishers where they were just dudes with Javelins and small blades.  Between the two kits, I easily had enough to build a unit of traditional Velites all in Wolf-pelts as well which I did.  However, I will not be painting those guys until I expand beyond the core force I need.  

As a note, I always paint the minis first, then paint the shields and then attach the shields.  Therefore, no one in the army has their shield yet!  

Now that I had a motley collection of soldiers assembled, it was time to go to the next step.  I sat down and brush undercoated the entire army because I was out of spray paint AND it was too cold to spray paint them anyway.  I was debating if I should use white, brown, or burnt umber.  The Burnt Umber worked very well with the 6mm Diadochi army, but ultimately I opted for the old reliable of white. 


 Now, it is time to sit down and batch paint their skin.  Frequently, I will batch paint the skin before I break it into a smaller unit-by-unit approach.  All that batch painting can make a guy go crazy.  

In addition to these, I also have painted 2 British battleships for Castles in the Sky.  At first, I thought these big ships were surplus to my needs.  However, as I have been in heavy playtesting for the game I decided I needed some more big ships for some hot battleship on battleship action!


So, for the next few weeks and months expect to see those 50+ Romans slowly getting painted up!  I didn't have many painting goals for the year because I knew those guys would keep me occupied for much of the year!  Until next time! 


You can follow Blood and Spectacles Facebook page for more fun: https://m.facebook.com/pg/BloodandSpectacles/posts/?ref=bookmarks&mt_nav=0

Or our website:

Or our Messageboard:

Or our Wargames Vault Page:

https://www.wargamevault.com/browse.php?keywords=blood+and+spectacles&x=0&y=0&author=&artist=&pfrom=&pto=     


Monday, February 1, 2021

Battle Report: Castles in the Sky- South Pacific Blues


The French had long managed a toe hold into the South Pacific island atoll changes in the form of radio stations, refueling depots, and small trading posts.  The British had also been active in the region, arguably to protect their colonies in Australia and New Zealand.  A great deal of shipping from all the Great Powers move through the region by sea and air, making it an important strategic location for all the Great Powers.  Plus, it's remote nature makes it a great posting for an aspiring, up and coming officer.  

The British had ignored the French control of the Bass Islands and established a small coaling station on the island of Rapa Ti.  In response, the French South Pacific Air Squadron under Commodore Valjean declared the island under French Sovereignty and began a blockade of the Coaling station with his airships.  

The British were keen to keep their Coaling Station open and sent in the South Pacific Flying Squadron to maintain the station.  Immediately, Commander Smythe-Butler decided to raise the blockade and try to retrieve the British personnel at the location.  

The two small fleets moved to engage off the coast of the island.  

Mission: 

We used the scenario generator to determine the mission, complications, and terrain for this battle report.  Today, we came up with a Blockade Run mission with the British as the attackers.  To improve their chances of success, Commodore Smythe-Butler has decided to approach the island at Night.  

Set-up: 

We are using a 48MU x 48MU sized board, with 1 MU being an inch.  

The area of the engagement has a number of small islands, including one with an altitude 3 Mountain in the center, two with altitude 1 hills, and another that is barely above sea level.  They form a small chain concentrate across roughly the center of the board.  


The French fleet deployed

The French are on the north side of the board steaming along in line a stern at mid-altitude and medium speeds.  They are led by the Chasseur destroyer, the Gloire, the Descartes, and the tail ship is the D'iberville.  The British are moving in on the South side, moving at line abreast.  They are coming in fast and at high altitudes.  The Left is the Arethusa, then Bull Finch, then the Duke, with the Minotaur on the right. 

The British Flying Squadron.... ummm.... flying? 

Forces: 

British: 

HMS Ajax- Commodore Smyth-Butler

Minotaur Class Armored Cruiser- Command Ship

- Command: 3- Commander Smythe-Butler

HMS Majesty- Captain Winston

Duke of Edinbourgh Cruiser

- Command: 2

HMS Arrow- Captain Osgood

Arethusa Light Cruiser

- Command: 2

HMS Spirit- Captain Michaels

Bull Finch Destroyer

- Command: 3

French: 

Toulouse- Commodore Valjean

Gloire Class Armored Cruiser - Command Ship

- Command: 4- Commodore Valjean

Morrocco- Captain D'strang

D'iberville Class Cruiser

- Command: 2

Pepin- Captain Feyette

Descartes Class Cruiser

- Command: 2

Roland- Captain Bourbon

Chasseur Class Destroyer

- Command: 2

Turn 1: 

Thanks to having an escort, the French roll 5 dice and score 4 successes.  The British have two escorts and also roll 5 dice.  They score a single success.  The French opt to let the British go first this turn.  The French have 4 potential Commands while the British only have 1.  

Move:

The HMS Arrow cranks up her screw speed and thrashes her way up to altitude 8.  Crewmen grab supplemental oxygen tanks or attach their hoses to the Oxygen ports and prepare for action.  The HMS Spirit is all ready pretty high, and speeds up and turns towards the mountain.  

Meanwhile the Commodore orders the HMS Ajax to Crash dive and drops to back from 7 to 5.  The HMS Majesty continues on course.  

The Captain Bourbon of the Roland makes an all ahead command and speeds up to 8.  The Toulouse makes a Come to New Heading Command and turns into the oncoming British line.  The Pepin stays in with the battle line of the Toulouse.  Meanwhile the Morrocco speeds up, gains altitude, and turns to try and hunt down the British Escorts that are inbound. 

Battle:

None, as no one has the range or LOS due to the darkness.  

End:

No action needed.

Turn 2: 

The French earn 4 Command successes, the the British 2.  Again the French elect to let the Brits go first. 

Move: 

The British Cruisers decided to go low, and started to drop altitude to 4 and 5 respectively.  In the meantime, their escorts stayed high and on the opposite side.  This forced the French to consider how to engage the British and slow them down.  


The French Destroyer kept sprinting towards the far edge of the airspace to try and get around the side of the British Cruisers.  The Toulouse turned to intercept them, and the Pepin followed in a battle line.  Meanwhile, the Morocco stayed high and fast to try and intercept the British Escorts.  Her powerful torpedo arrays were excellent counters to the British escorts.  

Battle: 

The two sides were beginning to enter long range and Torpedo ranges.  However, the darkness kept visibility limited to short range, so there is probably another turn or two of maneuver before things heat up! 

End: 

No actions needed.

Turn 3: 

This time, the French score 1 Success, and the British get 2!  They set these successes aside for Commands later in the turn.  This time, the British elect to have the French go first.  

Move: 

The French begin by moving the  Toulouse to try to intercept the incoming British cruisers.  The Commodore orders the ship to create a smokescreen and the engine room starts to over stoke the boiler successfully shrouding the ship in smoke.  

The HMS Ajax and Majesty begin to move to bracket the French Armored Cruiser.  However the Pepin is dutifully falling into position behind the Commodore's ship.  The Destroyer drops altitude and gains speed and is ready to pivot for her attack run.  

The HMS Spirit turns into try and get the range and angle on the Pepin for a torpedo barrage, as the Morocco closes in on the British escort high above a rocky island.  The HMS Arrow turns to potentially broadside the French ship below her.  


Battle: 

The Morocco's spotters call out the position of the HMS Spirit in front and above them.  The gunners respond by firing a Torpedo barrage at the small British ship.  The ships Point Defenses take-out 1 incoming torpedo and two others streak past.  However, three hit the ships side but only two successfully detonate for 2 hits and 4 friction!  The forward guns also pepper the British Destroyer for 1 more friction, and 2 hits.  


The Captain of the HMS Arrow is able to get a clear bead from the guns firing on the Morocco, and commands his crew to lock-on and fire.  The cannons reach out and strike home!  The Light battery shells ping harmlessly off the Morocco's armored belt, but the Medium Batteries find a soft spot and cause 2 clean hits! 

The HMS Arrow also fires its light battery at the French Torpedo Cruiser.  However, the height and size difference makes the firing ineffective. 

The rest of the two fleets do not have LOS in the darkness.  


End:

Now we apply damage.  The British HMS Spirit takes 4 armor loss to the torpedo barrage, and also has its Rudder Jammed.  The Morocco loses two armor points, but also has its bridge damaged by the shelling, and the forward light battery is out of action! 

Despite the heavy damage to his destroyer, Captain Michaels passes his Strike Your Colors test! 

The HMS Spirit manages to repair its damaged rudder, and the Morocco fixes its light battery.  However, the Morocco's bridge is still damaged.  This could impact its ability to re-load torpedoes.  

Both the British and French have high enough Command rolls to remove all the Friction from their ships.  

Turn 4: 

The two sides tie with 3 success on the Command dice.  Since the French have the higher command rating, they win.  They choose to go first. 

Move: 

The Toulouse and the HMS Ajax move up to engage each other at close range and the same altitude, armored cruiser against armored cruiser.  Meanwhile, the French destroyer Roland moves and sets up for a torpedo barrage on the Ajax. 

HMS Spirit tries to doodge past the French blockade, and the Morocco moves to follow her.  She fails to re-load her Torpedo tubes due to the darkness and her damaged bridge.  The HMS Majesty sneaks up towards the French Torpedo Cruiser, as the Pepin continues to support the Toulouse.  

Lastly, the HMS Arrow makes way to break through the blockade by slipping past the French line.  


Battle: 

Commodore Piet has the Toulouse Focus Fire on the Ajax.  In return, the Ajax Braces.  The HMS Ajax is pounded by the heavy battery of the French ship, but thanks to bracing manages to weather the storm with only 1 Friction.  

The HMS Majesty tries to Fire for Effect on the Morocco, but the gunner's are not prepared for such a command.  Instead, she fires normally.  Three shells hit home, but two are deflected by the Morocco's armored belt.  1 manages to strike home as a Hit, plus she gains 1 Friction marker. 

The Morocco fires on the HMS Spirit with her light batteries.  Captain Michaels orders his crew to Brace and negates 1 hit, but still takes 1 more!  That was the last British command.


HMS Ajax returns fire on the Toulouse.  The cannons roar as the shots from the Toulouse smash against her armor.  In return, they put 3 Friction markers on the French Cruiser and manage 1 hit! 

The Roland fires a spread of Torpedoes into the Ajax's side.  However, they all miss and fly at the Toulouse!  Thankfully, prepared Point Defense gunners take out the torpedoes but cause more Friction on the French ship.  

Finally, the Pepin's Captain orders the crew to Fire for Effect on the Ajax, using the last of the French Commands.  The bow Air Torpedoes either miss or are destroyed by the Ajax's Point Defense.  This gives her 1 more Friction.  The shells from the cruiser's Medium battery cause another 2 Friction, but none of the hits penetrate the Ajax's tough armor.  


End:

The French apply damage first, and the Toulouse loses 1 armor point.  The HMS Spirit also loses 1 armor point, taking her to 1 remaining! 

Again, Captain Michaels passes his Strike Your colors test and stays in the fight. 

The Morocco manage to rouse their injured bridge crew and bypass the damaged communication tubes.  The Bridge is back to being fully functional.   

The French and British are skilled enough officers to remove all friction. 


Turn 5:  

Both sides score 3 success again.  The French have the Initiative and choose to go second.  

Move: 

The HMS Arrow and HMS Spirit make for the objective, and bleed height for speed.  The Morocco comes about to give chase, but has lost them in the darkness.  The ship also fails to re-load her tubes again.    

The Majesty and the Ajax also plow through the French line.  The Ajax goes lower and fails to put up a smokescreen.    

The French Destroyer races below her larger brothers as she re-loads her torpedo tubes.  The Toulouse tries to come around to rake the Ajax, with the Pepin following behind.  However, the darkness makes sighting the British cruiser difficult. 


Battle: 

The Ajax uses her stern battery on the Pepin, who braces for the fire.  However, the height difference saves the Pepin from any damage. The Pepin only has light batteries that can fire back, and she opts to hold her fire. 

The Majesty focuses fire on the Morocco, and despite hitting her with several shells only causes 3 friction and 1 Hit.  

No one else has the range or LOS in the darkness.


End: 

The Morocco loses 1 more armored point.  

The French roll well enough to remove the Friction.  

Turn 6: The Final Turn

The French win with 4 to 3 successes.  They let the British go first knowing the HMS Spirit will get off the board. 

Move:

The heavily damaged HMS Spirit makes it past the Blockade.  

The Morocco realizes it is in big trouble with the HMS Majesty on its tail.  The Captain orders a Crash Dive, she drops from 6 to 3, and stalls from the sudden maneuver.  If she can not re-start, she will continue to fall in the end phase. 

The HMS majesty stays in pursuit of the Morocco, but she is being shadowed by the Roland. 

The Toulouse and the Pepin try to maneuver back to the battle, but they are out of position. 


Battle: 

The HMS Majesty fires a stern shot at the pursuing Destroyed, but misses.  The Cruiser can no longer see the Morocco in the darkness.  

The Roland's torpedo attack causes 1 hit, but it bounces off the British cruiser's armor.  

Meanwhile, the Ajax manages to get the drop on the Roland at altitude 3.  The crew Braces just in time.  The Ajax's broadside smashes into the little ship and causes 4 hits and 1 friction! 


End: 

The Roland has her Bridge damaged, her point defenses destroyed, and loses two armor points.  

The British and French can remove their Friction. 

Conclusion:

The Telegraph was more than happy to print the story of the daring rescue of the British Navy personnel from Rapa Ti.  They neglected to mention that the British had set-up their coaling station illegally in the first place.  Commodore Smythe-Butler had special commemorative medals created and distributed to the crewmen and officers who took part in the expedition.  They wore them with pride amongst London and the countryside, but after a few weeks the novelty wore off for the British public.  

Meanwhile, the Foreign offices of both nations came together and hammered out a deal.  The British Coaling Station would stay, but French ships would also be welcomed to buy coal there as well.  The French would guarantee the protection and safety of the British there.  In exchange, the British recognized French suzerainty over Rapa Ti.  Of course, money also exchanged hands via Swiss accounts.       

The British manage to break through the blockade and retrieve their personnel from the Coaling Station.  Not only did they get a ship off the board, they managed to cause 7 damage to 5 received.  It was a close run thing though, because if the Morocco had been able to re-load her torpedo tubes, it is likely the HMS Spirit would have been immobilized and sunk with 0 armor left.  

Things looked good for the French in the Mid-game, with the D'iberville doing its job against the British Destroyer.  However, the Bridge Damage from the HMS Arrow meant she could not re-load her tubes when I needed her to.  My Gloire and Descartes got out maneuvered and were not available for the end game.  My Destroyer was deployed poorly and should have been hunting enemy escorts instead of trying to snipe cruisers.        

In the late stages of the game, the British cruisers were running amok against my lighter French vessels.  Despite being at different altitude, the British had enough firepower to still make it stick.  The final barrage against my Destroyer caught me off guard and railed the poor little thing!  Without that, I at least would have beat them on damage.  

The darkness complication had a huge impact on this game!  With the limited line of sight, you had to get up close and personal, and once you did your shots were hitting pretty hard.  The bigger ships were able to weather it okay, but the lighter escorts were swiss cheesed.  Not even altitude difference and size difference was enough to help them this time. Air Torpedoes do not care about such things, and the British cruisers still had enough firepower up close to make hits stick. Lesson learned I guess.    


You can follow Blood and Spectacles Facebook page for more fun: https://m.facebook.com/pg/BloodandSpectacles/posts/?ref=bookmarks&mt_nav=0

Or our website:

Or our Messageboard:

Or our Wargames Vault Page:

https://www.wargamevault.com/browse.php?keywords=blood+and+spectacles&x=0&y=0&author=&artist=&pfrom=&pto=