Showing posts with label playtest. Show all posts

Monday, April 4, 2022

Battle Report: Darkest Knight - Secure the Artifact


I have been working on a solo/co-op/versus game tentatively called Darkest Knights.  I have always liked the idea of doing a horror themed game, and have many starts and stops at this goal.  After a lot of work, I finally got to the point with a game where it is ready to hit the table and get tested.  However, there were a few design goals and hooks I wanted to put into the game.  

  1. RPG Light elements
  2. LOS as a resource due to darkness
  3. Solo/Co-op/Versus playable
  4. Escalating tension/difficulty
  5. Lot's of choices
  6. Scale and Model Agnostic
  7. Modern horror veneer
So, here we are with a Playtest of Darkest Knight on the table using my infamous Paper Templates!  The Paper Templates were made using random images of models on the internet.  The heroes are mostly images of Reaper Models I was eyeing up for this project.  

The concept is simple.  Each player gets a team of 4 models that are their team of "Knights" to go on missions against the forces of "Darkness".  Each of the 4 models can be customized by choosing their attributes and a template that applies starting gear and special abilities.  The game itself uses dice shifting and a target number of 4+.  Monsters also have an escalating level of dice based on the level of Fear on the board that accumulates from player actions.  The last hook is that the board is considered to be constantly shrouded in darkness, and LOS is limited.  Therefore, the use of sources of light and illumination are critical for success.  All "monsters" spawn randomly through out the game.  

Lt. Wulf adjusted the comms to clear the static to better hear her instructions, "The unknown artifact is located somewhere in your search parameters.  Locate it and bring it home."

She double clicked the communicator to indicate she had received the signal and understood the teams instructions.  Lt. Wulf and her team of "Knights" was ready and prepared to head out into the darkness once again.  

She glanced over at Liu Xujiang, and reached over to adjust her gear, "Don't worry.  Things will go better this time.  We know what to expect." The nervous psychic nodded slowly, but didn't make eye contact.

Lt. Wulf next went and checked Sister Winifred's gear.  She was a big, experienced woman.  She was strapped down tight, with her crucifix secured at her collar.  Lt Wulf whispered to her, "Keep an eye on Xujiang this time out.  Last time shook her a bit." 

Finally, she came to Heidi Kroft, who was busy re-assembling her SMG, making sure it was clean and ready.  To her she said, "It will be your job to scout ahead to find this thing, the rest of us will try to cover you.  You are the fastest, so you get point." Kroft nodded in acknowledgement as she finished re-assembling her weapon.  

The Knights were silent until their APC rumbled to a halt.  The back door dropped with a clang, and the internal lights went red.  Lt. Wulf signaled and the team sprung out of the back of the APC.  They were immediately surrounded by darkness.  The only light was coming from the open rear of the APC.

Lt. Wulf grimaced.  That was going to make things much more interesting.   

I made a few Mods to the rules since the last time we tested out the game.  I updated the activation process so it is a choice.  Activate with a 6 MU LOS, or make an Awareness check to activate to try and gain additional LOS.  Success can add 1 MU per success over a 4+ to LOS.  Failure leads to a failure to act as you squint into the darkness.  

The rules for generating Threats were also updated to try and skew the result to more, lesser threats; and fewer hard threats.  I also cleaned up the order of operations to be IGOUGO and removed Threat Markers starting on the board immediately.  As the game progresses though, the threats spawned will tend to be more often based on the number of Fear tokens.  Let's see how it goes?      

Forces:
Our heroes are a team of "Knights" that have been gathered together and trained by a wealthy patron.  Exactly who this mysterious benefactor is is unclear, but they are loyal to each other and the mission of halting the spread of the Darkness across the land.  Our cast of heroes are:  

Lt. Ilsa Vulf
Shoot                  Fight                   Brawn                Brains                 Awareness
d12                      d4                        d6                        d8                        d10
Archetype: Leader                                                                  Keyword: Awareness
Starting Equipment: Battle rifle, Low-light goggles, pistol
Power: Re-roll failed Rally tests, Can activate another model rather than themselves on Activation

 
Sister Winifred
Shoot                  Fight                   Brawn                Brains                 Awareness
d4                        d6                        d10                      d8                        d12
Archetype: Devoted                                                              Keyword: Brains
Starting Equipment: Pistol, Holy Symbol, Flashlight
Power: Repulse Undead, Spectral, and Occult.  Use Occult texts with a Brains test
 
Heidi Kroft
Shoot                  Fight                   Brawn                Brains                 Awareness
D8                       d6                        d10                      d4                        d10
Archetype: Freerunner                                                         Keyword: Brawn
Starting Equipment: SMG, Knife, Satchel
Power:  Re-roll failed Brawn test for Dynamic Movement

Lui Xijiang
Shoot                  Fight                   Brawn                Brains                 Awareness
D8                       d6                        d4                      d10                        d8
Archetype: Psyhic                                                        Keyword: Brains
Starting Equipment: Pistol, Flashlight, Knife
Power: Freeze Target- Successful Brains test, the target is pinned


Mission:
 For this test run, the team needs to "locate an artifact".  They need to locate it, secure it, and take it off the board.  

Set-up: 
The game is played on a 36MU by 36MU board with 1 MU = 1 inch. 

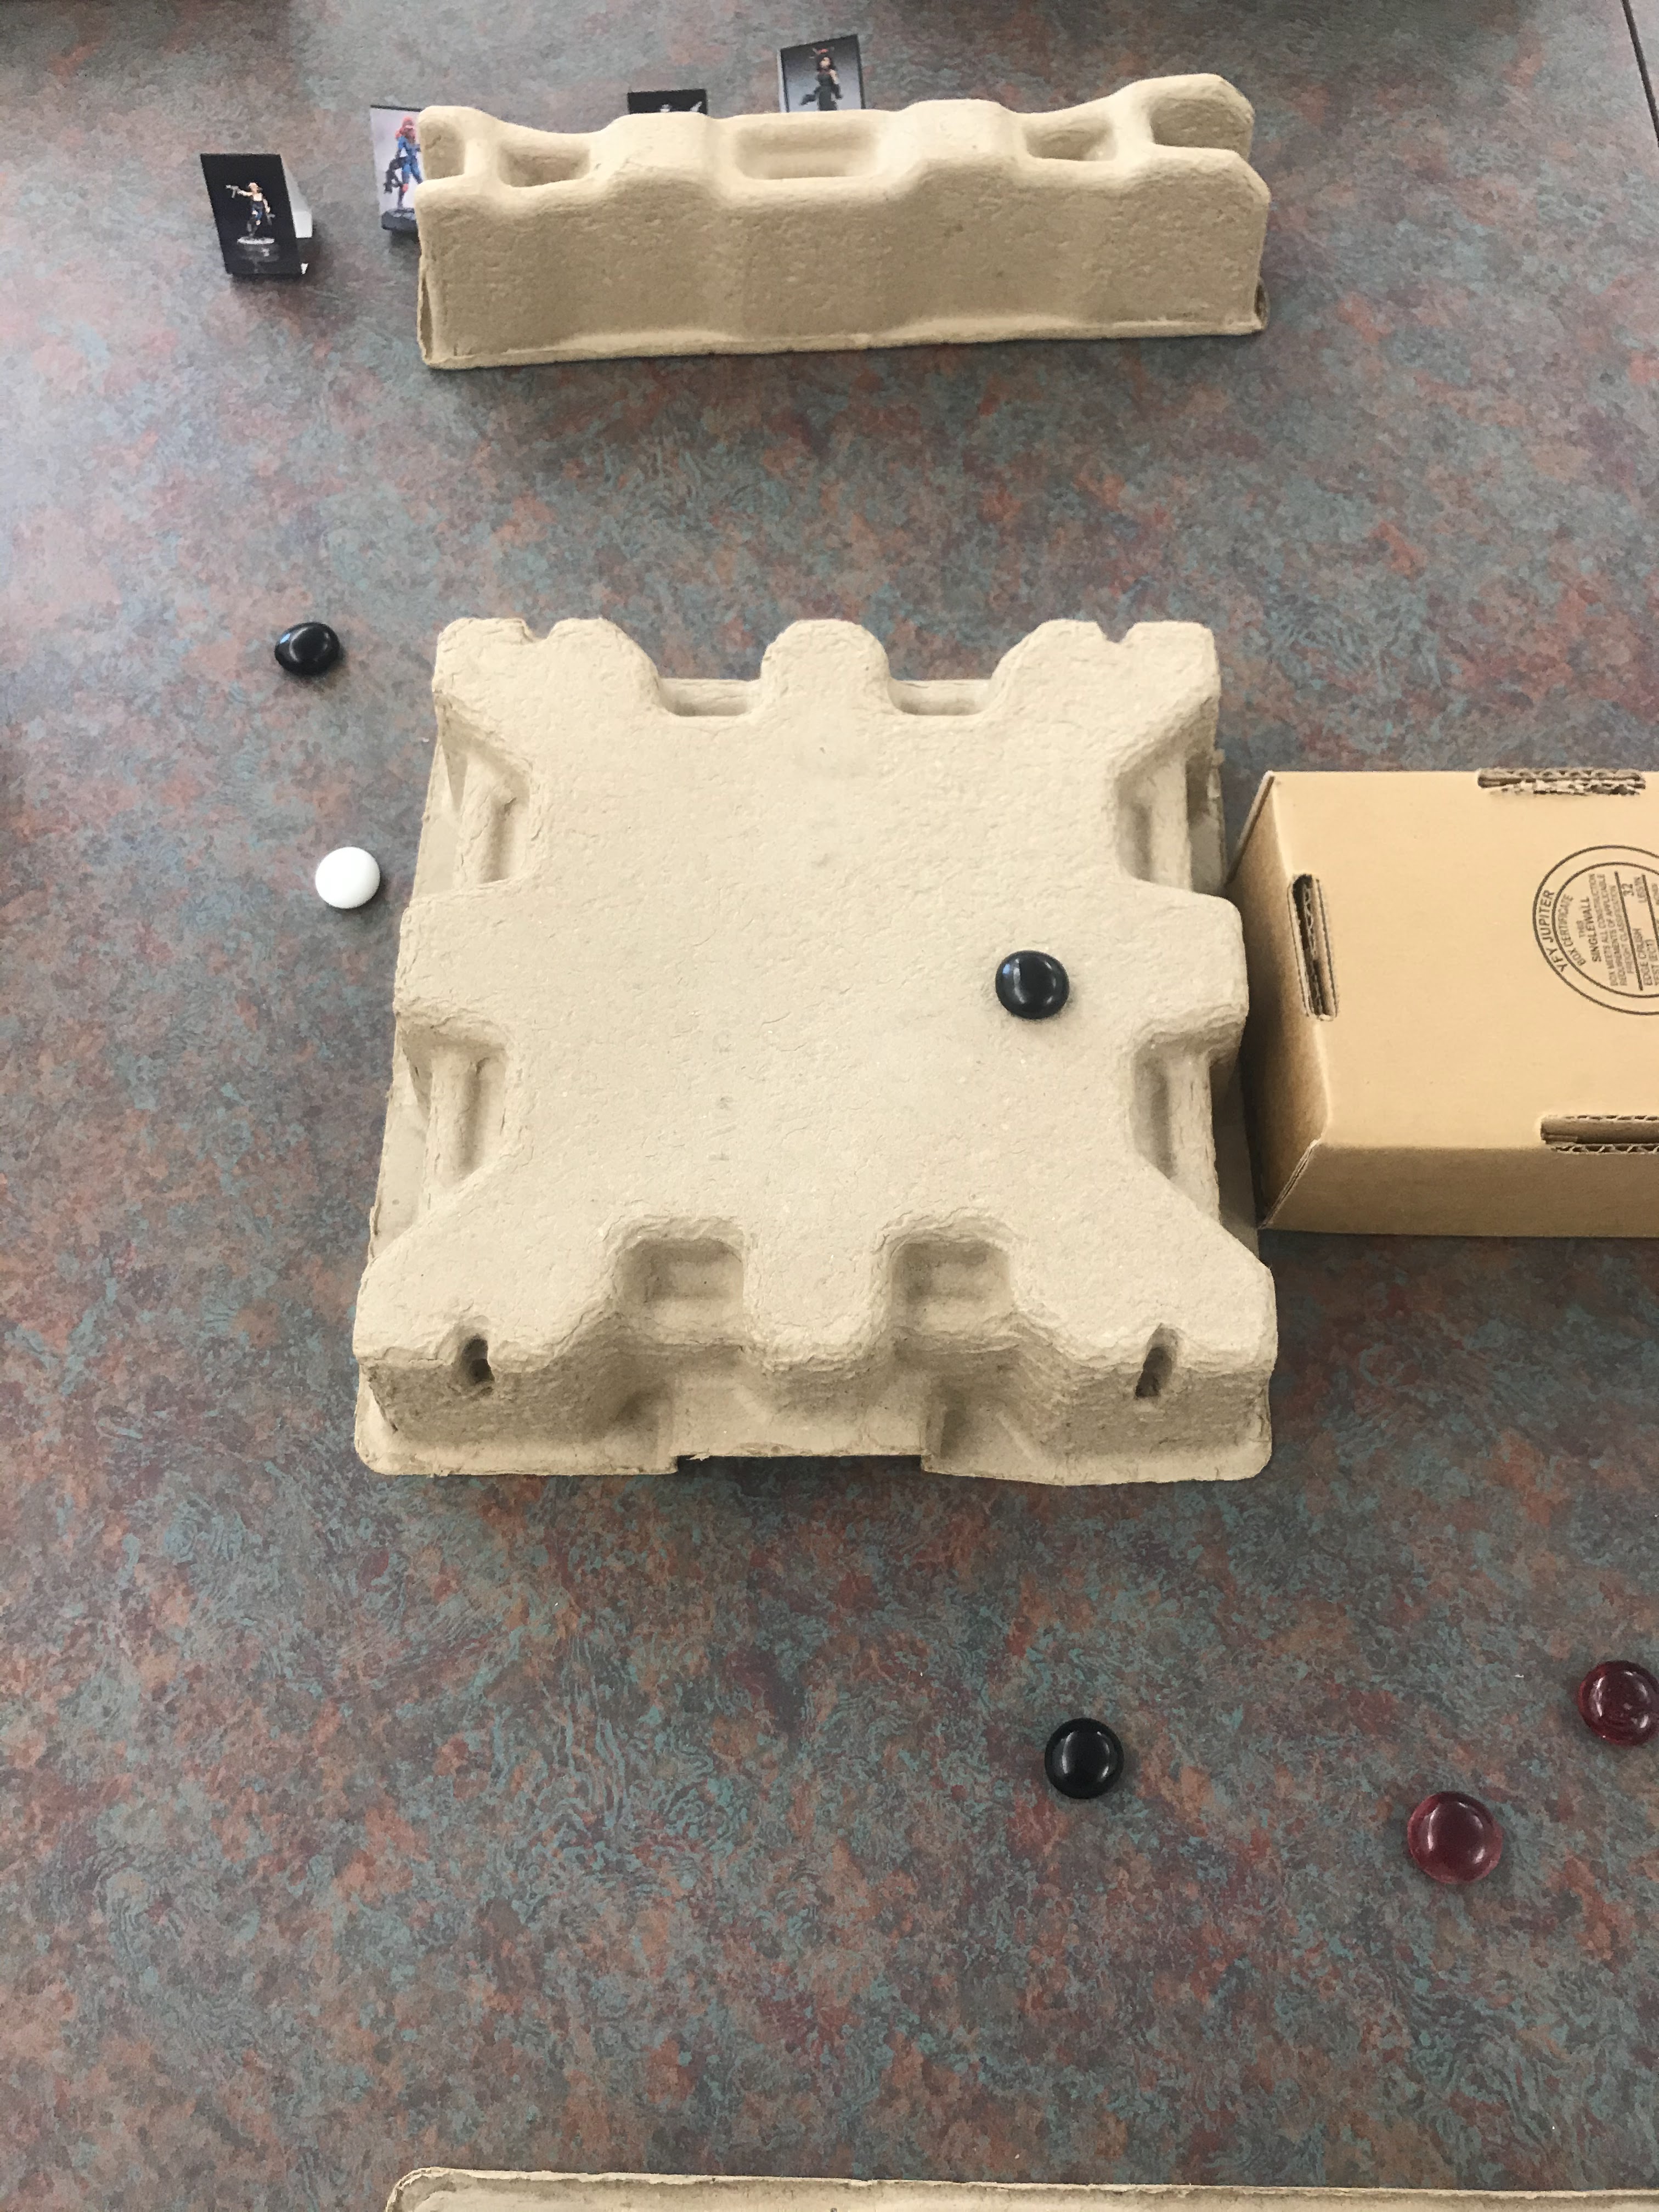
The board has a variety of LOS blocking terrain in the form of walls and buildings.  There are 4 Shadowpoint markers starting on the board.  The Shadowpoints are placed randomly around the board.  There are no illumination points.  The artifact is a white marker, that was randomly placed per the scenario.  

Shadowpoints= Black Tokens
Threats= Red Tokens  
Artifact= White Tokens

The "Knights" all deploy along the top edge of the board as the Infil point, this same location will also be their Exfil point.  


Turn 1:
Sister Winifred auto-activates and moves to the ShadowPoint closest to her.  Xijiang also auto-activates and moves up next to Sister Winifred.  Lt. Wulf also auto-activates and moves to the edge of a wall, and levels her rifle.  Heidi follows-up and moves to make for the objective.  

Two Threat markers appear at the furthest Shadowpoint, and then move away towards the edge of the table.  

Fear Token: 2
Threat Marker: 2
Shadowpoints: 4
Turn 2: 
Heidi decides to try a traditional activation and barely succeeds.  She moves up to the second ShadowPoint just shy of the artifact.  Xijiang tries to shut down the Shadowpoint next to her, but fails miserably.  Since this is her key attribute a new Fear token gets added.  

Lt. Wulf gives her activation to Heidi, who grabs the objective.  Sister Winifred tries to shutdown the Shadowpoint, and succeeds!  The Shadowpoint is shut down through a special incantation.  

No new threats spawn.  However, the existing Threat markers move back towards the center of the board.  

Fear Token: 2
Threat Marker: 2
Shadowpoints: 3


Turn 3: 
Heidi runs back toward the Exfil point with the artifact.  Sister Winifred and Xijiang move into cover positions.  Lt. Wulf then gives her activation to Heidi who continues to move to the board edge.  

No new threats generate.  The Threat Markers move towards the center of the board.  

Turn 4: 
Heidi leaves the board with the artifact easily.  The rest of the Knights fall back to the Exfil points.  

No new threat markers appear.  The Threat markers on the board, one moves towards the Knights, while the other one moves back to ShadowPoint 1. 


Conclusion: 
Well, that was too easy!  Why would I even share this with you?  Boring! 

I am sharing it with you to illustrate a point.  Playtesting the changes I made were critical to "balancing" the action and the danger.  The Auto-activations coupled with no Threat Markers starting on the board meant that their was no danger.  Now, add in the new way to generate monsters and the clarified Order of Actions and this game was a snooze fest!

So, let's change it up again!  This time, I have made a simple change.  All ShadowPoints begin with a single Threat Marker next to them.  I will keep the auto-activation option..... for now.  I also modified the Order of Operations to be Alternate Activation between the Player and the AI.  Let's see how these simple changes impacts the scenario and adventure.  

The set-up is exactly the same: 


Turn 1:
Immediately, when Xijiang activates she can spot the Threat at the ShadowPoint.  It is resolved to be a Zombie!  She opens fire with her pistol at it, but misses!  Ouch! Seeing the threat also causes 1 Fear Token to be added.   

The Zombie goes next and charges into the Psychic!  It attacks her, but fails to injure her.  Sister Winifred activates next, and lays into the beast!  Since Xijiang is there, Sister Winifred's fight goes up +1 dice to a d8.  She manages to slay the beast by crushing its skull.   


Lt. Wulf, auto-activates and moves up to the edge of the wall.  A Threat moves closer, near the objective, but is not revealed.  Heidi rolls for Activation and gets 2 extra MU of LOS.  She moves up next to Lt. Wulf.  

However, two new threats appeared near the Artifact and ShadowPoint #3.  The new threats can be seen by Heidi, so they are revealed.  However, they are just shadows and strange noises in the area.  

Fear Tokens: 3
Threat Tokens: 3
Enemies: 0
ShadowPoints: 4 


Turn 2: 
Sister Winifred moved up to ShadowPoint #4.  Xijiang also moves up with Sister Winifred.  The Threats move around.  Lt. Wulf activates Heidi and she moves up.  This reveals two Threat Markers, one is nothing but a rat scurrying around.  The other is a Zombie!  

Seeing the Zombie, Heidi auto-activates her own activation and fired her sub-machine gun in a burst at it.  It is enough and the Zombies is killed.  

No new Threats spawn.  

Fear Tokens: 4
Threat Tokens: 1
Enemies: 0
ShadowPoints: 4

Turn 3:
Xijiang tries to shut down the ShadowPoint, which she does easily.  The last Threat marker comes up into Heidi's LOS and generates a Zombie with a Chainsaw!  

Heidi activates and tries to burst fire on the Zombie with the Machine Gun.  She also manages to behead the Zombie with several bullets to its face!  Lt. Wulf then encourages Heidi to move up and get the Artifact.  Sister Winifred goes to the opposite edge of the wall.  

A new Threat Marker is spawned at the ShadowPoint #2.  

Fear Tokens: 6
Threat Tokens: 1
Enemies: 0
ShadowPoints: 3          

Turn 4: 
Heidi activates and runs back towards the Exfil point.  The Threat Marker moves closer to the edge of the building.  Lt. Wulf also encourages Heidi to keep moving.  

Sister Winifred moved forward to unveil the Threat Marker.  It turns into a zombie riflemen, who fires at Sister Winifred.  He fires at her and misses, but forces a Suppression test, which she passes.  


Xijiang falls back to the Exfil point, and covers Heidi with her pistol.  

No new Threats generate.  

Fear Tokens: 7
Threat Tokens: 0
Enemies: 1
ShadowPoints: 3
 
Turn 5: 
Heidi activates and exits the board.  The zombie fires at Sister Winifred again, but misses her again.  She again avoids suppression.  She ducks back into cover. Xijiang moves through the Exfil point.  Lt. Wulf falls back to the Exfil point.  

No new Threats    

Fear Tokens: 7
Threat Tokens: 0
Enemies: 1
ShadowPoints: 3


Turn 6: Doomsday Turn
Lt. Wulf drops back off the board out of the Exfil location.  The Zombie rifleman fails a Dynamic movement test and falls to his death trying to pursue Sister Winifred. She falls back to the Exfil Point edge, but does not get off the board. 

A pair of Threats appear in the center of the board.  

Fear Tokens: 9
Threat Tokens: 2
Enemies: 0
ShadowPoints: 3


Conclusion: 
The end result of securing the Artifact still happened, but this time the danger was much higher.  I only had to Fear 12, and got to 9.  Plus, I had to deal with several enemy threats.  We ended up dealing with 2 d4 Zombies and 2 d6 zombies.  However, despite the more difficult scenario, I suffered no real damage.  Therefore, we see an improvement, but I still need to tweak the threat levels.  

All of this information and tweaks came from about two hours of playtesting with the rules.  I detail my system for Playtesting in a different post.  From that post, we are still at the  "Just You and the Table" stage of testing.  The focus here is on tweaking and streamlining the core mechanics before adding in all the Chrome of campaign elements to the game.  

So far, the game is moving along nicely but there is still a lot of work to do before it is ready for prime time.  I am not sure about the activation process yet.  It seems too limiting, and I have had little need to use "Illumination" actions yet.  Plus, there is still more work to do on tweaking the threat levels.         

Watch this space as the game develops. 


Become a Patron and get access to all the cool stuff, a peak behind the curtain of Blood and Spectacles, and early-access to playtest games!  


You can follow Blood and Spectacles Facebook page or Instagram for more fun! 

Check out the latest publications and contact me at our Blood and Spectacles website

Or purchase all out games at the Blood and Spectacles Publishing Wargames Vault Page!

Monday, February 14, 2022

Battle Report: White Star/Red Star - Combat Air Patrol during the Initial Invasion

Image from here:
https://www.scalemates.com/books/the-korean-air-war-robert-f-dorr-warren-thompson--109961

Dateline: June 30th, 1950
Location: ON approach to Suwon Airfield

UN aligned countries were busily attempting to evacuate using the Suwon Airfield.  Meanwhile, North Korean forces were steadily advancing.  The Air Force strategy was to gain air superiority, interdict North Korean forces, and then engage in strategic bombing.  The North Koreans wished to support their ground advances.  

To this end, a CAP of Yak-9's and La-11 Fangs were loitering near the advance forces.  USAF on patrol to defend the Suwon Airfield were also in the area.  The North Koreans were routed to the area to try and drive the USAF aircraft off and clear the path for the ground forces to surge forward.  

I have been playing around with the core rules for Detection and the Action Economy for the game.  This is a V3 of the rules that I will be testing today.  The updates to Detection involve using the turn to influence the results of the detection.  The changes to the action economy are intended to keep game play dynamic like V1, but avoid the strange game play lags from that same version.  It also maintains the enhanced maneuverability and wingman rules from V2.  

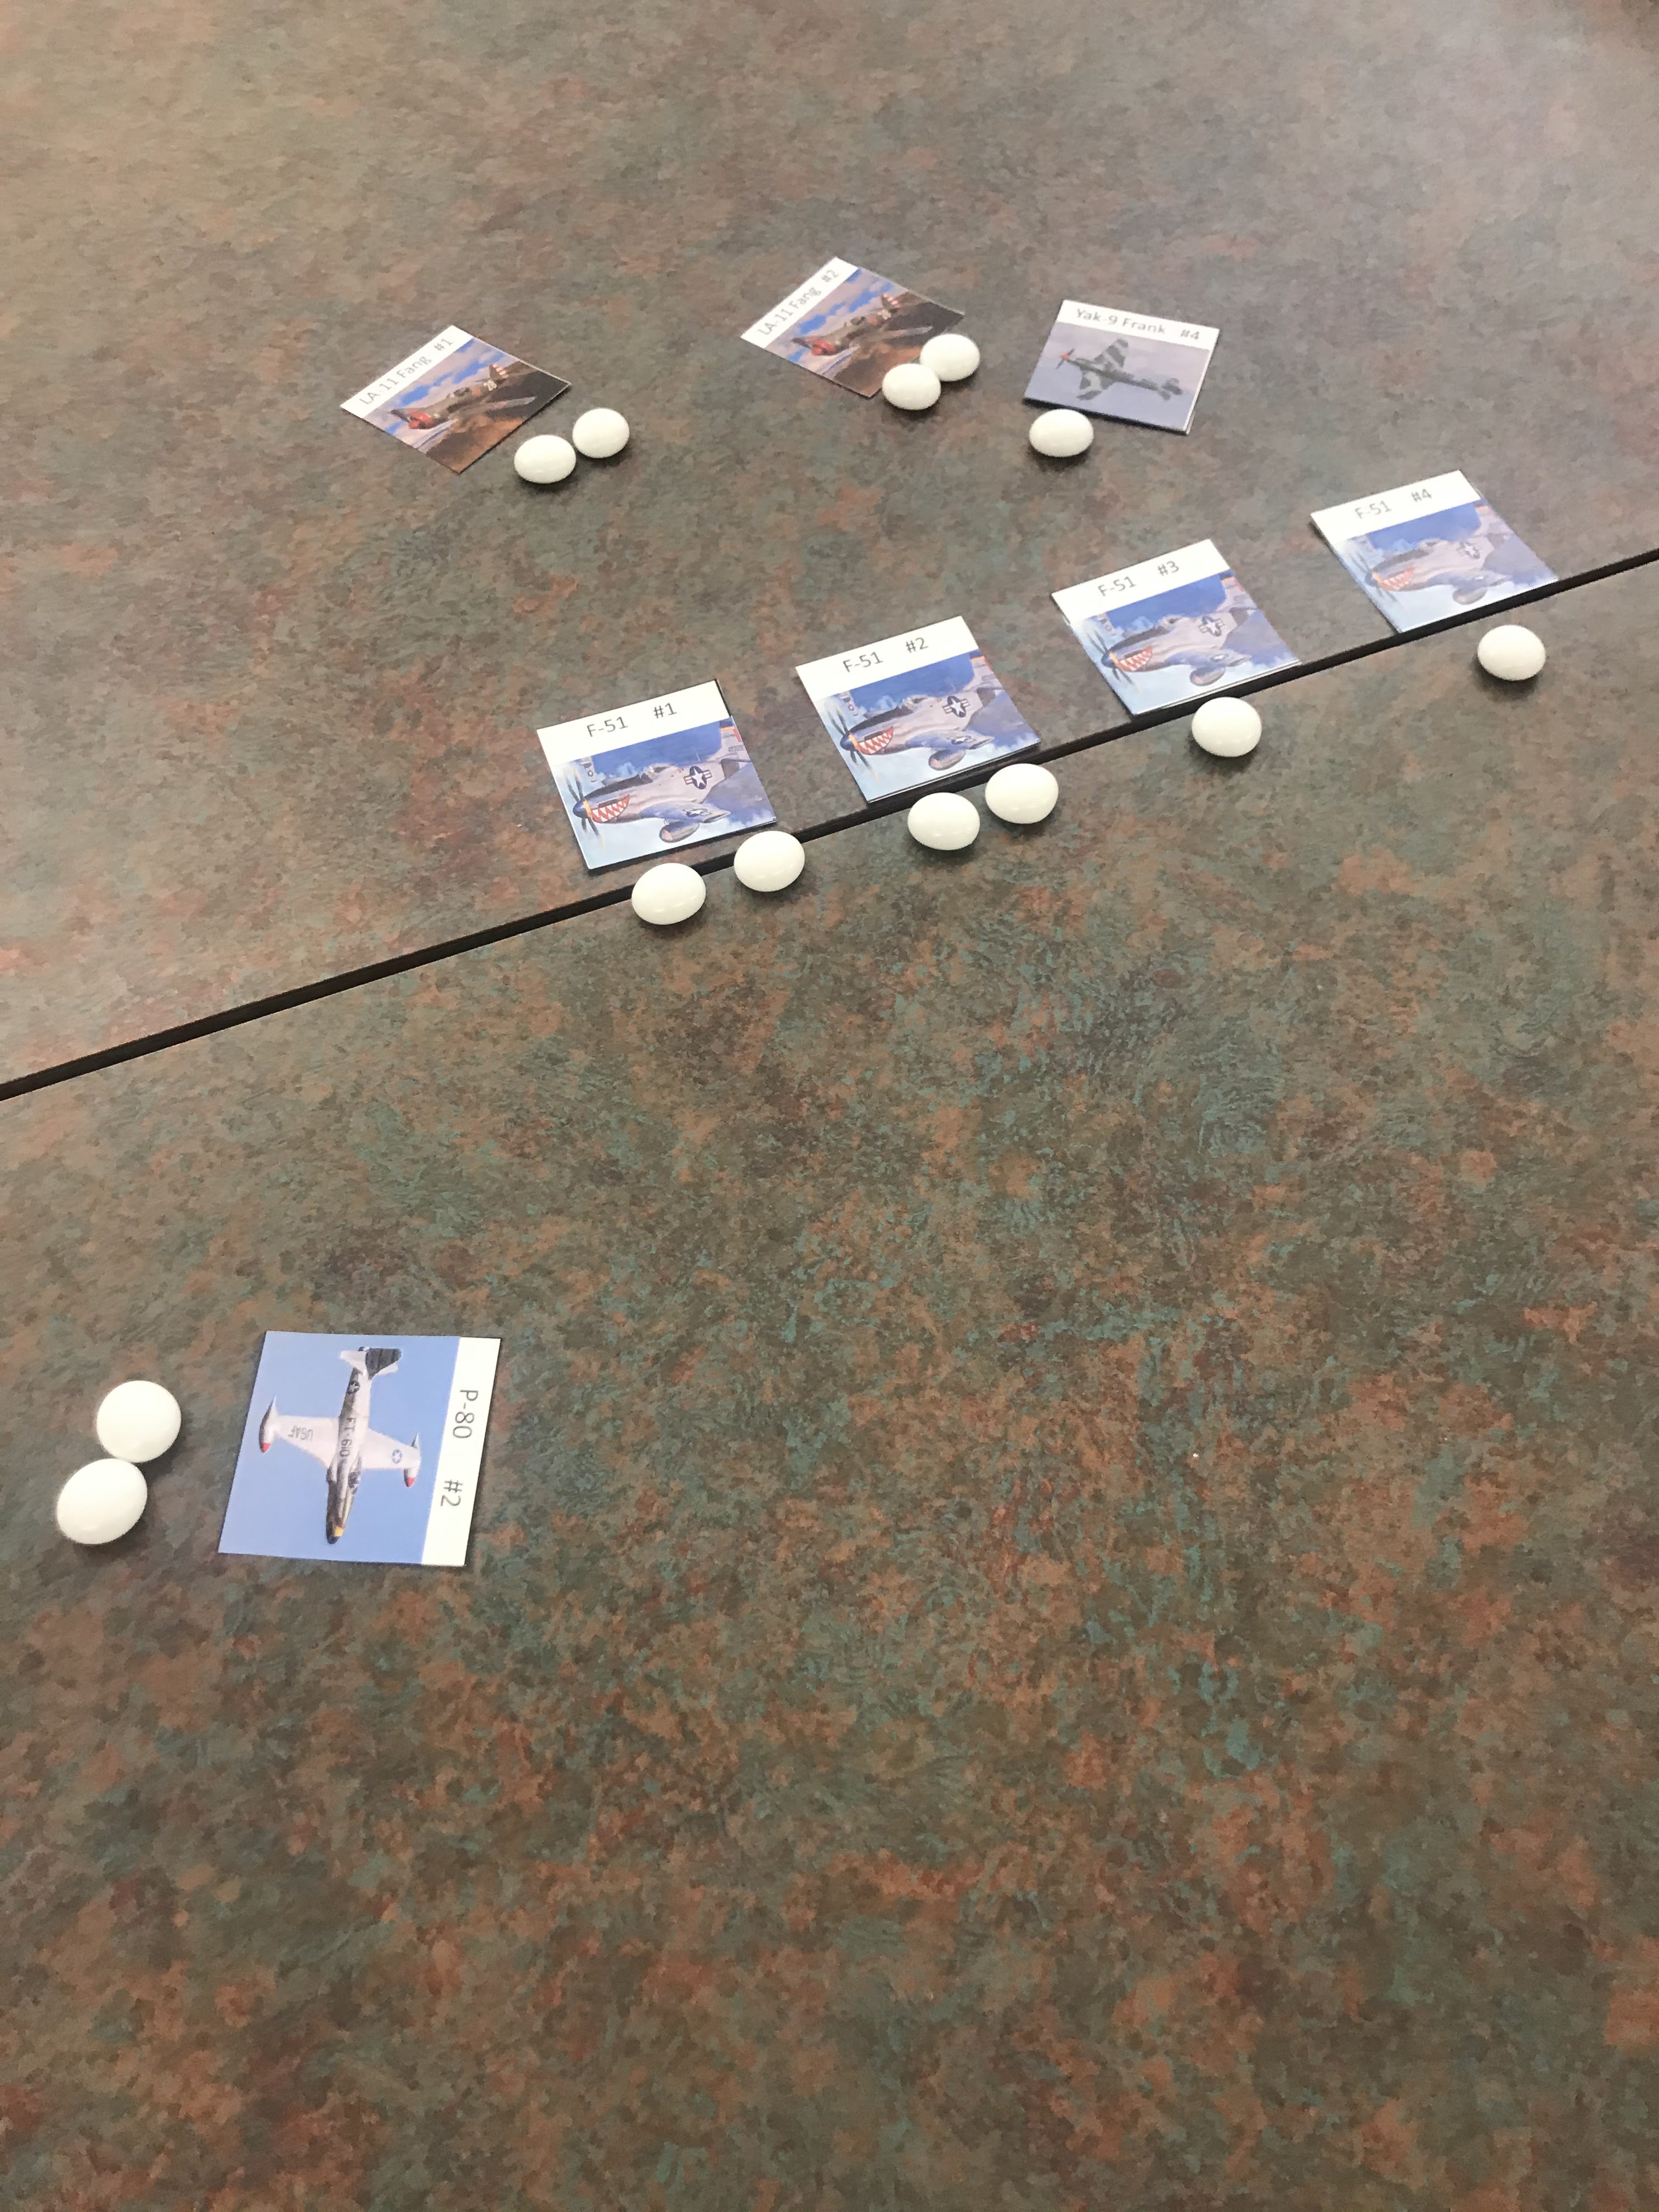
As usual, I am using my paper templates again.  Altitude will be dictated by beads.  0= low, 1=combat altitude, and 2 = high altitude. 

Forces:

USAF
4 P-51 Mustangs- Experienced Pilots
2 P-80 Shooting Stars- Experienced Pilots

North Koreans
4 La-11 Fangs- Rookie Pilots
2 Yak-9 Fritz- Experienced Pilots

Sortie
This is a Combat Air Patrol. 

Set-up
The game uses Measurement Units instead of a fixed measurement system.  This allows players to match their models and boards.  Today I will be using a 48 x 48 MU board, with an MU being 1 inch.  We rolled for weather and found it to be clear. No terrain is placed. 

The North Korean forces are the attackers.    

The Sortie, Weather, and Attacker were all determined via the rules in the White Star/Red Star rules.   

Turn 1: 
Detection Phase: 
No one is detected, so we quickly move onto turn 2. 

Turn 2: 
Detection Phase: Again, no one is detected, so we move onto turn 3! 

Turn 3:
Detection Phase: This time, the Communist forces are detected.  Since it is Turn 3, they can deploy anywhere on the board up to 18 MU in.  The Fangs are placed in two groups as wingmen on each side of the board and angling in.  They have bad climb rates, so start at high altitude.  The Yaks are set up as separate planes in the center at combat altitude.  No USAF planes are detected yet.

Yes, that is a SPAM tape measure. 
I got it from the SPAM museum in Austin, MN


Rookie: 
The Fangs are all rookies.  They can turn or change altitude, but with no enemy targets, they stay on target for now and move straight.  The Yaks do the same.  

Experienced:
The Yaks can maneuver around if they wish, as they are experienced pilots they can maneuver, but opt to go straight.  The Fangs are rookies, so must go straight.  

Ace: 
Everyone must go straight.  The lead Yak hits the center line of the board.  


Turn 4:
Detection Phase: This time, the Communists detect the oncoming USAF Shooting Star jets!  They can deploy up to 24 MU in, and the USAF commander opts to keep them as singles.  They are at high altitude and are angling in on the rookie Fangs on the  communist left.  


Rookie:
The Communists have more planes, so can choose to go first.  The Rookies in the Fangs are set-up as wingmen so will move together.  

The Rookies bank hard into the oncoming Jets, which kills their speed.  However, they might get a shot off!  The lead plane opens fire, and futilely drains their ammo.  No hits.  The Shooting Star also fires as he closes, but fails to score any hits.  However, he still has ammo in the hoppers.  
  
The lead Yak #3, turns at 45 degrees towards the American planes, but is too low to engage.  The second Shooting Star closes in on the rookie Fangs, and his shots are true as he downs the wingman.  He also has ammo left.  

The remaining Yak and Fangs fly forward.  

Experienced: 
The Communists have more planes on the board so get to go first.  Fang #3 is out of ammo and lost his wingman, he elects to disengage as best as he can.  He flies into and past the USAF Jets, who try to turn back into the enemy formation.  Yak #3 tries to chase them down, but may not have the angle.  

Yak #4 turns away, while the two Fang rookies go straight.  

Ace: 
Everyone flies forward.  

Turn 5: 
Detection: This time, the Mustangs are also detected and they deploy anywhere up to 30 MU in on the board.  The Jets had done their job and distracted the Communists, and now the Mustangs buzzed into firing position on the Communist planes.  Now the USAF has the most planes.  


Rookie: 
Mustang #1 and #2 move in as a wingman pair up close to Fang #1 and #2.  They are very close and start peppering the Communist planes.  The lead Mustang misses, while the Fang evades from the second ones fire.  Neither Mustang is out of ammo.  

Yak #4 break away hard from his pursuers.  The maneuver helps him avoid one, but the lead Mustang opens fire.  The Communist pilot evades the incoming fire.  The USAF still has ammo left.  


Fang #1 and #2 dive away from their pursuers to Combat altitude.  

Shooting Star #2 drops altitude to Combat altitude.  Yak #3 turns to try to spin back into the dogfight with the Mustangs.  Shooting Star #1 also banks back towards the fight, but is too high.  Fang #1 goes straight trying to disengage.     

Experienced: 
Mustang #1 and #2 chase after their prey, right on their sixes.  Since they are tailing, Mustang #1 blows Fang #1 out of the sky.  However, Fang #2 manages to evade a similar fate!  The Mustangs still have ammo.  

Yak-9 #4 manages to bank away from his pursuers!  Instead, Mustang #3 and #4 try to set up to support their fellow Mustangs after Fang #2.  

Everyone else tries to maneuver back into combat, except Fang #3 who is still trying to bug out! 

Ace: 
Everyone goes straight.  This time, Fang #4 manages to disengage, which triggers the disengagement turn.  


Turn 6- Disengagement Turn
Rookie: 
Mustang #1 and #2 try to get the angle back on Fang #4.  However, Yak #3 gets the angle and distance on them and manages to snag Mustang #1 with a burst of machine guns!  He still has ammo left.

Blurry Gun Cam footage! 

Fang #4 drops to low altitude and flies towards cover beneath the Yak-9.  The other mustangs follow Mustang #2, hoping to turn in at the enemy and overwhelm them with firepower.  The Shooting Star #2 turns to stay in the fight, while the #1 flies above the communists at High altitude.  

Experienced: 
Shooting Star #1 stays high, while Fang #4 tries to get away at low altitude.  Mustang #3 and #4 turn into the Yak and the lead plane fires.  However, the Yak manages to evade.  

The Yak returns fire, and downs Mustang #3 with a barrage of machine guns!  However, this time he is out of ammo.  Shooting Star #2 turns into the scrap, but is probably out of position.  


Fang #4 disengages.        Mustang #2 also turns towards the Yak, but does not have the angle.  

Ace: 
Everyone goes straight.  However, Mustang #4 takes a closing head-to-head shot on Yak #3.  He peppers the plane, and it goes crashing down in flames!  


Conclusion: 
That one went down to the wire!  3 USAF kills to 2 Communist Kills.  USAF scrapes a win!  It ended up closer than I expected after the USAF got deadly positioning thanks to avoiding detection until late in the game!  

The new process provides the advantage to the more experienced pilots, and still keeps the action moving fast!  The previous V2 action economy seemed like everything was moving very slowly and sluggishly.  This new version feels pretty fast, even for the slower planes.  The jets were clearly faster!  

Shooting and evading still worked as intended.  Detection is better than it was before.  The Wingmen rules worked well, and provided an interesting decision point at deployment.  Later, there were clear advantages and disadvantages to being in a wingman formation.  That is good, as it gives more decision points.  

I think I need to go through a few more Bomber Intercept scenarios with the new V3, as well as a ground attack scenario or two and these rules will be ready for Post-production. 


Become a Patron and get access to all the cool stuff, a peak behind the curtain of Blood and Spectacles, and early-access to playtest games!  


You can follow Blood and Spectacles Facebook page or Instagram for more fun! 

Check out the latest publications and contact me at our Blood and Spectacles website

Or purchase all out games at the Blood and Spectacles Publishing Wargames Vault Page!


Monday, January 31, 2022

Battle Report: White Star/Red Star - CAP in MIG Alley II


Image from here:
https://www.scalemates.com/books/the-korean-air-war-robert-f-dorr-warren-thompson--109961


MIG Alley was the nickname for the Northwest corner of Korea, where the Yalu River enters into the Yellow Sea.  This was the area where Communist MIG-15s tended to scrap with USAF Sabres for control of the skies.  Here, high above Korea was the site of many of the first Jet-vs-Jet battles in history.

The Korean War officially began June 25th, 1950.  The initial air battles were fought between the North Korean Air Force using old WWII era planes, and the South and their allies.  The USAF used later WWI propeller driven aircraft and some early Jet aircraft.  

On November 1st, 1950 the first MIG-15 jet fighters attacked a flight of USAF F-51 Mustang fighter-bombers.  Later that day, the first jet vs. jet combat took place between the MIg-15 and the F-80 Shooting Star.  The USAF's early jets were inadequate for the task, and soon the USAF was resupplying and using the new F-86 Sabre to counter the Communist threat.  

The MIG-15's during the early phase of the war were secretly being operated by the Soviet Unions highly skilled 64th Fighter Aviation Corp.  While the Soviet pilots were engaging in the air, they were also starting to build up the North Korean and Chinese pilots to eventually rotate in and replace them.  

As the F-86 began to appear in the skies over North Korea Mid-December the stage was set for a clash for control of the Skies over North Korea between the MIG-15 and the F-86 Sabre.  

After several play tests, and getting feedback from others I made a couple of BIG changes to these rules.  The first big change was to remove the "action economy" element of the game.  In the old version, all pilots took action in the Rookie Phase, Experienced Pilots and Aces in the Experienced Phase, and Aces only in the Ace phase.  This proved to be unpopular as an Ace pilot in a Prop plane could go faster than a rookie in a Mig.  Therefore, I removed this and instead gave the different levels of pilots the ability turn or change altitudes differently.  Rookies could only initiate a turn at the start of their move OR change altitude, experienced can at any point OR change altitude, while aces can change altitude and turn freely.  

I also made a bit of a change with Wingmen and formations.  Therefore, you can better imitate the true Finger Four formation or pairs of aircraft working in tandem on the table.  A formation has the Wing Leader activate first, and it auto actives the wingman who must maneuver the exact same way as the Wing Leader. 

Finally, I modified Detection so it was a bit harder to detect some planes right off the bat.  This allowed you to "sneak" them in and deploy them closer to the enemy.  I did this by changing it from a straight d6 to a d6+Turn mechanic.  I then increased the Detection number of all aircraft.  It is possible to detect a Jet fighter on turn 1, but it is unlikely.  Let's see what these changes did to the game. 

I intend on giving both of these changes a try today.   

Sortie: 

This time, I am purposely re-creating a playtest battle I posted previously.  As such, it will mirror the set-up of that battle in order to test the key changes I made to the rules.  The UN is the attacker, and the sortie will be the Combat Air Patrol.  

Set-up: 

Again, we are mirroring the original combat.  The weather was determined to be clear.  

Since this is a standard Combat Air Patrol in MIG Alley, no additional terrain is needed.  However, we add some hills on the edges of the board, ad determine them to be difficult terrain at Low Altitude. 

The board is 48MU by 48 MU and an MU equals 1 inch.  

Forces:

Today's battle will be using my (in)famous Paper Templates. 

USAF

4 F-86 Sabres- Experienced Pilots

Soviets

4 Mig-15s- Experienced Pilots

This will be a straight up dogfight between the two sides of equal points and aircraft.  

Turn 1: 

Detection Phase:
A great Soviet roll, leaves all the Sabres detected, while the Migs are not detected.  The Soviet player rolled a 6 +1 for the turn to get a 7.  The detection rating on a Sabre is a 7, so the Sabres are detected. 

I place the F-86's in a finger 4 formation, relative center of the table, and at high altitude to get us all started.  I decide that Sabre #1 and #2 are wingmen, and #3 and #4 are also wingmen.    

No Migs in sight yet. 

Action Phase:
The F-86s have no reason to split up, so continue going forward on their merry way.  They are blissfully unaware that Soviet Migs are about. 


Turn 2:

Detection Phase: 
This time, I roll a 5 + 2 for the Turn for a total of 7. This time, I get eyes on the Migs.  They can deploy up to 12 MU in on the board.  They deploy at low altitude, echelon right on their right edge of the board.  The Soviet player declares all her Migs are Wingmen to each other, so they will move as a unit.


Action Phase: 
The Sabres move forward and stay in formation, at high altitude.  The Migs also just stay going forward and in formation. 

Turn 3: 
We dispense with the Detection Phase since all planes are in sight.  

Action: 
The Migs ae coming in at an angle, so the question is whether to turn towards them to engage, or if I should do something different.  I am reluctant to go head-to-head with all that firepower, but to maneuver away may leave me sourly out of position, and still in a danger zone.  I decide I want to try to lure the big formation after i set of Sabres, while the other gets behind the Migs.  

Sabres #3 and #4 break left with a 45 degree turn.  The Migs, do not deviate from the low altitude flight path.  Sabres #1 and #2 using wingmen rules break to the left at 45 degrees.  

We will see if this works! 

Turn 4:
Sabre #1 & #2 continue with slight 20 degree turns to get behind the Migs.  The Migs, keep going forward in formation and pivot 20 degrees as well, towards Sabre #3 and #4, but stay low.   The final Sabres do a 180 degree turn by inverting, and drop to Combat altitude.  They are trying to avoid the oncoming MIGS.  

Turn 5:
Sabre #1 and #2 do 90 degree turns at high altitude to try and start getting behind the Migs.  The MIGs use their wingman formation and all go to Combat speed, and open fire on Sabre #3 and #4.  

Only Mig #3 has a shot and he fires at Sabre #4 at long range.  He gets two hits, but thanks to range and deflection, the Sabre jinks away.  Mig #3 has fired off all his limited ammo.  

The last Sabres hard break back towards their fellows and the Migs at Combat altitude. 


Turn 6:
Sabre #1 and #2 take 45 degree turns to get in behind the MIGs.  They still do not have the Angle as the MIG formation turns 45 degrees as well and towards Sabres #3 and #4.  

Mig # 4 and Mig #2 light up Sabres #3 and #4 respectively.  The Sabres again manages to shake off the shooting with maneuvers.  MIG #4 runs out of ammo from his pass.

The Sabres turn in and good head-to-head against the MIG line.  There shooting fails to bring down any enemy planes either.  They also have more ammo left in their feeds.  


Turn 7:
The aircraft maneuver around, but are in a furball up close.  

Sabres #1 and #2 are up high and failing to get the drop on the MIGs.  Meanwhile, the MIGs stay in formation and break hard left.  Sabres #3 and #4 cross their trail, but can't get the bead as they break 45 degrees to their right.  


Turn 8:
Sabres #1 and #2 drop to combat altitude.  

The Migs turn towards them, hoping to get a bead on them, but fail.  

Sabres #3 and #4 bank hard and swoop in on the MIGs tails.  Only #3 has a shot and opens up.  MIG #2 manages to maneuver away from the shots!  However, Sabre #3 still has ammo left.


Turn 9:
Sabres #1 and #2 cut across the MIGS flight path as they roar past the opposite way.  

Sabres #3 and #4 seem to have them in firing position and chase them down with a hard bank. 

Sabre 33 opens up on MIG #4, but the pilot evades masterfully.  Sabre #4 also fires on Mig #3, and this time he manages to blow the wing off his foe.  Scratch 1 MIG! 


Turn 10- Disengagement Turn
Sabres #1 and #2 try to gain altitude and disengage.  However, the MIG flight inverts and climbs to take them on.  MIG #1 opens fire on Sabre #1, but misses.  He still has ammo.  

Sabres #3 and #4 jet past underneath the MIG formation.  

Conclusion:
All aircraft break for home, running low on fuel and ammo.  The USAF won by downing 1 MIG to 0.    

So, the game felt very different with the changes I made.  Planes did less, zipping around then they did before, and the battle felt a lot less Vertical.  This felt like a more traditional WWII air battle game this time.  I am do not think it accomplished my design goals fully.  

I think I am going to go back and take another shot at the action economy approach, but this time, all pilots activate in the turn, but only the turn names pilots can maneuver in their turn.  otherwise they just fly straight?  That is another big change to the rules.  

The Detection rules worked better though, so those can stay!  I am also less sure about Wingmen movement, as they just ended up being big "groupings" of aircraft.  This is not necessarily bad though, and seemed to match my reading of the Korean War.  I will have to test those with the new "Action" economy again. 

Back to draft again...... 


Become a Patron and get access to all the cool stuff, a peak behind the curtain of Blood and Spectacles, and early-access to playtest games!  


You can follow Blood and Spectacles Facebook page or Instagram for more fun! 

Check out the latest publications and contact me at our Blood and Spectacles website

Or purchase all out games at the Blood and Spectacles Publishing Wargames Vault Page! 


Monday, January 24, 2022

Battle Report: Darkest Knight - Scout the ShadowPoints


I have been working on a solo/co-op/versus game tentatively called Darkest Knights.  I have always liked the idea of doing a horror themed game, and have many starts and stops at this goal.  After a lot of work, I finally got to the point with a game where it is ready to hit the table and get tested.  However, there were a few design goals and hooks I wanted to put into the game.  

  1. RPG Light elements
  2. LOS as a resource due to darkness
  3. Solo/Co-op/Versus playable
  4. Escalating tension/difficulty
  5. Lot's of choices
  6. Scale and Model Agnostic
  7. Modern horror veneer
So, here we are with a Playtest of Darkest Knight on the table using my infamous Paper Templates!  The Paper Templates were made using random images of models on the internet.  The heroes are mostly images of Reaper Models I was eyeing up for this project.  

The concept is simple.  Each player gets a team of 4 models that are their team of "Knights" to go on missions against the forces of "Darkness".  Each of the 4 models can be customized by choosing their attributes and a template that applies starting gear and special abilities.  The game itself uses dice shifting and a target number of 4+.  Monsters also have an escalating level of dice based on the level of Fear on the board that accumulates from player actions.  The last hook is that the board is considered to be constantly shrouded in darkness, and LOS is limited.  Therefore, the use of sources of light and illumination are critical for success.  All "monsters" spawn randomly through out the game.  

Lt. Wulf re-checked her weapon.  It was in prime condition and ready to rock-and-roll.  Next she checked her ear piece Comm.  

"Testing 1, 2, 3..... team check in."

"Sister Winifred, ready." The stocky, middle aged women clutched her holy symbol to her chest, and huge pistol strapped under her arm.  It was a sharp contrast to her nun's habit.  

"Heidi Kroft, ready." The tall, lanky woman racked her sub-machine gun.  Her hair had been pulled up into braids, keeping them out of her way.  Her gear looked strapped down and secured.  

"Lui Xujiang.  Checking in," her english was flawless, perhaps better than Ilsa's own.  There was no trace of her Chinese heritage.  However, of all the team, she looked the most nervous.  She rubbed her palms on her utilitarian coveralls.  Hard to believe she could freeze a foe with just her mind, but Ilsa had seen it herself.  

She nodded to her team, "Time to get out there and see where this mystical Darkness is coming from.  let's get ready to light it up!"  

The rest of her team gave nervous grins and glanced around the cabin of their APC.  It rumbled to a halt, and the back door dropped down with a clang.

"Go, go, go!"   

Forces:
Our heroes are a team of "Knights" that have been gathered together and trained by a wealthy patron.  Exactly who this mysterious benefactor is is unclear, but they are loyal to each other and the mission of halting the spread of the Darkness across the land.  Our cast of heroes are:  

Lt. Ilsa Vulf
Shoot                  Fight                   Brawn                Brains                 Awareness
d12                      d4                        d6                        d8                        d10
Archetype: Leader                                                                  Keyword: Awareness
Starting Equipment: Battle rifle, Low-light goggles, pistol
Power: Re-roll failed Rally tests, Can activate another model rather than themselves on Activation

 
Sister Winifred
Shoot                  Fight                   Brawn                Brains                 Awareness
d4                        d6                        d10                      d8                        d12
Archetype: Devoted                                                              Keyword: Brains
Starting Equipment: Pistol, Holy Symbol, Flashlight
Power: Repulse Undead, Spectral, and Occult.  Use Occult texts with a Brains test
 
Heidi Kroft
Shoot                  Fight                   Brawn                Brains                 Awareness
D8                       d6                        d10                      d4                        d10
Archetype: Freerunner                                                         Keyword: Brawn
Starting Equipment: SMG, Knife, Satchel
Power:  Re-roll failed Brawn test for Dynamic Movement

Lui Xijiang
Shoot                  Fight                   Brawn                Brains                 Awareness
D8                       d6                        d4                      d10                        d8
Archetype: Psyhic                                                        Keyword: Brains
Starting Equipment: Pistol, Flashlight, Knife
Power: Freeze Target- Successful Brains test, the target is pinned


Mission:
 For this test run, the team needs to "scout the area".  They do this by moving within 6 MU of a Shadowpoint Marker and make a successful Awareness test.  The more they investigate, the more they score victory points.  They do not need to "shut down" a Shadowpoint Marker to score. 

Set-up: 
The game is played on a 36MU by 36MU board with 1 MU = 1 inch. 

The board has a variety of LOS blocking terrain in the form of walls and buildings.  There are 4 Shadowpoint markers starting on the board, and 4 potential Threat markers.  The Shadowpoints are placed randomly around the board with a Threat marker adjacent to them.  There are also four illumination points, with a 6 MU radius that are also randomly placed.

Shadowpoints= Black Tokens
Threats= Red Tokens  
Lights= White Tokens

The "Knights" all deploy together in a corner of the board behind cover on the more well lit side of the board.     


Turn 1:
This is a solo test game, so the "knights" get to go first.  

The Knights choose Heidi to go first, as she is a Free Runner.  She has a d10 Awareness, so makes her check.  She rolls a 3, which is a failure!  Therefore, the Darkness gains 1 Fear marker and play turns over to the Darkness.  The Darkness fails to spawn a new Threat, but an existing at the nearest Shadowpoint moves 4 MU away.  

This time, Lt. Wulf tries to activate and successfully does so with a 5.  This gives her an LOS of 7 MU.  6MU is base, and she scored 1 over 4+ to add 1 MU.  She moves up, but can not see the nearest Threat marker due to blocking terrain.  Afterwards, play goes to the Darkness again!  

Sister Winifred gets an 11, so activates with a 13 MU LOS.  She goes around the other side of the buildings and draws LOS to a Threat Marker.  Thankfully, it was just an abandoned newspaper blowing in the wind, and making all sorts of noise! 


The darkness spawns a new Threat marker at the far Shadowpoint.  Then, Xujiang moves up to stay with Lt. Wulf.  

The Fear level is 2, and the Knights have not scouted any Shadowpoints.  


Turn 2: 
Heidi shakes herself out of her revelry and moves out.  She activates and passes a Dynamic movement test to get on top of the nearest building and nimbly move over its roof.  

Sister Winifred acts next, and moves forward.  She peaks around a corner and sees another threat marker.  Thankfully, it is just a stray cat!  

Lt. Wulf tries to activate next, but hesitates as Sister Winifred's voice buzzes in her ear bud, "Just a cat".  The Lt. breathes a sigh of relief, but the Fear level goes up 1 for failing an activation check.  The moment of concern causes Lui Xuijang to also freeze up!  Another Fear token means it is more likely for threat markers to spawn, and those threats to be enemies!  

Fear Markers 4, 0 Shadowpoints scouted! 

Turn 3:
Sister Winifred moves to go around a nearby wall, but can not get close enough to scout the second ShadowPoint yet.  

Heidi moves to the edge of the roof and squints off into the distance.  She had seen movement, but it was just a long shadow after all!  

Lt. Wulf moves to the first Shadowpoint, but can not inspect it yet.  To busy covering her movement from an attack.  However, her vigilance is warranted as a rifle toting zombie shuffles into view in the distance!  It fires at her, but misses! 

Hearing the gunshot crack through the night, Xuijang freezes up and takes cover.  1 more Fear Token!  

A second gun toting zombie spawns and attacks LT. Wulf up close!  It came out of nowhere!  However, the LT. fends it off!  

Fear Tokens 5
Shadowpoints Scouted: 0
Threats: 1
Enemies: 2

Turn 4:
Heidi opens fire with her sub-machine gun at the distant zombie, and forces it back 1 MU.  However, it is immune to suppression as it is undead and does not know fear!  

The Shadowpoints spawn another threat!  Meanwhile, Lt. Wulf struggles with the Zombie that jumped her!  She is not much of a fighter, more of a shooter!  Thankfully, neither is the Zombie!  However, the Shadowpoint spawns another Threat!  


Seeing the Zombie fight with Lt. Wulf the Psychic again stays in cover.  Sweat and nerves keep her pinned in fear! More fear Tokens! 

Hearing more potential threats in the darkness ahead causes Sister Winifred to also take cover and peer into the darkness!  

The rifle zombie that was pushed back fires on Heidi, but fails to hit.  

Fear Tokens: 10!
Shadowpoints Scouted: 0
Threats: 3
Enemies: 2

Turn 5:
Sister Winfred squints into the darkness and sees her caution was warranted.  Ahead in the darkness is a Zombie with an idling chainsaw!  The sister brandishes her Holy Symbol and calls down the power of Jesus to repel it.  The beast shambles back!  Away from the Sister's holy aura! 

Lui Xuijang concentrates on the Zombie fighting Lt. Wulf, and causes him to freeze in place with the power of her Mind!  This allows the LT. to blast him with her pistol up close and kill it!    
  
The other gun-toting zombie fires at Heidi and causes 1 MU of push back, which knocks her from the roof!  She takes an injury and reduces her fight to D4.  The fall also causes Heidi to fail her awareness check! 

Fear Tokens: 11
Shadowpoints Scouted: 0
Threats: 1
Enemies: 2

Turn 6: 
Lt. Wulf takes a moment to catch her breath after her close call with the zombie.  However, this means she can not scout the Shadowpoint.  This takes them to 12 fear, and triggers the Doomsday Turn next turn! 

A new Threat spawns near the Shadowpoint by Sister Winifred, and this causes her to huddle into cover.  Her Holy Symbol gripped in her hand.  

Heidi gets up, fires at the Zombie with the rifle, and fails to hit him.  

The Threat marker near the Sister charges at Winifred.  It is revealed to be a powerful undead Devourer! The attack strikes her in the head, and she reels back.  Her Brains are reduced to d6.  


Lui Xujiang moves up and draws a Line-of-sight on the rifle toting Zombie.  

Another Threat Marker appears, but goes behind a building by the second Shadowpoint.

Fear Tokens: 15!
ShadowPoints Scouted: 0
Threats: 3
Enemies:3

Turn 7- Doomsday Turn: 
Finally, Lt. Wulf activates and scouts the nearest Shadowpoint!  The nearest Zombie rifleman tries to push her back with shooting, but fails.  

Sister Winifred activates, and holds out her crucifix defiantly and screams in latin at the Devourer Zombie, who rushes off in terror of the mystical symbol!  

Another Devourer Zombie appears at the Shadowpoint near Sister Winifred!  

Heidi fires her SMG at the rifle toting Zombie, and hits him.  Causing him to go to d4!  

Another threat marker appears at the furthest Shadowpoint.  The undead forces are starting to respond to the Knights in their region!

In the last activation, Lui Xujiang hunkers down in fear, her eyes darting around in terror!  


Conclusion:
Seeing that the undead hordes of the Darkness were starting to gather, Lt. Wulf called for the withdrawal.  She triple clicked her ear piece, that was the signal for the rest of the team.  They fell back to their exfil location and loaded up in the armored vehicle waiting for them.  They rumbled away into the night.  

The radio crackled to life, the scratching, disembodied voice of their patrons filled the cabin, "Well?" 

The team sheepishly looked around before Lt. Wulf cleared her throat, "We didn't manage to get very far before the Undead started to swarm our position.  We located and pinned the location of one potential Shadowpoint rift in the target area."

"That will do,  Send the co-ordinates so we can target it for destruction via other means.  Was anyone hurt?" 

"Nothing serious, just some minor injuries.  However, we are all a bit shaken up.  I thought I was ready for the oppressiveness of the Darkness, but when you are on the ground.... in it......," her words trailed off.  

"No need to be ashamed.  That creeping dread is spreading everywhere.  That is why we need to locate and destroy more of these Shadowpoint before it is too late." 

The silence hung in the air uncomfortably for a moment.  

"Good for now.  Return to base, and we will plan our next move."  The radio snapped off.  

Well, that was fun.  How did it play?  Well, activation did not go nearly as well as I would have hoped!  Half of the Fear Tokens were generated as I blew activation rolls on d10's and d12's!  That sucked!  Poor Lui Xujiang spent more time scared of her own shadow than doing anything.  I think I will make the Awareness test to activate a choice.  You can activate with 6MU LOS for free, but making a check could allow a larger LOS, but the chance of failing and getting FEAR tokens and not activating.  Now, it is a decision point.    

I normally only let a model get 1 action to create more tactical play, and that really hurt in this game.  I had to make tough choices, but I also didn't get to do much before I got swarmed by tougher and tougher enemies.  I honestly did not expect those d6 rifle toting Zombies to be so tough to get rid of!  As you acquire Fear Tokens, the enemies that are spawned are tougher and tougher to drive off, and get better at killing you!  The main threat in this game is not the enemy models or Threat tokens, it is running out of time and getting bogged down in Fear Tokens and the game ending.  

The Illumination and LOS rules seemed to work fine.  The dice shifting and 4Ms worked fine as well.  I am unsure about the Frequency of the Fear Tokens, might need to dial them back a bit or not give them out so easily.  Also, currently it is easier to spawn the harder monsters and hard to spawn the easier monsters.  That escalates the tension, but seems "wrong" at the same time.  There should be more easier monsters and fewer harder ones.  I think I will tweak that spawning system a bit.  

The models all having different strengths and abilities worked well.  I liked that, even if one of my best shooters got jumped into close combat right away!  The special Repulse and Freeze powers worked well when they were used.  I think I will need to get these out on the table again and see what happens next time before I make too many adjustments.     


Become a Patron and get access to all the cool stuff, a peak behind the curtain of Blood and Spectacles, and early-access to playtest games!  


You can follow Blood and Spectacles Facebook page or Instagram for more fun! 

Check out the latest publications and contact me at our Blood and Spectacles website

Or purchase all out games at the Blood and Spectacles Publishing Wargames Vault Page!