Monday, December 26, 2016

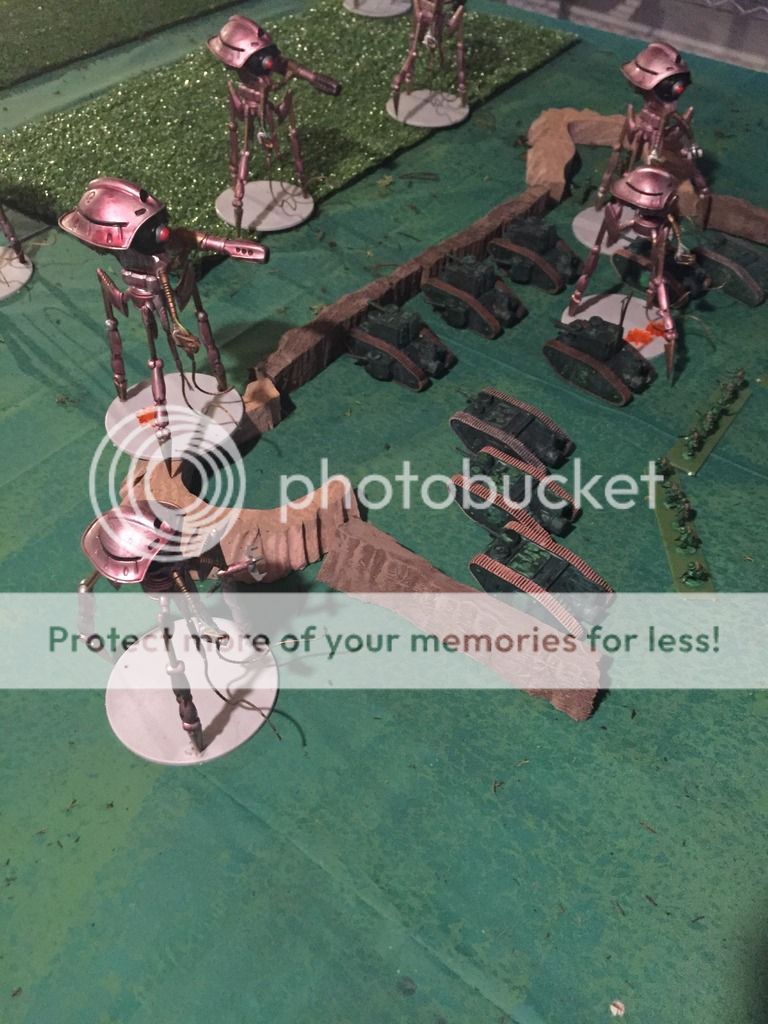
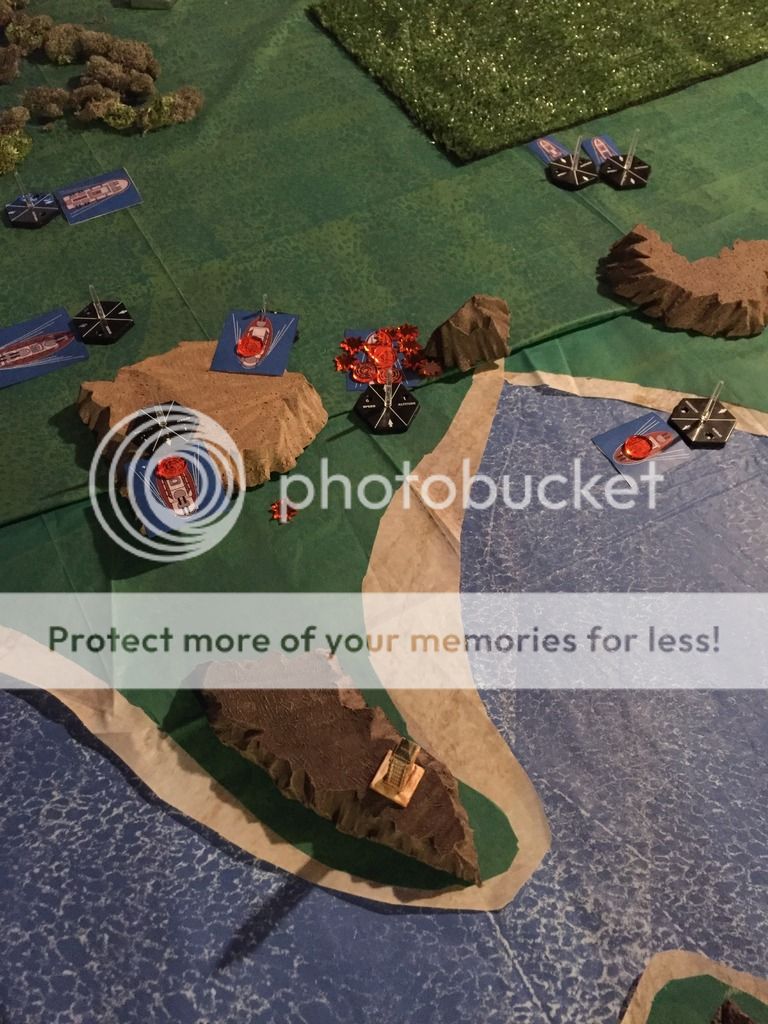
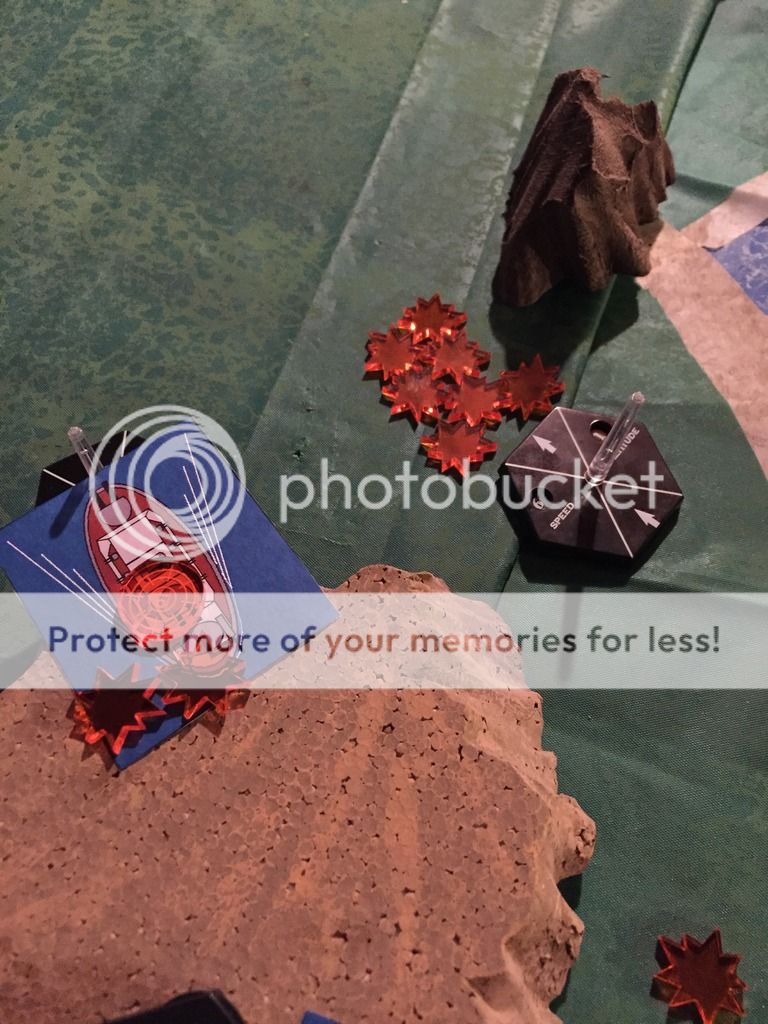
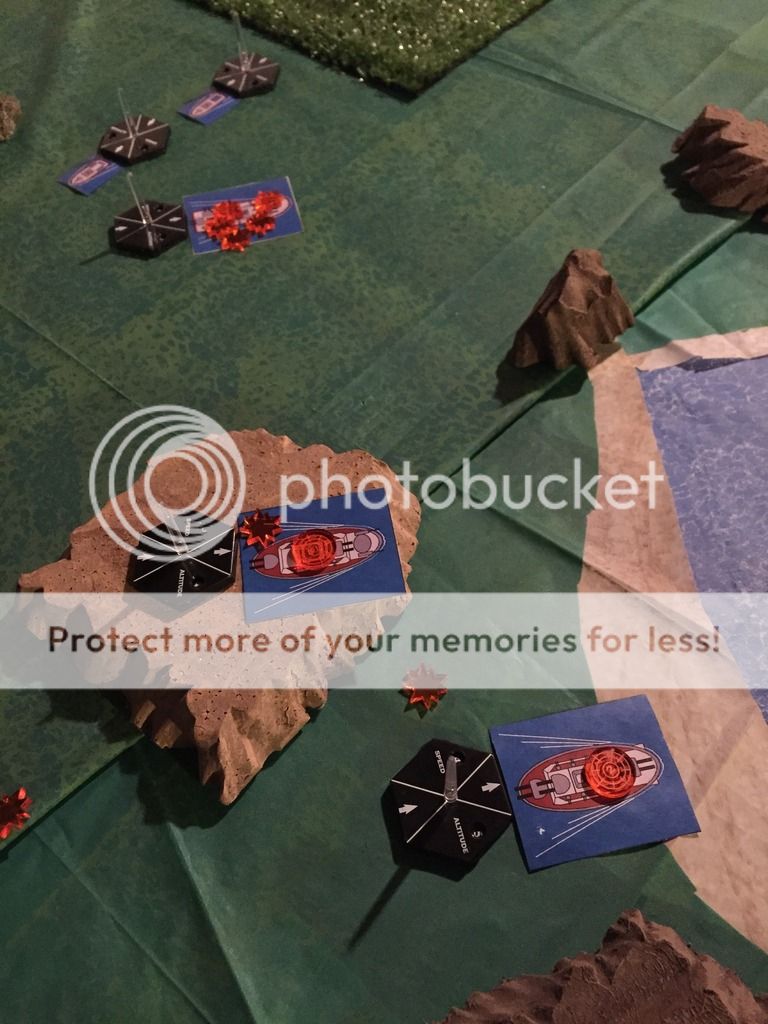
All Quiet on the Martian Front- Battle Report- 2nd Battle of Camp Release

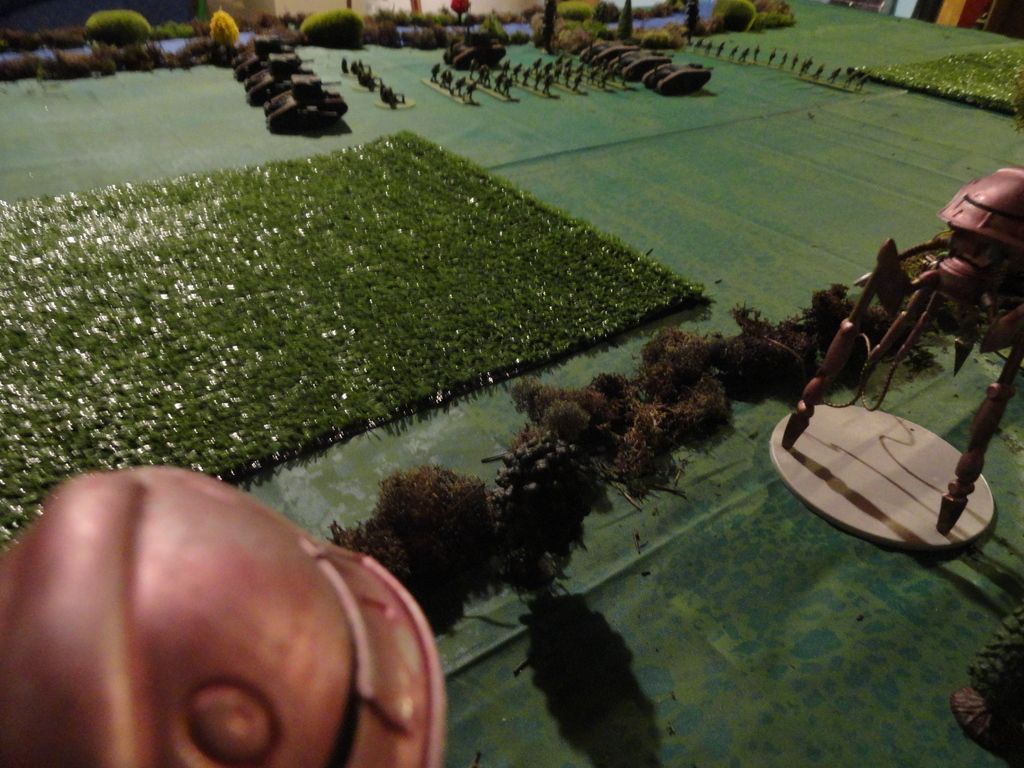
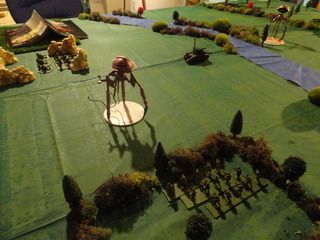
The presence of the Martian invaders in the Minnesota River Valley had been confirmed.  The commander at Fort Ridgely immediately sent additional troops up river to reinforce and garrison Camp Release.  It was at Camp Release where the Minnesota Volunteers had managed to push back initial Martian scout Tripods.  

As the Reinforcements moved up river, they were ambushed by a hunting Pod of aliens.  The troops were caught between the Martians and the river as the huge alien machines reared up from the forest and advanced.   

Martian Ambush Pod
2 Martian Scout Pods
1 Assault Pod

Minnesota Militia Scouting Party
3 Infantry Squads
Machine-Gun Squad
MkII Baldwin Tanks
MKIII Steamers
MKIIc Command Tank

Scenario:
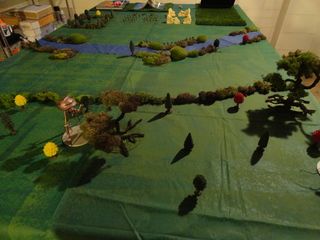
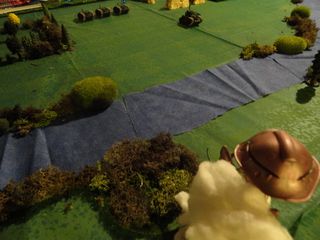
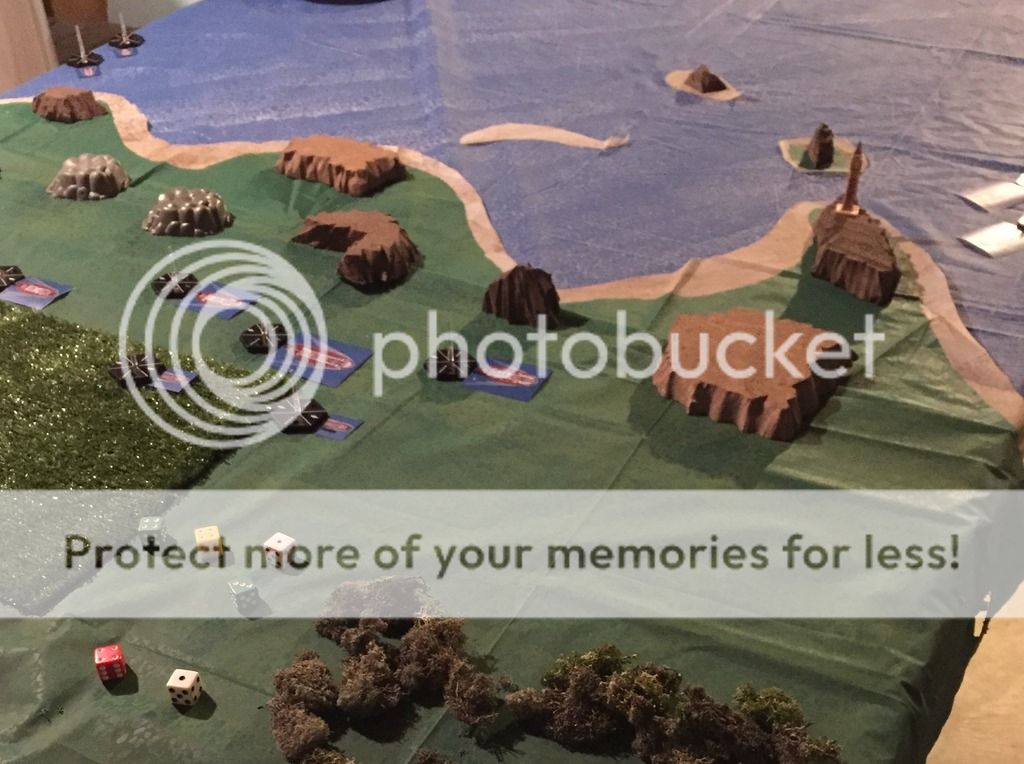
The Militia is moving up the Minnesota River Valley to reinforce Camp Release.  The river is on the left of their column, and the forest is 10 inches in from the right long board edge.  The Humans are in the approximate middle of the board.  The Martians can be placed anywhere within the tree line.

The game ends after the opposing army is broken or 6 turns.  

Set-up:
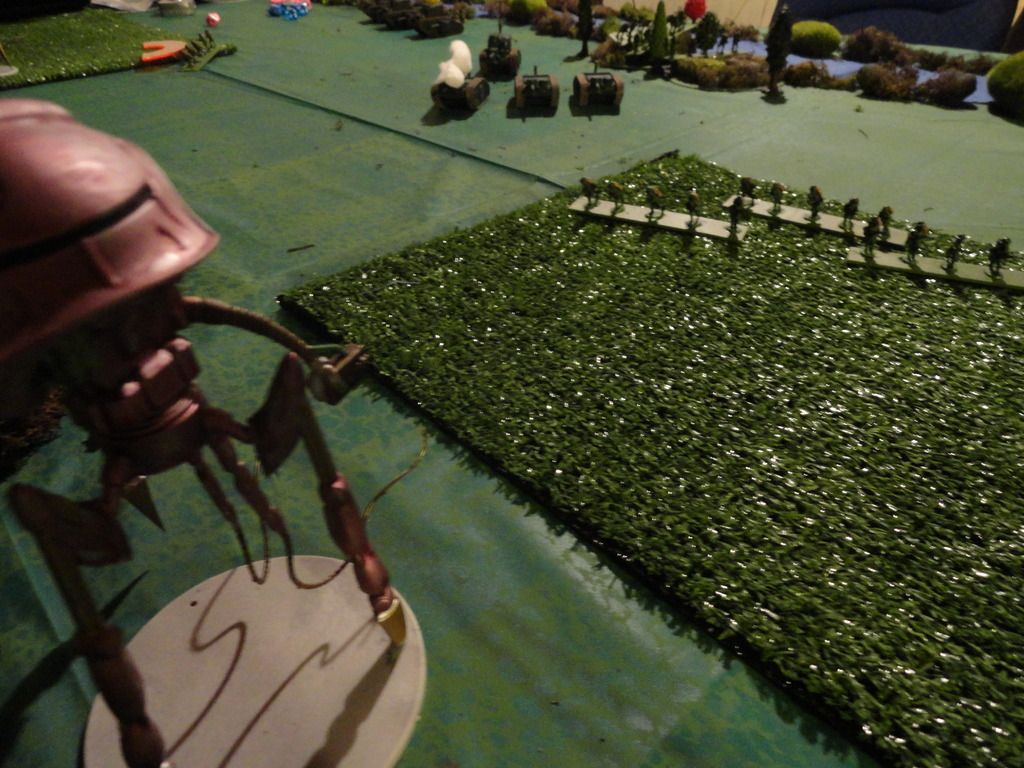
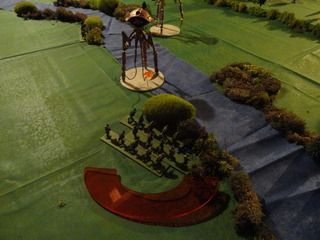
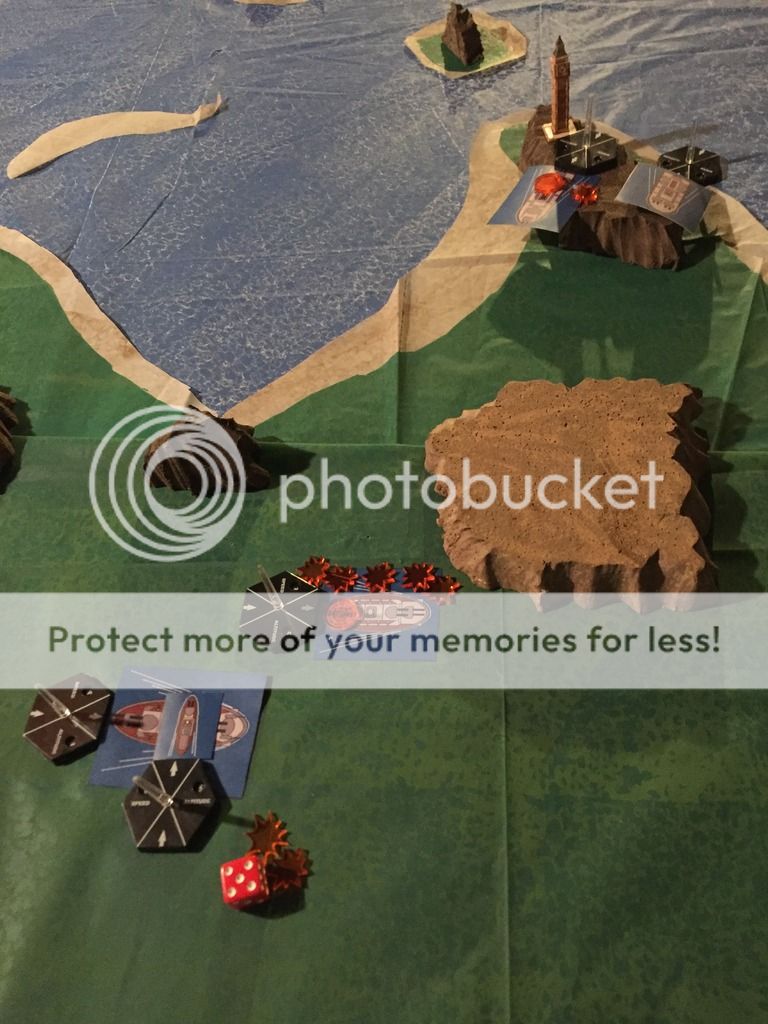
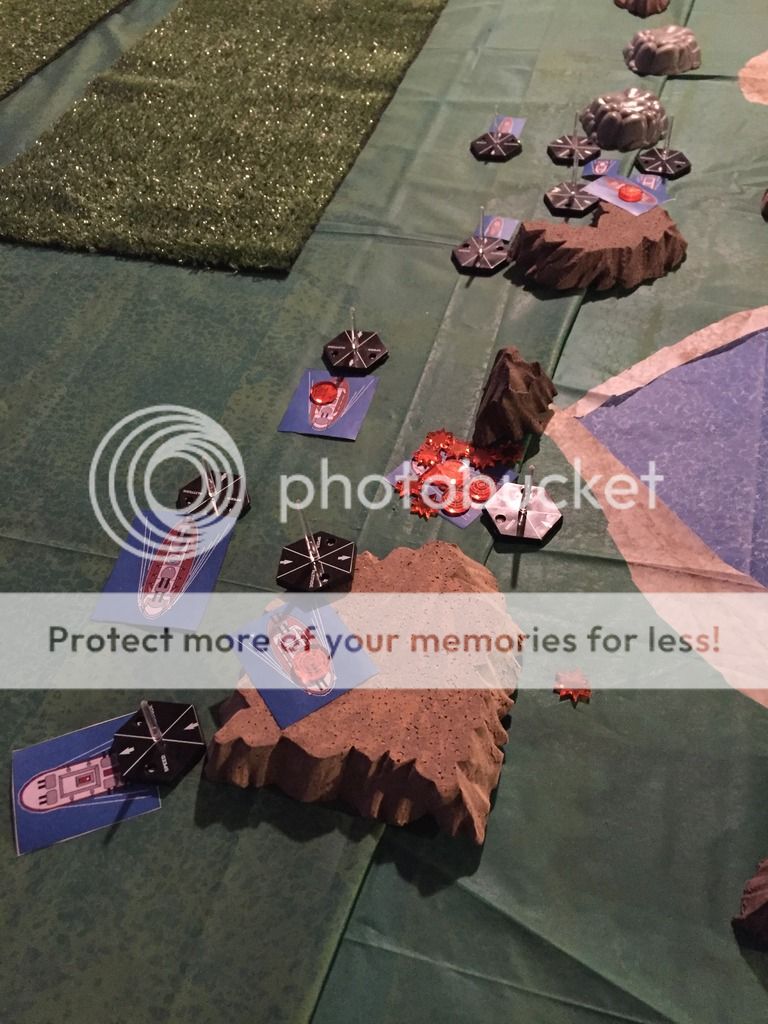
The Militia set-up moving up the river in the middle of the board.  Ann infantry screen is out front followed by the MKIIs, more infantry, the machine-gunners, and the MkIII.  The commander is riding along to the river side of the column.

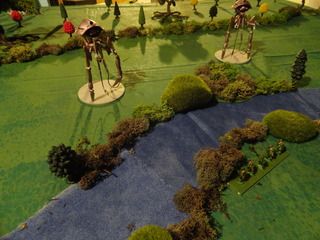
The Martians have the Assault Tripod moving to cut-off the column of troops.  The two scout Tripods are sweeping in from the back edge.


Turn 1
Initiative: Minnesotans
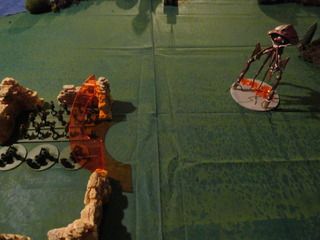
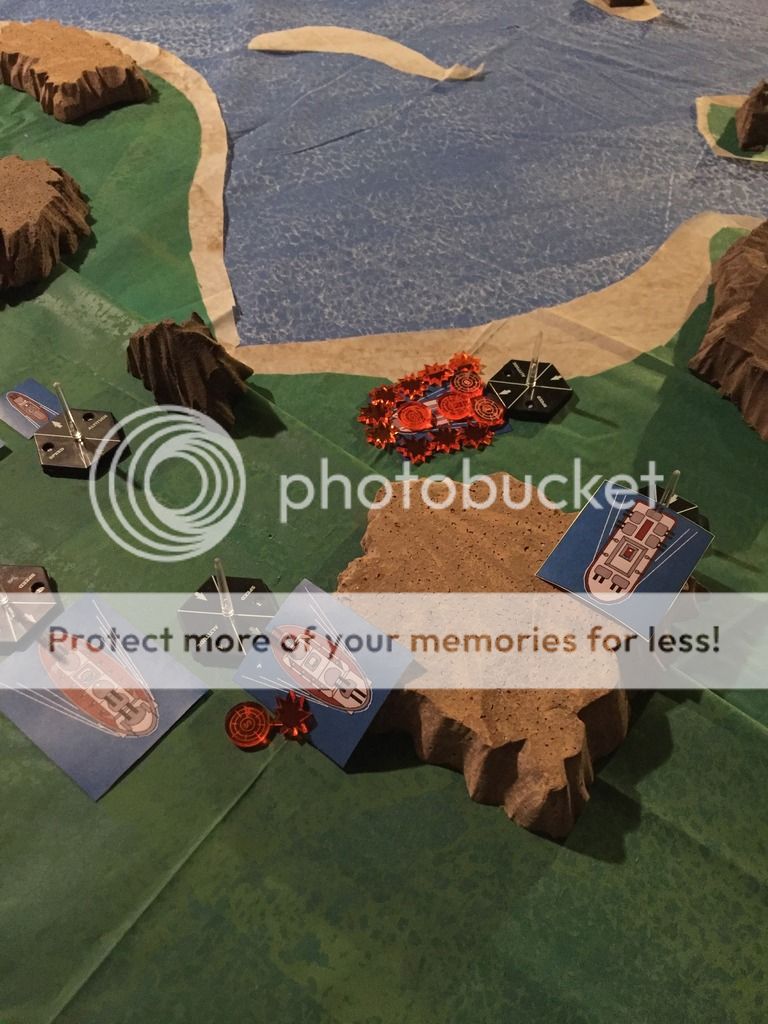
The Minnesotans win Initiative.  The Militia quick move to face the approaching alien menace!  The 4 inch guns on the MkII's and the command tank open fire on the leading tripod, but fail to phase it.  The MKIII's fare no better against the Scouts.   The infantry continues to move forward, while the tanks try to stay out of Sweep range.

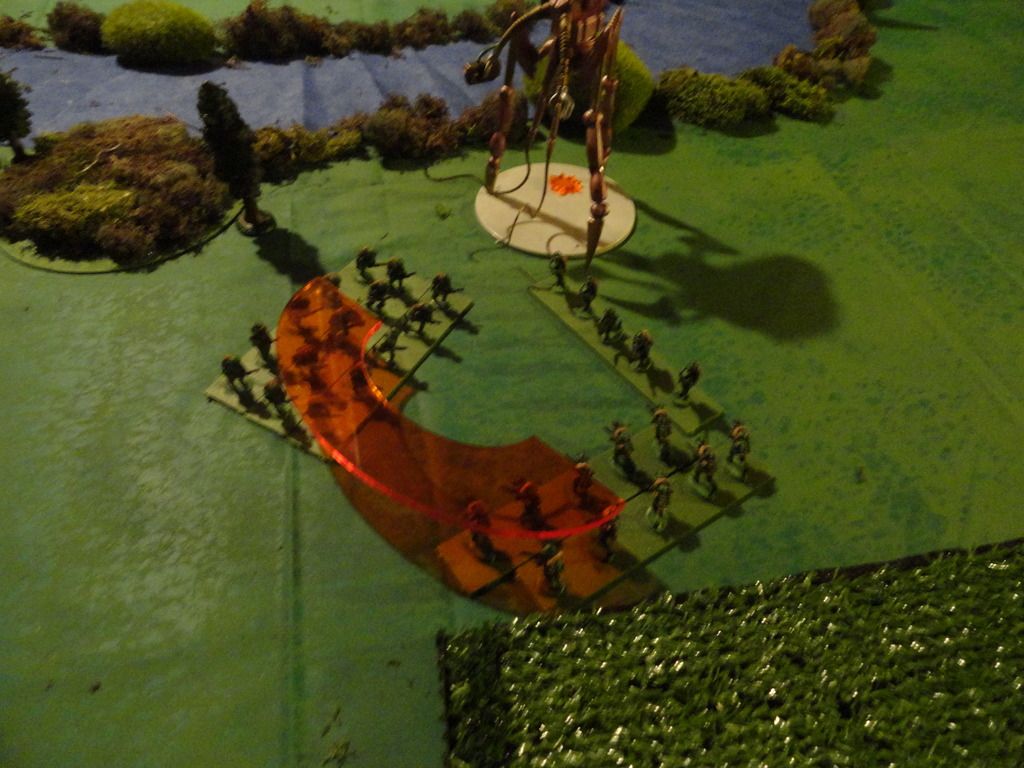
The Martians lumber out of the cover of the Forest, slowing them down.  However, they want to close the gap so they can sweep with their Heat Rays.  The first Scout scorches the first two squads of Third Platoon into dust, but the last squad still wants revenge!  The Assault Tripod pops one of the MkIIs, but his comrades keep steady.  The Tripods press the attack!


Turn 2
 Initiative: Minnesotans.
The rear of the column pours fire into the second scout tripod, attempting to bust it open.  This time a shot form the MKIII's hits something vital and the Scout bursts into flames!  A cheers goes up fromt eh human forces, but nothing else seems to stick.  The Tanks move around to try to reduce incoming fire and get into firing positions later.

Undeterred by the destruction of their fellow, the Martians again move forward. The Assault Tripod fails to sweep the MkIIs, and the Scout misses the Command tank.  With their poor shooting, the Martians scuttle away to reduce the number of incoming shots.


Turn 3
Initiative: Martians
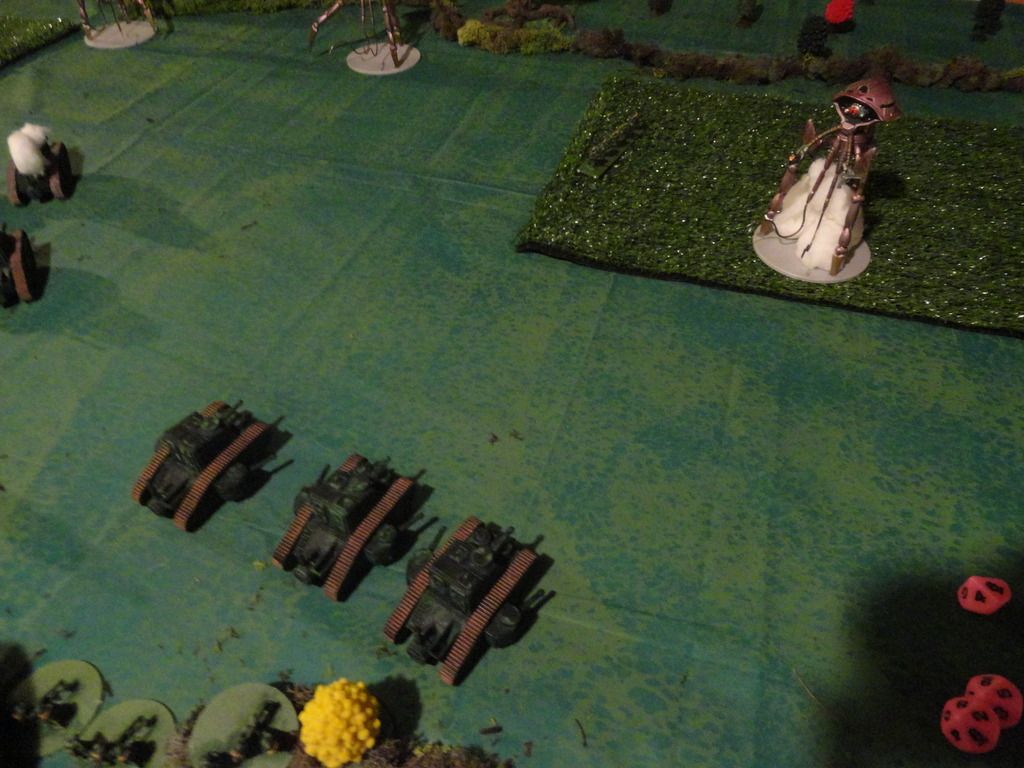
The Scout moves a bit closer, but the bigger Tripods is happy where he is.  The Scout manages to sweep and destroy both of the remaining MKII's this time.  The Assault Tripod failed to hit the Command tank.  The Tripods then retreat further up river.

The Minnesotan infantry move up to try and get into assault range.  The tanks also move to attack range, but despite a lot of shooting at the Scout, nothing seems to penetrate its armored hood.

Turn 4
Initiative: Minnesotans
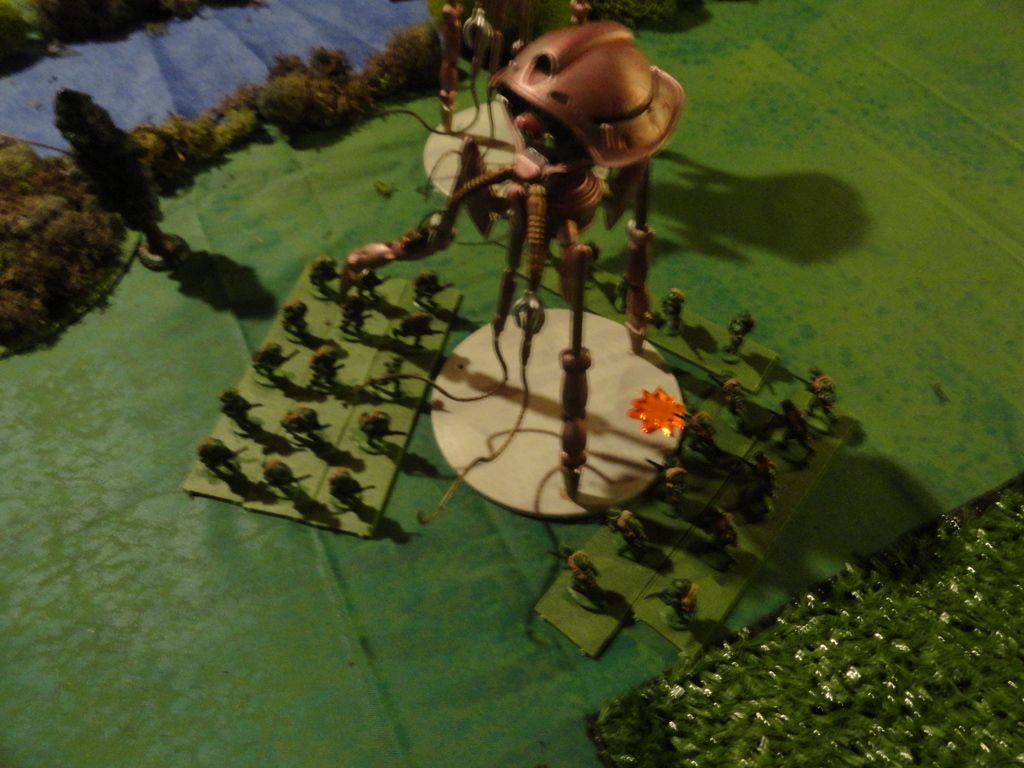
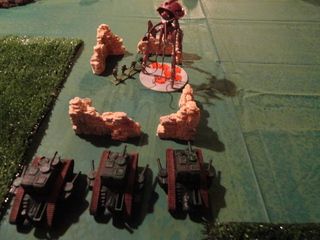
The tanks form a solid firing line.  Meanwhile, the Minnesotan infantry swarm out and two platoons attack the scout Tripod with grenades and elan.  The tanks manage to damage the Assault Tripods steering mechanisms with a powerful barrage.  The assault works a single armor point is removed from the Scout.


Martian retaliation is fearsome.  The Scout walks away from the assault units, and the bigger tripod sweeps over the brave Minnesotans.  The squads are killed, and the rest of the Militiamen flee in terror from the alien machines.  The Scout also sweeps the MKIII's and destroys one.  The Minnesotans are dwindling.  The Scout advances trying to catch the last squad of Third Platoon and destroy them.  


Turn 5 
Initiative: Minnesotans
The Minnesotans fall back away from the approaching alien.  Perhaps the Scout was too aggressive as the MKIIIs pound the advancing machine and terror away armor and damage its Heat Ray.

The Assault Tripod hit the command tank in the flank with its Heat Ray, but the Tank survives the smoldering inferno.  The Scout manages to gain control of its Heat Ray long enough to vaporize the remains of Third platoon.

With that, the Minnesotan commander orders all trooper to retreat.  The tank crews abandon their vehicles and take cover near the brush covered banks of the river.  The Scout Martian covers his larger brother as the two Martian Machines break off and head back into the cover of the forest.  The Assault Tripod stumbles and stops as it jerkily moves away from the battlefield.

Conclusion
This was a close battle.  One scout was destroyed, the other was down to half, and the Assault Tripod was walking funny.  The infantry went squish in this one, and gave up the game.  The MKIII's are very impressive tanks.  Too bad I like the MKII model so much, because the MKIII is FAR superior.  I think I want to get my hands on another Starter Set to bulk out my forces a bit, but I am unsure how easy that is going be be forward.  

The Minnesota Militia was unable to reinforce Camp Release, leaving it open for a potential Martian attack.  Will the Martian invaders be able to over run the defenders of Camp Release?  Will the Minnesotans keep the invaders from pressing down the Minnesota River Valley all the way to Fort Snelling?  Stay tuned to find out!

All Quiet on the Martian Front- Battle Report- 1st Battle of Camp Release

The commanding officer at Fort Ridgely has suddenly been flooded by refugees from further up the Minnesota River Valley, an event eerily like the start of the last Dakota War.  However, the Dakota had long since been moved to the reservations.  From their jumbled tales, he suspects that the War of the Worlds has come to his sleepy command.  Quickly, he organizes his local militiamen and sends them up river to find out what is going on.  In the meantime, he sends word to his superiors at Fort Snelling to prepare to reinforce and help defend the river valley.

Martian Scout Pod
3 Martian Scout Pods

Minnesota Militia Scouting Party
3 Infantry Squads
Machine-Gun Squad
MkII Baldwin Tanks
MKIII Steamer Tanks
MKIIc Command Tank

Scenario:
The Militia is moving up the Minnesota River Valley to investigate reports of Martian Red Weed sighted in the area, and to see if it heralds the approach on the Martian invader into the Minnesota territory.

usdakotawar.org- MNHS.org


They have camped over night near the burned out ruins of a farmhouse.  The troops are uneasy.  They turn in with a single Platoon on guard duty.  With the arrival of daybreak, they realize with horror that a Pod of Martian Scout Tripods was active in the area.  The closest one had taken up a resting position in a nearby woods.  As dawn arrives, both sides suddenly realize the close proximity they are to danger.

With startled shouts, the platoon on guard begins to wake their comrades and man the defenses.  The Martian blasts his war horns and summons his fellows into battle!


Special Rules:
Reserves- 2 Martian Scouts begin the game in reserve. Infantry units and the first Martian scout can take action immediately.

The game ends after the opposing army is broken.

Set-up:
The Militia set-up on their half of the board.  The Command Tank is placed anywhere within 12 inches of the short edge, and 24 inches in from the edge.  All human units must be deployed within 8 inches of the command tank to represent the human camp.

The Martian Tripod is set-up on the opposite side within 6 inches of the short board edge and 12 inches from either side.  They are set-up in a light wooded area.

Turn 1
Initiative: Minnesotans
The Minnesotans win Initiative.  The Infantry scrambles for cover in the farmhouse ruins and the orchard, while the watch platoon prepares to fire on the revealed scout.  The Command Tank moves over to the side of the ruins.

The Scout moves to the edge of the woods and waits, blowing his martian horns and waiting for reinforcements.

Turn 2
Initiative: Martians
A second scout appears from deeper in the woods and answers his friend's call.  The first scout waits, while the second one moves up.  

No more Minnesotans come to their comrades aid.  The third platoon moves up towards the stream banks to dig in.

Turn 3
Initiative: Martians
The first scout breaks the woodline.  He aims his Heat Ray at the troopers in the 1st Platoon near the stream.  He fires.  He hits with a 10, and the infantry element gets incinerated, but they stay put.  The second scout burst through the woodline and prepares to surge forward.

The Minnesotans hold in cover and wait for the Scouts to approach.  They ready their weapons.


Turn 4
Initiative: Martians
The two martians move closer to the 1st platoon, intent on incinerating them piecemeal.  They open fire, the first misses his target element, but the second incinerates one of them.  The last unit holds.  One of the scouts moves towards the 2nd platoon.

In return the Minnesotans jump into the action.  No reinforcements come to the battle.  The command tanks 4-pounder booms out across the field of battle, but the shot goes wide.  The last of 1st Platoon takes careful aim and fires.  Most of the shots bounce off harmlessly, but one shot takes off a point of damage.  2nd platoon misses.  They stay in cover.

Turn 5
Initiative: Martians
The first scout crosses the stream to engage 2nd Platoon.  The other one moves to finish off 1st Platoon.  The Valiant boys of 1st platoon are killed where they stand.  The other scout tries to sweep 2nd Platoon, but misses.  The first scout crosses back over the stream and takes cover in the brush.

The Minnesotans get ready to counter-attack the cautious scouts.  They can almost hear their reinforcements rumbling up behind them.  The 2nd Platoon opens fire with rifles and manages to damage the first scout again.  The command tank again misses.


Turn 6
Initiative: Martians
The scouts move boldly across the stream now.  Scout 2 opens fire on the command tank, but misses.  The second scout misses a sweep on the 2nd Platoon.   Scout 2 moves deeper into Minnesotan territory,while the first scout takes cover on the opposite side of the stream bed.


Both of the Tank platoons enter on the Minnesotan board edge.  The Type II's are crushing the soy bean fields as they approach, while the threes move across the open ground.  2nd Platoon begins to fallback towards the Orchard while the command tank presses forward.

The Tanks open fire with a thunderous boom.  Shells seem to ping harmlessly off the alien scout's  carapace.  3rd Platoon and the machine-guns open up on the probing scout, but fail to damage it.  The command tank's machine gun chatters away and blasts into the damaged Scout, damaging its Heat Ray.

Turn 7
Initiative: Minnesotans
The Tanks finally hit the Scout deep in their territory and damage its legs.  This time, the Scout martian is getting hammered by rifles and machine-guns to reduce it to 5 Armor.  The Command Tank uses his machine-guns again and damages Scout #1.

The last Martian enters the battlefield.  Scout #2, damaged and immobile uses his Heat Ray to sweep the ruins of the farmhouse.  He kills 2 Infantry elements and 1 Machine-gun unit.  The Machine-Gun squad is broken by the attack.  Scout #1 tries to fire on the Command Tank and fails to fire.  Scout #2 manages to stumble into the ruined farmhouse and completely break the machine-gun teams.


The remains of 3rd Platoon assault Scout #2 in the farmhouse.  The MkII and III's move up.  The assault fails as the tripod stands above it all.  The tanks fire on the Tripod in the Farmhouse ruins, the barrage kills the Minnesotan platoon and only scratches the Tripod.  The command tank fires his machine-guns at Scout #1 and fails to damage anyone.

Turn 8
Initiative: Minnesotans
The MKIII tanks open fire on Scout in the farmhouse.  Their shots find their mark and the alien explodes.  Too bad the explosion catches the MkIII unit and causes two of them to explode as well.  The Command tank riddles Scout #1 with machine-gun fire but fails to finish it.


The heavily damaged Scout #1 tripod retreats towards the wood line.  Meanwhile, Scout #3 moves up.  The Heat Ray of the Scout hits the Command Tank, but fails to damage it.

The MkIIs move up.  The Command Tank retreats from the approaching Scout tank, but is still in front of his troops. As he withdrawls, he fires his 4-inch gun and hits the Scout directly in the eye causing it to be destroyed.


Conclusion
With the destruction of his pod-mates, Scout #1 withdraws from the field, leaving it to the humans.  It was critical that he reported the contact to his superiors.

The Minnesotans regroup around the Command tank.  After picking over the remains of the destroyed Tripods, a few select pieces are sent by messenger back to Fort Ridgeley.  High Commands' worst fears have been realized.  The Martian menace has been confirmed in the Minnesota River Valley.  With that, word went to Fort Snelling to begin gathering additional soldiers and forces for the coming campaign.          
   
 Humans win the initial engagement in the Minnesota River Valley.

Thursday, December 22, 2016

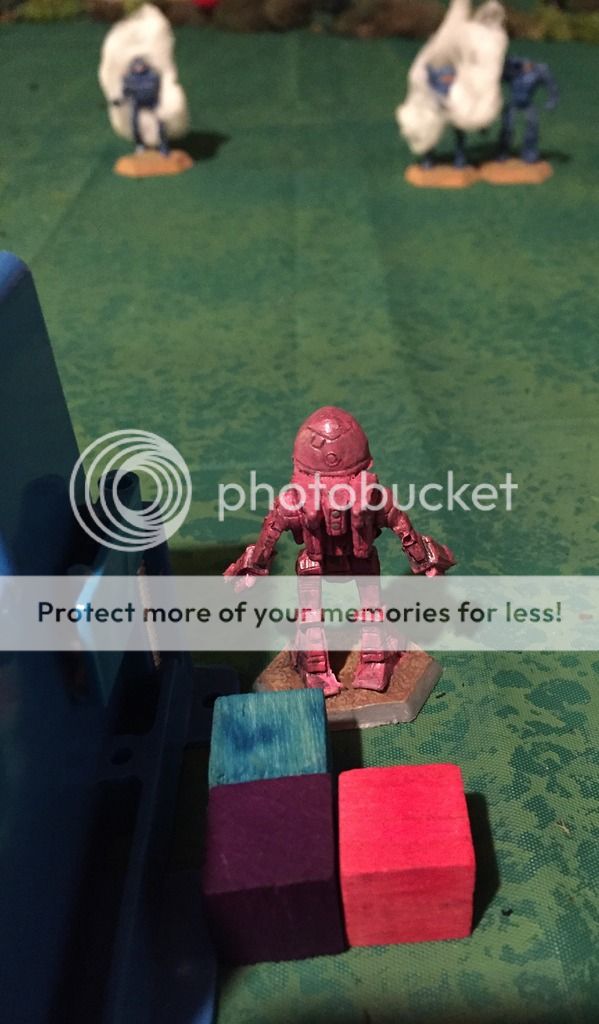
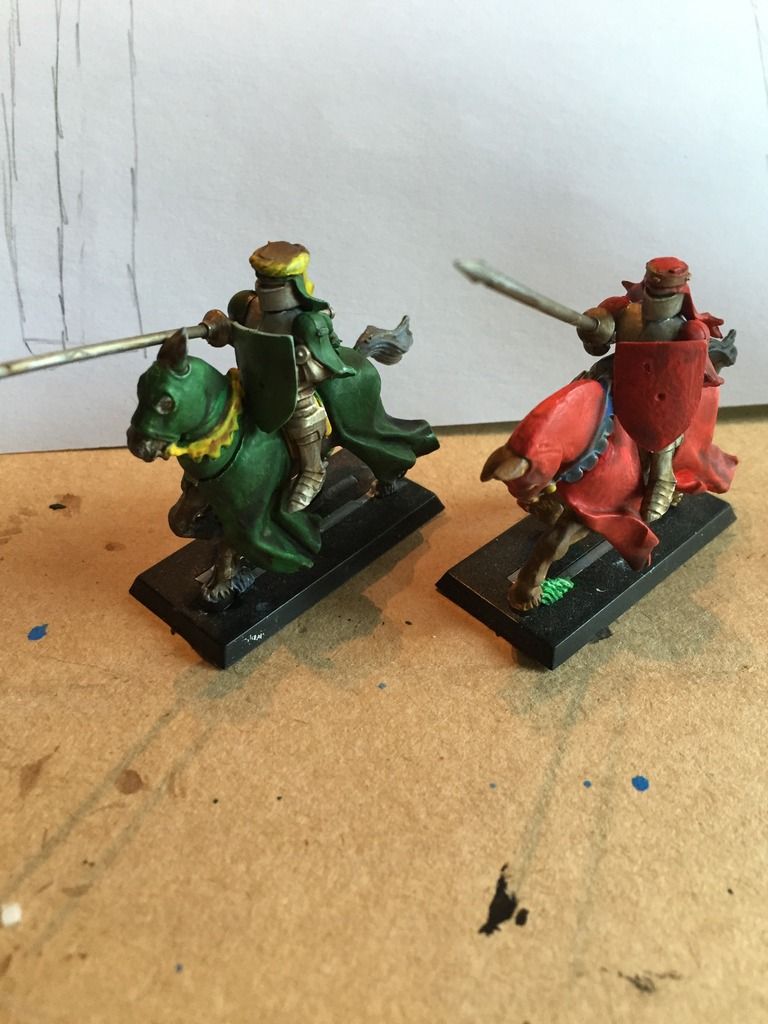
2016- A Year of Wargaming in Review

Wow, another year comes to an end.  Where does the time fly?  I’m not even sure I was having fun this time.  At the end of each year I like to recap my wargaming exploits, and begin to lay the groundwork for the following year.  

At the start of 2016, these were my goals:  
Red = Not started
Green = Completed!
Blue = Started but not finished

Painting and Modelling
1.       Assemble my Robotech RPG Tactics models- Still in the box!  I was put off by all the work involved and bad reviews of the assembly process.  Maybe this year? 
2.       Paint All Quiet on the Martian Front forces- I painted what I had!  I added more, so I still have some mobile artillery and a MKIV tank.
3.       Paint 2 Gladiator Chariots for The Games: Blood and Spectacle- Painted!
4.       Complete Painting my Necromunda Campaign- Still W.I.P.
5.       Paint Inquisitor 28mm Warband- The what now?  Still unpainted and collecting dust.

Rules Writing
1.       Complete the rules for Combat! Starring Vic Morrow!- Complete!
2.       Complete the core rules for 1 other Wargame system that was TBD-  I actually finished two and got a good start on 2 more!  See the links in the upper right hand corner. 

Purchases
1.       Buy all Osprey Wargame Series- Completed!  I am still waiting on Rogue Stars and Chosen Men.  You can see the reviews posted in December.
2.       Operation: Icestorm for Infinity- I haven’t really looked for it.  The game’s bloat put me off.
3.       Buy some WWII Models for Combat! – Ha, ha, ha, ha……

Playing
1.       Play a game of JUGS- Complete! I actually played 2!
2.       Necromunda- Nope...
3.       Aquanautica Imperialis- Sadly, no….
4.       AllQuiet on the Martian Front- Yes, I played a handful of games for the Minnesota River Valley campaign.
5.       Combat!- No, but….. reasons!
6.       Continue my RPG Campaign- yes, but it sadly fizzled when a key player got deployed.  It’s dead Jim!
7.       Play 1 new TBD game system I mostly played my own stuff this year, BUT I did play a game of Super Systems 4th Edition!

I had 17 objectives and I completed 9 of my Objectives.  That is better than I expected!  I also managed to complete a few things not on my list too.  I painted some new gladiators and played a couple games of The Games: Blood and Spectacle and Castles in the Sky. Finally, I started a silly blog at the tail end of the year too.     

It is funny how the winds of fate twist and turn you through the year like an autumn leaf on a cool October breeze.  I started off strong up until about March.  Then, real life got in the way of hobby time until about December.  Most of my year was spent reading and reviewing rules and writing my own while wishing I could play.  Sadly, there was not a lot of playing time.    

So, onward into next year!  I will have to start assembling my objectives for 2017.     

Some pictures from the wargames of 2016:


Monday, December 19, 2016

Review: Frostgrave- Osprey Games


Frostgrave is another Osprey title, but unlike the Wargames series, this is a stand-alone hardcover with additional support books.  This is NOT part of their wargame range.  The level of support for Frostgrave is greater than any individual Osprey title in the wargame series.  The only Osprey titles close to this support level are Force-on-Force or Bolt Action.  Some would argue that even these do not count since they are produced by different companies and only printed by Osprey. 

Frostgrave is a Fantasy Skirmish game.  The core of the game is a Wizard’s warband who are exploring the ruins of a frozen, ancient city for magical artifacts and treasure.  The main genre hook is that you control a wizard and his band of followers.  It essence, this is a campaign game that is reminiscent of Games Workshops Mordheim.   

So, let’s dig in and see what we have behind the covers. 

Things I like
I am a big fan of campaign games.  Therefore, I am immediately happy to see that the bulk of this book is about the campaign itself.  The game mechanics are very simple.  Therefore, it could be argued that this is a game created specifically for campaign play as opposed to the campaign being an add-on feature.  Wizards gain experience, learn new spells, get better stats, and find treasures.  One nice feature is that you can manage your retinue of retainers, but also your base of operations!  That was a new twist to the campaign game for me. 

The Turn Sequence is an alternating activation with a twist.  First the Wizard and up to 3 henchmen nearby can activate.  Play then alternates to the opponent’s wizard.  When activated a model can move and perform a different action such as attack.  They therefore have 2 actions per turn.  Then, the Wizard’s apprentice activates with up to 3 nearby models, and then alternates to the opponent’s apprentice.  Next the remaining soldiers, and finally any creatures in the warband will be activated.  This is similar to Strange Aeons characters that have "command".  The difference is that each model will still get a chance to do something every turn.  This also allows players to act and react to each other’s moves.    

The game has an impressive number of wizard types and spells.  The different “types” of magic allows you to really customize your character wizard.  Each wizard starts with 8 spells and each type has different rules for how many of each school they can draw from.  Your wizard can gain a good deal of character from the beginning.  The game even has rules for summoners and enchanters which is a big plus.

Many of the scenarios in the game come with wandering monsters, traps, ransom events etc.  It gives the board itself a character of its own.  That means, the board is just as much your opponent as the other warband.  This gives it a very “fantasy” vibe, but may increase the “randomization” more than some players like.  There is a large bestiary and a lot of different magical treasures to be found.      

The more you beat a foe in combat, the more damage you inflict.  Each model has a set number of hit points, and once they are gone they are out of the game.  The campaign system is pretty basic for henchmen, they either die, miss a battle or are fine.  For the Wizard and Apprentices  they might get serious wounds that reduce their effectiveness rather than die 

Things I Do Not Like
For a game built around a campaign, the campaign leaves a bit to be desired.  For instances, it is pretty clear that some combinations of spells are just better than others.  Telekinesis and Leap are two examples of this critique.  In addition, the treasures are randomized and can easily lead to big swings in campaign power levels.  There does not seem to be a good way to power balance during the campaign such as Necromunda underdog rules.  A few early wins could put one player way ahead in the campaign.  Finally, the only model that really benefits or experiences the “campaign” is your wizard.  Everyone else is just fodder.       
     
The basic game mechanics are very simple and derived on a d20 basis plus your model’s stats modifier.  This can lead to big performance swings in your troops and even your wizard.    

I also have concerns about the Scenarios.  They are all based on grabbing treasures that are randomly placed on the board.  However, if you drive the other warband off, you can collect any remaining treasure.  Since it is hard to move treasure off the board the incentive is to always kill off all of your opponent’s warband and ignore the treasure.  That doesn’t sound like much of a scenario if it ultimately boils down to kill them all.

As far as I could tell, there were no morale rules in the game.  Models and warbands would fight until they were all removed from play or left the board.  That streamlines the game play, but again helps all scenarios essentially boil down to kill them all, which I do not find that fulfilling of an objective. 

Finally, the game is so streamlined that it has lost any “meat” to it.  There is no real tactics that I can find in the game.  There are a few tricks you can pull, but aside from the “special rules” in the scenarios, games will quickly get stale.  Essentially, the game is trying to create depth from the Chrome instead of out of the core mechanics.  Games that try this approach have a relatively low replay ability.

Meh and Other Uncertainties
The game does have a number of scenarios with wandering monsters and other little wrinkles to them.  However, the core of collecting treasure is the same in all of them. It is like playing Necromunda but only the LOOT scenario over, and over, and over again. 

The book has great art that really sets the mood and palette for the game.  The Northstar Figures are showcased very nicely too.  However, I felt that the book was padded out to make it a longer, thicker hardcover book.  The margins and spacing was huge so each page has a ton of white space. 

I also picked up Thaw of the Liche Lord.  This has several special scenarios for a campaign, new soldiers, new spells, and new treasures.  It essentially adds-on to the Frostgrave world but doesn’t shake it up.   You could play perfectly well without it, but it does add some more chrome. 

Final Thoughts
Before picking up and reading this book, I had heard a lot of positive buzz for this game.  Upon reviewing it closer, I was left disappointed.  Perhaps my expectations were too high?  The game does a great job handling the wizards and the magic, but the rest is a bit flat.  There is no depth to the mechanics and the games will get samey and stale.  You or your group will have to work to keep building fresh and interesting takes on the same “Loot” scenario again and again.  Plus, the core mechanics are so streamlined and simple that there is no real strategy or tactics; just parlor tricks. 

If you look at this as a campaign game, it does have a lot of nice elements.  However, ultimately they typically only impact your wizard.  Your soldiers all stay the same and your apprentice only gains as a reflection of your wizard’s skill.  Many of the interesting magical treasures serve more to unbalance the game than help it. 

Overall, Frostgrave was a solid effort at the Fantasy Skirmish genre, but I do not think we have found the clear and present champion of the genre yet.  At this point, I am unsure if I want to purchase any more Frostgrave related content.  Can someone share a compelling reason on why I should get Into the Breeding Pits?                 

Sunday, December 18, 2016

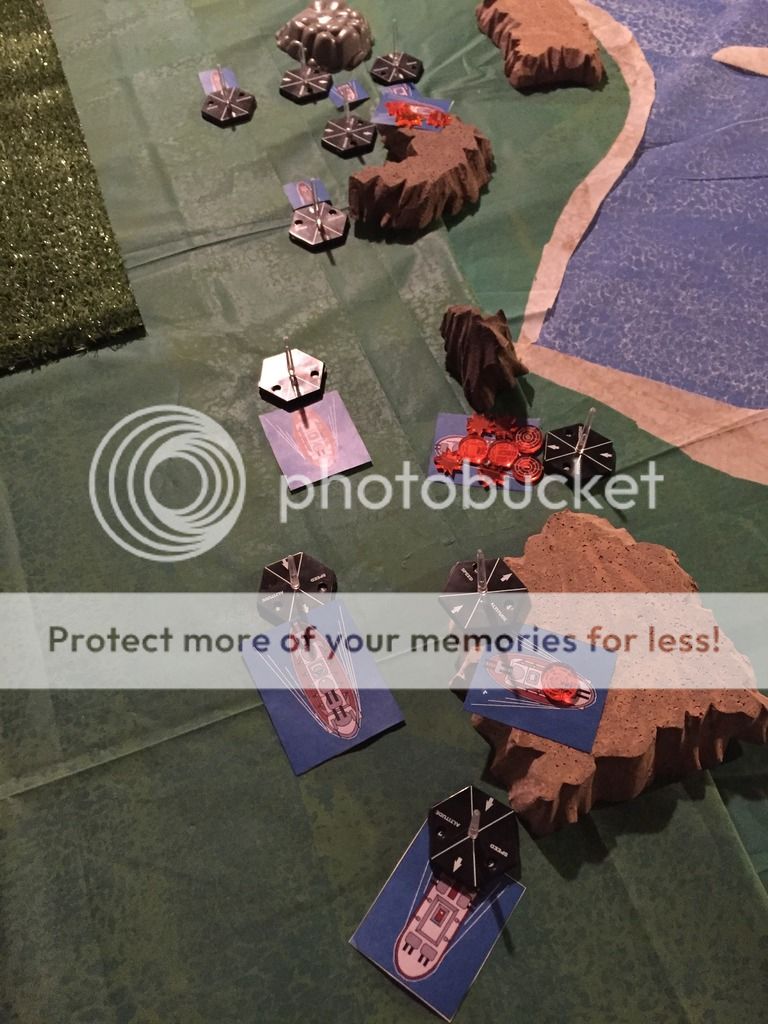
Castles in the Sky- Battle Report- Raid off Montenegro

If you look to the right hand side of this blog, you will see several links for Free Wargames.  These are games that I have created for you.  I made them because I like to make games.  I made them for no one else, but myself.  Therefore I give them away to you for free.  I am not trying to make money with these games at the links.  If you play them, I only ask one thing, that you share your experiences so I can make better games in the future!   

Castles in The Sky is a game of ponderous warships of the air; battling on the edges of empire after the Martian Invasion of the 1880’s.  The destruction of the Martian menace by microbes left a number of tripods available to be studied.  From these war machines, great leaps forward in technology were made including the Air Screw.  From these discoveries the great nations of the world built a new kind of war machine; the airship. 

In this blog, I will share adventures with my own games as well as published games.  Today’s battle report features Castles in the Sky using templates created for Aquanautica Imperialis and Forgeworld bases from Aeronautica Imperialis.  Sadly, Forgeworld no longer makes these bases.  In a pinch you can also use Litko flying bases as well or no bases at all.  I also used burst markers from All Quiet on the Martian Front.  Enjoy!         

This game came about when The Evil Monkeigh from DeltaVector started playing around with his own version of Aeronef

Castles in the Sky
Place- Off the coast of Montenegro in the Adriatic Sea circa 1914. 
Scenario- Italians are Raiding the Austro-Hungarians

Nation- Operational Cost- Armor Value
Italy- 24 (24)
Armored Cruiser- Vettor Pisani- 7 (8)- Command: 4- Flagship  
Frigate- Soldato- 5  (5)- Command: 1
Torpedo Boat- Pilo- 8 (4)- Command: 3
Cruiser- Zenta- 4 (7)- Command: 2

Austro-Hungary- 33 (46)
Heavy Cruiser- Radetzky- 6 (8)- Command: 3
Heavy Cruiser- Habsburg- 6 (8) Command: 1
Cruiser- Novara- 4 (7)- Command: 1
2 Destroyers- Huzsar- 6 (12) – Command: 2, and 3
Battleship- Tegetthoff- 11 (9)- Command: 2- Flagship

Operational Costs are an experimental method for determining balance rather than Armor Value.  The current rules call for Armor costs.

None of the vessels are in squadron.  

Set-up
The coast of Austro-Hungarian territory is set-up dividing the board in half.  The Austro-Hungarians are set-up heading north with the coast to their north edge. They are cruising at mid-altitude (3-5) and mid-speeds 3.  The line is led by the Radetzky, followed Tegetthoff, Habsburg, and Novara.  The Huzsars are to the starboard side of the Tegetthoff. 

The Italians are coming in from the Adriatic Sea.  They are coming in at full speed and relatively high altitudes.  The Italian cruisers are trying to attack the front of the Austro-Hungarian battle line, while the frigate and torpedo boat are sneaking up on the rear of the line. 

Any rocks are assumed to be Altitude 1, so a ship must be at Altitude 2 or better to cross over them.  If they are not, they will crash into the rocks.  LOS is also blocked at Altitude 1 by the rocks


Turn 1:
The Italians win the Initiative and elect to go first.

Movement:
All Italian vessels move to drop altitude and pick-up speed.  They are still too high to engage the Austro-Hungarians, unless they choose to rise up to the challenge.  The frigate and torpedo boat move to try to get behind the Austro-Hungarian column. 

The Tegetthoff drops altitude and speeds up.  The Radetzky makes no change, and dares the Italians to attack him, her turrets turning to face the threat.  The Huzsar’s begin to double back towards the other smaller Italian ships, and the Novara moves out of line to try and line up a shot with her air torpedoes. 

Battle:
The Italians open fire at the Radetzky.  The Italian’s are one altitude above, which means they need 5+’s to hit the Austro-Hungarian ship.  The shells from the Zenta ping harmlessly off the heavy cruiser’s armor.  The air torpedoes from the Vettor Pisanti are much more effective and reduce the Radetzky 1 armor point.  The Radetzky is surrounded by blast markers now.  The smaller Italian craft are out of range. 

The captain of the Radetzky prepares to return fire on the impudent Italians.  The heavy batteries target the Zenta.  The captain would love to give a Lock-On order, but the burst have disrupted his attempts.  Instead, he must satisfy himself with the boom of the heavy guns.  Due to the altitude difference and the burst, he will need 6’s to hit.  One shell manages to get through and jams the Zenta’s rudder!


End Phase
All damage is applied to the ships.  7 Burst markers are removed, which leaves one on the Radetzky going into the next turn. 

Turn 2:
The Italians win Initiative again and decide to go first.  

Movement:
The Italian small craft raced up to try and get into position on the trailing Novara cruiser.  Meanwhile, the Armored Cruiser tries to get into a position where her broadsides could come into play.  The poor Zenta moved forward, and tried to drop altitude to avoid getting pummeled by the Radetzky since her rudder was out. 

The Huzsar’s managed to turn about and move towards the smaller Italian craft.  The Novara dropped altitude to avoid the chasers, but it would not be enough.  The main Austro-Hunagarian fleet plowed forward.  The Tegethoff moved up to target the damaged Zenta with her broadsides. 

Battle:
The Zenta knew she was about to get pummeled and went on Brace for Impact orders.  Her shells went wide of the mark.  Thankfully, the captain passed the Ammo check, so the ship still had shots.  The Vettor Pisani Re-loaded Ordinance but was too high to fire on the Austro-Hungarian Radetzky. 

The Soldato and Pilo tried to put air torpedoes into the side of the Novara.  The Austro-Hungarian gunners were ready and took them out with quick-firing deck guns.  However, this put three bursts on the ship.  Not much luck for the Italians with their shooting. 

The Radeztky found the stricken Zenta in its broadside arc.  Bursts kept the crew disrupted, but the heavy cruiser still managed a broadside on the Italian cruiser.  A heavy shell smashes into the Italian ship again reduces its armor.  The crew’s attempt to Brace failed.    

The Habsburg also can target the Zenta with its bow batteries, and opens fire with a salvo.  Three shells hit, and one manages to strip a further armor point off the Italian cruiser. Again, the crew failed to Brace.   In addition, the Habsburg fires a salvo of air torpedoes.  However, Italian point defense destroys both before they reach their target.

Finally, the captain of the Tegethoff ordered his men to Lock-On, it was too bad they did not listen.  3 shells strike, two bounce harmlessly off the armor, and 1 strikes home.  The crew fails to Brace again!  They need better training! Another Armor point will be stripped away! 


End:
All damage is applied, and to the Zenta and is reduced to 3 armor from the battering it took from the Austro-Hungarian fleet.  Plus, it still has a damaged rudder. 

6 total Bursts are removed.  The Zenta still has 4, the Novara has 3, and the Radetzky has none. 

Turn 3:
This time the Italians choose to let the Austro-Hungarians go first!        

Movement:
The vanguard of the Austro-Hungarian fleet moves to engage the Italian cruisers by spreading to cover Altitude 3 through 5 as they steam towards the safety of their air defense zone.  The Huzsar’s race back towards the smaller Italian craft, and the Novara tries to get out of the way. 

The Zenta drops to altitude 2, and speeds up but is hampered by the bursts around her.  The Vettor Pisani moves up to altitude 7 to avoid the Tegethoff and Radetzky, but that also means she is out of range for her own weapons.  The Soldato and Pilo move into attack the exposed side of the Novara. 

Battle:
The second Huzsar fires on the Italian torpedo boat with its forward battery, but misses.  The Novara uses its stern battery on the torpedo boat.  However, a near miss allows the torpedo boat to absorb the shrapnel and keep on course, but she has picked up a burst.     

The Habsburg fails to Lock-On to the Italian Zenta with a command.  However, its gun batteries open up on the Italian craft at close range, with 1 altitude separation.  7 hits on the Italian cruiser!  The ship breaks out in a fire, it’s screw if fouled, and its hull is breached in several places.  The Italian Zenta will be reduced to –3 Armor.  One overkill hit and she will explode.  The crew will need to abandon ship.


The Austro-Hungarians have no other shooting, so the Italians take over.  The crew of the Zenta give a final barrage of fire before abandoning their vessel.   The barrage causes 5 hits on the Hapsburg with one managing to cause a hull breach on the Hapsburg heavy cruiser. 

The Pilo and Soldato both try to Re-load their Ordinance.  They both succeed but the Pilo may not fire as she has picked up a burst.  The Soldato fires at the Novara at close range.  The  deck gun misses.  The Austro-Hungarian gunners fail to hit the incoming torpedoes at close range, and one smashes into the Novara.  The cruiser’s hull is breached. 


End
There are no aeroplanes to move.

The damage is applied, and the Italian Zenta begins to lose lift and sink.  The crew abandons ship as a fire rages across the craft.  Her speed is dropped and she loses 1 altitude band.

There are no repairs to be made.

The Italians roll 4 and the Austro-Hungarians roll a 4.  The bursts are removed from the Pilo and 3 from the stricken Zenta.  The Austro-Hungarians remove all 4 from the Novara. 

Turn 4:
The Italians win initiative.  They choose to go first. 

Move 
The Italian commander realizes they have made a hash of things as he watches the Zenta begin to sink.  At least his countrymen are over land, making them more likely to escape the crashing airship alive.  His command ship stays high, and turns to move along the sides of the Austro-Hungarian fleet, knowing that they do not have the lift to catch him.  Instead, he is hoping to close in on the weaker Navara before the Austro-Hungarians can make it to the safety of their air defense network.

The smaller Italian frigate and torpedo boat break-off from the Novara and head to meet-up with the larger Italian ship. 

The Austro-Hungarian heavy cruisers move to eventually meet-up and support each other.  The Tegethoff speeds up and heads towards the safety of the Austro-Hungarian defense network.   The Huszars begin to come around to escort their larger brothers away. 

Battle
The Italians Re-load Ordinance, but no one has the altitude or range to fire. 

The Austro-Hungarians also do not have the range or altitude. 

Everyone is still maneuvering for round 2… if there is one.


End
The fire aboard the Italian Zenta reaches the combustible gases and magazines of the ship.  She explodes spectacularly.   The explosion catches the nearby Hapsburg and rocks the ship, but fails to cause further damage. 


There is no damage to repair. 

The Italians remove 4 bursts from the explosion from the Zenta, while the Austro-Hungarians roll a 2 and remove the bursts from the Hapsburg.     

Turn 5
The Italians win, and choose to go first. 

Move:
The Italian commander of the Vettor Pisani comes down from his high altitude and offers battle to the maneuvering Austro-Hungarian Heavy Cruisers.  The Soldato and Pilo race up to support and follow their command ship. 

The Tegethoff speeds up and manages to successfully and safely disengage from the battle.  The admiral leaves the captain of the Radeztky in charge of the mopping up operations.  Seeing the Italian come down to a lower altitude, the Radetzky and Hapsburg are happy to oblige the Italian and rise up to meet him.  The Novara drops for cover and speeds up to pass near the lighthouse on the coast. 

Battle:
The Italian commander is confident in his armored cruiser’s abilities, and opens fire on the Austro-Hungarian Hapsburg.  His confidence is misplaced, as the majority of the shells pass over head harmlessly, and a single light shell bounces off the heavy cruiser’s plate with a dull ring.  Seeing the futility of his broadside, the Italian quickly orders his men to Brace for Impact! 

The Hapsburg opens fire at medium range with a 8 firepower barrage.  Only a single shell finds its mark, and the rest fly past underneath.  The single hit clanks dully and careens off into the sky.  At long range, the Radeztky’s heavy guns boom out, and hit the Italian 4 times.  However, the range dulls the impact and no damage is done. 


End
Bursts are removed, with the Italians removing the 5 on the Vettor Pisani and the Austro-Hungarians removing bursts from the Hapsburg and the Zenta explosion. 

Turn 6
The Italian commander wins again, and decides to go second this time. 

Move
The Italians seem to be content to move out of range and try to disengage.  They go to high altitude out of the range of the Austro-Hungarians.  They signal their intent to disengage the Austro-Hungarinas.  The pending twilight makes pursuit difficult, and the captain of the Radetzky is content to let the Italians flee.

End
All remaining bursts are removed. 

Conclusion
The Austro-Hungarian papers are quick to condemn the Italian attack on their fleet.  The Italians, embarrassed by the incident blame the raid on pro-Balkan agitators within the fleet who were incensed by false reports of Austro-Hungarian atrocities in the Balkans.  They mutinied against their officers and coordinated the attack. 

In Rome, a few unfortunate sailors were hung.  In addition, the Italian government quietly paid a hefty indemnity to the Dual Monarchy.  Any surviving Italian sailors found alive in Montenegro were given a brief prison stay before being sent home to Italy. 

Behind closed doors, the Austro-Hungarian admiralty was pleased by the day’s actions.  The Heavy Cruisers’ and Novara had taken only light damage while destroying a rival Cruiser.  The captains of the Hapsburg, Tegethoff and Radetzky were seen as heroes of the Empire.  Their views and opinions were given considerable thought and value in the admiralty going forward. 

Post-game Analysis
Enough with the fluff let’s break down the game play.  As the Italians, I made a huge mistake right off the bat.  The Italian capitals were deployed to go straight into the teeth of the Austro-Hungarian main battle line.  I would have been better to attack from behind and overwhelm the rear ships piece meal, and inviting the heavier classes to try to come about and attack.  I paid a heavy price, with the Zenta being beaten to death with very little to show for it in return.            
      
So, did Castles inthe Sky meet its gameplay objectives?  They were:
1.       Decisions, decisions, decisions
2.       3D gameplay
3.       Tough ships that can take a beating and then suddenly crumple
4.       Individual ships, that can scale up to larger battles
5.       Not a dogfight, but a fleet battle. 
6.       Campaign play

I didn’t try the campaign yet.  However, here is what I found in this playtest. 
1.       Initiative was a tough decision if you won.  Going first allowed you to make orders, put burst on the enemy, etc.  However, the second player was allowed to dictate the terms of the engagements. 
2.       Big ships move and maneuver slowly, so pre-planning matters.  You are trying to guess where your opponents will be, and then slowly get there too.  As intended. 
3.       The engagement envelope is small at only +/-1 altitude difference, so it is easy to avoid fighting if you want to. 
4.       Point Defense can take out most Torpedo attacks
5.       Putting bursts on targets makes a huge difference.  It stopped the Zenta from fixing its damaged rudder, stopped the Pilo from launching a torpedo attack, and kept the Novara from escaping the Italian pursuers.  Putting bursts on opponents is a big part of game play.
6.       The bigger ships were taking multiple hits, and shrugging them off, but once their armor started to peel away, it could suddenly add up quickly.  As intended.
7.       Volume of dice on target makes a big difference.  As intended.

There are still a few things I want to tweak after playing, but overall I am pretty happy with how this game turned out.  The tweaks involve adjusting Air Torpedoes, perhaps opening the engagement envelope a bit more, and clarifying Bursts since they were so critical to the game play/tactics.   


I hope you enjoyed this battle report for Castles in the Sky.  Feel free to try the game for yourself.  It’s free!  If you try it out, let me know what you think.         

Tuesday, December 13, 2016

Review: The Men Who Would Be Kings- Osprey Wargame Series


Daniel Mersey returns with another book for the osprey Wargaming Series.  He also has penned Dux Bellorum, Lion Rampant, and Dragon Rampant.  This only adds to his efforts previously.  He may be my favorite designer in the series so far.   As he writes rules, he is not completely grounded in the history and instead adds a good dose of “Hollywood” into his rulesets.

This set focuses on “Colonial Wargaming” which covers a broad scope of time and conflicts across the globe.  That can be a daunting exercise.  However, his style may not be for everyone’s taste.  Thankfully, his design style starts with his objectives.  This allows the reader to judge for themselves how successful Mr. Mersey is at meeting them.  In The Men Who Would Be Kings his objectives were:

·         Quick play
·         Leaders and personalities to the fore
·         Small action focus
·         Broad troop types
·         Scenario driven
·         Reasonably balanced- with leaders, personalities, and scenarios adding difficulty

With those criteria in mind, let’s dig into the book itself. 

Things I Liked
These are not a reskin of rules like Dragon Rampant was to LionRampant.  You can see the core mechanics that were built upon from Lion Rampant, but they are a unique animal.  For example, each unit still has an “Activation Test” based on the officer’s leadership and discipline of the unit.  If failed, they will not act.  In DragonRampant or Lion Rampant, that would end your turn.  That is not the case in The Men Who Would Be Kings.  Instead, that unit is inactive while other units act.  However, all units can do a “Free Action” without passing a test.  The Free action varies by unit type.  Regulars can always fire, while natives can always Go To Ground.  That means   our units can always do something… but not necessarily what you wanted them to do. 

This game has basic rules for solo-play/all players vs a GM.  This is nice to see.  Interesting, in solo-play enemy units can appear relatively close or far away.  They do not always start at the opposite side of the board.  The solo-play rules allow you to be the Colonials, Natives, or even Regulars vs. Regulars. 

Force building is very easy and straight forward.  Like LionRampant, each unit is a broad category.  The units are divided into three categories; Regulars, Irregulars, and Natives.  These are further broken up into infantry, mounted infantry, or cavalry.  The designer essentially manages to break down a very complex period into easily digestible chunks which allows the game to cover a wide array of conflicts.

The mechanics are very easy.  Each model rolls a dice and compares the result to the unit’s stat.  Every success over the target number is a hit and removes an enemy model.  Range and circumstances may impact the target number. Range and cover dictate how many hits are needed to remove an enemy model.  The simple is relatively abstract but easy to play. 

Things I Do Not Like
The game is essentially IGOUGO if I am reading it right.  Players determine initiative.  The winner may then choose a unit, give it an order, and test to see if the order is carried out.  The order is completed and the player moves onto the next unit.  This can lead to long stretches of the opponent doing nothing more than removing models.  This is somewhat mitigated by the size of the forces involved. 

There are no specific campaign rules in the book for boasts and glory which was a bit disappointing since individual officers are such a big deal in this game.  Even a bit of the old Glory and Boasts from the other books would have been a nice add.  However, it looks like they replaced the campaign rules with the solo-play rules called Playing Against Mr. Babbage. 

Meh and Other Uncertainties
In Dragon Rampant or Lion Rampant, the leader of your army was the only one with personalities that were randomly rolled.  I personally was not a fan of these Leadership traits in those rules as they were unbalancing.  In these rules each Unit has randomized, individual Leader skill and traits.  These range from hapless and terrible to remarkable leaders, with most being somewhere in between.  I find this system works better in this game since you can use other officers in different units to off-set.  I think it will add to the friction of the game.  This will not be to all players tastes. 

There is a chance that the leaders of your Units will be killed off.  When casualties occur, there is a random test to see if any were your leader.  Leaderless troops typically have worse leadership tests (unless they were led by a hapless twit, which is possible) which makes the unit less reliable.

Terrain is abstracted to not impede play.  Generally troops in terrain require more hits to remove casualties.  It also has some impact on moving.  Overall, the terrain rules are designed to be quick and easy without getting in the way of the game. 

Pinning plays a big role in this game.  Pinned units can only try to Rally and may not take other actions.  This limits their ability to respond to the enemy.  Units are pinned by shooting, losing in melee, or seeing units wiped out nearby.

The game comes with a variety of scenarios to choose from.  The ones presented could fit nicely into a campaign.  The scenarios presented look like modifications and updates to scenarios in the Lion Rampant book and possibly a handful of new ones.  There are also a handful of optional rules including limited ammo which looks like a treat.  This also includes some theater specific rules.

Final Thoughts
I had been toying with the idea of making a game for the Dakota War of 1862.  I feel like these rules would fit the bill for the Dakota War perfectly since much of the war was smaller unit actions featuring irregular troops and natives.  These rules fit the bill nicely.  They would also work nicely for the Italo-Turkish War, another game I wanted to put on.       

However, I am not sure I am as sold on these rules as I am on Mr. Mersey’s other works.  He does a great job of streamlining and simplifying force selection for a variety of periods.  He also achieves his design objectives admirably.  By those measures this game is a success.  However, one of my most important elements in a game is Turn Sequence, and I am not satisfied with the IGOUGO nature of the game. 


That being said, I think this game fits a smaller scale wargame better than Blackpowder.  I prefer Blackpowder’s push your luck turn mechanics, but Blackpowder is pitched more at Regulars vs. Regulars than Colonial efforts.  I think the streamlined nature of this game and the scale suits itself well for a night of gaming with minimal effort.  Therefore, I don’t think you can go wrong for the price.          

Monday, December 12, 2016

Review: In Her Majesty's Name- Osprey Wargame Series


This was one of the earliest books printed by the Osprey Wargaming series.  Unlike other games in the Osprey series, this one has two supplements as well.  I will be reviewing all three of the books in one swoop!  This book was made by the same guys who did In The Emperor’s Name that some of you may be familiar with as it is set in the Warhammer 40K universe.  The writer's have also made a skirmish Samurai game called Daisho, and a dark ages skirmish game called Blood Eagle.  All of these games seem to use very similar mechanics.     

So, this game starts with about a page and a half of background about the world of In Her Majesty’s Name.  It is enough to give you the flavor, but it is just a skeleton for you to build off of.  This is what builds the basics of the setting and your Adventuring Company.  The game is firmly in the Victorian Sci-Fi category also referred to as Steampunk. 

Unlike some of the other Osprey games, it does not begin with or contain any designer’s notes, so it is harder to determine if the game successfully met its objectives.  However, based on the design and mechanics I can make some sweeping assumptions.  For example, this game is a skirmish game with some heroic elements.  I.e. named characters are better than the average dudes.  This tells me the game has some cinematic and pulp elements.  The size of the Adventuring Companies tell me this is supposed to be a skirmish game as the scale is one-for-one.  Etc, etc, etc.       

So, let’s get into the heart of darkness of this review.

Things I Like
The game has a small number of stats such as speed, fighting value, shooting value, etc.  These take the form of modifiers to a d10 dice roll.  However, they are also proto-dice pools.  If you are facing multiple opponents or have certain abilities you can spread those modifiers across multiple opponents. 

For Example, Lt, Napier of the British Rifles is facing two natives.  He can choose to split his Fight Value of +3 across both opponents, or focus all +3 on one guy. 

In addition, there is an interesting mechanic to volley fire or mob up on an opponent to make sure that everyone has a chance to hurt someone else, even if they have a superior value.  Therefore, quantity has a quality all its own, and the characters will not overwhelm the regulars if used appropriately. 

The game also comes with a fun selection of equipment, armor, weapons, mystical powers, abilities, etc.  I could see a close-knit game group having a lot of fun making up new stuff for their own character’s/retinues.  The game has a point system and encourages this approach. 

The initial book has some nice artwork and good mix of pictures.  It is evocative and makes me want to play this game.  Once you get beyond the main rulebook and into the supplements the art drops off considerably and forget pictures of minis and games. 

Things I Do Not Like
Like Ronin/En Garde the game seems interested with resolving all hitting/wounding in a single die roll.  Therefore, you roll the dice, add your stat modifier, add a weapon stat modifier, and subtract defense modifiers, and target armor modifiers.  That means, each shot requires you to know 4 modifiers when you roll the dice.  Good thing that this is a skirmish game as that would be rather cumbersome. 

Here is why I am not a fan of this approach.  The only activity is made by the attacker.  This removes agency from the defender and they basically stand there while the attacker does everything.  I would prefer an opposed dice roll as that requires both players to be engaged in all parts of the action.  Now, one player is active, while the other is passive.  That is not ideal.

Once a hit occurs, the target can make a Pluck save, which if failed equals Out-of-the-Game.  This does allow your opponent to do something in your turn.  

The game also has a basic campaign system and a few simple scenarios.  One critique is that the scenarios are very kill’em all style, which limits their scope for campaign/story play.  I think this is a big flaw, as that should be one of the biggest strengths of this system.  I don’t think this was due to space limitations as In the Name of the Emperor has similar set-up

Meh and Other Uncertainties        
The game has a lot of great ideas for players to build off of.  The supplements cover adventuring companies from Europe, North America, Asia, Africa and India.  There are some gaps as South America had some cool stuff going on at the time, and there is nothing about Australia.  However, the point system means creative players could delve into those areas.  Plus, the retinues and rules cover animals, vehicles, magic, etc.  It actually covers a lot of ground in a few hours reading time, but still leaves room for you as the player to build.  I like that in a game and it leaves scope for some story-telling. 

The rules are alternating activation within each phase.  The first player moves a model, and then the next player moves a model and they trade off back and forth until all movement is done.  Then the group starts shooting, then fighting, etc.   I think this is a good approach as companies tend to act as a unified group.  If it had been alternating activation where each model completes all of their actions before moving on, the Companies would act too independently.  This was a good design choice.    

Final Thoughts
I am a bit disappointed in this game.  There is so much cool flavor and potential, but the mechanics just don’t deliver in a compelling way.  I really, really want to like this game, but ultimately I don’t think I can fully recommend it.  The lack of opposed dice rolls and morale system leave me underwhelmed.  In addition, the strength of this game should be story-telling and campaigns but it just doesn’t deliver.  With the points builder system, you could make some very flavorful and fun Adventuring Companies to have campaigns with, but the weak campaign system leaves me wanting.         

However, with the right group willing to put some time and energy into this system, you could have an awesome series of club games.  If you merged In Her Majesty’s Name with some of the GW Specialist Games campaign systems (probably Mordheim)  you could have a really amazing system.  I am hoping that Osprey releases another supplement for this game that covers campaigns in more detail as that would really help this game a lot.  The current supplements only add more Adventuring Companies and some additional rules around animals/boats, but not much to the core mechanics or campaign system.  I would like to see more leveling up, base-building, an injury chart, resources/clues, and hiring mercenaries.  You could even add Blood Bowl style dirty tricks and the like.    

I want to give this game a good outing with my group, but I doubt I will.  I don't know if I want to devote the time to building the campaign system or painting the miniatures.  As it is, it has some interesting flavor and background, but I need more than just flavor in my games now-a-days.  Despite having three supplements, the game still feels like it is missing some key components.  I could see having a short campaign night or a fun event game, but I don't think it will become a staple of my gaming.        

There is also an additional supplement on the designer's blog for In Her Majesty's Name: Gothic.  You can find out about it here: https://inhermajestysname.wordpress.com/ihmn-gothic/