Showing posts with label Battletech. Show all posts

Monday, April 19, 2021

Battle Report: Classic Battletech- Ambush on Mundos


I have had the Battletech 25th Anniversary box set sitting on my shelf for a long time.  I remember getting it, reading the rules, and then deciding that Battletech just wasn't the game for me.  I was a bit daunted by all the lore, the Mech builds, hex maps, the old-school mechanics and the very knowledgeable and passionate community itself.  In truth, I was not "in love" with the mech designs or the mechanics.  Therefore, I painted some mechs and used them in other games instead!  The boxed set sat on the shelf and collected dust.  I was not convinced I wanted to take the plunge into another "Life style" game like 40K had been. 

Then, one day out of the blue, my daughter and I pulled it down off the shelf and decided to give it a go.  She didn't know anything about it, and I didn't remember much about it either.  I pulled out the Quick Start rules and gave it a read.  The rules focused exclusively on the basics (so no Heat, Crits, Pilot Checks, etc), and even had some special "beginner" Mech record sheets.  We set-up for the initial Green Training Scenario.        


This pit an Enforcer vs. a Hunchback on a relatively flat map with some woods on each side.  My daughter played aggressively with the Enforcer, as I hung back behind some woods.  She did some damage closing, but I let her approach.  Then, I burst around the edge of the woods and pummeled her at close range with all my weapons.  I blew the arm straight off the Enforcer, and it was all down hill from there.  We chased each other around the board a bit, before I finally destroyed her.  Her hits ended up mostly scattered across my mech, while mine pretty consistently hit her in the right arm/torso until it transferred over into her Center Torso.  

To be honest, it really wasn't that much fun.  There were not enough decisions, too many dice rolls, and we spent more time calculating mods and filling in bubbles then actually playing the game.  Plus, one-on-one meant there were no synergies and we were at the whims of the dice.  It was a game of stacking or unstacking mods. 

Despite this, we decided that I would go back and read the fuller intro rules and come back and try again with a few more mechs.  I went off and read up and did my homework.  I skipped the fluff and what not and just focused on the rules.  Therefore, this battle will just be an extension of my previous Mech games that used other rules.  


****************************************************************

Polanksi's Lancers were contracted to harass operations on the Planet of Mundos.  The primary export was timber and wood products.  Therefore, the Lancers were focused on attacking executives, storage facilities, and other infrastructure.  Their employer Lacstar Inc, was in negotiations to purchase the timber rights from the VolSaab Corporation, and any disruption to supply would cause the stock price to drop.  This would make buying the rights much easier.  

VolSaab was wise to such actions. Therefore, they had contracted out to two mercenary units to operate on Mundos to help protect their investment and get the best sale price of the rights.  The Rose Guard and Thor's Hammers were providing security on Mundos.  

Careful recon by Polanski's Lancers allowed them to map multiple patrol routes taken by Thor's Hammers.  The Hammers adjusted their routes regularly, but eventually an algorithmic analysis allowed the Lancers to predict likely paths of travel.  The Manager-Commander of the 14th Uhlans of the Lancers decided to try and set an ambush for the Hammers patrol using this intel.  

Forces:

Polanski's Lancers- 14th "Uhlans"

  1. Quickdraw
  2. Enforcer
  3. Hermes II
  4. Trebuchet
Thor's Hammers- Elements of the 3rd "Hard Strikers"
  1. Dragon
  2. Hunchback
  3. Zeus

 All pilots will be assumed to have Pilot Ratings of 5.  I could not find in the rules where it dictated starting or how to generate starting Pilot Ratings.

Both of us got our Mech record sheets ready, our quick play sheets, pencils, and our own sets of dice.  The Introductory rulebook was handy and ready to play.   

Mission:

Today's battle will be a straight forward fight to the death.  Units that leave the board will be considered retreating and destroyed.  Otherwise, the normal rules apply.  

Set-up: 

I will be using Hex Map #2, the same one we used for the Green Training Scenario.  Pretty much flat with some light and heavy woods on both sides.  

Dragon is placed in the center with the Hunchback and the Zeus within 3 hexes of it.  The Lancers can be placed anywhere behind the tree lines, on either side of the board.  We assume that the Mechs were prone, but have successfully stood up to begin the attack.  

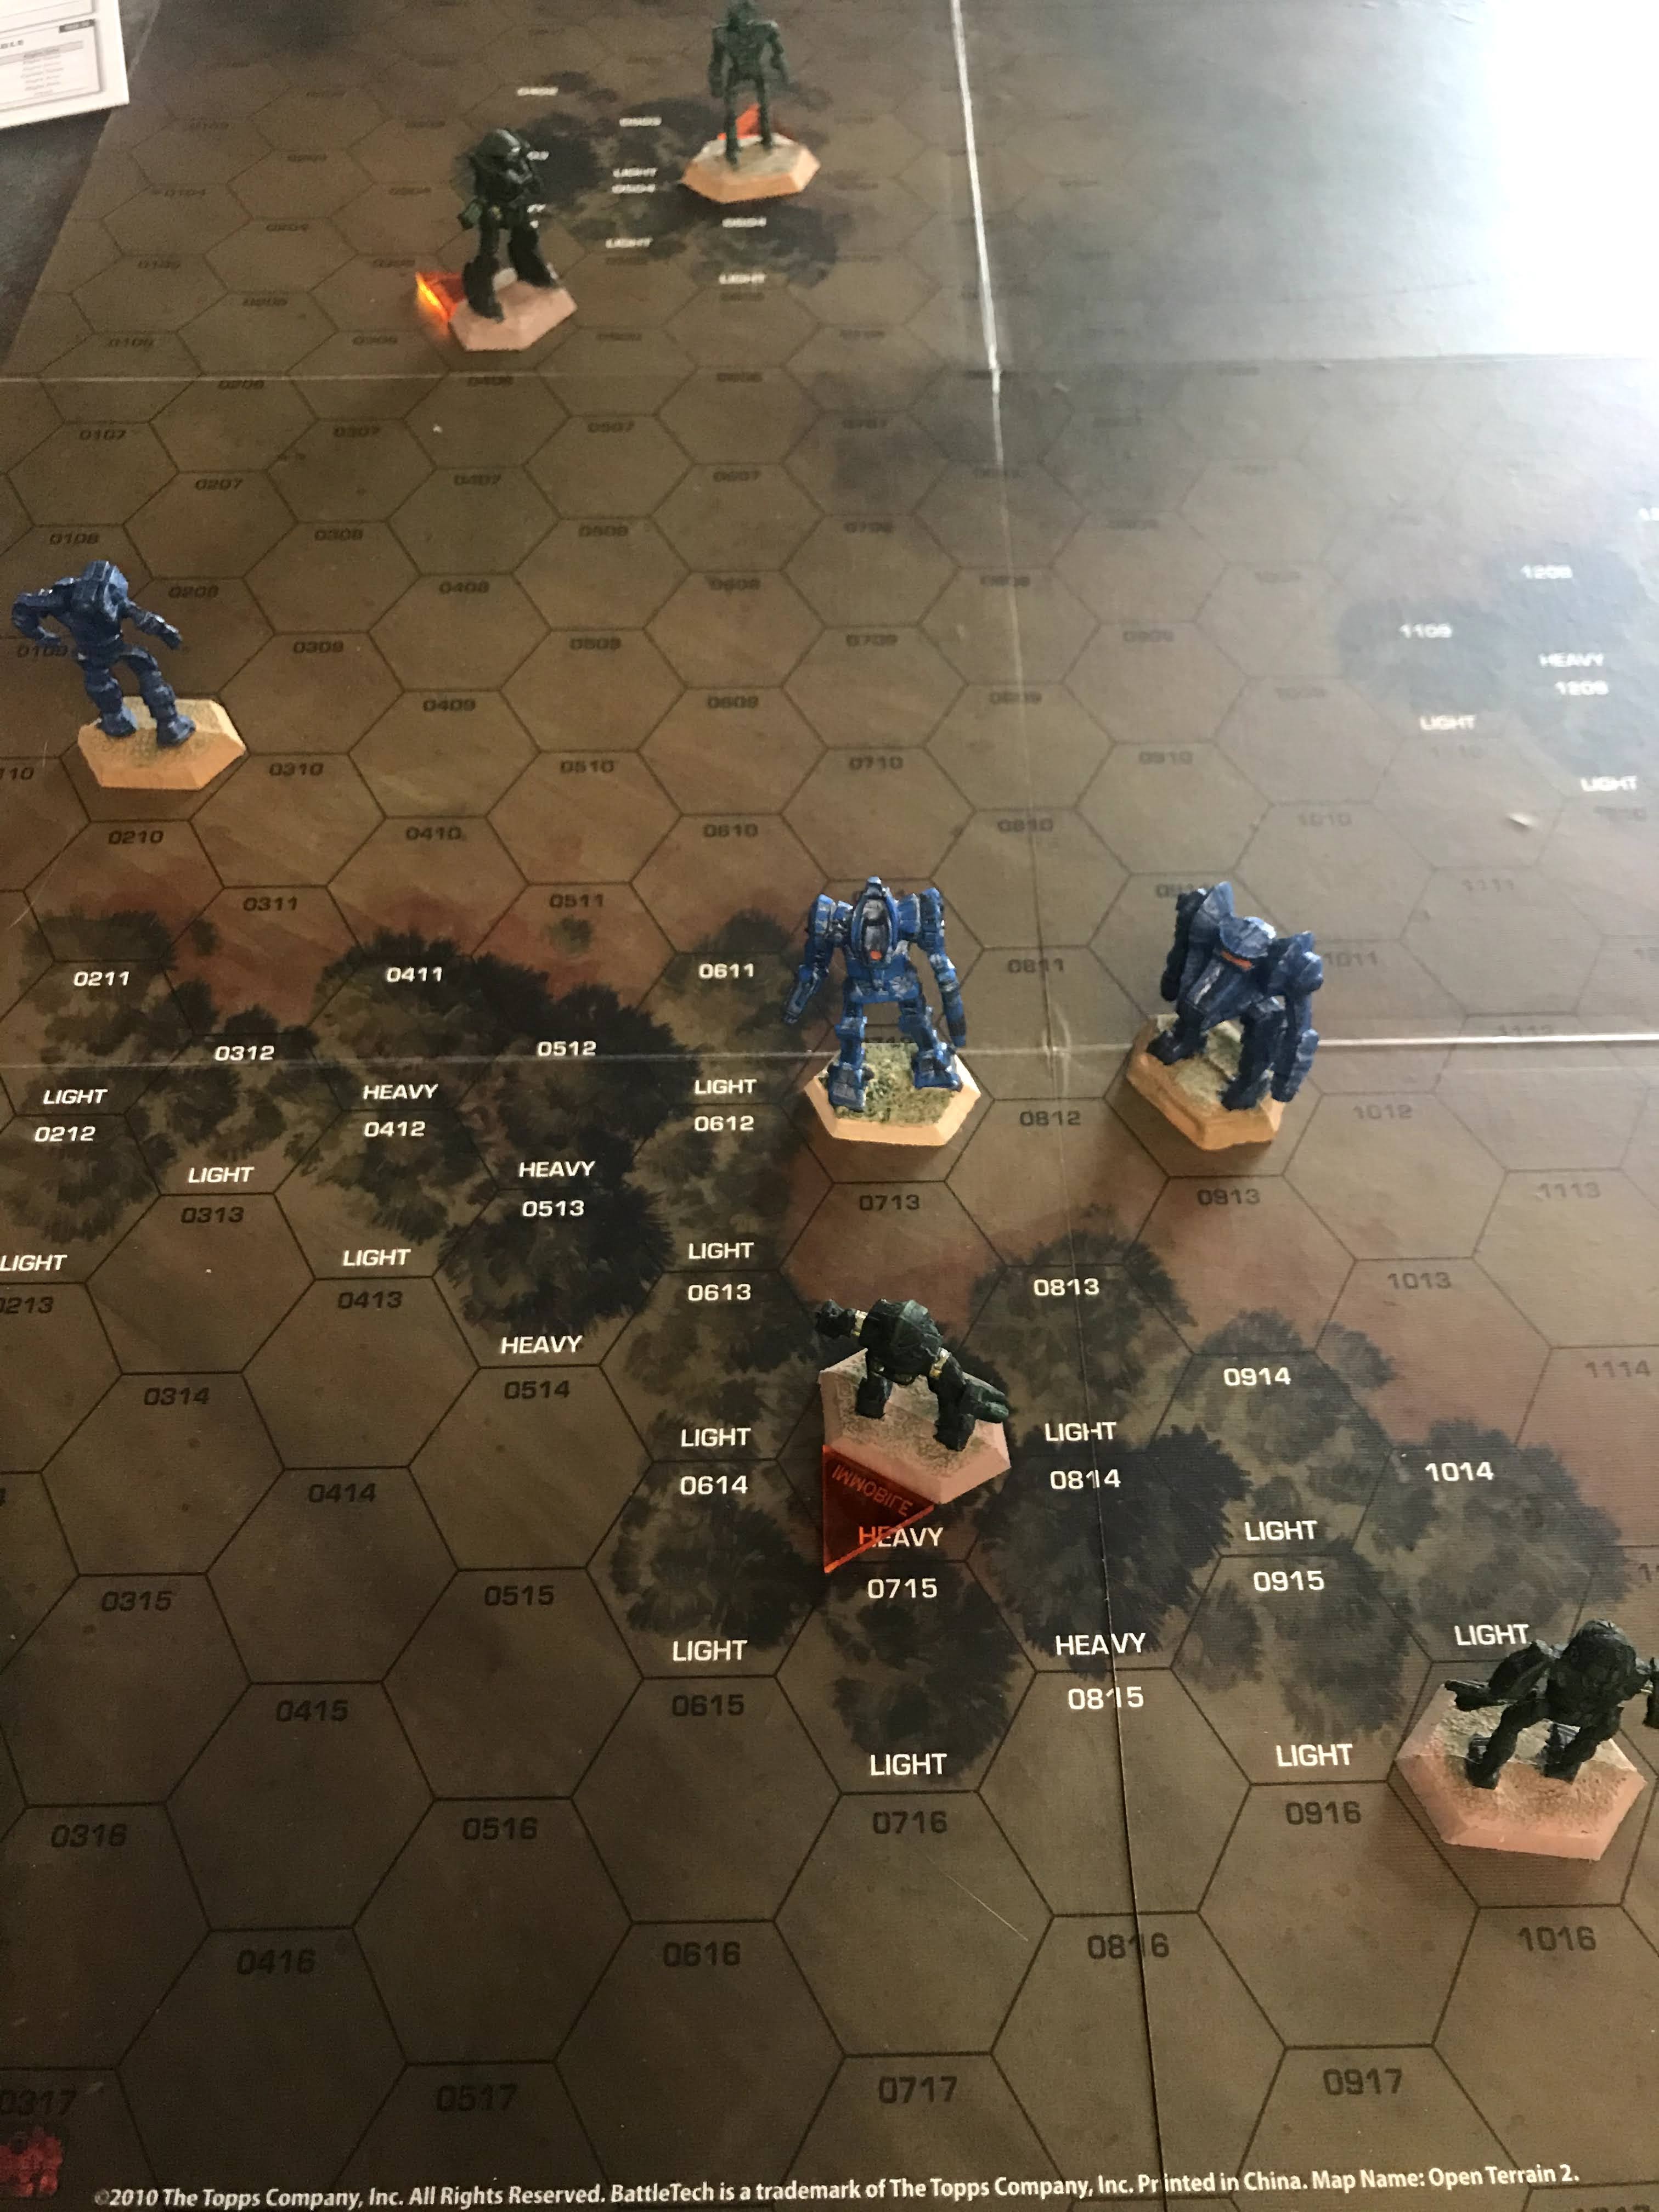
Hard to see what is what but he blue are: Hunchback, Dragon and Zeus
The Green are Quickdraw, Enforcer, Trebuchet, and then the Hermes at the other woods

Turn 1:

Initiative:  

Since Lancers are on the attack, we decided let them move and then shoot first this turn.  We will go back to normal initiative going forward.    

Movement: 

The Lancers all move closer to their targets.  The Quickdraw begins to move around the wood, while the Enforcer and Trebuchet try to move through it.  The Hermes skirts the woods.  

The Hunchback eagerly moves to get the angle on the Quickdraw and use his Auto-cannon 20.  The Dragon turns and marches at the Trebuchet emerging from the woods.  Finally, the Zeus moves to cover the center.  

Shooting: 

The Hermes uses his Auto-cannon and hits the LRM 10 detonating the left torso of the Dragon and causing extensive damage when all the ammo detonated!  Ouch!  Looking back, we probably should have applied the damage to the internal instead of the armor, but first game problems right.

The Quickdraws Medium Lasers also thwack into the left torso and center torso of the Hunchbacks armor and blew off a heat sink as well.  We definitely did not use the Crit table right on this result, but there it is.  The Enforcer is still too deep in the woods, while the Trebuchet fails to hit the targets with his lasers. 

The Hammer's respond.  The Hunchback rails the Quickdraw with his Auto-cannon and demolishes the right torso of the mech and bleeds over to the center.  However, the Hunchback raised his heat to around 15.  The Dragon also pings armor off the lightly armored Trebuchet.     

Heat: 

At this point, we also had a question about how to use Heat Sinks.  I have a feeling the Introductory Rulebook was a copy/paste job out of other Battletech books as some of the sections do not have proper headings, and other parts do not flow very smoothly between paragraphs.  Anyway, it looks like they work automatically during the Heat phase. 

We had been keeping track of it as we went along as well to make the Heat phase easier to recall.  


Turn 2: 

Initiative:

The Lancers win initiative, so the Hammers will move and shoot first.  

Move:

The Hunchback rushed the Quickdraw.  The Dragon pivoted and walked forward a bit to try and challenge the Trebuchet and Hermes.  The Zeus covered the treeline.  

Meanwhile, the Quickdraw fell back to make space for his LRMs against the Hunchback.  The Enforcer "jumped" to try and move beyond the Hunchback as well.  The Trebuchet also fell back into a covered firing position.  The Hermes darted forward past the larger Dragon and Zeus.  

Shooting: 

The Hammers have limited shots.  The Hunchback tags the retreating Quickdraw with his Medium Lasers, and damages its left shoulder.  Sniping from the Zeus at the Trebuchet misses due to the tree cover. 

The Quickdraw returns fire with a full LRM burst and Medium laser barrage at the Hunchback.  The salvo impacts into the Hunchback's right arm, and mangles it.  It has 1 armor point left.  The Trebuchet also fires a barrage of LRMs at the Dragon.  One barrage misses, but the other connects with its right leg, mangling the armor there, and causing damage to the right foot actuator and upper leg accuator.  

No one else has shots this turn.  

Heat: 

Everyone is able to sink back to 0, but the Trebuchet and the Quickdraw both have 1 Heat. 


Turn 3:

Initiative: 

The Hammers beat the Lancers this time.  Lancers move and shoot first. 

Move: 

The Lancers do a lot of running.  The Quickdraw runs back into the woods away from the Hunchback.  The Enforcer runs to try and get behind the Zeus by the smaller woods.  The Hermes joins him there.  The Trebuchet stays put and prepares their lasers.  

The Hammers see their chance and the Dragon and the Zeus close in on the Quickdraw, trying to isolate it.  The Hunchback turns to cover their rear.  

Shooting:

The Quickdraw pours Medium Laser fire into the Dragon, hitting it in the Torso multiple times and in the empty ammo for the LRM 10.  However, a Gyro is also hit in the attack.  

The Enforcer uses its Auto-cannon and hits the Hunchback in the right arm.  At this point, we also realized we are doing Internal Damage wrong.  In the Quick Play rules, once armor was depleted it moved to the next location.  In the real rules, you blow off the armor, and then go to the Internal Damage before moving on.  Woops!  Too late now! 

The Trebuchet uses its lasers on the Dragon, and blasts through the armor on its right leg to cause internal damage.  Meanwhile, the Hermes uses the Auto-cannon and snipes the Zeus in the head and takes out its life support system!  Ouch! 

The Hunchback fires on the Enforcer and shreds its right arm with the Auto-cannon, and manages to tag the left arm and cause critical damage that disables the Laser there!  Ouch again! That leaves the enforcer almost weapon less. 

The Dragon missed its shots at the Quickdraw due to the other mechs speed and the heavy Woods.  The Zeus however landed hits to the center and left torso with the Large laser and Medium laser, but no Crits.    

Heat: 

Everyone gets to go to 0 Heat, except the Hunchback who is at 2. 


 Turn 4:

Initiative: 

Hammer's win. 

Move: 

The Enforcer jumps behind the tree line for cover.  Meanwhile, the Quickdraw scrambles away from the two Hammer mechs.  The Trebuchet stands firm.

The Zeus and Dragon get ready to shoot it out with the two lighter mechs.  

Shooting: 

The Lancer shooting is mostly ineffectual.  The Dragon and Zeus both lose a bit of armor, but are fully functional.  

The Hunchback targets the Hermes.  Despite the Heavy Wood, the lasers and Auto-cannon tear into the small mech.  It's engine takes a hit and its left arm is completely blown off! 

The Dragon and Zeus also chip away at the Trebuchet and Quickdraw.  

Heat:

The Hunchback is still at 2.


Turn 5: 

Initiative:

Hammers win again! 

Move: 

The various lighter Lancers try to breakaway and converge on the Hunchback with multiple targets of opportunity, but also multiple return shots.  The other Hammers just turn and try to target the Lancers that ran past.  

Shooting: 

The Hermes, Trebuchet, and Enforcer all open fire on the Hunchback, and all miss.  The Quickdraw elects not to take a shot. 

The Hunchback fires everything at the Enforcer, and hits it in the left arm and torso.  The lower arm actuator is damaged, and two heat sinks are blown off.  Thankfully, the auto-cannon missed.  

The Zeus targets the Hermes with everything and pours firepower into it.  The LRMs blast apart the left torso of the Mech.  In addition, the Auto-cannon hits the right arm and freezes its shoulder and blows off the medium laser! 

The Dragon also plinks away at the Trebuchet.  

Heat: 

The Zeus has 1 and the Hunchback has 4.


Turn 6: 

Initiative: 

Lancers win! 

Move: 

The Hammers withdraw back to a triangle of firepower, while the Lancers try to converge their fire on the Hunchback.  

Shoot:

The Hunchback just peels off armor, and misses with his Auto-cannon on the Enforcer.  However, the Enforcer loses another Heat Sink.   

The Dragon manages an engine hit on the Trebuchet!  The Zeus peels off a good chunk of center torso armor off the Quickdraw as well. 

The Quickdraws Laser barrage on the Hunchback destroys the medium laser on the Hunch's left arm.  The Enforcer misses, and the Trebuchet hits him in the torso on each side.  The Hermes uses the last of his ammo on his only remaining weapon to peel armor off the center of the Hunchback.  

Heat: 

The Hunchback is at 4 Heat.


Turn 7: 

Initiative: 

Hammers win.  Lancers move and shoot first.  

Move: 

The Quickdraw moves up for a closer firing lane.  The Hermes also runs up to the Hunchback, as I decide to try out the Physical attack rules!  After all, the little guy has no weapons left!  The Zeus and Dragon move out a bit wider for better firing. 

Shooting:

 The Quickdraw fires on the Hunchback, peeling off armor on his left.  However, the SRMs miss.  The Enforcer hits the Hunch in the left leg, peeling off armor.  Finally, the trebuchet fires on the right arm, and causes some internal damage and injury to the shoulder joint.  

The Hunch's small laser hits the Hermes in the leg, but the auto-cannon misses.  The medium laser on the right arm also misses due to the bad shoulder joint. 

The Dragon plasters the Trebuchet in the central torso with the last auto-cannon rounds and its lasers.  It causes a second engine hit, and a Gyro hit.   

The Zeus hits the Quickdraw in the right arm and messes up the shoulder.  Plus, he peels off some leg armor.  There are no crits.  

Physical:

The Hermes runs up and smashes into the Hunchback.  The big machines stagger around to gain their balance but stay upright.  However, the Hermes has no more center torso armor left, but the Hunchback has its right arm smashed off, and takes an engine hit!    

Heat:

Most units can return to 0 heat.  Even the Hunchback and Hermes.  Not being able to shoot makes heat management pretty easy. 


Turn 7: 

Initiative:

Hammers win, so Lances move and shoot first. 

Move: 

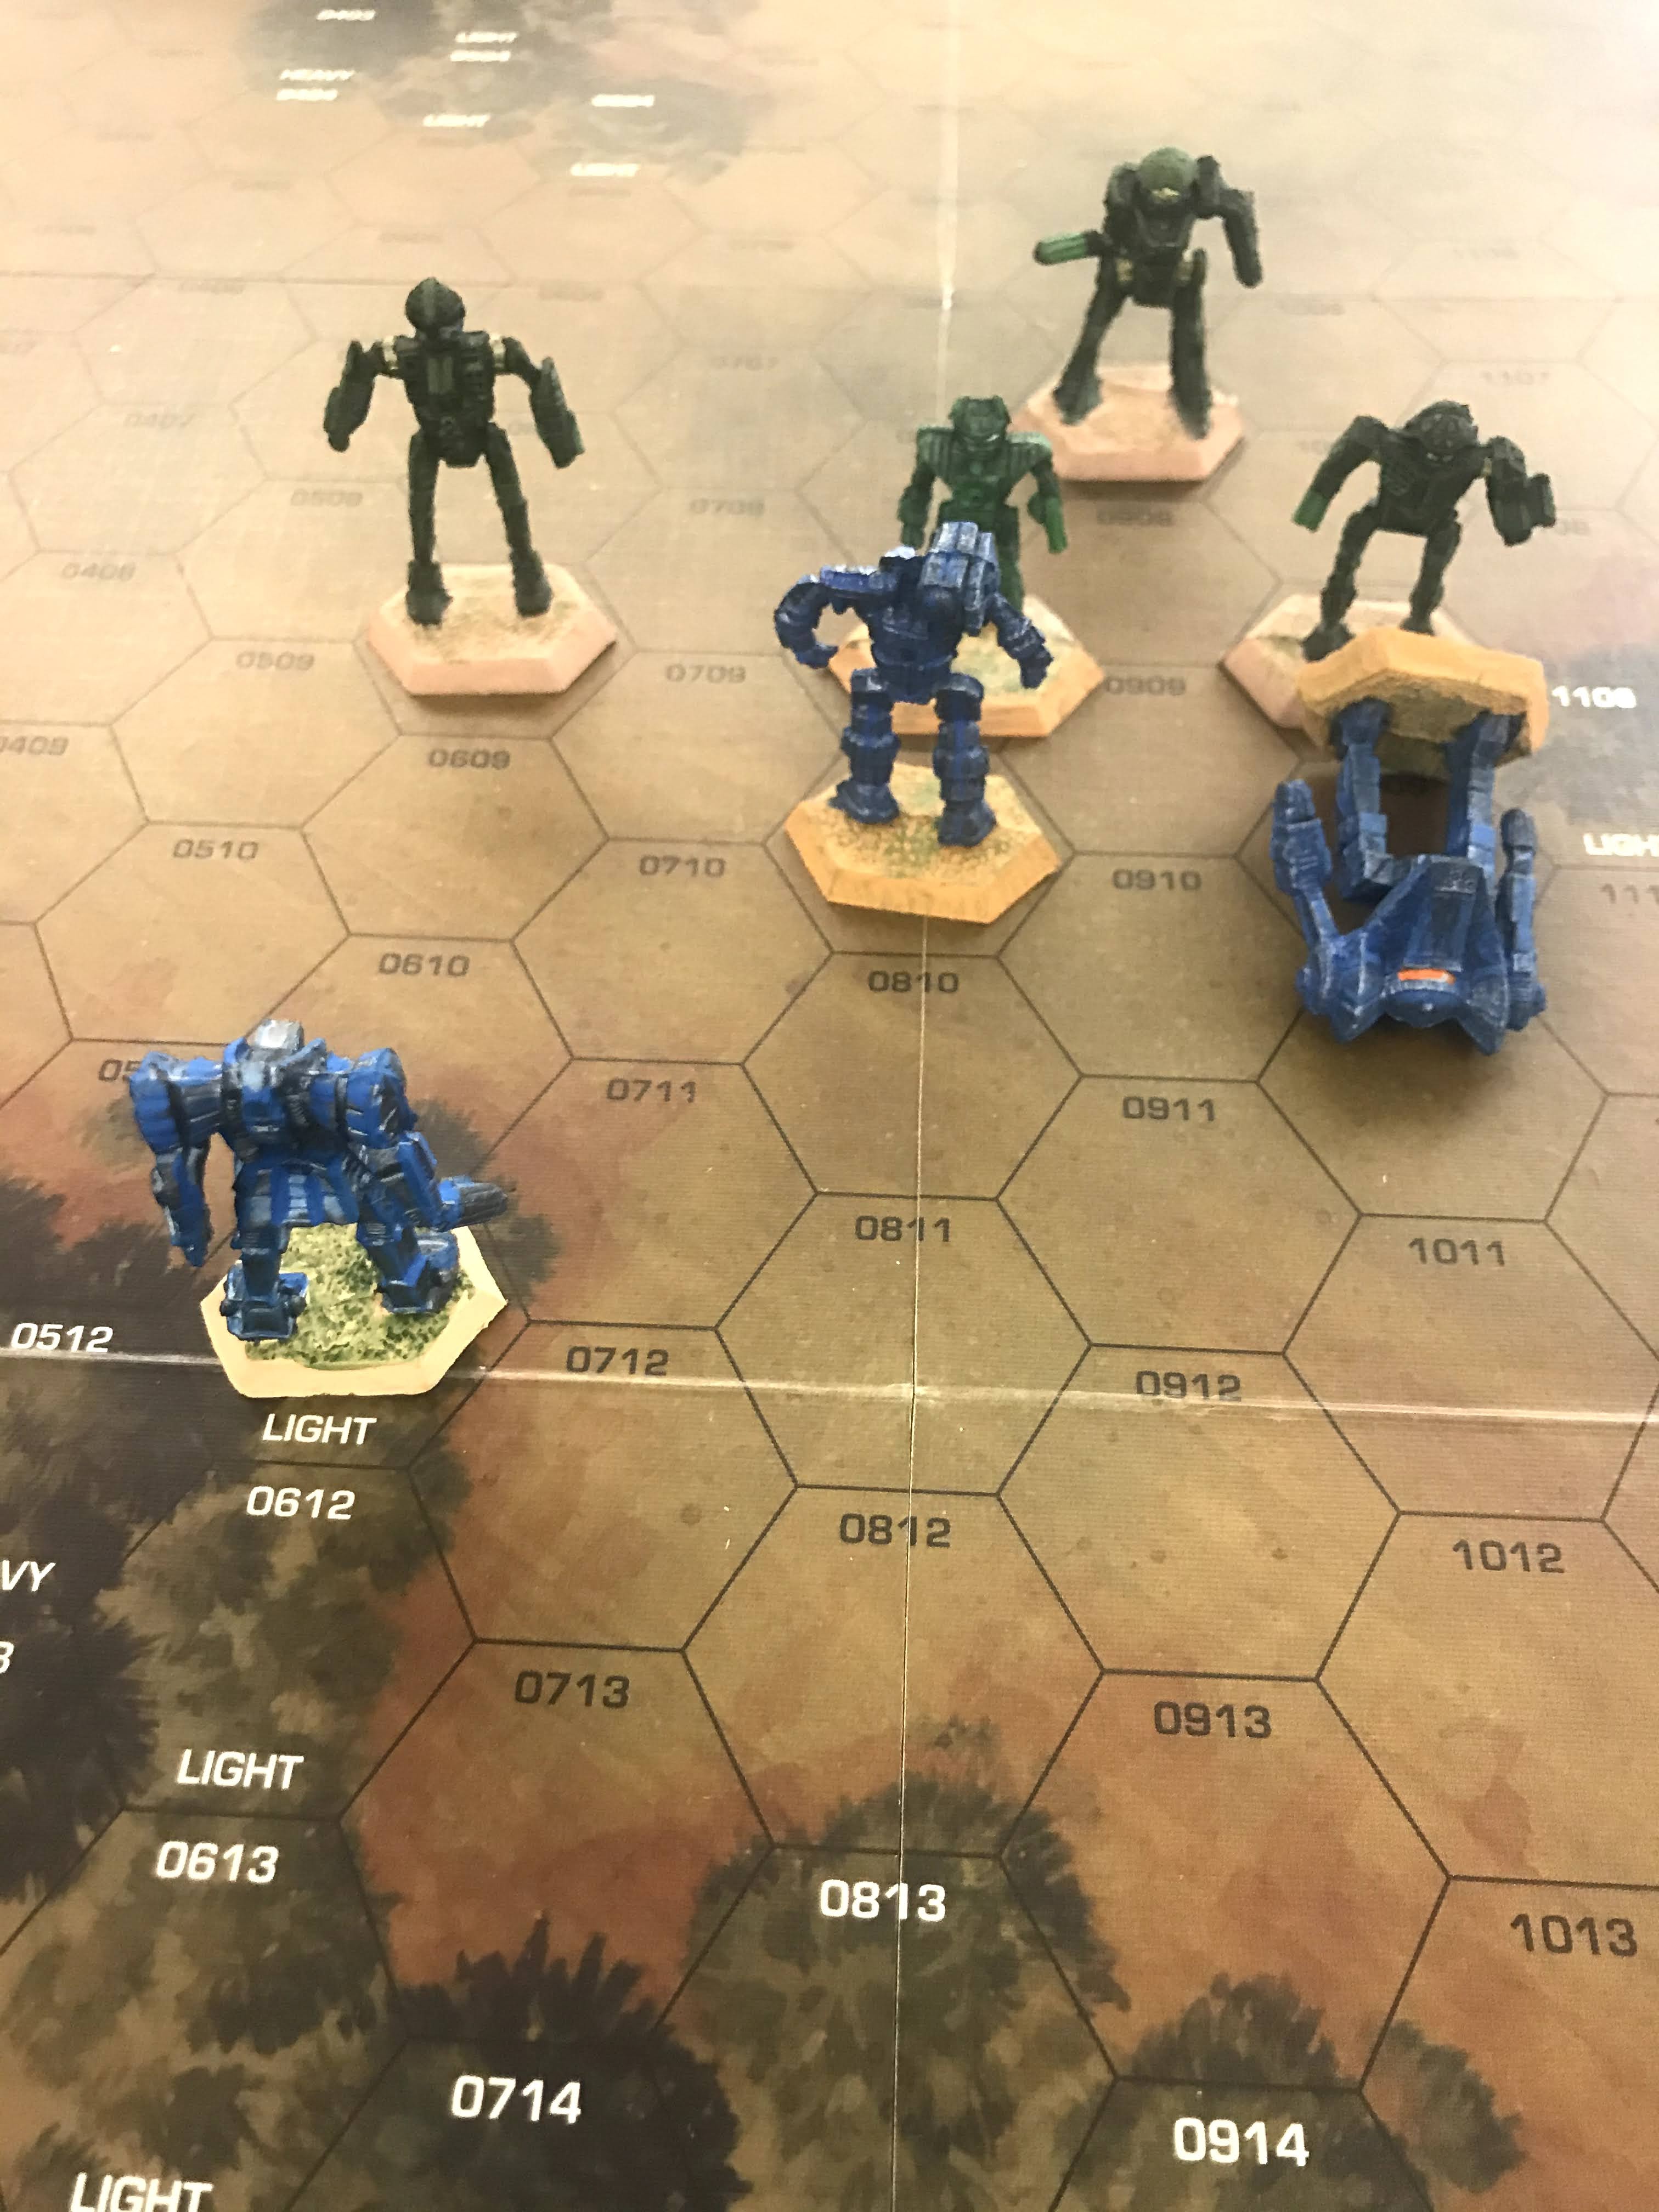
The Lancers turn to face their foes where they can.  The Dragon tries to move in on the Trebuchet for a Charge attack, but the damage to its right leg finally is too much, and the machine falls to the ground.  It further damages the leg and is prone.  

The Zeus backs up into the woods for some cover.  

Shoot: 

The Trebuchet and Quickdraw fire on their enemy mechs, peeling off armor.  

The Zeus returns fire on the Quickdraw, causing an engine hit.  The center of the Quickdraw is also in tatters. 

The Hunchback unloads on close range at the Hermes ripping into it with its Auto-cannon.  Its engine takes a hit, but the little machine is still in it!  It's center torso is shredded.           

Physical:

The little Hermes kicks the Hunchback in the left leg and damages its hip, peels off armor, and destroys a couple of heat sinks.  The Hermes can not punch as it has no left arm left, and the right arm has a bad shoulder.  

The Hunchback responds by punching the Hermes with its left arm, and hitting it in the leg.  


Turn 8: 

Initiative: 

Hammers win again.  

Move: 

The Hermes backs away from the Hunchback, who is then immediately engaged in a Death from Above Attack by the Enforcer.  The Quickdraw backs away, but he is pursued by the Zeus.  

The Dragon pulls himself up, and charges into the Trebuchet.      

Shoot: 

The Enforcer and Hunchback exchange fire as they approach!  They peel armor off each other.  The Trebuchet also peels armor off the prone Dragon.  

The Zeus fires on the Hermes and misses.  

Physical: 

The Enforcer lands and crushes the armor off the head of the Hunchback, and causes an engine hit.  However, the Enforcer also falls prone, losing armor.  The Hunchback tries to kick it, but misses.  

The Dragon charges into the Trebuchet and crushes it's engine.  The machine falls down, lifeless as the pilot struggles pointlessly at the controls.  In exchange, the Dragon's right leg finally gives out and the machine falls over prone again.  The right leg it totaled. 

Heat: 

Again, Heat is all under control.  


Turn 9:

Initiative: 

Hammer win.  

Move: 

The Hermes turns and flees.  The Quickdraw stays still, and the Enforcer gets up.  The Zeus moves to engage the Quickdraw in min range of his Auto-cannon.  The Dragon is prone. 

Shooting: 

The Enforcer manages to blast a Gyro on the Hunchback.  The Quickdraw scuffs up the paint on the Zeus.  

The Hunchback and Dragon blow both arms off the Enforcer in a fusillade of lasers and auto-cannon fire.  The Zeus also manages to blast the Center torso of the Quickdraw completely open.  The next shots will be critical hits!  

Physical: 

The Enforcer kicks the Hunchback, considering he has no arms! He kicks the Hunch in the left leg, and it looks pretty weak.  In return, the Enforcer is punched in the left torso and sparks fly as there is no armor left there.  

Heat: 

The Hunch has 1 heat. 


Turn 10: 

Initiative:

Lancers win this time.  

Move: 

The Zeus moves up expecting the Quickdraw to flee backwards.  The Hunch stays put. 

The Quickdraw does flee backwards to stay in short range of his lasers though.  

Shoot: 

The Zeus opens fire on the Quickdraw and blows its left arm clean off!  The return fire is minimal.  The Quickdraws return fire is also ineffective.    

The Hunch uses its last Auto-cannon ammo on the Enforcer up close and riddles him with shots in the torso.  The small lasers also exchange inconclusive blasts.

Physical: 

The Enforcer fails to kick the Hunchback.  However, the Hunchback does land a punch that wrecks the armor on the Enforcers head.  

Heat: 

The Hunch is up to 2 heat.         


Conclusion:

With that, the Uhlans send the surrender codes to their foes over the universal Merc frequency.  They are done here after 1 Mech getting cored, and the rest all taking severe damage.  By the Mercenary Code, details are arranged and the proper protocols followed for the surviving pilots to be picked-up, and the remaining mech to withdraw.  The fallen Uhlan Trebuchet is maintained as a prize by Thor's Hammers.  

Four and a half hours later, we have a conclusion.  Granted, we had to look up a lot of rules as we went, and we pointlessly jockeyed around shooting.  Clearly, we should have just closed and started throwing kicks and punches instead!  

Eventually, Thor's Hammers won! 

Uhlans- 6 Engine Hits

Hammers- 2 Engine Hits 

Final Results for the 14th Uhlans of Polanski's Lancers

Final sheets for the Strong Hammers of Thor's Hammers- Today's winners

Final Thoughts:

Yup, this confirms that Classic Battletech is not the game for me.  There was two much dice rolling and bubble filling in with not enough actual effect.  The decision making I found rather limited, as you mostly just stood there and tried to pound on the enemy.  Heat didn't become much of a factor to limit my decision making either.  I was typically able to do all the moving and shooting I wanted and I had enough Heat Sinks to take care of it.  

Mechs can take a ton of hits and shrug them off, especially if the shots are dispersed across the Mech rather than concentrated.  Even concentrated shots still took forever to actually DO something.  There were the occasional lucky hits, but not enough to actually influence the game, unless a weapon got destroyed.  Most critical hits just resulted in more annoying "Pilot Check" dice rolls or more Mods for me to remember and apply. 

My physical attacks were more powerful than my shooting attacks.  Therefore, I will just close in the next games, I will just close the distance via walking until I get close enough to kick, punch, or charge someone to death.  The boards are small enough where the game will be an inevitable brawl in the middle.  That does not feel very Big Mech to me, but what do I know?  Shooting almost seems pointless.    

I can see why this would be popular in some quarters as all the mods and options make the game appear to have tactical depth.  Honestly, I am not sure it is a very tactical game either as it seemed like standing still and blasting or getting up and kicking seemed like easy choices.  However, it does have a lot of potential for "Strategic" choice in the form of a bucket load of unit types and list building and a lot of opportunity to look for the "optimized" mechs and mech combos.  I am coming to realize that these "strategic" choices are highly valued in the wargaming community and perhaps to a very vocal minority is even MORE important than tactical choices.  However, I am pretty sure I do not know what people like to play so I am probably completely wrong.  

Overall, it was a bit of a frustrating game and frankly did not engage me in the game play.  By Turn 4, I was ready to call it a game even though there was no decisive result at that point.  It wasn't until turn 7 or so when things became interesting with damage levels, physical attacks, and falling over.  The long, slow, slog of the game did not appeal to me.  I could get a similar result with a different game system in about 1 to 2 hours instead.


You can follow Blood and Spectacles Facebook page for more fun: https://m.facebook.com/pg/BloodandSpectacles/posts/?ref=bookmarks&mt_nav=0


Or our website:

Or our Messageboard:

Or our Wargames Vault Page:

https://www.wargamevault.com/browse.php?keywords=blood+and+spectacles&x=0&y=0&author=&artist=&pfrom=&pto=    


Monday, March 23, 2020

Battle Report: Rampant Stars- Factory Assault on Mundos

Polanksi's Lancers were contracted to harass operations on the Planet of Mundos.  The primary export was timber and wood products.  Therefore, the Lancers were focued on attacked executives, storage facilities, and other infrastructure.  Their employer Lacstar Inc, was in negotiations to purchase the Timber rights from the VolSaab Corporation, and any disruption to supply would cause the stock price to drop.  This would make buying the rights much easier.  

VolSaab was wise to such actions.  Therefore, they had contracted out to two mercenary units to operate on Mundos to help protect their investment and get the best sale price of the rights.  The Rose Guard and Thor's Hammers were providing security on Mundos.  

Today, the 14th Ulhans of Polanski's Lancers have planned to strike at a early staging factory near the equatorial forest region.  Volsaab had built a number of logging and transport roads through this region so transports could bring newly cut lumber to nearby processing plants.  The Lancers decide to use this network to strike at the processing plants.

Near the lunch hour, Mecha from the Lancers were sighted by truckers moving along the road towards the Earl G. Howanzer Plant.  The plant had a contingent of Thor's Hammers on station, but additional reinforcements were requested from the Rose Guard, who dispatched elements of the 3rd Thorn Guard to assist in the defense.  

Today's battle was a rematch between myself and my family in a game of Rampant Stars.  I have found the rules for Rampant Stars work very well for streamlined Mecha combat as well as Unit-vs-Unit battles.  We pretty much used the same army lists as we last used on Mundos that were built by gut feel rather than any actual point system.

Forces
The Lancers used a variety of Irregular Light Mechs with speed upgrades backed by some Regular heavier units.  If I recall, there were 4 Irregular Lights and 4 Regular Armored units with various additional upgrades.

Thor's Hammers had 2 Regular Mechs and 2 Irregular ones with Armor upgrades.  The Hunchback also had a Heavy Weapon upgrade.  That thing had caused me headaches in the past.

The Thorn Guard had 3 Regular Mecha with armored upgrades, 2 with some sort of shooting upgrade, and 1 Irregular light mech.

Looking at them now, these probably aren't that balanced, by such is life.

Mission
The Lancers needed to target the enemy factory and reduce it to 0 hits.  it started with 10 Effectiveness points.

Set-up
The board was a 4x4 foot board.  A dirt road cut across the board diagonally.  A forest took up the south corner.  Two large areas of fields were also present on the opposite side of the board.  The Factory was next to the road on the Northeast side of the board.

The Thor's Hammers were deployed within 6 inches of the Factory.  The Thorn Guard were coming in as a clump from the Northern board edge.  The Lancers were in two groups.  The Lights led by a Regular mech were coming down the road.  The rest were emerging from the wood line at the board edge.


Battle
As this was a battle against my family, my notes are not as clear as they normally are.  I spend a lot more time interacting with them than taking notes.  However, the following is a general idea of how the battle flowed.

The Defenders went first and started to move out to defend the facility.  The Hammers were careful to stay within command range of their officer as they moved towards the fields to intercept the larger mechs emerging from the woods.  Their Hunchback was leading the way.  The Thorn Guard also moved up to support.  They were intent on getting between the factory and the attackers.


Some poor command rolls by the Lancers on the roadway led to a slower than expected advance.  Their emerging support forces had a similar comms issue due to the dense jungle canopy.  The Lancer leader led the way and took a series of long range shots at the Hunchback, that did nothing more than tell the Hunchback pilot the range of his opponent.


A devastating return barrage from the Hunchback simply shredded the Lancer leader for his impudence and reduced him to 1 hit.  He promptly fell back to avoid utter destruction.  Soon, the h\Hammers were taking up defensive positions in the fields, while the Regular Lancers warily moved in taking potshots as they approached.  Thankfully, effective ECM warfare from the Lancers kept the Hammers on their toes, unable to get a clear understanding of the situation.


Meanwhile, the Thorn Guard took the approaching Lancer Hit and Run force head-on.  It quickly turned into a close range particle beam fight as the little guys closed in rapidly with fire support from their larger brother.  The Thorn Guard officer spent most of the battle on the Comm-Link to command relaying data while his troopers did the hard work.

A heavily damaged Hermes II charge the Panther Regular mech to try and clear a path to the factory.  However, the larger mech quickly disposed of the little guy by kneecapping him with a swift kick, and then a stomp to the face.  That was a decisive moment, as despite taking several missiles, rockets, cannons, and beams the Thorn Guard was dishing it back out.  As another Light Mech went down and a third was shredded down to 1 Effectiveness Point, it was clear that the Thorn Guard line was going to hold.

On the other Flank, the Hunchback absorbed a lot of damage, but ECM kept the Thor's Hammers from striking back decisively.  Then, the ECCM managed to clear the static long enough for the Dragon and Whitworth to focus fire and severely damage an approaching Lancer Quickdraw.  They had decisively turned the battle on the flank as well, and the link up of the Regular Lancers and their lighter vanguard no longer looked possible.

A devastating salvo of firepower also took out the final mecha in the Lancer road assault.  It was clear the battle was lost and the Lancers fell back into the jungle to lick their wounds.


Conclusion:
The Thorn Guard lost 1 Light Mecha, and had 1 Regular Mech heavily damaged and crippled.  Thor's Hammers had 1 Mech crippled and another lightly damaged.    However, the factory was unharmed as the steel wall was not breached.

The Lancers lost 2 Light Mecha, 1 Regular Mecha, and had a Light and Regular severely damaged and crippled.  They completely failed in their objective.  The LacStar contract had been big....  but maybe not THAT big.  So far, the Lancers have lost every engagement on Mundos that they have fought in.  Maybe it was time to withdraw with some of their reputation intact.....


My initial attack ended up going in a bit piecemeal due to some command difficulties.  I did not do as good of job as the Thorn Guard and Thor's Hammers keeping my Leader in range to get the activation benefits.  However, soon, they were also having command problems and I started to shift my Regular Mechs over to link with the lighter vanguard.  However, I spent a bit too long obsessing about the very dangerous Hunchback and not enough time on the objective.  Ultimately, this lack of focus caused me to loose the battle.   


Overall, Rampant Stars has again proven to be a fun, quick little game that was fought in about an hours time between 8-10 units per side.  We didn't really use any of the scenario, complications, or location rules for this one.  Instead, we quickly set-up a board, got our models out, and made an objective on the spot.  I am pretty sure that point-for-point the Lancers were out numbered, but it was a fun family game over the afternoon.  In that sense....

Mission Accomplished!          


You can follow Blood and Spectacles Facebook page for more fun: https://m.facebook.com/pg/BloodandSpectacles/posts/?ref=bookmarks&mt_nav=0

Or our website:

Or our Messageboard:

Or our Wargames Vault Page:


Monday, June 24, 2019

Battle Report: Rampant Stars- Mecha Battle on Mundos

On the wooded planet of Mundos, the mercenary company of Polanski’s Lancers had been contracted by Lacstar Incorporated to disrupt the operations of their rival firm.  The Lancers had limited success in their efforts.  However, incomplete intel provided by Lacstar made operations difficult.  The CEO of the Lancers decided to perform a recon in force to try to explore and more completely map Mundos to help plan appropriate operations to meet their contractual obligations. 
Of course, Volsaab Incorporated did not want their operations disrupted.  They contracted out with the Rose Guard as general site protection.  Once the activity by Lacstar surfaced, they contracted out with Thor’s Hammers to provide additional punch on Mundos.  The two CEOs would have preferred the contracts for their respective merc companies, but a shared contract was better than no contract. 
Electronic snooping and surveillance tipped the two allied Merc groups to the 14th Uhlans of Polanski’s Lancers activity.  They managed to deploy to counter their reconnaissance efforts.  The Rose Guard and Thor’s Hammers objectives were to deny the vital information to their enemies and destroy as many of them in the field as possible.   
  
It was InternationalTabletop Game Day, and my family decided to celebrate with some tabletop gaming!  I was as surprised as the next reader of the blog was.  To that end, I had to come up with a game for us to play and right quick!  With that, I pulled out some old sheets I had made to use Battletech models for games of Rampant Stars.  I fluffed out a few additional units, and in a few short minutes we were ready to play with my wife and daughter teamed up against me.  I think we all know how this is going to turn out all ready!

Forces:
I am not going to go over them completely, but on Team: Family they had 8 Mecha.  For the most part, they were classed as Irregular Infantry with their Command mechs as Regulars.  They all were up armored to armor 2, with the Dragon and Cyclops up armored to armor 3.  Two had the either Rapid Fire or Armor Piercing Upgrades.  Then, the Hunchback had a Heavy Weapons upgrade to make it the most powerful weapon system on the board.


On my side, I had about 10 mechs.  They were all Regular Infantry.  I had three light mechs that were not up-armored, but had rapid movement.  I had 3 mechs with rapid-fire or Armor Piercing upgrades.  The rest were line mechs with armor upgrades to 2, and I had 1 mecha that was up armored to 3 armor points.


Mission:
We randomly rolled up the “explore” mission.  This means there were 6 tokens scattered across the board.  You could collect a token by getting a model within 1 inch of it.  Once collected, it was removed and placed on the players’ side of the board.  The team with the most tokens would win. 

Set-up:
We played on a 4x4 board.  The edge of the board was a river with brush on the shoreline.  The opposite side of the board had a large forest with jagged rocks projecting out into the board’s center.  This made a bit of a clear valley between the river and the forest.  The markers were placed at various random points along the center line. 

I placed a couple of light mechs near the edge of the forest to rush in and try to grab the objectives there.  The center was my heavier mechs, led by my assault mech with the best armor.  He was going to take the hits while a light mech got ready to dodge beyond and grab objectives.

My opponent set up with one of their command mecha to go into the woods supported by the Hunchback.  The rest were going to storm across the center and shoot me to pieces. 

The Game:
Sadly, I was to busy playing and did not have the best notes from this game.  I do not have turn by turn specifics.  However, I have enough of an overview. 

My light mech heavy force was advantaged by the scenario, and I expected to grab objectives early.  However, this early advantage was off set a bit by poor Command Checks that left some of my faster mechs at the start line.  The same happened to my wife’s light mech as well, so the heavier units took the lead on the advance early. 


Like I suspected, I was able to get my lighter mechs going and grab an early lead, going up 3 objectives to two.  The main formations closed in the valley and traded shots.  Most of it was a side show holding action while my commander, and two light mechs dashed for the last objective in the woods.  In the meantime, my families’ had a Dragon and Hunchback trundling into the area and closing fast. 


The Hunchback hunkered in and provided devastating cover fire despite the cover and speed of my lighter mechs.  One of my light mechs was blown to pieces without firing a shot.  In addition, my Command mech took a beating.  I was further hampered when my remaining light mech failed a critical command check. 


Despite taking a beating of its own, the more resilient Dragon mech managed to grab the last objective.  The Dragon command mech was then torn to pieces and destroyed by fire from my Commander and a light mech.  Too little, too late.  We finished off the shooting, a couple mechs were severely damaged in the valley as well. 


Conclusion:
The battle was technically a draw, however my lighter forces took a beating in the process.  I lost 1 light mech and took twice as much damage on the rest of my force.  I had to withdraw two other light mechs to avoid destruction.  However, it was a bit of a moral victory to take out one of the enemy joint Commanders in the battle, take that Thor’s Hammers!  

In an odd twist, two of my opponents mechs only left the baseline in the final turn due to Command failures.  1 of their lights and a line mech never got into combat….. and I still took the worst of the fighting! 

Overall, RampantStars makes for a quick, brutal, and fun mecha game too.  The entire game with set-up and takedown was about 90 minutes.  The longest part was setting the board up and statting up the mecha.  The game itself went very quickly with a mad scrambled followed by an intense firefight. 

Monday, October 9, 2017

Rampant Stars: Battle Report- Ambush- Battletech

Welcome to my RAMPANT STARS battle report.  This is a generic ruleset for Sci-fi games that are miniature line agnostic, scale agnostic, and usable in any sci-fi setting from a grim dark universe, to Vietnam in space, to the war against the machines.  Rampant Stars uses relatively broad unit types and Sci-Fi traits to allow you to customize for the game you want.  In addition, Rampant Stars uses a three tiered scenario generator that allows for countless variations for the games you play.  Finally, it is designed to be played in one hour of game time.  

Polanski’s Lancers have been hired by Lacstar Industries to grab some rival Klan Enterprises executives from a corporate off-site on the Low-Grav world.  The executives are travelling under the protection of Thor’s Hammers.  Thor’s Hammers have been contracted to protect the Klan executives while having their off-site team building excursion.   

Polanski’s Lancers
Enforcer
Elite Infantry      Effectiveness rating:  10                                Points: 4 (+2 Points)
Move    Command           Assault                 Defense               Shoot    Armor 
6              2+                           2+                           3+                           2+           1
Traits:
Commander
Rapid Fire- 2 Points

Trebuchet
Regular Infantry                               Effectiveness Rating: 10                                Points: 3 (+3 Points)
Move    Command           Assault                 Defense               Shoot    Armor 
6              3+                           3+                           4+                           3+           1(+1)
Traits:
Blast Radius- 1 Point
Armored- 2 Points

Quickdraw
Regular Infantry                               Effectiveness Rating: 10                                Points: 3 (+4 Points)
Move    Command           Assault                 Defense               Shoot    Armor 
6              3+                           3+                           4+                           3+           1(+1)
Traits:
Armor-piercing- 2 Points
Armored- 2 points

Assassin
Regular Infantry                               Effectiveness Rating: 10                                Points: 3 (+2 Points)
Move    Command           Assault                 Defense               Shoot    Armor 
6              3+                           3+                           4+                           3+           1
Traits:
Rapid Movement (+1 Point)- Roll 1 d6 for Double time
Enhanced Senses (+1 Point)- Ignore battlefield conditions

Total= 24 Points


Thor’s Hammers
Dragon
Regular Infantry                               Effectiveness Rating: 10                                Points: 3 (+3 Points)
Move    Command           Assault                 Defense               Shoot    Armor 
6              3+                           3+                           4+                           3+           1 (+2)
Traits:
Commander
Power Armored (+3 Points)

Dervish
Irregular Infantry             Effectiveness rating:  10                                Points: 2 (+3)
Move    Command           Assault                 Defense               Shoot    Armor 
6              4+                           4+                           5+                           4+           1(+1)
Traits:
Armored- +2 Points
Blast Radius- +1 Point

Hunchback
Regular Infantry                               Effectiveness Rating: 10                                Points: 3 (+6 Points)
Move    Command           Assault                 Defense               Shoot    Armor 
6              3+                           3+                           4+                           3+           1
Traits:
Heavy Weapons- +4 Points- 1 Hit counts as 3.
Armored- +2

Whitworth
Irregular Infantry             Effectiveness rating:  10                                Points: 2 (+2)
Move    Command           Assault                 Defense               Shoot    Armor 
6              4+                           4+                           5+                           4+           1(+1)
Traits:
Armored- +2 Points

Total Points= 24 Points


Mission
Missions are generated by rolling 3d6 three times and consulting a mission, complication, and Location chart.  Of course, you don’t have to roll any at all, but for a test game we might as well go for it!  

Ambush
The attacker sets-up terrain per the guidelines.  The defender sets-up their models as close to the center of the board as possible without violating zones of control.  The Attacker can place units touching any board edge.  Defenders are trying to move off the board edge voluntarily and in good order without routing or retreating off.  Once a unit leaves the board they can not return.  Attackers are trying to stop them.  If 10 points or more of the defenders starting units escape, the defender wins.  If they do not, the attacker wins.   

The Attackers are Thor’s Hammers.

EMP Storm
The world is clouded in swirling EMP that threatens communications and disrupts electronics.  The Commander can not use his +1 Command Check bonus due to the disruptions on the comm. channels. 

Location
Abandoned Outpost

Bases and Outposts tend to have a lot of small buildings, bunkers, roadways, fences, and walls to break-up the areas of the base.   Double Time moves always are considered to get the full additional movement roll.     

Set-up
This board is 4x4 in size with ruins scattered all over the board.  The Lancers are around a center building.  Thor’s Hammers are moving in from all sides to attack. 
  

Turn 1
Thor’s Hammers go first after a roll-off.  The Dervish decides to Double Time forward to try and get into a better firing position.  The Dragon decides to Move and Fire and closes in on the Enforcer.  His weapons open up at long range and….due to the range and reduced firepower from moving fails to cause any damage.  The Whitworth moves forward to cut-off the escape route of the Assassin.  The Hunchback stays put and opens fire on the Quickdraw at long range which knocks him down to 4 hits!  Again, the heavy weapon upgrade rules!

A terrible turn for the Lancers as they all fail their Command checks and are shaken except for the Trebuchet who rushes forward into cover. 


Turn 2:
The Dragon and Dervish are impacted by the EMP Storm and shaken.  Meanwhile, the Hunchback opens fire on the Quickdraw, and destroys him utterly!  The Whitworth moves an snap fires on the Enforcer, and  the range and cover educe him by 1 hit.     

The Assassina dn Enforcer rally, but this time the Trebuchet hesitates unsure how to avoid the enemy attack. 


Turn 3:
The Dervish and Dragon rally.  The Whitworth continues marching forward and shooting at the enforcer, but fails to cause any hits this time.  The Hunchback double times to a new firing position. 

The Enforcer rapid fires the Whitworth with his gatling cannon and the hail of fire causes the inexperienced pilot to fallback.  His mech took 3 damage in the attack.  The Assassin uses its rapid movement to make a break for it and stay away from the Hunchbacks firepower.


Turn 4:
The Dragon, Dervish, and Whitworth are all shaken as their scanners struggle to stay clear in the EMP storm.  However, the Hunchback tries to cut-off the fleeing Assassin.    

The Trebuchet stays shaken as well as the EMP storm swirls around.  The Assassin continues his full speed race to the edge of the outpost with the Hunchback stalking him.  The Enforcer follows to give covering fire. 


Turn 5:
The Dervish, Dragon, and Whitworth rally.  The Hunchback turns the corner spraying auto-cannon fire as he slices the pie.  A shell tags the Assassin and reduces him to 7 Effectiveness.  That means even if he escapes it won’t be enough to win now.  Another Lancer must also escape the board edge.  

The Trebuchet rallies.  The Assassin runs to safety outside of the ruins.  Meanwhile, the Enforcer decides to move rapidly to cover instead of shooting at the exposed Hunchback.  Either the Trebuchet or the Enforcer must also escape the board edge now to secure a victory. 


Turn 6:
The Dervish is shaken again.  This time the Dragon Moves and fires, catching the rear of the Trebuchet and reducing him 1 Effectiveness. The Hunchback maneuvers around the outpost and sees the Enforcer rushing away.  He snap fires but the massive Auto-cannon only needs to graze the light mech to do damage.  The Enforcer is knocked down to 5 Effectiveness but passes a morale test to keep in the fight. The Hunchback pilot calls to the Whitworth to help finish off the Enforcer, but the rookie pilot is shaken by the damage to his mech and does not respond.

The shooting from the Dragon must have woken up the Trebuchet pilot who rapid moves away from the source of the shooting.  The Enforcer also uses a burst of speed to get away fromt eh Hunchback and into cover. 


Turn 7:
The Dervish and Whitworth rally.  Too little too late.  The Dragon loses sensor contact again and it shaken.  The Hunchback continues to stalk his Enforcer prey, but the light Mech is out of sight.  It looks like he may escape too!  The Whitworth looks like he is going to let him scoot past. 

The Trebuchet breaks cover and runs for the board edge.  All the Enforcer needs to do is pass a Command check to escape and win the game for the Lancers.  Which he promptly does and escapes!

Conclusion
No turn 8 is necessary as Polanski’s Lancers have managed to complete the Mission victory conditions.  It is hard to call it a victory when one mech was completely destroyed, and all the others were damaged.  However, Thor’s Hammers were trying to keep 10 Effectiveness points from escaping the board, and 12 managed to escape. 

Some key failed morale checks and Command checks by the Whitworth secured the victory.  If that rookie had kept his head together then the Lancers may have been destroyed.  The Heavy Weapons on the Hunchback again proved their worth as they devastated enemy mecha, even with reduced dice, long range and cover.  It only takes one hit to reduce a target with 3 or less armor 1 Effectiveness, so it packs a punch. 


Overall, another fun game!