Monday, March 19, 2018

Battle Report: Men of Bronze- Battle of Cius- Ionian Revolt


Herodotus tells us a great deal about the Ionian Revolt.  Ionia was Greek colonies along the coast and edges of Turkey that had been captured and absorbed into the Persian Empire around 540 B.C.E.  In 499 B.C.E the Tyrant of Miletus, Aristagoras; failed to capture the island of Naxos.  This left him in a bad political position with his Persian overlords.  In a desperate bid, he decided to stir revolt amongst his people against the Persians.  This led many other local cities to cast off their Persian based Tyrants and replace them with Democracies. 

The Ionian Revolt had initial success in 498 B.C.E. when the allied Greek forces (including Athens, Eretria, and Ionians) managed to successfully attack Sardis.  Sardis was the seat of a Persian Satrap and one of the personal enemies of Aristagoras.  However, this minor victory was soon off-set by the Battle of Ephesus where Persian cavalry chased down and defeated the Greek forces. 

Despite the loss, the revolt spread further.  It spread to the Hellespont and Propontis.  The city of the Carians also joined the revolt.  In addition, Cyprus also revolted.  Persian rule was in danger across the region, it was only a matter of time before the might of the Persian army would respond. 

In 497 B.C.E., The Persian King had three generals appointed to put down the revolt.  The three Persians (Daurises, Hymaees, and Otanes) divided the area into three partitions and attacked.  Their attacks spread across the region.  The battles and sieges for this period are largely unknown, with only a few details of the battles coming down to us from archeology and Herodotus. 

Today’s battle will be one of those lost battles.  Hymaees marched to the Propontis and attacked the city of Cius.  Historically, he took the city.  However, no details remain.  Below I will be fighting a battle between the Persian general Hymaees and the defenders of the City of Cius.  For the purposes of this battle, the citizen militia has come out of the city to fight off the Persian force.  

The Forces
No details remain for the fall of the city of Cius.  We only know that Hymaees took the city with his army while his fellow Persians attacked in other areas.  Therefore, I will be using some standard armies from the Greek and Persian lists.  The exact details of the true armies are not available. 

Greeks
3 Militia Hoplites
2 Peltasts
1 Archer Unit
1 Psiloi

Persians
3 Archer Units
3 Drilled Infantry Unit
1 Psiloi

This is equal points in the system and should prove an interesting game. 


Deployment
This battle will be on a 6x4 board with both forces deployed on the long table edges.  The Greeks on the North side with the Persians coming from the South.  The Western edge of the battlefield is anchored on a river.  The Eastern edge has the ruins of a temple sacked by the marauding Persian recon troops.  The river is Dangerous terrain while the temple is Difficult.   
Greeks to the Left
 The Greeks of Cius to the North have anchored there right flank to the river.  They deployed across the battlefield in a battle line 6 base widths in.  From right to left the units are; psiloi, archers, the 3 militia hoplites in phalanx are the core, then the 2 peltast units deployed across from the temple.  The Persians face off against the Greeks also anchoring their left flank on the river banks.  They are deployed alternating archers and drilled infantry, with the Persian right being anchored by Psiloi light troops across from the temple.   
Persians to the Right.... caught in the middle with you

Turn 1:
Both sides begin with 7 Arête Points.  That means no one will have an Arête Point advantage to begin with.  The Persians bid 3, while the Greeks bid only 2.  The Greeks wish to hold back and possibly use their Move and Shoot abilities later in the turn.

The Drilled Infantry by the temple race forward to try and get the better ground.  Seeing the Persian strategy, the Greeks decide to try to interrupt to get their Peltasts moving to the temple and try to beat the Persians there.  The Greeks win the roll-off.  Some Greek Peltasts rush forward towards the temple ruins.  The Persians challenge for initiative using an Arête Point, and this time they win it back.  The Persian psiloi move ahead.  The Greeks again use Arete to try to steal initiative back from the Persians in the race to the temple.  They win the roll-off again.  
Peltasts make for the Ruined Temple
With their key units on the left in position, the Persians decide to let the Greeks continue to see how their battle plan unfolds.  The Greeks press forward their full moves across the front.  This leaves the light troops slightly out in front of the Hoplite center.  The Greeks wanted to use their Arête Points to move and shoot, but the Persians letting them maintain the initiative has left them without targets.  

The Persian forces also move forward.  Their archers begin to pull ahead of the infantry, causing a slight checkerboarding of their lines.  However, they have no units to Move and Shoot with either. 

Turn 2:
Both sides still maintain 7 Arête Points.  Both sides consider their initiative bids.  The Persians do not think they can beat the Greek Peltasts into the ruined temple but if they get their first, they will be hard to drive out.   The Greeks bid 3, and the Persians 2 this time. 

The two sides close in- Greeks Left, Persians Right
As expected, the Greek Peltasts get to the temple and use an Arête Point to Skirmish through the difficult terrain.  The second Greek Peltast unit follows on the outside of the temple, but since they touch the terrain they must spend an Arête Point to skirmish.  However, they are still considered in cover.  The Greek player pauses to see if the Persians will interrupt, but they decline the bait.

The Ionian commander now feels confident that his left flank is secure in the temple.  His right begins to castle up, with is archers moving forward to engage the Persian archers next turn, while the Hoplites approach. 

The Persian holds his Arête Points for potential re-rolls.  The Persian archers on the left and center move forward to get in a shooting duel with the Greek archers next turn.  The Drilled Infantry stay ready to support them if they get charged.  The far right begin to refuse their flank, and try to draw the Peltasts out of the temple to attack. 

Turn 3:
This turn will probably have first blood.  Both sides have 7 Arête Points, and choose their bids.  Persians bid 3, and the Greeks 2.  The Greeks think they can use Move and Shoot this turn and hold a few back.  The Persians want to use their Archers first. 

Since units can move, shoot, or fight; the Persian archers in the center start the shooting.  The initial Persian barrage reduces the Greek Archers 4 Courage!  They are turned around to rout!  Seeing this, the Greek player decides to try to interrupt and get some revenge!  The Greeks lose the roll-off, and the Persians keep the initiative. 
Greek on the Left, Persians the Right

The Persian Archers on the right open fire at the Psiloi by the river.  The second barrage is not as effective as the first and the Psiloi are reduced 1 Courage, and pass their Discipline check.  The rest of the turn, the Persians simply re-dress their lines. 

The Greeks take over, and immediately the psiloi on the Greek right charge the archers on the Greek right.  This takes 1 Arete Point, and the Persians spend 1 to Evade.  The psiloi spend 1 more to pursue.  And catch the archers.  The two units both take 1 Courage loss in the melee, but the Persians spend 1 Arete Point to re-roll a Discipline Dice and pass the check.

The Greek Peltasts spend the last Arête Points to skirmish through the ruins.  However, they can not move and shoot due to having no Arête points left to do so.  Two phalanxes press forward, whiel the third is hampered by the Greek Archers.

In the End Phase, the Greek Archers flee the field and force the Militia Phalanx behind them to pass a Collapse test.  The Phalanx passes. 

Turn 4:
The Greeks get 6 Arete Points and the Persians 7.  The Persians bid 3 Arete to Greek 3.  The two sides must roll-off!  The Greeks win.

The Greeks start by having the left most Militia Hoplite Phalanx charge the Persian Drilled Infantry.  However, the Persians use an Arête Point to counter-charge!  The two units clash in the center of the board, and the Militia loses 1 Courage, to the Drilled Infantry 2.  They are both at 3.  Both sides pass the Discipline check.  The Persians are pushed back 1 bw.    

The Persians decide to steal the initiative with an Arête Point, and win the roll-off.  The Persian Archers on the right fire into the oncoming  Peltasts and reduce them 1 Courage.  The Persian psiloi also attack them, but fail to cause any wounds with their javelins.

On the left flank, Drilled Infantry charge in to support the Persian archers with the Psiloi.  The combat is brutal and short.  The Archers lose 1 more courage and begin to waver, but the Greek Psiloi is destroyed utterly. 

The Persian Archers in the center and the Drilled Infantry on the right reposition themselves to avoid charges and support the attack.
 
The right most Greek unit declares a charge at the flank of the Persian Drilled Infantry.  However, it fails to come into contact with them!  This leaves them in Open Formation and wavering! 
Woops!  
Greek Peltasts in the temple fling javelins at the Persian Psiloi, and reduce them 2 Courage and wavering.  The others struggle out of temple grounds and fire at the Persian Psiloi as well, causing them to route.                   

In the End Phase, the Persian Psiloi and Greek Psiloi fled the field.  No one failed a collapse check.

Turn 5:
Ionian Greeks get 5 Arête Points to the Persian 6.  The Persians bid 4 to the Greek 2.
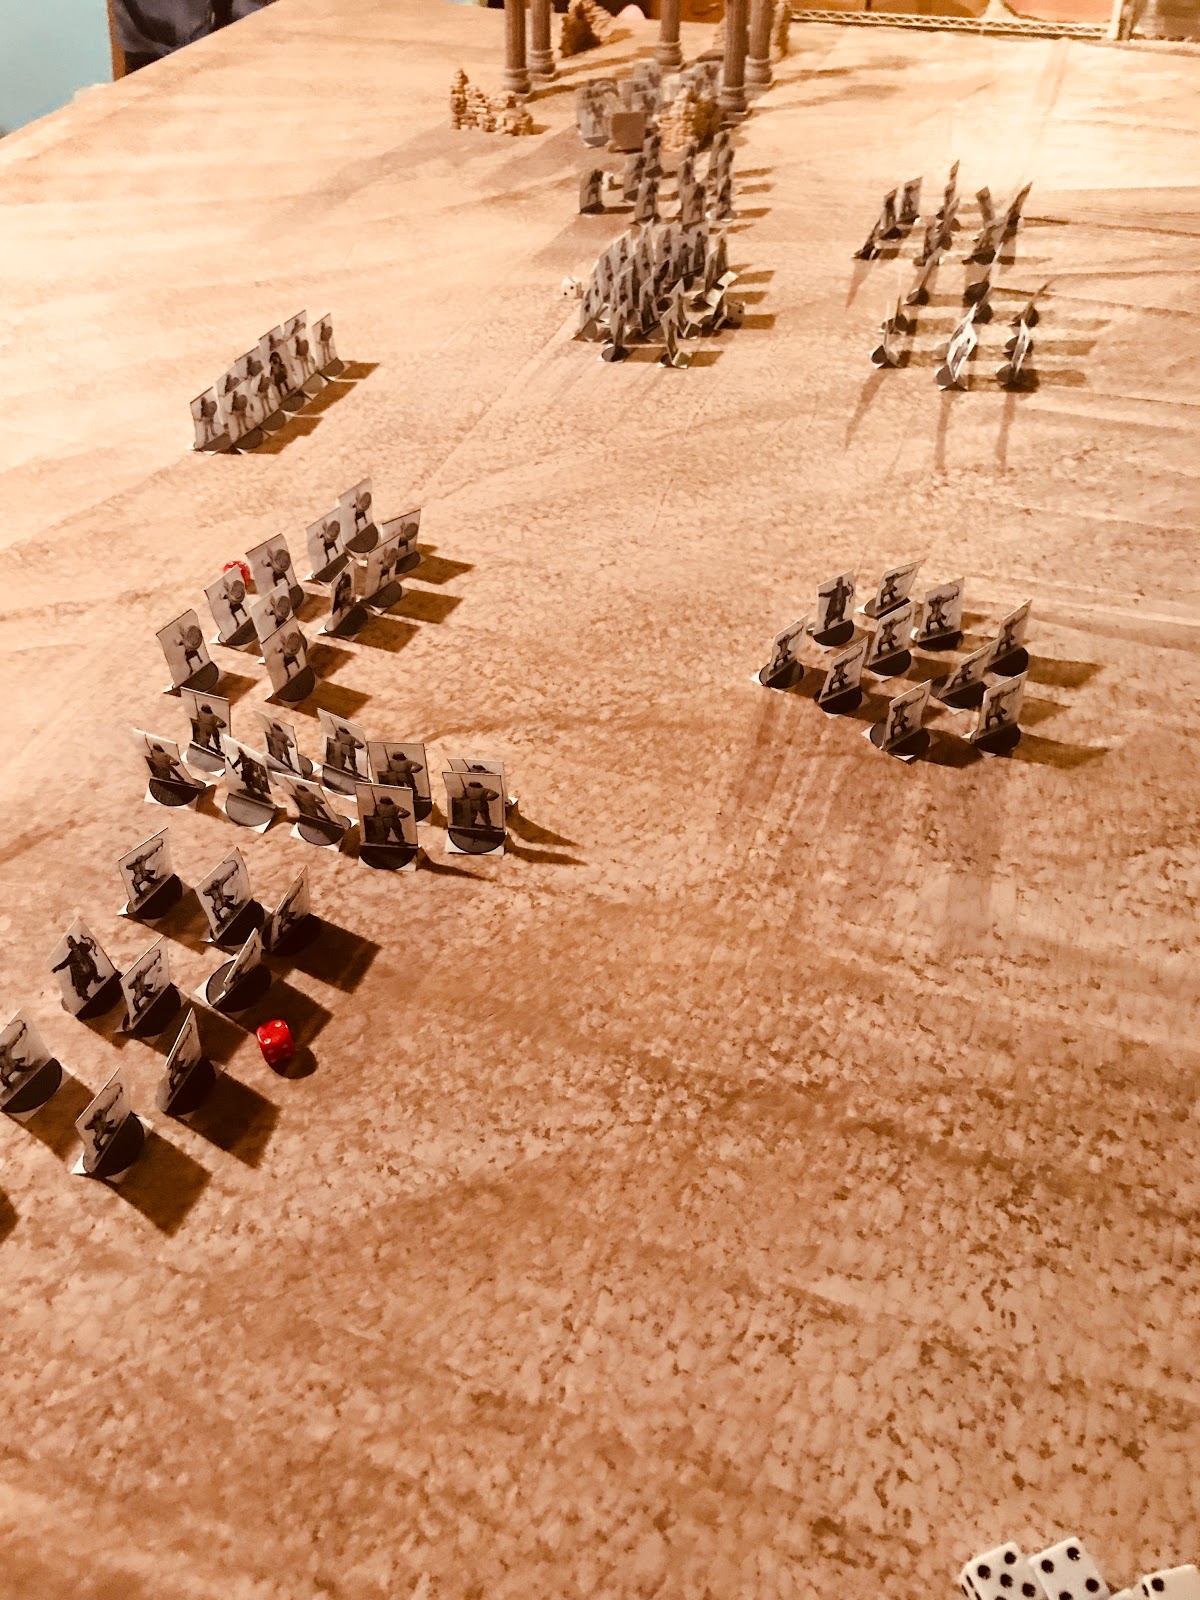
Greeks to the Left, Persians to the Right
The Persians immediately declare a charge from their drilled infantry on the wavering Militia Hoplites.  One of the advantages of being an Open Order unit is the maneuverability, and it pays off here as they pivot and charge.  The attack is pretty powerful, and reduces the Ionians to 2 Courage, and the Persian Infantry to 4.

The Greeks then manage to steal the initiative and declare a charge on the Persian archers with the Peltasts.  The nearby Persian Drilled infantry decide to support with a flank attack.  Both units are reduced to 1 Courage, and this could sweep up the Persian Drilled Infantry now, since there was not a decisive victory. 

The Greeks use their last Arête Point to move the second Peltast unit from the ruins.  The center Greek and Persian melee has no decisive results.         

Turn 6:
Both sides get their arête Points at Greek 5 and Persian 6.  The Greeks bid 2, while the Persians bid 0. 
Greeks to the Left, Persians on the Right
The Center Greek phalanx, breaks into open formation, and joins the melee on the Greek right.  Despite the help, things did not go the Greek way, as both sides lose a point of Courage, leaving the Greeks unit at 1 Courage!   The Persians try to steal the initiative, but fail.

The Greek Peltasts charge into the center melee!  Here things go better for the Greeks, and the Persians use two re-rolls to Reduce the Greeks to Courage 2, while they have 1 left! 

The big melee on the right reduces both units to 0 Courage,a nd the Greeks lose a Skirmisher unit, to the Persians Drilled Infantry and Archers. 

The wavering Persian archers is rallied back to normal.  Both units declare a charge into different scrums to help support next turn.  On the left, it does nothing.  However, the charge into the center melee reduces the Greeks to 1 Courage! 

Turn 7:
Like ancient battles are likely to do, they have devolved into 2 big scrums in the center.  Neither side bids any Arête to go first.  They want they re-rolls instead, both have 4. 
Two big Scrums and everyone is all mixed up! 

The Persians on their left flank taking on the Open Order Greek militia hoplites with archers manage to crush them!   They are routed.  In the center, both Greeks and Persian flee the field at 0 Courage. 
That left the batter Persians on the left flank masters of the field of battle.  ! unit of Drilled Infantry at 2 Courage, and 1 Unit of Archers at 2 Courage. 
All that remains...

Conclusion:
Today, I wanted to make sure that Archers were a viable choice and that an Archer heavy force could defeat Hoplites.  Doing the math, the Hoplites would have armor 3, and Archers have 4 shoot dice, so it would be tough for them to scratch the Hoplites.  The Ionian Revolt seemed like a good place to start as it was Greeks vs. Persians. 

My findings were that the Archers are better matched up against auxiliary troops, and then used to bolster the Drilled Infantry in combat as a support unit.  By using clever placement and effort, you could use the archers for Flank Charges and support.  The other way around, with infantry supporting the archers did not work as well.  A situation where an archer unit was facing off against a Hoplite unit would be a severe mismatch for the archers, even at range as they would only get 1 shot before being charged.  Elite and Drilled Hoplites would be an even more hopeless situation.    

Another finding, one of the key things to recall in the game is that a unit can only shoot, move, or fight.  Therefore, if you choose a unit to fight they can only do it once.  If other people join the battle after the initial unit has fought, the rules are not 100% clear on how to handle that.  That is something I will need to edit before May. 

I am still not finding Unit Collapse being an issue like I expected it to be.  Most units, even Discipline 2 can pass the Collapse test.  However, placing the test after Arête Points are discarded reduce the impact of re-rolls to the result.  That is good.

Overall, this was another historical battle where the Persians won.  The key moment was the failed charge by the Militia Hoplites that forced them into open order and wavering.  That was the key engagement of the battle and swung it to the Persians.

 With their field force destroyed, and Persian reinforcements closing in the City of Cius wisely surrendered.  Propontis was secured and Hymaees prepared to support his fellow general’s in crushing the Greek revolt in Ionia. 

Monday, March 12, 2018

Review: Warhammer 40K: 8th Edition- Games Workshop


One of my goals for 2018 was to play a game or two of Warhammer 40K 8th edition.  I have been playing various shades of Warhammer 40K since Rogue Trader days.  I played 1st edition, 2nd, 3rd, 4th, and 5th edition; before finally dropping out of the rat race that was Games Workshop edition changes.  I just couldn’t keep up anymore and found myself exhausted.  Half the time I was actually playing some bastardized hybrid of Warhammer 40K editions: 1-5; as I misremembered rules and stats and ended up with some amalgamation of rules instead. 

However, I had heard some good things about these 8th edition rules and I figured why not?  I have tons of models just sitting around.  I mostly use them to play Rampant Stars, Tomorrow’s War, Konflict 47, Starship Troopers, or whatever other Sci-fi games we want now.  I figured it might be fun to use them in the actual game universe they were intended for!  Plus, some of my old gaming buddies who had fallen away in the past, wanted to try it to get back into Warhammer 40K.  Who was I to argue, I would love to get back together with them and play some games.  With that, I let my buddy cobble together some leftover marines to field and army of Dark Angels to play.

The new rules are only 12 pages of quarter sheet rules in really small font.  Does this mean the game is more streamlined than ever before?   Let’s find out.  This will not be an exhaustive and definitive review of all the changes, for that you will need to go somewhere else. It is the snap judgements of a veteran player after a few games.
    

Things I Liked
They finally got rid of Template weapon and guess range weapons.  If I had a dollar every time that became a point of contention during a game, I would still be able to buy a new Warhammer 40K army!  Instead, weapons have a certain number of hits or random number of shots.  No templates.  That sped up play a lot. 

Next, they got rid of the Armor and Armor Penetration process for vehicles that had been with the game since late Rogue Trader days.  Instead all units simply have a Toughness.  Damage is resolved by a dice roll of Strength vs. Toughness.  Once a vehicle was reduced by a certain number of wounds, it would impact the ability to fight.  This was a much smoother system than the old Armor Penetration and Vehicle Damage tables.  However, each vehicle has a unique table, which is bad.   

Morale had also been simplified.  It reminded me a bit of Dragon Rampant where a failed morale test just caused additional wounds on the unit.  This represented soldiers running, becoming ineffective, or hiding.  Medium sized units seemed to be impacted more than larger or smaller units, but overall still an improvement.  Much easier to figure out and determine than fallback etc. 

Many people hate it, but I still kind of like the Hit-Wound-Save model.  This is still the core of the game system for mechanics.  I like it as it allows the opponent to do something other than just remove models.  They made some tweaks to the Save mechanics where everyone has an armor save and weapons have save modifiers that reduce it.  Many units also have an additional invulnerable style save that they can take and the player must choose which one they are using, but most of the time the answer is a no brainer.  I prefer this method to the 4th and 5th edition AP system.


Things I Did Not Like
Some key, core components are still problematic for me.  However, I don’t think they will ever “change” as they are integral to what makes Warhammer 40K, Warhammer 40K.  The first and biggest issue is still the I-GO-U-GO nature of the game.  I do not think I-GO-U-GO is inherently bad, but at the scale and size of a game as you are being asked to play in Warhammer 40K it is tedious.  I basically spent long periods of time watching my opponent do stuff and commenting on what they were doing.  It felt like I was a commentator at a Football game, who could only talk about what was happening instead of playing.  I would prefer to have had some way to react.  The Overwatch system allows some limited shooting when charged, but it was very unsatisfying.  Basically, I just stood there and watched.  This could be greatly improved with some sort of alternating activation of units, and then being able to use “Command Points” to either interrupt or chain activations.  However, that would take the game so far away from Warhammer 40K that it might as well get a new name.  Ultimately, this made the game very dissatisfying to play.    

The other big drawback to the game is simply that it has no unified system to do stuff.  The Hit-Wound-Save system is to roll a d6 and beat a Target Number established by a table.  That is the bulk of the system.  However, morale is completely different you roll 2d6 and try to beat a stat with some mods.  Sometimes a weapon gives multiple hits, other times multiple shots, and other times it is roll a d6 and consult a chart.  The core rules are better at this, but the simple rules bloat of Warhammer 40K with all the factions and gear means that it very challenging to know what does what without lots of looking at books, cards, etc.  Overall, this lack of a unified system to do anything means you are looking at rules all the time, even if you are relatively proficient with the 12 page base rules. 

On a related note, the sheer vastness of Warhammer 40 with all of its various factions is itself annoying.  Players want their factions to do special and unique things.  Therefore, the designers are coming up with hundreds of different ways to “skin a cat” to make that ‘unique” faction experience.  This leads to rules bloat and If This/Then That rules.  Beyond this, some of the other rules are nitpicky. 

I also am not a fan of the random charge range.  To me, this adds just one smidgeon more to luck than I would prefer, in an area where I would prefer skill and judgement.  Commanders need to know how far a unit will move, and randomizing that in the charge seems a bit odd to me.  It could be argued that instead of the skill of judging distance, it changes the skill to judging probability.  However, Poker does judging probability better and you do not need expensive 3D models to play it.  It makes more sense to me that a tactile pursuit like wargames would benefit more from spatial skill than probability skill.  I would tolerate random charge moves if randomized movement was fully integrated into the game with a base movement and a variable add-on/subtraction to move/charge distances.  However, now this is just a special mechanic because it can be special!  On the other hand, I also do not like it when units can just do whatever you tell them, and this at least adds a bit of mystery to whether the charge will succeed or not. 


Meh and Other Uncertainties
Hand-to-Hand is needlessly complex.  A game of units should not be so overly concerned with who can attack who in hand-to-hand and in what order.  In addition, shooting is also similarly nitpicky with who can see what and where true Line-of-Sight matters.  It is still a bit easier than previous editions as you can split fire and do some other interesting things.  Warhammer 40K should really adopt the leader model approach like Chosen Men to streamline moving, shooting, and hand-to-hand.

Psykers are back and have their own phase.  They can theoretically do psychic powers, shooting, and hand-to-hand all in one turn.  I imagine this will only get more and more abusable as more powers get added to by various factions.  Otherwise, they were just a bit of chrome add-ons for flavor.

There are some core scenarios in the book to help players get away from Kill’em All style missions.  That is good a thing!  They also did a lot of work with deployment zones and setting up the game to try and keep it replayable and avoid falling into the samey-samey mission/deployment zones all the time.  That was a big improvement.  These rules are only part of the larger rulebook and not the 12 page booklet.  However, the deployment zones, along with who goes first, and scenario objectives should allow a lot of variable games to be played.  You can even try to steal first turn, but it is a simply die roll with no risk/reward for trying to steal it.    

Games Workshop also added Command Points to the game.  These allow you to trigger special abilities or re-rolls.  They add a bit of resource management to the game that was sorely needed for an added layer of decision making.  All armies get a few base commands, and as your codex comes out you get more.  It is only a matter of time before those will get ridiculous and way out of balance.  However, I like the initial idea a lot. 

 Conclusion
It looks like Games Workshop actually woke-up and took a look around at the rest of the gaming industry and decided to try and compete a bit with modern designs.  I applaud their efforts to try and streamline and modernize their core game.  Ideas such as Command Points, removing Templates, and consolidating Stat lines are great strides forward. 

However, there are still some design decisions at the core of the game that continue to make it unappealing to me.  Lack of a coherent system and the I-GO-U-GO turn sequence combined with the game size (# of Units being played) is unattractive to me.  There were just long stretches where I as a player was not making any decisions, only reacting with dice rolls.

Will I play this again?  Probably.  Some of my old buddies are jumping back on.  However, I image that as more Codex and rules come out it will turn into a bigger train wreck as it goes.  I remember the days of playing Warhammer 3rd Edition with the Ravening Hordes black and white army lists.  That was an effective and streamlined game that I could finish quickly at reasonable points.  However, once more Army Books were released it became more and more of a tangled mess.  I expect 8th Edition to be no different, and the few Faction specific books I have looked at have not made me feel any better. 

I have been on this merry-go-round before, and I got off.  I am not eager to get on it again.  I am definitely not spending more money for another ride.        

Monday, March 5, 2018

Battle Report: Aeronautica Imperialis- Pitched Battle on Tokokai-5

A roar went up around Tokokai-5 as hundreds of engines roared to life. The walls defending the Ork fortresses across the planet had been breached.  The Varingyr immediately launched their armored assault forces towards the breach.  The Flayer-kin, either due to their war cunning or desire to fight; raced out in their crude buggies to do battle before the walls.     

The Feral Orks of Tokokai-5 had built their crude fortresses and settlements atop the old mine heads of the Tokokai Clan.  The Tokokai Clan’s allies from Irongard had arrived in orbit to establish if their Oath Brothers were hiding deep within their mineheads from the Ork invaders. 

A swirling battle erupted for control of the breach ensued.  


Forces
Varingyr Clanguard
Overlord Airship
-          Additional Weapon Load 3

3 Strike Eagle
-          Additional Weapon Load

Iron Eagle
-          Additional Weapon Load

Feral Ork Defenders
2 Flak Wagons

2 Waaagh! Bommaz
-          Additional Weapon Loads

 2 Fighta-Bommaz
- Additional Weapon Load

Mission:
This is the Pitched Battle scenario from the Airspace Compilation.  In this mission each player sets up 10 vehicles on the board, at least 18 inches in from their edge, and 6 inches away from any other edge.  Victory points are only earned by destroying ground targets. 

I thought about sculpting up some ground units for this battle.  However, but the time I sculpted up and painted 20 ground targets, it would have been 2019!  Instead, we opted to use some All Quiet on the Martian Front markers instead. 

Set-up:
This battle is using the same board as the previous battle to represent the Varingyr armored forces trying to push through the breach created by the Warlord.  Rocks and the wall are all Altitude 1 so collisions/crashes can happen. 

The Ork ground forces are set-up as the orange blast markers, while the orange circles are Varingyr ground forces.  The Orks have cleverly placed their ground targets where they can be protected by their ground defenses.  The Varingyr are in a semi-circle beyond the Ork forces, but close enough where we might get a few low altitude tangles.  

The Varingyr aircraft are in two packages.  The north package is the Strike Eagles coming in hot at altitude 1, ready to strafe.  The other is the Overlord escorted by the Iron Eagle.  It is at mid-altitude as the Zeppelin ability will allow it to drop easily. 

The Ork Fighta-bommas are lined up to give the Strike Eagles some issues while they attack ground targets too.  They will be covered by the Falk wagons.  The Waaagh! Bommaz are looking to hit the fringes of the Varingyr ground forces. 

Remember, points are scored for taking out ground targets, and not enemy aircraft.  However, if you take out enemy strike fighters, they can not hit any ground targets!  

   
Turn 1:
Initiative: Varingyr

Movement:
Both sides move towards the battlespace with speed.  The Orks look like they will be over the target zone next turn. 

Shooting:
None

Turn 2:
Initiative: Orks

Movement:
Waaagh! Bomma 2 overshoots the nearest Varingyr tank, but proceeds forward towards the oncoming Varingyr forces.  The rest stay in formation, and it looks like they will go head-to-head but eh Orks are much higher. 

Shooting:
Waaagh! Booma 1 strikes first and drops two bombs on an enemy tank, causing 1 point of damage!  Not enough to destroy it. 

Strike Eagle 1 fires his rockets and Mag-cannons at an Ork truk and manages to reduce it to a single point of damage remaining as well.  Strike Eagle 2 opens fire and destroys an ork War Wagon in a similar barrage!  While Strike Eagle 3 misses its ground targets.   

The Ork flak wagons do not have the range yet. 


Turn 3:
Initiative: Varingyr

Movement:
The Varingyr continues to press forward on the attack, with the Overlord trying to provide some air cover.  Meanwhile, the Orkaircraft streak over the Varingyr lines to bomb there targets.  As Fighta-bomba 1 turns over the front lines, Iron Eagle 1 swoops in on him to attack.  Also, the Ork Ground Defenses are now in range. 

Shooting:
In a moment of self-preservation, Srike Eagle 1 opens up on the nearest Flakwagon, and hits it for 1 damage.  It is still functional! 

Fighta-Bomba 1 drops his Bomb payload on a Varingyr tank and obliterates it. 

The Overlord uses a broadside of Mag-cannons to pepper Waaagh! Bomma 2, who manages to fly through the storm of shots unharmed.  He dropped a payload of bombs behind him on a Varingyr tank as well.  However, the little tank was made of sterner stuff and survived with 1 point of damage. 

Strike Eagle 2 and 3 open fire on two separate targets with rockets and mag-cannons, but only cause 1 hit.  Meanwhile, Figha-Bomba 2 and Waaagh! Bomma 1 unload thwi paloads, and destroy 1 tank and damage a second.     

Flak from Ork Ground defenses spray the Strike Eagles, causing Strike Eagle 2 to start blowing smoke. 

Finally, the Iron Eagle swoops in and fires on Fighta-bomma 1.  2 Hits but no damage. 


 Turn 4:
Initaitive: Orks

Movement:
The Varingyr Strike Eagles continue towards the wall, but their main armaments are out, all they have left are nose mounted mag-cannons for strafing.  The Overlord moves low to use its strafing weapons on the ork vehicles left. 

Meanwhile, the Ork Fighta-bommas wing over to get their rokits into range.  Waaagh! Bomma 2 turns back to follow the frontlines, while Waaaagh! Bomma 1 misjudges a power dive and crashes into the ground taking the pilot with it. 

Shooting:
Ork Ground defenses spray skyward but fail to connect.  Varingyr Strike Eagles also fail to connect with their Mag-cannons on ground targets.  The Overlord’s broadside fails to damage the war truk on the ground, and some Hearth missiles reach out and damage another Ork vehicle but fail to destroy it.


Turn 5:
 Initiative: Varingyr

Movement: 
The Varingyr strike crast try to spin around to re-engage, however Strike Eagle 2 is too close to the wall and crashes, killing the crew.  Meanwhile, the Orks swoop down around the battlefield and attack targets of opportunity.  The iron Eagle tries to chase down Fighta-Bomma 1. 


Shooting:
Fighta-Bomma 1 fires his quad big shootas and tears apart an all ready damaged Varingyr tank. 

The Strike Eagles use the last of their Mag-cannon ammo on two ground targets but fail to damage them. 

The overlord opens fire on multiple targets and manages to send 1 Ork War Wagon to Gork N Mork.  Ork Ground Defenses are unable to harm the big ship.  In addition, Fighta-Bomma 2 fails to hit Strike Eagle 3. 

Waaagh! Bomma 2 hits a ground target for 1 damage.  Then, Iron Eagle 1 manages to snag Fighta-bomma 1 with Mag-cannon shells and cause him to blow smoke. 


Turn 6:
Initiative: Varingyr

Movement:
The Strike Eagles move to disengage since they are out of ammo.  The Overlord tries to turn to use its broadsides on the Ork vehicles.  Meanwhile, the Iron Eagle tries to chase downt he Fighta-Bomma 1.  Fighta-Bomma 2 half loops to get back into the battle, and the Waaagh! Bomma comes in low to strafe more Varingyr tanks. 

Shooting:
The Overlord manages to smoke an Ork ground vehicle with its broadsides at mid range.  The Waaagh! Bomma’s big shoota shells ping harmlessly off the side of the Varingyr Tank. 

Both sides half inflicted 3 destroyed vehicles.


Turn 7:
Initiative: Varingyr

Movement:
The Strike Eagles get to the board edge and head back to base.  Next turn will be a disengagement turn.  The Overlord drifts up and over the Ork wall.  Meanwhile, the Ork Fighta-bomma and Waaagh! Bomma overshoot their targets as they are going way too fast.  Fighta-bomma 1 turns back sharply and lines up on aa Varingyr tank, while the Iron Eagle stays in pursuit. 

Shooting:
Fighta-bomma 1 needs 2 hits to damage and win the game and is lined up on target.  However, Iron Eagle 1 gets to fire first due to initiative.  He rolls 6 mag-cannon dice for 2 hits, and rolls for damage…. He gets 1 6.  Fighta-Bomma 1 is knocked out of the sky!


Turn 8- Disengagement Turn
Initiative: Orks

Movement:
Fighta-Bomma 2 tries to do a high G-turn to strafe a tank, but just overshoots and gets an Iron Eagle on his 6 for his efforts.  The Waaagh! Bomma has better luck, and finds a damaged tank in his sites at medium range. 

Shooting:
The Waaagh! Bomma needs to get 1 damaging shot to win the game.  He lines up and rolls his dice.  3 hits.  He needs 1 5+ to damage.  He succeeds and blows the Varingyr tank sky high. 

The Iron Eagle does shoot up the Fighta-bomma, but causes 1 hit.  The grot in the turret misses his return shooting. 

With that, the remaining aircraft head for home. 


Conclusion
That went down to the wire, but ultimately the Orks win this scenario by dusting 4 Varingyr tanks to 3 Ork War Wagons. 

Let’s talk about some of the aircraft performance.  The Strike and Iron Eagles are very underwhelming overall.  They do not have much punch.  Perhaps I should have gone with different weapon loads for them.  The Overlord did fine, but I definitely picked the wrong weapon load here.  It is not maneuverable enough for forward firing rockets and Hearth Missiles and once I was out of the combat zone, I could not bring it around fast enough.   On the Ork side, we are having a hard time using Ork Rokits as they were getting way too close to the targets and then could not use them!     

Meanwhile, both of us had issues flying today.  We both lost a plane to bad flying.  He power dived into the ground, and I crashed into a wall!  This whole mini-campaign was characterized by some bad flying.  I guess terrain can still matter in a flying game, if it involves lots of ground targets.  That made it a bit more cinematic. 

Overall this campaign was a Minor Varingyr victory.  The Warlord Super Heavy was the star of the campaign and allowed for the Varingyr to win the 2nd and 3rd scenario.  The Orks won the first and last battle.  Overall, a pretty balanced campaign tree.

After fierce street-to-street fighting, the Clanguard managed to batter their way into the feral ork settlements.  Once inside the perimeter, Engineers from the Guild were able to verify which settlements were built on Varingyr ruins.  If it was a pure Ork settlement, the Clanguard fell back and let the fleet bombard the Ork settlements into oblivion. They were then re-routed to support their fellows around active mineheads. 

Where Engineers found Varingyr relics they pushed forward to locate access points to the Tokokai Clan mines.  Once there, they set up a perimeter and the Engineers began to re-active the ancestral spirits to open the mine heads.  The Clanguard of Irongard were able to send in reconnaissance teams into the Tokokai mines to locate their old allies.  Instead, they found nothing but abandoned and ancient tunnels.


Unable to locate any Tokokai Clan members alive, Azoki Helmsward called off the attack.  Using air cover and select orbital bombardment, the Clanguard was recalled back to the fleet.  The War Council was saddened by the discovery that their old clan allies were lost to them.  Instead, Azoki marked the planet for later re-conquest by the Helmsward Clan.  Her fleet turned to explore the next former Tokokai Clan stronghold.  Tokokai-5 was lost…. for now.  

Monday, February 26, 2018

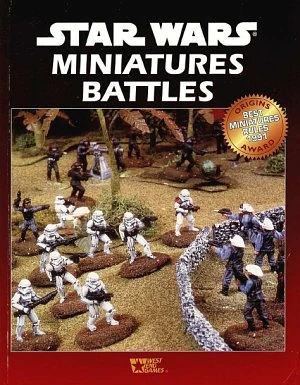
Review; Star Wars Miniature Battles- West End Games

A long time ago, in a hobby shop far, far away…..

As a young lad, I was a typical nerd kid.  I liked war gaming and had gotten my start in the Warhammer worlds of Fantasy and Rogue trader.  However, I also liked RPGs and played AD&D, Shadowrun, and of course West Ends Star Wars RPG.  I had stumbled across the Star Wars Miniature Battles rules as well but could never find the scratch to buy it.  Plus, I was not very fond of the Star Wars metal miniatures of the time.  Consequently, I never picked it up. 

However, today is a different age.  No longer do I need to poke around dusty, dark bookshelves and avoid the store cat to find such archaic oddities!  No, thanks to the wonders of the internet you can find old, no longer produced titles available from anywhere across the globe!  In my wandering I ran across that which I had not tried before…. Star Wars Miniature Battles.  I got a copy and decided to give it a go!   

I have clearly played Star Wars themed wargames before.  Upon receiving my goodies of nostalgia, I rushed home and dug out the Galoob Micro Machine Strom Troopers and Rebels that I had available and scanned through the basic rules.  I was eager to see what this book held and the long held promise of Star Wars wargaming from yesteryear.  With FFG’s Legion rules on the horizon, now seemed like a good time to give these a review. 

May the Force be with us!
From Wookiepedia

Things That I Liked
The game has a consistent mechanic for resolving actions.  There are two types of rolls, Straight Skill Rolls and Opposed Rolls.  For these you simply roll a d6 and add your skill level compared to a Target Number.  If you beat the TN you succeed.  Opposed rolls have the players roll against each other and add a relevant stat, the higher one wins.  Shooting is a Straight Skill, while Damaging and Close Combat are opposed rolls.  They maintain these two simple mechanics for the entire ruleset.  That is better than most other wargames from the time can manage.  

The game uses a 1 always fails and counts as a 0 result, while a 6 is an “exploding” dice that can be re-rolled and add to the results.  This means any soldier can get lucky and hurt even elite enemy troops, and no one is invincible.  Even an Ewok can take out a Stormtrooper.

The game has lots of diagrams and examples to give you a good feel for how it all works.  This made the rules very clear and easy to interpret. 


Things I Do Not Like
This game has a lot of modifiers.  This probably stems from the time period and the RPG heritage of the game.  There are situations that are +1, +2, and beyond.  This means you will want a quick-reference sheet handy.  However, the game encourages you use unit stat cards, which make a ton of sense since the game also has a lot of Stats. Some of them seem a bit useless except for one off situations and edge cases.  The core game does not really use most of them, and they come into greater play when you add the unique armory, force powers, creatures, droids, etc.      

This game uses alternate activation by phase.  Therefore, Player A moves a squad then Player B until all squads have moved.  Then they alternate firing.  Then Close Combat is resolved, etc.  This allows them to use an Overwatch mechanic where a unit can choose to fire at an enemy moving unit by foregoing their normal move and shooting.  An early action/reaction mechanic!

It uses individual troopers as a basis for many mechanics even though it is a squad based game.  This includes true Line-of-Sight, wounds, facing, close combat, etc.  This really bogs the game down with tokens and other needless crunch and slows the game down.  I found this very disappointing and could see at a glance ways to modernize these rules.  However, for the period they are pretty par for the course. 

All injuries do not take effect until the end of the fire combat phase, and all hits are randomized.  Therefore, a squad hitting 12 times might all hit the same guy.  Then, you can’t change him over to injured/dead until all shooting is complete.  I am not sure how you keep track of it all until the end, but there you go.  I guess this is to add “realism” that everyone will shoot the first Stormtrooper through the breech of the door, but just makes wound resolution/tracking even clunkier.   

Morale has 4 levels from good, to shaken, to demoralized, to routed.  It is one level too many in my book.  Plus, the Threat Rating vs Command opposed roll is a bit clunky.


Meh and Other Uncertainties
The game covers all the Star Wars items you would want from armory, creatures, force powers, droids, etc.  If you saw it on the screen, you can stat it up and play it in the game.  There is a unit creation system so you can bring the things from shows to life.  In addition, you can add your own gribblies and aliens too. I am sure this system is easily abusable, and it is a bit clunky; but it is there.  The only thing missing are vehicles as this is an infantry based game.  There are a lot of tools in the Advanced Rules tool box that a player could use, but doesn’t have to.  It reminds me of Force-on-Force/Tomorrow’s War in that way.   

Close combat involves pairing off, and means out-numbering a foe is a big benefit.  However, it will be tough to get into Close combat anyway, as the attackers and defenders must both pass morale tests, and then the defender can also shoot at the incoming attackers.  You need to be a Jedi (or at least a hero) to get a Close Combat off successfully. However, that doesn’t feel off since most combat in Star Wars is resolved at range

There is an entire section about using a Gamemaster in this book.  Again, I think this is more a product of the time the book was made.  However, I tend to like GMed games and feel they have their place.  I know many do not favor this, and I do not feel the game “requires” a Game master to run properly. 

The book does not have a campaign system at all, but it does have three scenarios.  1 is a basic scenario, and the other two are in the advanced rules section. 


Conclusions
This is clearly a product of its time.  The cover proudly claims an Origins Award for Best Miniature Rules for 1991!  You can see the “popular” mechanics of the time in the mechanics of the Star Wars Miniatures System such as individual figure resolution, Gamemasters, and wound resolution.  It is a bit clunkier than modern games, but yet you can still see some of the ideas that allowed it to be the Best Miniature Rules of 1991!  I can see the evolution of modern sci-fi wargames in its design even if it is still a bit unwieldly by today’s standards.

 I can also see where the mechanics and stats were designed to tie in a bit to the West End Games RPG with the “exploding dice” and the stat choices.  That would make it easy to translate an RPG character into the Miniature Battle game and create cross-over opportunity.  That could equal more sales!

The only glaring omission is vehicles, but that might get covered in the supplements such as the Companion and Imperial Entanglements, which I also have my hands on.  Maybe after trying this out in the field, I will review those two supplements as well. 


Overall, I got it for the right price-point, so do not hate that I have this.  I do not see it being a staple of my gaming unless I am having a “retro night”.  I think other more modern games do the same thing, slightly better.  I would not go out of my way to track it down, but if you want to give it a go, look here: http://www.d6holocron.com/downloads/wegminiatures.html

Monday, February 19, 2018

Wargame Design: New Wargames W.I.P. for 2018

One of my goals for 2018 was to create two new WIP games for the blog.  I also shared some of the ideas that I have been mining and working on for 2018.  One of the games I talked about was Conquest! Rome in Italy.  I am pleased to announce that a Work-in-Progress version is now available on the blog.  It will be available for a short period of time, and I am eager to get feedback on how it currently works.

This game was a challenge to build.  There were two main reasons for the challenge. 

1.       The game covers the Roman conquest of Italy from Rome’s founding to the end of the Pyrrhic Wars.  That is a range from something like 753 B.C.E. to 275 B.C.E.  We are talking 500 or so years!  During that time, the Roman military went through (at least) 3 major structural changes and all of them need to be represented in the rules even though they work very differently. 

2.       The next issue was that early Roman military history is a bit sparse for the Roman military itself, but especially for her opponents.  Much of the “history” at this time was almost mythical, especially when dealing with the Kingdom of Rome prior to becoming a Republic.  This is due to the sacking of Rome by the Gauls in 390 B.C.E. that destroyed many of the Roman records. 

In addition, ancient authors did not spend too much time discussing formations, tactics, etc.  Instead they were focused more on telling a narrative at a higher level and assumed their readers knew what they were talking about.  Since many Romans had military experience, such discussions were not relevant.  For modern readers and scholars, the lack of this detail is problematic.  We don’t know what they are talking about!

As a designer, I had to decide how to deal with this ambiguity.  Thankfully, I had the bare bones to work off of from my two related works Men of Bronze and Heirs toEmpire to help guide my efforts.  Ancient warfare has a similar vibe to it.  It is about the push of shield on shield, spear vs. sword, etc.  Morale and holding together is the key factor in success and failure.  The critical decision is how to abstract a units’ ability and the mechanics of resolution to get a somewhat historical result.

The game was intended to meet the following criteria:
1.       Focus on quick, simple game play with easy rules for combat
2.       Use resource management to represent C-and-C
3.       Streamlined unit types
4.       Close enough “historical” outcomes

For Conquest: Rome in Italy I am still unsure how to organize armies together.  In this draft, I am using units of ten bases with a leader.  The situation of being in or out of formation is critical for combat bonus and ability to absorb damage differently.  It is still focused on a closer battlefield level.  This works well for the early periods of Roman history such as the Kingdom period, Etruscan battles, and battles with local city-states.  However, once we get to the Republic and the Triplex Aceis this scale seems too small.  That means looking at unit interactions and abstracting some of the factors makes sense.  Therefore, I have not fully decided on the “scope” of the game when it comes to Unit interactions.  Hopefully, you guys can look at these rules and help me decide. 

Feel free to discuss the rules on the Messageboard here.        


The next game is an interesting set of rules for me.  Unlike most of my rules, these came to me in a dream!  Yes, I dreamed these rules and then went and wrote them down.  Why would I dream about rules?  Clearly I have problems!

Fog of War is not as polished as many of my games are.  It is functional, but was not built in PowerPoint from the ground up like most of my games.  This one was pounded out in a Word document in the heat of the moment after awaking.  In addition, it departs from my normal rules in another key way.  This game was built and designed for groups to play as opposed to 1-on-1 games.  It was designed for two teams of 3+ people per side to play and uses an Umpire.    

I have been banging my head on Horse-and-Musket style games for a long time.  I do not normally play them and have little experience with them.  However, I have been thinking about how I integrate a Muskets and Magic style game.  Therefore Horse-and-Musket have been circling in my psyche for several years.   In addition, I have been thinking about novel ways to foster team building and working together at my corporate job.  That is the elements at work in my psyche to generate Fog of War.

The game was intended to do the following:
1.       Creating a Fog of War between players on the same team
2.       Restricted communications to force clarity
3.       Simplified mechanics and resolutions for newbie players
4.       Focus on working together as a team to meet objectives
5.       Lots of friction!
6.       No specialized stuff to play- Minis not required

I expect the players of this game (My direct reports) will have no exposure to wargames; hence the need for an Umpire.  Their experience with wargames also made me want to avoid using special gear beyond dice.  Therefore all measurements are with playing cards, wounds are tracked via candy, and combat resolution is via dice.

Friction and Fog of War is integral to this game.  The entire idea is to force the team to work together on team goals with limited communication, time limits, interpretation of orders, and independent decision making where mistakes will be made.  The idea with this game is for it to be clunky and awkward as a commander to follow orders, but easy to resolve actions once committed. 

I plan on using this game with about 10 people in the dry run plus an Umpire.  If you get a chance to try it out feel free to post about it on the Messageboard.


You can find both of these games on the right hand side of the blog under the Work-in-Progress section of the blog.  I can now cross one resolution off my 2018 Goals list.    

Monday, February 12, 2018

Battle Report: Aeronautica Imperialis- Wall Breaker on Tokokai 5

Clanguard from the Irongard Expedition Fleet had successfully landed and established  forward operating bases on the surface of Tokaki 5.  From there, they prepared to assault the Ork Strongholds that sat amid the ruins of the Tokaki Clan’s mine heads.  In order to enter the mines and search for remanat so the Tokokai Clan, the Clanguard would need to push the Orks out of their settlements. 

To make matters more difficult, most of the Ork settlements were protected by crude earthen walls.  Varingyr are masters of mining and underground combat, but they lacked the numbers and equipment for a full blown siege.  Azoki Helmsward wanted this to be a quick operation to identify if Tokokai 5 was worth a full war effort of her Clan.  She was unable to bombard the walls from orbit as the wall was too close to the Tokokai Clan’s mineheads, and could unduly damage material and structures necessary for their resurgence.    

Therefore, Azoki turned once again to her mighty Warlord Airships to lead the way.  They would use their bomb loads and powerful Bombardment Cannons to blast through the Ork Curtain Wall.  However, the walls were laced with AA batteries and weaponry.  In addition, feral Ork aircraft patrolled the skies and would quickly move to intercept her Warlords.  Therefore, each airship was accompanied by an escort of fighters and strike fighters to suppress enemy aircraft and AA. 

Once the wall was breached, her ground forces could storm forward and push the Orks out of the Tokokai Clans holdings.  Once cleared, the search for her allied Clans members could begin in earnest.


Forces
Varingyr Clanguard
1 Warlord Super-Heavy Airship
-          Weapon Loads- Bombs
2 Iron Eagles
-          Additional Weapon Load- Mag-cannons
2 Strike Eagles
-          Additional Weapon Load- Rockets/Mag-cannons

Feral Ork Defenders
1 Tractor Cannon
1 Eavy Flak Cannon
2 Flak Wagons
3 Fightas
-          Additional Weapons- Rokits
1 Fighta-Bomma
1 Grot Buzza


Mission:
This is the Wallbreaker scenario from the Airspace Compilation.  In this mission a wall is set-up 10 inches in from the board edge and runs long edge to long edge.   Each section has 4 hits.    

Set-up:
The Orks have set-up their ground defenses across the line, anchored by the fearsome tractor Kannon and Eavy Flak Kannon.  The Ork aircraft are set-up in reserves as they rush to defend the wall from attack.   

The Varingyr have set-up with the Iron Eagles and Strike Eagles in a single package at the center of the board and mid-altitude and full speed.  The Warloard is deployed out to the board edge, looking to sweep in and use its broadside Bombardment Cannons on the Wall.      

Turn 1:
Initiative: Varingyr

Movement:
 The Iron Eagles and Strike Eagles raced in at altitude 2  and full speed straight at the wall.  Their mission was to take-out the dreaded Traktor Kannon before the Warlord got close.  That diabolical Ork weapon could take down the Warlord in 1-shot since it effected altitude and not hits.  The Warlord had plenty of hits, but no speed. 

The Ork fighters stayed in reserve since it was turn 1.

Shooting:
None

Turn 2:
Initiative: Orks

Movement:
A Grot Buzza moves into the area and proceeds towards the oncoming Varingyr craft.  Meanwhile, the Iron Eagle and Strike Eagles move to line up on the Traktor Kannon.  There is no subtlety in their approach.  The Warlord moves to come in behind them. 

Shooting:
None

Turn 3:
Initiative: Orks

Movement:
No new Ork aircraft enter the board.  However, the Grot Krews are whipped to their gun pits by Ork Runtherdz.  The Grot Buzza rolls away from the oncoming enemy, hoping to loop back in and avoid their head-to-head firepower. 

The Varingyr press ahead, ready to enter the Flak Zone.  The smaller craft split into two strike packages with a Strike and Iron Eagle respectively.  The Warlord truddles up behind  and points towards the enemy walls. 


Shooting:    
None

Turn 4:
Initiative: Orks

Movement:
The Buzza look slike he has avoided going head-to-head. 

The Varingyr are going straight down the throat of the Ork Defenders.  They are starting to wish they had spent more on Ground Defenses and less on aircraft that haven’t showed up yet!

Shooting:
The Ork Traktor Kannon took aim and fired on the Lead Strike Eagle.  With a blue-white beam, the stench of ozone, and hellacious Wumzzap! It connected on the lead Varingyr craft.  With glee the Gretchin Krew jammed the downward lever, and the Varingyr craft was whipped down into the ground and destroyed!  That was the power of the Traktor Kannon! 


The Varingyr’s second Strike Eagle opened fire on the Ork gun.  Despite a fusillade of fire, the Gretchin Krew stood by their weapon and readied it to fire again!  

The Eavy Flak Kannon also fired, but missed!


Turn 5:
Initiative: Orks

Movement:
The Buzza tried to turn back into the fight, but was far out of position.  Meanwhile, Iron Eagle 1 peeled off and turned to chase the Grot down.  Another Ork Fighta showed up and sped in over the wall to disrupt the Varingyr attack, but the enemy aircraft swooped out of his field of fire and closed in on the Flak gun to the side of the wall.  The Warlord followed themto avoid the Traktor Kannon  and prepped the Barrage Cannons.    

Shooting:
The Flak Gun saw the incoming Strike Eagle and opened fire.  The shells raced up and pattered ont eh Varingyr craft causing it to blow smoke!  Despite the barrage, the Strike Eagle returns fire with its last rockets and blasts the gun emplacement apart!  The point of attack on the wall is now clear. 

The Eavy Flak Kannon fires on the huge Warlord, but misses.  The Traktor Kannon fires on Iron Eagle 2, but misses.

The Warlord chooses to hold off on firing as it closes the distance. 


Turn 6:
Initiative: Orks   

Movement:
Two more Ork fightas show up and race straight at the Warlord, who slowly moves towards the target.   Fighta 3 also tries to swing in on the big ship. 

Buzza tries to circle back, but Iron Eagle 1 gets on his tail.  Iron Eagle 2 just flashes beneath the approaching Orks, and Strike Eagle 1 turns into the, and goes beneath them.

The Warlord looks like it is in position to destroy the wall. 

Shooting:
Fighta 1 and 2 are too close for Rokits.  The two fighta’s pilots try for sustained bursts but fail.  In addition, their close range shooting does not scratch the paint on the Warlord.  The Eavy Flak Kannon also fails t stop the big ship. 

Iron Eagle 1 fires on the Buzza, but fails to bring it down.  The Warlord unloads its Barrage Cannon at close range and simply decimates that section of the wall.  The Wall has been penetrated, and the Varingyr have won the battle. 


Turn 7- Disengagement Turn
Initiative: Orks

Tailing Fire: Iron Eagle 1 misses the Buzza. 

Movement:
For the most part, the Orks and Varingyr are happy to disengage without further conflict.

Shooting:
The Eavy Flak Kannon hits the Warlord for 1 point of damage.  As it departs, the Warlord drops her bombs on a section of the wall, but fail to destroy it. 

Conclusion:
Hmmm, the Super-Heavy bomber had no problems getting through and destroying the wall.  The only set back was the traktor Kannon taking out a Strike Eagle.  I knew that thing would be trouble.  I wanted to get in a position where the Barrage Cannons could really pound the wall, but the failure to destroy the Traktor Kannon forced me to go out wider than I wanted. 

Looking at the Scenario, the enemy aircraft should not be in reserve as by the time they show up, it is all over but the crying.  The Defender should really stock up on more ground defenses but that might not even be enough to stop a Harbinger or similarly sized enemy craft.  This scenario would be more interesting against a swarm of strike fighters and smaller bombers instead. 

Victory for the Varingyr leads them to….


…. Pitched battle scenario.  I will need to use Strike Eagles here as well.  Perhaps I will use the same board set-up as well to represent the Varingyr trying to force the wall?    

The Vox crackled to life....

"Target Breached.  Retunring to Base."

The War Council let out a cheer aboard Azuki's Helmward's flagship.  They relayed the report back down to the Clanguard on Tokokai 5's surface.  Almost immediately, Varingyr armored forces began to roll out towards the Ork positions.  Iron Eagle and other aircraft dusted off to support the attack.