

I finished painting my 6mm Diadochi armies from Baccus Miniatures and I wanted to celebrate with a game of Heirs of Empire. This was the game I built to use these armies in. It focuses specifically on the Wars of the Diadochi after Alexander's death. As an added bonus, I am going to add the rules for Heirs of Empire on the Wargame Vault so you can pick them up for yourself!
Today, we are going to look at a side show operation after the Conference at Babylon established Perdiccas as the Royal Regent.
After Perdiccas solidified his position as Regent defending Roxanne and her unborn son, he had a great deal of work formalizing and consolidating Alexander’s gains. This was no longer a campaign to push the boundaries of the empire, instead it was stabilizing the internal arrangements of the Macedonian Empire. This included regions bypassed by Alexander for various reasons. One of his first goals was to re-open the old Persian Royal Road.
Perdiccas turned his attention to a Persian Satrap that had still been loyal to the old regime. This rebel still possessed a formidable force and threatened the re-opening of the roadway. Perdiccas mustered the army and marched to overthrow the Satrap.
History does not record who this was, but we do know that Perdiccas fought two battles with his Persian foe before defeating his army in central Anatolia. We fought the first of the two battles, and the Persians barely scraped by with a victory. The mighty Silver Shields were laid low!
Now, Perdiccas has sent the Silver Shields off from his Royal Army to escort a caravan of Gold to the royal treasury. They will not be with the army as they need time to rest and recover after their defeat. This will give them time to stay out of Perdiccas' hair for a while. After all, Antigenes and his veterans were spoiled pre-Madonnas. Historically, at some point the Silver Shields were sent on such a mission and separate from the Royal Army. We know nothing of the Persian Satraps forces.
Forces
Perdiccas' Royal Army
Right Wing:
Companion Cavalry
Center:
Bronze Shields
War Elephants
Skirmishers
2 Theuropheroi
Left:
Epilektoi Cavalry
Rebel Persian Satrap
Right Wing:
Epilektoi Cavalry
2 Asphract Cavalry (Javelins)
Center:
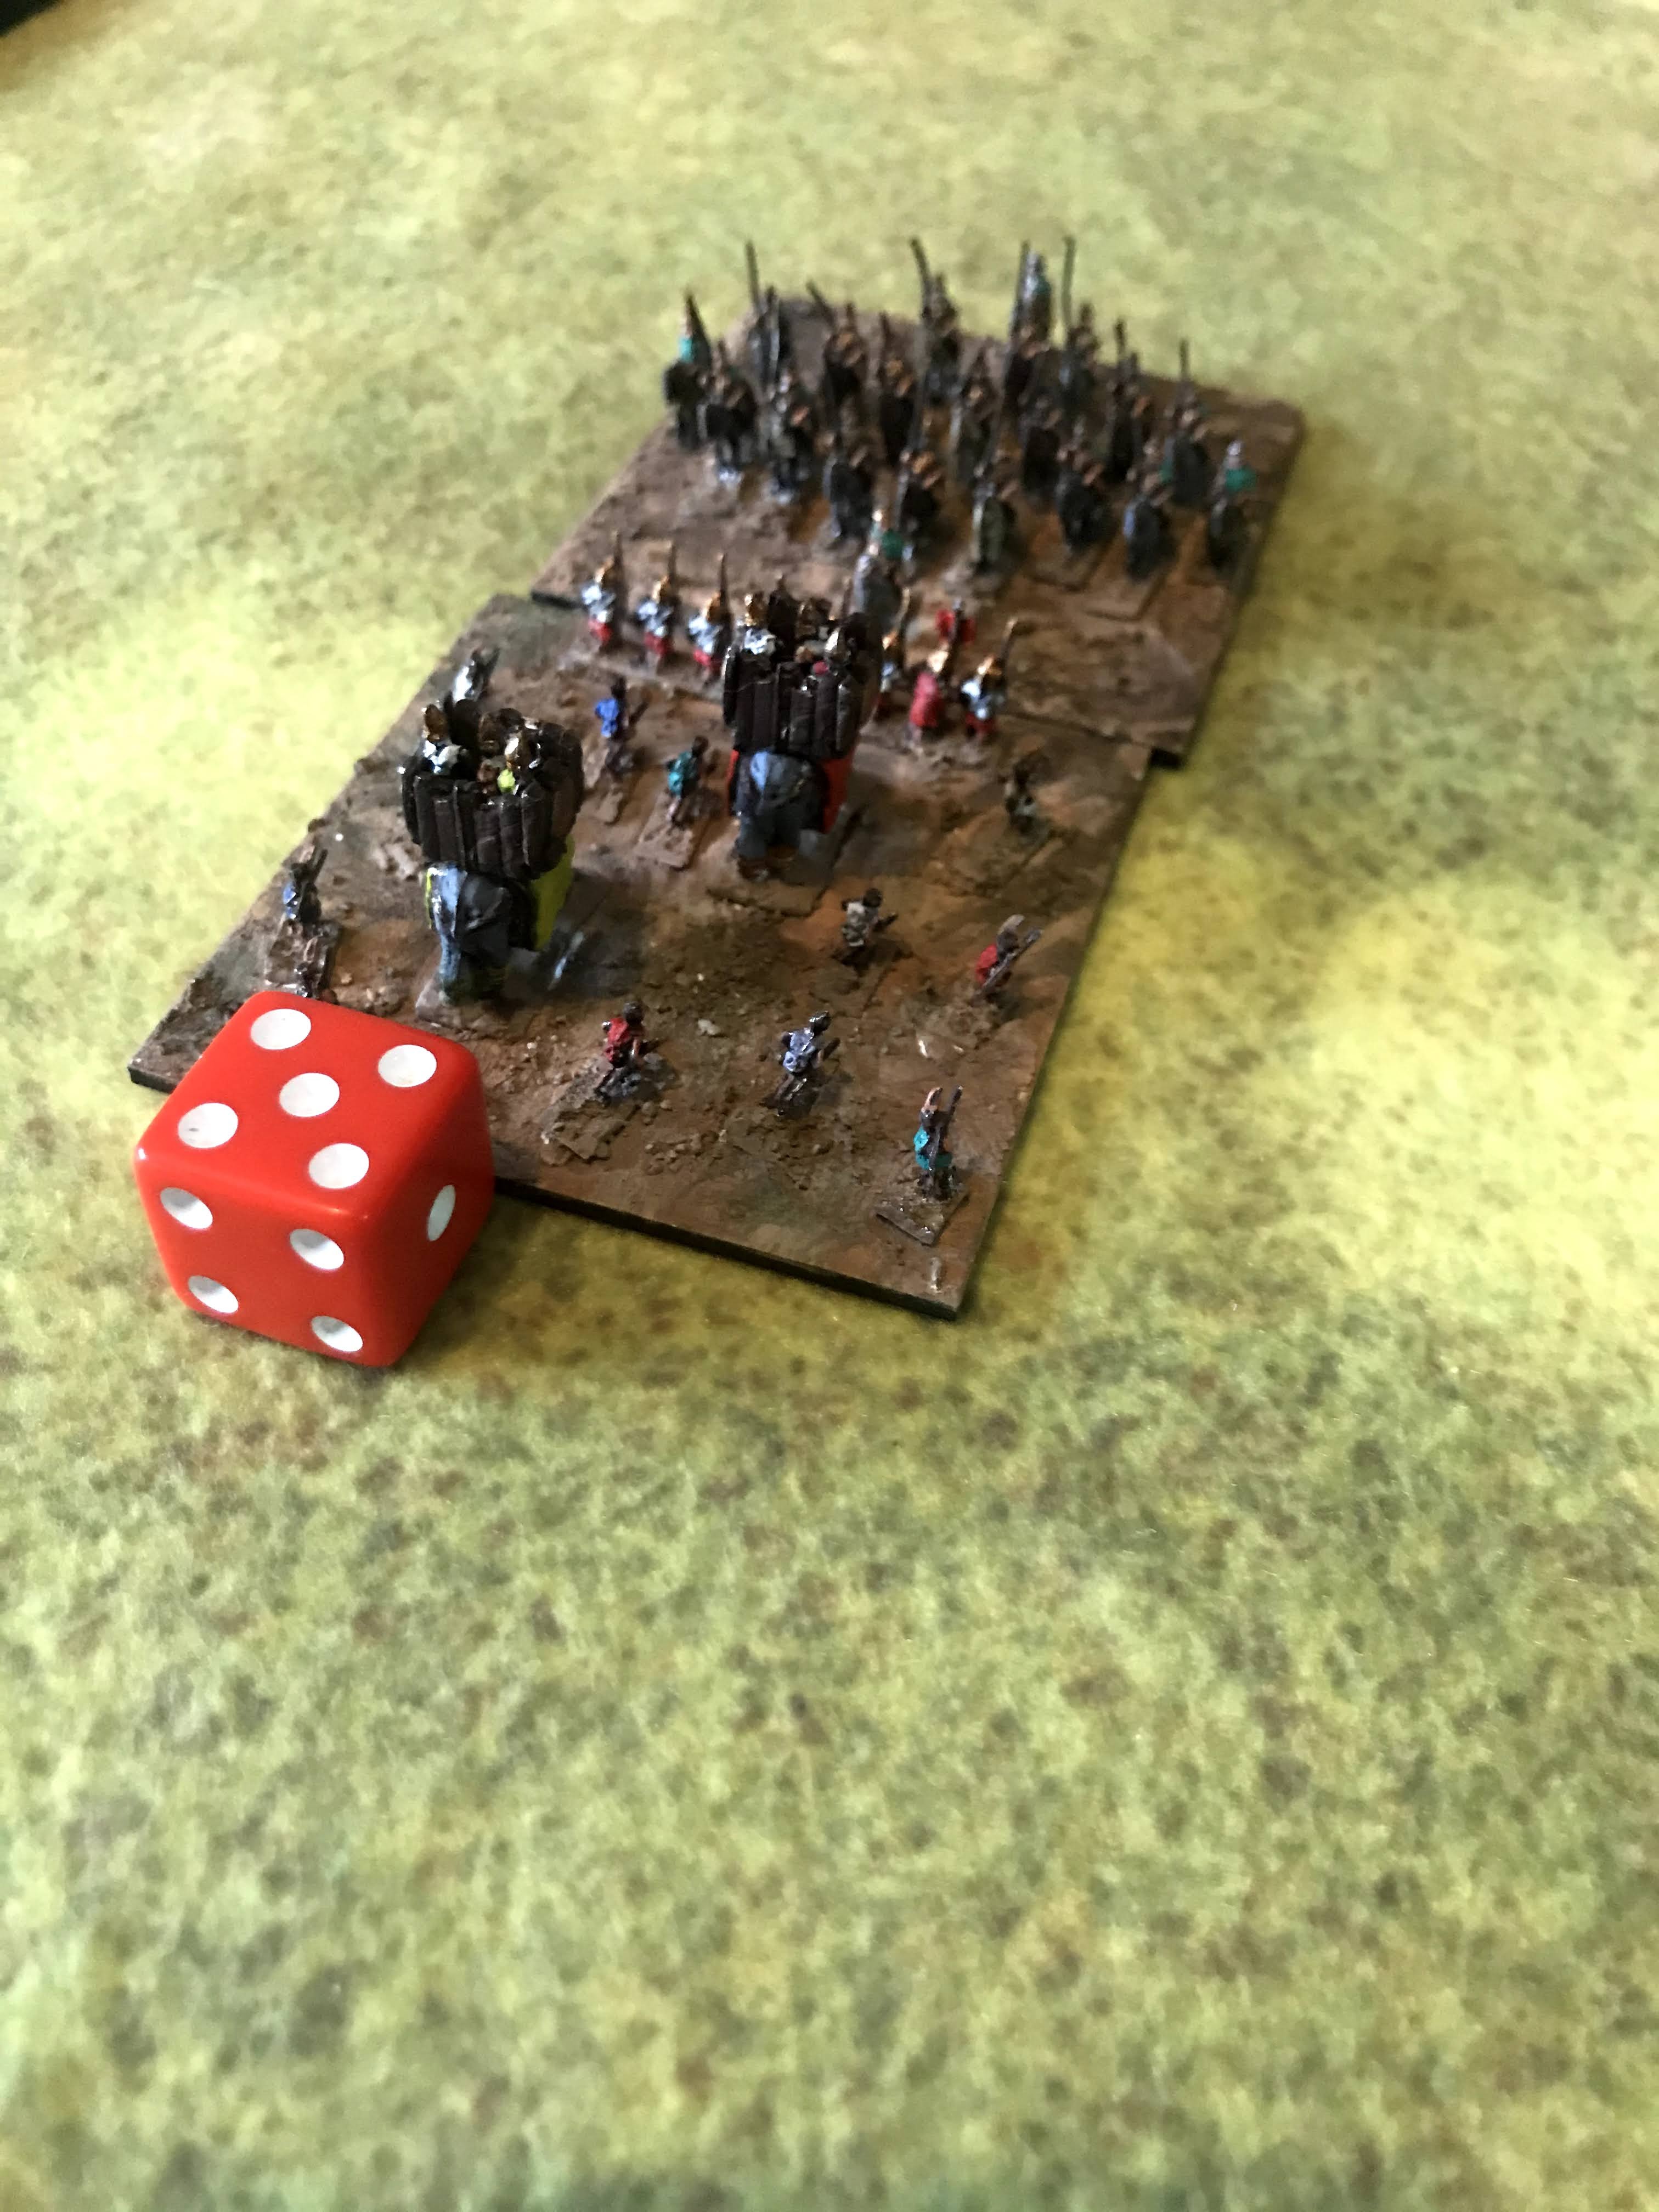
White Shields
White Shields
Skirmishers
Left Wing:
2 Skirmishers
2 Archers
Both armies made changes going into this rematch. Perdiccas ditched the Silver Shields and replaced them with War Elephants and some Skirmishers. The Persians removed the Theuropheroi and replaced them with another Archer unit and Skirmisher unit. Both of the removed units were disappoint for their respective armies last game. The Persians also changed up the composition of their Wings.
Scenario:
We randomly rolled a scenario, and got a Breakthrough instead of a Set Piece Battle. That means, Perdiccas needs to get 15+ points of troops off the opposite board edge in 8 turns to win. That could be tough as he is out numbered with a more "elite" force. However, the re-alignment of the Persian wings may give him a chance to out-maneuver the Persians with his cavalry wings.
This scenario makes sense with Perdiccas objective of opening the old Persian Royal Road, and taking the rebel Persians main city.
Set-up:
We follow the guidelines for set-up found in the Heirs of Empire rules. Today, the battle will be played on a 48MU x 48MU board. 1 MU is 1 inch.
We decide to place the Royal Road down the center of the board stretching from edge to edge. We decided movement on the road would be at +1 MU. A small cluster of buildings is along the center edge. It is an old Persian messenger station and its perimeter is difficult terrain. Along the Macedonian right we placed rugged hills. On the Persian right are some fields. They are all difficult ground. The fields and the hills may hem in and hinder the cavalry operations of both sides.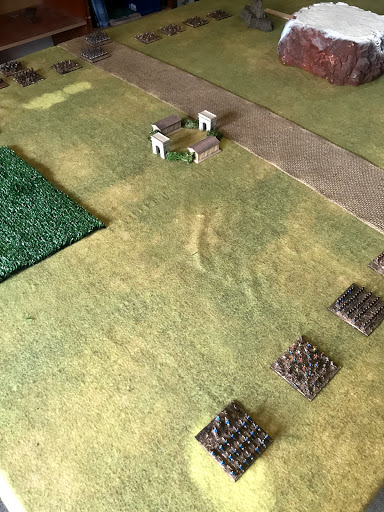
Now, Perdiccas has sent the Silver Shields off from his Royal Army to escort a caravan of Gold to the royal treasury. They will not be with the army as they need time to rest and recover after their defeat. This will give them time to stay out of Perdiccas' hair for a while. After all, Antigenes and his veterans were spoiled pre-Madonnas. Historically, at some point the Silver Shields were sent on such a mission and separate from the Royal Army. We know nothing of the Persian Satraps forces.
Forces
Perdiccas' Royal Army
Right Wing:
Companion Cavalry
Center:
Bronze Shields
War Elephants
Skirmishers
2 Theuropheroi
Left:
Epilektoi Cavalry
Rebel Persian Satrap
Right Wing:
Epilektoi Cavalry
2 Asphract Cavalry (Javelins)
Center:
White Shields
White Shields
Skirmishers
Left Wing:
2 Skirmishers
2 Archers
Both armies made changes going into this rematch. Perdiccas ditched the Silver Shields and replaced them with War Elephants and some Skirmishers. The Persians removed the Theuropheroi and replaced them with another Archer unit and Skirmisher unit. Both of the removed units were disappoint for their respective armies last game. The Persians also changed up the composition of their Wings.
Scenario:
We randomly rolled a scenario, and got a Breakthrough instead of a Set Piece Battle. That means, Perdiccas needs to get 15+ points of troops off the opposite board edge in 8 turns to win. That could be tough as he is out numbered with a more "elite" force. However, the re-alignment of the Persian wings may give him a chance to out-maneuver the Persians with his cavalry wings.
This scenario makes sense with Perdiccas objective of opening the old Persian Royal Road, and taking the rebel Persians main city.
Set-up:
We follow the guidelines for set-up found in the Heirs of Empire rules. Today, the battle will be played on a 48MU x 48MU board. 1 MU is 1 inch.
We decide to place the Royal Road down the center of the board stretching from edge to edge. We decided movement on the road would be at +1 MU. A small cluster of buildings is along the center edge. It is an old Persian messenger station and its perimeter is difficult terrain. Along the Macedonian right we placed rugged hills. On the Persian right are some fields. They are all difficult ground. The fields and the hills may hem in and hinder the cavalry operations of both sides.

The Persians have their Cavalry wing cover the gap between the fields and the villas. The Center confidently moves up the road. The Persian left is the weakest, as it is covered by the Skirmishers and Archers. However, the depth of their formation will make it hard to break through there. Their flank is anchored by the cliffs. A formidable position.

The Macedonians are the Companion cavalry across from the skirmishers and archers, the center is across the road and approaching the buildings. The Epilektoi are close to the left wing and ready to move up between the fields and messenger station. 

Turn 1:
Both sides roll up Commander's Gaze for their armies. The Persian rebels do not roll very well, and end up with about 5 Gaze. Meanwhile, Perdiccas gets the best possible roll with 10 Gaze. He easily bids 6 to the Persian 2.
Perdiccas' army moves out. Everyone moves forward. The Companion Cavalry stays with the battle line. The Left Wing Epilektoi moves to the edge of the plains and pivots. However, they seem content to not stray too far ahead. The Persians do not try to interrupt. On their turn, they also move out across the line and move towards the center of the board. The idea is to narrow the field of battle and pin the Macedonians away from the edge of the board.

Turn 2:
Again Perdicccas' gets a perfect Commander's Gaze roll, while the Persians are lack luster. This time, the Persians do no bother to bid any Gaze, as they may want to use their limited number. Perdiccas bid 6, to shut the Persians out of going first.
The Royal army moves forward again. This time, the Elephants and Light Infantry make for the left side of the villas, while the Skirmishers cross behind and get ready to enter the compound. The Macedonians remember how hard it was to dislodge the Persians from the Oasis last time they met. The Epilektoi Cavalry waits and falls in behind the Elephants. The Phalanx continues up the road, with the Light Infantry and Companions with Perdiccas covering their flank. The Persians again do not interrupt.
The center White Shields boldly move up the road, supported by a unit of skirmishers. The Skirmishers get to the edge of the Post-Station and toss their javelins and rocks at the Royal Skirmishers, but are just out of range. On the Persian Left, the skirmishers eagerly rush forward and also throw some Javelins, but are far short. The Archers stay back and let the Skirmishers screen them.

On the Persian right, the Javelin armed Asphracts close the gap and pepper the Perdiccan Theurophoroi with Javelins, causing them to lose 3 Courage, but they do not waver. The Persian Commander holds back with the Heavy Cavalry and waits for a potential enemy break through.

Turn 3:
This time, the Commander's Gaze rolls are not so lopsided. Perdiccas gets 6 to the Persians 5. The Persians have a tough decision, use Gaze to try and go first, or save it for Evades and interrupts? Perdiccas needs his for charges. Perdiccas ends up bidding two to the Persians 0.
On Perdiccas's right, the peppered Thuerephoroi decide to try to charge into the Persian light horse. The Persians try to Evade, but are just barely caught by the Light Infantry thanks to a Pursue. Both sides take a beating, but the Asphracts lose 2 Courage compared to the Infantry's 1. The Asphracts also begin to Waver. The melee is pushed back towards the Persians 2 MU.
The unengaged Persian Cavalry goes into Open Order and falls back to act as a buffer for any break throughs. Then, the Asprachts and Theurophoroi on the left annihilate each other and rout. The Skirmishers and the Bronze Shields keep fighting in the Villas.
Meanwhile, Persian Skirmishers on the Persian left charge into the Perdiccan Light Infantry and Companions respectively. It goes bad for the Persians with the Light Infantry annihilating the Skrimishers, but losing 2 courage, and the Companions doing the same but only losing 1 Courage. That may have been a bad idea! 

With Persian Momentum spent, the Royalists took over. With the timely charge of the Perdiccans Skirmishers into the Post Office, the Persian skirmishers were decisively pushed out of hte area, and reduced to 1 Courage and wavering. Once out of the buildings, a flank charge by the Epilektoi sent the Persians reeling into rout!

The War Elephants made for the Persian bulwark to break through. However, the troops with the Elephants started to Waver after seeing their fellow light infantry get routed.
On the Persian side, the fleeing Skirmishers caused the lead White Shields to start to waver. The Archers also decided to Collapse. This left the Persian Left completely open! That Skirmisher charge WAS a bad idea!
Turn 4:
Well, the tables turned pretty quickly with some ill-conceived offensive on the Persians part! They were trying to tar pit the enemy units, but they simply obliterated the Skirmishers and caused a collapse of the Persian left flank! The Persian losses limited their Commander's Gaze to 6 total spread across the two wings, while the Macedonians had 9 spread across three wings. The Persians bid 2, and the Perdiccans 3.
With the left flank gone, Perdiccas immediately rode hard to get past the Persian army and into the gates of the city beyond. The Persians try to seize the initiative, and do so successfully.

The Persian Cavalry re-formed and the Javelin Asphracts attempt to chase down the Companions. However, without any Commander's Gaze remaining, they can not charge to catch up or attack with their Javelins. With that, the Perdiccans re-gain the initiative with a Commander's Gaze.
The War Elephants charged into the Persian Satrap and his bodyguards. The horses were not pleased to be so near such smelly, big animals. However, the Persian line held, only losing one courage and being pushed back 1 inch. Now, one of their best chances at stopping the Perdiccans was tied up in combat.
The Light Infantry on the Perdiccan right moved up towards the road and tossed their Javelins at the wavering White Shields, causing them to lose another Courage. The White Shields used a Commander's Gaze to remove their wavering status.
The Perdiccan Epilektoi pivoted and made for the enemy city, following the lead of their Commander with his Companion Cavalry. Finally, the wavering Perdiccan Skirmishers rallied.
Things look bad for the Persians this time. 

Turn 5:
This time, the Persians rolled up 5 Gaze to the Perdiccan 6. The Perdiccans bid all 6 to go first, the Persians bid 0. They opt to hold it for interrupts and re-rolls.
Perdiccas and his Companion Cavalry successfully ride off the board edge and towards the Persian city gates. They have Broken through, but it isn't enough to win yet. The Persians attempt to interrupt, and succeed. 

The Persian light horseman go into Open Order, turn around, and charge into the Perdiccan Epilektoi, using up all of their Commander's Gaze. It is a flank charge. The clash dissolves into a swirling melee, but the heavy cavalry clearly have the upper hand over the Javelin wielders. The Asphracts have 1 Courage left and are wavering, to the Epilekoti's 3 Courage.

The Persian White Shields charge into a Perdiccan Thuerophoroi with a desperate battle cry. The fighting on the roadway's edge is fierce, and the White Shields lose 1 Courage and begin to waver. However, the Light Infantry decides to break and flee, their Courage spent.
The War Elephants and Epilektoi bodyguards keep hacking at each other, The Elephants keep wavering and are pushed back with the loss of 2 courage. However, the Persians also lose 1 Courage.
In the End Phase, the Perdiccan Light Infantry flees. The Bronze Shields and Skirmishers see it, but do not waver. All the Macedonian Royalist pass Collapse tests.

Turn 6:
This time, the Persians have more Commander's gaze with 7 total. The Perdiccans have 5. Persians bid 0, while the Perdiccans bid 1.
The Macedonians start with the Cavalry fight. This time, it is one sided as the Thessalian Epilektoi annihilate the Asphracts. The Persians try to seize the initiative and fail.
The War Elephants push back and manage to surge into the Persian horseman, reducing them 1 Courage. However, they do not Waver! However, the effort costs the War Elephants a Courage as well.
The Perdiccan Skirmishers emerge from behind the Post-Office and toss their Javelins to reduce the White Shields a further Courage. they fail their Morale test, and since they were all ready Wavering. They break and flee. 

The Bronze Shields hold position in the buildings. However, the last White Shields is not content to let them hold Persian ground. They charge in an try to dig them out. Thanks to re-rolls both units lose a point of Courage in hard fighting.

In the End Phase, the first White Shields unit flees. The remaining Persians pass their Collapse tests.
Turn 7:
The Persians have the most Gaze, but even going first there is no way to stop the Perdiccan Epilektoi from leaving the board and breaking through. The Perdiccans bid all of their Gaze with 2, and the Persians bid 3.
The Persian Satrap and his bodyguards reduce the War Elephants to 1 Courage, but can't break them. However, they avoid losing any further Courage and do not rout!
In the center, the Phalanxes keep pushing on each other. Both sides lose a point of Courage, but do not Waver. The Skirmishers join in and cause the White Shields to be pushed back from the buildings. The tide is turning against the Persians there as well.

Finally, the Thessalian Epilektoi of Perdiccas' Royal Army just barely prances off the board towards the Persian satrap's city gates.
Conclusion
Decisive Perdiccan win! In the history books, it took Perdiccas two battles to best the rebel Persian Satraps along the Persian Royal Road. The same happened here as the Persians won the first battle, but Perdiccas returned and decisively beat the Rebels. The losses were pretty lop-sided in this battle, 2 Macedonian Light Infantry to most of the Persian army. Ouch!
It is pretty obvious that I got too aggressive at the end of Turn 3. The intent was to bog down the heavier and quicker Perdiccan troops into a tarpit of Skirmishers, that would delay the Macedonians long enough to keep them from being able to clear the board edge. That was a huge mistake as the Skirmishers were quickly blown away and the Archers fled. It would have been much better to keep them as a force in being and a threat. Instead, I handed them to the Macedonians on a silver platter. Woops!
The War Elephants were tough to crack and just stuck around. That tied up my reserves. They were a good addition to the Perdiccan army. The Skirmishers are also tough to weed out of difficult terrain, as it should be. Missile fire was again surprisingly effective in weakening enemy units. Finally, the reduced charge ranges of +3 MU helped make Evade and Pursue useful skills again. Overall, a fun game despite me blowing it.
Perdiccas cavalry unit was able to storm the gates of the rebel Satrap's city while his Royal Army mopped up the rest of the Persian army. To the Persian troops, Perdiccas was merciful and allowed those useful to him to join his own army. However, he was less than merciful to the Satrap. His family was ritually tortured, as was the Satrap himself. The cruel treatment was custom for the region, but Perdiccas' fellow Diadochi marked it out as a sign of Perdiccas' cruelty and "easternization". It sowed the seeds for the coming break-up of the Diadochi as each decided to try and grab Alexander's Empire for themselves.
That was in the future. For now, the Royal Road had been re-opened. Travel across Asia Minor had been restored. Perdiccas and the Royal Army had been victorious. Now, the elaborate funeral procession for Alexander could begin.

You can follow Blood and Spectacles Facebook page for more fun: https://m.facebook.com/pg/BloodandSpectacles/posts/?ref=bookmarks&mt_nav=0
Or our website:
Or our Messageboard:
Or our Wargames Vault Page:
No comments:
Post a Comment