Monday, February 20, 2023

Wargame Design: Castles in the Sky- New Ship Types!


As many of you know, when I was writing Castles in the Sky there was a strict word count for the book.  However, I wrote so much content that I had to go back and remove some of it from the book.  Even with my edits, the final book is still larger than any of the other Osprey Wargaming Series books!  Instead of the normal 64 pages, it is 80 pages of content!  

To make the rules fit to the new expanded size, I still had to cut out some rules and other details that I wanted to keep in.  The biggest space eater, was the ship templates.  Therefore, I had to remove a lot of ships.  Therefore, each fleet was left with only 1 Battleship, a cruiser of two, and 1 or two escorts.  All nationalities lost at least a single ship to make space.  I want to make these ships available to the community here on the blog! 


First off, here are the rules I had originally intended for the Regional Powers that are not represented in the book:

Regional Powers

Besides the Great Powers, there are a number of other countries attempting to gain regional power through the use of an Air Navy.  South America is especially rife with these types of regional politics.  However, they are not the only place.  The countries bordering the Baltic Sea have a similar regional competition politically, economically, and militarily. 

Most of these countries lack the industrial base to build Air Warships on their own.  Instead, they tend to form alliances or sign building contracts with one of the Great Powers.  This power tends to act as their “patron” on the world stage.  This patronage allows these lesser powers to improve their own military forces with secondary units and designs from their Patron powers.  The United States and Britain are exceptions to this process as they are willing to sell Air Ships to anyone with the right coin.   

These Regional Powers tend to have one “fleet” of Air Ships that consists of a few cruisers and escorts.  They can not field larger forces and it takes great national effort to field the Air Ships they have.  Some try to emulate their patron’s doctrine’s and organization, others adhere to the Mahan school, while others follow the Jeune Ecole approach to Air Warfare.  No matter the doctrine, there are few formal academies and actual hands-on training is rare compared to the Great Powers.  There simply is not money in the budget to fly the fleet on a regular basis. 

Officers tend to come from families with commercial interests in knowledge of Airships.  The crews are the left-over conscripts that the local armies do not want.  Therefore, command ability can vary wildly and crew skill is low at best. 

These regional forces do not intend to compete with the Great Powers, except in desperation.  However, the can be effective against local nations with limited access to Air Power.  Such a fleet can make the difference between victory and defeat.  Hence, all nations that aspire to greatness must try to build an Air Fleet of their own.   

Lesser Powers include regional powerhouses like Chile, Argentina, Brazil, Greece, China, Sweden, Spain, Portugal, Denmark, Belgium, and similar countries.  Most have a single Patron that provides the bulk of their forces, with a few airship supplements from the United States or Britain.     

Determining Command Dice

Regional Power
Roll a d6 for each ship:
1-2= Command of 1
3-5= Command of 2
6 Command of 3

Line-of-Battle

Choose a patron Great Power for the Regional Power.  They can choose Armored Cruisers, Cruisers, Light Cruisers, and Escorts from this list.  In addition, they may add 1 United States or British Cruiser for every 2 Cruisers from their Patron.  For every 3 escorts taken, 1 may be taken from either the United States or Britain.

For Example, Argentina has Britain as a Patron Great Power.  Therefore, they choose to take a Minotaur class armored cruiser, Active class Light Cruiser, and 3 Shah class frigates.  Assuming they still have Operational Value left, they can then choose 1 United States Cruiser and 1 United States Escort.  In this case, they choose Denver class and a Smith class to round out their fleet.  

Brigade Models British aeronef take on Prussians from Spartan Games Dystopian Wars range

 British Empire

The following are additional warships for the British Navy.  They follow the normal rules for generating Command found in the main Castles in the Sky rulebook.

Class: King George V   
Category: Battleship  
Armor: 9
Speed: 2- 6                    
Altitude: 7                      
Turns: 1/45      
Lift: 1
Armament:                     Firepower:    Power:      Fire Arc:        Ammo:
Heavy Battery                -/5/3/1          +4/+2/+1   Bow/Port/              4+
                                                                              Starboard
Heavy Battery                -/5/3/1         +4/+2/+1   Stern/Port              4+
                                                                             Starboard
Light Battery                  -/4/3/1         -/-/-           Bow/Port/              5+
                                                                             Starboard
Light Battery                  -/3/2/1         -/-/-           Stern/Port              5+
                                                                            Starboard             
Point Defense                4/-/-/-          -/-/-             All                       -
Operational Cost: 11
 
 
Class: Lion       
Category: Cruiser (Battle Cruiser)       
Armor: 8
Speed: 2- 8                    
Altitude: 8                      
Turns: 1/45      
Lift: 1
Armament:                     Firepower:      Power:        Fire Arc:       Ammo:
Heavy Battery                -/6/4/2            +3/+2/+1     Bow/Port/              4+
                                                                                  Starboard
Heavy Battery                -/6/4/2            +3/+2/+1     Stern/Port              4+
                                                                                  Starboard
Light Battery                  -/3/1/-            +1/-/-           Bow/Port/              5+
                                                                                 Starboard
Point Defense                2/-/-/-              -/-/-              All                       -
Operational Cost: 6
 
 
Class: Invincible
Category: Cruiser (Battle Cruiser)       
Armor: 7
Speed: 2- 8                    
Altitude: 8                      
Turns: 1/45      
Lift: 1
Armament:                     Firepower:      Power:     Fire Arc:     Ammo:
Heavy Battery                -/5/3/1           +3/+2/+1   Bow/Port/              4+
                                                                               Starboard
Heavy Battery               -/5/3/1           +3/+2/+1    Stern/Port              4+
                                                                               Starboard
Light Battery                  -/4/2/-            +1/-/-        Bow/Port/              5+
                                                                              Starboard           
Point Defense                2/-/-/-             -/-/-           All
Operational Cost: 5

French Republic

The following are additional warships for the L’Aire Nationale.  They follow the normal rules for generating Command found in the main Castles in the Sky rulebook.
 
Class: Charlemagne
Category: Battleship (Heavy Cruiser) 
Armor: 8
Speed: 2- 5                    
Altitude: 7                      
Turns: 1/45      
Lift: 1
Armament:                     Firepower:      Power:    Fire Arc:       Ammo:
Heavy Battery                -/7/5/3            +4/+3/+2  Bow/Port/              4+
                                                                               Starboard
Heavy Battery                -/7/5/3            +4/+3/+2  Stern/Port              4+
                                                                               Starboard
Light Battery                  -/3/1/-             +1/-/-       Bow                    5+
                                                                                                                  
Light Battery                  -/3/1/-             +1/-/-       Starboard              5+
                                                                                                                               
Light Battery                  -/3/1/-             +1/-/-       Port                    5+
 
Light battery                  -/3/1/-            +1/-/-         Stern                  5+         
 
Point Defense                3/-/-/-               -/-/-         All
Air Torpedo                    4 (Speed 18)  +3            Bow
Operational Cost: 6

German Empire

The following are additional warships for the German Navy.  They follow the normal rules for generating Command found in the main Castles in the Sky rulebook.
 
Class: Kaiser
Category: Battleship  
Armor: 9
Speed: 2- 6                    
Altitude: 7                      
Turns: 1/45      
Lift: 1
Armament:                     Firepower:   Power:      Fire Arc:        Ammo:
Heavy Battery                -/5/3/1          +4/+3/+2  Bow/Port/              3+
                                                                             Starboard
Heavy Battery                -/5/3/1          +4/+3/+2  Stern/Port              3+
                                                                             Starboard
Light Battery                  -/3/1/-          +1/-/-        Bow/Port/              4+
                                                                            Starboard
Light Battery                  -/3/1/-          +1/-/-       Stern/Port              4+
                                                                            Starboard             
Point Defense                2/-/-/-            -/-/-          All
Air Torpedo                    1 (Speed 18) +3          Bow
Air Torpedo                    1 (Speed 18) +3          Port/Starboard
Operational Cost: 11
 
 
Class: Helgoland
Category: Battleship  
Armor: 9
Speed: 2- 5                    
Altitude: 7                      
Turns: 1/45      
Lift: 1
Armament:                     Firepower:   Power:     Fire Arc:        Ammo:
Heavy Battery                -/7/5/3          +3/+2/+1 Bow/Port/              3+
                                                                            Starboard
Heavy Battery                -/7/5/3          +3/+2/+1 Stern/Port              3+
                                                                            Starboard
Light Battery                  -/3/1/-          +1/-/-       Bow/Port/              4+
                                                                           Starboard
Light Battery                  -/3/1/-         +1/-/-       Stern/Port              4+
                                                                          Starboard             
Point Defense                2/-/-/-           -/-/-         All
Air Torpedo                    1 (Speed 18) +3         Bow
Air Torpedo                    2 (Speed 18) +3         Port/Starboard
Operational Cost: 11
 
Class: Konig
Category: Battleship  
Armor: 9
Speed: 2- 5                    
Altitude: 7                      
Turns: 1/45      
Lift: 1
Armament:                     Firepower:     Power:     Fire Arc:        Ammo:
Heavy Battery                -/5/3/1            +3/+2/+1 Bow/Port/              3+
                                                                              Starboard
Heavy Battery                -/5/3/1           +3/+2/+1  Stern/Port              3+
                                                                              Starboard
Medium Battery           -/3/2/1            +2/+1/-      Bow/Port/              4+
                                                                              Starboard
Medium Battery           -/3/2/1            +2/+1/-      Stern/Port              4+
                                                                              Starboard             
Point Defense                2/-/-/-             -/-/-           All
Air Torpedo                    1 (Speed 18) +3             Bow
Air Torpedo                    2 (Speed 18) +3             Port/Starboard
Operational Cost: 11
 
Class: Deutschland
Category: Battleship (Heavy Cruiser) 
Armor: 8
Speed: 2- 5                    
Altitude: 7                      
Turns: 1/45      
Lift: 1
Armament:                     Firepower:    Power:      Fire Arc:        Ammo:
Heavy Battery                -/4/3/1           +3/+2/+1  Bow/Port/              3+
                                                                              Starboard
Heavy Battery                -/4/3/1           +3/+2/+1  Stern/Port            3+
                                                                              Starboard
Medium Battery           -/4/2/-              +2/+1/-    Bow/Port/              4+
                                                                             Starboard
Medium Battery           -/4/2/-              +2/+1/-   Stern/Port              4+
                                                                            Starboard             
Light Battery                  -/3/1/-           +1/-/-      Bow/Port/              4+
                                                                            Starboard
Light Battery                  -/3/1/-          +1/-/-       Stern/Port              4+
                                                                            Starboard             
Point Defense                2/-/-/-            -/-/-          All
Operational Cost: 6 

Class: Seydlitz
Category: Cruiser (Battle Cruiser)       
Armor: 8
Speed: 2- 6                    
Altitude: 8                      
Turns: 1/90      
Lift: 1
Armament:                     Firepower:   Power:     Fire Arc:        Ammo:
Heavy Battery                -/5/3/1         +2/+2/+1  Bow/Port/              3+
                                                                            Starboard
Heavy Battery                -/5/3/1         +2/+2/+1  Stern/Port              3+
                                                                            Starboard
Light Battery                  -/4/2/-         -/-/-           Bow/Port              4+
                                                                            Starboard
Point Defense                2/-/-/-           -/-/-           All
Air Torpedo                    1 (Speed 18) +3           Bow
Air Torpedo                    2 (Speed 18) +3           Port/Starboard
Operational Cost: 7
 
 
Class: Kolberg
Category: Cruiser (Light Cruiser)         
Armor: 7
Speed: 2- 10                  
Altitude: 9                      
Turns: 2/45      
Lift: 2
Armament:                     Firepower:    Power:   Fire Arc:        Ammo:
Medium Battery           -/2/1/-             +2/+1/-   Bow/Port/              3+
                                                                           Starboard
Medium Battery           -/2/1/-`            +2/+1/-  Stern/Port              3+
                                                                           Starboard
                                                                                                                                 
Point Defense                6/-/-/-             -/-/-        All
Bombs                              4 (Speed 6)  +1         Stern
Operational Cost: 4


There are new ships for all the Great Powers.  However, for the sake of space, I will leave it at the first three Nationalities for now.  In a few weeks I will have more ships to add for the Russian Empire, Kingdom of Italy, and The Dual Monarchy and more.  

To sign off, I want to provide access to a couple last resources that maybe useful to you in your games: 

Quick Reference Sheet
https://app.box.com/s/5smrkaa313mgwu8ypzp9qw56oxhohwgo

Ship Templates

Record Sheets

The Tokens, Templates, and Sheets were made by Robert Kurcina from the Delta Vector Google Group.  Thanks to his help, Castles in the Sky was made possible in the first place!

These resources should help you out with your games as you go forward.  Good hunting!  Let me know if you have any questions.  


Become a Patron and get access to all the cool stuff, a peak behind the curtain of Blood and Spectacles, and early-access to playtest games!  


You can follow Blood and Spectacles Facebook page or Instagram for more fun! 

Check out the latest publications and contact me at our Blood and Spectacles website

Or purchase all out games at the Blood and Spectacles Publishing Wargames Vault Page!

Monday, February 13, 2023

Review: Xenos Rampant- Osprey Games


The long awaited book by Daniel Mersey and Richard Cowen has finally come out.  The latest in something referred to as the "Rampant Series" which is a series of games all using the same basic rules as found in the original Lion Rampant. This one takes the action all the way into the not-so and oh-so distant future.  As such, it has two of my favorite elements in a wargame.... model agnostic and base agnostic!  I am so here for this!   


Some of the Rampant series of books


Osprey must have been pretty confident that they had a winner on their hands, as they skipped straight to hard cover with this one.  Unlike the tight, original Rampant sets of rules in their nice 64 page blue book styles, this one is an indulgent 192 pages!  

I am interested to see where this one mimics the Rampant series, and where it treads new ground.  I probably won't go over the entire Rampant system here, but instead cover some of the key changes or updates made for this book from the core rules.  If you are interested in the base rules, you can find that in my  Lion Rampant review.  

So, power up the main hyper drive, set your phasors to maximum carnage, and get ready to blast off into the stars!!!!!!!!!


Things I Liked

Did I mention this game is scale and base agnostic?  Oh, well..... IT IS!  Armies are typically between 30-50 models and are referred to as detachments.  There are some limits on tanks, making this a Unit vs. Unit skirmish style game.  The game uses the Strength Point system found in Dragon Rampant so you can have single model and reduced model sized units.  Typically, a unit is worth 5, 10, or 15 strength points.  

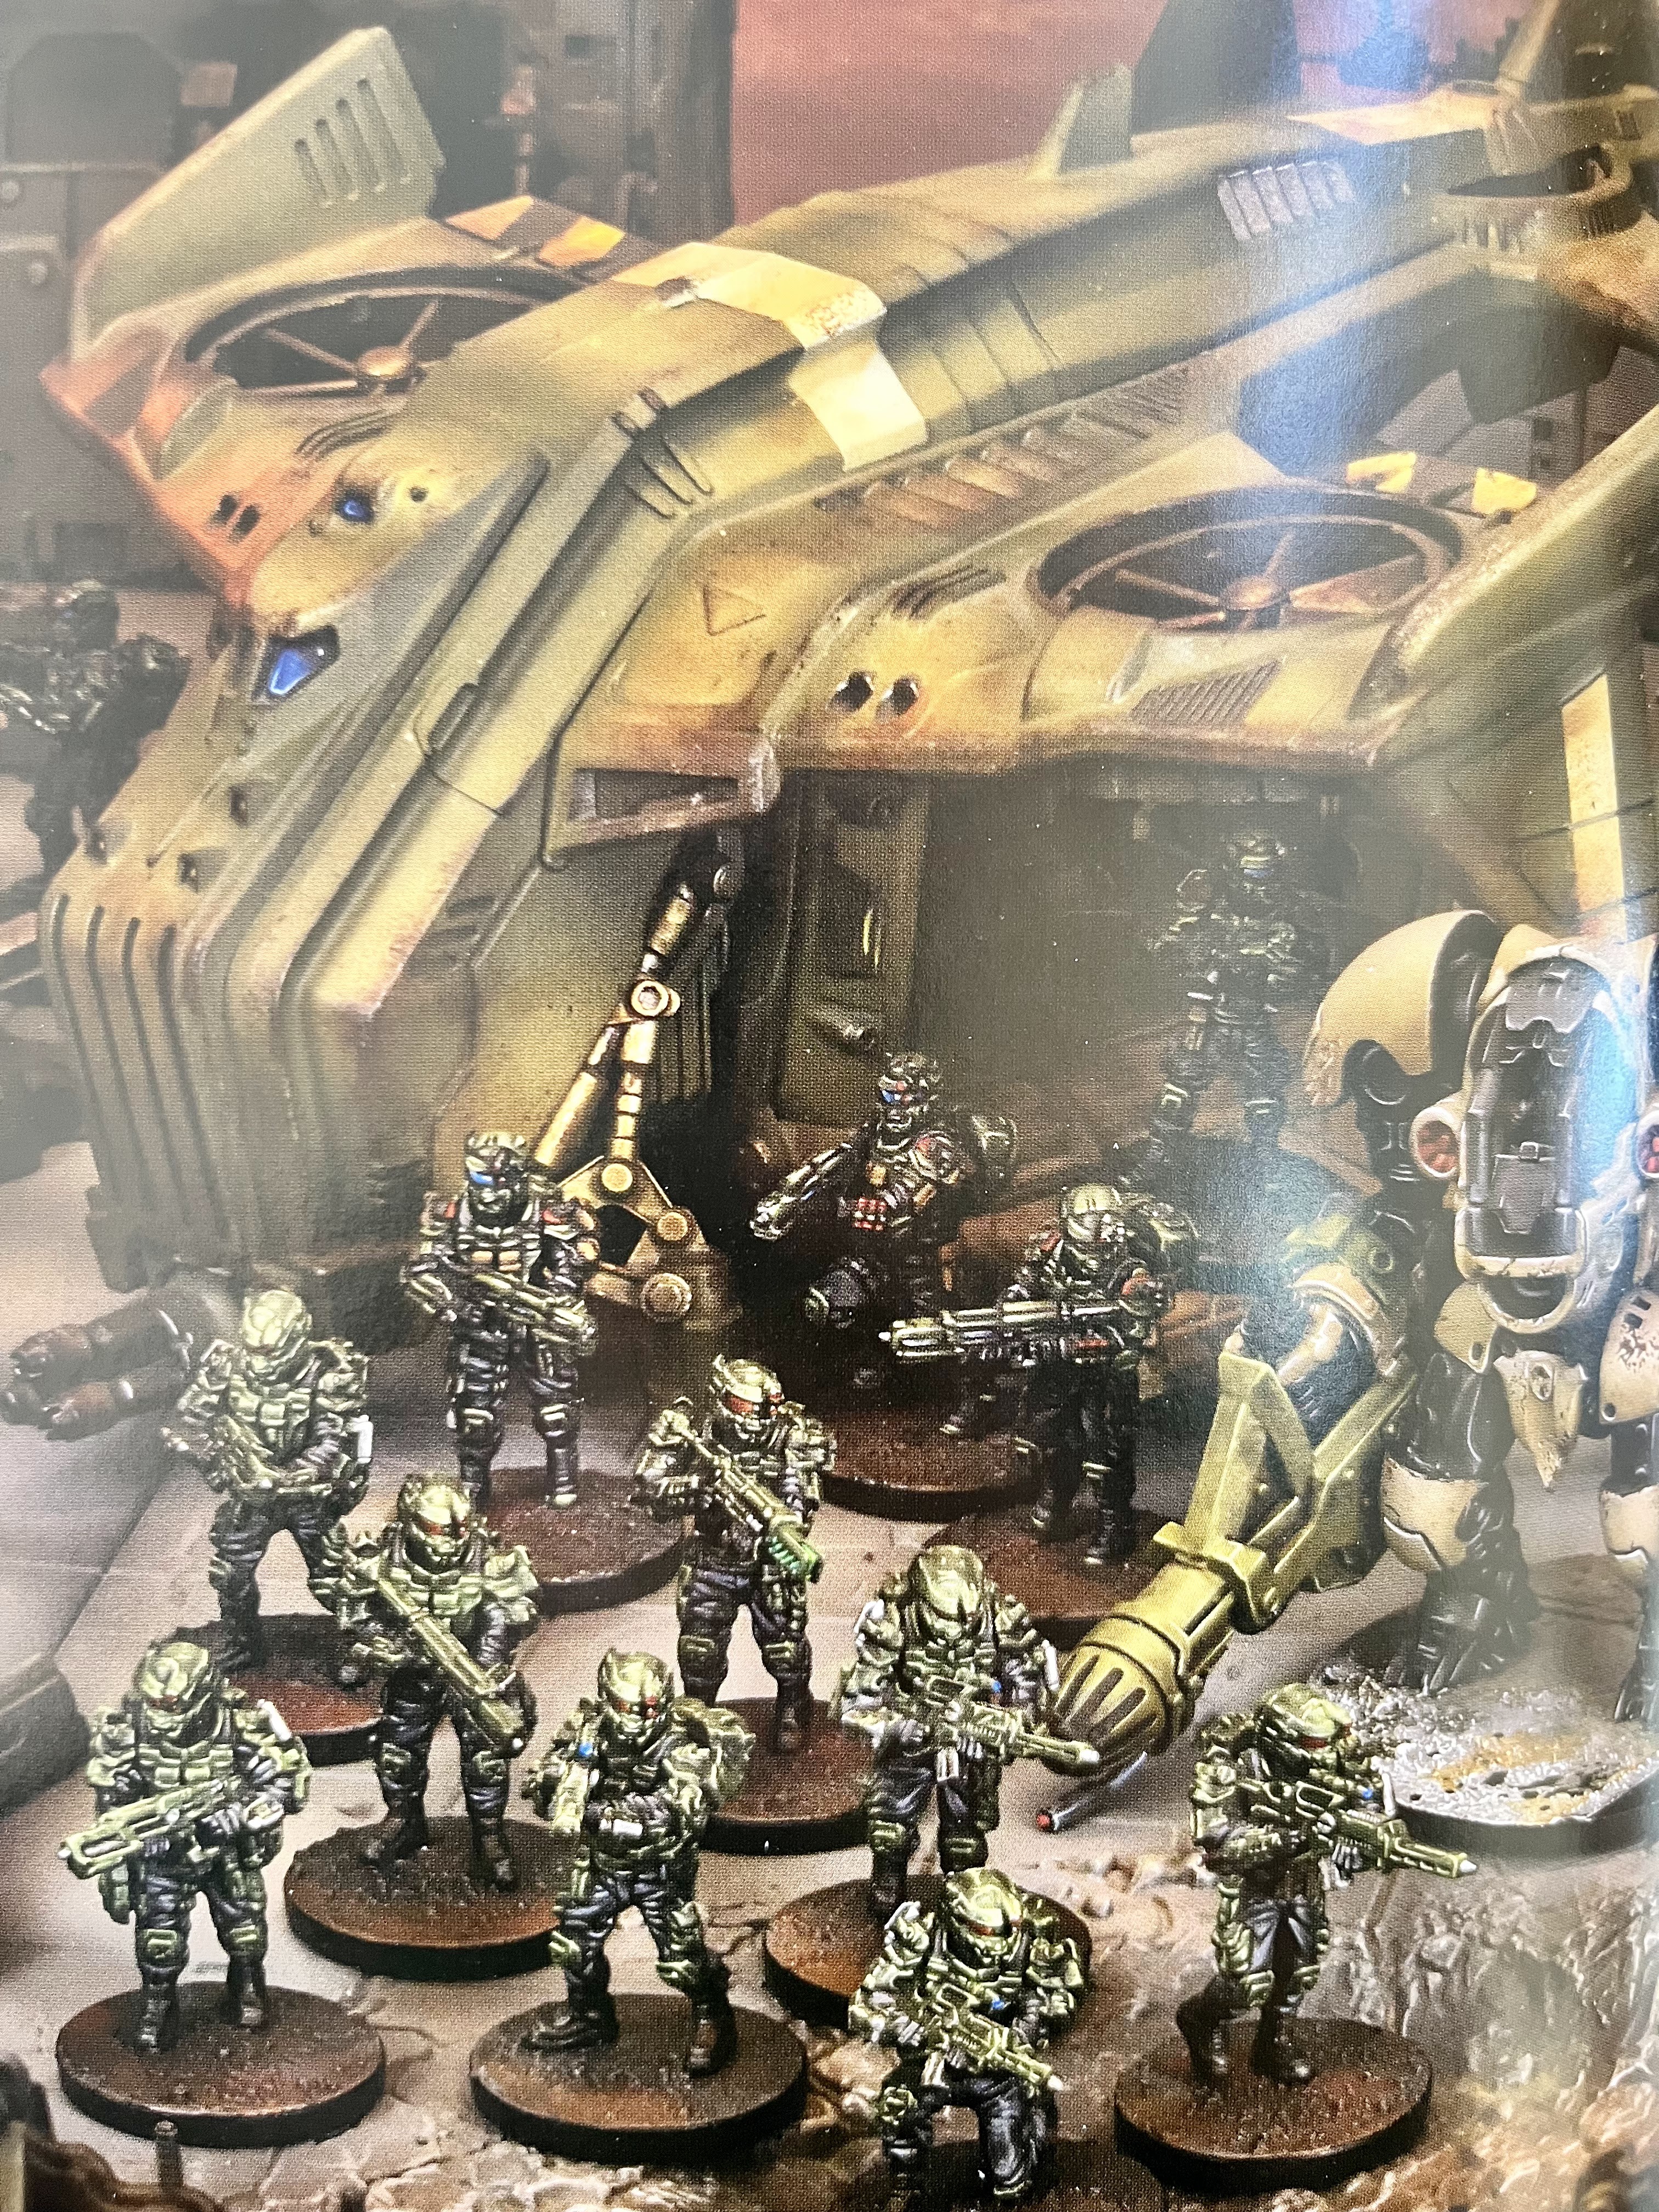
This book is filled with lovely painted minis, and they sourced them from a variety of manufacturers.  Nice to see Osprey spread the love around in this book! The non-mini artwork is pretty fun too.  I have a feeling they commissioned all new art for this one. 

A hallmark of Rampant games is to take a potentially dizzying array of units and condense them down into some basic themes.  They do that here as well, with a variety of infantry units to choose from, some very broad alien types, and basic vehicle types as well.  Each have slightly different profiles and access to abilities.  However, there is also a section where you can add additional unit by unit Xenos Rules to help make your units less "generic" and give them some flavor for a specific feel to them.  These two approaches allow maximum flexibility to make the type of units you want. 

One of the most controversial rules in the Rampant series is the "activation roll" you need to take to activate a unit.  Failure rotates play to the other player.  They handle it in this game by giving units a preferred action or Free action.  The unit can take this action without an activation roll, therefore you can always "do something" if you do not want to risk an activation roll.  However, if you want to act and the Free Action is not useful, too bad; you make an activation test.  This adds "friction" to the game and forces choice.  In addition, they have added "Reactions" that some units can trigger when they are attacked.  This allows for a lot more give and take in the system than previously existed.  Finally, they added a really nice looking "Order of Operations" flow chart for activation.  

One of the Optional rules in the Near Future section of the book includes a Fog of War mechanic that I like.  I would want to incorporate the general idea into more of the rules with thematically appropriate list of random events.   


Things I Did Not Like

They are still using the "random trait" schtick for a player's commander.  I would prefer if they just had a points cost and you could pick.  Especially since you can get traits that do not apply to your commander, or are really not fun.  However, this does add a certain "friction" to the game and allows for the RPG-lite on the table top. 

There are two things that make this a bigger book than the normal Rampant "Blue Book".  The first is that the rules themselves are written in a less concise, more Rick Priestley, and English Gentleman style than the Rampant books.  They were a clinic in less is more, where this is a bit more "homespun".  

The second reason is that they spend more time than most Rampant books with adding setting details.  In a typical Rampant book, there is not enough space to do this type of work.  However, here they have Weird War, Near Future, Judge Dredd style gang/street violence, Post-Apoc, and Space Opera where they go into some detail into the settings, potential factions, and how to build the proper detachments.  A similar book but for Fantasy, Dragon Rampant; does not have the space to be this indulgent.  All though good work, it feels a bit like filler to get this beyond "Blue Book" level.  

I really wish the game would have done something a bit more creative around terrain, or fighting on alien worlds.  Some of this comes in the "setting details" but I think the Rogue Stars warzone and mission tables are one of the coolest things in the Blue Book series, and would have liked to see some cool "Sci-fi" terrain tables here as well, or some details in the setting sections.  

I would also have liked a "Moongrunt/Lunar" setting as well as a Hard sci-fi setting.  However, I think this game was more focused on "cinematic" style games.   


Meh and Other Uncertainties

The book comes with a 11 scenarios, which has been an area where Rampant books have shined in the past.  These ones seem a bit more basic, but a nice wide selection to enhance replayability.  

There are also a couple of pages on campaign play, and the scenarios deal with some campaign elements as well.  For example, they award benefits and restrictions for the next game in the campaign for force selection and the like.  For the most part, your leader can gain abilities and traits as the campaign progresses, a similar element is in Pikeman's Lament.        

The rules expand a bit on the normal terrain rules for such games.  They make terrain a bit more "modular" by assigning a few tags to them.  A small, minor difference.  However, things like hills acting as soft cover when attacked from below a units height add some fun differentiation to terrain. 

There are some basic guidelines for table size, with the standard 24 point detachment of 30-50 models using 4x4 foot tables.  There is also a brief discussion of playing multi-player games.  There is no mention of solo or co-op play, as it is primarily designed to be a Versus system.  However, I am sure you could use a Mr. Babbage process as seen in The Men Who Would Be Kings in a pinch.  

The game allows pre-measuring.  

Final Thoughts

To be truthful, there is not a lot of new things here if you are familiar with how to play a Rampant game system.  That is good and bad.  As I approached this book, I got exactly what I expected out of it and it perfectly fits to type for a "Rampant" book.  On the flip side, that was also a disappointment as well. 

 Therefore, if you are a fan of the Rampant series it does exactly what you would expect it to do, just at a higher glossier price point.  It has a few extra bits here and there to help flesh it out like the addition of the Reaction system and some of the optional rules later in the book. The army creation is also still very flexible, but makes each unit type still feel unique with their selection of options combined with the Xenos rules.

I am happy with the purchase and can see myself using these rules on the table.  Now, if we can get Dan to make a Dux Bellorum and Dragon Rampant mash-up I would be really happy! 


Become a Patron and get access to all the cool stuff, a peak behind the curtain of Blood and Spectacles, and early-access to playtest games!  


You can follow Blood and Spectacles Facebook page or Instagram for more fun! 

Check out the latest publications and contact me at our Blood and Spectacles website

Or purchase all out games at the Blood and Spectacles Publishing Wargames Vault Page!          


Restless Stars: Operation Hemlock- Pushing back the Greenskin


As part of the ongoing Operation: Hemlock we will be having a big battle between the the Orkz and the North Ammoriss PDF on Baron's rest.  

The Ork gangs had come pouring out of the Green Zone and onto Baron's rest for much of the year.  However, their advance had been halted at the gates of Camp Hope(Less) by the combined Refugee Militia and North Ammoriss PDF.  It had been a hard fought slog, but soon the tables were turning.  The PDF halted the Ork onslaught, slowed the rate of Ork reinforcements using combined arms strategy of Land, Sea, and Air.  Then, they hit the Orks hard!  

Thankfully, the Ork resistance had been mostly scattered, with the Orks infighting with each other almost as much as with the Human defenders.  This allowed the Imperial forces to strike hard at the Ork camp with heavy bombers, off-shore bombardment, and even a Space Marine raid to blind them of the approaching PDF columns.  

Colonel Brusilov looked over the holo-map in the back of his command Chimera.  The ground forces were in place.  A wall of armored steel had been slowly pushing down to Look-Out Pointe, the last bastion of Ork resistance on Baron's Rest.  His line had been encountering scattered Ork mobz out in the deserts, and snapping them up.  Only scattered and disorganized rabble had opposed him.      

He was sure the Orks must have been alerted to his troops' presence.  Despite the mountain top of Look-Out Pointe being several hundred feet lower now, it still commanded the land and Sea approaches.  The dust cloud his armored columns were kicking up alone would be visible for miles.  Brusilov was confident that it didn't matter.  This time, he had the firepower, the armor, and the numbers to push the remaining Orks back into the sea.  The battle for Baron's rest was about to end, and the Battle for the Greenzone was about to begin.  

Forces: 

Taskforce: Chalice

PDF Command  

  • Regular Mounted
  • Traits: Blast, Leader

PDF Troopers

  • Regular Infantry
  • Traits: None   
Refugee Militia

  •  Irregular Infantry
  • Traits: None

PDF Mobile Troopers

  • Regular Mounted
  • Traits: Big Unit

Ragnarok Tank

  • Regular Infantry
  • Traits: Big Brute, Heavy Weapons, Slow

Ragnarok Tank

  • Regular Infantry
  • Traits: Big Brute, Heavy Weapons, Slow
Waaaagh! Skarbash

Ork Nob Trukkerz
  • Regular Mounted
  • Traits: Big Unit, Leader
Ork Basherz
  • Irregular Infantry
  • Traits: Fierce, Combat Weapons
Ork Stomperz
  • Irregular Infantry
  • Traits: None
Ork Big Bangerz
  • Irregular Infantry
  • Traits: Armor Piercing, Rapid Fire
Ork Kartz
  • Irregular Mounted
  • Traits: None
Ork Dread
  • Irregular Infantry
  • Traits: Power Armor, Squad Support Weapons
Ork Bikerz
  • Irregular Mounted
  • Traits: Rapid Movement, Squad Support Weapons
Mission
This will be a simple "Secure the Area" scenario.  Instead of rolling 3d6 on the random scenario generator, we decided to just make this a general smack down.  Winner take all! 

However, we did roll up the "Dawn" complication.  Therefore, as the game moves along, Line-of-Sight will increase.  

The Location is pre-set in these battles to be the Outdoor: Desert World. 

Set-up  
We will be using a full 6 foot by 4 foot table.  

In addition, we are using the normal terrain placement rules.  In this case, the Orks are the defenders so they get to set-up the terrain per the guidelines found in the rules.  Due to the size of the board, we will be using 6 pieces of terrain.  

We divided the board into 6 rough 24 inch by 24 inch areas, and placed the terrain around the board like this: 

1- Large hill
2- Dune
3- Rocky area
4- Dune
5- Ruined Walls
6- Rocky Area

The Imperials choose section 1-3, with the Orks in section 4-6.  


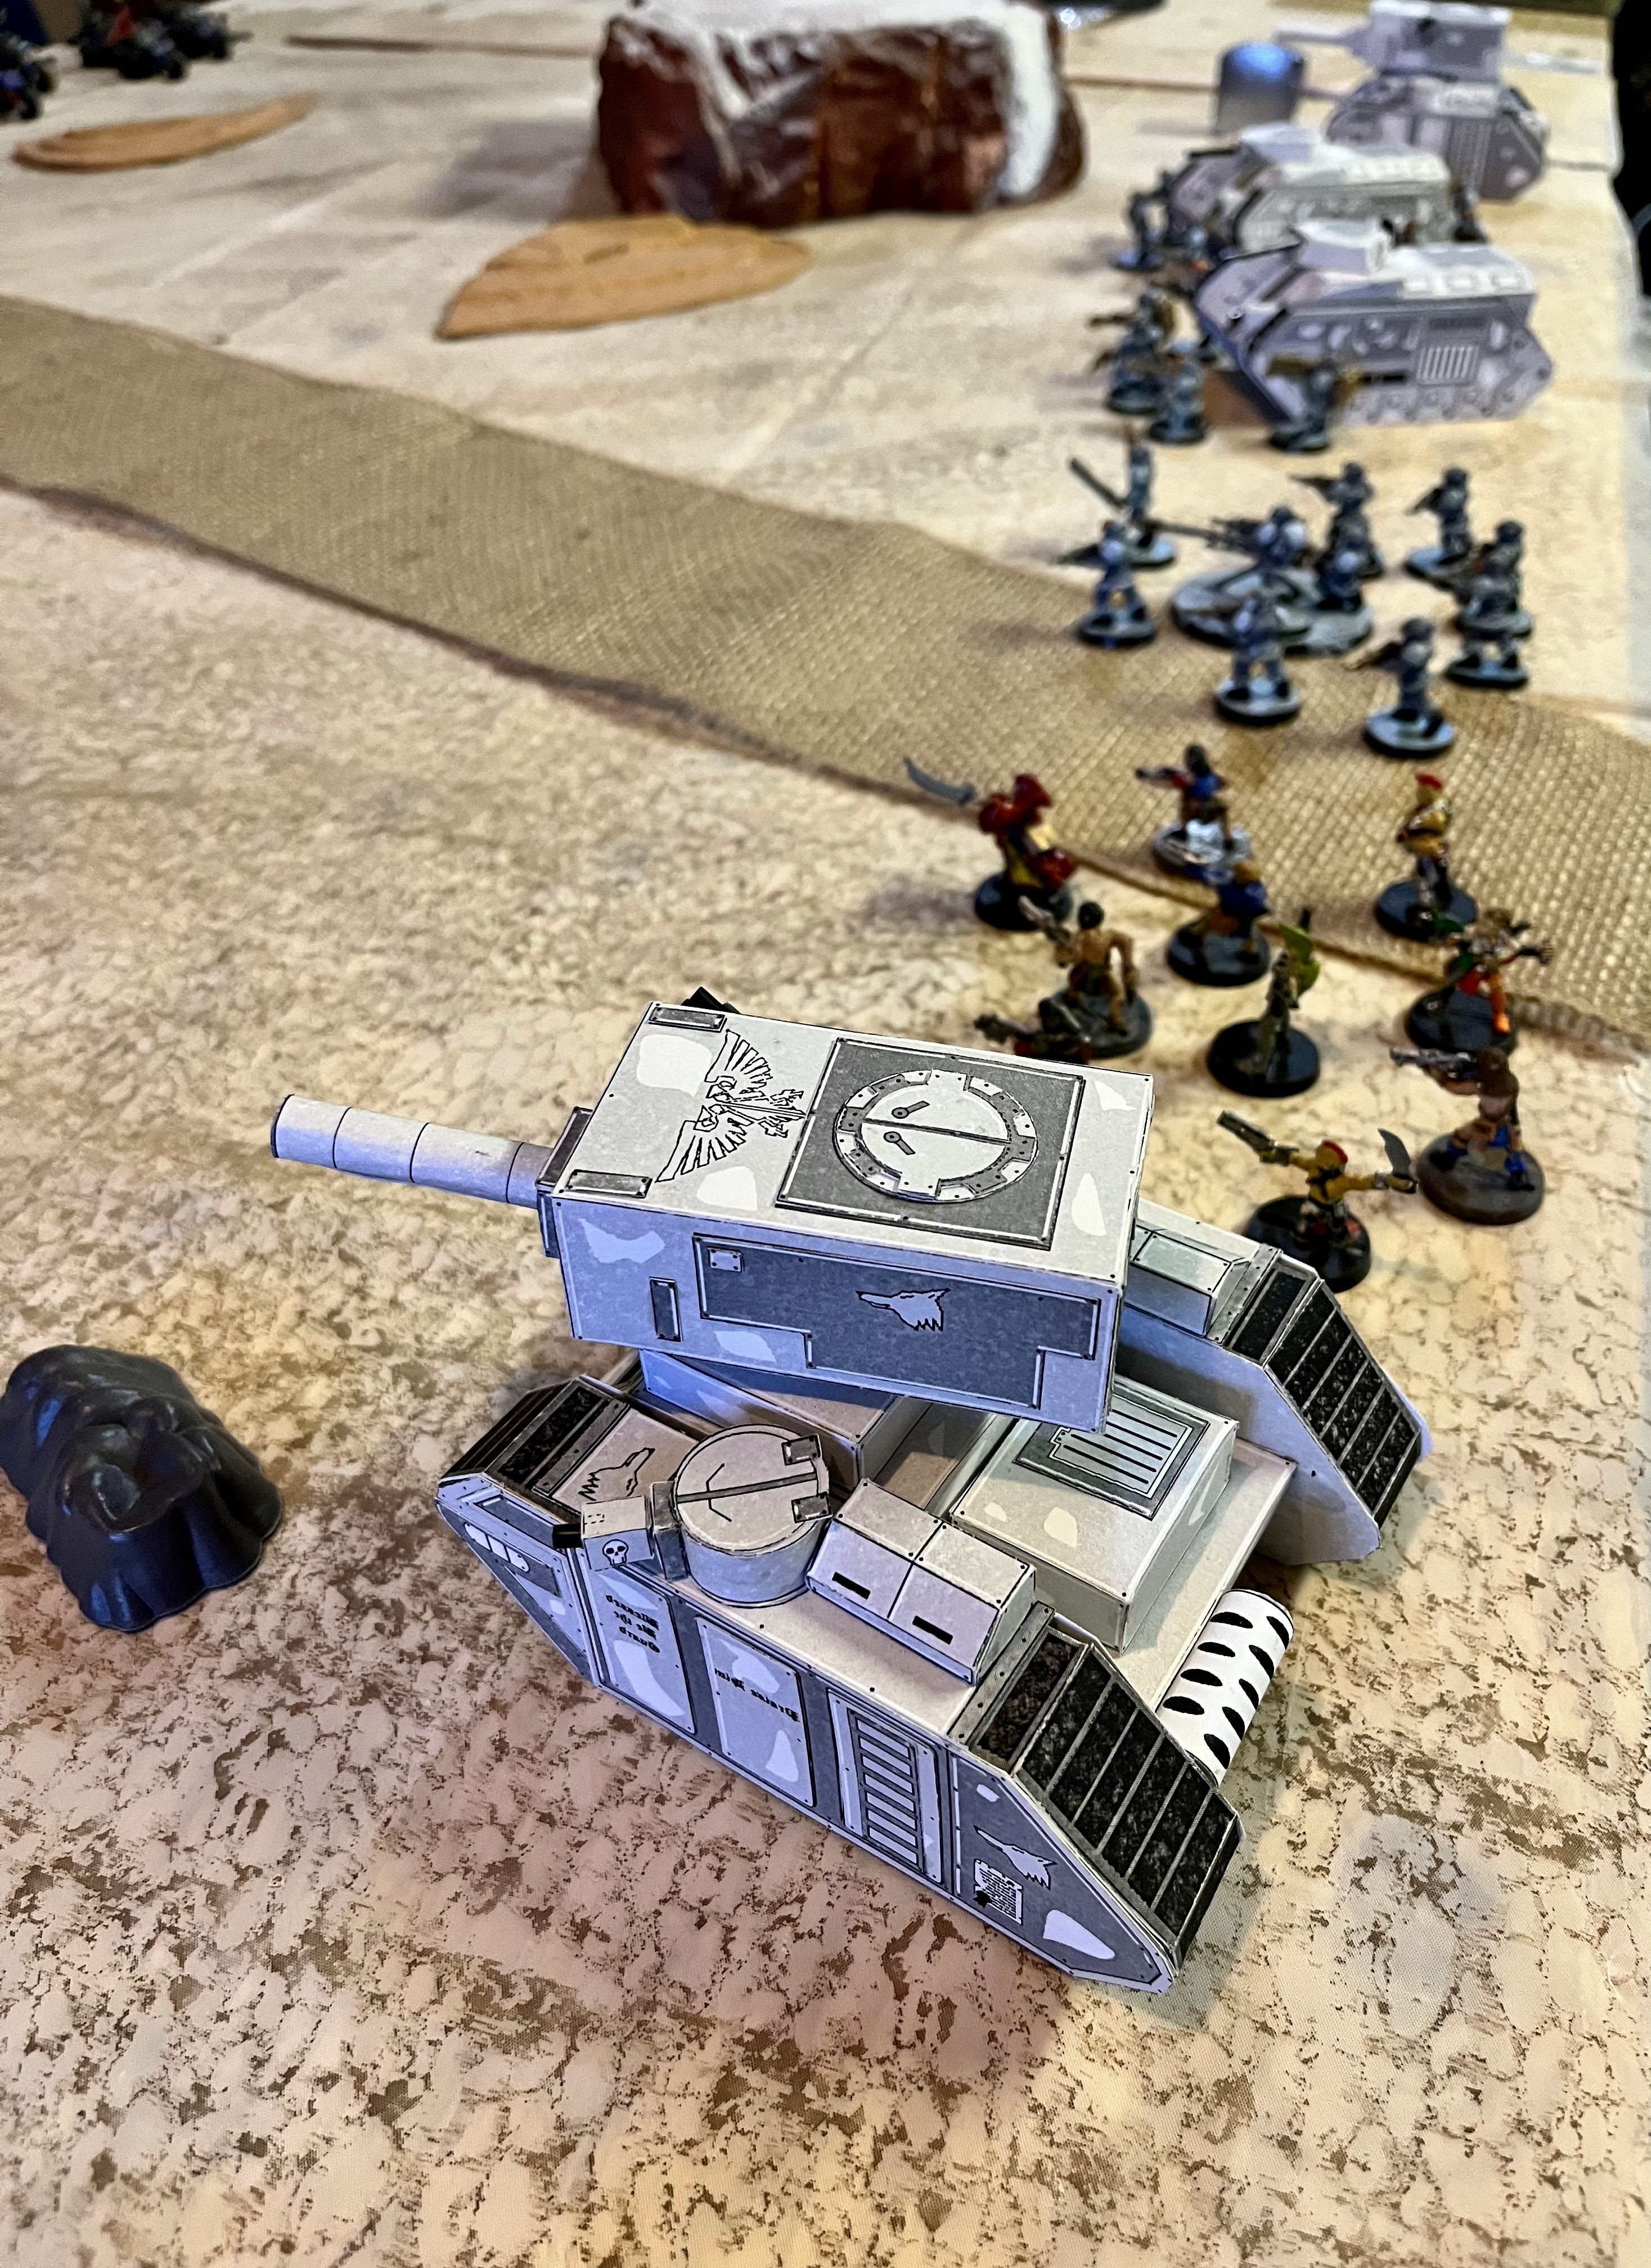
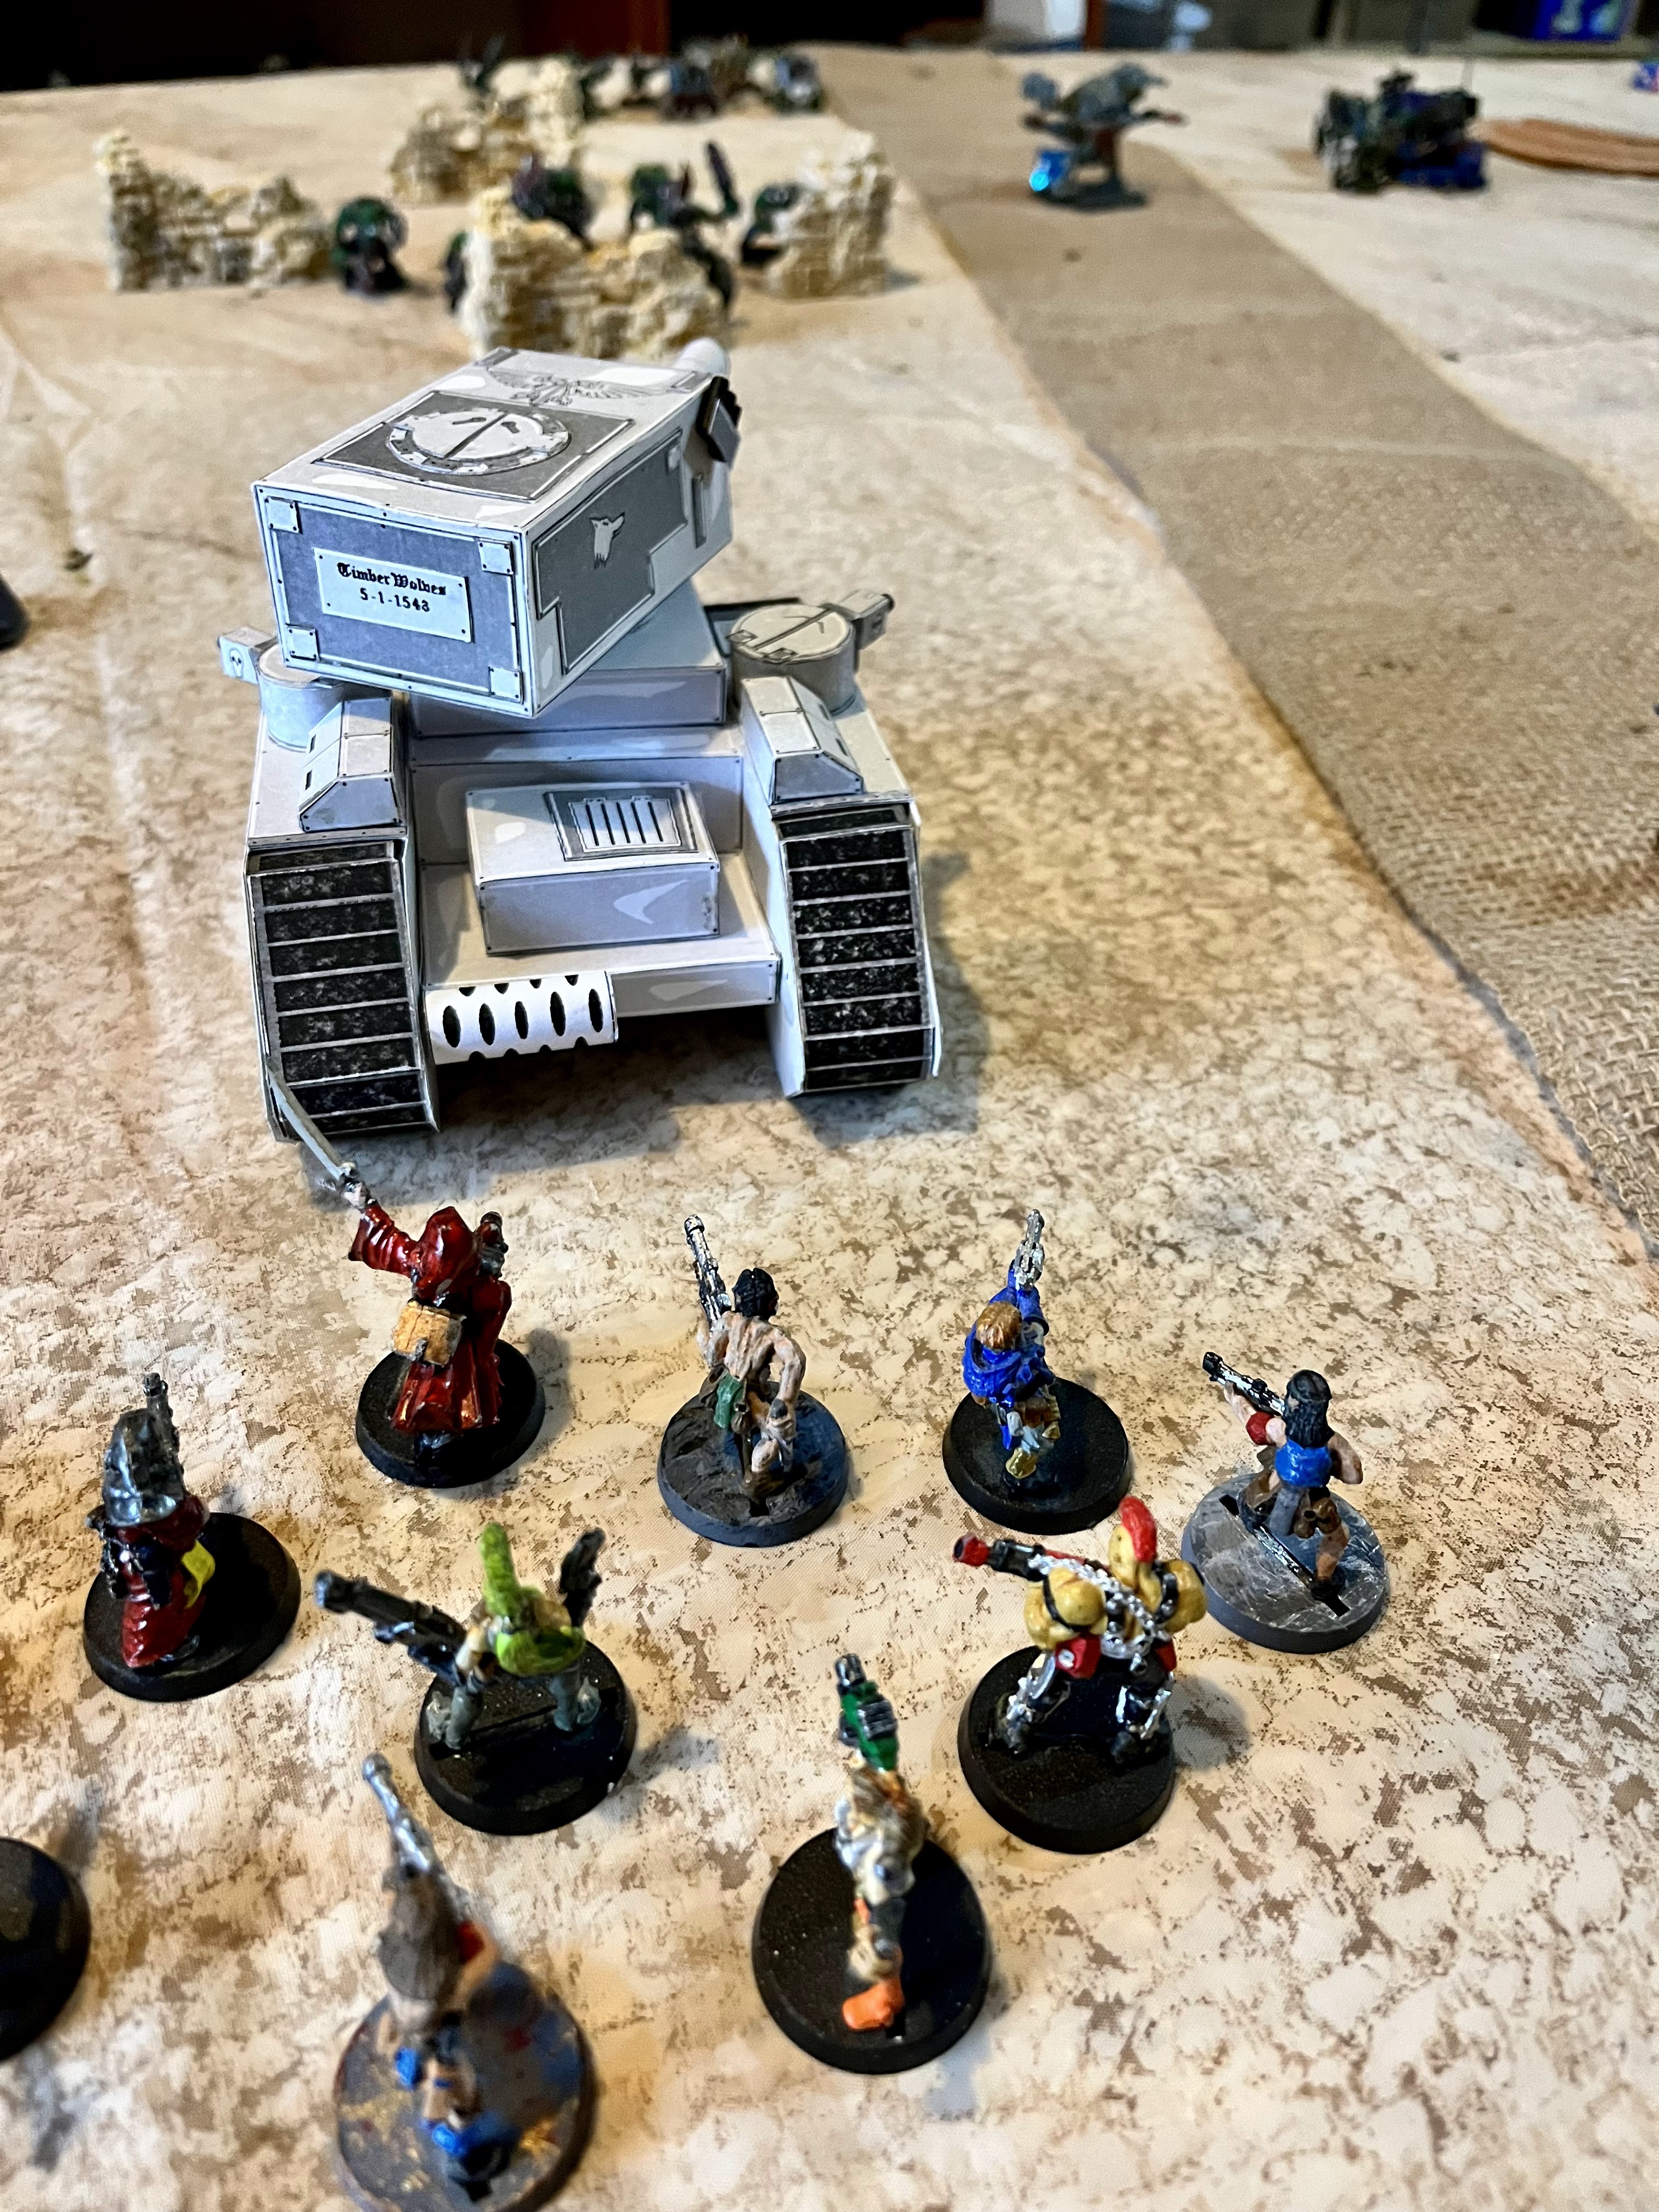
The Imperials anchored each flank with a Ragnarok.  From left to right we have the Ragnarok, Mobile Troopers, Troopers, Commander, Militia, Ragnarok.  The Orks from left to right on their side are Bikerz, Kartz, Trukkerz (Nob), Dread, Basherz, Big Bangerz, and Stomperz. 
 

Turn 1: 
The Orks start activating units.  However, it is still night time, so LOS is only 6 MU.  The Ork Kartz manage to dash forward at full speed and get and early jump to the middle of the board.  The Ork Warboss follows on their flank, but lets them lead the charge.  Ork Foot troopers also surge forward on the right flank.  

Imperial troops also move forward in the center, with the Imperial command squad and Armored Unit taking cover behind the dunes by the hill.  The two Ragnaroks also rumble forward on each flanks, very slowly.  

All other units are rattled or confused with their orders and stay put, shaken. 


Turn 2:
The sun continues to rise, and LOS is now 12.  

Ork kartz move forward and fire at the Armored Fist in cover, but only serve to kick up dirt and debris into the air.  The warboss also drives forward shooting, this time the Imperial command squad takes a hit.  The Ork foot soldiers continue to surge forward, with the  Basherz getting into some cover. The Big Bangerz, Kan and Bikez all rally for next turn.

The Imperial Commanders return fire, and take out 2 Effectiveness Points for the Ork Warboss, but the has a Big Unit with him.  The Armored Fist lay into the Kartz, and take out 4 Effectiveness points, but they avoid being Shaken.  The Ragnarok on the Imperial left trundles forward, but can not see any targets.  The one on the right stops as the commander tries to figure out their orders.  The Troopers rally themselves, but he militia is less lucky.  


Turn 3: 
The sun is still rising, giving 18inches for LOS. 

The Ork Boss crashes his trukk into the enemy Arrmored Fist squad, and piles out into the attack.  Both sides lose two in the attack, and the warboss and his troops fall back.   


The Kart cuts across and tries to screen the Imperial Commander.  Meanwhile, the Bikerz get moving and head up to support the main melee.  The Kan rushes forward, while the Runtherderz yell ineffectually at the Big Bangerz.  The Basherz take cover in the ruins, while the Stomperz get confused and mill about in cover.  

On the Imperial turn, the command squad tank shocks the last Kart, and crushes it beneath their APCs treads.  The foot troopers rally and rush up the road to defend their commanders.  However, the two tank commanders are still unsure of their orders and targets.  The Militia is still milling around their deployment point.  


Turn 4: 
The sun has risen enough to make LOS 24 inches.  

The Warboss shouts to the Kan to take out the Imperial Boss.  The pilot enthusiastically fires his heavy weapons into the exposed APC.  Bolt rounds and rockets lash out and blow the Imperial commander and his squad into atoms.  From there, the Ork warboss moves to take cover behind the hill.  The explosion of the PDF tank causes confusion in the Ork lines, and everyone else is shaken. 

The Imperial Troopers and Armored Fist squad fire at the Ork Dread, recognizing the threat, but its heavy armor shrugs off most of their fire power.  A few auto-cannon rounds damage it reducing it to 8 Effectiveness points. It avoids being shaken.  The rest of the Imperial troops rally at the loss of their officers. 

Turn 5:
The sun has risen enough for a 30 inch LOS.

The Ork warboss again tries to assault the entrenched Armored Fist squad, but the Imperials hold the trenches and force them back, and shaken.  The Orks lost three Effectiveness vs. the Guards 2.  The dread's heavy weapons try to dig them out next, but fails to cause any damage thanks to cover. The Stomperz and the Big Bangerz rally. 

The right most Ragnarok fires on the Dread, and hits it for 3 Effectiveness point loss, but fails to shake it!  The troopers on foot, target the Orks in the ruins, and manage to take out two, despite range and cover.  Fire from the entrenched Armored Fist reduces the Warboss to 1 Effectiveness.  The Ragnarok on the right catches the Bikerz in confusion and opens fire on them, reducing them to 4 effectiveness.  The Militia move up behind the Ragnarok.    


Turn 6: 
LOS is now 36 inches.  

The Big Bangerz move up and fire at the entrenched Armored Fist squad, but fail to cause any damage.  The Dread manages to reduce them 1 more Effectiveness point.  The Stomperz rush out of cover and attack the Ragnarok up close and personal.  They manage to reduce it 3 Effectiveness, but lose 6 in the process.  They fall back from the tank, but are not shaken. 


The Imperial forces are shaken by the ferocity of the Ork attack, and are all shaken! 

Turn 7: 
LOS is now 42 inches. 

The Dread moves forward and fires at the troops in the open, killing 1.  The Big Bangerz open up on the Armored Fist Squad, and their heavier artillery is enough to finally kill the troops dug-in by the hill.  The Stomperz move and shoot ineffectually at the Ragnarok.  The last Basherz rush towards the Imperial lines. 

The Imperial forces see the threat coming, and rally across the line.  Only the Ragnarok on the right flank is still shaken.  

Turn 8: 
The Basherz rush into the Imperial troops, and kill 4 before they are put down with bayonet and las-bursts.  The Dread opens up on the Ragnarok, but the shells bounce harmlessly off its armored hull.  The Big Bangerz are out of range, and try to move up but are shaken.  


The Imperial forces rally and target the Orks coming through the rock field on the flanks.  They unload, and reduce them to 2 effectiveness points and shake them despite the cover and range.  

Conclusion: 
Ultimately, it is a draw on the plains of Baron's Rest, as both sides take heavy casualties, but remain in the fight.   No one is able to secure the area.  However, the Imperial forces held a slight edge in Effectiveness Points remaining 33 to 20.  


Colonel Brusilov watched the battle play out across the southern reaches of Baron's Rest.  His troops engaged across the line, but he was disappointed to see no new break throughs develop.  He had used a mix of Imperial Guard, PDF, and Militia in a combined arms approach.  The losses of PDF and Militia were easily replaced from North Ammoriss.  However, replacing the losses of his experienced Guard troops was another matter.  

In retrospect, his next attack he would use his own Imperial Guard forces as the spearhead, while PDF and Militia forces held the line.  Another possibility was to call on elements of his other Taskforce commanders to help break Ork resistance on Baron's Rest.  That meant using air power or naval bombardment to pin down Ork forces before sending in his troops.  He did not relish sharing the victory with them, but they could not move onto attacking the Ork held Green Zone until they had been expelled from Baron's Rest completely.   

I took command of the Greenskins, and I was very disappointed in the performance of my Bikerz and Big Bangerz.  They kept failing their Command checks.  I tried to use my Boss has a battering ram, but my skumgrod wisely kept them in cover to improve their saves.  I had better luck when I used the Boss as a way to boost key units Command rolls.  However, once I wised up it was too late to make the difference.  The Dread was my star unit, and its heavy armor and squad support weapons were an excellent combination.   

My skumgrod's unit of the match was the Regular Mounted unit that he made a Big Unit.  It dug into the dunes, and that made it hard to dig out of.  The extra armor made a big difference when I tried to kill them.  The Ragnarok's were a bit disappointing due to bad command rolls, but they were hard to hurt and when they passed they dealt out the pain.  My Bikez, Dread, and Big Bangerz were the best antidote to these units, but only the Dread managed to get to a place to engage them.  

Meanwhile..... (Bonus Kill Team Action!) 

While Ork forces were being engaged by elements of Taskforce: Sword, Space Marines from the Panther's Claws deployed from their forward operating position in an attempt to raid the Ork camp for key pieces of intel.  Previously, the marines had successfully raided Look-out Pointe.  They expected only a token force of defenders, while the bulk of the Orks went out to the big scrap.  

However, Boss Skragthumpa was not convinced that everything was as it seemed.  He held his warband back.  Maybe it was because he had a scrap with one of his peers, maybe Mork gave him a vision, or maybe he was just a kunning Blood Axe?  Whatever the reason, he and his boyz were there when the Space Marines came rolling in hot.  

The Ork encampments on Baron's Rest had been turned to scrap and ruins by the Ammoriss Air PDFs heavy bombardment.  In addition, artillery from taskforce: Sword had sighted in on the scrap compounds and been steadily raining shells down on them. The two forces came to blows around the remains of the Mek Shedz, called Skrap Alley.   


This was a Kill Team mission where we had to look for intel in scrap piles.  You one a VP for every pile you searched as an action.  Each of us had a scrap pile in our deployment zone, and there were 4 others outside, going across Skrap Alley.  We had identical terrain, mirroring each other.  

As the orks, I chose the aggressive strategem that let me run a model out ahead.  Therefore, I quickly took got a boy across to one of their scrap piles and looted it before the beakies could get there.  As we traded the targeted my boyz, but I concentrated completely on the objectives, not even bothering to shoot back.  

By the end of the second turn, I had lost three boys, but had a VP lead firmly in hand.  He would have to be very aggressive and lucky to unseat me.  Despite taking a beating, I managed to delay and contest enough objectives that he was unable to catch up to me blitzed lead.  


There was barely any shots fired by my side, and my Big Shoota stayed silent the whole game.  However, in the late game we did get into some close combat, and close firefights.  I wounded Marines enough to keep them from getting to their objectives; but not enough to kill them.  

At the end of the day, Boss Skragthumpa was killed, along with all his boyz.  In return, they killed 1 marine, and wounded two others.  More importantly, the sacrifice kept the Pather's Claws from getting the intel on the Ork war machine they were after.  They withdrew with their mission incomplete, as the alarm rang through the Ork camp, summoning more boyz to Skrap Alley to fight. 


A minor set-back to General Brusilov's plans on Baron's Rest. I hope you enjoyed this snippet of Kill Team action woven into this larger battle report.  

Conclusion: 
In the Kill Team game, it all came down to careful Objective play.  I had it pretty well in hand by the end of the 2nd "turning point" of the battle.  However, my opponent still put up a stiff fight, and it went down to the wire.  There is something strangely dissatisfying about winning a game by losing all of your troops!  

I have been building up some 6mm Forces for a climactic battle for Baron's Rest.  I have also been working on some Imperial Subs for Aquanautica Imperialis and some targets for an Aeronautica Imperialis fight.  Those might help swing the final battle for Baron's Rest.  Afterall, if the Orks can impact the supply lines back to North Ammoriss, they might be able to hold out!  


Become a Patron and get access to all the cool stuff, a peak behind the curtain of Blood and Spectacles, and early-access to playtest games!  


You can follow Blood and Spectacles Facebook page or Instagram for more fun! 

Check out the latest publications and contact me at our Blood and Spectacles website

Or purchase all out games at the Blood and Spectacles Publishing Wargames Vault Page!          


Monday, February 6, 2023

Review: Pulp! - Osprey Games


My faithful readers know, that I always get the latest Osprey Wargaming Series books.  I have every single one, starting with #1 Dux Bellorum.  I also make it a point to get every single one that comes out.  Why?  Am I some sort of crazed fan?  A completist collector?  Addicted to wargames rules?  Well, maybe.... but the real reason is very simple.  If they do not sell, they stop being made. I want them to keep being made.  

Pulp! is the latest "blue book" and I of course have it!  In the books own words, the rules are "a scenario based, skirmish wargame where players take on the roles of heroes and villains inspired by the pulp fiction of the 1920's and 30's."  There are some great miniatures out there for this genre, and it is a popular niche for skirmish wargaming.  That means you can play characters like Doc Savage, The Shadow, Flash Gordon, and Dick Tracy.  The Pulp game has to be able to cover a wide variety from crime thrillers, to space opera, to horror, to historical fiction, and beyond.  That is a tall order for any game system to cover such a spectrum of potential game types.  I am interested to see how the game manages the abstractions.  

So, let's lead into this review with both fists swinging......


Things I Liked

To help give the Pulp heroes and villains a bit more of a punch, they can use Special Points to buy advantages and special rules.  However, it is interesting that each one is a single use only, so the only way you can continue to use the advantage is to buy it more than once.  This is very different from other games, and I liked it as a nice way to balance some of these unusual rules.  It also feels "Pulp" as the heroes frequently use some special skill to save the day, or avoid a cliffhanger; but typically they only use the same skill once in a series.  

This book has some really great pictures of minis on some really great tables.  I think they are mostly PULP! Miniatures and Copplestone Castings with a lot of paint work by Kev Dallimore.  They really make me want to dive into a few Pulp style games. 

For attacking, they use a "firepower" style mechanic where you roll dice based on the weapon, and look for the skill of the shooter to score a hit.  Modifiers apply such as cover, LOS etc.  Targets that are hit get a Protection roll to avoid getting hit.  A hit causes suppression, and a second hit causes a wound, and a second wound causes a Knocked Out.  That gives our "heroic" characters some resilience.    In melee, there are no suppression hits, only wounds.  

There us a short list of some particularly PULP style weapons like Death Rays, Glue Guns, and Hypno Rays in the rules to add some 1930's Sci-Fi flavor.   

There is also a RPG Lite element as you can give your single model Heroes and Villains access to Life Experience that give different benefits, as well as some Traumas and Phobias.  This makes your main characters unique and is a MUST for Pulp! style adventures in my book.     

Things I Did Not Like

Most Heroes are single model units, but henchmen are in small groups of 2-4.  That is fine, but they seem to activate and take actions individually.  This seemed a bit cumbersome.  However, you typically only have 1-2 groups of henchmen.  If they were going to resolve actions individually, you might as well let them pool their dice and all take the same action at once anyway.  

The dice used are d6, which is fine by me.  However, a 1 always fails and a 6 always succeeds.  No mods can be made above or below these values.  Therefore, the pool of dice results in this game is low, and your ability to influence the results via mod stacking is also relatively low.  

The rules do not have any simple rules for vehicles.  I think this is a big miss, as car chases and the like were a staple of the genre.  There is a lot of discussion about animals in the book though.  

A big selling point of the book was Co-op and Solo play.  However, the book barely touches on the subject, leaving most of the heavy lifting to the activation rolls.  Osprey recognized this and quickly put out free-rules for solo/co-op play on their website.  They seem to be a combination of random dice roll for result and order of operations for the enemy AI.  Nothing is really detailed on deployment or scenario modifications.  Therefore, I would suggest that this game works best as a Versus affair.     


Meh and Other Uncertainties

A typical game is 1 hero/villain single model, 1 Elite single model, and a handful of henchmen squads of various skill level.  More skill level typical adds access to Special Points and stats.   

The game makes use of an Activation roll.  If failed, the model/Unit can only take partial actions.  These are typically passive, defensive related actions.  So, the model is not helpless but also not doing much.  Activation rolls are like Marmite.  Some like the Friction it adds to a game to be overcome, while others see them as an annoying hinderance.  I personally do not have a preference, but prefer to be able to take a free action, and then dice for additional actions instead. 

Since this is a skirmish game, there are all sorts of movement related stuff you can do.  Most of them are all lumped into the rules under movement, so they might be hard to find later when searching for the exact way to do it.  However, they are there and that is good.  You will want your hero to jump from rooftop to rooftop at some point! Interestingly, the action you choose on activation also will impact how much you can move.  

The book spends several pages on Scenario design.  It only has two sample scenarios though.  I appreciate the effort to lay-out different deployment types, and ways to add chrome to a scenario.  However, I feel like many gamers will find this section of the book dissatisfying.  However, given the large swathe of game types this book is trying to cover, it makes sense to take this approach over hard and fast scenarios.  

There is some cursory talk about campaigns and the RPG section has a discussion about character progression.     

Final Thoughts

PULP! is a perfectly serviceable set of rules.  However, if I was new to the genre and wargaming in general this set of rules would leave me a bit bewildered about how to proceed.  It is a really good tool box, but how these tools go together is not always 100% clear.  I appreciated the RPG-lite elements and the Special Points, but it was not clear to me how I should use them to make a great game or game units.   

Also, I think the ruleset is a bit too generic and it ends up feeling a bit flavorless and missing that two-fisted hero of action that it needs to pop off the page like a purple-prosed serial or early comics panel.  It tries to be all things, to all people when a tighter focus like Flash Gordon style space adventures, The Shadow-esque crime heroes, or Back-of Beyond adventures would have netted a tighter, more flavorful game.

I think this one would shine with a solid GM/host setting the theme, and with players putting together some appropriately themed groups of minis.  This could also make a good show game, as you hand the players the stat cards for minis that all ready match the theme of the board.  Clubs and gaming groups will be able to have fun with this, but one-off games seem less likely with this set.  You can forget pick-up games entirely, but this genre normally does not do pick-up games.    

This one won't set the world on fire, but like all Osprey Wargames Series it has some great little gems of ideas and mechanics that I can take away into my own designs.             


Become a Patron and get access to all the cool stuff, a peak behind the curtain of Blood and Spectacles, and early-access to playtest games!  


You can follow Blood and Spectacles Facebook page or Instagram for more fun! 

Check out the latest publications and contact me at our Blood and Spectacles website

Or purchase all out games at the Blood and Spectacles Publishing Wargames Vault Page!