The city of Tarentum was one of the largest and most powerful of the Greek city-states in Southern Italy. This area of Italy had been in the Greek sphere of Influence for decades and the Romans were newcomers in comparison. However, the Roman consolidation of central and northern Italy did not go unnoticed in the area known as Magna Graecia. Therefore, when Roman ships on a "sightseeing" journey entered their harbor, the Tarentines took it very seriously.
The Tarentines appealed for aid from their Greek brothers on the mainland. Their pleas mostly fell on deaf ears, except for one man. Pyrrhus of Epirus decided to come to their aid. Pyrrhus was widely considered by his contemporaries to be one of the greatest of the successor general-kings. He had all ready had a well-earned martial reputation, and had been swinging well over his weight-class. However, he was also an inveterate opportunist, and he saw the Tarentine's plight as a chance to further his own ambitions. He soon set sail for southern Italy with his battle hardened forces.
Of course, the campaign of Pyrrhus in Italy is the stuff of historical "legend". After several hard fought victories, Pyrrhus choose to leave Italy. The Romans had tasted defeat, but the victories were so costly for Pyrrhus that he had to abandon his attempts to subjugate the area for himself. He abandoned his allies and sailed off to fight the Carthaginians in Sicily instead.
There are several major battles that history records. However, for every major battle recorded, there were several smaller skirmishes or lesser encounters that led up to the big clash. Today, we will be playing one of those lesser engagements.
You can order your copy of the Wars of the Republic rules here.
Forces:
Today, Pyrrhus and his troops will be represented by my Macedonian forces for Men of Bronze. Pyrrhus' forces were of the Macedonian Successor style so they should fit right in. My Romans will be my Early Republican Roman troops. All models are from Victrix.
Pyrrhus Of Epirus
1 Bronze Shields - General
1 White Shields
1 Light Cavalry
1 Militia Hoplites
1 Light Infantry
Roman Triplex Acies
1 Skirmisher
2 Hastati
1 Principes- General
1 Triarri
Set-upThis was completed using the rules laid out by the rules in the booklet. The board is 72 x 48 MU with an MU being 1 inch. The board was divided into 6 grid spaces and terrain rolled and placed using the chart. The Players took turns rolling and placing terrain, with the player being able to place the terrain anywhere they wished in the grid square.This system led to the following set-up.Grid 1 is the Roman right, 2 Roman center, and 3 is Roman left. Grid 4 is Pyrrhus left, 5 is Pyrhuss center, and 6 is Pyrhuss right.Grid 1- No terrainGrid 2- No terrainGrid 3- No terrainGrid 4- Grove of TreesGrid 5- Grove of TreesGrid 6- No terrain
Wow, that was a strange set-up roll. I hope we roll better during the actual game!
The Romans set up in a standard Triplex Acies formation in the center. Skirmishers on the left edge, Principes, , Hastati, Hastati, with the Triarri in the rear of the center.
Pyrrhus' troops are deployed thus form their left to right: :Light Infantry in the left trees, Militia Hoplites in the center woods in open order. Bronze shields in the center flanked by the white shields. Cavalry on the right in the open with plenty of room to maneuver.
Mission
We set-up our scenario using the method found right in the main rules. Therefore, we will be playing a Secure and Control Raid scenario. Both armies are trying to have a unit standing at the exact center of the board. The battle is 8 turns or until 1 side collapses. If no one is in control of the center at the end of the game, it is a draw.
There are no additional complications in this battle.
Turn 1:
Both sides collect their Commander's Gaze tokens and consider their bids. Romans have 6 tokens, to Pyrrhus' 6 Tokens. The Romans bid 4 to go first, to the Greeks 2. Romans begin the turn.
Move:
The Romans start by moving their Hastati on the right, in loose formation. Then, the Skirmishers on the Left. The Greeks then decide to interrupt and succeed.
Pyrhus' troops spend a Commander's Gaze to skirmish with their light infantry in the woods, so they begin to break from the edge. The Bronze Shields march towards the objective, while the White Shields move closer in loose formation next to the Bronze shields. The Militia Hoplites struggle through the woods at half speed. Finally, the Cavalry moves up cautiously, and less than their full move, they are trying to maintain the battle line.
With all Greek moves done, the Romans finish moving. The Principes and center Hastati move up in Legion formation. The Triarri are in Phalanx and go less than a full march forward.
Melee:
None. The units are too far apart.
End:
No action yet. Maybe next turn.
Turn 2:
Both sides collect their full Commander's Gaze again. The Romans bid 3 to the Greek 2, ands win initiative.
Move:
This time, the Greeks let the Romans complete their movement uninterrupted. The Triarri half march forward again, then the rest of the battle line spring boards ahead of them with full moves. The Skirmishers on the left try to spread out to reduce the Cavalry's movement. Meanwhile, the Hastati on the left try to stay loose and ready to react to any Greek thrusts from the flank.
The Militia Hoplites are still hung up in the woods, and as a result, the main body of Bronze shields slows their advance to help secure their flank. The White Shields move up aggressively and line up with the Principes and form Phalanx with a Commander's Gaze. The Light Infantry uses a Commander's Gaze to skirmish and breaks out of the woods and starts to go wide to try and get around the Roman flank.
The Greek light cavalry decides to try to scare off the Roman Skirmishers and declares a charge, that barely would make contact. However, the Skirmishers elect to use a Commander's Gaze to Evade, while the Cavalry use 1 to Pursue. Skirmishers on foot only get 1d3, while horseman get 1d6, so things do not look good for the Skirmishers. Both sides score a two, which leaves them in contact.
Melee:
The Greek Light Cavalry charges into the Roman Skirmishers and gets three hits. The Last Commander's Gaze is used to try and blast them into a rout, but it fails. They have 1 Courage left, but not enough Discipline to avoid wavering. In return, the Light Cavalry also loses 2 Courage, and also starts to Waver. The skirmishers are pushed back 2 MU.
End:
Nothing to see here..... yet.
Turn 3:
The two forces still have full Commander's Gaze as they have not lost any units. That looks like it will change this turn! The Greeks bid 2 Gaze to go first, and the Romans bid 0.
Move:
The Greek Militia Hoplites break free of the woods, and snap into a Phalanx formation at the cost of 1 Commander's Gaze. The Romans try to interrupt, but fail.
Next, the Greek Light Infantry moves forward at full speed, trying to get around the Roman edge. The Bronze and White Shields shuffle forward, waiting to see the outcome of the Cavalry skirmish to see if they will be able to get help in their initial charges.
The Romans see the danger, and re-shuffle their battle lines with their more mobile Legion formation. The Principes move sideways, and line up on the objective. The Triarri breaks into loose formation and moves to the edge to deal with any cavalry break through. The Hastati on the Roman right stays in loose formation and aggressively moves forward, shielding the slower and more cautious Legion Hastati unit moving slowly forward.
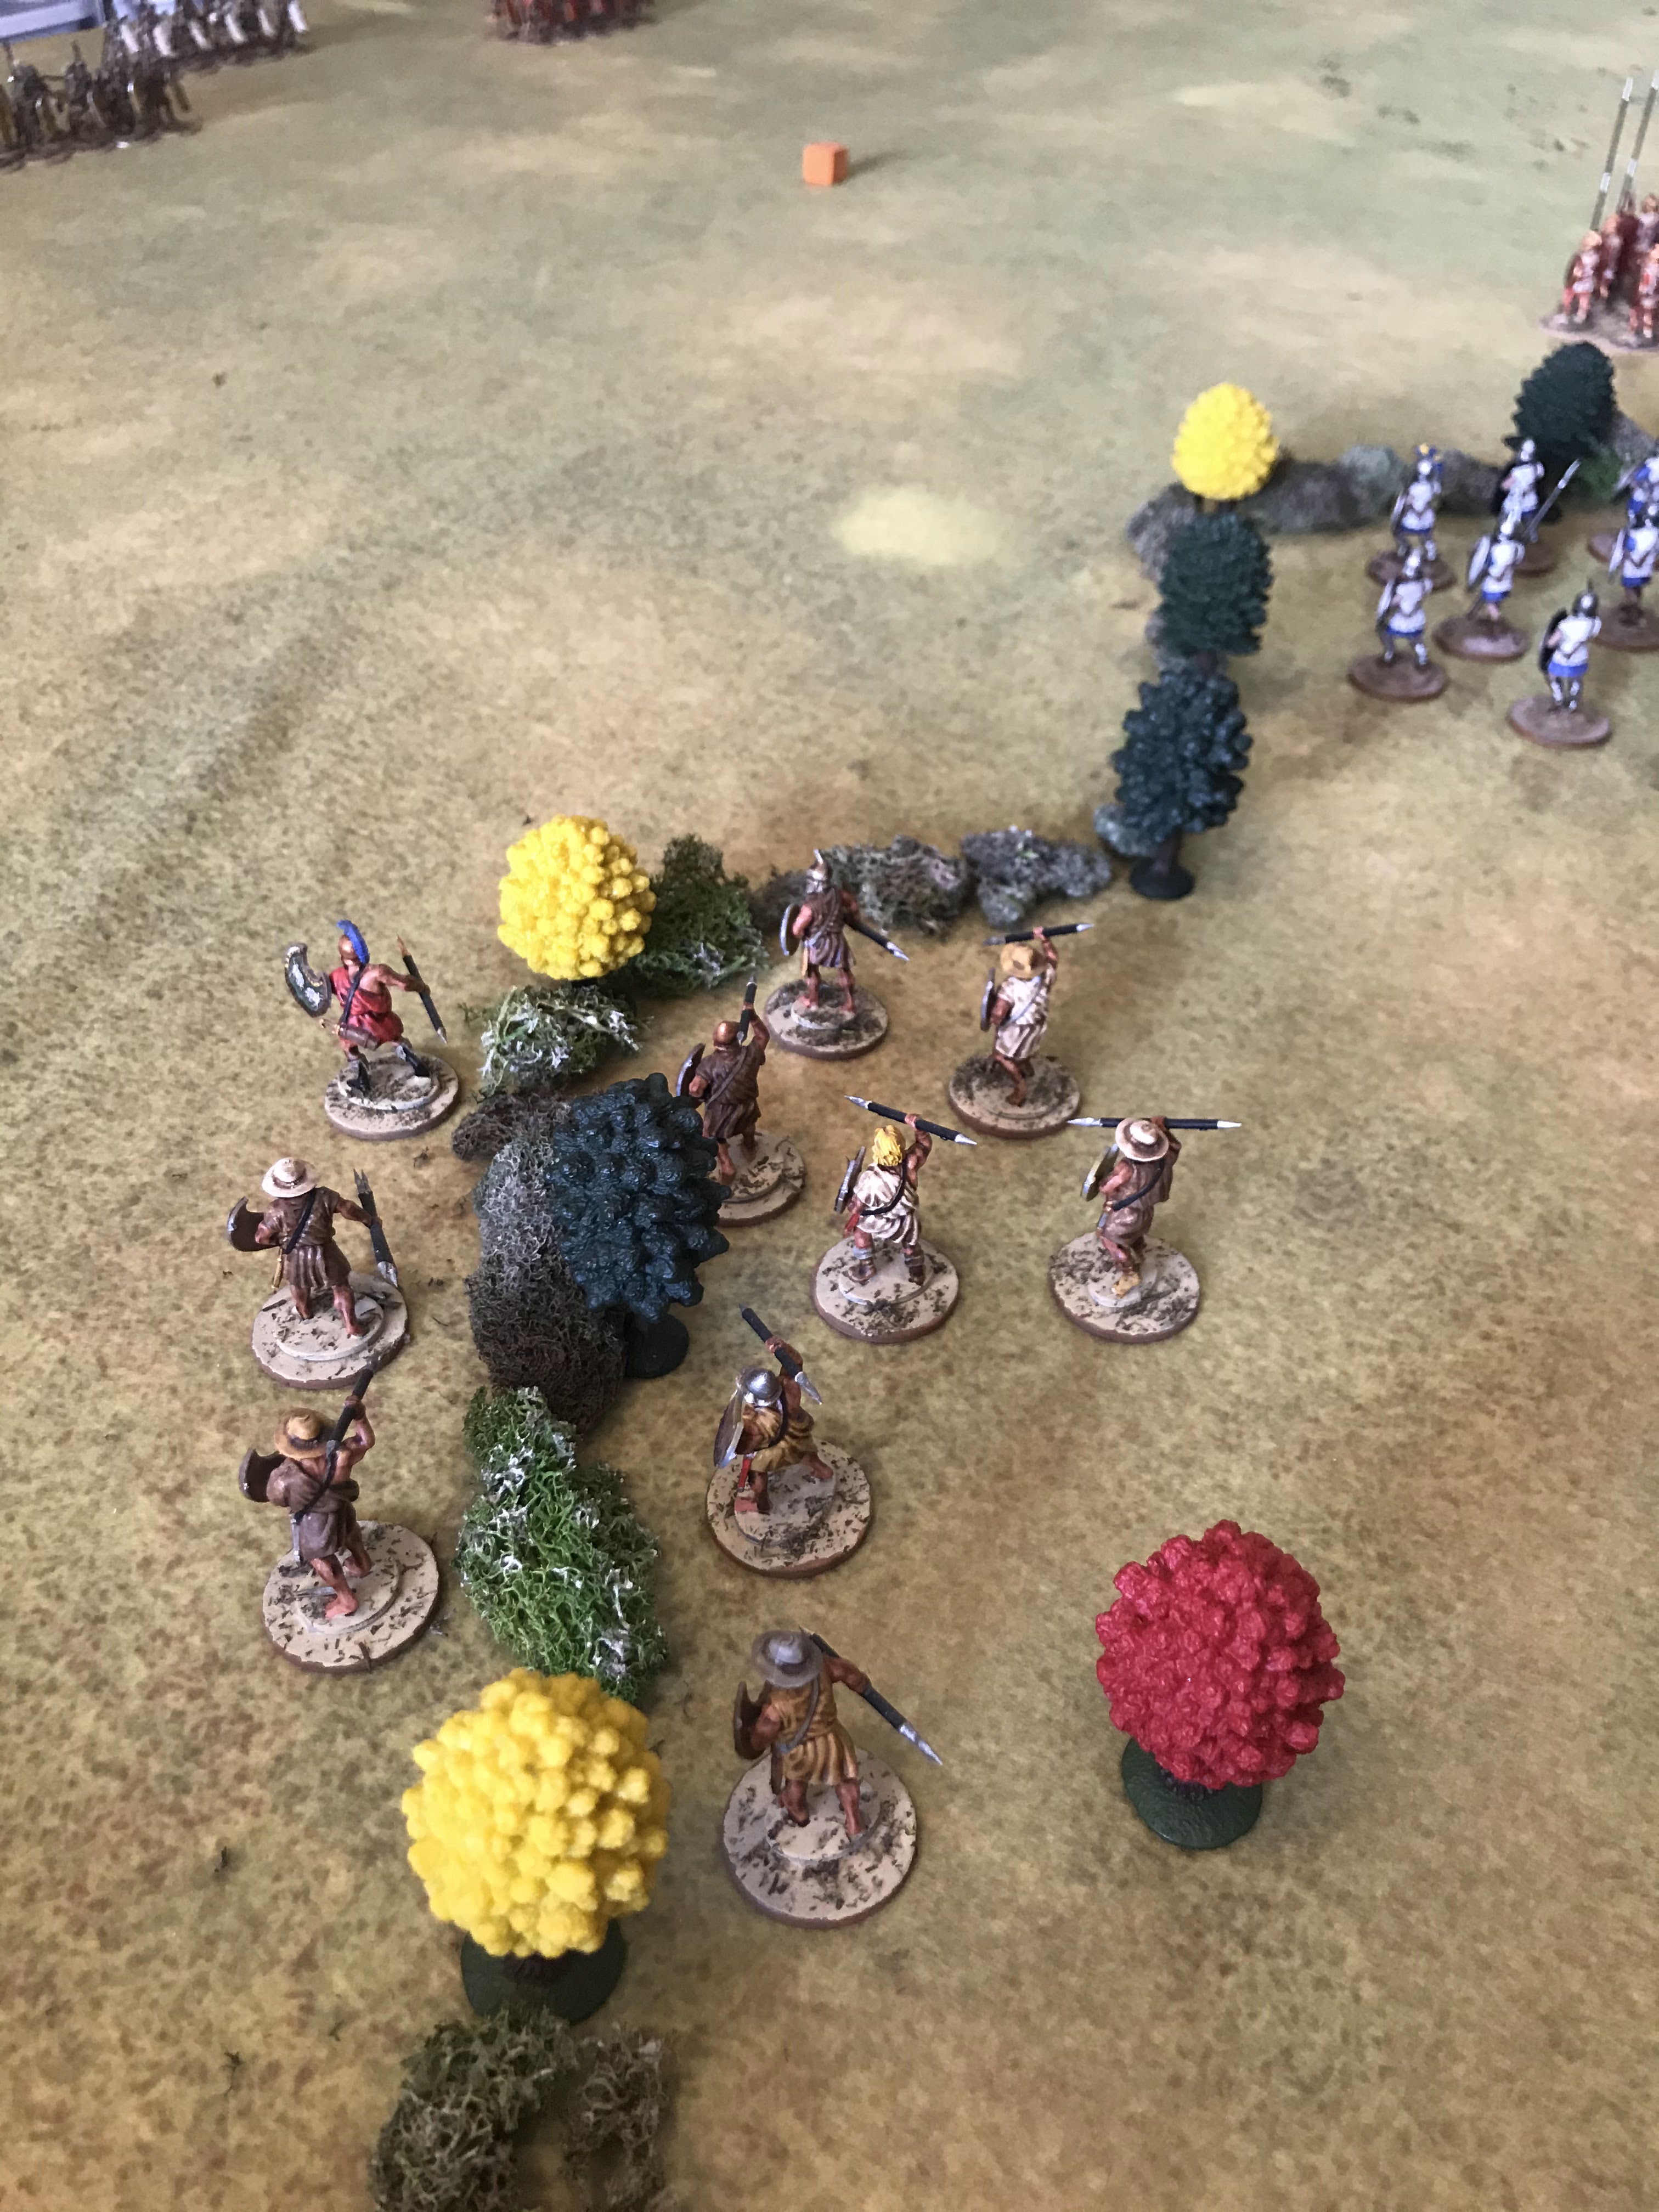
 |
| Romans on the left, with Greek Light Infantry in the foreground looking across the battlefield. |
Melee:
Even with Re-rolls, the Skirmishers fail to break the attacking Light Cavalry. The horsemen overrun the Roman skirmishers position. They are turned about and will rout in the end phase. However, the Horseman only have 1 Courage left. The Greek commander will need to coordinate carefully to exploit the flank.
There is no other fighting.
End:
The Principes and Triarri see the Skirmishers routed, but they easily pass their Wavering checks. They are fine, as they expected those dogs to run.
Turn 4:
The Greeks now have the Commander's Gaze advantage of 6 to 5. The Romans Bid 1, and the Greeks bid 2 to go first.
Move:
The Greek light infantry on the Greek left moves up and throws Javelins at the Hastati at the edge. The attack fails to cause any courage loss even with the use of a re-roll.
The Romans use a Gaze to interrupt, and take over the initiative. The Triarri form into Phalanx, and declare a charge on the Horseman. It just makes contact, but the Horseman want to use a Gaze to Evade. However, they are wavering, so they can not use Gaze for Special Orders! They are caught by the Romans as they are too disorganized to respond.
The Greeks ponder trying to regain Initiative, but they determine that the distances are not right, and hold onto their Gaze. This would prove to be a mistake....
The Hastati on the right flank form into Legion and charge into the Light Infantry there. The Light Infantry could try to evade, but the charge is judged to be too close. They could not escape and save their Gaze. That was the last of the Roman's Gaze.
With their flanks engaged, the Romans slowly move forward. With no Gaze, they can not react well to charges with Pilum or Counter-charges. Play turns back to the Greeks.
The Romans careful maneuvering pays off as the Militia Hoplites charge at the Hastati in the center and fall short. They are left wavering and out of formation. Easy meat next turn?
Seeing their fellows fall short, the Bronze shields inch closer to the objective and the looming fight with the Principes. The White Shields break into loose formation and get ready to react to the Triarri next turn.
Melee:
The Romans decide to start with the battle with the Peltasts. It is soon discovered that the Peltasts have 0 chance against the Roman legion. It is only a matter of how long they can hold and keep them out of the fight. They lose 1 Courage and are pushed back 1 MU, but do not waver.
The organized and formed Triari quickly put the disordered and wavering Horseman to flight. Both the Roman flanks now seem secure.
End:
The Horseman are removed from the board. The White and Bronze Shields watch them flee. The Bronze Shields begin to Waver from the sight.
Turn 5:
Both sides are back to equal Commander's Gaze of 5. Greeks bid2 to the Roman 3. The Romans go first.
Move:
The Romans start by charging into the loose formation and wavering Militia Hoplites in the center.
The Greeks try to spend a Commander's Gaze to gain initiative. The roll-off does not go their way, and the Romans maintain control.
The Roman Triarri march ahead, break formation and re-align themselves facing the White Shields before using the last Roman Commander's Gaze to reform into phalanx. The Principes hold position and play goes back to the Greeks.
Pyrrhus gives a sign of relief as he quickly rallies his Bronze Shields and marches to the objective. The White Shields also use the last Commander's Gaze to form up into Phalanx and face the Roman Triarri.
Melee:
The Romans choose to start with the Hastati and Peltast fight on the Roman right. Bad rolling an no re-rolls keeps the Greek Peltasts in good shape and still in the fight. They have 3 Courage left and are pushed back 1 MU again.
In the Center, the Hastati rain Pilum's down on the disorganized and wavering Militia Hoplites. Poor rolling and lack of re-rolls again allows the Hoplites to stay in the battle, only losing 1 Courage! They are pushed back 2 MU and continue to waver.
End:
No action needed.
Turn 6:
Both sides collect their 5 Gaze. Both sides Bid 3. In the roll-off, the Romans win.
Move:
In the center, the Principes charge the Bronze Shields, who gamely counter-charge! Meanwhile, the Triarri aggressively move towards the White Shields but do not have the range. Instead, the White Shields charge, and the Triarri counter-charge.
Everyone is in Melee!
Melee:
The Romans start on the right with the Hastati vs. the Light Infantry. Again, the Hastati push back the Light Infantry 2 MU, but only cause 1 Courage loss. The Light Infantry are still game and are happy to tar pit the Romans.
The Hastati also push back the Militia Hoplites causing 1 Courage loss. They are pushed back 2 MU and have 3 Courage left, but continue to waver.
The Principes manage to push back the Bronze Shields 2 MU and inflict 1 Courage loss for none of their own. However, they have an uphill battle now that their Pilum's have been used.
The Triarri and the White Shields fight to a stand-off with both sides losing 1 Courage.
Turn 7:
Both sides have 5 Commander's Gaze and bid 0 for initiative since everyone is engaged in Melee. Instead, they save them for Re-rolls. Greeks win the initiative and can choose the order of Melee.
Move:
None
Melee:
They start with the Bronze Shields vs. Principe battle. The Romans use 2 re-rolls to reduce the Greeks 1 Courage. The Greeks use all 5 re-rolls and fail to scratch the Legions. Terrible rolling on the Greek side. They are pushed back 1 MU again, and are barely holding onto the objective, but are still at 3 Courage.
The White Shields and Triarri continue to pound on each other, with neither side getting the upper hand. The higher starting Courage maybe the difference maker for the Triarri.
The Center Hastati continue to grind down the Militia Hoplites. Pushing them back 1 MU and reducing them 1 Courage down to 2 left.
On the Roman right, the Hastati finally manage to hack through the Light Infantry there and send them on a rout.
End:
The Greek Light Infantry is removed from the board, but no one can see them flee. No waver tests are needed.
The Greeks do need to start taking Collapse tests, but everyone passes them with no issues.
Turn 8- Final Turn
The Greeks get 4 Commander's Gaze to the Roman 5. However, no one bids any. The Greeks have initiative.
Move:
The Roman Hastati on their right, breaks formation to try and get back into the fight. They try to move back towards the Militia/Hastati fight. However, they will not make it in time to make a difference.
Melee:
The Greeks start with the Bronze Shields vs the Principes. Both sides dump re-rolls into the battle, but the Bronze Shields get the upper hand and push the Romans back 3 MU and inflict 1 Courage loss. They maintain control of the objective!
The White Shields are reduced to 1 Courage and start to waver, compared to the Triarri going to 2 Courage left. However, neither side gives an inch of ground.
The Hastati in the center push back the Militia Hoplites yet again, but fails to rout them.
End:
No action needed.
Conclusion:
Exhaustion begins to take its toll on the soldiers fighting. As if by mutual accord, both sides step back from the fighting and tentatively withdraw. Their weary arms barely able to hold up their shields any longer. The Romans fall back to their camp, and leave the field to the battered Greeks. A ragged cheer goes up from Pyrrhus' men for holding the field must be a victory. However, it is soon obvious that they may have claimed the field, but the Greek soldiers paid a much heavier butcher's bill. There would be no time to erect trophies, as the dead would need to be buried and burned.
Truly a Pyrrhic Victory. The Greeks managed to hold the center objective, but they were losing. Only the onset of exhaustion and the coming night fall saved them a victory. It was the last push by the Bronze Shields that allowed a victory at all. To put it in how close a run thing this was, the Romans had 11 Courage left to the Greek 5! By rights, this should have been a Roman victory as I was taking Collapse tests, and my opponent wasn't. The loss of the Greek Light Infantry and Cavalry was enough to trigger Collapse tests but the Greek units left stayed in the fight. That was close, as a bad result there or a less than great result in the Principe/Bronze Shield fight would have cost me the game.
Overall, my coordination of the Greek units was poor. I wasted my cavalry and my Light Infantry . The Cavalry struck too soon, and the Light Infantry was a greater threat as a force in being on the flank instead of bogged down with the Hastati. My dice rolling was poor as I mostly failed to scratch the Legion formations armor, except with copious amounts of re-rolls at the end.
On the Roman side, they let me get to the objective first and that ultimately cost them. However, their use of units was skillful and where they engaged they generally had the advantage. The skirmishers were there to protect from the cavalry getting a rear or flank attack later in the game, so they did their jobs just fine. The Romans are a slow meat grinder. It is hard to kill them, and they slowly grind you down. Their Legion formations are tough to break, and can grind out Courage loss steadily on a foe. They are not a "shock" army but an attritional one.
Become a Patron and get access to all the cool stuff, a peak behind the curtain of Blood and Spectacles, and early-access to playtest games!
Check out the latest publications and contact me at our
Blood and Spectacles website


Wow, I really enjoyed reading through this. I grew up playing Avalon Hill & SPI games where units were rarely destroyed unless surrounded or heavily overmatched and it's something I've always wanted to recreate in a miniatures game. You really captured that in this - units locked and largely stationary, other units giving ground over time, and the slow disordering of the battle lines.
ReplyDeleteGreat game and great report!