Monday, November 30, 2020

Battle Report: High Noon- Turkey Shoot-out


Long time readers of the blog may recall that Thanksgiving is a time where I get to play Dexterity Games with my family!  Normally, we play Total CARnage but this year I came prepared for something different. I brought my plastic Cowboys and Indians for some games of High Noon.  Perhaps it wasn't the most appropriate game for the season, but we had tons of fun! 

This won't be a battle report per se, as we played about 5+ hours of High Noon of the course of a couple days.  I wasn't even involved with all the games that were played as once my relatives had the basic rules, they went on about it on their own.  I only got involved in a handful of games myself.  Do not worry, we all were wearing masks and socially distanced, a 6 foot table makes that much easier.    

However, I will add a few phots and some comments that I can.  The lighting isn't always the best because we were in a sun room (with cracked windows for air flow), but it is better than nothing!  We played a variety of scenarios from the book, including an Indian Raid on the town, a shoot-out, guarding the Jail, Rootin' Tootin' and more!  There were multi-player games and one-on-one match-ups through out the day.  


Mean Joe Greene and his Outlaw Band roll into town for a bit of a hijinks.  However, Sheriff "Cool Hand" Luke and his Posse are there to to rain on their outlaw parade!  


 Here, the Dakota lay siege to the town of New Ulm in the Minnesota River Valley.  The citizens bravely defend the town.  Despite having the edge in technology, the Dakota swarm into the town and past the initial line of defenses.  The residents are forced to fall back.  


Here a Dakota Warrior brought a knife to a gun fight!  He evaded a haul of bullets to get up close and personal with this New Ulm resident.  The knife worked as his shield protected him up close, and he landed a killing blow! 


 A Dakota with a Long Rifle manages to snipe a resident of New Ulm from a pretty good distance while they were in cover!  Not bad shooting/flicking! 


The battle comes to a climax as Dakota warriors get through the initial defenses and head into the lower part of town.  The defenders put up a good fight, but ultimately had to pull back.  The Dakota laid siege to the town of New Ulm three times during the Dakota War of 1862, but each time eventually had to withdraw.  The town was defended mostly by armed residents and a few law men.  

These games gave me a chance to teach a bit of local history in the guise of playing games.  That is always a bonus!  


Here the "Red Hat" Gang tries to break one of their own out of the town jail.  Sheriff Luke has stationed his deputies around to protect the building.  He knows the gang's leader Erik the Red will stop at nothing to try and free the prisoner and skee-daddle out of town.


It was a brutal fire fight, but Sheriff Luke and his men manage to hold firm and drive off the Red Hat gang once and for all.  They won't be coming back to these parts anytime soon!  

Half the fun was getting everyone to name a few figures and do some RPG-lite with outrageous cowboy drawls, and terrible slang from old westerns.  You know, saying things like, " Sheriff Luke is shooting like a polecat left out in the hot sun too long!"  What does that even mean.... no one was really sure!  But it was good fun at the time!  There was also a lot of shouting "Yee-haw" and "Yee-Howdy".  I recall Mean Joe Greene taking out a deputy from range, and the deputy player saying, "That's a fine how-do-you-do!"  Good times!  

Like I said, the Thanksgiving Dexterity Game is a bit of a tradition.  This year was no exception and it was a big hit.  The kids always break the ice, and then later in the evening the adults start getting in on the fun too!  High Noon even managed to compete well against various video games and VR for play time!  Hawt Dawg!   

Early the next morning, the kids were playing before I even woke up!  The first thing I heard Black Friday morning was, "Stick'em up, Pardner!"  That was a fine way to wake up.  

Overall, another successful Thanksgiving of gaming.  I hope you all had as much fun as we had!       


Monday, November 23, 2020

Heirs of Empire: The Mauryan Empire - Army List


Heirs of Empire is intended to play the Wars of the Diadochi after Alexander's death.  There was a 50 year period of warfare that engulfed the the Near East as the various Diadochi successor's tried to unite the old Hellenistic empire under their banner.  Ultimately, they all failed, but three powerful kingdoms were established.  These kingdoms were often called the Successor Kingdoms.

The kingdom furthest East was that of Seleucus.  He established his capital in Syria and his empire extended all the way to Bactria (Afghanistan) and the edge of India.  Often, he would need to turn his eyes Eastward to maintain control of his empire.  Seleucus rarely went that direction to expand his empire, only to shore it up.    

The reason was simple.  To the East was a rising power, the Mauryan Empire in India.  There Chandragupta was a rising power.  He had conquered a neighboring Indian empire called the Nanda Dynasty.  This allowed him to create an empire of his own.  

The Indus River Valley had been conquered by Alexander toward the end of his campaign.  The former Persian Empire had 4 Satraps established there.  Alexander mirrored this approach and maintained these Satrapies.  However, the Mauryans asserted their influence and gained control of these 4 Satrapies.  This caused Seleucus the re-evaluate his decision and to try to consolidate his Eastern borders.  

The Mauryan-Seleucus War took place between 305 and 303 BCE.  Appian is the main source, and his account is less than a paragraph of details.  The end result was a confirmation of the status quo, a marriage relationship between the two leaders, and a stable border.  The Mauryan Empire was able to retain the Indus and gained lands into Bactria.  It has also been speculated that the war elephants Seleucus brought to the Battle of Ipsus had been gifted to him from Chandragupta.   


The Army of the Mauryan Empire

The Indian sub-continent has access to a vast pool of manpower for the Mauryan's to draw from.  In addition, it was rich in minerals and resources to arm and equip such an army.  By this date, the Mauryan Army was a professional force that was sponsored and supported by the taxation of the state.  This professional status allowed for a combined arms approach to their military structure.  This featured war elephants, chariots, cavalry, and infantry.    

The tactical structure of an Indian force varied significantly from that of Seleucus' Macedonian style army.  The smallest tactical element was called a "Patti".  In theory, it was composed of a single elephant, a chariot, 3 horseman, and 5 infantry soldiers.  From there, these units were built up into larger forces in multiples of 3.  

There were also references to something called a Vyuha.  This appears to be a combined arms military unit of about 5,000 troops.  The Vyuha has 5 sub-units that each unit had about 45 chariots, 45 elephants, 225 cavalry, 675 infantry men.  These Vyuha had various formations that they could adopt based on the tactical need of the army.  

The weaponry and equipment of the average soldier had stayed relatively unchanged in the region from Alexander's day.  Chariots and War Elephants often had archers or spearmen in their crew.  They formed the shock element of a Patti/Vyuha.  Infantry were either sword and shield men or archers.  There were some instances of heavy infantry that made use of two-handed swords.  Cavalry were light lancers or javelin men.  

The Indian bow was somewhat unique.  It was a large bamboo construct similar to a long bow.  It required the user to steady the tip of the bow against the ground and the front foot.  This allowed a "full draw" of the weapon.  Greek sources claim that the Indian bows were powerful enough to pierce even heavy Greek armor.  However, if the bow could not be properly set, it had reduced effectiveness.  Compound bows were also available, but also less commonly used.  Cavalry did not seem to utilize mounted bows while Chariots and War Elephants did.  

For protective equipment, the helmet was not in wide use.  Instead, the turbin was the primary headgear of Indian infantry that provides some limited protection.  Their shields were typically ox hide spread over wooden and wicker frames.  During this period, body armor was not a common feature of Indian forces.  After Alexander's invasion, metal and lamellar armor became more important for mounts such as horses and War Elephants.  


The Mauryan Empire in Heirs of Empire

The basic building blocks of the Mauryan Empire can be easily translated into the unit types in Heirs of EmpireThe game purposely uses abstracted unit types to fill in the various units and troop types found across the Near East.  Let's break it down with what units probably existed in a Mauryan Empire force and how do they translate into units in the game.  

The Indian Infantry forces are mostly composed of two main styles.  Sword and Shield based infantry and Archers.  These can be covered easily with Drilled/Warband Infantry and Archers.  For the occasional Heavy Infantry you could use Drilled Infantry to represent them.  

Cavalry was clearly of the Asphract variety.  This would include regular Asphracts or upgrades to Javelins.  Chariots could be Asphracts with Bows or if you wanted a bit more kick you could use Epilektoi Cavalry to represent them as a "shock" force.  

War elephants are War elephants.  No need for special rules or translations here.        

The more challenging aspect of making the Mauryan Empire army fit into Heirs of Empire is there unique Vyuha system of organization.  Unlike Hellenistic forces who tended to group like units together, the Indian army seems to prefer to spread them out.  In this case, It seems to me that a Vyuha will need to be looked at roughly as being equivalent to the Wing of an Army in game.  The translation is not a clean 1 to 1, as the Vyuha is not an exact match.  Such a compromise is an abstraction.  However, it still gives the proper "feel" to the Mauryan Empire army in the game rules.  


Mauryan Empire Line of Battle

Use the following lists to build your Mauryan forces for Heirs of the Empire.  The Line of Battle help to choose the appropriate Units for your Historical forces.  Check the scenarios for starting point cost for a force.  

The Line of Battle will have an entry with a  number.  The number indicates the limit of that Unit you can take in the army.  If an entry says 1+ your army must have at least one of these units in it.  If it is 0+ any number of that unit may be taken.  If a Unit is not on the list, it can not be chosen. 

Mauryan Empire

Center:
1-3 Elephants
1+ Warband Infantry
0-2 Drilled Infantry
0-3 Archers
0-3 Asphract Cavalry
0-3 Epilektoi Cavalry

Left:
0-1 Elephant
1+ Warband Infanty
0-1 Drilled Infantry
0-2 Archer
0-1 Asphract
0-1 Epilektoi Cavalry

Right:  
0-1 Elephant
1+ Warband Infanty
0-1 Drilled Infantry
0-2 Archer
0-1 Asphract
0-1 Epilektoi Cavalry 

Sample Mauryan Army 

Below you can see a Sample Army built from the Lines of Battle provided.  They give you an idea of what your force could look like.  They are all built to a 54 point force.  They range from 5 to 8 Units each. 

Mauryan Empire

Center: 
Elephant                        10 Points
Asphract (Javelins)        8 Points
1 Archer                         4 Points
1 Warband Infantry        6 Points

Left: 
1 Asphract                     6 Points
Warband Infantry          6 Points

Right: 
Warband Infantry            6 Points
Archers                            4 Points

Total- 54 Points

This army has numbers and range, but not great shock "hitting power" compared to a normal Diadochi force.  In a pinch, the same Line of Battle could be used for other Indian opponents such as Porus vs. Alexander.  

Final Thoughts
Appian doesn't give us much detail about the Seleucus and Mauryan War, if there even was a war at all!  However, if you wish you can easily create a "What-if" campaign or a scenario.  The normal rules for Heirs to Empire would work fine to detail what happened once Seleucus crossed the Indus to support the ousted Greek Satraps of the region.  The Mauryan forces would be playing on their own turf, and have access to a greater reserve of manpower than Seleucus could ever hope for.  Many historians believe this is why Seleucus made peace and left, leaving the area to be Chandragupta's area of influence.  The great things about a war like this is that there is not enough detail for us to do it wrong, and plenty of room for a Wargamer's imagination to do the rest.  


You can follow Blood and Spectacles Facebook page for more fun: https://m.facebook.com/pg/BloodandSpectacles/posts/?ref=bookmarks&mt_nav=0

Or our website:

Or our Messageboard:

Or our Wargames Vault Page:


Monday, November 16, 2020

Battle Report: Only the Strong Survive- Big Al vs. Steggie


This book has been on a slow boil since late 2018.  Like most of my projects, the initial core rules come pretty quick.  However there is much more to a game than just "Core Rules".  Therefore, once I get a set of rules up on the WIP section of the blog, they tend to marinate for a bit until I rotate back to them.  I tend to keep 2-4 games in various states of work.  It keeps me and you on your toes!  

I finally took the time to hash out the final few Dinosaur types and scenarios.  You may recall a past post about Playtesting these rules.  Well, that is all done with now.  

Only The Strong Survive is a model-vs-model dinosaur skirmish game.  It is designed to be playable between single Dinosaurs and small groups.  There is always a bit of a challenge in trying to make single model-vs-Model games interesting.  

Big Al the Allosaurus had been roaming across the savanna for a few days.  It's stomach rumbled ominously.  It was hot.  Big Al had managed to scare some smaller scavengers away form a carcass a few days ago, but that had only been a few nips of food.   He needed something a bit more substantial.  

Most of the other Dinosaurs saw he coming, and re-grouped into their herds and stayed away.  It was going to be a tough hunt.  It was too hot for a long, slow approach.    

As he crested a small rise, a pair of trees broke up the plain in front of him.  A herd of Stegosaurus were in the distance.  However, what caught his eye was one that had broken away from the pack and was closing in on the trees, unaware of the Carnivore's approach.  

In an instant, their eyes met and the hunt was on.  All thoughts of the heat were forgotten as this was the moment Big Al had been hoping for.   

Forces:

Allosaurus with 10 Instinct Dice- Big Al

vs

Stegosaurus with 9 Instinct Dice- Steggie


Mission:

This will be a straight up kill or be killed type of scenario.  Steggie has wandered away from his herd towards some choice bits of foliage, when they are set upon by a roving carnivore; Big Al.  Steggie is trying to drive Big Al off, while Big Al is trying to kill Steggie for a meal.  

Set-up:

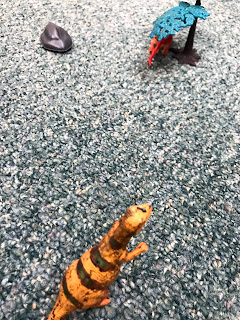
We are playing on the floor in a two by two space marked off with notepads.  It was a bit makeshift with what I had brought, which was not very much.  I had two plastic trees and a plastic rock, that we put near the middle of the area.  Not much to work with this time.      

Turn 1: 

Our Allosaurus, Big Al; bids 2 while Steggie bids 0 Instinct Dice for initiative.  

Big Al uses three Instinct Dice to move towards his prey and launches his attack!  He tries to Body Block Steggie, but only has a few dice to do so.  Steggie defends so it is 2 vs 3 dice.  Steggie avoids the attack.  


Steggie then reacts with 3 dice vs. 1 and wins.  Not enough for a special reaction, so he just takes over and starts playing.  He uses his last 2 Instinct Dice to get by a tree to fend off the Carnivore.  Big Al tries to react with 2 dice, but fails. 

Since neither Dino has Instinct Dice left, the turn is over.


Turn 2:

Big Al bids 2 vs. Steggie's 3 Instinct Dice.  After winning Initiative, Steggie starts trundling along behind Big Al.  Big Al reacts with 3 vs. 1 dice and wins. 

Big Al pivots and uses two dice of movement to catch up to his fleeing prey.  He then attacks with 4 dice using a standard bite attack.  Steggie defends with 3 dice.  Big Al wins with 1 hit, but it is not enough to get past Steggie's armor.  

All Instinct Dice are used, so the turn ends. 


Turn 3:

Big Al bids 2 dice to 0 again and wins.  

The carnivore puts max dice into a Hatchet Attack, but has a terrible roll.  Steggie uses Max Defense and easily avoids the attack.  

Not to be deterred, Big Al uses his last Instinct Dice on a quick bite attack, that Steggie also avoids with 2 defense dice.  

All Instinct Dice are used again, so the turn ends. 

Turn 4:

This time, Steggis bids 3 vs. Big Al's 2 for initiative.  

Steggie aggressively attacks using max attack on a piercing tail swipe.  However, Big Al uses his max defense dice to dodge the attack.  

He responds with a 5 dice counter-attack, and Steggie can not defend.  This time, Big Al tears a chunk out of Steggie and causes 1 light wound.  Only 8 more for a kill! 

Turn 5: 

Big Al bids 2 again and Steggie gives 0 for initiative.  Steggie is ready to battle it out with his tail.  

Big Al launches a Max Attack Hatchet Attack, which Steggie tries to avoid with Max Defense again.  The higher target number for the Hatchet Attack does not help, and Steggie avoids the attack.  Big Al uses his final dice to move away and try to get around to Steggie's less defended front.  

Steggie uses his last two moves to get by a tree to reduce Big Al's attack vectors.  


Turn 6: 

Big Al bid 2 and so did Steggie.  Big Al upped his bid 1 to get the Initiative.  

Big Al moved towards Steggie, but then Steggie tried to React with 3 dice vs. 3 from Big Al.  Big Al won when Steggie whiffed his React roll.  

Big Al spent another Instinct Dice to move into Combat Range, and then attacked with a Body Block.  3 vs. 3 defense.  Big Al's attack worked, and Steggie is pushed back Slow distance and knocked down!  

Steggie is in trouble, but both Dinos have used all their Instinct Dice.


Turn 7: 

Steggie is Knocked Down and will need to spend Instinct Dice to get up again, however Big Al wants to attack before that can happen.  Steggie bids 3, keeping enough for a Max defense.  Big Al bids 4.  

Big Al immediately jumps in to attack!  He uses all his remaining attack dice for a bite attack!  7 dice vs. Steggie's 5.  Big Al manages to take two quick snaps out of the Knocked Down dino.  When you are knocked down your reaction and defense target numbers are increased to 6+.  

Steggie needs to get up, but both Dinos are out of Instinct Dice.  


Turn 8: 

Desperate to stand, Steggie bids 3 dice, to Big Al's three.  Again he increases it 1 to win.  

Big Al launches a Hatchet Attack against his downed foe.  This time, Steggie rolls away from the attack as Big Al got 0 successes for his attack.  

Steggie kept 1 dice, so he can stand again.  


Turn 9:  

Big Al bids 2 to Steggies 0.  

Big Al tries to bite again with all 8 dice, to Steggie's max defense.  Big Al manages to get through 1 more time, and cause another wound.  Steggie goes up to Medium wounds, and their armor is reduced from 1 to 0.  Oh no! 

Steggie Reacts with 2 dice, looking for two success so they can push back.  However, they get 0.  Big Al used their last Instinct Dice on the reaction as well.  

All Instinct is used up. 

Turn 10: 

We see the same pattern with Big Al bidding 2 to Steggie's 0.  

This time, Big Al uses 5 dice to try to body block Steggie again.  Steggie resists with 4. The two animals collide, but neither gives an inch.  Steggie tires to react again, but Big Al counters and the two stay stalemated.  

Then Big Al tries to take a quick nip and causes another wound.  Normally, Steggie's armor could have handle it, but not in their battered state. 

Oh no!  Steggie did not keep any Instinct Dice for a survival test.  Their Survival factor is coming into play.  They make an immediate move to the edge of the board and escape.   


Turn 11: 

This time, Steggie's player bids 7 dice for Initiative, while Big Al only bid 2.  

Steggie uses their last dice to move and they successfully escape off the board.  

Conclusion:

"Big Al didn't bring down his meal, but he managed to get a few mouthfuls of meat.  If he was lucky, his prey would weaken and lay down.  If he stalked it close enough he would be there to finish the job.  As long as his prey did not make it back to its herd, Big Al still had a chance to fill his belly full."

The battle itself was relatively quick, but having more Instinct Points to start with helped out a lot.  Big Al managed 5 hits, while Steggie landed none.  Big Al was on the attack the entire time, and Steggie had a hard time dealing with it. 

For both Dinosaurs, there never seemed to be enough Instinct Dice to go around.  Steggie ran out before making their Survival Test and that ultimately caused them to flee.  In addition, any changes you can force to your  opponent's target number is a big impact.  

I really needed to add more jungle and swamp terrain to the board.  That would have added immensely to the game as their would have been places to hide, flanks to block, and movement to hinder.  That would have added more tactical depth to this battle.  

Finally, I have a feeling the game will play pretty different with more animal, and Dinosaurs ganging up on each other.  You would have to be more careful with how you use your Instinct Dice pools, because a Dino without an Instinct Dice pool is in a tough place and easily injured.

Thanks to this battle, I went back and added more "Combat Maneuvers" that Dinosaurs can do.  This adds even more options with most Dinosaurs being able to launch between 5 to 7 different attack types depending on the Dinosaur.  I think this will add more decision making to the attackers and the defenders.  That is good.  

You can find the game on the Blood and Spectacles Wargame Vault page.  Try it for yourself and let me know what you think on the message board.    


You can follow Blood and Spectacles Facebook page for more fun: https://m.facebook.com/pg/BloodandSpectacles/posts/?ref=bookmarks&mt_nav=0

Or our website:

Or our Messageboard:

Or our Wargames Vault Page:

Monday, November 9, 2020

Review: Reality's Edge- Osprey Games


 I played lots of 2nd and 3rd Edition Shadowrun in my youth.  Cyber-punk was a thing for me and my cohorts back in the day.  However, I have to admit the allure and edge of Cyber-punk has worn off on me since my youth.  Similar to how my former carbonite hard love of Star Wars has pretty much died.  Despite no longer being on the razor's edge of love, I was pretty excited to see Osprey Games release Reality's Edge as I had long thought about cyberpunk on the tabletop. 

I have to say, this is a hefty tome.  It is one of Osprey's hardback books, and it is a thick one!  320 pages of the bleeding edge of cyber-punk game design.  The opening 8-10 pages do a great job of setting the cyberpunk scene for those who are not familiar with the genre.  The Lexicon is also a plus, even if I think it is missing a few choice words or two.  The art of the Sprawl does a good job of setting the right feel too.  I think some of that card Infinity terrain from their boxsets will go along nicely for this game too.   

To set the scene for you, chum; the world is run by the Mega-corps.  At the gleaming tops of their spires and arcologies is a different world.  A world of luxury and power.... but at the cost of your freedom.  The company?  They own you.  Down the food chain is employees and salarimen who work to drive the Corporate profits in return for a piece of stability, security, and a some infotainment.  Then there is the street, that is where the real meets the far-too real.  In the street, the bulk of humanity struggle to make the pain go away through sims, pharma, and base entertainments.  The Street is where you are alive..... until you aren't.  The Street is a dangerous place. 

You play as a Showrunner, a person who has a powerful patron; and in return for their patronage you offer blood, sweat, tears, but mostly blood.  You do the jobs in the Street that those in the Spires won't do.  You get your hands dirty for them, so they can play their little corporate power games.  In exchange you get some script and maybe a chance at being made a permahire.  That is when you ascend from the Street to the stability of the employee cadre.  Salary, health benefits, and more awaits.  No more gig work for you.  All you have to do is get a good rep, keep your patron's hands clean, swipe it from the Man, and crack copious amounts of skulls along the way.  

The Showrunner assembles a team of operatives to help him carry out his corporate backed crime spree.  They each offer unique skills and abilities that must be used appropriately.  You are their best shot at a warm bed, a full belly, and all the sims they could want.  The Showrunner just has to hold them together long enough to get the job done.  The Showrunner and their operatives are your "team" on the game table.  

Now that we have some idea of where Reality's Edge is, let's chrome up and hit the Street....    


Things I Liked

Each member of your crew can be a unique operator with their own role to play.  Even at creation, no two operatives need to be the same as they all can choose from different edges and options.  Even if you have more than 1 of a single type, they can still start off very different from each other.  From the Drone Jockey, to the Console Cowboy, to the Cyborg, to the Masque.  They all bring a unique set of skills and edges to the party. 

Your Showrunner is a pretty well developed character with a background, motivation, and a archetype of their own.  In addition, they are accompanied by a virtual avatar of their employer.  All of these options allow you to customize your "leader" character and provide a bit of backstory and narrative to the your crew. This RPG-lite element helps build an emotional investment with the game. 

Each model has a simple stat called "Firewall" which is used to defend against cyber attacks and the like.  A simple stat to help deal with the potential complexity of cyber-hacking is a good idea.  There is also a somewhat "catch-all" stat called Mettle that allows for agility checks, activation, intelligence checks, survival checks, etc.  I prefer a Stat to a variety of special rules to cover these situations so this is in my wheelhouse.     

The game does have a variety of actions a model can perform.  Some actions of note include, dropping prone, overwatch, and Misc Action.  Misc Action is a good catch all that allows for RPG lite elements which are always a bonus in a skirmish game.  The Overwatch action allows a limited interrupt capability to the games activation system.  Actions range from 0 to 2 AP, with the majority of them only taking 1 AP in a game where you tend to have 1-3 AP per activation. 

Probably the "big idea" this game brings with it to the table it to try and add Hacking/Decking into the mix as a tabletop activity that is necessary to be successful.  In a way, it is like having magic in a Fantasy game.  Hacking in this game takes two forms; Combat Hacking and Virtual.  Combat is on the table real-time, while virtual is avatars and the like moving around the battlefield and launching electronic hacks.  These can effect equipment, gear, and the environment.  They can buff, de-buff, attack, and other actions based on the Apps that are used.  There is a lot going on with the rules here, but the inclusion of "virtual" beings moving concurrently with the "meat" space is a pretty interesting idea.  

Things I Did Not Like

For activation, the game has you make a Mettle test for each model.  If passed, you have 2 actions you can take.  If a critical is rolled, you gain an additional action.  However, it failed you have 1 Action and then play moves to your opponent to start activating their models.  This continues back and forth until all models have activated.  I am not a fan of this mechanic because I have used a similar one, and found that in skirmish games it can lead to a lot of dice rolling for not a lot of reward!  I would prefer if everyone gets 1 AP, and then if they wish to use a second.... THEN make the activation test.  This allows you to skip rolling and losing activation to your opponent.  The decision to roll or not to roll then matters.  As presented here, there is no decision, simply mechanics.  

The designer of these rules also created the game This Is Not a Test.  One of the key elements of that post-apoc game was that even if you shot a person you did not know if the target was killed, injured, or even wounded until after all activations had been completed.  This rule set keeps these rules in place.  In theory I like the concept of these rules.  However, in practice I find them a bit cumbersome as you need to mark the model and interrupt the game flow later to determine wounds.  Ultimately it is a friction mechanic to add some uncertainty to the game which I like, but the actual execution gets a bit cumbersome.  You will have to decide if the trade-off is worth it to your games.  

The book also has rules for suppression fire, which I like in theory.  However the way the wound system works means that it becomes a bit of an If This/Then That type of rule that takes you a bit out of the game to resolve.  The results of Suppression Fire are mods to hit, mods to wound, and a key word special rule!  I may prefer the suppression rules in Black Ops where the opponent decides if they want to take saves, or simply keep their head down and avoid getting hit.  The execution is cleaner.  Again, I like the idea behind the rules but I am not enamored by the execution of them.  The game also has rules for shooting through walls, walking your fire, shooting into melee, and using template weapons so there are a lot of shooting options for a player.  


Meh and Other Uncertainties

The game is played on a 3 foot by 3 foot board, the  measurements are inches, and the it is intended for 28-32mm models.  The game allows pre-measuring but asks that you "do not abuse it", but defines this as simply whatever your opponent will tolerate.  That is the oddest way I have seen the issue addressed.  

Basic gameplay is opposed rolls +stat, highest result wins.  There are also Stat checks where you roll a d10 and trying to beat a Target Number.  Pretty standard stuff, BUT I would prefer if they were closer aligned.  I.E. Opposed rolls were to beat a TN like Stat rolls were.  Nothing too ground breaking or outside of the norm here.  

The game has the rules you need for running, jumping, climbing, falling, hiding, and spotting, difficult terrain, going prone, etc that you need to play in a tight and messy urban environment.  These should allow players all sorts of options that interact with their existing terrain collections.  

There are a few pages on bystanders in the rules.  These act as complications and "living" elements of the sprawl around you.  There are always people everywhere, even when you are trying to keep a low profile.  I like the inclusion of these rules as they fit the setting really well.  

This game is filled with chrome.  There is tons of weapons with keywords and stats, armor, cyberware, drones, drugs, Apps, skills, and equipment.  About 40% of the book is this kind of stuff.  It really fluffs out the world and adds to that customization and RPG-lite element of the rules.  I am sure some of it is not 100% balanced because there is just too much of it! 

There are 10 scenarios in the rule book, and each scenario has a couple of mission complications.  Then there is a list of 30 potential hitches for any game.  Bystanders also add more potential variables to any of the scenarios.  To keep in even more interesting, individual operatives have motivations that can give them XP boosts during a game too.  Add in the campaign elements and all the RPG-lite and you have a lot of replayability in this game.       

The campaign system seems to follow the tried and true campaign system established by Games Workshop with Necromunda/Modheim/Gorkamorka.  It has injuries, income, experience, buying and selling, plus a few other items like corporate trace and reputation.  The two main factors are Reputation and credits.  They are distinct, but Reputation is the way to determine "balance" between two opposing groups.  Each JobOp and the post-game is supposed to represent about 30 days, so a full "Year in the Life" is about 12 scenarios.  There are also a list of potential ways to determine a campaigns "winner" based on the set end time of the campaign.  

The book ends with a "bestiary" for common NPC types and models that come up in the various hitches and scenarios of the game.  There are not currently any solo or Co-op play rules (that I am aware of), but I could see them easily being developed by a group that was so inclined.  


Final Thoughts

What makes this different from any other game out there?  Of course, there is the strong cyber-punk feel to it and the RPG-lite elements to go with it.  That is a core draw right there.  If that interests you, then this is a solid game for it.  

From a Game Design standpoint it brings the following: 
1. Delayed Injury Resolution
2. Hacking and Virtual Elements
3. Individualized Units that can become Unique Characters
4. Campaign elements

Mechanically, I am not a huge fan of the activation system or the injury system.  Beyond that, there is a lot going on in the rules.  I can't shake the feeling that there is a relatively high noise to signal ratio.  For example, you can choose to do suppression fire, concentrate and shoot, move and shoot, or walk fire to multiple targets.  However, ultimately these are just variations of "shoot" and doesn't really add to the tactical play.  The options may add more sizzle than actual steak.  This is probably a matter of taste, but it feels like there is more "crunch" then is strictly necessary.    

This would be a great game for a dedicated group to gather around and agree to play X number of games for a limited campaign.  I could see a game group setting up to play a "Year in the Life" campaign, work together to set-up terrain, NPCs, and bystanders.  This would allow the game to excel with a great deal of RPG-lite and an evolving storyline.  It is well suited for a narrative style of play in an existing gaming group.      
   

Monday, November 2, 2020

Operation: Hemlock- AQ: Force of Arms- Battle Report


Vice-Admiral Travers had been pleased with the success of Taskforce: Chalice and their performance.  They had been instrumental in stemming the flow of Orks out of the Green Zone and to Baron's Rest.  The engagements had been in the open ocean, under the sea, and in coastal waters.  However, the Ork menace was still comfortably ensconced in Da Deff Islands.  General Kurtz and High-Command was ready to move to the next stage of Operation: Hemlock.  Instead of keeping the Orks contained, it was time to exterminate them from the area.  

Chalice had been beefed up with some additional ships, and now it was time to sweep the Approaches to the island clear.  Warboss Skarbash had been building and collecting an impressive fleet of Ork ships.  They had traveled from across Ammoriss to bring Orks to Skarbashz growing Waaagh! energy.  However, the Orks biggest threats were still submersibles and commerce raiders attacking the PDF convoys into the area.  Therefore, Chalice was being called on to pen in the enemy ships and trap them back in port or sink them.  

Vice-Admiral Travers had unsuccessfully tried to blockade the Deff Islands with mines and pickets before.  This time, his strategy was going to be more aggressive.  He assembled several smaller patrol lines of escorts and light cruisers.  The plan was to sweep the Approaches, located enemy forces, and then use the Wrath of Humanity and her escorts to sink any opposition.  It was standard North Ammoriss Naval PDF strategy; find, fix, sink.  

Well, that is an interesting title.  What is AQ?  What is Force of Arms?  Well, a long time ago in a galaxy far, far away I created a game for the Warhammer 40K universe called Aquanautica Imperialis.  It was a game about wet-navies fighting on an Imperial world called Ammoriss.  This was part of a larger campaign called the Battle for Ammoriss.  It was good fun and pulled a lot of material and ideas from Man O' War and Battlefleet Gothic to give it that distinctly GW design feel. I still play it pretty regularly and even Made my own Miniatures for it. 

From there, it evolved into another game called Aquanautica Imperialis: Battle for the DepthsThis game took heavy inspiration from Aeronautica Imperialis.  However, instead of fighter planes shooting at each other, it was submarines from Aquanuatica Imperialis fighting for undersea control of Ammoriss.  More fun was had, but I never got around to making any miniatures at the time. 

As you can see, I have a bit of a soft spot for Sci-Fi and Naval wargaming.  I have since experimented with various versions or adaptions of Aquanautica Imperialis.  I was working on an Anti-submarine game between PDF and Tyranids for a while called Horror of the Deep based off older versions of Adeptus Titanicus.  However, I never properly finished that game. 

Force of Arms is an attempt to create a large scale Sci-Fi Naval combat game closer to an Epic style battle.  That means covering more ocean space with more ships, but still creating a different gaming experience from the traditional Aquanautica Imperialis.  At the scale of Force of Arms, you aren't as interested as what is happening to an individual ship, or even a squadron of ships.  Tactics like broadsides, cross the  T, melee, raking, etc are abstracted.  Instead, it is a game focused more on Strategy, detection, deployment, and taskforces of ships coordinating together to complete their objectives. 

I had some inspiration come to me one day, and I pounded out the rules in a matter of days.  The impetus of these rules actually grew out of thinking about a game play issue for a historical airplane game.  Some of the key games that inspired these rules were:

Chain of Command
Battlegroup
Blucher
Epic: Armageddon
Jovian Chronicles

I won't go into further details.  I have not placed the rules in the Work-in-Progress section yet as they still need much more polish.  However, I was so excited about the basic rules that I wanted to get them to the table as soon as I could.  Operation: Hemlock seemed like a great way to do it.  Hopefully, this battle report will give you a flavor for the game?  

Forces

North Ammoriss Naval PDF
Ascendant Battleship Patrol Line- Wrath of Humanity
- Protector Escort

Escort Flotilla- Shield of Alset

Anti-Submarine Flotilla- Guardians of the North
- Augur Buoys
- Attached ANS Hunter

Steadfast Light Cruiser Task Force- Swift Lance
- Mines

Break Point- 13

Skarbashz Big Bloo Boyz
Big Dakka Mob-
- Ram
- Nobz

Boiler Boatz Mob
- Smokescreen

Runt Boatz Mob

Sneaky Gitz Mob

Break Point- 14

These are relatively small forces to help me get a feel for the rules and how they work overall. 

Set-up
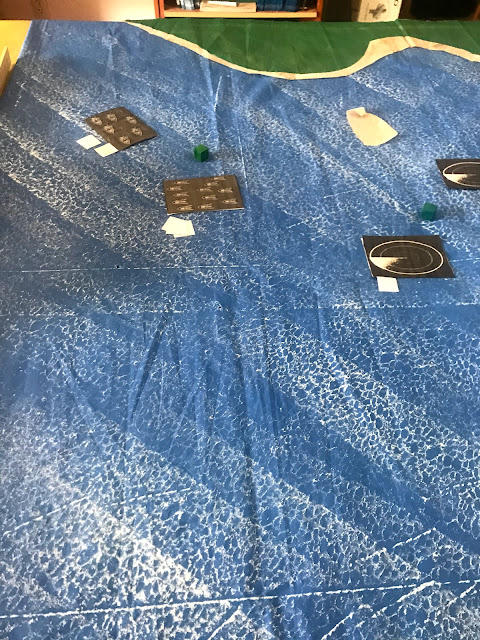
This game will take place on a 4x4 foot board.  The North of the board will have a small coastline to represent the Green Zone of Da Deff Islands.  The rest is open Ocean, with a couple of small Drill Rig platforms.  Each fleet will have 2 Deployment Nodes. 

Mission
Today's battle represents a standard battle.  Therefore, both sides are trying to get the other enemy force to their Break Point by inflicting hits on enemy forces.  Each hit will require the player to draw a Morale Chit worth 1-5 Morale loss or critical damage to the task force.  Once a fleet has exceeded their Break Point, the game is over. 

Turn 1:
Initiative Phase:
No one has any forces deployed, so it is a straight roll-off.  Some reconnaissance style assets such as aircraft, escorts, etc can influence this roll. 

Imperials win, and choose to force the Orks to act first.  The Imperials have 1 Order to the Orks 1 Orders.  

Deployment:
The Orks decide to only use 1 Deployment Node of their two to start the game off.  They keep the other for subsequent rounds.  The PDF deploy both of their Nodes.  

We start by moving our Deployment Nodes until they become "Fixed" in place.  Deployment Nodes are where our forces will be able to deploy forces from.  One of the Imperial and the Ork Nodes is fixed off the coast of the Green Zone.  The second Imperial Nodes chooses to be fixed near the center of the board.  The Orks still have a Node they can deploy next turn if they wish.     

The Imperials deploy a Blip forward from each Nodes, while the Orks deploy back from there Node.  It is not clear what is what.  The second Imperial blip also deploys an element.  

Orders: 
The first Imperial Blip makes an All Ahead Full order.  Meanwhile the Orks make a Run Silent, Run Deep Order.  We all know the first Ork Blip was a Sub Mob.    

Battle: 
All contacts are still blips, so no firing will likely happen.  However, we check passive ranges to make sure.  No one did an Augur Spike, so no further action is needed as no Blips are revealed.  

I think attacking before moving will take a bit of time to get used to! 

Maneuver:
The First Imperial blip goes All Ahead Full, and reveals that the first Ork blip was indeed a group of Subz.  However, they quickly break off Augur contact and disappear from the escorts scopes.  The second Imperial Blip moves towards the first Imperial deployment Node.  


With that, the 1st turn of the game is over.  

Turn 2: 
Initiative: 
The Orks win and earn 1 Order, while the Imperials have 0 Orders.  

Deploy: 
The Orks deploy their second Node, and begin to move it.  The second Nodes is easily able to move around and partially encircle the Imperial Nodes before choosing to fix itself. 

The Orks deploy 1 Blip at each Node, while the Imperials Deploy only a single Blip by their first Node closer to the coast.  

Orders:
The Orks use their special Waaagh! ability to put All Ahead Full on both of their blips.  The Imperials have no Orders to give.  

Detection: 
The Escort Flotilla is close enough to an Ork Blip by their first Node to determine it if a pack of Boiler Boatz.  No other Detection occurs.  

Battle: 
The Ork Boiler Boatz oepn fire with their weapon batteries at the Escort Flotilla, and they return fire.  This is a close range fight, so both sides will have +2 Firepower dice.  You make an Opposed roll between the Firepower of the shooter, vs the Counter Measures of the target.  Boiler Boatz also always counter as obscured due to their inherent Smokescreen, giving them +2 to Counter-measures.   


After all the dice are rolled, the Boiler Boatz take 1 Chit, while the Escort Flotilla takes 3.  The Imperial players reveals that the Escort Flotilla is broken.  However, one of the Imperial Chits reveals that a Weak Point was also hit and two additional Chits need to be drawn.  The total is enough to obliterate the Imperial Escorts, but the damage then goes onto the overall Morale of the Fleet as well.  The Imperials have 4 chits to the Orks 1.  The Ork player reveals that the Boiler Boatz were also crippled in the engagement.  

Maneuver: 
The Boiler Boatz go All Ahead Full, but due to their crippled status, it is more of a limp along full.  The other Ork Blip also races towards the second Imperial Deployment Zone to try and capture it, but it is too slow and too far away.  

The initial Imperial Blip falls back away from the Boiler Boatz, while the second moves towards them to potentially engage.  


Turn 3: 
Initiative: 
The Imperials have an additional dice since a sub element is deployed by one of their blips.  This gives them Initiative and 1 Order.  The Orks have 0 Orders.  

Deploy: 
Both Fleets deploy the rest of their forces onto the board.  The Imperials at their second Deployment Node, and the Orks deploy one blip at each Node.  


  One of the Imperial Blips deploys an element.  The Blip deployed at the second Imperial Node.  

Orders:
The Imperial Blip near the second Node successfully receives a Lock-on Order.  The Orks use their free Order to go All Ahead Full on one of the blips near the second Imperial Node.  

Detection:
The two Blips by the Imperial Node are within passive range of each other and reveal themselves.  The Imperials are the Wrath of Humanity with a Protector Escort, while the Orks are the Big Dakka Boats!  The protector also increases the Passive Augur of the Wrath of Humanity, to reveal the second Ork blip to be a mob of Runt Boatz.   

One of the PDF blips by the initial Deployment Nodes goes Active Augurs and tries to reveal the Ork Blip.  The Imperials are revealed to be Steadfast Commerce raiders.  However, they fail to detect the Ork Blip.  It stays as a Blip.  

Battle:
This was the moment Admiral Travers had been waiting for.  The human battleship task force versus the main Ork threat.  The Lock-On order is decisive and allows the Wrath of Humanity to land 6 damage chits on the Ork Big Dakka Mob after the Counter-measure rolls.  The Smokescreen helped, but it wasn't enough.  The Ork player grabs his tokens, and declares his Mob broken and out of the battle.  Ouch, however the Ork fleet maintains the chits for fleet morale reasons.  


The damage is so severe and crippling to the Ork fleet, that the rest of the Ork force decide to withdraw back to safety in the ports of the Green Zone of the Deff Islands.  

Conclusion
That ended rather abruptly as the Ork Big Dakka Boatz were so utterly devastated byt he Wrath of Humanity Taskforce, that the Ork forces decided to call it a day!  The Orks took 19 Morale Chits and broke at 14.  Bad draws!  The Imperials took 9 and had a break point of 13.  

The Ammoriss Naval PDF was victorious.  


So, how did the game play?  Hmm, it worked as intended for the most part.  I need to go back and balance the Chit draws a bit as most taskforces did not survive an attack as they were pulling multiple Morale loss chits consistently.  I need more 1's and 2's and fewer 3+ in the stack.  Related to this, I may need to re-jig the Morale rating of the various forces.    

Sometimes, it was hard to keep track of which Chits were for which force, so there will need to be a Blue and a Red force for the cards and make color coded Deployment markers.  

The core of the game was detection and blind man's bluff.  I would say neither of us played this part that well, except for my opponent's opening tricks with his Ork Sneaky Gitz.  I failed to use my anti-sub flotilla well at all!  However, the right initiative, with the access to the right order, with the right unit allowed me to take the W and detecting the enemy there was key.  If I had not had initiative my Commerce Raiders would have gotten pasted by the Ork Subz and possibly won the game for the Orks.   
That said, we consistently kept screwing up how many dice we could throw for Initiative/Orders due to deployed Escorts and subs.  We were under rolling in the later turns.  

Admiral Travers read through the reports coming in from the various Taskforce commanders.  Ork forces had been detected and succesfully engaged.  The Xenos were fleeing back to their ports, licking their wounds.  Ork Capital Ships had been successfully repulsed!  The Approaches to the Green Zone were secure.  The Admiral sighed with relief.  It was another feather in the cap of Taskforce: Chalice.

Upon hearing the reports, General Kurtz was said to respond with a curt nod and a rough Cadian salute, "Done well enough."  With that, he and Commander Brusilov turned to the task of transferring the forces of TaskForce: Sword to the Green Zone.  

Warboss Skarbash could fee the noose tightening around his neck.  The cunning pirate knew he was going to have to do something unconventional if he wanted to throw the Imperial war machine off its stride, and gain back the initiative.