Tuesday, January 10, 2017

Poseidon's Warriors- Battle Report- The Corinthian War

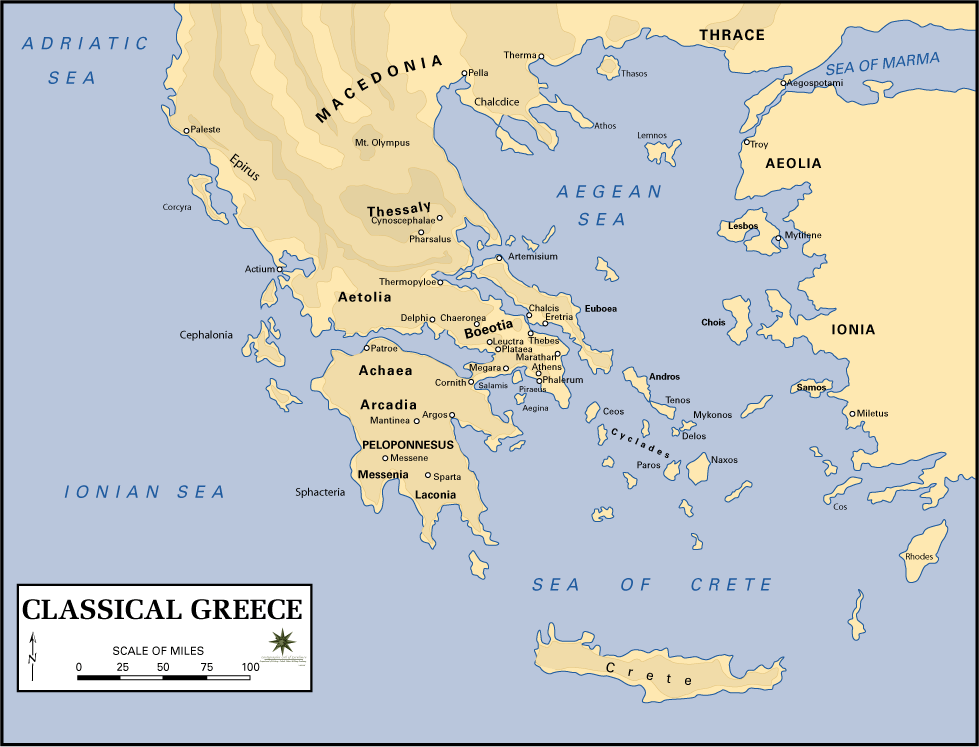
The Corinthian War was a conflict between an expansionist Sparta and her allies and the combined alliance of Athens, Corinth, Thebes, and Argos.  The war took place between 395 to 387 BC and involved forces on land and sea.  The land warfare mostly took place near Corinth and Thebes while the ocean battles took place around the Aegean. 

Corinth and Athens were the second and largest fleet in Ancient Greece.  They were well established naval powers.  Sparta on the other hand was attempting to build their Naval power to align with their abilities on land.  Most of the Spartan ships were tribute from allied city-states from the Aegean.

Not all battles of these ancient wars were properly recorded and many were lost to the mists of time.  The action below is one such battle. 

The Forces

Spartans    
 1 Slow Trireme unit with Commander, Elite Marines- 210 pts
4 Slow Trireme units- 150 pts each
Total= 810 points

Alliance
1 Fast Athenian Trireme with Admiral- 200 pts
3 Slow Corinthian Triremes units- 150 pts each
1 Fast Athenian Trireme deploying in reserve- 150 points
Total= 800 points

I found this cool set of Trireme and other ancient warship templates on the internet.  I don’t recall where, but if you know drop me a comment and I will give them full credit.

I used the triremes as the Fast ones and the Quadremes as the slow Triremes.  They were just a bit bigger but not too much bigger.  Either way, they worked great on my 4x4 board.  Templatesfor the win again! 

Set-up
On the west coast is a difficult shoreline.  The Spartans are entering from the south side of the board.  They are spread out across the ocean, with the Commander screened by another squadron.   The Alliance is scattered with a Slow and Fast Trireme unit sheltering in a small bay, and two Slow Trireme units are at sea.  The reserve Athenian Units are sailing desperately to get behind the attacking Spartans. 

Mission
The Spartans are trying to smash their way past the Alliance ships and move on to help support their land operations near Corinth.  The Alliance is trying to stop their advance. 

Turn 1
Athenians win initiative and decide to let the Spartans go first.  The two fleets take alternate activation and move forward to engage.  No one has the range. 

Turn 2
Athenians again elect to let the Spartans activate first.  The Spartans press forward, while the Alliance attempts to hold position and maneuver their Fast Trireme into a flank position. 


Turn 3
The Athenian admiral chooses to go first.  In the distant haze he sees familiar sails as his reserve Fast Triremes move up behind the Spartan fleet.  They quickly drop sail and take-up rowing as they close in on the rear of the unsuspecting Spartan fleet. 


However, the Spartan command squadron turns slightly and unleashes their artillery on the newcomers.  They manage to kill the marines on one, and reduce two by half speed.

The rest of the Spartan fleet moves forward, while the Alliance tries to maintain an arc formation. 

Turn 4
The Athenian admiral wins and goes first again.  The chasing squadron rams into the Spartan commander’s squadron on the sides and sinks two ships! 


The rest of the fleets continue to move to engage.  The time for fancy maneuvering is over, and the crews nervously brace themselves for the carnage to come. 


Turn 5
The Athenians win initiative with their admiral and choose to begin the carnage.  The first Corinthian squadron starts the battle by ramming the second Spartan squadron.  Two triremes come apart, but the first stays together and the two grapple together.  However, the Corinthian marines scramble aboard the enemy ship and take over the vessel quickly.  


The Spartan 1st squadron returns the favor to the Corinthians and smashes two of the 1st Squad into scrap. 

The Corinthian 4th Squadron manages to smash into the Spartan 5th on the side and virtually annihilates them.  One trireme remains. 

The Spartan and Corinthian 3rd Squadron go head-to-head.  4 Corinthians are sunk, while 3 Spartan ships are destroyed.  The remaining Trireme from the Corinthian 3rd Squadron turns and smashes into the remnants of the Spartan 2nd, sinking another vessel. 

The Spartan command squad manages to snag the edge of the Corinthian 4th and sinks a vessel.  The last vessel of the Spartan 5th Squad showers the Corinthian 4th with arrows, but fails to cause any real damage.

The Athenian admiral is satisfied watching from a distance and waiting to scoop up stragglers. 

The last vessel of the Spartan 2nd smashes and sinks the last of the Corinthian 3rd squadron, wiping them from the sea. 

Artillery fire from the Athenian 5th squad of Fast Triremes manages to kill the elite marines on one of the command vessels. 


After the carnage of Turn 5, the Spartans decide to call it a day.  They fail their morale roll and flee. 

Conclusion
The Spartan fleet was no match for the combined Corinthian and Athenian forces. This naval defeat on the approach to Corinth left the land forces isolated and ill-supplied.  The Spartan troops were forced to withdraw from Boeotia.  In addition, the losses of these Triremes would prove to be decisive as they were no longer available for the Spartan fleet at the decisive naval battle off Cnidus. 

This was a quick, brutal game.  With triremes only, they were sinking left and right.  They only can save from a ram on a 6+ and I only rolled one all game.  The ship that saved was then immediately swarmed by Corinthian marines. 

I didn’t feel like the fast triremes were significantly better than the slow ones.  It didn’t help that the Channel Assault scenario allowed for them to get behind me.  Ouch!  There wasn’t too much I could do about it. 

This was brutal, fast, and fun.  It will make a nice companion to land based games using Men of Bronze for land warfare.  I should be able to put some fun campaigns together.  I think I will keep going on the Corinthian War theme for my Ancient Greek battles.  Until next time!      

Saturday, January 7, 2017

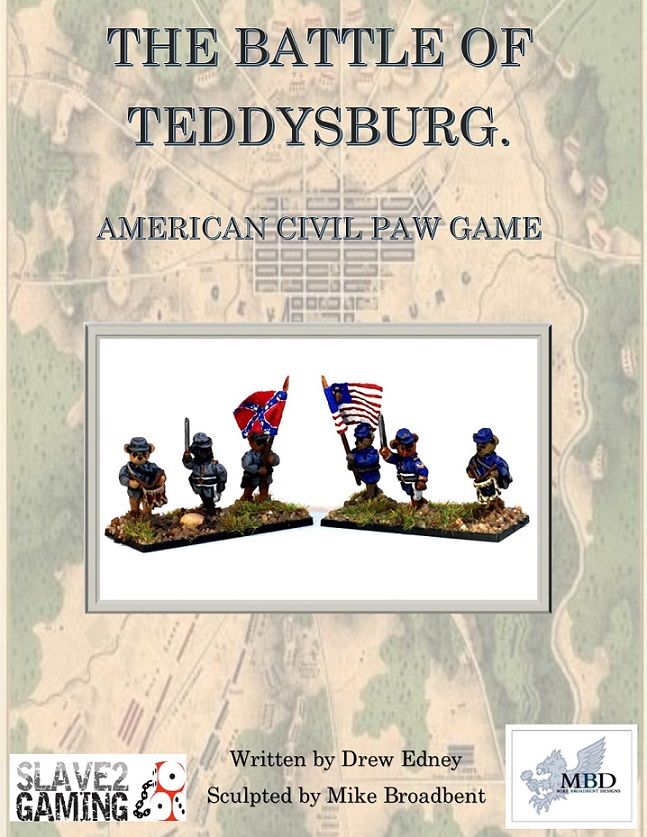
Review: American Civil Paw: The Battle of Teddysburg- Slave2Gaming

As you know, I play a lot of All Quiet on the Martian Front, and am relatively active in their online community.  Through this connection, I connected with Slave2Gaming.  They are an online miniature maker from Australia, who made a range of Dark World War 18mm figures that were useful during the gap between Alien Dungeon closing and Ironclad picking up the AQMF product line.  Their cavalry is very cool.  The models themselves are sculpted by Mike Broadbent and he is the primary sculptor for Slave2Gaming.  Drew from Slave2Gaming reached out and asked me to take a look at and review one of their upcoming releases and I agreed. 


The game is called: AmericanCivil Paw: The Battle of Teddysburg.  It is a set of American Civil War rules with a bit of a twist.  The combatants are all teddy bears re-enacting the “War between the States”.  Therefore, some of the conventions of that era are adhered to, but it is a bit more whimsical take on the subject.  The objectives were to create a relatively quick, streamlined set of rules less than 25 pages that would allow the Teddy’s to take to the table top.  The rules were intended to be a “Mass Battle” game using 18mm figures formed into multi-based regiments.  At the moment, the rules are in PDF download format only, with a more official book potentially being released with the range.

Before printing the booklet, the designer would like to get feedback and make changes.  Therefore, the PDF version of the rules is currently in BETA.  Hopefully, some of you with a lot of experience in ACW games will be able to give them some insight before they pay to print the book.  He is especially interested in adding more unique Fantasy traits to the game but still keep the ACW theme.    
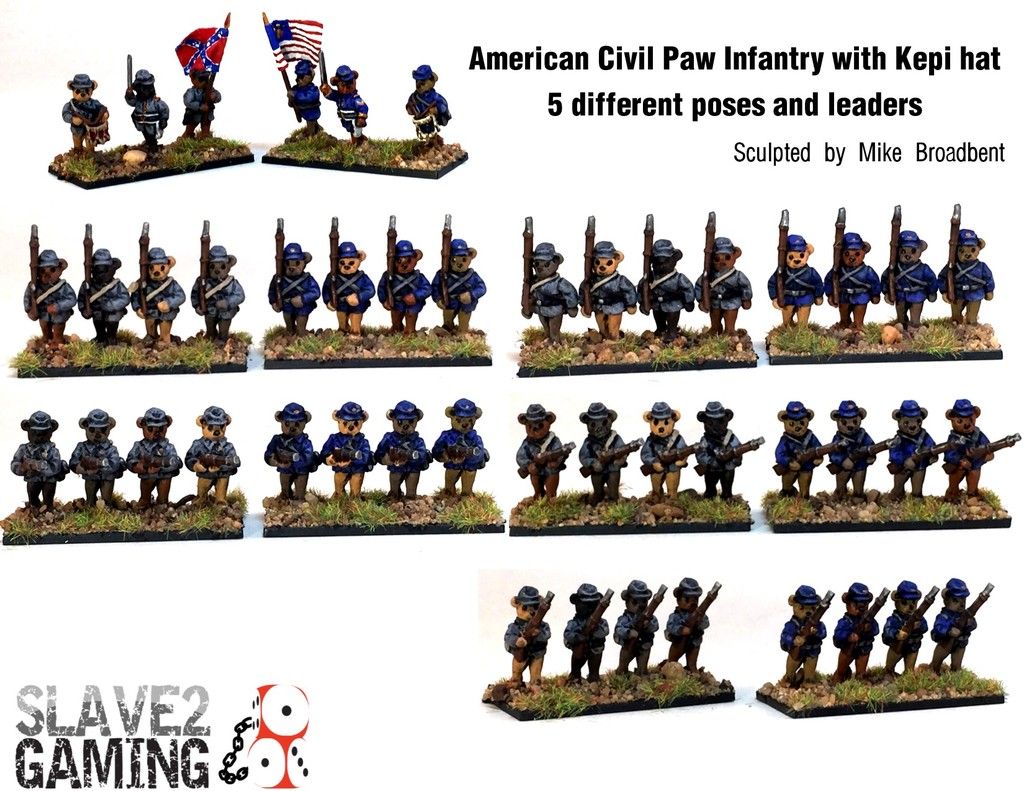
Of course, besides the rules they are releasing an adorable range of miniatures that Mike sculpted.  They are up to his usually standards of high quality and they should be great for Horse and Musket players looking for something a bit different, gamers who play other generic fantasy settings such as Dragon Rampant or Kings of War, and also gamers introducing the concept of wargaming to the next generation.  The range by Mike will be a great bridge between fantasy and historical gamers and also act as a gateway for newer gamers.  Teddy Bears don’t need to worry about their uniforms as much as real ACW toy soldiers! 

Too cute!  They also have other hat variants.  Wargamers love fancy hats!.  


You can find the BETA rules here at the moment: American Civil Paw: The Battle of Teddysburg


Once more into the fluffy breach then?

Things I Liked
The game follows many standard staples of a Horse and Musket ruleset.  You have different formations such as line and column.  You have forward 180 degree fire arc.  You have movement based on a leader base.  You have firepower based on the number of bases that can shoot/combat.  So, if you have played Horse and Musket games many of the core mechanics are there for you.  It will be easy to pick-up and play. 

There is no casualty removal.  All bases are left on the table until the unit flees off the board or is completely wiped out.  That way, all those nice Teddy Bear figures you spent time painting will be in the thick of it for most of the battle.  No one likes to buy and paint troops to have them removed before they even do anything.  Instead, it uses a “hit Point” style system where each Base in the unit provides a “hit”.  Infantry units are a bit more resilient with 10, while cavalry has 8, and Artillery only 2.   

Units can always move and Shoot/charge without any test so your lads will always have something to do.  More complicated actions require command tests.  Units that have taken a certain level of injury MUST have commands to act.   

The system uses a Target Number system on a d10.  All units pretty much use the same target numbers, and there are very few modifiers.  This is good as it reduces the memorization needed to play.  Most modifiers are relatively intuitive for the period.  The game tends to avoid a lot of the “If This/Then That” type rules you can find in this periods games. 

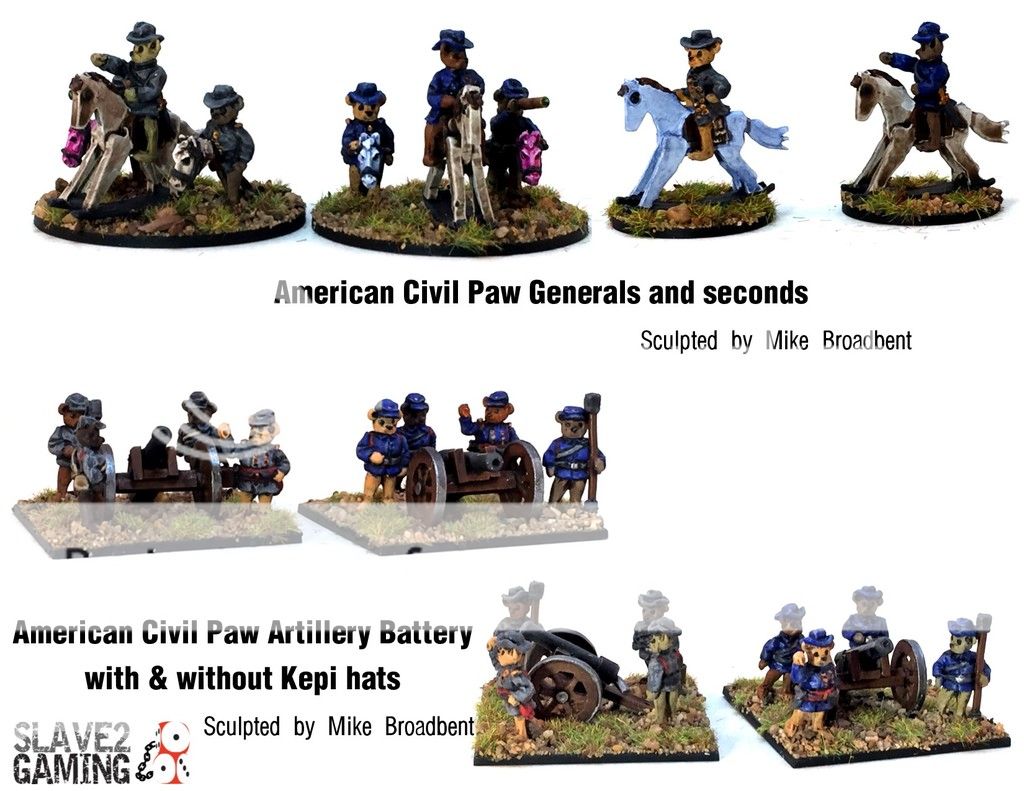
The stick horses for cavalry.... too cute!
Things I Did Not Like
The game uses the Bolt Action Grab Bag approach to activation.  This is a solid and tried and true mechanic however I tend to prefer to play games with less passive activation systems.  When a unit has its chit pulled from the bag it is placed by the unit as a reminder that it has activated. 

Perhaps due to the streamlined nature of the rules, the game did not have any rules about flank attacks or enfilading fire.  I think such rules would help increase the desire to maneuver before engaging and add more tactical choices/depth to the game.  There are also no rules to cover if more than one unit engages another in combat/assault or the ability to support an assault.  Again, I feel these elements would help add to the tactical possibilities of the rules.       

The game is intended to be played on a standard wargames table that is trying to represent forests, creeks, small towns, etc.  I actually see this as a missed opportunity and a chance to differentiate the rules form standard Horse and Musket games.  Considering this is a game about Teddy Bear warfare, I feel it should use 1:1 scale terrain of household items so you could actually walk into any room and start a game on the floor with whatever is on it.  Carpets are your flat, open terrain with rugs acting as fields, and mismatched slippers as impassable terrain.  Now you have a unique and interesting gaming experience not found in most other wargames.  There are a lot of American Civil War games out there and I think this is the “gimmick” to help differentiate the game as opposed relying only on Mike Broadbent’s miniature line. 

Meh and Other Uncertainties
The game play is pretty straight forward and easy.

It would be kind of fun to add some variable leadership qualities to the rules as well.  The personalities of the American Civil War commanders played a large role in the outcomes on the battlefields.  This might expand the scope greater than what Slave2Gaming  were trying to achieve, but it would allow them to add more to the Teddy Bear theme and some silly puns.  Everyone loves silly puns…. well…. everyone who wants to play Teddy Bear ACW anyway.  Okay, maybe just me then….   

Rocking horses for officers.... too cute!

For morale, it is interesting that panicked units are very hard to use with a base Target Number of 9 to activate on an order.  Some of the modifiers would make it impossible to steady/rally them.  However I maybe misreading the rules on this segment, since being in Open Ground adds a +1 to the Target Number, making it a 10 required.  I am unsure how I feel about this as it makes sense in the context of the American Civil War game where units would sometimes just stop, but not completely break.  However, maybe it would just be easier to remove them?    

The rules have a few diagrams and illustrations to help demonstrate the rules.  This is a good thing.  I feel some examples of play would also help but the rules are clean and simple enough that it may not be needed.  Some fun pictures of Mike’s painted Teddy Bears in the field would be cool too.   

Army creation is straight forward and basic.  They have a couple of unique traits for each side, but I know they want to expand this part of the rules.   

Final Thoughts
The rules are a solid, simple way to get into the period and they are the right price at less than $5.  They will do the job of supporting the miniature range.  Plus, they will be a good base to build on for future additions to the game.       


The game itself has an interesting hook or gimmick; cute and cuddly Teddy Bears re-fighting the Civil War.  However, the rules themselves do not have that same hook or gimmick.  They are perfectly solid and serviceable set of rules that will allow you to play Teddy Bear Civil War battles but there just isn’t enough here to really differentiate them from a game like Blackpowder or Longstreet.  To me, there are a lot of ACW rulesets out there and it takes a little something special to make them stand-out rule wise.  I am not sure Slave2Gaming’s American Civil Paw: The Battle of Teddysburg currently has that something to stand out as a rules system.    

Thursday, January 5, 2017

Horizon Wars- Battle Report- Battle of Lachute, Quebec

As Operation: Plantagenet roiled Europe, the French had not bit sitting idly by and watching the British build-up.  They had been preparing for an indirect response to British aggression.  They had not anticipated the ferocity and direct action that Operation: Plantagenet unleashed.  Instead, the French had been stoking anti-British resentment across the commonwealth to try and spread the British forces into a worldwide war instead of a regional European conflict. 

As the British opened their offensive, the French launched their own plan.  For the past several years they had been arming and supporting Quebecois separatists in Canada.  At the outbreak of war between Britain and France, the Quebecois rose up and overthrew the local government and declared independence.        

Naturally, the Canadian government was not amused.  Immediately, the 1st Canada armored brigade was activated and moved to attack Quebec from Ontario.  Their offensive was spearheaded by the Lord Strathcona’s Horse, an armored forced with a long military history.  They were met near the border by the 4th Regiment of Quebec Liberte, a newly revealed force raised by the Quebecois separatists.  The initial engagement of the war took place on the outskirts of the town of Lachute at the Ontario/Quebec border. 

I purchased and read the rules for Horizon Wars as soon as they came out.  However, I wanted to give them a play before I wrote my review.  They seemed a bit more nuanced than other Osprey titles, and I felt a play through was needed before I could give it a real review.  I remember when Robey Jenkins (Precinct Omega) first started working on these rules as part of his 5Lbs. Wargaming series.  At the time, I was working on Jugs-The Game of Big, Stompy RobotsThey felt like they had similarities in our initial design goals.  However, we ended up with two very different game systems.  I think I could convincingly argue that Mr. Jenkins’ rules are more innovative than what I came up with.  I also think they handle tanks and infantry better in the game play. 

In Horizon Wars, each unit uses a “Presence” rating to determine their value in the game.  This allows you to try to build relatively even force lists.  However, the lists could be modified by the scenario being played and the Command Headquarters you choose for your list.  According to the book, an engagement of this size should take about an hour to play.     

Lord Strathcona’s Horse- Presence 15
CHQ- Heavy Cavalry
2 Units- Heavy Cavalry
4 Units-Light Cavalry
1 Unit- Recon


4th Regiment du Quebec Liberte- Presence 14
CHQ- Heavy Infantry
2 Units- Heavy Infantry
2 Units- Light Infantry
1 Unit- Heavy Cavalry
1 Unit- Light Artillery


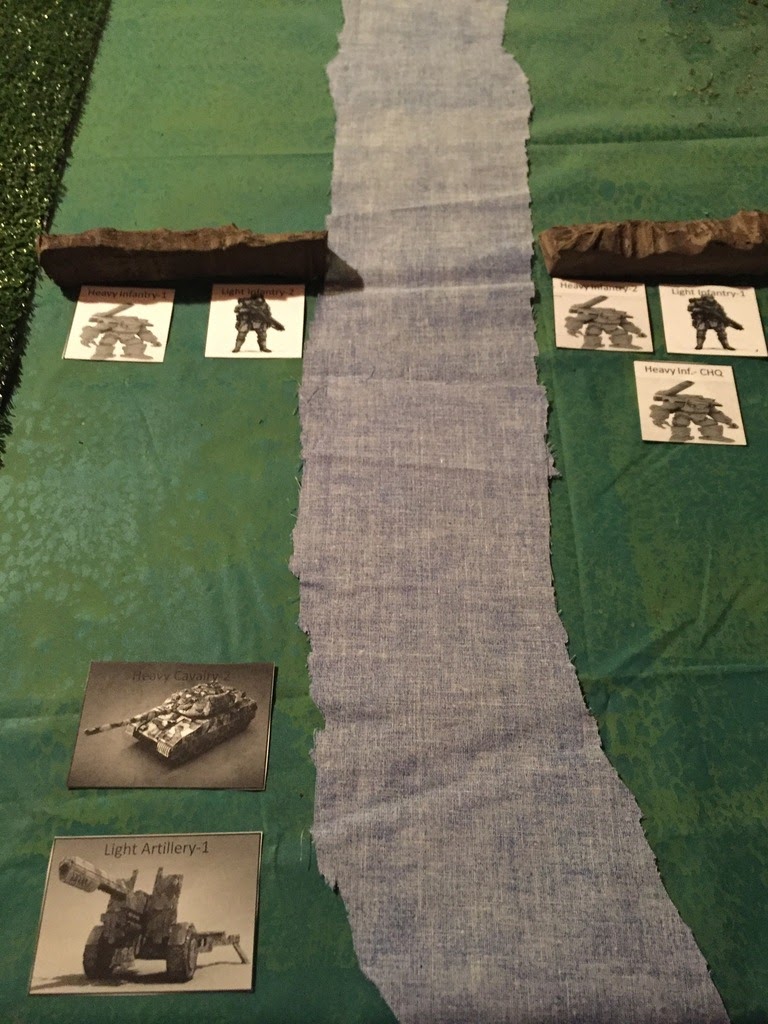
I tried to use a mixed set of forces for this battle report to see how they work out.  I purposely left out aircraft and Mechs in order to streamline the gameplay and not bog it down.  This game will be played out using templates I made in PowerPoint for proxies.   

Set-up
The forces meet coming down the 327 from Brownsburg and towards Lachute.  The board is bi-sected by the main roadway.  Fields and scattered copses of trees are along each side.  The board is approximately 4x4.    

The Quebecois have dug in quick defensive works running perpendicular to the 327.  The Light infantry and positioned there along with some Heavy Infantry units to stiffen them.  Up the 327 waits the Heavy Cavalry and Artillery to act as a reserve force. 

Lord Strathcona’s Horse is approaching down the 327 in column with the Light Cavalry leading the way.  Upon seeing the enemy forces, the commander decides to engage. 

The Mission
The Canadians are trying to smash aside the defender’s and reduce them to two elements or  less.  The defenders are trying to do the same.  The player with the most Presence on the board wins after 6 turns will win.

Turn 1
The Canadians have the initiative. 

Lord Strathcona’s Horse have a heavy task.  The Quebecois rebel infantry dig in along the ridgeline and pour fire into the advancing units.  Light Cavalry 1 and 2 both absorb a few hits, but Heavy Cavalry 1 takes the brunt of it taking 4 hits. 

The Canadians race down the 327 and return fire.  They need to close the distance rapidly, and try to get behind the fortification line as fast as possible.  IN this case, the most direct way is the fastest way.  The return Canadian fire is relatively ineffective, but they have forced the Quebec heavy units out of reserve and into the battle.  In addition, the hits that did strike home were against the Quebec CHQ.      


Turn 2
The Quebecois seize the initiative.

The battle around the 327 breach explodes this turn as Lord Starthcona’s Horse tries to force the gap, but their way is blocked by an enemy tank.  An opening duel takes out the Canadian Heavy Cavalry 1 with the help of some Heavy Infantry and the Quebecois cheer.  However, the pressure continues to mount as Light Cavalry units move forward and open fire cutting down the Heavy Infantry screening the Quebecois Heavy cavalry from assault. 

With the way forward cleared, the Lord Strathcona Horse CHQ tries to smash his way past the blocking Quebec tank, but things to do not work out as intended.  Stranded in front of the Quebec firing lines, the CHQ is blasted apart by short range fire. 

The close range fire of the Quebecois infantry units leaves the Canadian Light Cavalry units 1 and 2 in tough shape.  However, combine follow-on fire from the Canadian Heavy Cav-3 and Light Cav-3 and 4 manages to blast the Quebecois Tank force into oblivion.  This leaves the way potentially open to bypass the Quebecois defense emplacements. 


Turn 3
The Canadians regain the Initiative.

The armored units try to force the gap, which is a challenge when they are defended by Infantry units.  Light Cavalry-3 rumbles through and opens fire on the artillery piece, causing some damage.  Light infantry- 1 of the Quebecois counters with a barrage of shooting and then charging in.  However, the Canadian light cavalry fights tenaciously and small-arms fire drives them away. 

Infantry firepower destroys Light Cavalry- 1 before it can storm the gap as well.  Firepower from Canadian Light Cavalry-2 immobilized the Quebecois-CHQ.    

The larger armored units plow in as well.  The Quebecois CHQ is unable to respond with an assault as they are immobilized by gunfire.  However, the rebel Heavy Infantry-2 storms the 327 breach and blasts the Canadian light cavalry apart in close combat and fires on the Heavy armor. 

Light Cavalry-4 of the Canadians blasts the artillery away as they move into the breach.  The Quebecois CHQ is unable to destroy Canadian units with shooting.  Finally, Canadian recon unit bushwack the Quebecois light infantry in the trenches, accurate shooting with a critical and the Quebec rebel unit is destroyed. 


Conclusion
The Canadian Recon unit’s successful shooting reduced the Quebec rebels to only two units, and their CHQ called for a withdrawal.  It was a costly victory for the Canadian Lord Strathcona’s Horse but the way was now open to push into Quebec proper.  With the 327 secured, follow-on Canadian forces were able to set-up a F.O.B for the push into Montreal to attempt to unseat the rebellious Quebecois government.  The Quebecois rebels fell back to the suburbs and began to fortify the city and cul-de-sacs to repel the Canadian assault. 

This was a fun little game.  I have a feeling that Horizon Wars could be a very mobile game with lots of possibilities for maneuver and jockeying for position.  As the ranges shorten, the combat becomes fierce and the firepower begins to tell. Close engagements can be very decisive between infantry and vehicles.  Even between vehicles they all paid a heavy price.  In ordinary games where the objective wasn’t a breach the deadly combinations of assaults and short range firepower would make me wants to stay at range and maneuver for a decisive application of firepower.  

This scenario did not really allow such a tactic as the “Dug-in” infantry was very resistant to long range firepower.  The armor had to close to get quality shooting chances and use their superior firepower dice, but as you get closer the risk of an infantry assault increases.  Infantry assaults on vehicles tend to end badly for the vehicles unless you are really lucky.     

Heavy Cavalry could take a pounding, especially against Move and Shoot attacks.  Such attacks reduce the firepower of the shooter.  Infantry get a lot of defense dice, but a single critical can ruin their day with Armor/Agility of 1.  Heavy infantry was surprisingly fierce as well, especially when dug-in.  I didn’t feel like any of the units in the game were “worthless” as even the Recon unit played a key part in swinging the game, even though I didn’t have indirect fire artillery. 

The book was also pretty accurate for the length of the game.  Set-up, and take down extended the time somewhat. However, if I hadn't been documenting the game and double checking rules it would have been shorter still.  As a player gets better at the rules, I think they could have a relatively quick, enjoyable game.

So, the big question for this game is whether I would play again.  I would.  In fact, it made me want to accelerate some of my plans to get some “Not Epic” units that I could use in conjunction with Aeronautica Imperialis.  For the short term, templates will work fine while I get a few more 6mm units banged together.  The prices seem about right.


Wednesday, January 4, 2017

Review: Horizon Wars- Osprey Games


Horizon Wars is another title by Osprey Games.  Like Frostgrave, this one has a stand-alone hardcover rulebook and is not part of the Osprey Wargames Series.  Unlike Frostgraveit has not generated any “official” new content, but I know the author Robey Jenkins (PrecintOmega) has put unofficial content on his Facebook page.  Mr. Jenkins is relatively active online and is more than happy to talk about Horizon Wars with you. 

I remember being on the Warseer Forums when Robey started building and selling the “Mech” portion of this game.  At the time, I was also working on a Mech game with JUGS, so I followed his work closely.  This was part of his “5 Pound” (as in the currency) wargaming efforts.  After finishing the mech game, he made an air frame and conventional forces game.  They could all work separately or together and were sold independently at the time.  Horizon Wars seems to be all of these works combined together into one source with some additional scenario and background content added. 

That’s a long enough stroll down memory lane.  I am sure if I mis-remembered any of the above Mr. Jenkins will be along soon to sort me out.  Let’s dive into the review. 

What I Liked
The game uses a rather innovative mechanic for resolving shooting attacks.  You measure the distance to the target, add modifiers, and that becomes your Target Number for success.  The unit firing rolls its firepower dice and adds them up.  Every time you can create a combination of this Target Number it is a potential hit.  The defender can roll his Defense dice, and any roll he makes that matches the roll of an attacker is cancelled. 

So, If I am shooting at a target 12 inches away in the open, my TN is 12.  If my unit has Firepower 3, I happen to roll a 9, 8, 7.  That would be 24 but would only be a single hit, since 8+7 exceeds 12, but 9 does not.  In addition, let’s say the defender rolls two defense dice and gets a 2 and 7, then I would have 9+8 which still exceed 12 and gives me one hit. 

This is a pretty clever mechanic as longer range shots are automatically more difficult due to the range, but there is theoretically no range limit.  This is a much more “active” way to deal with advanced weapons on the tabletop and much more elegant than giving each weapon system a “range” stat.  Very clever! 

I also really enjoy the “Adventures” system. It is essentially a method to create a set-piece battle that reflects the effects of previous engagements on the forces.  You roll up three categories, a situation, mission, and purpose to help you define the reason for the battle and that impacts the forces involved.  Based on the situation, mission, and purpose it changes your force selection, deployment, and mission objectives.  This means as a commander you no longer have “perfect knowledge” and must work with the “friction” of battle before it begins.  Very clever again!

Conventional, Mecha, and flying units all seem to be fairly well balanced against each other.  You do not have to take Mechs to be competitive.  They are just another unit type with some fun add-ons, but a tank can blast a Mech just as easily as vice-versa.  The same goes with aircraft.   

The size of the forces involved is also interesting.  For most 6-10mm scales games you see them focused on what I would call “battle” scale games.  In Horizon Wars the forces are almost “skirmish” scale.  You do not need dozens of tanks and infantry stands to play.  When I mocked up a couple of average sized game forces, they clocked in at 7 and 8 units respectively.  That is smaller than a game of Blood Bowl!  The game is intended for each “unit” to be a single model for vehicles and 3-5 infantry models on a base.  Wow, that makes playing this game super affordable!  The engagement ranges are also relatively short with 2x2 to 4x4 tables for game play.  This rulesets seems to hit the sweet spot for scale and price.    

Things I Do Not Like
With the aircraft rules, some of the seams start to show in the game.  The aircraft rules would work just fine as stand-alone rules for an aircraft vs. aircraft duel.  However, they start to get a bit muddier when you are trying to integrate them in with conventional ground forces as their movement is a bit different than that of ground forces.  This is a common problem when trying to make a combined arms game, and the aircraft rules combined with the Conventional rules add just a bit more complexity than I like.  This is the only part of the game where you can see the independent design of its components start to show a bit. 

Damage in Horizon Wars is based on attrition.  What does this mean?  Well, units all have a base set of stats.  As you take damage, the stats are reduced.  When the stats go to 0, a unit may not be able to move, shoot, or is destroyed.  The defender chooses which stats get reduced, unless a critical hit was rolled, in which the attacker chooses.  I am not a fan of this approach as it tends to increase “tracking” in the game.  Some level of this is unavoidable, but in a 6-10mm scale game I prefer either disabled/destroyed or not.

Every unit gets two activation a turn.  They can use this to move, shoot, engage in close combat, etc.  It is possible to use them up all at once or to save your second activation to potentially “react” to an opponent’s action.  I really like the nature and concept of this mechanic, but it is essentially an “action” point system.  I am not a fan of the system presented here for two main reasons. First it relies on counters on the table to track, and I tend to dislike those.  Second, it leads to more tracking and at 6-10mm scale I prefer to reduce the tracking. 

Both the action/reaction system, and attrition damage system are less of a problem in Horizon Wars as it is more of a scaled down skirmish game than a typical 6-10mm battle game.  These same mechanic with a larger unit count would be a deal breaker, but with the number of units present it works well enough. 

Meh and Other Uncertainties
The book has some really great artwork, including full page artwork.  I love the cover and think it captures the feel of the game really well.  There is a couple great full-page pieces of art inside as well, especially page 14 and 32.  However, some of the “in game” photos are a little less inspiring with boring terrain.  However, I recognize some of the models from PrecintOmega’s painting log from back in the day, and that made me smile.

There are several scenarios in the book.  They are pretty standard stuff, but when combined with the Adventures details they can shine and do the job.

There are also four “pre-packaged” sci-fi backgrounds that you can set your games in as well.  The first is a hypothetical future conflict where the British decide to attack the French essentially for the LOLs and because the French needed a “good kicking”.  This is my favorite of the backgrounds as it makes no sense, and even the people describing it “in-universe” are baffled by why it happened in the first place.  I could make some preposterous comment about how it mimics the absurd nature of modern warfare, and amplifies the general mood of Post-Brexit Britain to satirical levels; but that would just be a bunch of tosh.  The others are a Venus/Earth/Martian civil war, Mech obsessed E-sports-nutters, and truly advanced/grimdark/future of Galactic expansionism.  All of the pre-packaged sci-fi universes are a bit tongue in cheek and I appreciate that. 

Finally, the index provides a number of sources for 6-10mm models to fill your armies.  There is also a handy play summary sheet and army stat sheet for tracking. 

Final Thoughts
Horizon Wars is a nice little game.  It covers combined arms nicely and has some innovative and creative mechanics to model such "advanced” warfare.  The scale of the conflicts represented also makes this a great game for small spaces and the forces are affordable.  There is a bit more book-keeping than I typically like in a 6-10mm game, but the small number of units makes it manageable.  It is a nice bit of design work and I look forward to playing it more.  

As I said, Mr. Jenkins was working on this game when I was building Jugs.  Truth be told, I think his efforts are much more innovative and deal with combined arms much better.  The aircraft pieces feel like their own game to me, but they are perfectly serviceable if a bit complex to be integrated into ground warfare.  His Mechs also scale nicely together.  I think we had different design goals, as the big, stompy robots of Jugs were supposed to be the pinnacle of warfare where in Horizon Wars they are just another tool of the military trade.

It looks like Osprey has been on a roll with their rules.  Add this into the “Hit” column.

Tuesday, January 3, 2017

Men of Bronze- Battle Report- The Corinthian War

The Corinthian War was a conflict between the city-states of Sparta and a coalition of rival states that lasted from 395BC to 387 BC.  The alliance included Thebes, Athens, Argos and Corinth.  The alliance was displeased with Sparta’s aggressive expansionism in Ionian, and Greece.  The majority of the conflict on land revolved around major battles near Thebes and Corinth. 

The Battle below is between Sparta and the Corinthian allies.  Many of the battles were recorded by Greek historians, but today’s has been lost to the shrouded mists of time.  This battle takes place after the battle of Nemea, but before the sea battle of Cridus.  An “Alliance” army composed of the survivors of the Battle of Nemea is trying to face down the approaching Spartans and their allies and check their successes on land.

The Forces

Corinthians
2 Drilled Hoplites              20 pts
1 Militia Hoplite                  8 pts
1 Psiloi                                 2 Pts
1 Archers                             4 Pts
1 Peltast                               4 Pts
-Total                    38 Points

Spartans
2 Elite Hoplites                 24 Pts
1 Drilled Hoplites              10 Pts
2 Psiloi                                 4 Pts
-Total                    38 Points 

Set-up
On the North side the Corinthians have deployed to do battle.  On their left flank are the Peltasts, then the Militia Hoplites in open order.  Next comes a  Drilled Hoplites unit in Phalanx formation.  Then comes the Cretan archers followed by another unit of Drilled Hoplites formed up in a phalanx.  The right flank is anchored by Psiloi unit in open order. 


The Spartans have drawn up on the south side of the valley.  On their left flank they have deployed a Psiloi unit of helots.  This is followed up by an allied Perikoi unit of drilled Hoplites in phalanx.  Next to them were the elite Spartans themselves, drawn up in a phalanx formation.  The right flank was anchored by another unit of Psiloi helots.


The north and south sides of the valley have some rocky outcroppings.  On the west side is a grove of trees that separates the Corinthian Peltasts from the Spartan Psiloi.  The rest of the valley is open ground. 

 Of note is that both sides are made up of paper stand-up models for the armies.  They are also carbon copies of the sample armies found in the Men of Bronze book for the represented forces. 

Mission
This is a pitched battle.  Each side is attempting to collapse the enemy army. 

Let us begin! 

Turn 1
The Spartans have 5 Arête points and the Corinthians have 6 Arête Points.  The Spartans bid 0, and the Corinthians bid 0 for Initiative.  Therefore, they roll off.  The Corinthians win and go first. 

The Spartan generals watch as the Corinthian advance forward.  They do not try to steal the initiative.  Oddly, the Militia Hoplites are still in open order which allows them more maneuverability, but at a great risk to their safety if charged. 

The Spartan Psiloi move forward and slide in front of the Hoplite units.  They are to act as skirmish screen and to shield the phalanx units.  The Spartiates march forward, but the Perikoi hold back.

Turn 2
The number of leaders on the board did not change, so the Arête points stayed the same as well.  Again, neither side made a bid for initiative, perhaps waiting to see how the other sides’ battle line took shape.  The Corinthians win the roll-off again.

The Corinthians again move forward unopposed by the Spartan army.  The Peltasts barely make the edge of the grove.  Meanwhile, the Militia Hoplites finally form into a phalanx unit (costing 1 Arête point) and their plan to support the Corinthian Drilled Hoplites with a flank attack is clear.  The question is if the Spartans will willing march into it.

For their part, the Spartans are content to let the battle play out.  The Psiloi complete forming a solid skirmish screen in front of the Spartan battle line.  The Hoplites slowly and carefully march up behind.  They are confident in the Spartan skill-at-arms and are being cautious not to blunder it away with a rash attack. 

Turn 3
Arête points are redistributed again the same as the previous turn.  The Spartans bid 1 Arête point to go first.  The Corinthians bid 0, unsure what the Spartans plan is.  The Spartans go first. 

A unit of the Psiloi rush forward and use an Arête point to move and shoot.   They barrage the Cretan Archers with javelins.  It reduces the archers Courage by 1 to 3.

The Corinthians decide to spend an Arête point to try to steal the initiative back, and succeed.  The Cretan archers shoot back and decimate the Psiloi and reduce them to 1 Courage.  However, they do not break.  The Spartans try to steal the Initiative back, but fail.     

The Corinthian Psiloi move up and their barrage of Javelins sends the Spartan helots scurrying.  They are removed from the board as their Courage was reduced below 0. 


On the opposite board edge, the Peltasts gain the grove and use an Arête point to skirmish and move through easily.  The rest of the Corinthians form a solid battle line. 

The Spartans rush forward with their second Psiloi unit and throw at the Cretan archers again.  The Cretans are reduced to 1 Courage.  Their fate probably lies in the next initiative results.

The Spartiates move up quickly behind their skirmish screen.  The Perikoi break into open order and move to follow their Spartiate comrades, using the time before the true battle commences to get into a better position. 

In the End Phase, all the Spartans passed their Discipline check to avoid Collapse after losing a unit. 

Turn 4
This time the Spartans only get 4 Arête points to the Corinthian 6.  The Spartans bid 2 to get initiative, but the Corinthians bid 3.  They go first. 

The Corinthian Psiloi move up and launch their Javelins at the Spartan Helots.  Only 1 hit, so the Spartans are down to Courage 3.  The Spartans try to steal the initiative with an Arête Point.

The Spartans succeed!  The Psiloi throw Javelins into the archers and reduce them to 0 Courage.  They flee the field.  The rest of the Spartans slowly move up, but are slowed by their own skirmish screen.  The Perikoi rush behind the Spartiates in open order unsure where to deploy their phalanx. 

Seeing the gap in their line, the Corinthians use their drilled abilities to try to close it.  Both Drilled Phalanx units use an Arête point.   The Militia Hoplites slowly move forward to set-up an attempt at a Flank attack.  The Peltasts also move from the cover of the Grove and begin to swing in the Corinthian right flank. 

In the End Phase, a Corinthian Drilled Phalanx and Psiloi started to waiver from the Cretan’s destruction. 


 Turn 5
The Spartans get 4 and the Corinthians get 5 Arête points.  The Corinthians bid 0, and the Spartans bid 1.  The Spartans go first. 

The Perikoi head back to the Sparta left and form phalanx to repel the Corinthian Peltasts.  The Corinthians then decide to try to steal the initiative, but fail.  The Spartan Psiloi form up and use an Arête Point to charge the Corinthian Psiloi who are wavering.  Despite having 4 dice for charging, the Spartans only hit once, and the Corinthians return the favor.  There is no pushback. 

The rest of the Spartan Battle line waits, unwilling to get caught up in the skirmish battle to their fore and potentially expose themselves to a counter-charge by a drilled Phalanx unit. 

The Corinthians spend an Arête Point to rally both of their wavering units.  The Corinthian Peltasts break free of the cover of the grove, and use an Arête point to toss javelins at the Spartiate lines, but they all miss!

The Corinthian Drilled Phalanx reforms into phalanx, spending the last Corinthian Arête point.  The two Drilled units then move up to present a united front to the Spartans. 


Turn 6
The Spartans get   4 and the Corinthians get 5.  Both sides bid 0, so they roll off.  Spartans win. 

They start by using an arête point to charge the Peltasts with the Perikoi.  The peltasts use an arête point to try and evade.  The Peltasts roll 1 BW and move back, but the Perikoi’s charge easily takes them into the fleeing skirmishers.  The Perikoi cause three courage loss to none, but he Peltasts stay in the combat and pass their discipline check. 

The Corinthian Psiloi route the Spartan helots in combat.  The Corinthian Psiloi fallback as the Corinthian Phalanx moves forward.  The stage is set for the decisive showdown. 
                              
In the End Phase, the Spartans all passed their Discipline Check after seeing the Psiloi chased off.


Turn 7
The Spartans have 3 Arête points, and the Corinthian have 5.  The Corinthians bid 3, and the Spartans bid 0.  They decide to hold them for dice re-rolls.

The Corinthian Drilled Phalanxes start by charging into the Spartiates.  They use their last arête points to pull off the charges.  The Militia and Psiloi are just a hair too far away to provide support!  Next turn? 

The Spartan Perikoi rundown the Corinthian Peltasts and rout them.  However, that is at the fringe of the battle and the loss of the Peltasts will not cause any Discipline checks in the End phase.  No one really saw it happen. 

The main collision is spectacular and loud, but each unit only loses 1 Courage between the main units.  However, the use of arête re-rolls allows the second Spartan unit to inflict 2 courage loss on the second Corinthian unit and push them back into their allies, depriving them of a charge bonus and forcing them to join the melee in support. 

Turn 8
The Spartans get 3 and the Corinthians get 4.  Neither bids for initiative.  Spartans win the roll-off. 

The Perikoi break formation and set-up for a successful charge next turn into the big melee.  The Corinthians decide to take the initiative and succeed.  The Psiloi charge into the melee on the opposite flank of the battle. 

After all the combats were resolved, the Spartan commander was pushed back 2 inches and has 2 Courge vs. 3 from the Corinthian commanders unit.  The Psiloi flank attack proved invaluable.  On the other flank, the Spartans pushed back the Corinthian forces despite the Militia's support. 


Turn 9
The Spartans have 3 points, and the Corinthians have 4.  The Spartasn bid 1 to go first and the Corinthians bid 0.     

The Spartans Perikoi use point to form phalanx and then charge into the battle using all the Spartan arête points.  The fighting was fierce but the Corinthians were reduced to 0 Courage and the Drilled and Militia Unit fled. 

On the other Flank, the Corinthians managed to route the Spartan commander and his phalanx with the help of the Psiloi. 

In the End Phase, Collapse tests were triggered by the losses.  All units stay in the game.


Turn 10
Both sides get 2 tokens.  Neither side bids for initiative.  Corinthians win.

The Corinthians break into open order and quickly try to get into position for an attack.  The psiloi rush forward and throw Javelins at the weakened Spartan unit but fail to finish them off, as their Phalanx protects them. 

The Spartiates also break into Open formation and scatter away to set-up a new phalanx line.  This allows the Perikoi to pay an arête point and charge the open order Corinthian Phalanx.  The charge is decisive and the Corinthians break and scatter under the organized assault. 

With the Corinthian commander fleeing, the Psiloi decide to leave the field to the battered Spartans and their allies. 


Conclusion
The Perikoi of the Spartans win the day after the Spartiates took a drubbing and the Spartan commander was killed on the field of battle.  Perhaps that is why the historians failed to record this battle as the Spartans quickly swept it under the carpet after the much more decisive battle at Nemea. 

Despite the Spartans victories on land, their foes were powerful at sea and they could not bring the might of their land armies to bear on them.  The war would continue as Sparta started building ships.            

I actually plan on potentially playing game of Poseidon’s Warriors next to continue the story of the Corinthian War.  I have Galley templates ready to go now.  Should be fun.   

The Men in Bronze rules are a work-in-progress for me, and this was my first test on the actual field of miniature battle.  Previous test runs were simple exercises on paper.  Overall, the game ran pretty well.  The bidding process for Initiative was cool, and the use of Arête points was a fun hook. 

The mechanics worked well for the most part, BUT I think I will need to go back and review Collapse and Wavering tests as they seemed too easy to pass, even for skirmisher units.  Perhaps as the list goes down you get modifiers to the success Target Numbers or disciple dice reduction.     

The end showed the importance of Phalanx vs. Non-phalanx formations.  The rules were intended to highlight this, and I think they do.  Overall, as I played through it felt like the descriptions of Greek Phalanx combat I have read.  There was an opening skirmish phase, followed by the big push of Phalanx, which would lead to one flank breaking the other, and the army fastest able to respond to their local successes would be the winner.  That is exactly what happened in this battle.


Overall I am pretty happy with the results. You can find the WIP rules on my blog in the links on the side under Work-In-Progress Games.    

Saturday, December 31, 2016

JUGS: A game of Big, Stompy Robots- Battle Report- Asset Depreciation at the Pulp Mill

After the failed raid by the 14th Uhlans of Polanski’s Lancers, The Strong Hammers took the rival JUG pilots into custody.  The Uhlans waited the contractual agreed amount of time before revealing that their employers were Lacstar Industries.  With this information, VolSaab authorized the String Hammers to attack Lacstar Industries installations on Mundos.    
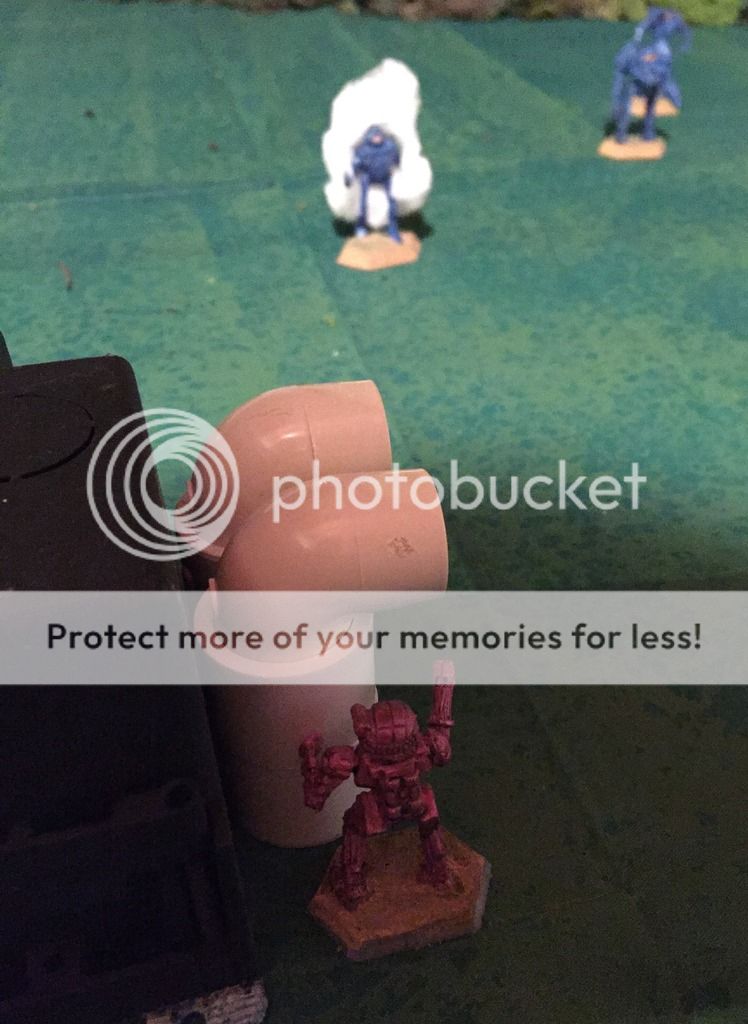
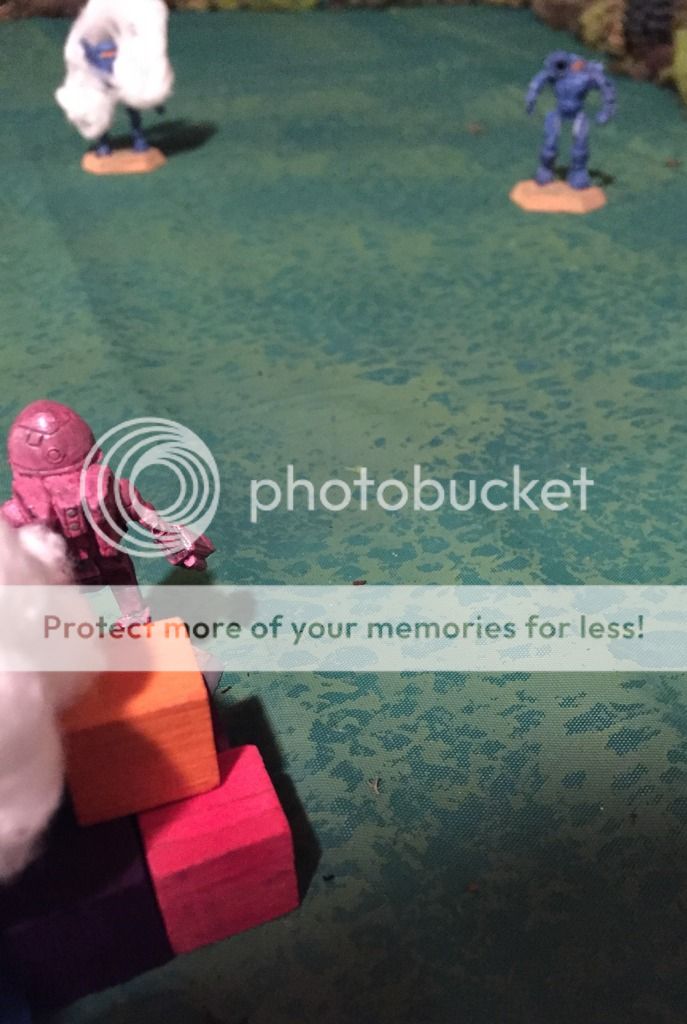
However, Lacstar Industries main security contract was not with Polanski’s Lancers, but with a Mercenary Company known as the Rose Guard.  On duty on Mundos was a Line unit known as the Thorn Watch.  Die to security precautions, they had not been advised of the Uhlan’s involvement on Mundos until their attack on the Strong Hammers failed.  
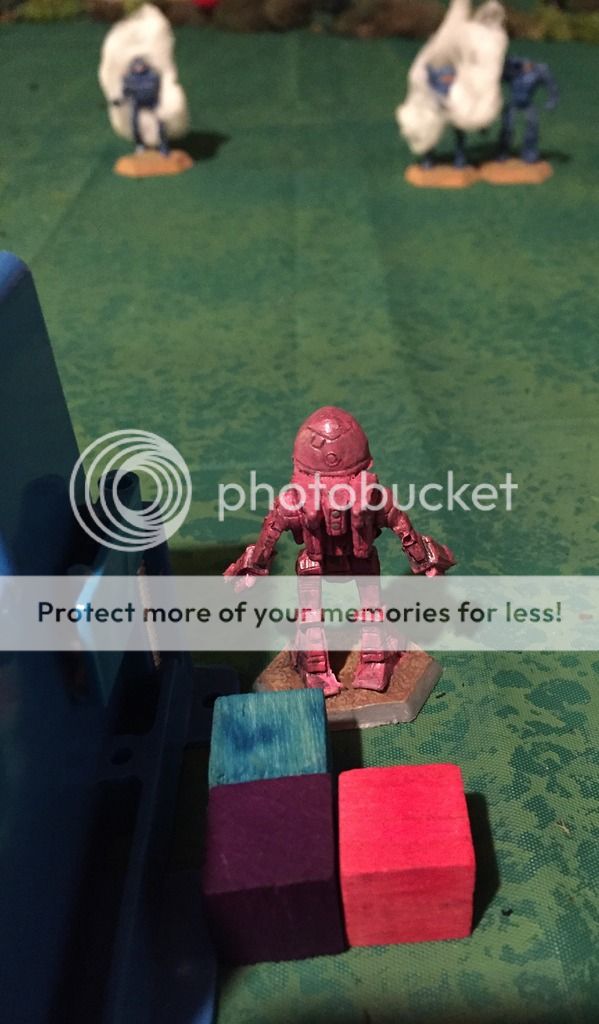
As a result, the Thorn Watch scrambled to set-up an extended wartime defensive perimeter.  However, the Strong Hammers struck too quickly, and the Thorn Watch were left to repel a close assault by the enemy JUGS.

Forces
Once again we didn’t bother with using the Unit Builder, we just ball parked it.


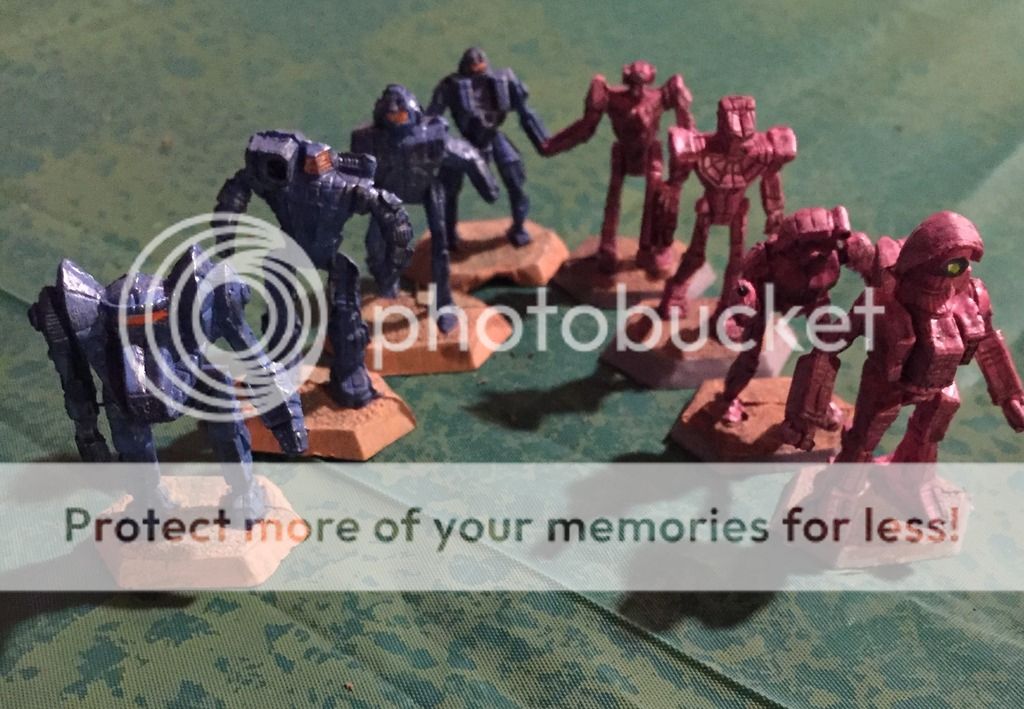
Strong Hammers (Blue Jugs)
1 Heavy Line (Front, Dragon)
1 Line (Hunchback)
2 Light Line (Whitworth, Dervish)

Thorn Watch (Pink Jugs)
1 Heavy Line (Front, Cyclops)
1 Line (Vindicator)
1 Light Line (Panther)
1 Picket (Commando)

Mission
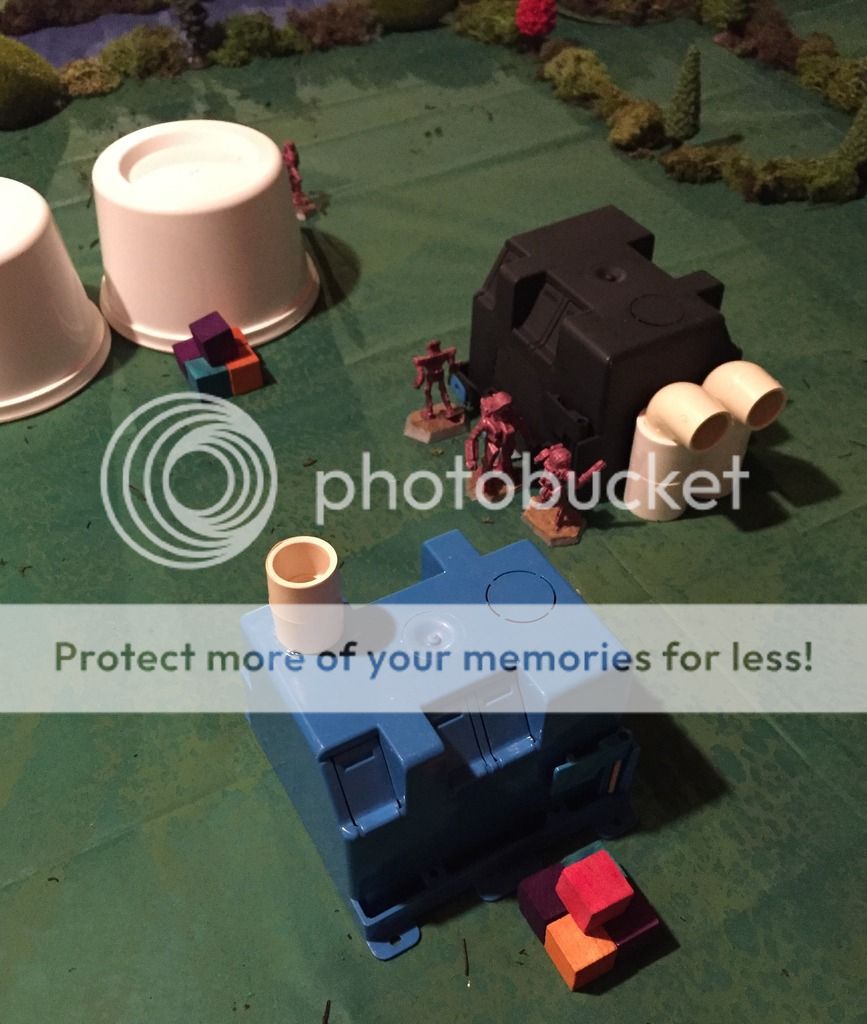
Today we are playing the Asset Depreciation mission in the JUGS rulebook.  There are two Key Targets of the attack.  They are placed within 6 inches of any board edge and each Key Target has 5 hits.  Today we have some shipping Containers that have vital equipment stored inside for the Lacstar Industries timber-mills to continue processing tree pulp.

The Thorn Watch JUGS are set-up within 6 inches of any Key Targets.  The Strong Hammers are set-up on the opposite board edge.


Turn 1
The Strong Hammers get to Activate first.

The Dervish activates first.  He manages to stay out of LOS of any enemy JUGS and moves towards a copse of tress at the edge of the river.

The Whitworth strides straight forward, and moves into LOS of the Commando, who does not opt to React.  The pilot passes a Pilot Check and does an ECM Burst to cover his approach.

The Dragon tries to Run, but fails its Pilot check.  Instead, it lumbers through the woods towards the Lacstar Industries site.  The Hunchback manages to break the treeline near the Dragon.  In its exposed position it decides to Brace.

The Thorn Watch had been patiently waiting to see how the attack develops.  However, now it can wait no longer as it is time for them to activate.  The Cyclops lumbers out from behind the factory and towards one of the Key Targets.  The Strong Hammers do not have the range to react and attack so just watch the Jug move into position to block their shots.

The Vindicator moves into firing position, and unloads with her right arm Gatling cannon, which ignores the ECM Burst.  However, the shots ping harmlessly off the Whitworth’s armor.  The Vindicator then does an ECM Burst of its own.

The Panther steps out and just has the range on the bold Whitworth.  The Panther’s beam manages to blast a searing hole in the Whitworth’s armor and reducing it 1 Hit.

The small Picket Commando races ahead into the cover of the woods by the forest and getting there before the Dervish can reach them.  

Turn 2

Thorn Watch gets to Activate first.

The Cyclops begins to lumber, but the Whitworth reacts to it.  The Strong Hammer attempts to press forward to try to get a shot at the unprotected key targets, however, the Vindicator beats it to the punch and activates in response to the move.  The Vindicator again let’s loose with a hail of plasma packets, but the Whitworth’s armor easily absorbs them.  The Vindicator then does an ECM Burst moving it from Obscured to Fully Obscured.

The Whitworth finished stepping forward.  As he does so, the Panther tries to react but fails.  The Strong Hammer has an obscured shot at one of the Key Targets with his cannons and rockets.  The barrage destroys two of the containers.

The Cyclops finally gets to finish its move and settles in right in front of the Key Targets, and blocks them from further attack.  However, it fails to Brace.

The Panther moves into cover by the trees near the river.  The Dervish tries to react, but fails.  The Panther then Locks-on to the Whitworth with his weapon array.  The Whitworth pays for its daring and aggressive move forward, and not Bracing.  The Panther’s rockets and Beam slash into the JUG and reduce it 3 Hits, down to 2 and crippling it.


The Commando stays out of sight and performs and ECM Burst to go from Obscured to Fully Obscured.

The Dervish sees the other Key Targets, and aggressively moves in to attack despite what happened to the Whitworth.  The Commando is the only one who can react, and does so once the Dervish finished its move forward.  It moves out of the trees and behind the Dervish to eliminate return fire.  Its rockets and light cannon reach out at the Dervish but its armor and shields swat away the blows.

The Dervish finishes its attack run and unloads on the Key Targets.  Its missiles all fail to find the mark, and the cannon takes out one container.  Disappointed, the pilot decides to Brace.

The Hunchback strides forward eager to get its powerful main gun into the action, however, the distance is still too great.  The pilot fails to Brace.

This time, the Dragon passes its Run check and stomps forward eager for battle.  However, it can not Brace and is taking a risk to try and get into range.

Turn 3
Strong Hammers can activate first.

With the Key Target still in sight, the Dervish tries to Lock-on to the Key Targets.  He does successfully.  He opens fire again.   This time he is more successful as his Missiles blast away three more containers.

The crippled Whitworth stumbles forward to get closer to the target area.  The Thorn Guard has to think about if they want to react to this crippled JUG or wait for one of the Heavier units.  The Vindicator successfully reacts.  A fusillade of firepower slams into the Whitworth, and this time its armor buckles and the JUGS systems shutdown.


The Whitworth is completely out of the fight.  It then moves to cover the last Key Target from the Dervishes attacks.

The Dragon fails to perform an ECM Burst.  It then moves towards the Cyclops to do battle.  The Cyclops fails to react, which means the Cyclops is not braced!  However, the Panther does react.  He locks onto the Dragon and fires, happy he had moved forward to try and set-up this crossfire to begin with.  The Rockets are knocked from the sky by the Dragon’s PD, but the Beam mercilessly reduces the Dragon by 3 Hits!  It is amazing no Critical Damage is inflicted.

The Panther’s attacks must have thrown off the Dragon’s firing solutions as almost nothing finds its way to the Cyclops.  The Thorn Watch heavy slaps away the rockets with PD and absorbs the cannon shells.

Now the Hunchback walks up and locks-on with his Cannon.  This time, the Cyclops manages to react and immediately Braces for impact.  Then, it fires its own weapons at the Dragon.  It is a punishing barrage!  The Dragon’s armor absorbs the cannons, but the Beam tears through it, reducing it from 7 Hits to 4 and crippling the Dragon!  Plus, the Point Defense and Rockets were damaged in the attack.


The Strong Hammers are starting to have second thoughts about their strategy!  The Hunchbacks cannon roared to life and managed to reduce the Cyclops by 1 despite bracing!  In addition, the cannon on its right arm mount was damaged.

The Commando was the last JUG to activate, and it did so now.  It scampered behind the Dervish and shot it again for no effect.

Turn 3
Thorn Guard win activation.

The Vindicator goes first to try and screen the last Key Target on that side of the board from the Dervish.  However, the Dervish Reacts to the movement and fires first!  He fails to lock-on and opens fire.  It only takes one missile, and it hits and destroys the Key target.  There are only three left, and it is behind the Cyclops.  The Commando tries to React as the Dervish goes to move, but fails.


The Vindicator completes its move.  With no Key Targets to protect anymore, it moves tot eh edge of the factory complex and targets the crippled Dragon.  However, before it can fire, the Dragon reacts.

The Dragon fails to Brace.  However, it does open fire on the Cyclops with its remaining weapons power.  Nothing sticks and the Cyclops’ shields knock the shells harmlessly aside.

Now the Vindicator Locks-on and fires at the crippled Dragon.  Locking-on pays off as there are 5 hits and only two are saved!  The Dragon is reduced to 1 Hit left.

The Cyclops activates and immediately tries to Brace again, and does so successfully.  He takes aim at the Hunchback this time and the Strong Hammer tries to react but fails.  The weight of fire is noticeably lessened due to the critical damage on the Cyclops right arm and the Hunchbacks armor absorbs all the hits.


The Panther activates and moves to get an obscured shot at the Hunchback.  The Hunchback reacts!  He turns and moves to try and get an Obscured shot at the Key Targets.  He locks-on and fires.  His shooting is dead-on and the last three Key Targets are obliterated by his cannon!

In frustration, the Panther locks-on to the Dragon and destroys him with a precise Beam attack.  The Commando also fires a parting shot at the Dervish, but the armor absorbs the rocket attack.

With that, the Thorn Watch radios a formal withdrawal request to the Strong Hammers.  The Strong Hammers agree and terms are met per the Mercenary Accords and Guidelines.

Conclusion

The Strong Hammers pulled it off, but only with some serious losses.  A Heavy and a Light Line JUG were both taken out in the Raid.  However, VolSaab will be suitably impressed by their efforts to bonus them on their contract.  Meanwhile, the Thorn Watch failed to protect the equipment and Lacstar Industries production on Mundos has been seriously hampered.  Heads will roll at the Corporate Headquarters for the botched efforts.  

Some final thoughts on the gameplay:

1.The activation and reactions can take a bit of getting used to.  You need to think before you just start doing stuff as you might get interrupted.

2.Again, the action/reaction follows much easier than I expected.  You simply complete the reactions, then go back to the previous units, and so forth.

3.Ammo is a consideration as both of us decided not to take low opportunity, long range/obscured shots unless it mattered.  We wanted to save it for better chances.

4.Bracing is key, and Beams rule!          

I might actually paint up some more JUGS for this!