Showing posts sorted by date for query Blood Red Skies. Sort by relevance Show all posts

Monday, December 8, 2025

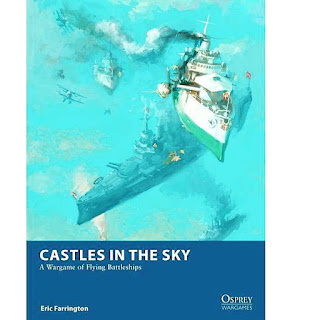
Battle Report: Castles in the Sky - Club Med Adventures


The Austro-Hungarians are back and looking to blow-up some more British ships!  Their last face off had the Austro-Hungarians defend their borders against a British attack.  I am not sure they still count as freshly painted, but the Dual Monarchy is looking to see what their bigger ships can manage! 

After the Sudova Riviera Incident, the Royal Navy still had a bad taste left in their British mouths.  They had paid reparations, but it was the HMS New Zealand that had been lost with all hands.  This distaste made some captains in the Air Navy Service look for the chances to make the Austro-Hungarians pay.  

The Austro-Hungarian fleet was on maneuvers above the Mediterranean, clearly in international airspace, far enough away from any shores.  They had been careful to chart their path to avoid any international incidents.  However, the British Navy heard about these maneuvers and moved to shadow the Hapsburg fleet.  

On the third week of maneuvers, the British used a squall as cover to move close to the Austrian fleet.  The British ignored all attempts to communicate, and their ensigns signaled that they were intent on battle.  The Austrian admiral decided to indulge them.  

The Forces

The British

Queen Elizabeth class- Battleship - HMS Valiant- Comm 4

Duke of Edinburgh class - Cruiser - HMS Black Prince - Comm 4

Warrior class - Cruiser - HMS Ajax the Greater - Comm 3 (Green Die) 

Shah Class - Escort - HMS Trout - Comm 2


Austro-Hungarians

Erzhog Karl Class - Battleship- SMS Kaiser Max - Comm 3

Novarra Class - Cruiser - SMS Custoza  - Comm 4

Novarra Class - Cruiser - SMS Schwartzenberg  - Comm 3 (Red Die)

Zenta Class - Cruiser - SMS Spalato - Comm 4

Huszar Class - Escort - SMS Leopard   - Comm 1

Huszar Class - Escort - SMS Panther   - Comm 3 (Red Die)


Mission

This is a standard Patrol mission from the main rulebook.  Therefore, it will be 6 turns and use Armor Loss as the victory conditions.  

Set-up

The table is a 48 x 48 MU board with 1 MU equal to 1 inch.  This battle takes place far out over the Mediterranean.  Therefore, there is no ground-based terrain.   However, there is one large cloud bank, a left-over from the squall between the two fleets at Altitude 6.  

The Dual Monarchy is moving at an angle across the board in a general Line Astern formation between 3-6 altitude and 4 speed.  The British are coming in Line Abreast in the center of their deployment at Altitude 6 and Speed 5.  

As usual, I will be splitting the battle report into three broad sections to give an overview of the game, and not every detail and altitude and speed change.  This division will be the Maneuver Phase, the Combat Phase, and the End Phase of the overall battle.  

In addition, this will be my first game using my snazzy new Cigar Box Battles mat #105 Ocean.  I have 1-inch hexes put on it in case I use it for other games that may need them.  However, this game does NOT use the hexes for play.  This is my fourth mat I have gotten from Cigar Box Battles and I really love my fleece mats.  I have a general ground mat, a space mat, and an urban mat.  They are easy to fold up and store, light for easy transport, and stand-up to wear and tear really well.  Plus, I am in a cold region and in a pinch you can use these fleece mats as an emergency blanket!            

Maneuver Phase   

The Austro-Hungarian fleet had solid command and control.  They were able to dictate the operational pace during this phase of the battle. 

The Royal Navy eschewed subtlety in their approach and barreled forward just under the cloud heights.  The HMS Trout moved to try and get in front of the Dual Monarchy battle line.  The forward guns of the British fired at the enemy fleet ineffectively as they closed. 


The Austro-Hungarians were less eager to mix it up and tried to get the British to close into their broadsides.  However, return fire from the SMS Kaiser Max went catastrophically wrong when both main batteries jammed!  

The SMS Schwartzenburg also rocked the HMS Ajax the Greater with a barrage of torpedoes early in the maneuver phase, causing two serious hits.   

Battle Phase

The two fleets get to the action surprisingly quickly.  The HMS Valiant manages to get the SMS Schwartzenburg into her port arc.  The admiral gives the order to Fire for Effect, and the Austro-Hungarian cruiser is pounded by the big guns of the battleship for 1 hit and 5 friction.  

This means the Schwartzenburg can not fire her Torpedoes.  However, her sister ship the SMS Custoza has the HMS Ajax the Greater all lined up and fires away.  The Warrior manages to avoid the worst of it, but still is hit by three, and one finds a home.  Thankfully, they had prepared for impact and the damage was minor.


The British frigate blasted through the squall and fired her two torpedoes at the trailing SMS Spalato.  Eagle-eyed gunners manage to take out one, while the armored belt absorbs the follow-up shot.  In a similar fashion, the SMS Panther manages to hit the HMS Black Prince with a torpedo as the Austro-Hungarian escort manages to maneuver around the British fleet.   

The SMS Spalato and the SMS Kaiser Max pour damage into the little HMS Trout causing the ship to rock and flounder from friction.  In the exchange, her Rudder is jammed.  The Kaiser Max manages to clear the jam from her main guns. 

It is clear that the British are trying to cut-off the Austro-Hungarian command ship, so the admiral makes a decision and decides to Come About and plow into the Squall.  However, the British ships are able to close the gap and get into short range and line-of-sight.  

 In desperation, the Kaiser Max splits her fire between the HMS Valiant and the HMS Black Prince.  The Valiant absorbs the hits on her armor but takes Friction.  The Black Prince tries to Prepare for Impact but fails!  She takes friction and two more penetrating hits.   The British Admiral smiles wickedly, but the grin is wiped away as his command ship is rocked by the desperate Austro-Hungarian fire.  He can not Fire for Effect, but he is still confident his battleship outmatches his foe.  The big guns roar out and riddle the Austro-Hungarian command ship causing 6 friction and 4 hits.  

The SMS Leopard fires on the HMS Ajax the Greater, but the PD takes out two and the last torp misses.  The Ajax adds more to the Kaiser Max damage with two more real hits and additional friction.  The SMS Spalato targets the Ajax in retaliation but only causes friction.  The Austro-Hungarian Air Torpedoes had trouble hitting anything due to the winds from the squall. 

The fire from the Kaiser Max managed to unseat the forward Medium Battery of the HMS Black Prince, making the forward main gun inoperable.  In return, the Kaiser Max blew-up completely from the furious firepower from the Valiant and Ajax the Greater!  The detonation of her magazine is enough to engulf the three main British ships, and the SMS Leopard and Spalato.  The HMS Black Prince is damaged from the blast and has her screw fouled, however her captain decides to stay in the fight.  The HMS Ajax the Greater's bridge was destroyed in the blast as well.  The SMS Leopard caught on fire, and her bridge was also destroyed.  The HMS Valiant and SMS Spalato weather the blast unscathed.  

The HMS Trout manages to repair her rudder.  The Captain of the SMS Spalato takes command. 

End Phase   

Despite the loss of the command ship, it is still a close game based on Armor loss.  However, the Austro-Hungarian fleet is out of position, while the British are still in a solid formation.  Many of the Dual Monarchy's ships reload their Torpedoes, while the SMS Spalato Crash Dives to try and get out of the kill zone of the British fleet's guns.  

The SMS Panther drives straight for the HMS Trout and fires its bow battery at it, causing a hit.  Meanwhile, the British Admiral again fires for effect on the diving SMS Spalato and manages to tag it with a hit.  The SMS Custoza manages to sink a few long range air torpedoes into the HMS Trout as well.  However, the HMS Ajax the Greater also manages to hit the diving Spalato, but jammed her forward battery in the process.  

The SMS Spalato had its screw fouled, slowing it in its sprint to escape.  Meanwhile, the HMS Trout was crippled from the Torpedo and gunfire.  The Captain strikes her colors to avoid destruction.    The Leopard fails to put out the Fire on board.  

The SMS Schwarzenburg and the Custoza decide they are not done with the British just yet, and line up for an Air Torpedo attack.  The British HMS Valiant decides to Prepare for Impact.  The two cruisers launch a withering barrage that manage to overwhelm the point defenses of the British and hit the Battleship and the Cruiser.  The damage is enough for the HMS Ajax the Greater to Strike her Colors.  

With that, the Captain of the SMS Spalato signals for his ships to scatter and return to base.  

Conclusion

The British were left with the field of battle but took some serious damage in the process.  Let's go to the big board.  It looks like the British lost 17 Armor, to the Austro-Hungarian 13 Armor loss.  Technically, a win for the Austro-Hungarian forces.  However, the British can take some solace in destroying the Dual Monarchy Flagship and Battleship.  The late "loss" of the HMS Ajax the Greater and HMS Trout shifted the balance.  

Once again, the value of Air Torpedoes pays off.  Their ability to snipe from lower or higher altitudes is great.  The pair of Novarra class cruisers paid-off, and the Escorts were not bad either.  Too bad the SMS Leopard had a command rating of 1, so I had them on Battleship escort duty.  The SMS Panther worked great though.  The rest of the ships in the Dual Monarchy did their job but were not nearly as useful.  

The Queen Ellizabeth class battleship is terrifying to face.  Those powerful main batteries combined with the almost automatic ability to Fire for Effect can ruin any ships day.  It basically one-shotted the Kaiser Max!  If the British have one, eventually it is going to get a powerful broadside off.  It the HMS Ajax the Greater had not have struck their colors, it would have been a tie.  

The Royal Navy sense of pride had been satisfied as they sent the Austro-Hungarian fleet scurrying back to port.  Their control of the skies over the Mediterranean was confirmed for all to see.  However, close analysis by the Admiralty after the fact revealed the truth.  The Royal Navy had not covered itself in as much glory as they had hoped.  

At the Concert of Europe, the other powers looked upon them as the aggressors.  The Italians in particular were displeased with this show of forces in their desired sphere of influence.  The Foreign Office had hoped to pry them from the Triple Alliance by humiliating their traditional foe the Austro-Hungarians, but doing so over the Mediterranean only made the Italians suspicious of British intentions in the region.  

For the Austro-Hungarian point-of-view, this helped rally their balkanized people behind a united front.  National pride had been hurt by the aggressive British moves towards them.  The Dual Monarchy was more united than ever, and their ties with the Italians actually improved, despite territorial disputes between them.  The loss of the Kaiser Max had been a terrible loss of life and air naval power, but the boost in unity may have been a fair trade.  The crew became post-humous National heroes.

Until next time!


Become a Patron and get access to all the cool stuff, a peak behind the curtain of Blood and Spectacles, and early-access to playtest games!  


You can follow Blood and Spectacles Facebook page or Instagram for more fun! 

Check out the latest publications and contact me at our Blood and Spectacles website

Or purchase all out games at the Blood and Spectacles Publishing Wargames Vault Page!           

Monday, September 15, 2025

Wargame Design: Abstraction is the Name of the Game


Recently, I reviewed Mike Hutchinson's latest game; Pacific Command.  This reminded me that Mr. Hutchinson is a master at using abstraction to focus game play on the key elements of the game that he wants to emphasize.  His abstraction technique has two parts to it: 

1. Focus on what the Game is intended to focus on

2. Reduce the energy need to complete everything else

I think he has only refined this ability as he has gone along.  I would say, it might even be considered his "signature" game design style.  This is a real skill and one of his key strengths as a designer.  Well, at least in my humble opinion.  Not all of the 4Ms.  Need to be given equal weight during a game.  

Wars of the Republic

What is Abstraction?

There has been a surprising amount of digital ink spilled on this topic.  Abstraction is surprisingly hard to pin down!  My definition of Abstraction is pretty straight forward. 

Abstraction = Reducing Complex Realities into Simple Game Procedures

For example, the process of flying an airplane is a very complex procedure involving a lot of physics and calculations.  It is so complex that I don't have the faintest idea of how it actually works.  It has a wide variety of factors involved in order to do it well and not doing it well can lead to the death of the people in the aircraft! 

We see the challenge of Abstraction when you look at many modern aircraft games.  There are complex maneuver cards, speed and altitude changes, stalling, and other complex rules.  The action that takes seconds in real-life can take half-a-day to play!  I love to play these types of rules sets because they often tax my brain tactically, but they are nothing like an actual dogfight.  These are very complex realities involved. 

Therefore, Abstraction would be taking these abstract realities and reducing them down so that the only decisions for the player are the ones the game designer intends them to make.  Taking a look at the air combat example again, Blood Red Skies abstracts most of the Physics of flying.  Instead, it focuses on decision to move your planes into a position where they can or can not shoot at the foe to reduce enemy morale.  The rest of the game is secondary to that main focus. 

Ork Fighters for Aeronautica Imperialis

Why Abstract? 

This is much easier to answer.  

Complex processes may more accurately reflect the reality of a given situation, but typically such complex procedures bog down the game, require a higher mastery of game play to execute, disrupt the pace, requires more resources, and makes a game less interesting to play.  Players spend more time operating the controls of the game than interacting with the experiences the game is trying to recreate.  This puts cognitive distance between the game and the player.  This cognitive distance is often considered to be "less fun" by large segment of wargame players.  

Of course, what is FUN is another question all together, and not easy to answer. 

Odin's Ravens

Abstraction in Wargame Design

There is a lot of debate about whether abstraction is: 

1. A compromise forced on game designers to make games playable 

2. Abstraction is the whole purpose of game design in the first place

The first argument basically believes that Wargames should be mostly simulation in nature.  They are trying to recreate a space and time as closely as possible in order to mirror the decision making of the participants.  The purpose of the game is to create an experience that can be used to teach, draw conclusions, or otherwise as a learning tool.  This approach is more commonly a mindset in "professional" wargaming community, the historical Hex-and-Counter community, and some Historical games.  

The second view is more of a gamist or narrative approach.  The focus is to create a game experience to either "find out what happens" or to entertain as a game.  In these approaches, the abstraction is necessary to make a game playable by a layman or leisurely hobbyist.  The abstraction is to allow players to resolve a scenario or game with a plausible conclusion in a timely manner.  Lessons and learnings can happen, but the focus is more on delivering an entertaining and satisfying conclusion to and for the players.  The main focus is on playability rather than completeness. 

Now, I am not doing either of these positions any justice.  Both are equally valid and useful ways to think about abstraction.  However, I have a strong bias towards the second for a simple reason, I am designing Hobby wargames with a more Gamist and Narrativist slant to them.  The Simulation is secondary for me.  

Since I lean into the second category, I tend to ABA- Always Be Abstracting.  Therefore, I am trying to create the shortest possible procedure to resolve a process in a way that I find satisfying and gets a solid result.  

Battle of Kadesh using In Strife and Conflict

Abstraction Tips and Tricks

 Here are some tips and tricks to help you think about abstraction in your game designs.  

1. Have a Point of View on how things work in your game world or historical setting.   

2. Decide which parts of your game you want to emphasize and put more rules and detail there. 

3. When you create a process to achieve a result, always try to strip it down to the fewest steps possible.            

4. At the point of emphasis, do not leave the rules flavorless.  This is the heart of your game, if it has no bite; than no one will want to play your rules.  

5. Not all processes need to be given equal weight. 

6. Just because it happened one time doesn't mean you need rules for it, focus instead on what your rules are trying to do. 

7.  Be ruthless in streamlining your game.  Kill your favorite rules. 

8. It is always easier to add complexity via Special and Advanced Rules later.  

9. Abstracted rules give your more design space if you want to expand later

I talk more about this with Mark's Game Room


Final Thoughts

To me, the difference between good wargame design and not-so-good wargame design is often determined by how well it can abstract the core concepts into playable rules.  For my money, good designers should ABA- Always Be Abstracting.  Emphasize the key aspects of the game or period and abstract the rest even further.  

Abstraction is the name of the game.  

Until next time! 


Become a Patron and get access to all the cool stuff, a peak behind the curtain of Blood and Spectacles, and early-access to playtest games!  


You can follow Blood and Spectacles Facebook page or Instagram for more fun! 

Check out the latest publications and contact me at our Blood and Spectacles website

Or purchase all out games at the Blood and Spectacles Publishing Wargames Vault Page!                                   


Monday, September 12, 2022

Battle Report: White Star/Red Star - CAP near Taejon, July 1950


July 19th, 1950 the USAF sought to establish air superiority against the invading communist forces.  This was know as the Air Battle of Korea.  At this stage in the war, the USAF was using a combination of piston and jet engine aircraft for this mission.  The primary opponents were the North Korean air force using propeller driven late WWII era aircraft.  

On July 19th, F-80's from the 5th air force took on advanced elements of the North Korean Air Force.  They engaged in a dogfight near Taejon.  In the engagement, the F-80s managed to down 3 enemy Yaks.   

I am super excited to get my Tumbling Dice miniatures out on the table to see how they look and feel on the table! 

Mission:
We used the rules from the book to determine the Sortie for today and came up with a Combat Air Patrol in clear weather.  This is a simple scenario to kill the other sides planes.  

Forces:
We have decided to use the North Koreans and USAF lists.  

USAF
3 F-80 Shooting Stars 
- Experienced pilots


North Koreans
4 Yak - 9 Franks
- 3 Rookie Pilot
- 1 Experienced Pilot


Set-up:
This games starts off with both players undetected.  There is also no need for terrain, but we added some for the look.  

The game is taking place on a 86 x 86 MU board.  1 MU is equal to 1/2 and inch.  

Two of the Yaks are connected as wing-men.  Everyone else is individuals in this furball. 

For reference, if a plane has no stand, it is at low altitude, stand is combat, and on top of a dice on a stand it is High altitude.  

Turn 1: 
Detection:
No one is detected this turn, so no planes enter play yet.  

Turn 2: 
Detection: 
No aircraft detected by either side still.  This is eating into the games turn limit, and allowing planes to deploy further in on the board once detection occurs. 

Turn 3: 
 Detection: 
Nothing. All pilots are still scanning the skies. 

Turn 4: 
Detection: 
The F-80's are spotted, and need to be deployed on the table.  Since it is the 4th turn, they can be deployed up to 24 MU in.  

The F-80's deploy with two at combat altitude and 1 at High.  They re moving diagonally across the board.

Rookie: 
The lead F-80 makes a 45 degree turn and heads towards the village.  The second stays high and straight, while the third makes a 20 degree turn and turns towards the village too. 


Experienced: 
The USAF continue to move.

Ace:
They all move straight, as they are Experienced pilots and can not make moves in this phase.  

Turn 5: 
This time, the USAF sees the North Korean Yaks.  The North Koreans can deploy up to 30 MU in from their board edge.  

The Yaks put their Rookie pair forward, going across the board to try and lure the USAF after them.  The other two are further back, with the last rookie at High altitude. 


Rookie: 
The North Koreans have to start moving planes first, since they have more of them.  Both sides begin to turn into the attack, looking like they are setting up to go head-to-head.  No one changes altitude. 

Experienced: 
The USAF have more Experienced planes and move first. The paired North Koreans have to move together as a pair, since they are a wing-man team.  

The USAF moves to bypass the rookie bait, and head for the North Korean Experienced pilot.  Both sides close the distance, and get ready to fire.  

Ace:
Neither side has any Aces, so the North Koreas move first.  All pilots can only go straight, and not change altitude.  They also can not shoot in this phase.    


Turn 6: 
Detection:
There are no more planes to detect, so this phase is no longer needed going forward. 

Rookie: 
The tailing Yak at high altitude banks 45 degrees to try and set-up against the high F-80.  Meanwhile, the Rookie pair turn at 20 degrees to dissuade the high F-80 from dropping down altitude. 

The Experienced North Korean Pilot and one of the F-80's are going head-to-head.  the North Korean fires, but the range is far enough for the USAF pilot to maneuver around the incoming fire. However, the North Korean pilot kept ammo in the hoppers for another pass with a disciplined burst.

The lead F-80 just misses the angle on the North Korean experienced pilot and can not fire.  The other F-80 is lined up after avoiding the incoming fire, and opens up a return burst.  The North Korean dodges the long range burst as well.  The USAF pilot also has ammo remaining. 


Experienced: 
This time, the USAF has the advantage as they have more experienced pilots.  The F-80 presses home the head-to-head attack on the experienced North Korean pilot, and this time is able to bring him down with a burst.  However, it was a long burst and the F-80's guns go dry.  He will want to break-off and away.  First kill to the USAF! 


The other North Korean pilots can not maneuver, as they are all rookies.  Instead, they go straight.  The High F-80 stays high and turns in to go over the Rookie pair.  Meanwhile, the F-80 leader turns back into the furball. 

Ace: 
No one can maneuver, so they all go straight! 

Turn 7: 
Rookie: 
The Rookie pair dive down to low altitude and make to break-off.  The F-80 that is out of ammo also turns away to break-off.  

The High Altitude North Korean Rookie sees a USAF F-80 bearing down, so he turns into the attack and fires.  However, he fails to hit the mark.  The incoming F-80 returns the favor.  However, he also misses.  Neither plane is out of ammo yet.  


The lead F-80 tries to duck in and cut-off the Rookie North Korean if he tries to break away or go lower.  

Experienced: 
The USAF F-80 fires on the Rookie Yak-9 pilot, who manages to dodge the shots.  The two aircraft race past each other.  Both with ammo remaining.  

The lead F-80 stays at combat altitude, incase the higher Yak dives.  

Ace: 
Everyone goes straight! 

Turn 8: 
Rookie: 
Everyone is faffing about and trying to regain position.  

Experienced: 
The F-80s still in the fight are using their superior speed and skill to get back in on the Yaks, cutting off their turning radius.      

Ace: 
Straight again! 

The F-80 that is out of ammo manages to disengage from the fight and head for home with 1 Kill to their record.  


Turn 9: 
Rookie: 
Lead F-80 is still 1 altitude level above his prey as they try to flee.  The last rookie Yak drops to combat altitude, hoping for a chance on the F-80 leader.  The last F-80 is still turning back into the scrum and at high altitude. 

Experienced:
The F-80s both dive.  However, the Lead F-80 can not get the angle on the pair of Rookie North Korean pilots.  However, their higher altitude pal also has no shot. 

Ace:
Straight ahead! 


Turn 10: 
Rookie: 
The North Koreans go first as they have more planes.  The rear Yak dives, but can not get a shot off.  

The second F-80 is still too high, but gets ready to cut-off the last North Korean aircraft.  

The Rookie pair try to cut in under the attacking Lead F-80, but he manages to fire a burst and take out the tailing plane.  The USAF pilots still has ammo.  


Experienced:
With 1 Kill under his belt, the lead F-80 breaks off from the fight and disengages off the board.  The second F-80 dives at the fleeing rookie Yaks, but misses the angle. 

The last Yak also has no shots, but does not have the skill to try a shot anyway. 

Ace:
They all fly straight. 

Turn 11- Disengagement Turn
With all three phases, the last planes can easily disengage off the board.  

Conclusion:
The USAF F-80s of the 5th Air Force managed to disengage with no losses, and 2 Kills to their record.  A successful day in the Air Battle of Korea

A couple observations from this battle.  Typically, I use 1 MU = 1 inch.  The shorter MU slowed the game down a bit, but allowed more maneuver.  With 1 MU is 1 inch, the game would have lasted closer to 6 or 7 turns instead and the action would have occurred much faster.  I think I will use the 1 MU = 1 inch going forward.  The shorter distance also made the aircraft feel slower as well.  

As the North Korean player, I was too aggressive with my Experienced pilot and when he was knocked down I did not have much to respond with.  My hopes for a draw fizzled when one of my Rookie wing-men got shot down.  Then, it was all about avoiding losing more planes and getting out alive! 

The faster Jets and skill of the American pilots played a part in the battle.  It was this advantages that allowed them to shoot my Experienced pilot down, and bag a Rookie.  A historically accurate result in this engagement.  


Become a Patron and get access to all the cool stuff, a peak behind the curtain of Blood and Spectacles, and early-access to playtest games!  


You can follow Blood and Spectacles Facebook page or Instagram for more fun! 

Check out the latest publications and contact me at our Blood and Spectacles website

Or purchase all out games at the Blood and Spectacles Publishing Wargames Vault Page! 


Monday, January 31, 2022

Battle Report: White Star/Red Star - CAP in MIG Alley II


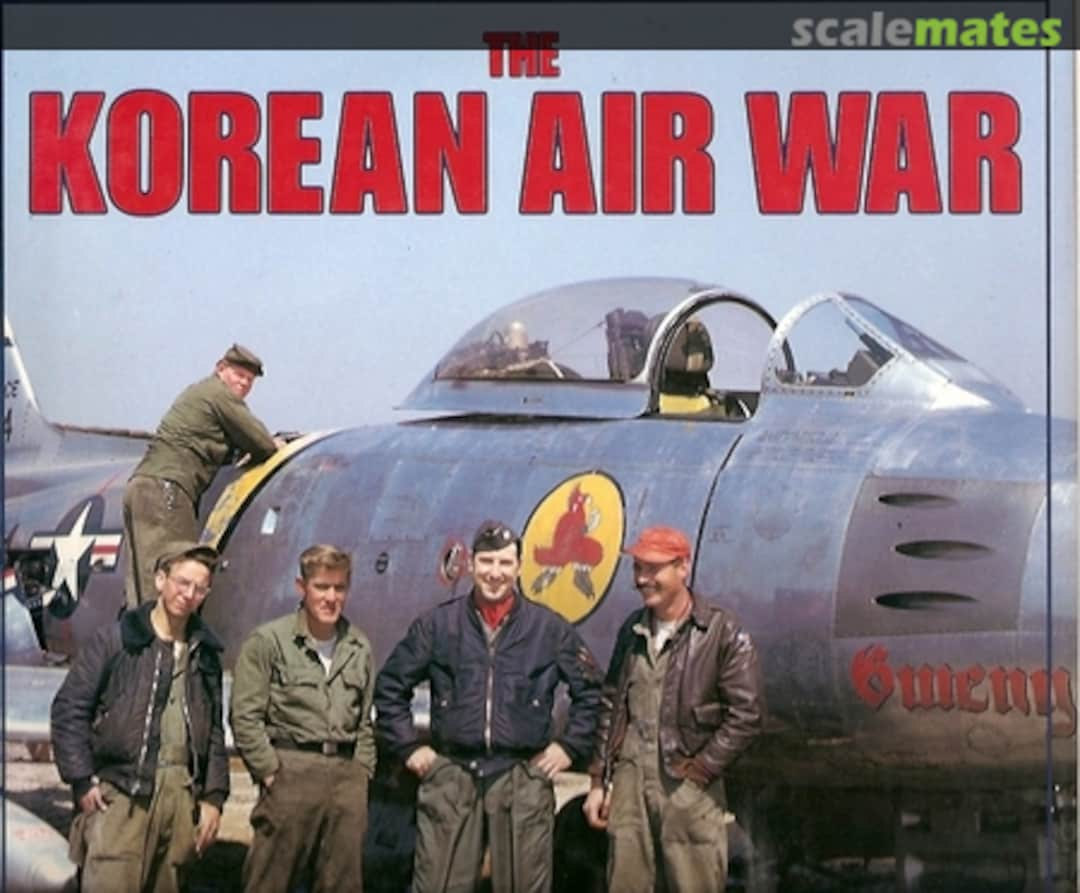
Image from here:
https://www.scalemates.com/books/the-korean-air-war-robert-f-dorr-warren-thompson--109961


MIG Alley was the nickname for the Northwest corner of Korea, where the Yalu River enters into the Yellow Sea.  This was the area where Communist MIG-15s tended to scrap with USAF Sabres for control of the skies.  Here, high above Korea was the site of many of the first Jet-vs-Jet battles in history.

The Korean War officially began June 25th, 1950.  The initial air battles were fought between the North Korean Air Force using old WWII era planes, and the South and their allies.  The USAF used later WWI propeller driven aircraft and some early Jet aircraft.  

On November 1st, 1950 the first MIG-15 jet fighters attacked a flight of USAF F-51 Mustang fighter-bombers.  Later that day, the first jet vs. jet combat took place between the MIg-15 and the F-80 Shooting Star.  The USAF's early jets were inadequate for the task, and soon the USAF was resupplying and using the new F-86 Sabre to counter the Communist threat.  

The MIG-15's during the early phase of the war were secretly being operated by the Soviet Unions highly skilled 64th Fighter Aviation Corp.  While the Soviet pilots were engaging in the air, they were also starting to build up the North Korean and Chinese pilots to eventually rotate in and replace them.  

As the F-86 began to appear in the skies over North Korea Mid-December the stage was set for a clash for control of the Skies over North Korea between the MIG-15 and the F-86 Sabre.  

After several play tests, and getting feedback from others I made a couple of BIG changes to these rules.  The first big change was to remove the "action economy" element of the game.  In the old version, all pilots took action in the Rookie Phase, Experienced Pilots and Aces in the Experienced Phase, and Aces only in the Ace phase.  This proved to be unpopular as an Ace pilot in a Prop plane could go faster than a rookie in a Mig.  Therefore, I removed this and instead gave the different levels of pilots the ability turn or change altitudes differently.  Rookies could only initiate a turn at the start of their move OR change altitude, experienced can at any point OR change altitude, while aces can change altitude and turn freely.  

I also made a bit of a change with Wingmen and formations.  Therefore, you can better imitate the true Finger Four formation or pairs of aircraft working in tandem on the table.  A formation has the Wing Leader activate first, and it auto actives the wingman who must maneuver the exact same way as the Wing Leader. 

Finally, I modified Detection so it was a bit harder to detect some planes right off the bat.  This allowed you to "sneak" them in and deploy them closer to the enemy.  I did this by changing it from a straight d6 to a d6+Turn mechanic.  I then increased the Detection number of all aircraft.  It is possible to detect a Jet fighter on turn 1, but it is unlikely.  Let's see what these changes did to the game. 

I intend on giving both of these changes a try today.   

Sortie: 

This time, I am purposely re-creating a playtest battle I posted previously.  As such, it will mirror the set-up of that battle in order to test the key changes I made to the rules.  The UN is the attacker, and the sortie will be the Combat Air Patrol.  

Set-up: 

Again, we are mirroring the original combat.  The weather was determined to be clear.  

Since this is a standard Combat Air Patrol in MIG Alley, no additional terrain is needed.  However, we add some hills on the edges of the board, ad determine them to be difficult terrain at Low Altitude. 

The board is 48MU by 48 MU and an MU equals 1 inch.  

Forces:

Today's battle will be using my (in)famous Paper Templates

USAF

4 F-86 Sabres- Experienced Pilots

Soviets

4 Mig-15s- Experienced Pilots

This will be a straight up dogfight between the two sides of equal points and aircraft.  

Turn 1: 

Detection Phase:
A great Soviet roll, leaves all the Sabres detected, while the Migs are not detected.  The Soviet player rolled a 6 +1 for the turn to get a 7.  The detection rating on a Sabre is a 7, so the Sabres are detected. 

I place the F-86's in a finger 4 formation, relative center of the table, and at high altitude to get us all started.  I decide that Sabre #1 and #2 are wingmen, and #3 and #4 are also wingmen.    

No Migs in sight yet. 

Action Phase:
The F-86s have no reason to split up, so continue going forward on their merry way.  They are blissfully unaware that Soviet Migs are about. 


Turn 2:

Detection Phase: 
This time, I roll a 5 + 2 for the Turn for a total of 7. This time, I get eyes on the Migs.  They can deploy up to 12 MU in on the board.  They deploy at low altitude, echelon right on their right edge of the board.  The Soviet player declares all her Migs are Wingmen to each other, so they will move as a unit.


Action Phase: 
The Sabres move forward and stay in formation, at high altitude.  The Migs also just stay going forward and in formation. 

Turn 3: 
We dispense with the Detection Phase since all planes are in sight.  

Action: 
The Migs ae coming in at an angle, so the question is whether to turn towards them to engage, or if I should do something different.  I am reluctant to go head-to-head with all that firepower, but to maneuver away may leave me sourly out of position, and still in a danger zone.  I decide I want to try to lure the big formation after i set of Sabres, while the other gets behind the Migs.  

Sabres #3 and #4 break left with a 45 degree turn.  The Migs, do not deviate from the low altitude flight path.  Sabres #1 and #2 using wingmen rules break to the left at 45 degrees.  

We will see if this works! 

Turn 4:
Sabre #1 & #2 continue with slight 20 degree turns to get behind the Migs.  The Migs, keep going forward in formation and pivot 20 degrees as well, towards Sabre #3 and #4, but stay low.   The final Sabres do a 180 degree turn by inverting, and drop to Combat altitude.  They are trying to avoid the oncoming MIGS.  

Turn 5:
Sabre #1 and #2 do 90 degree turns at high altitude to try and start getting behind the Migs.  The MIGs use their wingman formation and all go to Combat speed, and open fire on Sabre #3 and #4.  

Only Mig #3 has a shot and he fires at Sabre #4 at long range.  He gets two hits, but thanks to range and deflection, the Sabre jinks away.  Mig #3 has fired off all his limited ammo.  

The last Sabres hard break back towards their fellows and the Migs at Combat altitude. 


Turn 6:
Sabre #1 and #2 take 45 degree turns to get in behind the MIGs.  They still do not have the Angle as the MIG formation turns 45 degrees as well and towards Sabres #3 and #4.  

Mig # 4 and Mig #2 light up Sabres #3 and #4 respectively.  The Sabres again manages to shake off the shooting with maneuvers.  MIG #4 runs out of ammo from his pass.

The Sabres turn in and good head-to-head against the MIG line.  There shooting fails to bring down any enemy planes either.  They also have more ammo left in their feeds.  


Turn 7:
The aircraft maneuver around, but are in a furball up close.  

Sabres #1 and #2 are up high and failing to get the drop on the MIGs.  Meanwhile, the MIGs stay in formation and break hard left.  Sabres #3 and #4 cross their trail, but can't get the bead as they break 45 degrees to their right.  


Turn 8:
Sabres #1 and #2 drop to combat altitude.  

The Migs turn towards them, hoping to get a bead on them, but fail.  

Sabres #3 and #4 bank hard and swoop in on the MIGs tails.  Only #3 has a shot and opens up.  MIG #2 manages to maneuver away from the shots!  However, Sabre #3 still has ammo left.


Turn 9:
Sabres #1 and #2 cut across the MIGS flight path as they roar past the opposite way.  

Sabres #3 and #4 seem to have them in firing position and chase them down with a hard bank. 

Sabre 33 opens up on MIG #4, but the pilot evades masterfully.  Sabre #4 also fires on Mig #3, and this time he manages to blow the wing off his foe.  Scratch 1 MIG! 


Turn 10- Disengagement Turn
Sabres #1 and #2 try to gain altitude and disengage.  However, the MIG flight inverts and climbs to take them on.  MIG #1 opens fire on Sabre #1, but misses.  He still has ammo.  

Sabres #3 and #4 jet past underneath the MIG formation.  

Conclusion:
All aircraft break for home, running low on fuel and ammo.  The USAF won by downing 1 MIG to 0.    

So, the game felt very different with the changes I made.  Planes did less, zipping around then they did before, and the battle felt a lot less Vertical.  This felt like a more traditional WWII air battle game this time.  I am do not think it accomplished my design goals fully.  

I think I am going to go back and take another shot at the action economy approach, but this time, all pilots activate in the turn, but only the turn names pilots can maneuver in their turn.  otherwise they just fly straight?  That is another big change to the rules.  

The Detection rules worked better though, so those can stay!  I am also less sure about Wingmen movement, as they just ended up being big "groupings" of aircraft.  This is not necessarily bad though, and seemed to match my reading of the Korean War.  I will have to test those with the new "Action" economy again. 

Back to draft again...... 


Become a Patron and get access to all the cool stuff, a peak behind the curtain of Blood and Spectacles, and early-access to playtest games!  


You can follow Blood and Spectacles Facebook page or Instagram for more fun! 

Check out the latest publications and contact me at our Blood and Spectacles website

Or purchase all out games at the Blood and Spectacles Publishing Wargames Vault Page! 


Monday, June 14, 2021

Battle Report White Star/Red Star- CAP in MIG Alley


MIG Alley was the nickname for the Northwest corner of Korea, where the Yalu River enters into the Yellow Sea.  This was the area where Communist MIG-15s tended to scrap with USAF Sabres for control of the skies.  Here, high above Korea was the site of many of the first Jet-vs-Jet battles in history.

The Korean War officially began June 25th, 1950.  The initial air battles were fought between the North Korean Air Force using old WWII era planes, and the South and their allies.  The USAF used later WWI propeller driven aircraft and some early Jet aircraft.  

On November 1st, 1950 the first MIG-15 jet fighters attacked a flight of USAF F-51 Mustang fighter-bombers.  Later that day, the first jet vs. jet combat took place between the MIg-15 and the F-80 Shooting Star.  The USAF's early jets were inadequate for the task, and soon the USAF was resupplying and using the new F-86 Sabre to counter the Communist threat.  

The MIG-15's during the early phase of the war were secretly being operated by the Soviet Unions highly skilled 64th Fighter Aviation Corp.  While the Soviet pilots were engaging in the air, they were also starting to build up the North Korean and Chinese pilots to eventually rotate in and replace them.  

As the F-86 began to appear in the skies over North Korea Mid-December the stage was set for a clash for control of the Skies over North Korea between the MIG-15 and the F-86 Sabre.  

Sortie: 

We randomly determined who the Attacker/Defender was and UN forces decided to be the attackers.  The Sortie was also randomly determined to be a Combat Air Patrol.    

Set-up: 

We used the standard rules to create the set-up for this sortie.  The weather was determined to be clear.  

Since this is a standard Combat Air Patrol in MIG Alley, no additional terrain is needed.  However, we add some hills on the edges of the board, ad determine them to be difficult terrain at Low Altitude. 

The board is 48MU by 48 MU and an MU equals 1 inch.  

Forces:

Today's battle will be using my (in)famous Paper Templates

USAF

4 F-86 Sabres- Experienced Pilots

Soviets

4 Mig-15s- Experienced Pilots

This will be a straight up dogfight between the two sides of equal points and aircraft.  

Turn 1: 

Detection Phase: 

Things start out with both sides rolling very well for detection.  The Mig-15's and the F-86's are both detected by the enemies radar systems.  Since the USAF are the attackers, they choose to have the MIG-15's place first. 

Since the MIG-15 is an excellent climber, the Soviets decide to place themselves at Low altitude to start with.  The MIGS deploy with their Leader out front on the east side, and the rest deployed within 12 MU in echelon.  


The F-86 Sabres decide to deploy at High Altitude as they are better at diving on their foes.  They deploy with their leader in the center of the board, and use a tight "Finger Four" formation.  Since they are at high altitude, I put two dice under each template.  The MIGS at low altitude need no height markers.  There are only Low, Combat, and High Altitudes in the game, and I use dice under the template/base to represent height changes.    


When deploying, all aircraft of the same type need to deploy at the same altitude and within 12 MU of another craft of the same type.  This represents the aircraft working together as part of a squadron at deployment.  

Rookie:

All the pilots in this battle are experienced Pilots.  Therefore, they will be able to move and act in the Rookie Phase and the Experienced Phase, but not the ACE phase.  

MIG #3 and #4 take 20 degree turns and head towards the hills.  Meanwhile the Sabres press ahead, as do MIG #1 and #2.  No one is close enough for any shooting..... yet. 

Experienced:

MIG #4 needs to go up 1 altitude to avoid any issues with the hills.  Otherwise, he and MIG #3 stay on course to the outside edge of the oncoming furball.  The Sabres all keep moving straight.  MIG #1 and #2 do the same.  

The distance is still too great for shooting.  Timing your Dives/climbs and turns for maximum effect is not easy.  


Turn 2: 

Detection: All Planes are detected and deployed. 

Rookie: 

MIG #3 stays on course to the western hills.  

The lead Sabre dives on MIG #2 and opens fire at long range.  The .50 Cal machine guns in the nose of the Sabre open fire with a burst at long range, but the MIG evades it with a successful maneuver test.  

MIG #2 moves closer to the lead Sabre and opens fire with their cannons.  He scores 2 hits, and the Sabre only scores 1 Maneuver success.  The wing leader is shot from the sky!  MIG #2 still has ammo for the next Sabre.  

Sabre #3 stays at High Altitude, judging the Dive would not get a MIG in his fire arc.  MIG #4 breaks back towards the furball with a 45 degree turn.  Planes can turn OR change altitude, but not both in a turn.  

Sabre #2 turns towards the western hills and MIG #3.  MIG #2 turns at low altitude to fall in behind MIG #2.  Sabre #4 dives down to low altitude now as well.  


Experienced:

MIG #3 turns back into the furball in the valley.  Sabre #2 swoops down at him, but misses the angle and overshoots!  MIG #2 makes a sharp turn and gets the angle on Sabre #2, but it will be a Deflection shot.  He opens fire with his cannon and gets 2 successes.  The Sabre only gets 1 Maneuver save and his taken down by the MIG!  However, MIG #2 is out of ammo!  

Sabre #3 swoops from high altitude to low altitude and opens fire on MIG #1.  He scores 1 hit, and the MIG pilot scores 0 Maneuver saves.  Scratch 1 MIG!  However, Sabre #3 runs out of ammo due to the long burst he used.  

MIG #3 goes up altitude, while Sabre #4 turns in to the attack.  He gets a bead on Mig #2 and opens fire with long bursts from his nose machine guns.  However, the MIG maneuvers away from the shots as the Sabres guns run dry.  

With 2 Sabres down and the rest Out-of-Ammo, we move into the Disengagement Turn. 


Turn 3- Disengagement Turn

Detection: All planes detected and deployed. 

Rookie:

MIG #4 turns into the dogfight and gets a bead on Sabre #4.  he opens fire at combat range, but the Sabre avoids the cannon fire.  The MIG is out of ammo.  Sabre #4 takes a hard, high-G turn and tries to bug out.  He flies in low over the hills with a successful Maneuver check.  

MIG #3 sees no shot, and decides to get to safety.  He climbs to high Altitude to avoid contact.  Sabre #3 goes guns the throttle to get out of there and tries to break contact.  

MIG #2 and MIG #4 break contact by climbing to High Altitude.  


Experienced

No one wishes to engage further and the game is called.  

Conclusion

The Soviets win with 2 Kills to 1 Kill.  When the last remaining Sabres ran out of ammo, it was all over but the crying! 

As the Soviet player, I was lucky that the Wing Leader's swooping attack failed to stick.  From there, I had the USAF on the back foot and I was able to concentrate firepower more effectively.  As always, my daughter did a better job of keeping her forces and firepower together, but this time my flanking maneuver to attack in echelon paid off.  

Here are some high level thoughts on the game: 

  • That was quick, quick, quick! 
  • The rules were super easy to play.
  • Timing your dives, climbs, and turns is harder than you would think.
  • Timing is critical as the engagement window is small with straight fire arcs on 1 altitude band
  • Turning vs Altitude change is a big decision point
  • Choosing when to shoot matters as you WILL run out of ammo, so make every shot as high percentage as possible!
  • Detection played no part in this battle.          
Overall, that was quick and fun.  There was decision making, but no one was agonizing over the mechanics of flying.  Instead, it was about how and when to engage and shoot.  So, it worked well as a game and met my design goals.  

The next question is how historically accurate is it?  Traditionally, Mig patrols were looking for B-29's to take out.  They would often fly low and then quickly climb to attack them.  Sabres would fly high and then dive in to the attack, while the Migs would scatter and try to out climb the USAF to get away from danger.  The USAF valued enemy aircraft kills, while Soviet pilots were less focused on dogfighting and more focused on interception.  My daughter doesn't know any of  that, but naturally adopted the "swooping" tactic based on her reading of the aircraft profile.  

In the end, much of this dog fight was vertical vs. horizontal which is pretty accurate.  The "shooting" only lasted a few moments and there was no protracted "dogfighting" like in WWII.  It ended with the USAF running out of ammo, which was not uncommon.  Then, the Migs going high to get away from danger which was a common tactic.  It matched a "typical" encounter of the period with one glaring exception.  The Soviets won and drove the Sabres off.  Usually, the Migs were the ones to bug out from an USAF CAP!  


You can follow Blood and Spectacles Facebook page for more fun: https://m.facebook.com/pg/BloodandSpectacles/posts/?ref=bookmarks&mt_nav=0

Or our website:

Or our Messageboard:

Or our Wargames Vault Page: