We rolled up a Bombardment with the British as the attacker. There are no complications that are rolled up. Both sides choose up to 25 Operational Value, and both sides can bring their battleships for another battleship showdown! The French have an armor 7 ground target to defend.
For today's Bombardment, we will be playing on a 48MU by 48MU board. We determined terrain randomly using the chart in the rulebook:
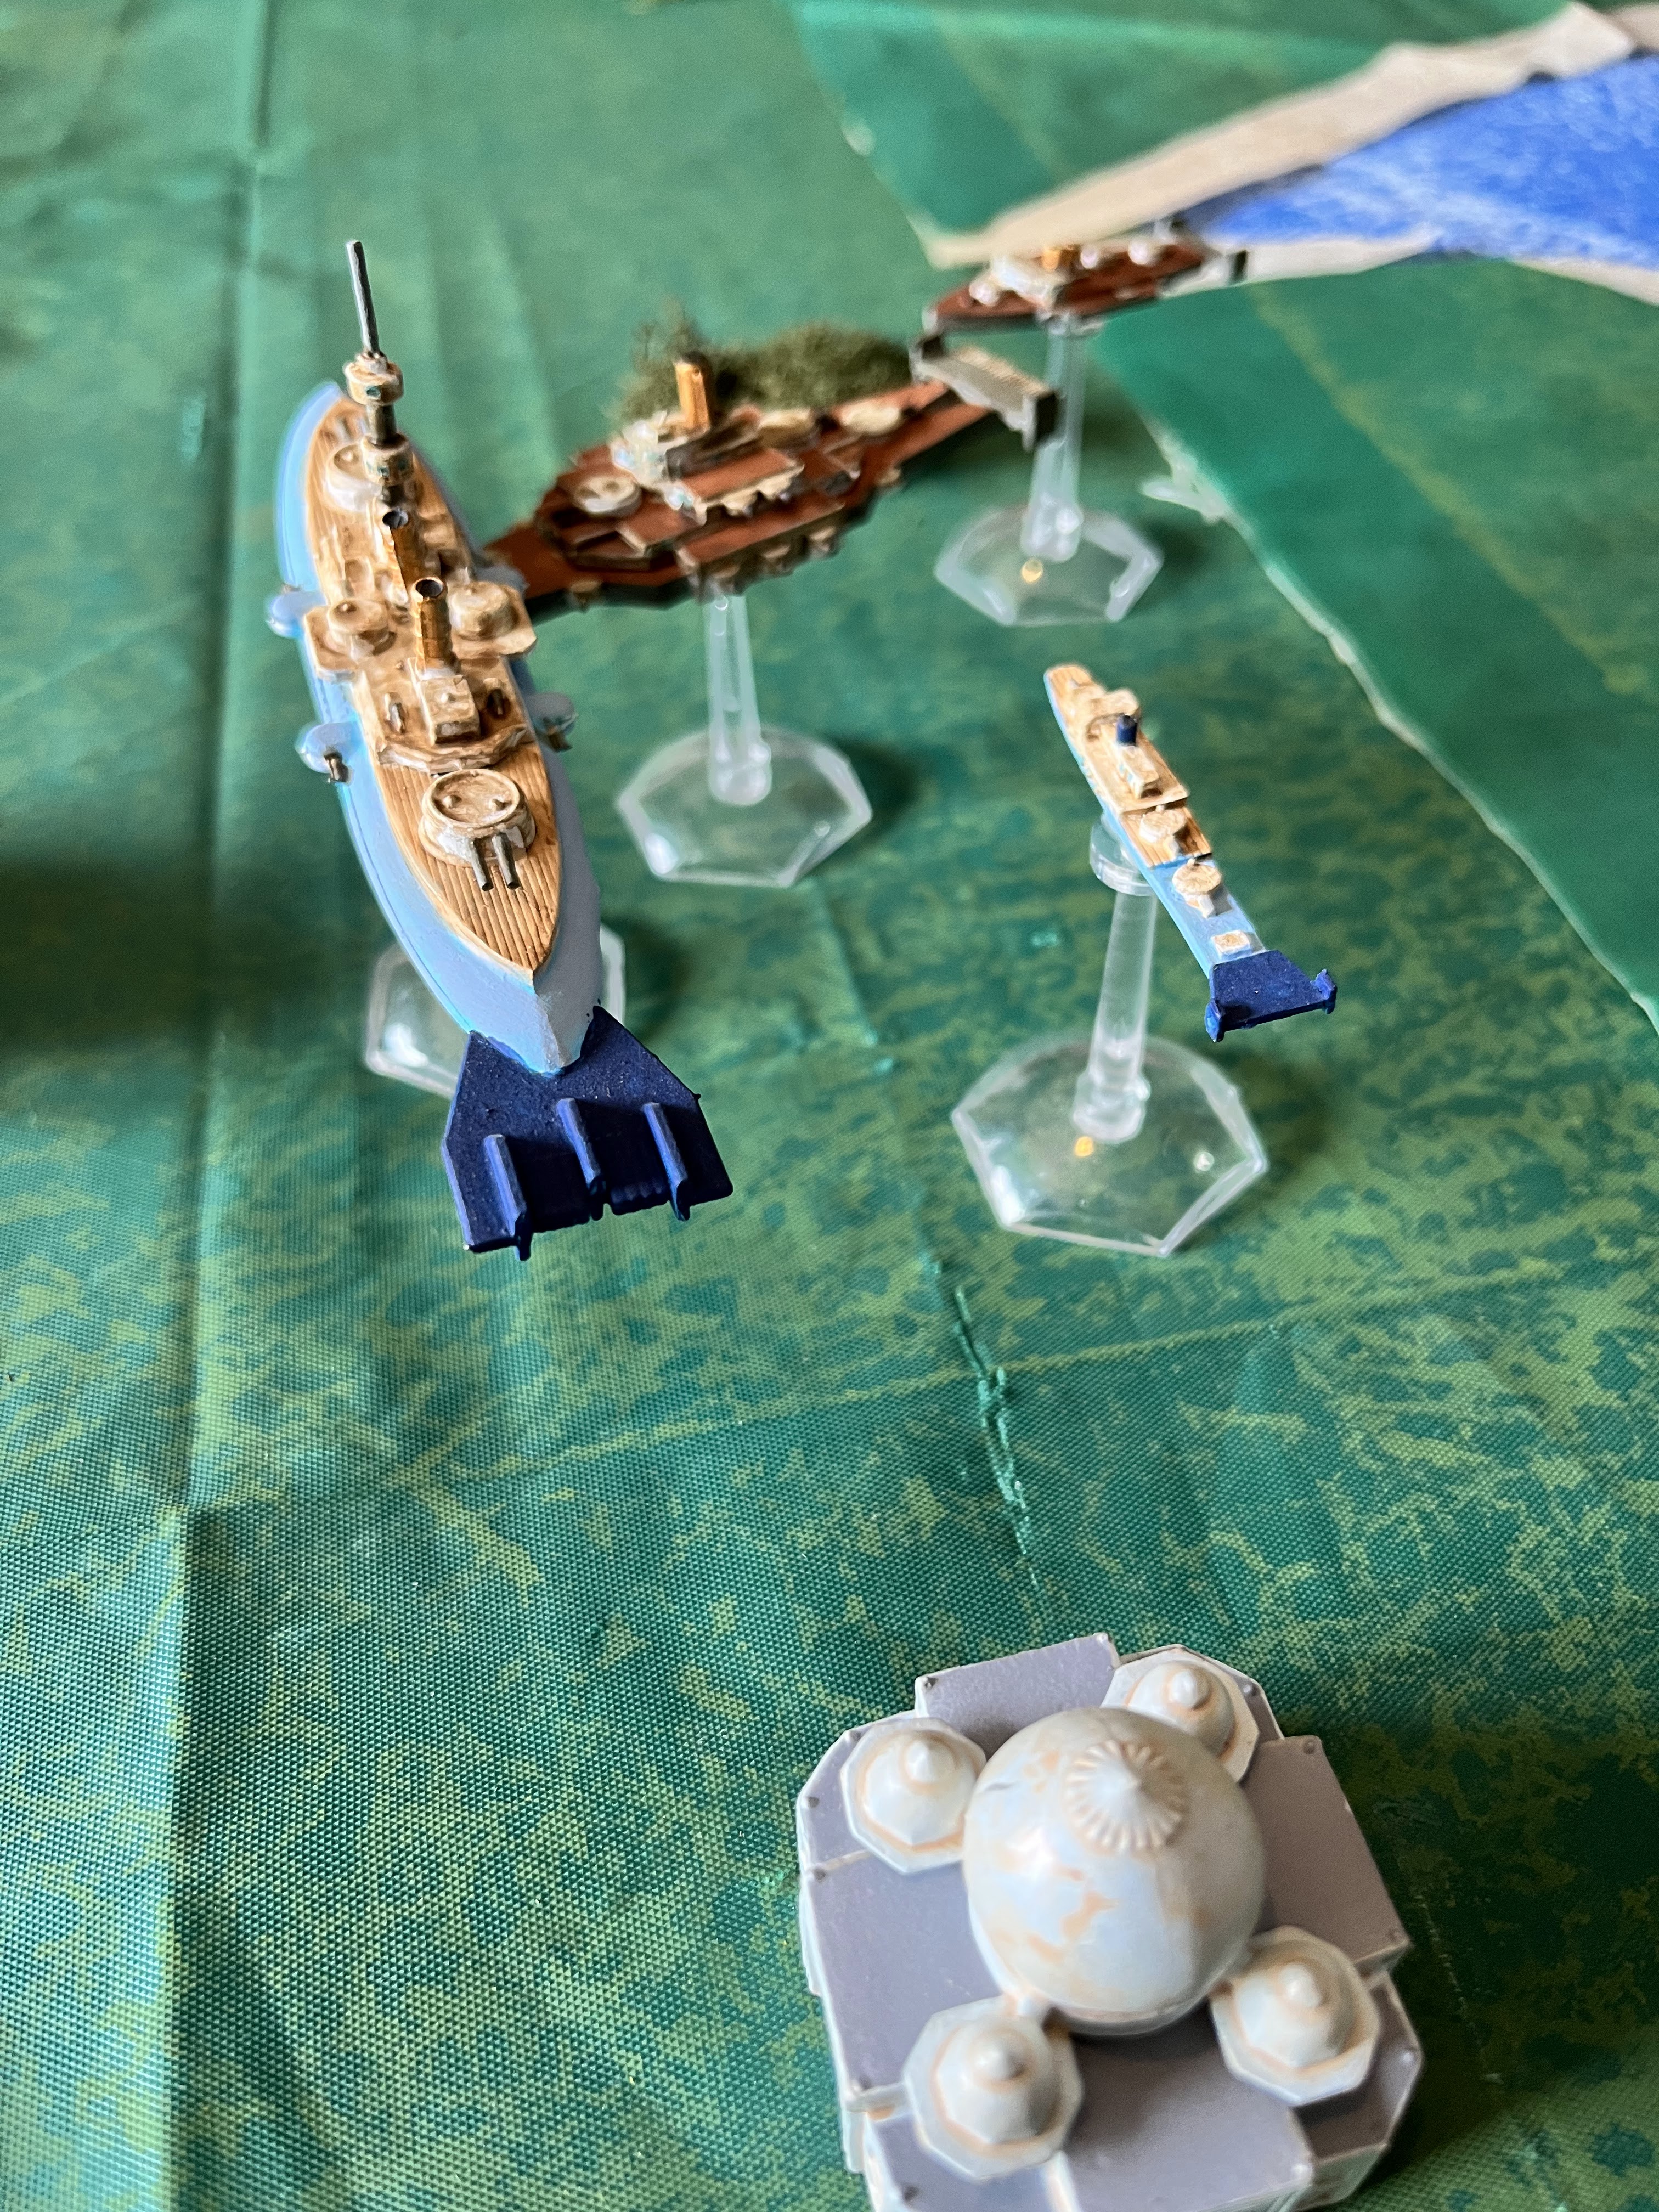
The French place their defended position before any airships are placed. It is 18 MU in from the French board edge, centered on their deployment zone in Grid 1 and 2. The French can deploy 12 MU in, and the British deploy in Grid 3 and 4 and can be up to 6 MU in.
The French can deploy up to 12 MU in from their side, and you can see them steaming in. They are led by the Camot at Alt 4 and speed 4. Her escort is the Tromblom matching her speed at alt 5. Then the Tourane is at Altitude 3 and same speed. The Fantassin is trying to cover the Tourane and the Tonkin at Alt 4, while the Tonkin is at Alt 5.
The British are coming in on the alternate side on the British right corner, being led by Commodore Duckworth's flag on the HMS Malayan. They are in a familiar formation with the Malayan at Altitude and speed 4. The HMS Medusa is covering her at Altitude 5. The HMS Archeron is at Altitude 4, and the HMS Corsair is at Altitude 3. They are all matching speed 4. They can only deploy 6 MU in.
Turn 1:
Initiative: The British win with 3 Commands to the French 2. They decide to go first.
Move:
The lead British ships begin a long, slow descent as they gain speed from dropping altitude. The French stay on course. Meanwhile, the rear British ships also stay on course.
Battle:
The distance it still too great to engage.
End:
None
Turn 2:
Initiative: The British and French both get 3, so the British decide to maintain going first.
Move:
The British continue their advance, with the Malayan then gives an order and creates a smokescreen around herself. The Medusa stays with her. In response, the Tonkin and the Fantassin begin to speed up for a torpedo attack run.
The rear British ships stay slightly higher than their cohorts and on course. The Camot begins a turn to place herself above the target, and the Tromblom follows suit. They both dropped altitude to match the Malayan. The Tourane presses ahead with no speed or altitude change.
Battle:
The big guns have the range, but neither side chooses to fire yet. They decide to hold their fire for a better shot.
End:
Turn 3:
Initiative: This time, teh French win with 2 to 0. They opt to go second to let the British come to them.
Move:
The Archeron speeds up provide some cover fire for the Malayan. The Tourane drops, passes beneath the Camot as she also gains speed.
The HMS Corsair also speeds up and is providing top cover. The Fantassin moves up and prepares to fire her torpedoes. The Malayan drops altitude and clears her smoke, and she turns to bring the target under her broadsides. The Medusa follows her.
The Tonkin joins the torpedo line with the Tourane and Fantassin, all at staggered altitudes.
The Camut turns, one altitude above the Malayan and prepares to fire on the British Battleship. The Tromblom follows her charge to provide point defense as needed.
Battle:
The British have a tough choice. Do they attack the French Battleship that is going to pepper the Malayan, or do they go for the actual target before it is too late? The British choose to use the Corsair's torpedoes to attack the Camut, and try to put some friction on her to reduce her effectiveness. The plan works as the Camot takes three friction from the attack, but no real damage. However, now the French ship can not get commands and is at -1 firepower.
After assessing the situation, the French choose to hold fire. They do not like the odds of a misfire!
The Malayan fires on the target, and hits it twice, but fails to damage it. Earth is dramatically flung upwards by the barrage, but fails to cause any real damage. The Medusa also fires, but misses.
End:
There is only 3 Friction on the Camot, and it is easily removed.
Turn 4:
Initiative: The French score 2 to 1 commands, so the French elect to go first this time.
Move:
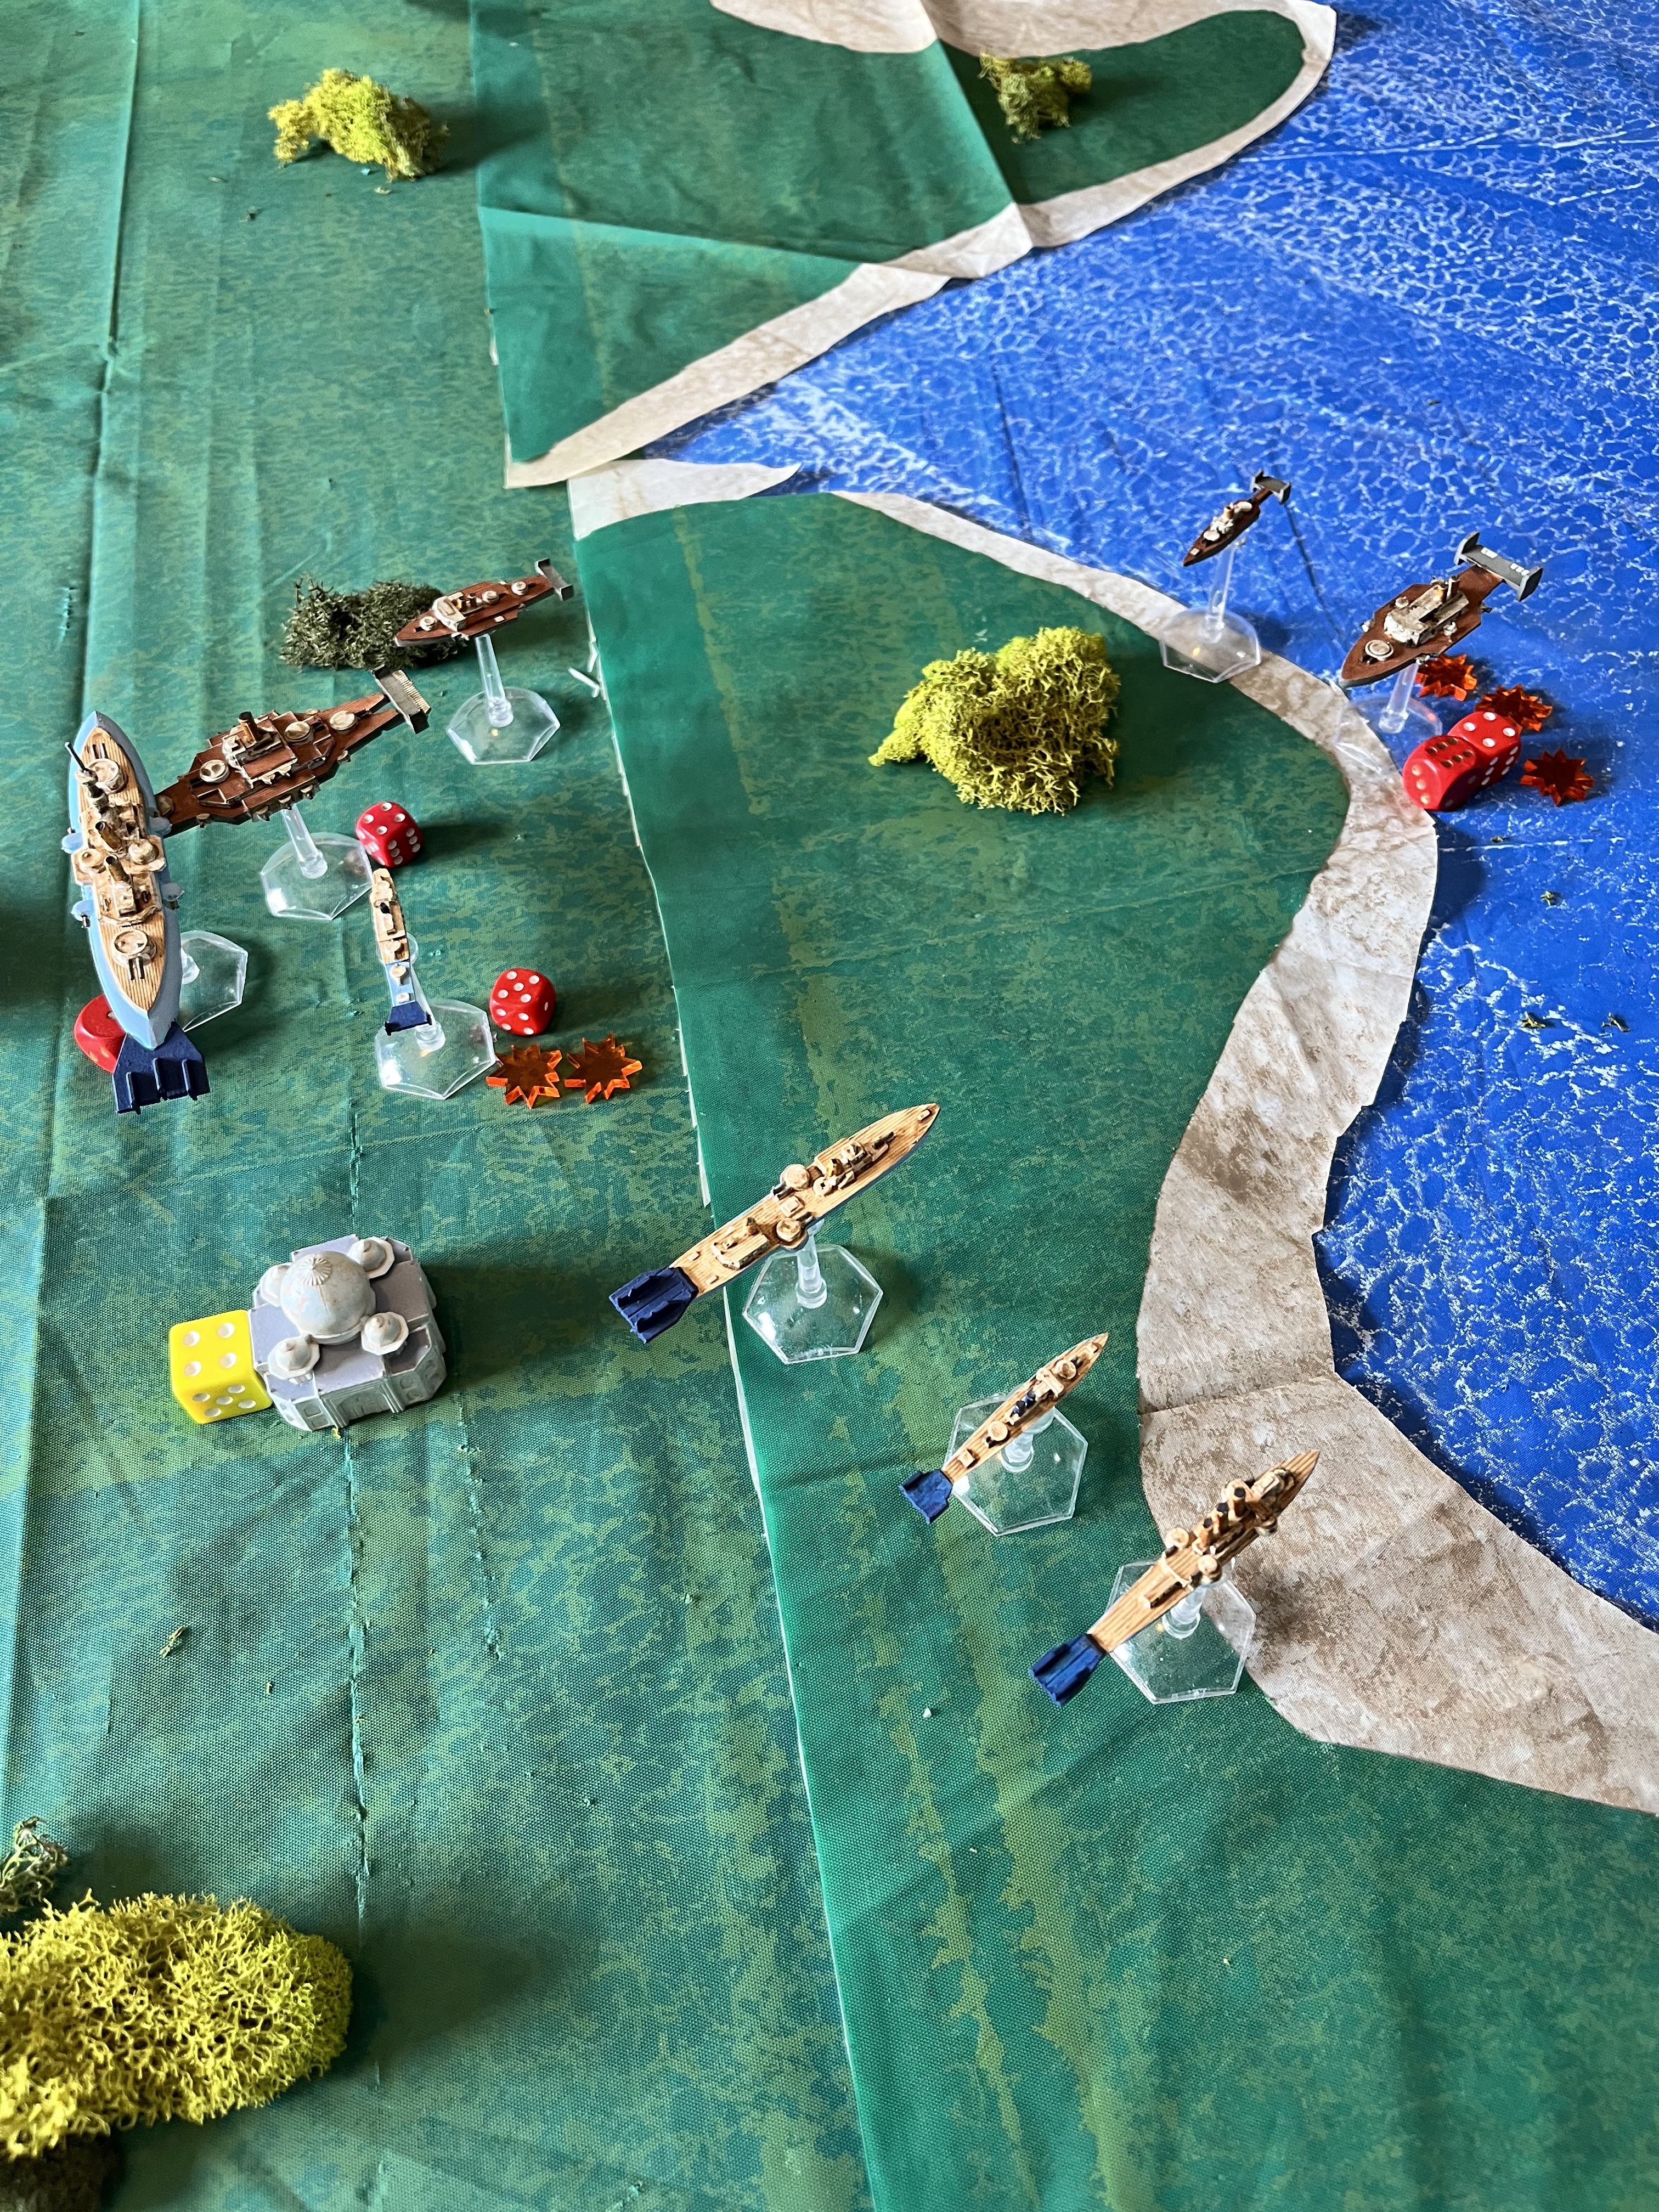
The Three French warships move forward, all at different altitudes and ready to barrage the Archeron with torpedoes. The Archeron and Corsair move up to support their command ship, with the Corsair easily re-loading her tubes.
The Malayan dangerously drops to 1 Altitude to maximize her broadside against the target. The Camot dramatically crosses just above the Malayan and prepares to fire at point blank range! Both ships escorts stay with them, one altitude above of their charge.
Battle:
The French do not want to take any chances this time, and try to make a Fire for Effect command, but fail! The Camot fires first at the Malayan. The Camot's stern heavy batteries and starboard medium batteries jam and fail to fire! However, the Malayan is still peppered by shells. Causing four friction, but failing to cause damage!
The Malayan is shaken, but fires on the target anyway! The stern light batteries jam, but the heavies manage three hits on the target. This time, the barrage is devastating, and reduces the target from 7 to 4 armor. That will make it much easier to hit.
The Archeron's Point defense gunners slap away the Tourane's torpedoes easily, leaving two Friction. Her return fire from her main battery fails to find the mark, and promptly runs out of shells. The Fantassin's torpedo attack fails to find the mark, as the Archeron takes out two out of 3, and the last one misses.
The Corsair fires her torpedoes at the Tromblom. Two are hit by Point defense, and the third strikes the ship and causes damage. The last one misses, but he point defense of the Camot takes it out before it can attack the Battleship.
The Tonkin fires at the Archeron, and uses a Fire for Effect command. Two of the oncoming torpedoes at destroyed by point defenses. However, the Fire for Effect orders worked as the last four strike the Archeron, causing three actual hits, and putting the British ship at 10 Friction!
The Medusa also fires on the Tromblom and causes three more friction and one more hit!
End:
The Tromblom loses 2 armor, and the bridge was damaged in the attack.
The Archeron is crippled by the torpedo attack! However, she passes her Strike you Colors test, but begins to sink!
The captain of the Tromblom is quickly revived by his bridge crew.
The Malayan re-arms her stern light battery.
The Archeron clears her bow medium battery for action
The Camut manages to re-arm her stern heavy battery
There is 20 Friction on the board, but the two commander's roll to have 21 removed. All friction is removed.
Turn 5:
Initiative: Both sides score only 1 command, but the French maintain from last turn. Again, they choose to go first.
Move:
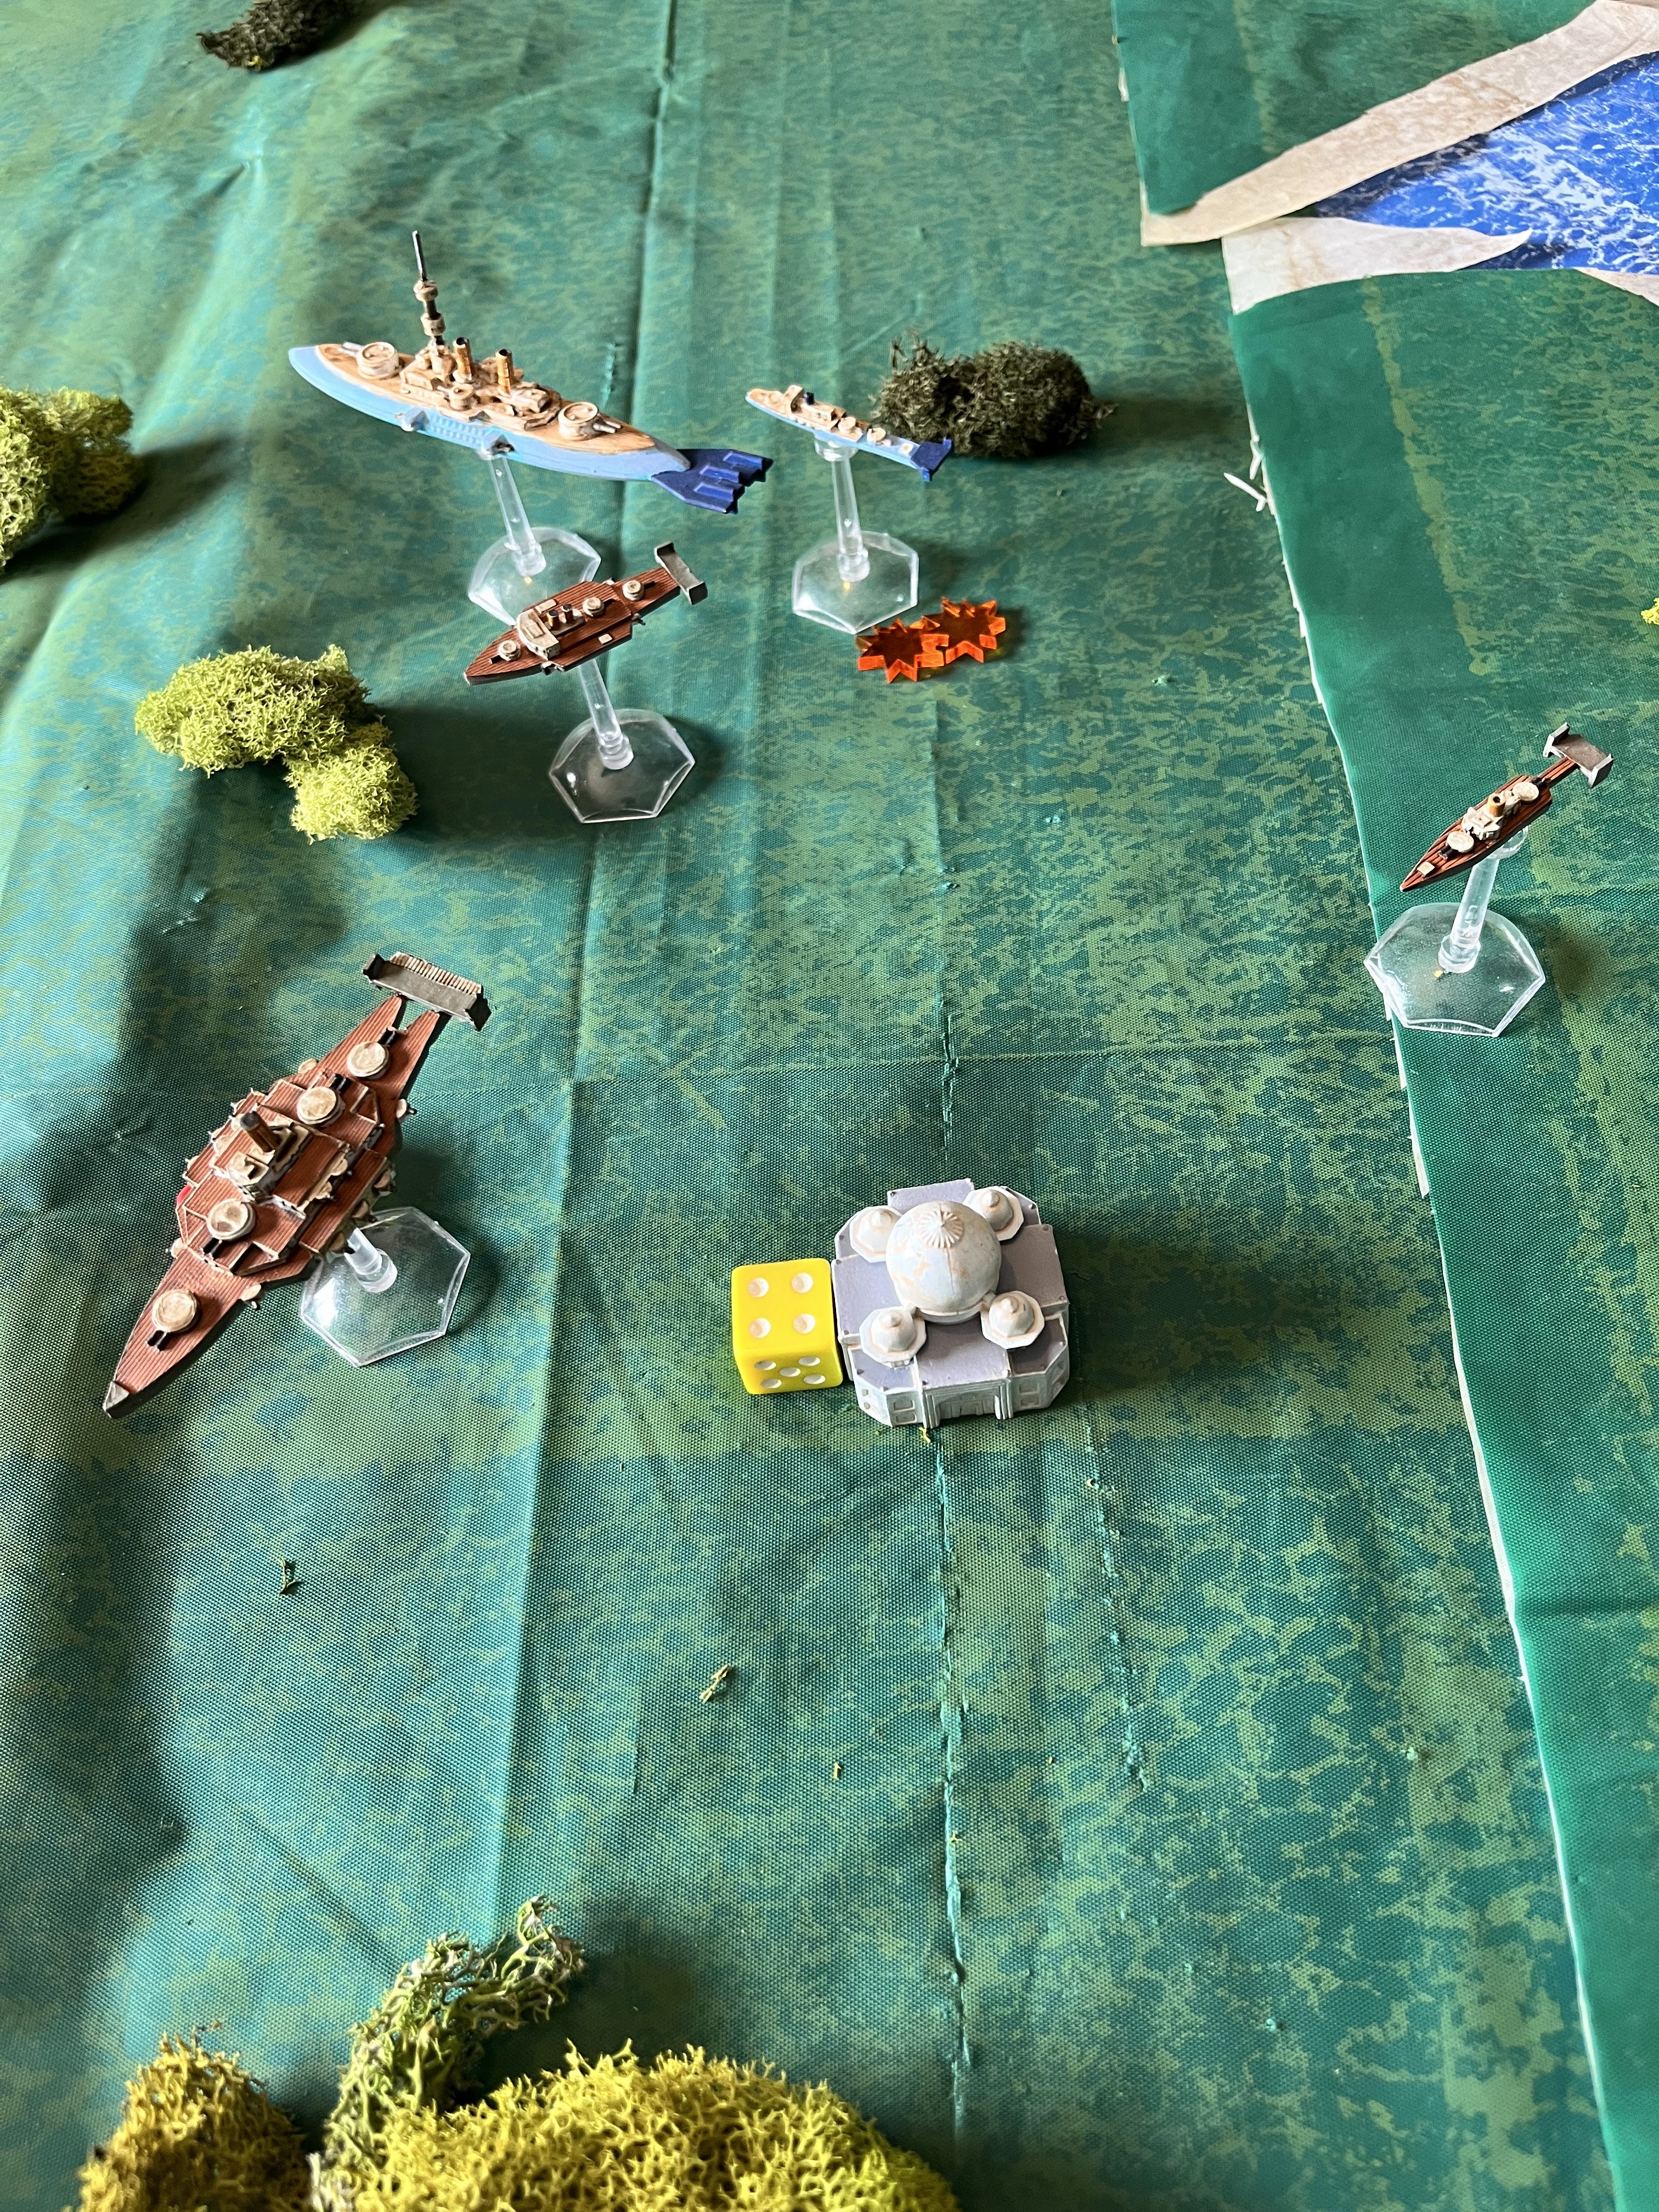
The French Destroyer moves to avoid further conflict, and speeds up to 8. The Malayan gets out from beneath the French and begins to circle the ground target.
The Tonkin, follows the lead of the Fantassin and moves to avoid further battle. The HMS Corsair, closes with the ground target to help finish it off with torpedoes, which they easily re-load.
The Medusa is high enough to cross over the Camot. Meanwhile, the Camot and the Tromblom slowly maneuver and try to turn back into the fight.
Battle:
Again, the French start with the Camot, and make a Fire for Effect command. This time they are ready, and open fire on the Malayan. The barrage causes 7 friction, and 1 actual hit!
The Malayans bow heavy battery and light batteries are enough to destroy the French smuggler's den on the ground. The Stern batteries fire at the Camot, and cause 1 hit and 4 Friction.
The Tromblom launches her sky mines and they manage to attack the HMS Corsair. The Point defense destroys 1, but a second hits the Destroyer. Two others remain in play as a hinderance. Return fire from the Corsair misses the French destroyer.
The Medusa puts one more Friction on the Camot as they pass.
The Tourane puts two friction on the crippled Archeron as they pass. In return, The crippled Archeron still manages to cause 1 friction and a hit with her bow medium batteries.
End:
The Tourane lost 1 armor
The Corsair lost 1 armor and her Point defense weapons
Camot lost 1 armor.
The Malayan also lost 1 armor.
The Archeron sunk to altitude 2.
Crews on the Corsair get their PD working again.
The Camot gets her Medium starboard batteries working again.
There is 17 Friction on the table. The two commanders remove it all.
Turn 6- Final Turn
Initiative: British win 2 commands to 1. They elect to go first.
Move:
The Malayan gains altitude as she tries to fly away. The Camot does the same. The Medusa and Tromblom follow their respective flags.
The Corsair is still in a minefield, and manages to blast one set of mines but is hit by the other. She takes 1 damage.
The Other French ships are eager to disengage from the sinking Archeron.
Battle:
The British take some parting shots at the French, but only the Medusa causes 1 friction to the Camot.
The French are content to disengage from the battle.
Conclusion:
The British complete their objective and destroy the French-aligned smuggler's depot. However, it was at a cost as the HMS Archeron was crippled in the fighting. The Camot Pre-dreadnought manages to once again tangle with a modern Queen Elizabeth class Dreadnought and come out in good shape. However, it is clear that in a straight up fight the HMS Malayan would shred the French battleship.
However, that tightens up the campaign to 4 for the French and 3 for the British. It is first to 7 to trigger the final battle, and you need to be up by 2.
Once the smuggler's depot was destroyed, there was little reason to keep fighting. The French and British disengaged and head for safety. This gave them the chance to repair their damage. The Malayan managed to repair her damage as she steamed back towards port. The Corsair managed to repair 1 of 2 hits. Meanwhile, the crew of the Archeron managed to stablize her and complete needed repairs on 2, bringing her be down 1.
The French also had some damage to manage. The Camot's crew manage to patch up her armor and her Medium starboard battery as well. The Tromblom is not so lucky, and has 2 hits lost still. The Tourane fixes her one armor loss as well.
Despite winning, the French manage to keep the Kra Isthmus in a state of turmoil, and maintain control of it.
Participants gain the following Experience:
Malayan: 9 + 6 = 15
Archeron: 7 + 3 = 10
Corsair: 4 + 2 = 6
Medusa: 4 + 2 = 6
Camot: 8 + 2 = 10
Tromblom: 2 + 3 = 5
Tourane: 11 + 1 = 12
Fantassin: 7 + 1 = 8
Tonkin: 13 + 4 = 17
Tonkin and Tourane had both previously received experienced crew upgrades, which they did not get a chance to try this game. Not enough commands to Re-load Ordinance after they were empty. Only the Malayan gains a level, as the rest are at the cusp or below. HMS Malayan gains Stoke the Engines to help it gain speed.
The British are using Laem Chebang to repair the Achilles, so it is not available to help repair ships. They use Phra Nakon to finish repairs on the Archeron which will take two more rounds. That leaves the Corsair damaged going into the next battle.
The French use two assets; the Kra Isthmus and Hanoi to repair the Tromblom. Meanwhile, Saigon completes work on the Cuchinchina, which returns to active service after refitting and repairing. Meanwhile, the Hue is still doing maneuvers and training off Tourane for another 2 rounds.
The loss of the smuggler's harbor and depot was a setback to the French efforts to de-stabilize the Kra Isthmus. However, despite the largest depot being destroyed, the rebels had enough supplies and moral to continue their struggle against the oppressive rulership of the King of Siam and the British supporting them. Despite the loss, Commodore Aubre was still feeling confident, as he felt the Royal Navy of Siam was on the back foot. They were reacting to counter his efforts, instead of taking the initiative themselves.
Meanwhile, on the British side the simmering antagonism between Commodore Duckworth and Commander Montgomery of the Corsair only grew. A furious diplomatic scramble was occurring as the two traded cables with the Foreign Office, accusing each other of sabotaging the British efforts in the region. For now, the government was still backing Duckworth, and his recent victory only helped maintain his position. However, the Commodore knew he needed to wrap up this business with Siam soon.


No comments:
Post a Comment