Welcome back to Wargaming on a Budget. Many years ago, I barely held onto the hobby of wargaming, because I was getting priced out of it. All my money was going to being a young parent and homeowner. No time or money for wargaming. Plus, when I started wargaming Do-IT-Yourself was a huge part of the hobby. There was not much pre-made terrain or supplies for wargaming, and instead you had to get creative, loot like crazy, and use your imagination! In honor to this bygone era of wargaming, I like to show off some of the tips and tricks of yesteryear to help make wargaming an affordable hobby. Plus, there is a certain pride one can take in terrain they built up themselves.
Last, time you may recall that I built a Kill Team sized game board. However, it is not enough to simply have a game board, you need to create fire lanes, corners to cover, and other nooks and crannies to make your games much more tactically challenging and fulfilling. Today, I am going to show you an easy way to "fill-in" the board for compelling games.
Before you begin, you will want a metal edged ruler, a razor cutter, pencil/pen, PVA or similar glue, masking tape, cereal card/card stock, sprue bits, and then the paints you will use. Spray paint works great for this project.
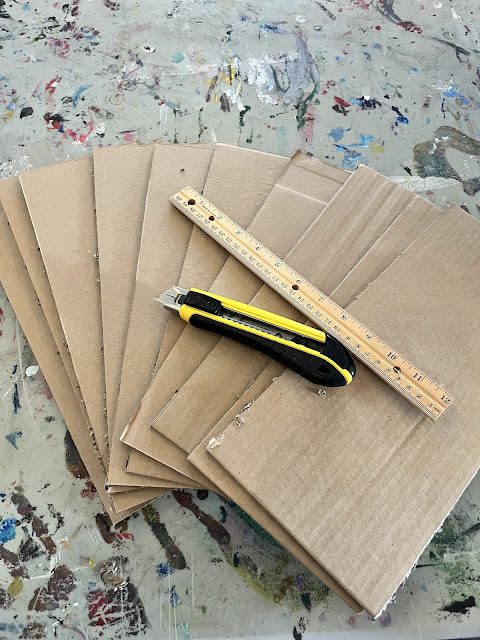
The first thing I decided to do was use some of my left-over cardboard and cut it into 6 inch tall and 8 inch long rectangular sections. It is best to have a metal edged ruler, so that when you cut with your box cutter/razor blade you can use the metal edge as a guide. In addition, you will want to run your razor blade over the cut a few times to get through the various layers of a corrugated box. Cut on something you don't mind slicing up like another layer of boxes or a cutting mat. Your blade WILL go through and cut whatever is underneath so do not cut on your kitchen table, counter top, or carpeted floor. You will regret it.
I cut-out 10 pieces, and you can make them various lengths and heights, but I made them all the same. I made my walls 6 inches tall, but honestly 4 often does the job and makes it easier to get in and out of the board.
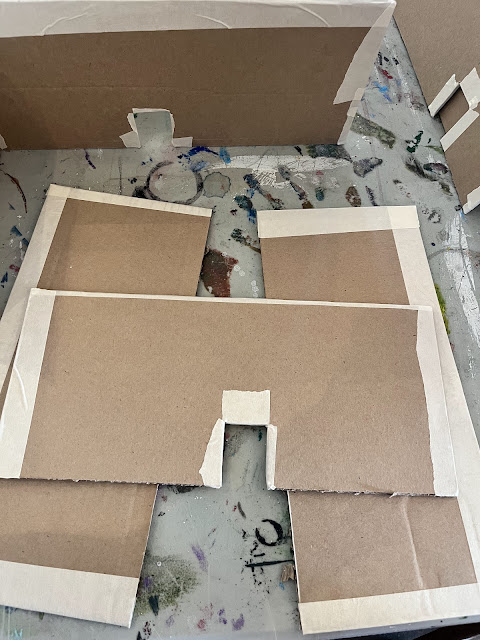
Once you have the wall sections cut you will want to add a few doorways as openings in your long wall sections. These make great little chokepoints and short cuts to move around the board. Each wall section should have 0-2 or these. For most 28mm miniatures, these doorways will be about 1-1/4 inch wide and about 1-3/4 inches tall. It might make sense to put a model where you want the door to make sure the dimensions are big enough. Then, you use the same method as cutting the card to cut-out the door way. Once you cut out one, the scrap can be used as a guide for the rest.
Next step is to use your masking tape to seal all the edges and corners of the cardboard. This strengthens the cardboard, but also seals off any bad cuts and the unsightly corrugated edge. When you paint the cardboard, it will help it look finished. You do not have to be too precise in this step, just make sure all gaps are covered.
Next, take two or three sections of walls, and simply paste them together using PVA glue at 90 degree angles. I like to make T and H shaped sections, but U and L shapes also work well. You will need to put the glue along the edge of the wall, and then simply hold them together for a few minutes while they dry. Not much different than assembling models. I hade two H shapes, and 2 L shapes when I was done gluing all 10 pieces together.
 |
| A Reaper Cloud Giant and Axolotl mage for scale |
Congrats, you are now ready to do the time consuming part. The first thing you do is take bits of cereal packet and cut three pieces for each side of the doorway. You glue these on to create a door frame around each archway. So you put one strip across the top, and one on each side of the door. Then you do it again on the opposite side of the wall piece. This helps the openings look like actual doorways.
From there, you grab your bitz box, cut-up sprues, cereal packet, and assorted found items and go to town gluing them all over the surface of the wall sections with your PVA. Some good bits are squares of cereal packet, cut up straws, bits of screen, and corner sprue pieces, string hanging out from under a bit of card, or long sections of sprue. More angular shapes work better than organic shapes. These additions will create the illusion of texture on the walls once they are painted. This is the longest step of the process.
Once you have suitably covered the wall sections with scrap, you will be ready to paint. I recommend three layers. The initial layer should be the lightest and a full covering. This will be the base color. Then, I recommend a darker color than the base coat, and I would use a distance spray as you do not want this coat to over-power your initial coat. I also spend a bit of time using the darker color on the edges of the wall and any large blocked up shapes on the wall. The final spray is another distance spray of black to add some texture, and maybe around any doorways to darken them up. When this stage is done, the walls will look something like the below.....
Now comes the final step. Go online and print up some posters and graffiti online. Carefully cut these out and glue them around on your walls. You can also use stencils and the like in order to paint numbers and letters on the wall to add that "pop" of detail. It is also a good time to take some acrylic paints like bronze, brass, copper, black and oranges and drybrush along the edges of some of the edges. You can also paint a few squares here and there. All these details make your walls look "lived in" and more like a location worth fighting over instead of a blank space
Once you have all of your sections done, you can easily set them out on your game board in different combinations to make narrow corridors, open bays, and wide edges. You can use your L, T, U and H shaped wall sections to make a variety of interesting shapes and tactical situations. For added fun, you can even put them on your board at an angle instead of flush or straight with the edges. Also be sure to add the scatter terrain for the final look!
Well, you can see the same basic shapes in the game board and the walls in order to make compelling and inexpensive game boards. The same spray cans can be used for each stage, and the materials are all found materials, and simple household items. This board cost less than a single blister of miniatures.
Until next time!


Hola
ReplyDeleteEl acabado final es muy bueno, y realmente se ve bien para juegos futuristas tipo Kill Team o Necromunda. Gracias por el artículo.
He de reconocer que lo de que el bricolaje sea parte del hobby me gustaba mucho y veo que cada vez importa menos (tristemente, en mi opinión) y que las propias empresas que venden miniaturas cada vez animen menos a los jugadores al bricolaje y a la conversión de modelos.
A los jugadores más jóvenes (yo tengo 45 años) les sorprende saber que antes no se vendían (o no eran tan fáciles de adquirir) elementos de escenografía y muchos son muy reticentes a crear escenografía o a convertir modelos usando cualquier cosa que tengas a mano.
Gracias de nuevo. Un saludo desde España.
MM
Nice! The setting is reminiscent of Doom.
ReplyDelete