

Chalice had been beefed up with some additional ships, and now it was time to sweep the Approaches to the island clear. Warboss Skarbash had been building and collecting an impressive fleet of Ork ships. They had traveled from across Ammoriss to bring Orks to Skarbashz growing Waaagh! energy. However, the Orks biggest threats were still submersibles and commerce raiders attacking the PDF convoys into the area. Therefore, Chalice was being called on to pen in the enemy ships and trap them back in port or sink them.
Vice-Admiral Travers had unsuccessfully tried to blockade the Deff Islands with mines and pickets before. This time, his strategy was going to be more aggressive. He assembled several smaller patrol lines of escorts and light cruisers. The plan was to sweep the Approaches, located enemy forces, and then use the Wrath of Humanity and her escorts to sink any opposition. It was standard North Ammoriss Naval PDF strategy; find, fix, sink.
Well, that is an interesting title. What is AQ? What is Force of Arms? Well, a long time ago in a galaxy far, far away I created a game for the Warhammer 40K universe called Aquanautica Imperialis. It was a game about wet-navies fighting on an Imperial world called Ammoriss. This was part of a larger campaign called the Battle for Ammoriss. It was good fun and pulled a lot of material and ideas from Man O' War and Battlefleet Gothic to give it that distinctly GW design feel. I still play it pretty regularly and even Made my own Miniatures for it.
From there, it evolved into another game called Aquanautica Imperialis: Battle for the Depths. This game took heavy inspiration from Aeronautica Imperialis. However, instead of fighter planes shooting at each other, it was submarines from Aquanuatica Imperialis fighting for undersea control of Ammoriss. More fun was had, but I never got around to making any miniatures at the time.
As you can see, I have a bit of a soft spot for Sci-Fi and Naval wargaming. I have since experimented with various versions or adaptions of Aquanautica Imperialis. I was working on an Anti-submarine game between PDF and Tyranids for a while called Horror of the Deep based off older versions of Adeptus Titanicus. However, I never properly finished that game.
Force of Arms is an attempt to create a large scale Sci-Fi Naval combat game closer to an Epic style battle. That means covering more ocean space with more ships, but still creating a different gaming experience from the traditional Aquanautica Imperialis. At the scale of Force of Arms, you aren't as interested as what is happening to an individual ship, or even a squadron of ships. Tactics like broadsides, cross the T, melee, raking, etc are abstracted. Instead, it is a game focused more on Strategy, detection, deployment, and taskforces of ships coordinating together to complete their objectives.

I had some inspiration come to me one day, and I pounded out the rules in a matter of days. The impetus of these rules actually grew out of thinking about a game play issue for a historical airplane game. Some of the key games that inspired these rules were:
Chain of Command
Battlegroup
Blucher
Epic: Armageddon
Jovian Chronicles
I won't go into further details. I have not placed the rules in the Work-in-Progress section yet as they still need much more polish. However, I was so excited about the basic rules that I wanted to get them to the table as soon as I could. Operation: Hemlock seemed like a great way to do it. Hopefully, this battle report will give you a flavor for the game?
Forces
North Ammoriss Naval PDF
Ascendant Battleship Patrol Line- Wrath of Humanity
- Protector Escort
Escort Flotilla- Shield of Alset
Anti-Submarine Flotilla- Guardians of the North
- Augur Buoys
- Attached ANS Hunter
Steadfast Light Cruiser Task Force- Swift Lance
- Mines
Break Point- 13
Skarbashz Big Bloo Boyz
Big Dakka Mob-
- Ram
- Nobz
Boiler Boatz Mob
- Smokescreen
Runt Boatz Mob
Sneaky Gitz Mob
Break Point- 14
These are relatively small forces to help me get a feel for the rules and how they work overall.
Set-up
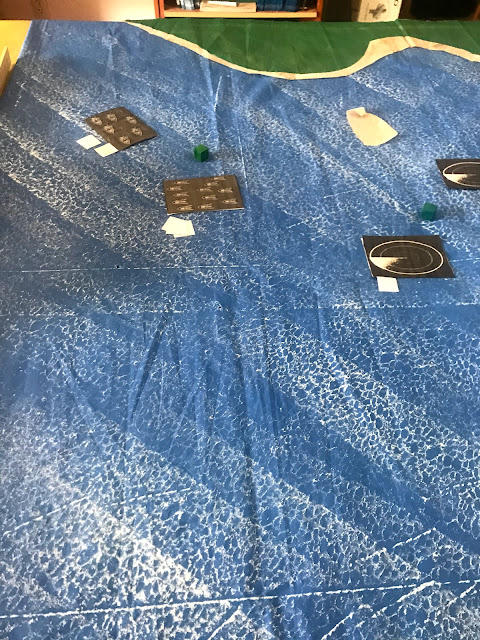
This game will take place on a 4x4 foot board. The North of the board will have a small coastline to represent the Green Zone of Da Deff Islands. The rest is open Ocean, with a couple of small Drill Rig platforms. Each fleet will have 2 Deployment Nodes.
Mission
Today's battle represents a standard battle. Therefore, both sides are trying to get the other enemy force to their Break Point by inflicting hits on enemy forces. Each hit will require the player to draw a Morale Chit worth 1-5 Morale loss or critical damage to the task force. Once a fleet has exceeded their Break Point, the game is over.
Turn 1:
Initiative Phase:
No one has any forces deployed, so it is a straight roll-off. Some reconnaissance style assets such as aircraft, escorts, etc can influence this roll.
Imperials win, and choose to force the Orks to act first. The Imperials have 1 Order to the Orks 1 Orders.
Deployment:
The Orks decide to only use 1 Deployment Node of their two to start the game off. They keep the other for subsequent rounds. The PDF deploy both of their Nodes.
We start by moving our Deployment Nodes until they become "Fixed" in place. Deployment Nodes are where our forces will be able to deploy forces from. One of the Imperial and the Ork Nodes is fixed off the coast of the Green Zone. The second Imperial Nodes chooses to be fixed near the center of the board. The Orks still have a Node they can deploy next turn if they wish.


The Imperials deploy a Blip forward from each Nodes, while the Orks deploy back from there Node. It is not clear what is what. The second Imperial blip also deploys an element.
Orders:
The first Imperial Blip makes an All Ahead Full order. Meanwhile the Orks make a Run Silent, Run Deep Order. We all know the first Ork Blip was a Sub Mob.
Battle:
All contacts are still blips, so no firing will likely happen. However, we check passive ranges to make sure. No one did an Augur Spike, so no further action is needed as no Blips are revealed.
I think attacking before moving will take a bit of time to get used to!
Maneuver:
The First Imperial blip goes All Ahead Full, and reveals that the first Ork blip was indeed a group of Subz. However, they quickly break off Augur contact and disappear from the escorts scopes. The second Imperial Blip moves towards the first Imperial deployment Node.

With that, the 1st turn of the game is over.
Turn 2:
Initiative:
The Orks win and earn 1 Order, while the Imperials have 0 Orders.
Deploy:
The Orks deploy their second Node, and begin to move it. The second Nodes is easily able to move around and partially encircle the Imperial Nodes before choosing to fix itself.
The Orks deploy 1 Blip at each Node, while the Imperials Deploy only a single Blip by their first Node closer to the coast. 

Orders:
The Orks use their special Waaagh! ability to put All Ahead Full on both of their blips. The Imperials have no Orders to give.
Detection:
The Escort Flotilla is close enough to an Ork Blip by their first Node to determine it if a pack of Boiler Boatz. No other Detection occurs.
Battle:
The Ork Boiler Boatz oepn fire with their weapon batteries at the Escort Flotilla, and they return fire. This is a close range fight, so both sides will have +2 Firepower dice. You make an Opposed roll between the Firepower of the shooter, vs the Counter Measures of the target. Boiler Boatz also always counter as obscured due to their inherent Smokescreen, giving them +2 to Counter-measures.

After all the dice are rolled, the Boiler Boatz take 1 Chit, while the Escort Flotilla takes 3. The Imperial players reveals that the Escort Flotilla is broken. However, one of the Imperial Chits reveals that a Weak Point was also hit and two additional Chits need to be drawn. The total is enough to obliterate the Imperial Escorts, but the damage then goes onto the overall Morale of the Fleet as well. The Imperials have 4 chits to the Orks 1. The Ork player reveals that the Boiler Boatz were also crippled in the engagement.
Maneuver:
The Boiler Boatz go All Ahead Full, but due to their crippled status, it is more of a limp along full. The other Ork Blip also races towards the second Imperial Deployment Zone to try and capture it, but it is too slow and too far away.
The initial Imperial Blip falls back away from the Boiler Boatz, while the second moves towards them to potentially engage.

Turn 3:
Initiative:
The Imperials have an additional dice since a sub element is deployed by one of their blips. This gives them Initiative and 1 Order. The Orks have 0 Orders.
Deploy:
Both Fleets deploy the rest of their forces onto the board. The Imperials at their second Deployment Node, and the Orks deploy one blip at each Node.

One of the Imperial Blips deploys an element. The Blip deployed at the second Imperial Node.
Orders:
The Imperial Blip near the second Node successfully receives a Lock-on Order. The Orks use their free Order to go All Ahead Full on one of the blips near the second Imperial Node.
Detection:
The two Blips by the Imperial Node are within passive range of each other and reveal themselves. The Imperials are the Wrath of Humanity with a Protector Escort, while the Orks are the Big Dakka Boats! The protector also increases the Passive Augur of the Wrath of Humanity, to reveal the second Ork blip to be a mob of Runt Boatz.
One of the PDF blips by the initial Deployment Nodes goes Active Augurs and tries to reveal the Ork Blip. The Imperials are revealed to be Steadfast Commerce raiders. However, they fail to detect the Ork Blip. It stays as a Blip.
Battle:
This was the moment Admiral Travers had been waiting for. The human battleship task force versus the main Ork threat. The Lock-On order is decisive and allows the Wrath of Humanity to land 6 damage chits on the Ork Big Dakka Mob after the Counter-measure rolls. The Smokescreen helped, but it wasn't enough. The Ork player grabs his tokens, and declares his Mob broken and out of the battle. Ouch, however the Ork fleet maintains the chits for fleet morale reasons.

The damage is so severe and crippling to the Ork fleet, that the rest of the Ork force decide to withdraw back to safety in the ports of the Green Zone of the Deff Islands.
Conclusion
That ended rather abruptly as the Ork Big Dakka Boatz were so utterly devastated byt he Wrath of Humanity Taskforce, that the Ork forces decided to call it a day! The Orks took 19 Morale Chits and broke at 14. Bad draws! The Imperials took 9 and had a break point of 13.
The Ammoriss Naval PDF was victorious.

So, how did the game play? Hmm, it worked as intended for the most part. I need to go back and balance the Chit draws a bit as most taskforces did not survive an attack as they were pulling multiple Morale loss chits consistently. I need more 1's and 2's and fewer 3+ in the stack. Related to this, I may need to re-jig the Morale rating of the various forces.
Sometimes, it was hard to keep track of which Chits were for which force, so there will need to be a Blue and a Red force for the cards and make color coded Deployment markers.
The core of the game was detection and blind man's bluff. I would say neither of us played this part that well, except for my opponent's opening tricks with his Ork Sneaky Gitz. I failed to use my anti-sub flotilla well at all! However, the right initiative, with the access to the right order, with the right unit allowed me to take the W and detecting the enemy there was key. If I had not had initiative my Commerce Raiders would have gotten pasted by the Ork Subz and possibly won the game for the Orks.
That said, we consistently kept screwing up how many dice we could throw for Initiative/Orders due to deployed Escorts and subs. We were under rolling in the later turns.
Admiral Travers read through the reports coming in from the various Taskforce commanders. Ork forces had been detected and succesfully engaged. The Xenos were fleeing back to their ports, licking their wounds. Ork Capital Ships had been successfully repulsed! The Approaches to the Green Zone were secure. The Admiral sighed with relief. It was another feather in the cap of Taskforce: Chalice.
Upon hearing the reports, General Kurtz was said to respond with a curt nod and a rough Cadian salute, "Done well enough." With that, he and Commander Brusilov turned to the task of transferring the forces of TaskForce: Sword to the Green Zone.
Warboss Skarbash could fee the noose tightening around his neck. The cunning pirate knew he was going to have to do something unconventional if he wanted to throw the Imperial war machine off its stride, and gain back the initiative.

You can follow Blood and Spectacles Facebook page for more fun: https://m.facebook.com/pg/BloodandSpectacles/posts/?ref=bookmarks&mt_nav=0
Or our website:
Or our Messageboard:
Or our Wargames Vault Page:
That was good fun, and seemed to capture the feel of WW2 style fleet actions. The names of the flotillas is very evocative and the talk of Augury was suitably grim and dark. I assume that Dark Eldar Pirates practices Haruspicy, or, more likely, Anthropomancy.
ReplyDeleteThanks Euan,
DeleteFor a long time, I have wanted to make a "modern" naval wargame and this was a stab at it. Harpoon is FAR too crunchy for me, as I wanted something more at the level of Dystopian Wars or Fighting Sail in the crunch department. I just converted my basic Modern rules into AQ to test it out.
Ultimately, I do not think it will work as a "modern" naval wargame as "Modern" naval just doesn't have fleet actions like this in them. Back to the drawing board.