
*******************************************************
Under the employ of Mistress Merciveaux the Cabal of the World Walkers participated in her assault on an Ork-held world in Wilderspace. Her spies indicated that the planet had once been the center of an ancient civilization that had powerful warpcrafters. The Mistress intended to scout the ruins and locate any artifacts of value.
Her flagship, The Scorned Lady; slipped into orbit over the planet. The Orks below were relatively primitive and could not stop her warship. However she did not wish to risk an orbital bombardment as she wished to capture the ancient civilization's artifacts intact. Instead, her sorcerers located likely locations of warp power. She then deployed scouting aircraft to sweep the area and report any warp signatures that were detected.
Recon Sweep
Cabal of the World Walkers
1 Hell Driver Recon Plane- Hy'wok
1 Hell Blade- Ry'Zor
1 Hell Blade- Spar'Ow
Da' Skrapperz
1 Fighta- Grimtoof
1 Fighta- Drillsnik
1 Fighta- Bomma- Snikgit
-Rokkits
Set-up:
We rolled up 4 potential recon targets. If you get a plane within one altitude and 6 inches you roll to see if they are worth doing further recon. WE placed them in a somewhat straight line in the middle of a shallow valley that was angles slightly off the center line of the table.
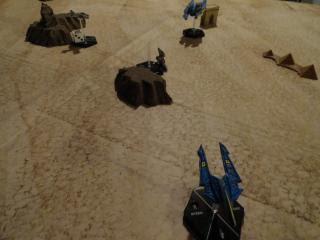
The Cabal entered the board high and fast to represent them coming out of Orbit and racing down towards the planet to complete their missions. The Hell Diver was in the right, with the Hell Blades paired up next to it.
The Ork defenders were at mid altitude and medium speed. The Fighta-Bomma took the center, while a fighta took each flank. The targets were ancient ruins situated in a valley between a series of altitude 1 and 2 rock outcroppings.
Turn 1:
Initiative: Orks
Moving: The chaos planes race forward trying to bleed off altitude so they can actually perform their mission, they don't even vector towards their targets yet. The Orks look like they want this to be a low-level dogfight and drop down a bit and fly over the Valley of the Temples where most of the Recon targets are.
Shooting: None
Turn 2
Initiative: Orks
Move: Fighta 1 wings-over to stay in the valley and drops down lower confident that he will be safe from the Chaos planes. However, he underestimated their speed and agility as they power dive down and rocket towards him. Hellblade 2 has an angle on him, but his wingman is still too high.
Caught by surprise by their aggressiveness, the remaining Orks are out of position and broke hard to the left, expecting them to continue to move straight to slow down. The Hell Driver dives low, but its lower speed means it is trailing her escorts considerably.
Shooting: Hellblade 2 opens fire on Fighta 1, but his shots go high over their mark. Consider it a warning shot!

Turn 3
Initiative: Chaos
Moving: The Hell Driver takes a high-G turn towards to cross the Valley of the Ruins. Fighta-Bomma 2 cunningly completes a wing-over to try and chase the recon plane down. However, Hellblade 2 anticipated the move spiraled around to intercept.
Hellblade 1 went after the Fighta-Bomma, but a Half-loop took the Ork plane above his foe and almost made the hunter the hunted.
Shooting:
Hellblade 2's auto-cannons stitched Ork Fighta 2, but failed to hit anything useful. Instead, a bunch of bolt-on plates and debris fell away from the scrap plane.
The Hell Driver was just out of short range and an altitude level away. However, a couple loose shells found their mark, but failed to do anything other than scratch-up the paint.
Turn 4
Initiative: Orks
Move:
Fighta 1 and 2 turn to go over the Valley of the Ruins, but they overshoot the action and end up out of position. The Hell Driver breaks hard right after skirting the Pyramids and the final temple in the valley. Neither seem to have any warp signature to speak of.
The Fighta-Bomma roars over the top of the valley walls and power dives in, its fuselage just cresting the top of the jagged rocks by inches. Despite his impassioned flying, he comes up just out of position on the Chaos Recon plane. The HellBlades circle back into the action, with the aggressive flying of H3llblade 2 letting him line-up another shot, this time on the Fighta-Bomma. Can he make it stick this time?

Shooting:
Per the request of the Ork player, we take a closer look at the attack vector of the Fighta-Bomma, and it is judged to have an angle on the Hell driver after all!
Despite the close range fusillade of shots, none damage the Hell Driver. Too bad he is too close for Rokits.
Hellblade 2's firing tone solid, and he opens fire on the Fighta-Bomma, this time causing the Ork craft to blow smoke! However, he only has one burst of ammo left.
Turn 5
Initiative: Orks
Move:
The Orks realized that they could not stop the Hell driver from scanning the last temple, so moved to try and stop it from circling back to the arch ruin by crossing back to the opposite side of the Valley. The Hell Driver completed its can of the final temple and found nothing of interest and broke hard to begin circling back.
Fighta 12 tried to shake the pursuing Hellblades and broke away fromt eh battle, but Hellblade 2 used his superior handling to easily follow him.
Shooting:
Orks have no shots. Oh no!
Hellblade 2 uses the last of his ammo, and causes Fighta 2 to blow smoke. Tzeentch works in mysterious ways as Hellblade 2 is out of ammo. Despite some excellent flying he will have to go home empty handed.
Turn 6
Initiative: Orks
Move:
The Orks moved to try and intercept the Hell Driver, but the Chaos craft cut behind them and powered past their trap. Meanwhile, Hellblade 1 cut in and got the interior line on Fighta 1 and the the Fighta-Bomma.
Hellblade 2 raced away from the battle. His controller gave him permission to break, and then return to the Scorned Lady in orbit.

Shooting:
Orks have none! Oh no!
Hellblade 1 opens fire on Fighta 1, but only manages to spark his shells across the fuselage.
Turn 6
Initiative: Chaos
Move:
This time the Ork Fightas were able to swing in on the Hell Driver as it raced past the final ruins. Again, no warp energy was detected, so the entire Valley of the Ruins had been a wild goose chase!
Hellblade 2 was bale to move in behind Fighta 1, and hopefully he would be able to take him out before he could fire on the Recon plane.
Shooting:
Hellblade 2 prayed to Tzeentch and opened fire. His burst ripped the wing right off Fighta 1 and the plane plummeted into the Valley below taking its pilot with it. Boom!

Fighta 2 saw his wingman go down just as he fired on the Hell Driver. Most of his shots went wide, but a few managed to harmlessly go through the tail fin.
Turn 7
Initiative: Ork
Move:
The Hell Driver Half-Loop caused the Ork Fightas to break away to the head of the Valley. However, it wasn't far enough as Hellblade 1 managed to cut across and come in perpendicular to the Fighta-Bomma.

Oh No, the Orks have no shooting!
Hellblade 1 riddles the Ork aircraft, but again nothing seemed to stick. Perhaps the smoke from the damage craft had thrown off the Hellblades firing.
Turn 8
Initiative: Chaos
Move:
The Orks decided to call it a day and tried to disengage. Fighta 1 managed to while being pursued by the Hell Driver. Hellblade 1 tried to chase the Fighta-Bomma but it dived away.
Shooting:
The grot in the Fighta-Bomma ball turret opened fire on the Hellblade as a parting shot. The Grot was lucky and the Hellblade disintegrated in mid-air and the pilot was killed.

Turn 9- Disengagement Turn
Initiative: Chaos
Move:
Now the game was in doubt, and the Hell driver moved to try and intercept the Fighta-Bomma. However, it wasn't enough and the Ork plane gleefully raced off the board.
Shooting:
None
Conclusion
Grumble, grumble, grumble. I won the game, but the victory was marred by a last minute lucky Grot shot. I should have just let the filthy savages go, but I got greedy.
Anyway, on VP,s it was a narrow victory, but Mistress Merciveaux had learned that eh Valley of Ruins was just that. No valuable warp artifacts would be located there. Perhaps elsewhere on the planet had yielded better results.
As for the Hell Driver, it did its job just fine. No complaints here. As for the mission, I was disappointed that none of the targets of the Recon Sweep proved to be anything worth using the Glyphs of Scrying on. So, it really was just an elaborate dogfight after all. However, the mission objectives made sure it didn't just devolve into a straight up furball.
No comments:
Post a Comment