
*****************************************************************
Tangle over the Coast of Last Hope
6x4 Table
Warzone 2- Coast of Last Hope
Special Rules: Terrain is alt 1, stacked terrain is Alt 3, and the center mountain is Alt 6.
Forces:
Cabal of the World Walkers
Hellfang 1- Pilot: Klaug
Hellblade 2- Pilot: Blak'vind
Hellblade 3- Pilot: Lon'Her
Waaagh! Boomshakka
4 Fightas
Deployment:
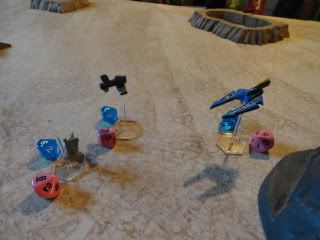
The Orks pair of into two groups of two, with one towards each edge. One group was slightly higher. The higher group was at full speed, while the lower group was moving a bit slower.
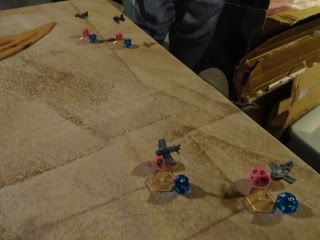
The Cabal came in at staggered high altitude and max speed. They stayed together with the Hellfang slightly behind.
Turn 1
Initiative= Chaos
Movement
The Chaos aircraft all break to the right hard, and move perpendicular to the Ork craft.
The Orks all turn into each other and move into a big tangle. I'm really not sure what they were doing. The lower ones try to gain some altitude.
Shooting:
No shooting.
Turn 2
Initiative= Orks
Movement
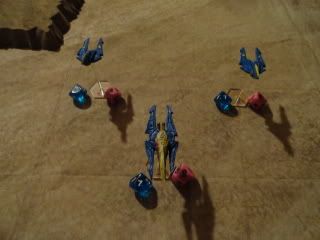
The Orks manage to stay in formation, with all aircraft coming up to altitude 6-8 to try and meet the Chaos fighters. They seem to be providing mutual protection, and they seem to be acting pretty cautiously.
The Hellfang cuts back towards the Ork fighters, but stays at high altitude. Meanwhile, the Hellblades use their agility and spiral back on their own jet wash, and move towards the opposite board edge they had just been facing.
Shooting:
No one has the proper angle, range, or altitude... yet.
Turn 3
Initiative= Chaos
Movement:
Hellblade 2 and 3 climb and turn towards the advancing Ork fighters. They use their superior abilities to stay above the Ork craft. For their part Ork 3 drops to a lower altitude. Ork 4 follows suit with his wingman.
The Hellfang's Power Dive is pretty dismal, and instead it leaves him at the same altitude as one of the ork fightas. Fighta 1 senses victory, and breaks left towards the Chaos aircraft. Unfortunately his speed and timing are off, and he ends up behind the Hellfang. His Ork wingman stays with him, but is not in a better position to attack.
Shooting:
Still None.
Turn 4:
Initiative= Chaos
Movement:
The Hellfang power dives again and rolls to the left. This should take him out of danger. Ork 1, in danger of disengaging prematurely; breaks right hard and barely manages to scramble away. His wingman follows.
Meanwhile, Hellblades 2 and 3 Power dive to try and get into a better position on the Ork fightas. They end up at alt 5 and 7. For their part Ork 3 and 4 see the danger and break back towards their fellow Ork pilots for mutual protection.
Shooting:
Both sides manage to get through the first pass with no shots being fired. Wow.
Turn 5:
Initiative= Chaos
Movement:
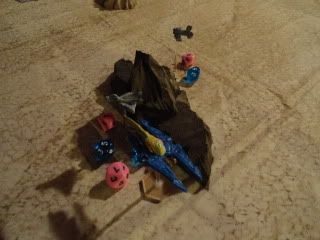
The Hellblades split around the central mountain, while the Hellfang tries to get back into the fight.
Ork 3 and 4 swing out wide lazily passing Ork 1 and 2 who go the other way. This brings Ork 1 and Hellblade 2 into potential shooting range!
Shooting:
By only a fraction of an inch, Ork 1 is in Medium range. With a prayer to Tzeentch, the Chaos pilots opens fire, not expecting to get another chance at this. Apparently, his prayers are answered as the auto-cannon shots stitch their way through the Ork craft, and splatter the pilots brains all over the canopy. It slowly glides down into the surface of Bin Mazar below. Ork 2 is unable to retaliate as he is too high. Pretty lucky as I was expecting to get a face full of Ork lead.
Turn 5
Initiative= Chaos
Movement:
This time, everyone miscalculates what the enemy is going to do. The Hellfang and Hellblade 3 try to get the angle on Ork 3 and 4 and succeed in splitting them up. Hellblade 2 tries to circle back on Ork 2, but he climbed high enough to avoid the Chaos plane.
Shooting:
No one is at the right altitude.
Turn 6:
Initiative= Orks
Movement:
Ork 2 and 4 try to pincher Hellblade 2, but his superior speed allows him to escape away. Meanwhile, the Hellfang slowly comes around the center mountain and finds Ork 4 in his sights. Ork 3 tries to get the drop on Hellblade 3, but again the Chaos aircraft's superior handling gives it the advantage as it scuttles away and lines up for a return pass.
Shooting;
Orks get to shoot first, but they have nothing to shoot at! Bad for them.
The Hellfang lines up his shots and let's loose. All his shots either go wide, or fail to find a vital part in the junk fighter.
Turn 7:
Initiative= Orks
Movement:
Ork 4 dives away from the Hellfang, and the Hellfang finds himself way out of position. Hellblade 2 spirals back towards Ork 4. Meanwhile, ork 2 and 3 try to set a trap for Hellblade 3, but the chaos planes pilot manages to get behind them instead. D'oh!
Shooting:
Again, the agile Chaos craft catch the Orks out of position.
Hellblade 3 opensfire on Ork 2 at short range, but the Ork aircraft manages to evade the incoming shots. Hellblade 2 is out of range of Ork 4.
Turn 8:
Initiative= Chaos
Movement:
Again, the Hellblades speed allows number 3 to simply dart away from the trap that the Ork fighta 2 and 3 were setting up.
Ork 4 tries to get an angle on the Hellfang, but it is too far away. Meanwhile, Hellblade 2 just misses getting into a firing position on Ork 4.
Shooting:
None.
Turn 9:
Initiative= Ork
Movement:
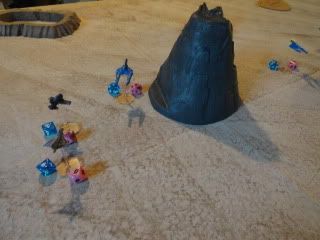
The Orks try to again set-up a trap for the chaos craft, using overlapping fire and careful deployment of wingmen. However, the high speed and agility of the Chaos aircraft take them just out of range or altitude. Ork 4 is just our of position to fire on Hellblade 2, and the Hellfang side slips away from the incoming Ork fighters. All this maneuvering puts Hellblade 3 dangerously close to the mountain in the center of the board.
Shooting:
The orks have nothing to shoot at despite carefully setting up an attack run. However, Hellblade 2 finds Ork 3 in his sights. He fires, but fails to cause any damage.
Turn 10
Initiative= Orks
Movement:
Hellblade 3 fails a pilot check and crashes into the center mountain. The pilot fails to bail out and pays the ultimate price for his foolish flying. Ork 4 also seems to get position on Hellblade 2 as the two are going head to head at the same altitude. Meanwhile, Ork 2 and 3 and the Hellfang are out of position for this turn.
Shooting:
The pilot of Ork 4 hits the triggers on his Big Shootas and blast through Hellblade 2's weak armor. The pilot triggers his ejection seat as his aircraft disintegrates around him.
Turn 11- Disengage
Initiative= Orks
Movement:
Ork 4 tries to wing over and chase the Hellfang, but the Chaos pilot bugs out. Orks 2 and 3 disengage successfully as well.
Shooting:
None
Result: Ork Victory
Notes: This was the most tactical game I may ever have had with a GW/FW system. Each player was thinking really hard. I had plenty of opportunities to take out the Ork Fightas, but some missed shots cost me. Then, to lose a Hellblade (and pilot) to poor flying on my part... well... that just sucked AND cost me the game. Things were going Okay until that last dismal turn. Oh well.
The Hellfang did not impress me much. It's lower maneuverability hinders it from staying with the Hellblades. Plus, the firepower of the Lascannon isn't that much greater. Of course, I didn't get to test its increase resilience to enemy fire. That could be a big win for it.
Overall, a great game with tons of tactical maneuvering. I don't know how many times the maneuverability and speed of the Hellblade saved me.
No comments:
Post a Comment