Showing posts with label Gladiators. Show all posts

Monday, September 30, 2024

On The Painting Desk: A Ludus of Gladiators


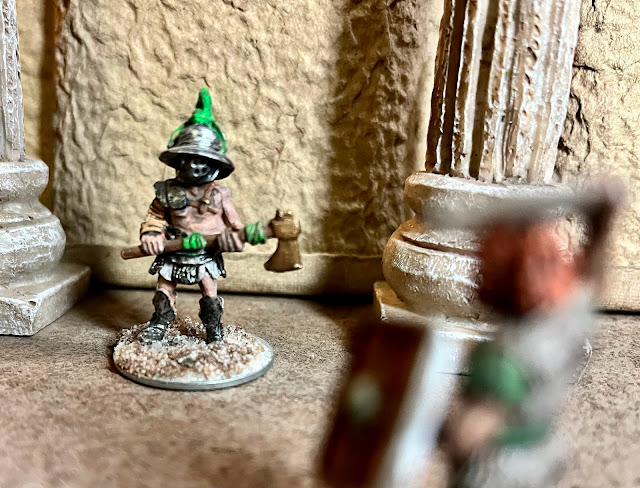
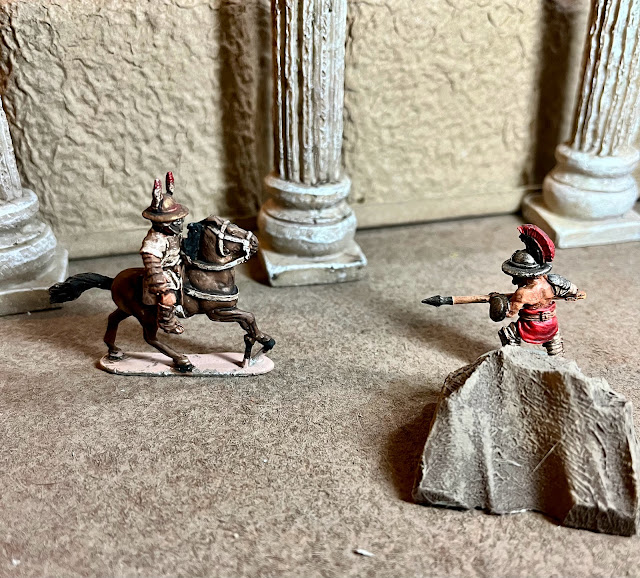
I have a large collection of Crusader Miniatures gladiators to play The Games: Blood and Spectacles with.  I can easily field just about any combination of gladiator types, and I probably have enough models for 3 different gladiator troupes.  However, when I ordered my Chaos Guard Kill Team from Only Games I also picked up a pack of the Wargames Atlantic 3D printed gladiators.  Did I need more gladiators?  Not at all.  Do I have more gladiators?  Oh yeah! 


About 9 bodies and an assortment of gladiator gear, weapons, and heads came in the mail.  The models needed a bit of work removing flash and connection points.  About the same as removing flash and sprue connections from just about any models.  The bodies came as one piece, with separate arms and heads.  It looked like I could make a wide variety of gladiator types.  I started by gluing the torsos to some washers to act as bases.  

Before I got too far in the project, I decided I needed to get out the rules again to make the appropriate gladiators I would need.  Glancing at the Ludus creation rules the core of the Laniste's troupe was 1 gladiator of each class.  That meant I needed a Heavy, Medium, and Light type as a base.  It would be a no-brainer to go with a Murmillo, Secutor, and Retarius as those were the "core" gladiator types.  However, I had some options to make a few more exotic designs like a Gaulus (Big axe) or Dimachaerus (Two swords).  Oh, time to make some decisions! 

One thing I noticed right away was that the proportions on these guys are much more accurate.  The Crusader models have a bit more exaggeration in order to make their type obvious.  Not so much with these 3D Prints.  That makes some of their helmets look a lot less interesting or intimidating, but much more realistic in scale.  The weapons too are more delicate and less blocky.  Not sure how I feel about it yet, and am a bit concerned with how they will mix in with my existing Troupes?   

Primed, but not fully undercoated yet

 Per the rules, you start with 500 Denarii to spend.  I want the core of my Troupe to be hardened fighters, so I spend the money on 3 Deserters to be my core gladiators.  I decide on a Hoplomachus for my Heavy, a Dimachaerus for my Medium, and a Retarius for my Light.  That takes up about half of my recruiting cash up front, and now it is time to fill in the rest with some back-ups!  I probably want at least 1 back-up per type as well.  I pick-up 3 slaves to train-up as well, and I chose a Murmillo (Heavy), Secutor (Medium) and Retarius (Light).  That is 6 Gladiators for 3 events per Games?  I do not think that is enough.  I decide to purchase a Barbarian Gaulus for the giggles.  That will leave me some money in the bank.  A Troupe of 7 gladiators out of the 10 I have to paint.  The others can be used as Damnati or Noxi opponents as needed.  The rest of my money gets split-up and goes into reserve.       

  1. Deserter- Hoplomachus  
  2. Deserter- Dimachaerus
  3. Deserter- Retarius
  4. Slave- Murmillo
  5. Slave- Secutor
  6. Slave- Retarius
  7. Barbarian - Gaulus
With that sorted, it is on to the painting!  I start by doing my standard Grey Seer spray, then dark grey wash, and then white highlight.  Nothing too special there, but it is a different approach then what I used on my Crusader gladiator models, so we will see how they look together.  

Primed and Ready! 

For these guys, I wanted a wide variety of skin tones, and my speed paints were not going to be up to the challenge.  When painting, I try to go from the lowest point, i.e. skin; and work my way up on a model.  I was going to have to use my Armypainter paints along with my Flesh Wash to get the desired outcomes.  I used Elven Flesh, Barbarian Skin, Tanned Flesh, Fur Brown, and Monster Brown as my base skin tones.  Hopefully, that would give me a wide-variety of skin tones to match the cosmopolitan look of the Roman Empire?  We will have to see how it all turns out in the end!  

Diversity and Inclusion in this Ludus

From that step, I decided to go back to my Speedpaints and Metallic Speedpaints to finish them all off.  I was not 100% sure how that would look with my existing Base+Wash gladiators from Crusader.  Plus, I have not really used the Speedpaints on Historical models.  This would be a big experiment for me.  It would probably help me decide how I was going to paint my Anglo-Saxons next. 

For the most part, I was batch painting this guys.  I started with their foot wear and slowly moved up the models.  I would take a look at what the details were and then gather a couple paint options for that detail.  Then, I would put them in little groups and paint them up.  They took about one evening to get all the block painting done, and then I let them dry.  

Block Painted with Speedpaints

After letting them dry, I gave them all an Armypainter Soft Tone wash.  That would cover any missed gaps, define the models a bit more, and just dirty them up a bit to look more like gladiators.  I find the soft tone works pretty well for fleshy models or natural colors as it is based on a brown, sepia like tone for the wash.  

Painting is done!

That left the final step, basing.  My gladiators I have based differently than my other figures. Instead of the usual Territorial Brown with scattered lichen, I will be using beach sand to base them.  I stuck with the Territorial Brown, lathed it onto the bases.  Then, I dipped it into the sand and tapped off any excess.  This only took a few minutes to get them all based up.  

Based up

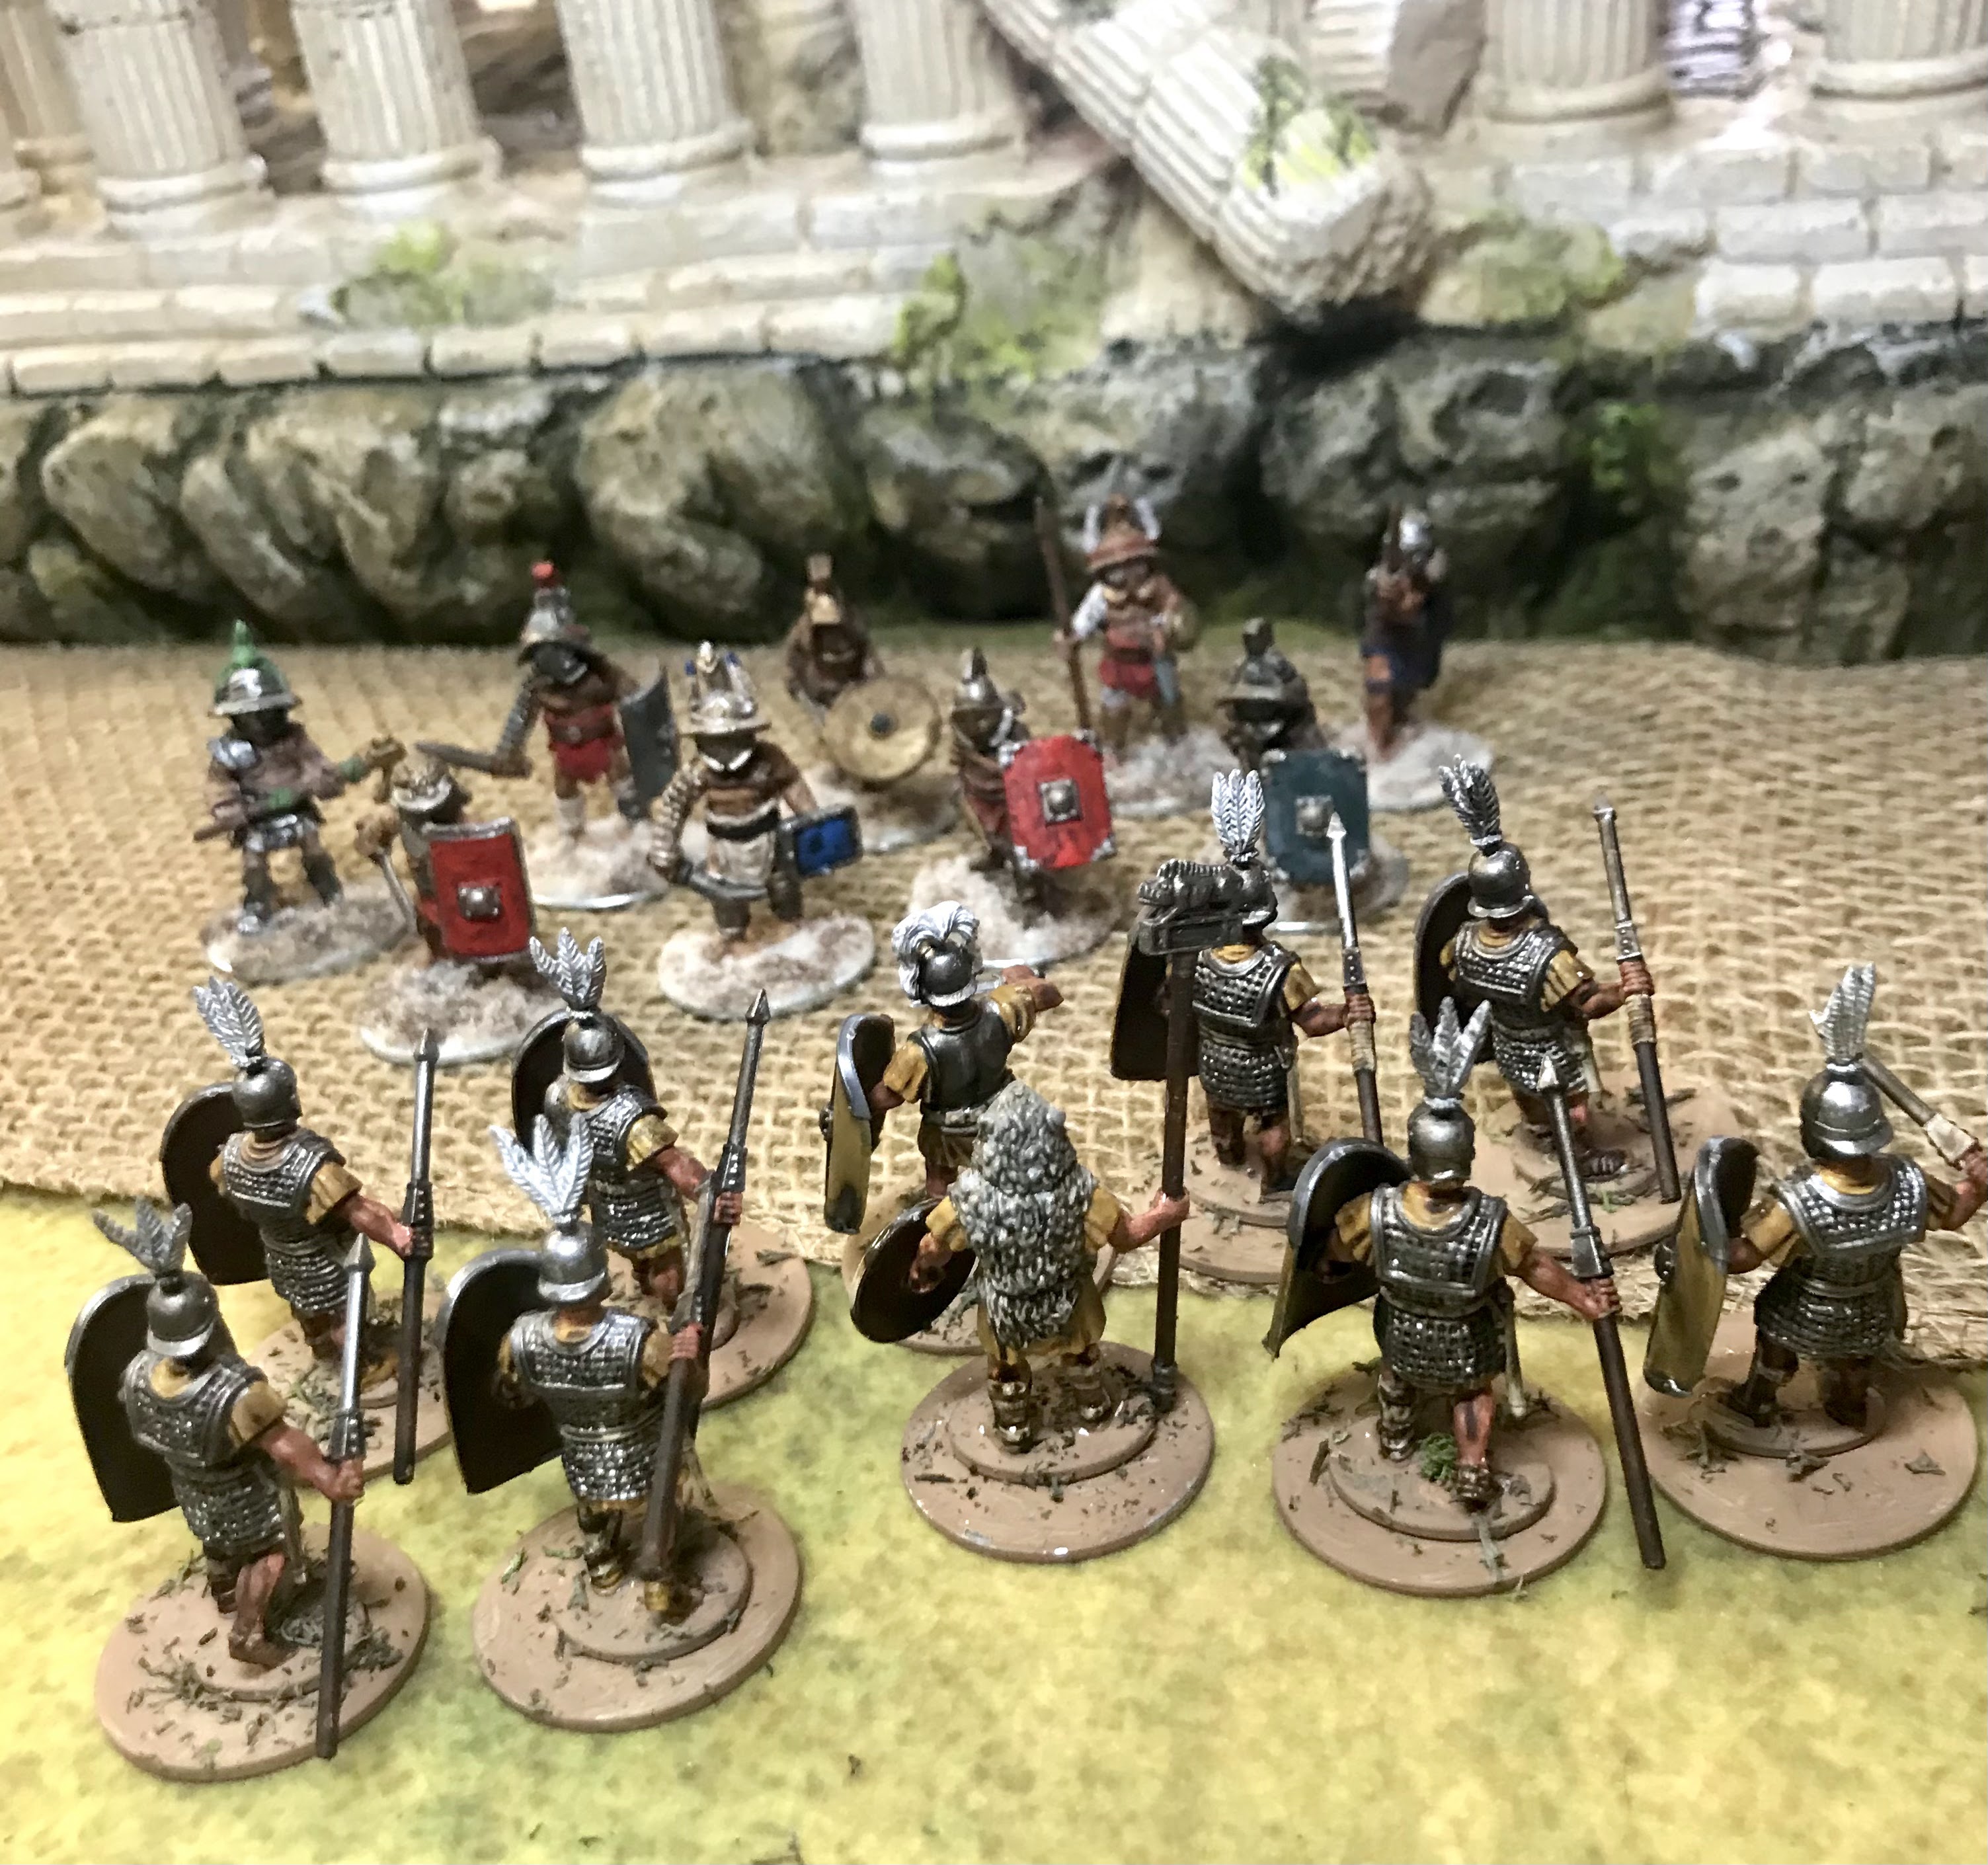
Here they are next to some of the other gladiators from Crusader.  

Wargames Atlantic 3D Prints on the left, Crusader metal gladiators on the right

Well, that was a nice little palette cleanser and test before going onto the next project.  The Anglo-Saxon army.  That has about 50 models in it.  However, as a test for using Speedpaints on Historical models, I think these turned out well.  In addition, I was able to successfully combine using regular Armypainter and Speedpaints to get a good result.  Doing this also sped up the time it took me to finish these 10 guys tookabout 3 days of work time, or a weekend for a unit.  A good pace.  

Until next time!  


Become a Patron and get access to all the cool stuff, a peak behind the curtain of Blood and Spectacles, and early-access to playtest games!  


You can follow Blood and Spectacles Facebook page or Instagram for more fun! 

Check out the latest publications and contact me at our Blood and Spectacles website

Or purchase all out games at the Blood and Spectacles Publishing Wargames Vault Page!          
     

Monday, July 4, 2022

On The Painting Desk- Sands for the Arena!


 One of the projects I wanted to complete and update for 2022 was The Games: Blood and Spectacles - 2nd Edition.  The first edition was one of the first games I ever built and..... well you can tell.  It is a fun game, but the mechanics are very inconsistent across the game, the lay-out is questionable, and many of the images are not public domain.  Therefore, I have been wanting to bring it up to a higher standard and re-release it.  After all, it has been a staple of my gaming stable, and the namesake of my publishing company!  

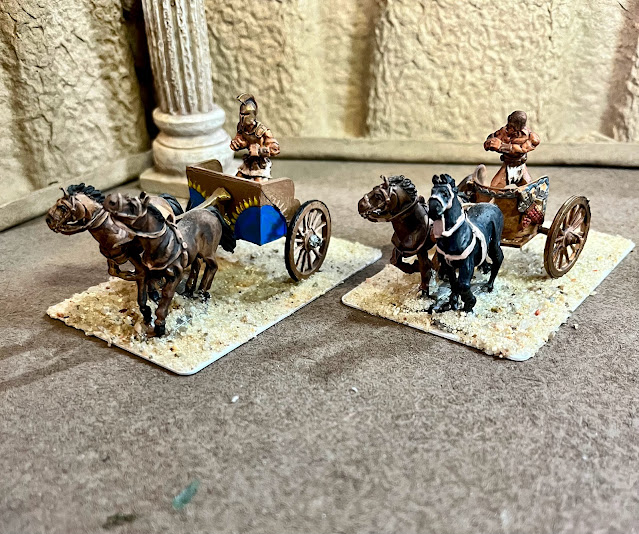
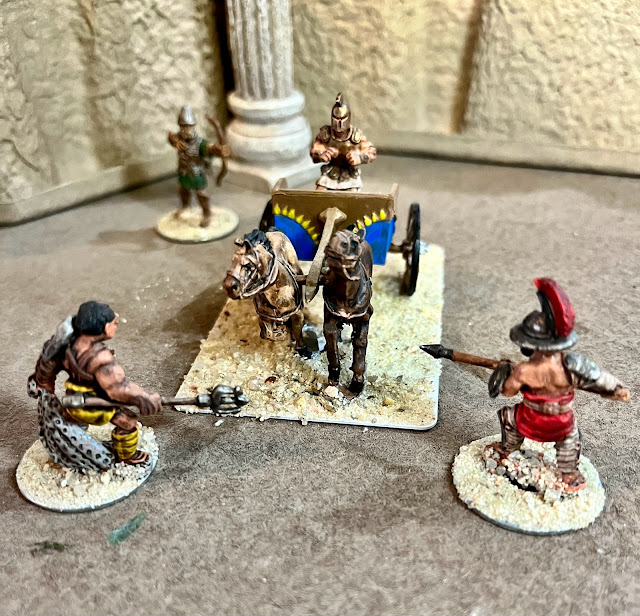
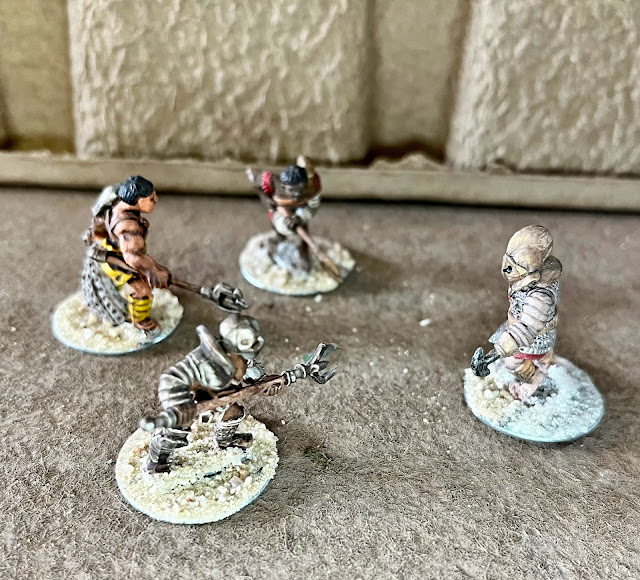
Long ago, I purchased the full set of Crusader Miniatures Gladiator line.  In addition, I also purchased some chariots from the Old Glory Gladiator Wars line.  These were the basics of my gladiator ludus (school) and allowed me to run many of The Games over the years.  I finally had them all painted about 3 years ago.  However, I never got around to properly basing 75% of the gladiators or the chariots.  I needed model shots for post-production on The Games: Blood and Spectacles - 2nd Edition so now was the time to change all of that!  

Basing was very simple.  First, I had a cup full of beach sand that I got from the local beach.  In a pinch play sand or really any sand will do.  I then got some white PVA glue.  Next I found a crappy big-box retailer painting brush with a wide set-up.  I simply globbed the white PVA onto the bases with the brush, and then sunk them into the cup of sand until the base was covered.  I then tapped the excess off the side of the cup.  This is the results.....


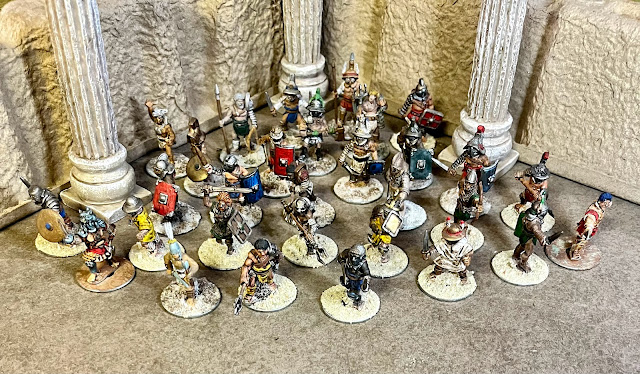
A fully based ludus of gladiators ready to serve their lanista.  That is a gaggle of gladiators!  

Those look a lot better than the white bases they use to have.    

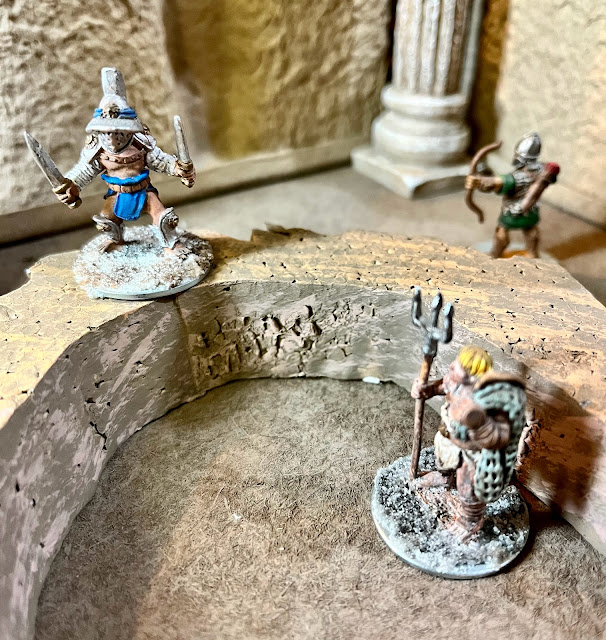
For my arena, I used a large round, wooden cake board from my old days owning a bakery.  I simply painted it brown, and sponged two alternate brown colors over the top with a sponge roller.  For walls, I use brown packing containers accented with aquarium pillars I found at the local pet store.  I don't base it with sand to avoid sand getting all over my play space.    

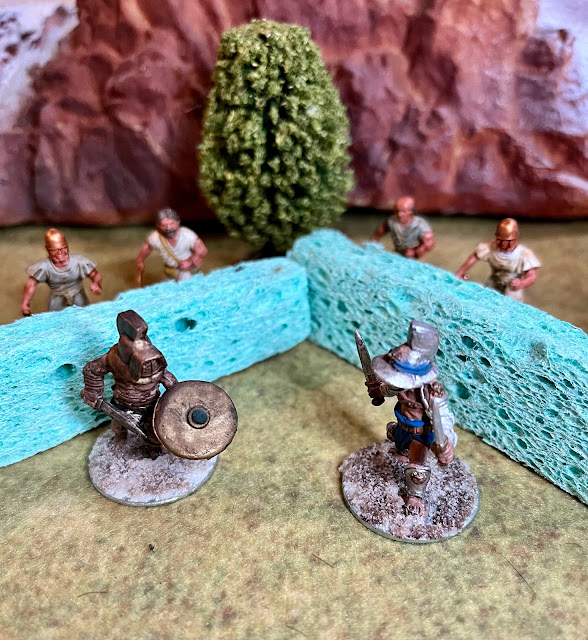
However, not all gladiator bouts were in an arena.  Gladiator fights also took place in other venues such as at the cemetery, people's homes, farms, and smaller local venues.  Therefore, you can use other structures rather than a full sized arena.  For a greener look I use my Cigar Box Battles mat.  For rural locals I might use green sponge hedges and agricultural fencing.  In Villas, I might use a cobblestone base surrounded by speckled walls with columns instead.  Finally, I can also "flood" my arena with a water matt to add extra challenge for my gladiators.  


Of course, I made these arenas, painted the models, and based them all so I could use them in the post-production of The Games: Blood and Spectacles - 2nd EditionThe original game revolves around using Combat Pool to score successes during the various events.  However, these dice pool mechanics did not carry over into other aspects of the rules, and instead used a hodge-podge of rules.  This new version streamlines this into a more unified set of mechanics to make it easier to recall the core rules during play.  Now all stats are essentially depleting dice pools.    


Of course, with depleting dice pools, players would need an easy way to track what their gladiators had used during the game.  Therefore, I also added some easy to use gladiator cards to help players track their gladiators status during play.  In addition, campaign play has always been a core part of the game, so I added a Troupe tracking sheet as well.  Finally, I added some QRS documents to the PDF to help players recall key things like Striking Success options during play.  


Finally, I modified the game to be scale and model agnostic.  There are a lot of great gladiator models out there.  From 15mm to 54mm, they can now all be incorporated into the rules.  I used my standard tricks of converting all distances into generic Measurement Units that can fit any scale the player wishes.  This also allows it to fit on any table size the player wishes as well.  


It still has the ludus building and management aspects of the original game.  Players can still create their own unique gladiator troupes featuring the archetype gladiators of their choice, gladiators earn experience, gain injuries, and are often killed in the arena.  In addition, there is a dynamic set of events that make up each Games using historical examples as the baseline.  Therefore, no two Games need ever be the same; from battling beasts, dealing with convicts, fighting gladiator duels, to chariot racing.  


Of course, the last and biggest change is that all the artwork and images from the old book has been replaced with new pictures.  These will be a combination of model shots, historical finds, and public domain artwork.  Unsurprisingly, the subject of the gladiator has been a fascinating topic for people of all ages since the end of the practice of gladiator bouts.  There are countless sculptures, paintings, mosaics, reliefs, and other artwork to draw from.   Plus, add in the fact that I have various models to take photos of now! 


So, this gives you a taste of  The Games: Blood and Spectacles - 2nd EditionIt took me a few years, but I am happy that I have finally gotten all these awesome Crusader and Old Glory models based and ready for action.  They turned out nice and I look forward to using them as I start demoing the game locally, online, and for the blog.  


Become a Patron and get access to all the cool stuff, a peak behind the curtain of Blood and Spectacles, and early-access to playtest games!  


You can follow Blood and Spectacles Facebook page or Instagram for more fun! 

Check out the latest publications and contact me at our Blood and Spectacles website

Or purchase all out games at the Blood and Spectacles Publishing Wargames Vault Page!

Monday, November 29, 2021

Battle Report: Wars of the Republic - Romans vs Slaves


The Wars of the Republic rulebook has some army lists for the Late Republican Romans to take on various slave revolts.  Of course, the most famous is the 3rd Servile War against Spartacus.  The book has a scenario for the Battle of Vesuvius.  Today, we are going to continue the theme of Romans vs. Slaves but we are going to be playing a different scenario then the one in the book. The Battle of Vesuvius has some strange circumstances that made the scenario a bit unique.  Instead, we are going to play a much more straight forward, ahistorical battle.  

In the winter of 72-71 BC Crassus had assembled his army.  He marched out to face Spartacus and his army.  It is not entirely clear, but some scholars believe that the two armies met.  In the ensuing skirmish, Crassus won and this was what caused Spartacus to turn Southward.  

This turn is often seen as the beginning of the end for Spartacus and his army.  It led to the failed attempt to leave Italy to Sicily.  Then, the Slave army was hemmed in at Bruttium and only managed to escape after breaking out of a costly siege.  

There is no clear, definitive record of this battle.  In fact, it may just be local myth.  This will give us as wargamers some space to play a game where the outcome is unclear.  We only know that this "skirmish" took place after Crassus had ordered a "Decimation" of  his own men to "boost morale" of his troops. Spartacus had opted not to cross the Alps and leave Italy earlier in 72BCE.  

If you have further interest in playing out this conflict beyond what is in the Wars of the Republic rulebook, my first supplement for the game is available on the Wargame VaultThis supplement is called Revolt!  and details the Spartacus' campaign including 15 new scenarios, more historical details, and appropriate army Lines of Battle for different phases of the campaign.  

Forces

We know a bit about how a Late Republican Roman force was outfitted.  We also know that Crassus recruited veteran troops back to the Eagles for this campaign.  Velites and Cavalry had been phased out of the legion and instead replaced mostly with auxiliary troops.  The main body was made up of cohorts instead of maniples now.  

Crassus
1 Veteran Legion - Crassus
1 Legion Regulars
1 Militia Legion
2 Light Infantry

The Slave Army was made up of mostly escaped slaves.  They were using looted weaponry and gear.  Most had little or no combat experience, and non-combatants had to move with the army.  It is estimated to be an army around 70K+ people.  Of course, many of them would not be engaged in the fighting. 

Spartacus     
1 Elite Infantry with Pila - Spartacus
1 Drilled Infantry with Pila
2 Light Infantry
1 Archers/Slingers

At this point, it is VERY unlikely anyone was still armed as a gladiator.  However, the Elite infantry will be composed of Gladiator models, and I will be using gladiator models as leaders of the other units. This is purely for flavor and one of my favorite things about the Third Servile War, I can use some of my Gladiator minis! 


Mission
We rolled for the mission and scored Recon in Force.  The Romans are the Attackers as they try to get the position of the Slave army.  In this mission 6 numbered tokens are placed face down.  The Romans need to reveal 2 Even tokens to win.  The game will last 8 turns or until 2 even tokens are revealed, or one of the opposing armies collapses. 

Set-up
Again, we used the rulebook to determine the set-up.  We are playing on a 72MU x 48MU board.  1 MU equals 1 inch.  We are using the grid system to lay out the board and randomly determined the terrain.  1-3 is the Roman side, and 4-6 is the Slave side. 

1= Walls - We used a temple
2= Swamp, Spring, Water
3= Walls- We used a temple
4= 1 level hill
5= Swamp, Spring, Water
6= Swamp, Spring, Water

We decide to connect 2,4, and 5 with a river moving through the table.  The river is fordable, but considered dangerous terrain.  There is one ford which is just difficult terrain, but not dangerous between 3 and 6.   The defenders place the tokens around the board.  We decide not to use any other complication for this battle.    

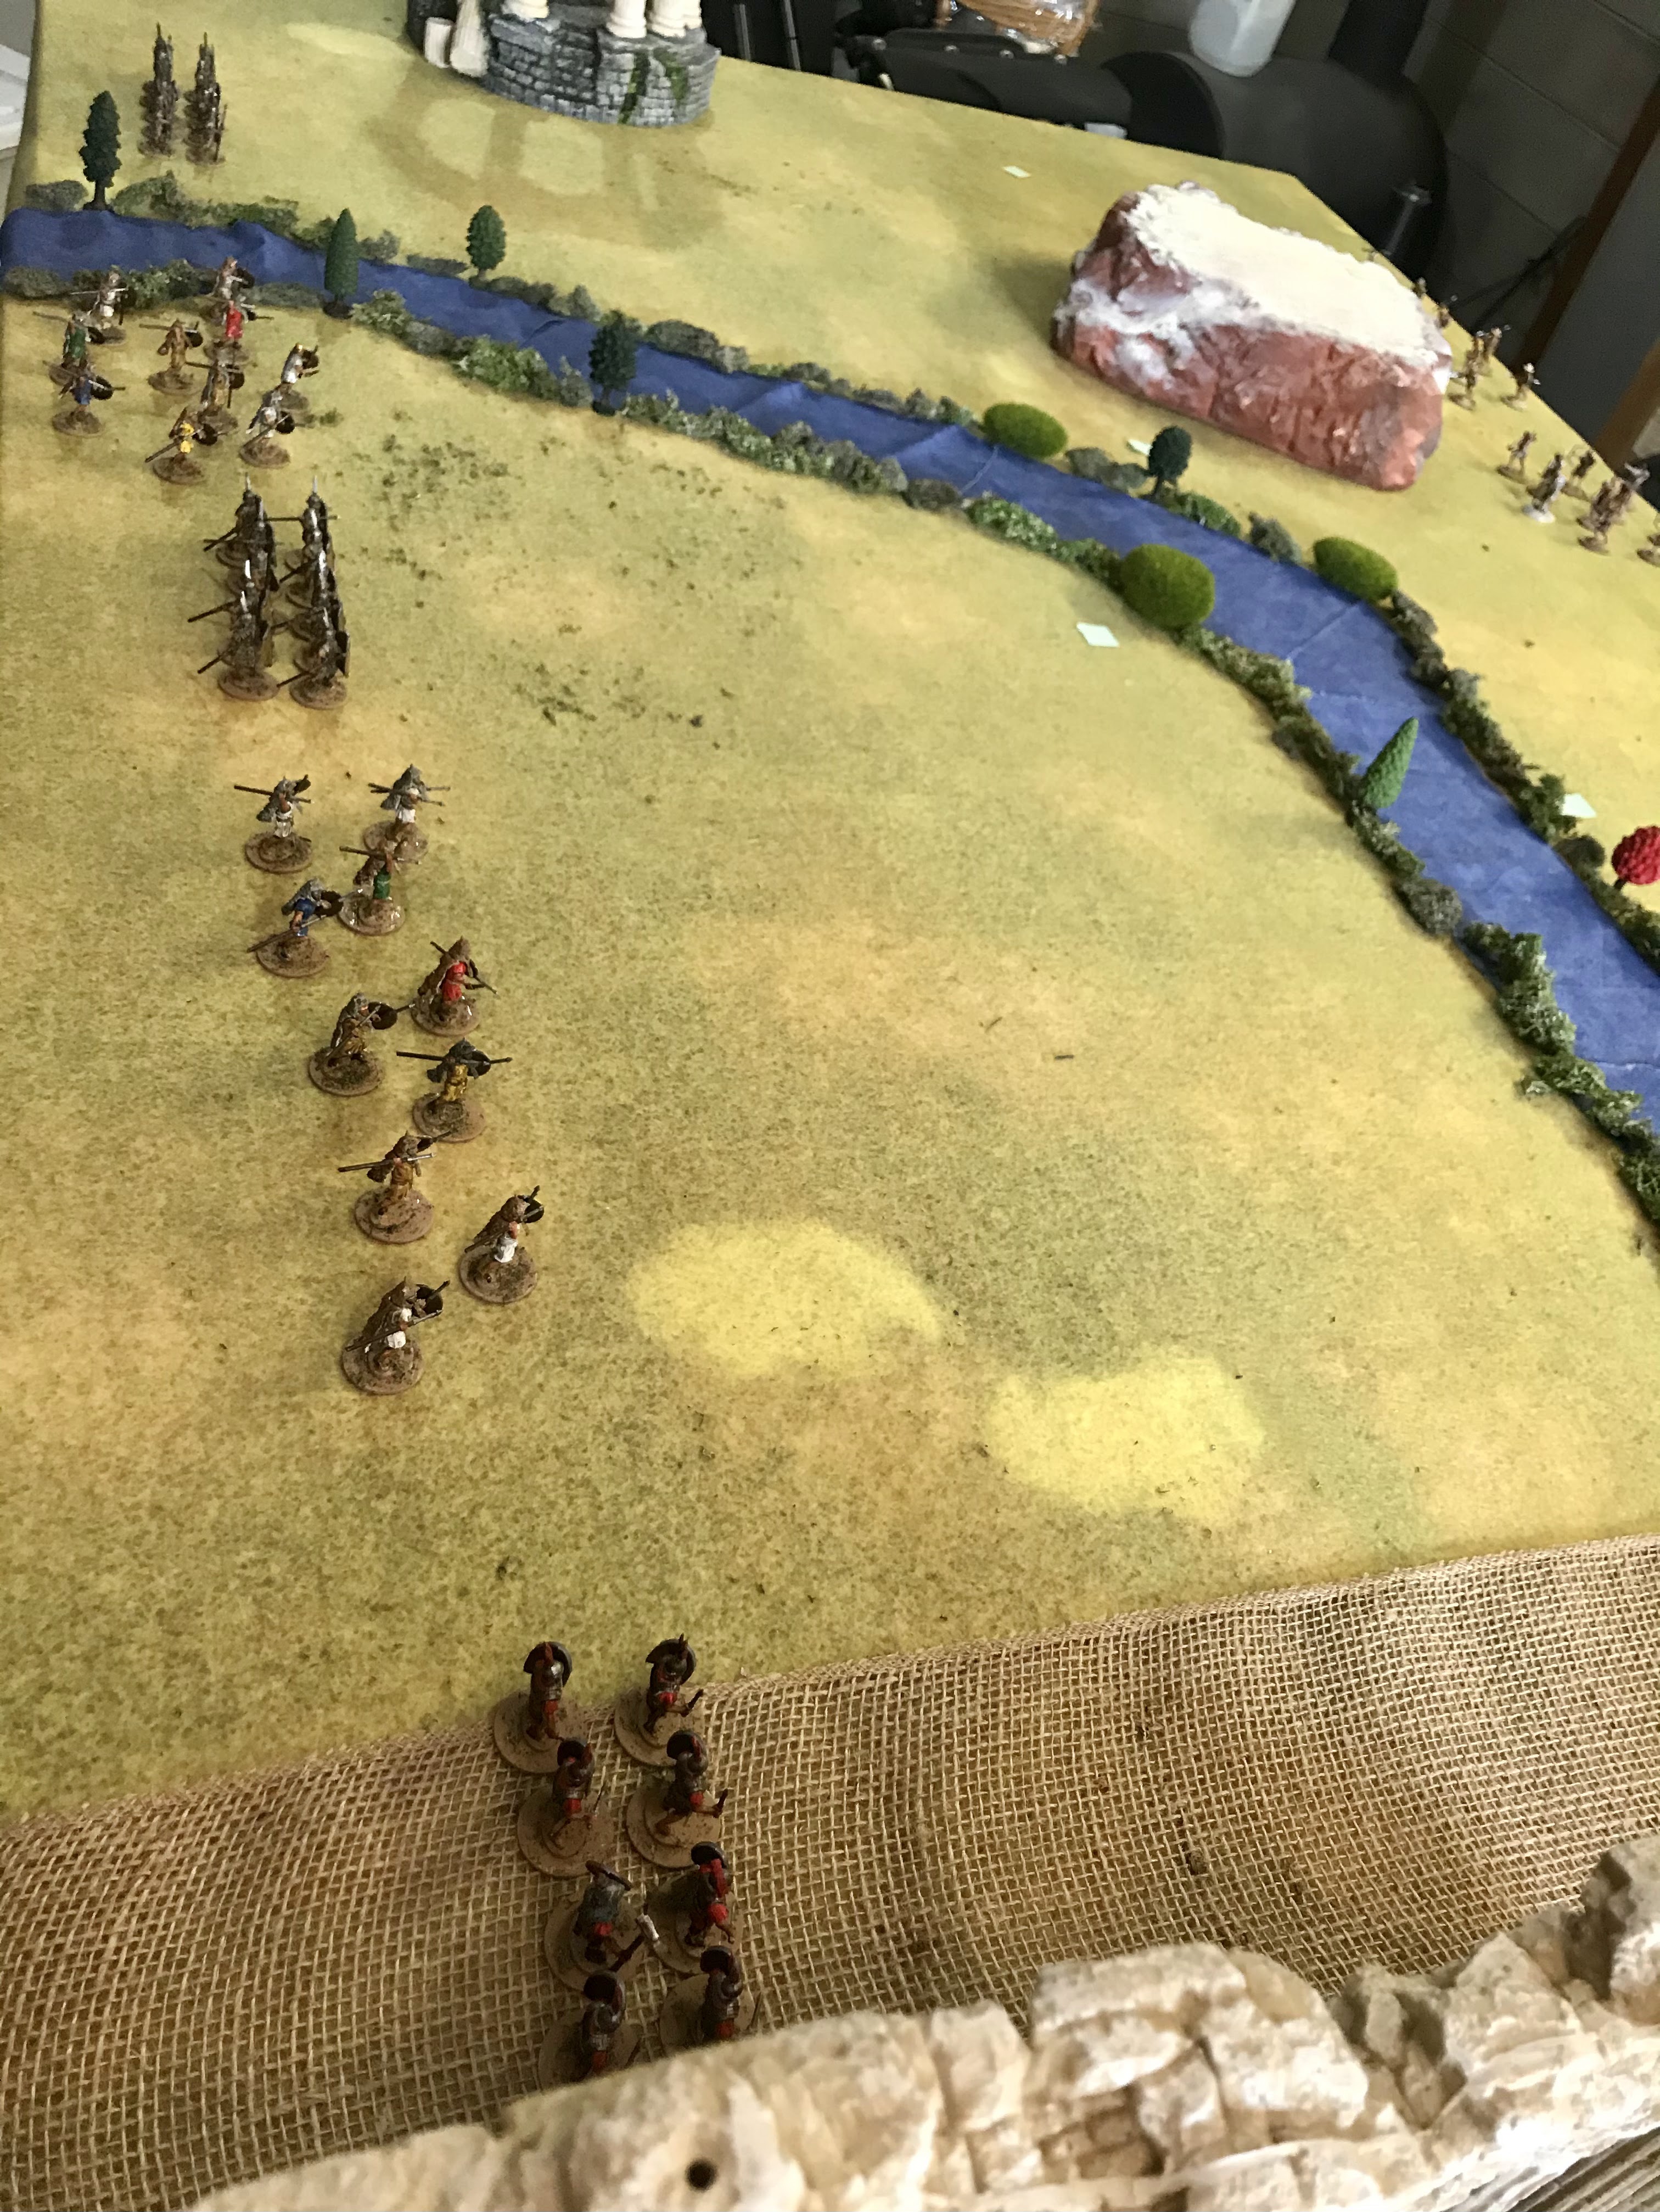
The Romans deploy from their left to right the following: The Legion Regulars are near the temple and along the road to the ford.  Next to them is light infantry, then Militia Legion, and light infantry by the riverside.  On the opposite side of the river by the circular shrine is the Veteran legion.
Romans on the left of the photo

The Slaves deploy opposite them and left to right is Light Infantry on the flank on the road to the ford.  Next to them is drilled infantry, then Spartacus and his elite infantry, archers in the shadow of the hill, and light infantry on the right flank.   
Slaves to the right

Turn 1:
Crassus and Spartacus collect their Commander's Gaze.  They both get 6 Gaze tokens, 1 for each unit and 1 for themselves as commander.  They bid for initiative.  Crassus bids 6, while Spartacus bids 3.  The Legion goes first. 

The light infantry on the river bank moves forward, and Spartacus tries to steal the initiative. The slaves do so successfully.  The light infantry on the left flank move to the ford and take cover in the underbrush of the far bank.  


The rest of the army moves forward, with the infantry closing in on the shoreline.  The archers nestle beneath the hill, and the right flank light infantry skirt along the base of it towards the edge of the board.  

Crassus is surprised by the speed in which the slave army moves into position, but he is undeterred as his Romans move up in a slow and disciplined fashion.  

Turn 2: 
Crassus again bids all 6, to the Slaves bid of 2.  Crassus gets initiative.... for now. 

The center Light Infantry moves up first and stays spread wide to cover their Legion comrades flanks.  The Militia moves forward in formation next, making way to the river bank and one of their recon points.  The Legion Regulars also march confidently down the road towards the lightly defended ford. 


Spartacus tries to interrupt, but fails. The rest of the Romans move forward, with the Light Infantry on the river side.  Crassus and his Veterans confidently move up unsupported in their Legion formation.  Their exposed flank makes a tempting target to the slave forces, but that side is only held together by Light Infantry and Archers.  

Spartacus and his troops take over.  The Slave army begins to shift towards the left flank.  The Archers move to cover the objective and pass between the hill and the river side.  The right flank Light Infantry moves to the top of the hill.  Meanwhile, on the left flank, the Light Infantry begins to cross the river at the ford, while the Drilled Infantry moves to support their crossing.  Finally, Spartacus himself moves to the river bank and on an Objective. 
Spartacus leads the way, a Thracian style Gladiator


Turn 3:
This time, Crassus has to consider his bid a bit more carefully. Spartacus bids 0, while Crassus bids 2. Crassus goes first again.  

The Light Infantry along the river bank rush forward and secure an objective marker.  They move it to Crassus' side of the board.  They then use a Commander's Gaze to throw Javelins at Spartacus' men but fall short.  Spartacus attempts to interrupt, but is unsuccessful. 

Crassus and his Veterans break into open order and re-align on the far objective, they re-form and move out.  Reforming Legion costs 1 Commander's Gaze.    Spartacus again tries to interrupt, and is successful this time.

The Slave archers pull back and fire at the Light Infantry.  The Romans take cover behind the underbrush at the river bank, but still lose 1 Courage!  However, they do not waver.  Spartacus and his Elite Infantry comrades begin to charge across the river.  The Light Infantry decides to Evade, and they drop back 2 MU.  It was unnecessary as the Gladiator's could not make it across due to the dangerous terrain.  They begin to waver, but do not loose any courage due to the difficult terrain.  A big gamble that does not look like it paid off! 

The Slaves on the right flank consolidate their position on top of the hill.  They decide they do not have the range or power to hit Crassus' Legion with javelins effectively. 


The slave light infantry on the left makes it across the ford, as the Drilled Infantry moves up behind and takes their position on the opposite bank of the river.  

The Romans take over, and the center Light Infantry rushes to the river bank and uses their last Commander's Gaze to throw Javelins at Spartacus and his men in the river.  They fail to cause any Courage loss.  

The Legion Regulars hold position by the temple, covering their flank from the Slave Light Infantry. The Militia Legion also has to hold position due to the traffic jam in front of them.    

Turn 4:
Both commander's bid 2 Commander's Gaze.  After a moment of hesitation, Spartacus decides to up his bid to 3 and wins initiative.  

Spartacus starts by moving his left flank Light Infantry away from the ford, and in a position to harass the Legion regulars if they try to force the ford.  


Next, his Elite Infantry tries to finish crossing the river.  This would bring them in contact but the Light Infantry evades away.  The Drilled Infantry move into the ford and protect the objective there.  The archers also move up to provide covering fire to Spartacus next turn.  The Light Infantry on the hill hold position.  

Crassus takes over.  The injured Light Infantry get out of the way and head to the river bank opposite the archers.  The Militia Legion than declare a charge on Spartacus and his troops.  Spartacus's troops are unable to use their Pila or counter-charge as they are wavering, but the Militia Legion have no such limitation.     

Instead of supporting their Militia Legion friends, the Roman Light Infantry begins to cross the river to try and snag the objective on the other side.  


Melee:
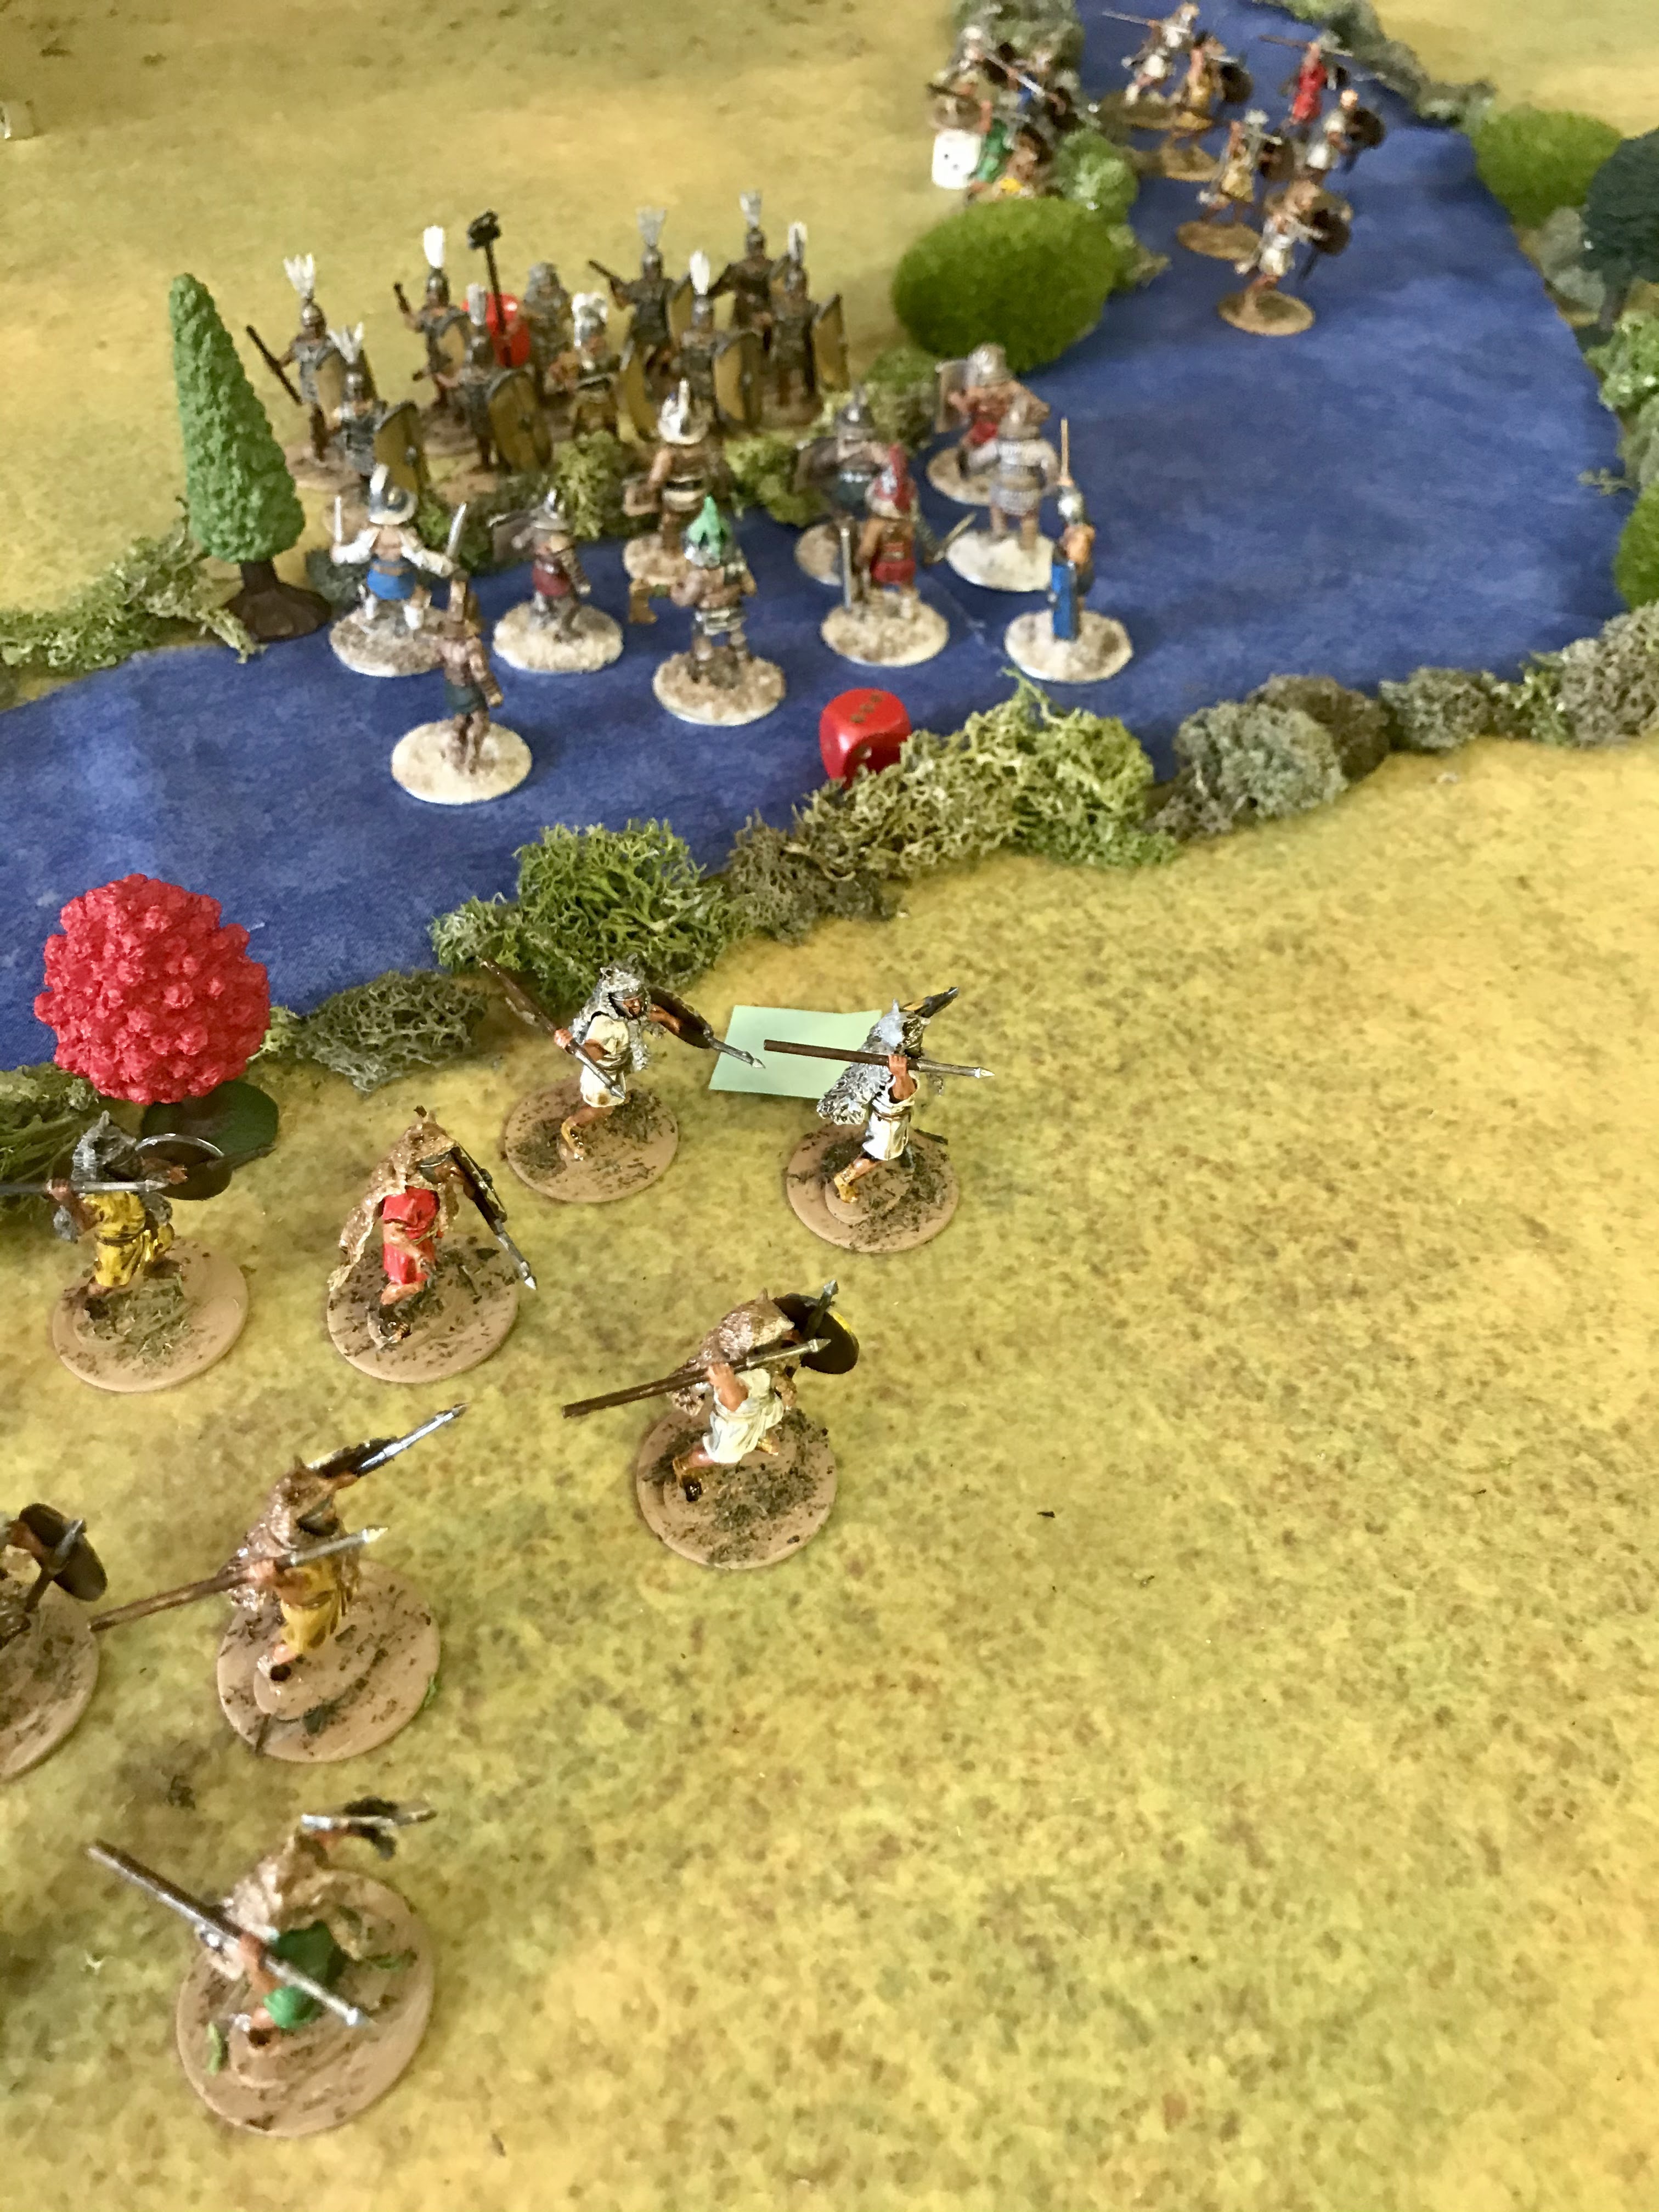
Spartacus and his troops are wavering, so could not use Counter-charge or Pila.  The Militia Legion did the charge and could use their Pila.  Therefore, the Gladiator's are at armor 2, as they are in difficult terrain.  The Legion is not, but is in formation. 

Spartacus uses his re-rolls and manages to inflict 1 Courage loss, and force the Militia to waver.  However, they also lose 2 Courage and are pushed back into the river with the Romans right behind them!   The Militia also used the Roman's last two re-rolls from Commander's Gaze.  

Turn 5: 
 Crassus again bids 2, and Spartacus bids 0.  Crassus goes first.  

Crassus and his veteran's march and collect the far objective.  They again break into open order, pivot to a new direction and re-form up.  


The Roman Light Infantry both jump into the river.  The right flank Light infantry are nearly across, while the left flank starts in.  They screen their crossing with a barrage of Javelins on the Slave archers, but fail to cause any disruption. 

The Legion Regulars move up and reform their position using the last Commander's Gaze.  They are out enough to tempt the Slaves into an advantageous combat, but then they can not react to the Light Infantry crossing the river. 

With that, Spartacus takes over, and is in a bit of a rough spot.  The Romans have 2 objectives.  A third will likely give them the win.  He needs to act fast to disrupt their plan.  

On the Slave left, they decide to take the bait and try to crush the Legion Regulars there.  The Drilled Infantry cross the ford, and then charge home.  The Romans have no Gaze to counter-charge or throw Pila.  The Drilled Infantry are also supported by the Light Infantry who also spend a point to charge in.

The Slave Archers use Gaze re-rolls and fire into the oncoming Light Infantry and reduce them 2 Courage, but not enough to cause them to waver.  

Melee:
Crassus decides to start with the Militia Legion in the center fighting Spartacus and his men.  Neither side makes any headway. The slaves suffer no courage loss for fighting in the river either. 

On the other side, the Slaves managed to charge and throw Pila, while the Romans could not counter-charge or throw their own Pila due to lack of Gaze.   Despite the lop-sided attack dice, both sides only lose 1 Courage.  However, the Legion begins to waver, which forces them to lose their formation.  

Turn 6: 
Neither side has lost a unit yet!  Therefore, they both have 6 Commander's Gaze. Crassus bids 2 to go first, while Spartacus bids 0. Crassus has the initiative.  

Roman Light Infantry manage to get behind Spartacus and his men and secure an objective.  With that, Crassus reveals that he has a 4 and a 6 which gives him two even numbered tokens...... and the game!  


Conclusion: 
Crassus and the Romans win. This aligns nicely with the unknown skirmish we were fighting.  In the history, this skirmish between Crassus and Spartacus is what convinced the rebel general to turn and head south again.  Therefore, a defeat like the one we saw above aligns with what may have happened in real life.  An indecisive battle that the Romans won. 

That was a great game!  It went 6 turns and no one had the clear upper hand combat wise.  However, careful maneuver, deployment, and deciding when and how to engage won the day.  In fact, no one even lost a unit before the game was done. 


My plan was to use them to rip the heart out of the weaker Roman center, while the Drilled and Light Infantry held the left flank, and the right side just stayed alive as a threat/speed bump to getting the objectives there.  The plan worked "okay"ish.  I misjudged the move across the river with Spartacus and his Elite Infantry and it was a bit too slow to stop the Romans from getting the objective on the opposite side of the board.  The rest of the plan was working as intended, but my weak center push cost me the game as my momentum was spent and I got bogged down.  From then on the Slaves and I were just reacting to Crassus' moves.  Not a great place to be. 

Despite losing, I had a great time playing this battle.  It was really fun putting the Gladiator models from Crusader on the table as my Elite Infantry and Unit leaders.  I also enjoyed the challenge of the river and ford.  This was one of my favorite tables we have fought on with Wars of the Republic  yet.    

You can pre-order the rules for Wars of the Republic from Osprey/Bloomsbury Publishing here.


Become a Patron and get access to all the cool stuff, a peak behind the curtain of Blood and Spectacles, and early-access to playtest games!  


You can follow Blood and Spectacles Facebook page or Instagram for more fun! 

Check out the latest publications and contact me at our Blood and Spectacles website

Or purchase all out games at the Blood and Spectacles Publishing Wargames Vault Page!

Monday, May 18, 2020

Battle Report: Broken Legions- Oracle of the Unknown Gods


The old tales told of an ancient temple high is the mountains above Dacia.  It was far away and a remote place.  For several days the party had scaled twisting mountain trails, crossed treacherous chasms, and scaled impossible slopes.  Then, eventually they stepped off a mountain trail and into a beautiful vista.  Perched aside a towering mountain, hidden from view below was a wonderful and grassy plateau.  How such a garden could exist here could only be explained as the will of the gods. 

 Exactly which gods held sway, no one could be certain.  However, there is no doubt that they made such an idyllic plateau possible.  Untended and ill-kept was a long forgotten temple.  That must be the sacred shrine.  Inside was rumored to be ancient and holy relics, power and wealthy, but so much more.  The party stepped off the mountain trail and into the plateau. 

On the far side, another group of men could be seen!  How was this possible?  Truly, the gods were trying to protect their secrets!  For only they could draw two parties of warriors to this place?  Perhaps it was not the paradise it appeared?  Perhaps it was a beautiful sepulcher instead? 

Broken Legions is a game set in a Fantastical Roman Empire of myth and legend.  The power of Rome is propped up by more than just the strength of her arms, but by the magic, mystical, power of the gods.  Various forces are vying to find the favor of the gods for their own ends, and to free themselves from the yoke of Rome. 

Today, a band of Greek Argonauts have been led to the ancient lost Oracle by the whispers of Hera and their own meticulous research.  The Sons of Spartacus have been drawn to the Oracle of the Unknown Gods by the whispers of the washer women, and local slaves who claim the oracle can help them reach their freedom. 

The Forces 


The Argonauts- The Archaeon League
Argonuat Hero- Aegis
Herculean Champion- Demetrius the Brazen
2 Argonauts- Xanthippus and Cleomones
5 Mercenary Holpites
3 Mercenary Archers

Sons of Spartacus- The House of Leptis Minoris
Arena Champion- Hector (mounted)
Doctore- Janus
1 Mounted Gladiator
4 Assorted Gladiators

Mission
The objective is the Oracle of the Unknown Gods located in the shrine at the center of the board.  In addition, there are two other objectives on the board to be discovered by the warbands.  The party with the most VPs at the end of 10 turns wins. 

Set-up
The table is a 4 by 4 foot table with the Oracle of the Unknown Gods set in the middle.  Also on the table is a sacred grove, a secondary temple complex, and some smaller ruins.  They are all overgrown with shrubs and have been long abandoned.  One objective is within the Sacred Grove, while another is outside one of the temple complexes entrances.

The warbands are coming from opposite sides of the table.  For the Argonauts, Aegis and Demetrius take up a westward position, while Xanthippus leads the Archers in the center, and Cleomenes takes the bulk of the Hoplites on the right.


The Sons of Spartacus have Hector and his fellow rider in the center.  Janus, a gladiator, and a bow armed gladiator cover the sacred grove, while two other gladiators move to toward the other objective.     


Turn 1:
The Sons of Spartacus win Initiative.

Hector and his companion ride bravely forward, right to the edge of the shrine.  The rest of the Gladiators move forward, but much slower than their leader.  Janus let's the Sagitarius (archer Gladiator) lead the way as he stays nearby ready to support.

The Argonuats are all on foot, like good Greeks should be.  They also move up.  They tend to hunker closer together, with the archers in the center ready to support in either direction.

Turn 2: 
The Sons win again.

The two sides again move forward, with the Sons of Spartacus horseman staying in cover by the main shrine.  The Argonauts move up much slower, but closer together for mutual support.

The Sons of Spartacus Sagitar takes a pair of long shots at the lead Mercenary Hoplite, but the shots fail to find their mark.

Turn 3: 
The Sons of Spartacus continue to win the Initiative.

The Sagitar moves into the grove to collect the half buried artifacts found there.  Janus had taken cover behind some brush.  Good thing, as several Greek Archers take pot shots at him, but miss.

Meanwhile, Aegis his companions move to acquire the artifacts at the foot of the secondary temple.  However, they are set upon by a duo of Gladiators, and Hector himself rides into the melee looking for Glory.

On the Other side, Cleomenes and his troops move to the entrance to the main grove, but there they are also set upon by Janus, Gladiator, and an Equis.  Whoever wins that combat will be able to enter the main sanctuary and locate the Oracle to the Unknown Gods.

Melee:
In the Melee phase, things start to heat up as general engagements are all around.  The Retarius attacks Aegis, who deftly avoids the enemies attacks and avoids becoming ensnared.  Aegis' return attackers are also fruitless.  Demetrius steps in to assist his Captain against his foe.  As a bodyguard, Demetrius can re-roll a failed attack with a successful presence test.  He succeeds and re-doubles his efforts, this time he manages to wound the Retarius.  Gladiators can take 2 wounds, while most models can only take 1. 

Hector charges down a mercenary Hoplite on his stead.  However, the Hoplites shield holds true against the Gladiators cavalry spear.  The Hoplites return thrust is easily parried by Hector's shield.  The remaining Gladiator and Hoplite also battle inconclusively with each other.

At the entrance to the Shrine, the Mercenary Hoplites try to fight off the Gladiator's led by Janus.     The fighting here is also inconclusive as the two sides clang sword and spear against shield.  It looks like both sides are settling in for a long slog.

Turn 4: 
The Sons of Spartacus have the initiative.

It begins with Janus trying to Challenge to face him one-on-one.  However, after scurrying through the rules, it is determined that Cleomenes as an Argonaut is only a Henchman after all, while Janus is a Hero.  No challenge can be made.  Hector however can Challenge Aegis and does to single combat!  The Greek accepts and the combatants make way for each other.   

Despite having the Initiative, most of the Sons are locked in Combat.  The Sagitar continues his duel with the Greek archers, but fails to find a mark.  Cleomenes the Mad (an Argonaut) runs up into the Oracle of the Unknown Gods and claims the objective.... for now.

Xanthippus (another Argonaut) moves away from the Greek archers and engages Janus the Doctore along with the Hoplite all ready fighting the Gladiator Hero.  One of the Greek Archers manages to hit the Sagitar and manages to wound the Gladiator.  The Sagitar is broken from the shot and turns to flee.

Melee:
Xanthippus' charge is successful.  He drives his spear into Janus' thigh.  The Doctore is momentarily stunned by the attack, and his will to fight is broken.  He jumps back from the melee to gain some distance and breathing room.  This leaves two Hoplites fighting the Equis. 

Meanwhile, Aegis and Hector battle in their clash of Champions.  This leaves the Secutor gladiator fighting two Mercenary Hoplites, while Demetrius takes on the Retarius.  The two champions battle to a stand still with blades bouncing off shields.  however, in the swirling melee, Aegis' gladius' tip slashes across Hector's spear bearing forearm drawing blood.  This causes Hector to break off from the fight and ride away.  He takes the time to start to bandage his wound and glare at the petulant Greek Hero.

(The Gladiator's seem prone to being Broken today!  It must be tough to have two wounds!)       

The Retarius manages to Ensnare Demetrius in his Net.  However, it isn't enough to stop the big brute from smashing the Retarius to the ground with a body block.  It looks like the Retarius is down for the count after that hit.

The Secutor has better luck and downs one of the Mercenary Hoplites with a well-placed sword thrust.  However, he must contend with his fellow still.  However, the Son of Spartacus has no trouble fending off the probing spear of his foe.

The Hoplomachus Gladiator at the foot of the temple grapples with his foe in a spear battle.  the Gladiator Crits and converts it into another successful attack.  The Mercenary saves two of the three hits, before the Galdiator's spear finds a weak point in the defense and strikes home.  The Hoplite is downed.

Likewise the Equis fights a Mercenary as well. This time, the height advantage from his mount is decisive and another Hoplite goes down.  however, his friend fills the gap quickly and attacks. This battle is another draw.

Hector and the Sagitar manage to rally themselves.  However, Janus continues to flee the battle.  The Gladiators lost 1 and have their Doctore fleeing, while the Argonauts lost 3 Hoplites. Ouch all around.

Turn 5: 
The Argonauts win the initiative

Prior to the Argonauts moving, the earth at the base of the shrine begins to shudder and shake.  With an unnatural crack skin to thunder, the floor itself rises up and shapes itself into the countenance of what could only be described as some sort of godling!  The great stone beast rumbles some oath like gravel across a mountainside and attacks Cleomenes with a swing of its mighty hammer!

The cagey Spartan manages to roll with much of the blow, but is still knocked into a nearby pillar.  The Spartan straightens his helmet and leaps at the beast with a bellow of his own!  His spear splinters as he sinks it into a weak spot between the stone giants rocky slabs.  The creature groans like two boulders smashing together!


Action Phase:
Hector decided not to re-engage with Aegis and Demetrius.  Instead, he begins to ride around towards the front of the Oracle, leaving the Secutor Gladiator to his fate.

Most of the other units are locked in melee.  Aegis and Denetrius with the support of a Mercenary Hoplite near the foot of the secondary temple versus the Secutor Gladiator.  In front of the Oracle, Xanthipus and a Mercenary Hoplite are battling a Hoplomachus and Equis gladiator to control the entrance to the Oracle.

Meanwhile, the Sagitar and the Greek archers continue their archery duel.  The Sagitar strikes first and takes down one of the Greeks.  However, the return fire is enough to take the bow armed gladiator out of the fight.  All is Lost tests are not taken until each warband is down to 25% or less.


Melee:
Aegis, Demetrius and the Secutor all continue their combat near the foot of the temple.  There, is some sacred inscriptions that will need to be copied and translated.  However, for now a fierce combat surges above them.  The competitors all jockey and dance for position, with blades, axes, shields, and spear tips swirling and dodging in the battle.  The Secutor is experienced in facing more than a single opponent, but eventually a shot powerful attack from Demetrius finds its mark and injures the Gladiator.  However, he gamely stays in the fight.

In the front of the shrine, the Hoplomachus and Equis continue their combat with the Mercenary Hoplite and Xanthippus.  The fight is a standstill as they all trade blows.


Recovery:
Janus rallies himself and turns to re-enter the fight.

Turn 6: 
Initiative is won by the Sons of Spartacus again.

The Shrine's Guardian again tries to smash Cleomenes.  However, the Spartan has gotten over his initial awe, and dodges around from the great beast.  His armor and shield protect him from several glancing blows, that send the Greek warrior bouncing from pillar to pillar.  However, the warrior manages to sink his Xyphos into the great monsters wrist during one of its passes.

Action:
Hector stays in reserve as Janus moves back up to the fighting at the front of the shrine.  Most of the rest of the combatants are locked in place.  Thanks to Cleomenes, the Greek Archers can not fire on the Guardian.  Their only target is Janus, but he is obscured behind the melee.  Their shots miss the Doctore.

Melee:
The Sons want to start the fighting at the front of the Shrine.

This time, the Hoplomachus manages to out fox the Merceanry Hoplite he is facing, and send shim sprawling with a swipe of his spear butt.  This puts the Greek out of the fight as he lands awkwardly.
The Equis manages to land a blow on Xanthipus that injures the Argonaut, and the Greek falls back from the fight with his allies down.  This leaves the Sons of Spartacus in control of the Shrine entrance.

With a flourish of swordsmanship, Aegis manages to take down the Secutor he and his companions were entangled with.  This leaves the foot of the temple firmly under Greek control.  Will they be able to get over to the Shrine in a timely manner?

Recovery:
Xanthipus quickly rallies now that he has created some distance from his foes.

Turn 7:
Greeks win the Initiative.

It was a tough turn for the Greeks, as Cleomenes is still locked in combat with the Shrine guardian.  Cleomenes continues to dodge desperately, but the monster gets a grip on the Sparta, raises him off his feet and smashes his stone head into the mad Spartan's Helmet.  The Argonaut falls limp from the blow, and the Guardian casually tosses him aside.

Action:
Hector and Janus move towards the shrine, preparing to attack the Guardian.  Aegis and Demetrius are also trying to circle around to the front of shrine.  The gladiator Equis moves to secure the objective in the Grove, and for his efforts gets shot with arrows from the Greek Archers.  This forces him to flee!  The Hoplomachus gladiator decides to charge the newly rallied Xanthippus. 

Melee:
The Hoplomachus charges into the remaining Argonaut, but the Greek stands firm behind his shield.  He responds with a push from his own shield and spear that manages to injure the Gladiator.  However, this Son of Spartacus is made of sterner stuff and stays in the fight!


Turn 8:
The Argonauts win Initiative.

The Guardian stands in the shrine, daring any to enter these sacred grounds.  His huge stone hammer held at the ready.

Action:
The Heroes of the two factions have a decision to make.  Do they fight each other first or do they team up and take out the Guardian of the Shrine?  Both of the Heroes of the Sons of Spartacus are all ready injured.  However, so is the Guardian!  If either side loses more men, they will have to start making All is Lost tests.

Aegis moves towards his archers, and uses the "Take it down!" heroic action.  Which he passes.  The Archers turn their attention on the Guardian.

With that, Hector decides to try to charge in and Support his last gladiator against Xanthippus.  Losing the Hoplomachus could have dire circumstances.  Demetrius also tries to charge into this melee and support his comrades.  Janus moves to cover ready to move in on the Guardian if the Archers injure it further.

The Archers fire.  However, the columns on the shrine thwart their shooting.

Melee:
Hector attacks Demetrius with his cavalry spear.  The large Greek manages to block the attack, that causes Hector to become unsteady in the saddle (a fumble).  Demetrius sees the moment of weakness and strikes, managing to injure the Gladiator Hero.  He is down to his last HP.


Xanthippus and the Hoplomachus fight each other to a draw as spear clashes against shield.

Recovery:
The Gladiator Equis rallies at the edge of the valley.  He turns his horse back around and surveys the situation.

Turn 9: 
The Argonauts maintain the initiative.

The Guardian is content to stay in the Shrine and await a challenger.  His gaze carries the anger of the devine as his eye sweep the battlefield.

Action:
Aegis joins Demetrius in the battle with Hector.  Janus moves up, but can not get their in time.  The Equis also rides back towards the shrine.

The archers again fire at the Guardian.  An arrow finds the mark, but splinters on the monster's stone skin.

Melee:
Aegis charges into the battle and strikes swiftly at Hector.  The Gladiator defies death as Greek heroes blade strikes and is deflected by Hector's gladiatorial medal of honor.  He survived thanks to a Fate point.  Hector's return attack with a flurry of Gladius blows on Demetrius fail to find a weak spot in the big man's armor.  The flurry of blows causes Demetrius to go on the defensive and miss his mark.   

Xanthippus and the Hoplomachus continue to be locked in combat, both with a single hit point left.

Turn 10: 
The Sons of Spartacus win the Initiative this round.

None dared enter the shrine, so the Guardian patiently awaits a challenger.

Janus manages to charge back into the combat and squares off against Aegis, then Demetrius against Hector, and Xanthippus vs. the Hoplomachus.  This will be the decisive combats.  However, Aegis challenges Hector with a Heroic Action.  Hector accepts and the two square off after all.  Janus and Demetrius pair off.


The second Equis moves to enter the shrine, but he is fired upon by the Greek archers.  One arrow manages to stick in the Equis armored sleeve, but does not injure him. 

Melee:
Janus gets to attack Demetrius first.  Demetrius takes a hit, and withdraws from the combat as he is broken.

Aegis and Hector square off.  The Gladiator hero fails to injure the Argonaut captain, and the gods forsake him.  Aegis manages to slip his blade past Hector's defense and take him out of the battle with a brutal wound.  The Gladiator falls from his horse dramatically.

Engrossed in their own battle, Xanthippus and the Hoplomachus continue to spar.  The Spartans heavy armor pays off again as his Hoplon absorbs the brunt of the gladiator's attacks.  However, the Argonaut can not capitalize and the Hoplomachus parries and dodges away from any counter-attack.


Recovery:
Demetrius remains broken as he falls back.

The remaining Sons of Spartacus begin to take All is Lost tests.  Seeing that their leader has fallen, Janus calls for the rest of his men to fall back.  This causes the remaining Sons of Spartacus to withdraw from the valley.

The Argonauts have claimed the Valley for themselves.  However, the Shrine to the Unknown Gods is still being protected by the Guardian of the Shrine.  They will have to satisfy themselves with the runes etched into the stairs of the adjacent temple, and the treasures of the grove.  Perhaps, with a suitable offering they can appease the Guardian and access the Shrine yet. 

Conclusion:
Argonaut victory!

Overall, a slaughter as the two sides battled relentlessly for access to the Oracle of the Unknown God.  The Gladiators all have 2 hits starting, as opposed to the Greeks that were mostly 1.  The Greeks had the numbers, but struggled to thin down the Sons of Spartacus.  However, the heavy armor of the Argonauts gave them the staying power they needed to press on.  The Sons horse also gave them great mobility, but it may not have gotten used appropriately as they got locked in combat.

Then, when the Greeks awakened the Guardian, things got real!  The Guardian was a nice added touch to the scenario.  We used the Minotaur stats, and I finally accomplished one of my long lived gaming goals to get a Skylander on the wargaming table.  It wasn't even a game of Dragon Rampant!       

Post-game, the Argonauts did okay.  Only 1 mercenary Hoplite dies.  Cleomenes the Mad recovered as did the archer.  On the Sons of Spartacus side, the Retarius died.  Hector was injured but was getting better, he had -1 Physique next game, removing some of his damage output.  The Sons earned nothing as the losers, while the Argonauts had a decent bounty of 8XP.  XP can be traded for advancements or coin to recruit.  The Greeks could easily replace their Merc Hoplite, but the Sons could not replace their Retarius.     

In my initial review of Broken Legions, I had some concerns about two elements.  The first was the crits/fumbles mechanics.  The second was how the weaponry, powers, stat lines, etc stacked to make resolving combats a bit fiddly.  In action, I can see some of my concerns were justified.  I definitely needed some cheat sheets for what my dudes were doing, and where I was rolling what.  I felt like a standard combat between two models took about 6 dice per side of the combat.  In addition, with alternate activation and a separate Melee phase some of who got to attack first, and the order of operations got a bit fiddly too.

The other issue is that I pretty much fought my warbands until they were dead due to how the All is Lost rules are written.  Models will turn away from a fight pretty easily, but warbands tend to fight until they are decimated and can not be rebuilt.  Then the losers in the campaign do not get enough to start to replace lost models.  If you lose a few games you are out of the campaign quick.

I love the idea and theme behind this game.  It has a lot of good flavor and concepts behind it. I think the mechanics still need another once over, but I can overlook some of that if the story I can tell on the tabletop is good.  Since I have forces I will probably play again!


You can follow Blood and Spectacles Facebook page for more fun: https://m.facebook.com/pg/BloodandSpectacles/posts/?ref=bookmarks&mt_nav=0

Or our website:

Or our Messageboard:

Or our Wargames Vault Page: