Monday, March 30, 2020

Men of Bronze: Battle Report- ...IF...


After Philip II’s victory over the Greek City-states at Chaeronea he was confident in his hegemony of Greece.  It is said that he sent heralds to the Ephors of Sparta and demanded their capitulation. 

“If I invade Laconia you will be destroyed, never to rise again.” 

Supposedly, the Sparta Ephors responded thus:

“If”

Today’s battle is represent this hypothetical battle between the Macedonians and the Spartans.  A true “What If” scenario!  See what I just did there.

Forces
The Macedonian army will be the well-oiled machine that crushed Thebes and Athens at the Battle of Chaeronea and end the freedom of the Greek City-States north of the Peloponnese.  We will use the same army list as the Men of Bronze rulebook has for that historical battle.  At Chaeronea it is said that Philip’s son Alexander led the cavalry.  Today, I will put the overall Commander as Philip and have him lead his own Companions.  Alexander will be elsewhere.

Philip II of Macedon
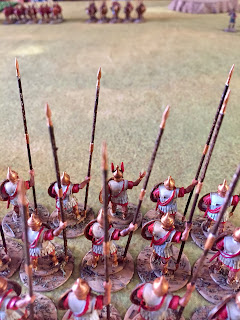
2 Macedonian Phalanx
1 Light Hoplites (Hypaspists)
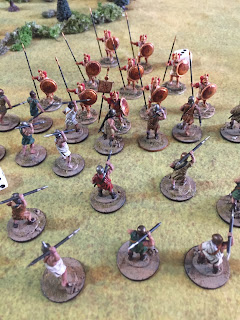
1 Heavy Cavalry- Led by Philip  (Companions)
1 Psiloi

The Spartans are no longer the military force they once were.  The Theban general Epamonidas had seen to that at such famous battles as Luectra.  The Helot slave state of Messina had been liberated by the Theban and the traditional Spartan caste system had been destroyed.  In fact, Sparta had few actual true Spartiates left at this stage due to land issues and military losses.  Their army was not what it once was, and relied more on mercenaries, Perikoi, and other allies. 

Spartans
1 Elite Hoplite- Spartiates and General
1 Drilled Hoplite- Perikoi
1 Militia Hoplite- Allies
2 Psiloi- Allies, mercenaries and helots
1 Peltast- Mercenaries

The Macedonians would generate 6 Arete Points to the Spartan 7 at the start of the battle. 

Scenario
This will be a standard Decisive Battle scenario as the Macedonians try to force the strait into the Peloponnese.  The battle will take place on a 72 BW by 48 BW board, with the standard BW being 1 inch.  The battle will be 8 turns or until a Collapse of one side or the other. 

Set-up
We go by the book on terrain placement, with alternating terrain placement via random roll.  This included some ruins, farm lands, a grove and rocky terrain.  Sounds like Greece to me!  The grove and a field flanked the Macedonian deployment zone, and it was split by a ruin.  The Spartans had the rocks on the left, a field splitting their deployment zone, and a field on the far flank.  The center was relatively open for a clash.


The Macedonian battle line from their right to left was: Light Hoplites, Macedonian Phalanx, Macedonian Phalanx, Psiloi (in the ruins) and the Cavalry on the far left.


The Spartan battle line from their right to left was: Peltasts in a field across from the Macedonian cavalry, the Milita Hoplites in a different field in loose formation, the Perikoi in phalanx, the Spartiates in phalanx both facing the fearsome Macedonian phalanx units, and the 2 Psiloi units in the rocks on the flank.  The Spartans apparently learned from the lessons of losing several battles to Thebes and placed their best units across from the Macedonians best infantry. 

Turn 1:
Both sides collect their Arete Points, and consider their Initiative bid.   

The Macedonians won the Initiative by bidding 4 Arete Points to 2.  The Macedonian forces moved up across the board.  The Light Hoplites stayed in open order for maximum maneuverability to counter the Spartan Psiloi units across from them.  The Phalangites marched forward.  Meanwhile the Psiloi used Arete to scramble into the ruins for cover.  The Cavalry moved forward, but there way was partially blocked by a field in front of them.

The Spartans did not interrupt.  They used some Arete points to move forward with their Psiloi on the flank, they were measuring up their chances against the Hypaspists.  The Spartan units in Phalanx slowly marched forward, careful to not out distance their allies in the field on their right.  The allies slowly trudged forward, encumbered by the rough terrain.  Finally, the Peltast mercenaries moved up towards the field between them and the Macedonian Heavy Cavalry. 


The two sides were closing the distance to prepare for action. 

Turn 2:
The two sides again collected their Arete points.  The Macedonians won the bid again, suspiciously similar to the last turn. 

The Bronze shields surged forward, while the second phalanx unit with white shields held back a bit.  This created a slightly staggered main battle line.  The Hypaspists ranged ahead on the flank, still in loose formation to counter the enemy Psiloi from harassing the main force.  Ths Psiloi in the ruins ventured out as they saw the militia across from them was plodding through the field.  The Heavy Cavalry moved up and started to move in on the Spartan flank. 


The Spartans also moved forward.  The Psiloi rushed out of the rocks and confronted the Macedonian light hoplites.  They threw Javelins, but they fell short.  Woops. 

The Militia in the field got to the edge, and formed Phalanx immediately.  The enemy Heavy Cavalry was approaching.  The Perikoi and Spartiates inches up, but kept their flaks protected from the roving enemy horse.  The Peltasts rushed across the field and threw their Javelins at the Companion Cavalry, but the horseman’s breast plates kept them safe.  This left the cavalry with a tough decision about what to do next.


Turn 3:
Both sides collected their Arete Points.  Macedonians bid 2, while the Spartans bid 3.  Spartans go first. 

The Spartans start by having the Psiloi aggressively charge the Hypaspists before they can form up.  The initial assault is thwarted, but the first squad is soon supported by their brother Psiloi.  In the ensuing exchange, both groups lose 1 Courage in the fighting. 


The Peltasts in the field also choose to throw their Javelins at the Heavy Cavalry but again fail to injure the riders.  The rest of the Spartan force is content to stay where they are and let the Macedonians come to them since their flanks are protected from roving cavalry.   


The Macedonian Pike blocks move forward towards the Spartans.  They judge the distance to far to mount a charge, but dare the Hoplites to come at them…. Bro.  The Psiloi hold their ground to flank charge any unit that tries to maneuver into the pikeman’s flank. 

Meanwhile, Phillip himself makes a dangerous decision to charge his cavalry into the fields to try and rout the Peltasts there.  The Peltast try to Evade, and almost make it thanks to the rough terrain.  Sadly, almost doesn’t count and the cavalry men ride into them and reduce them 2 courage thanks to the charge.  The Companion Cavalry are not phased by the Peltast’s feeble attempts to fight back.

Turn 4:
The Spartans and Macedonians collect their Arete Points and plan their strategy for the turn.  The Macedonians bid 2, while the Spartans bid also bid 2.  The Spartans decide to up their bid 1.  They judge now is the time to strike, and begin the turn. 

The Spartiates judge the distance and determine now is the time to charge their foe.  For their part, the Macedonians are game, and Counter-charge.  Both sides spend Arete points and the two units clash head-on with the crash of spear on shield! The pushing and shoving results in both sides losing 1 Courage.  Upon review, the Spartan charge would have fallen short but the Macedonian Counter-charge allowed the connection. 

The Psiloi and the Hypaspists continued their whirling battle. The Hypaspists lost 1 Courage, while the Psiloi lost 2 Courage.  No one starts wavering.  The Spartan Psiloi are close to routing and the gamble of their charge may not have paid off. 

On the opposite flank, the cavalry continue to pursue and push back the Peltasts on the opposite flank.  The Peltasts are down to 2 Courage, and the Cavalry are unhurt.  The Peltasts are keeping the Macedonian force and are tying them up and dragging them further from the main fight. 


The Perikoi and other Macedonian Pikeblock charge and counter-charge each other.  The fighting is fierce, but the Perikoi are on the defensive and lose 1 Courage and pushed back.  Seeing this, the militia Hoplites break formation and charge towards the flank of the melee, but fall short due to leaving the difficult terrain of the fields.  This causes them to Waver as they close in. 


The Macedonian Psiloi move up and lob javelins at the Militia Hoplites, but fail to cause any further damage.

Turn 4:
Both sides collect their Arete points, 6 for the Spartans and 5 for the Macedonians.  No one has lost any units yet, but that looks like it could change this round.  Most of the warriors are engaged, but the Spartans bid 2 Arete Points, while the Macedonians hold theirs for Re-rolls. 

The Spartans start by rallying their Militia from wavering.  They then form into a phalanx again, and launch their charge into the Macedonian Phalanxes flank!  This triggers combat for that melee.  The Spartans are out of Arete points.  The combat does not go the Spartans way, and the Macedonians push the Perikoi and the militia back.  The Macedonians lose 1 Courage to 3, while the Spartans are reduced to 2 and are wavering!  Macedonian re-rolls were critical in this engagement.

The Spartiates also are pushed back and lose Courage to the Macedonian Phalanx.  Again, Macedonian re-rolls pushed the Spartans as they were reduced to 2 Courage, but held firm.  The Macedonians were down to 3. 

The Companian Cavalry continued to push back the Peltasts, but that was the plan.  The Peltasts were close to routing, but they were doing their job tying up the Heavy cavalry and keeping them away from the decisive combats. 

Finally, the Spartan gamble of using the Psiloi vs. the light Hoplites was playing out on the other flank. The Hypaspists were reduced to 1 Courage, but that was enough to rout the Spartan Psiloi.  The
desperate gamble on that flank had failed.


The Macedonian Psiloi move to prepare to support their phalanx engaged with the Perikoi and Militia Hoplites.    

At the end of this turn, things looked bad for the Spartans. 

Turn 5:
With the Spartan Psiloi routed, the Spartans only earned 4 Arete Points.  The Macedonians had the advantage with 5 Arete Points.  The Macedonians bid 1 to try and go first so they could get their Hypaspists into a support position against the Spartiates.  This is enough to win as the Spartans want all their Arete Points for Re-rolls to try and break their foes. 

The Hypaspists move towards the scrum between the Macedonian Phalanx and the Spartiates.  The Macedonian command determines it is too far away to charge in and support and holds the Arete Points for re-rolls in the fight. 

That is a wise move.  The Spartiates manage to reduce the Macedonians down to two Courage, but in return effective use of Re-rolls allows the Macedonians to route their foes.  The Spartiates decide discretion is the better part of valor and make a break for it.  


The Macedonian Heavy cavalry final routs the Peltasts they were fighting too.


The Macedonian Psiloi move in and support their Macedonian allies fighting the Perikoi and Militia allies.  

The fighting is fierce and both sides make use of re-rolls.  The Perikoi roll horribly and only reduce the Macedonians to three Courage.  In return, they are also routed from the field causing the entire Spartan army to be routed.    


Conclusion
It was a sad day for Sparta.  Phillip made good on his promise and made low the city of Sparta.  It would not rise again.  Soon, he was killed on an Assassin’s blade.  His son Alexander’s attention was elsewhere….    

As the Spartan player, I knew that I had an uphill battle.  The Macedonian Phalanxes are pretty tough, plus the Heavy Cavalry could sweep in and easily flank my main forces.  I would need to rely on my light forces to carry a higher than normal load.  The plan was simple, use the Psiloi to overwhelm the Hypasipists so that they could come back and help the Spartiates with the Macedonian Phalanx.  The Perikoi would be helped out by the Allied Militia hoplites, and the Peltasts were to keep the Cavalry tied up long enough for the battle to be over by the time they could arrive. 

The plan ended up being executed pretty well.  Sadly, the Psiloi couldn’t quite pull off the task assigned to them.  Once they fled, it was pretty clear what way the wind was blowing.  In addition, the Militia supporting the Perikoi fought particularly poorly.  Finally, the Peltasts did their job perfectly, and were the bright spot of the battle. They tied up the Heavy Cavalry for most of the game, and even when they fled; the Macedonians were out of position.  By the end of turn 4, the writing was on the wall.  My only hope was some amazing rolling and poor collapse tests on the Macedonians part.  Needless to say, that did not happen.   

One other very interesting aspect of this battle was that it was fought over the course of a couple weeks.  I am very lucky in that I can leave my wargaming table set-up 24/7/365.  My wife and I came back separately and at various times to play the game here and there.  We would play out a turn or half turn, make note of where we left off and come back much later.  We were trying to fit it in between various tasks that were impacted by/during the Pandemic.  Therefore, the game had little interaction between the actual players compared to a normal game, and gameplay had large gaps between sessions.  Frequently, I would walk away and think about what I wanted to do next; come back and see what had happened and then try to adjust my plan.  It was interesting, was a very different experience, but it worked. 


You can follow Blood and Spectacles Facebook page for more fun: https://m.facebook.com/pg/BloodandSpectacles/posts/?ref=bookmarks&mt_nav=0

Or our website:

Or our Messageboard:

Or our Wargames Vault Page:

Monday, March 23, 2020

Battle Report: Rampant Stars- Factory Assault on Mundos

Polanksi's Lancers were contracted to harass operations on the Planet of Mundos.  The primary export was timber and wood products.  Therefore, the Lancers were focued on attacked executives, storage facilities, and other infrastructure.  Their employer Lacstar Inc, was in negotiations to purchase the Timber rights from the VolSaab Corporation, and any disruption to supply would cause the stock price to drop.  This would make buying the rights much easier.  

VolSaab was wise to such actions.  Therefore, they had contracted out to two mercenary units to operate on Mundos to help protect their investment and get the best sale price of the rights.  The Rose Guard and Thor's Hammers were providing security on Mundos.  

Today, the 14th Ulhans of Polanski's Lancers have planned to strike at a early staging factory near the equatorial forest region.  Volsaab had built a number of logging and transport roads through this region so transports could bring newly cut lumber to nearby processing plants.  The Lancers decide to use this network to strike at the processing plants.

Near the lunch hour, Mecha from the Lancers were sighted by truckers moving along the road towards the Earl G. Howanzer Plant.  The plant had a contingent of Thor's Hammers on station, but additional reinforcements were requested from the Rose Guard, who dispatched elements of the 3rd Thorn Guard to assist in the defense.  

Today's battle was a rematch between myself and my family in a game of Rampant Stars.  I have found the rules for Rampant Stars work very well for streamlined Mecha combat as well as Unit-vs-Unit battles.  We pretty much used the same army lists as we last used on Mundos that were built by gut feel rather than any actual point system.

Forces
The Lancers used a variety of Irregular Light Mechs with speed upgrades backed by some Regular heavier units.  If I recall, there were 4 Irregular Lights and 4 Regular Armored units with various additional upgrades.

Thor's Hammers had 2 Regular Mechs and 2 Irregular ones with Armor upgrades.  The Hunchback also had a Heavy Weapon upgrade.  That thing had caused me headaches in the past.

The Thorn Guard had 3 Regular Mecha with armored upgrades, 2 with some sort of shooting upgrade, and 1 Irregular light mech.

Looking at them now, these probably aren't that balanced, by such is life.

Mission
The Lancers needed to target the enemy factory and reduce it to 0 hits.  it started with 10 Effectiveness points.

Set-up
The board was a 4x4 foot board.  A dirt road cut across the board diagonally.  A forest took up the south corner.  Two large areas of fields were also present on the opposite side of the board.  The Factory was next to the road on the Northeast side of the board.

The Thor's Hammers were deployed within 6 inches of the Factory.  The Thorn Guard were coming in as a clump from the Northern board edge.  The Lancers were in two groups.  The Lights led by a Regular mech were coming down the road.  The rest were emerging from the wood line at the board edge.


Battle
As this was a battle against my family, my notes are not as clear as they normally are.  I spend a lot more time interacting with them than taking notes.  However, the following is a general idea of how the battle flowed.

The Defenders went first and started to move out to defend the facility.  The Hammers were careful to stay within command range of their officer as they moved towards the fields to intercept the larger mechs emerging from the woods.  Their Hunchback was leading the way.  The Thorn Guard also moved up to support.  They were intent on getting between the factory and the attackers.


Some poor command rolls by the Lancers on the roadway led to a slower than expected advance.  Their emerging support forces had a similar comms issue due to the dense jungle canopy.  The Lancer leader led the way and took a series of long range shots at the Hunchback, that did nothing more than tell the Hunchback pilot the range of his opponent.


A devastating return barrage from the Hunchback simply shredded the Lancer leader for his impudence and reduced him to 1 hit.  He promptly fell back to avoid utter destruction.  Soon, the h\Hammers were taking up defensive positions in the fields, while the Regular Lancers warily moved in taking potshots as they approached.  Thankfully, effective ECM warfare from the Lancers kept the Hammers on their toes, unable to get a clear understanding of the situation.


Meanwhile, the Thorn Guard took the approaching Lancer Hit and Run force head-on.  It quickly turned into a close range particle beam fight as the little guys closed in rapidly with fire support from their larger brother.  The Thorn Guard officer spent most of the battle on the Comm-Link to command relaying data while his troopers did the hard work.

A heavily damaged Hermes II charge the Panther Regular mech to try and clear a path to the factory.  However, the larger mech quickly disposed of the little guy by kneecapping him with a swift kick, and then a stomp to the face.  That was a decisive moment, as despite taking several missiles, rockets, cannons, and beams the Thorn Guard was dishing it back out.  As another Light Mech went down and a third was shredded down to 1 Effectiveness Point, it was clear that the Thorn Guard line was going to hold.

On the other Flank, the Hunchback absorbed a lot of damage, but ECM kept the Thor's Hammers from striking back decisively.  Then, the ECCM managed to clear the static long enough for the Dragon and Whitworth to focus fire and severely damage an approaching Lancer Quickdraw.  They had decisively turned the battle on the flank as well, and the link up of the Regular Lancers and their lighter vanguard no longer looked possible.

A devastating salvo of firepower also took out the final mecha in the Lancer road assault.  It was clear the battle was lost and the Lancers fell back into the jungle to lick their wounds.


Conclusion:
The Thorn Guard lost 1 Light Mecha, and had 1 Regular Mech heavily damaged and crippled.  Thor's Hammers had 1 Mech crippled and another lightly damaged.    However, the factory was unharmed as the steel wall was not breached.

The Lancers lost 2 Light Mecha, 1 Regular Mecha, and had a Light and Regular severely damaged and crippled.  They completely failed in their objective.  The LacStar contract had been big....  but maybe not THAT big.  So far, the Lancers have lost every engagement on Mundos that they have fought in.  Maybe it was time to withdraw with some of their reputation intact.....


My initial attack ended up going in a bit piecemeal due to some command difficulties.  I did not do as good of job as the Thorn Guard and Thor's Hammers keeping my Leader in range to get the activation benefits.  However, soon, they were also having command problems and I started to shift my Regular Mechs over to link with the lighter vanguard.  However, I spent a bit too long obsessing about the very dangerous Hunchback and not enough time on the objective.  Ultimately, this lack of focus caused me to loose the battle.   


Overall, Rampant Stars has again proven to be a fun, quick little game that was fought in about an hours time between 8-10 units per side.  We didn't really use any of the scenario, complications, or location rules for this one.  Instead, we quickly set-up a board, got our models out, and made an objective on the spot.  I am pretty sure that point-for-point the Lancers were out numbered, but it was a fun family game over the afternoon.  In that sense....

Mission Accomplished!          


You can follow Blood and Spectacles Facebook page for more fun: https://m.facebook.com/pg/BloodandSpectacles/posts/?ref=bookmarks&mt_nav=0

Or our website:

Or our Messageboard:

Or our Wargames Vault Page:


Monday, March 16, 2020

Random: What to Expect When You Are Expecting


The books have been closed on 2019 for the Blood and Spectacles Publishing.  This seems like a good time to say “Thank You” for all of you who have purchased a product, contributed to our work, shared a review, posted a battle report, and provided help and feedback about any Blood and Spectacles Game.  Rest assured, I try to track down and read all the feedback I can find whether they are reviews, battle reports, social media posts, message boards, or comments on the Blog.  It is your help that provides impetus to keep me making games.  Thanks to your help, Blood and Spectacles had a good year with a lot of great accomplishments! 

Highlights includes:

·         Publishing Men of Bronze with Osprey
·         Getting 2 Work-in-Progress games on the Blog
·         Selling two new Wargame book pitches
·         Getting two new games up on the Wargame Vault

I look forward to continue to put out new games over the next few years.  I have frequently said that being a freelance wargame designer makes you very little money, you have to do it because you want to do it for yourself.  Your support helps fuel my desire to keep making games, to set aside time to make and test them, and to get the models and resources I need to keep making them. 


I once had a conversation with a friend and freelance author.  He was explaining how to survive as a freelancer.  He said to me, “One book won’t pay for itself.  Once you have 50 books in your catalog; that is when you can start to sustain yourself.”  I have found something similar to be true for Wargame Design.

So far, I have:

·         1 Published book
·         2 Under contract
·         9 games to buy on the Wargame Vault
·         6 Free and Complete Games
·         4 WIPs

Not too bad.  However, I still have a couple of games concepts that are in the hopper.  They have had some development work on them, but are not ready for WIP status yet.  Here are some items you can expect to see upcoming:

·         1 of the WIP will get completely finished.  Do you have a preference?  Tell me in comments…
o   Glittering Void- A game of space mecha.  Need to finalize the Campaign system, source some models, and do more complete Playtesting
o   Only the Strong Survive- Dinosaur fighting game.  Need to finish the alternate Dinosaur types, take photos, playtest, and update for publication.
o   Redline- Car Combat game.  Want to update with some better faction rules, campaign system, and get better photos.

 ·         Magelogue
This is a game of Fantasy Gunpowder at a Corp Command level.  Imagine Warmaster meets LaSalle.  Rival factions of Fantasy races battle for dominance using a combination of magic firearms, fantastic beasts, and high magic. Since this uses very different mechanics from all of my previous work, it is taking the most time.      


I know, I know.  I have been promising this one for a long time.  It is slowly evolving, but always seems to fall back in the Queue. 

·         Under the Martian Yoke
This is a survival horror game set in 1938, post the Martian Invasion of Orson Welles.  The Martians have won.  The East Coast has been devastated, and you play survivors trying to escape the Martian terror.  Imagine LastDays, Mordheim, This is Not a Test, but where the setting is more modern/WWII.  The focus is action economy, randomized warbands, campaign play, and an escalating Danger Level that adds friction to the game.   


·         Darkest Night
Things that go bump in the night are gathering into a storm to take over humanity.  Ancient evils such as Vampires, Werewolves, Mad Scientists, Sorcerers, and more are coming to take over the world.  Only Human sponsored Hunter groups can stop them.  Imagine a Frostgrave/GhostArchipelago game only set in a world of modern, urban horror.  Choose your patron well, for it will dictate the composition of your gang.  It would be a campaign base game with heavy emphasis on darkness, modern weaponry, and the supernatural.


·         Korean Skies
The battle between newly created Jet aircraft of the United Nations (and the allies) and the North Koreans (and their allies) in the skies of Korea.  This is a historical, airplane game that would feature period aircraft, historic scenarios, height and firing bands, and maneuver options.  I am sure the old Aeronautica Imperialis would be a strong influence.  It would NOT use a hex grid.

·         Men of Bronze Inspired Historicals  
With the release of Wars of the Republic in a year or so, I might release a group of Men of Bronze inspired Historical games for specific periods.  I have some work done for the Third Servile War, The Wars of the Diadochi, the Neo-Assyrian Empire, the Viking Age, and others.  They would probably be stripped of the core combat mechanics and published on the Wargame Vault.  


·         Friends and Foes
This would be a linear campaign wargame detailing the Dakota War of 1862 with several historical scenarios.  This particular campaign is close to my heart as it occurred locally to me.  The mechanics would be small unit vs small unit with various skill levels based on the type of units.  Activation would be similar to Dux Bellorum where different unit types would determine action sequence.  I imagine this would be a WargamesVault only release as well since the subject and conflict are very specific. 


Those of you who have been following the Blog and Blood and Spectacles Publishing for a while will see that some of my previous concepts have fallen back into the Concept folder again and no longer on the list for development.  One that I regret the most is Skies of Fire, but as you also know…. Things change.  Sometime things jump the Queue because I am excited about them in the moment and have the time to pump them out.    


So, once again Thank you for your support whether it be financial, mental, or spiritual.  Without you, there would be no Blood and Spectacles Publishing.  After all, to be a Wargame Designer you need two things; Wargames and people to play them.  Thanks for playing!   


You can follow Blood and Spectacles Facebook page for more fun: https://m.facebook.com/pg/BloodandSpectacles/posts/?ref=bookmarks&mt_nav=0

Or our website:

Or our Messageboard:

Or our Wargames Vault Page:


Monday, March 9, 2020

Battle Report; Aquanautica Imperialis- Operation: Hemlock


Boss Skarbash leaned back in his ramshackle throne. Bits of jetsam and flotsam had been collected by his Gretchin and Oomie slaves to build it. The pieces were from sunken or beached merchant ships his pirate boyz had waylaid or sunk. It was a symbol of his success as a war leader and it was intnetional that he sat in it now and held court with his commanders.

Da Oomiz stop us from getting more boyz across,” Kaptin Krumprukk snarled. He smashed his meaty hand down on the map, right over Baron's Rest.

Boomgob joined the Goff Kaptin in his anger, “Their big birdz managed to strike the boyz gathered near Look-out Pointe. We can expect their armored wagons to follow-up.”

Skarbash nodded, “The Oomiez are skilled skumgrod. Badwrench, tell them our surprise for the Oomiez.”

The Big Mek grinned from ear to ear. “Oomiez are strong.... when they are well fed. Skarbash has sent his best pirates into the Approaches. They have been waiting for days, watching.”

Skarbash laughed, “They know the routes the Oomiez take. I know Oomiez, if their fuel, las-packs, and food is at the bottom of the ocean; they can not stop us. Badwrench, send my boyz the signal”

The Big Mek bowed respectfully, and tottered off to the Vox station The Ork wolf-packz were being let loose to hunt.


** ** ** **

Today's battle will be a game of Aquanautica Imperialis between the Ork Kill Fleetz and the Human PDF Naval forces.

Forces:

Ork Kill Fleet
Sneaky Gitz w/Traktor Kannonz and Nobz 190
Sneaky Gitz w/Nobz and Ram 175
Grot Sub
Grot Sub
Grot Sub

515 Points

Ammoriss Naval PDF
2 AN Protector
AN Hunter w/HK Torpedo
3 AN Faithfuls
1 Constant
4 Merchantmen Transports

515 points

Mission:
This is a Convoy protection mission in the Approaches to the Deff Islands. The merchant vessels are carrying key war materials to the Imperial held ports. The Ork submersibles have been waiting patiently in the approaches and learning the common approach routes used by the convoys from North Ammoriss. With the coded message from Big Mek Badwrench, they have been cleared to begin to attack these convoys.

The Orks win if they sink 3 of the 4 merchant ships. The PDF win if more than two escape the board.  

This game could have been played with the traditional Aquanautica Imperialis rules, or using the Battle for the Depths variant.  I chose the traditional format, as I had the templates handy.  

Set-up:
This battle is being played on a 4x4 foot table. The entire board is deep water in the Approaches warzone. Therefore, there is no terrain on the board.

All the Ork Attackers are submerged so they do not need to be placed on the board. The Imperial ships are placed touching one of the board edges and they are trying to escape the opposite board edge.

Turn 1:
Initiative: PDF

Move:
The Imperial Convoy begins to scatter as Grot Subs were spotted coming to firing depth in the distance.

The Faithfuls tried to pull ahead, with two of the merchants slipping in behind a Protector class to the North. On the South side, the convoy steamed ahead, protected by a pair of Constants and a Protector.

The Grot Subs seemed to be focusing on the Northern ships.

Battle:
At the watch officer's signal, the Imperial forces launch a barrage of torpedoes into the water towards the enemy subs. The Grots also fired their barrages.

End:
The torpedoes cross paths as they move towards their targets.


Turn 2:
Initiative: PDF

Move:
The Grot Subs all try to go Run Silent, Run Deep. Two manage to make the dive, but one fails. The Imperial torpedoes find their mark and send Grot Sub 3 to the bottom with a hit. First blood to the PDF.

The Faithfuls put themselves into the line of fire for the Grot Torpedoes. Meanwhile, the Merchant ships keep trying to get out of the way of the Grot torps. The escorts try to stick with them.

An Ork Sneaky Gitz comes to firing depth off the North edge of the Convoy with a bead on the two Merchant ships.

Battle:
Imperial forces manage to Reload Ordinance.

The Sneaky Gitz fire a barrage of Torpedoes at the lead merchant ship to the North. Two hit the target, but bounce off as duds, while the other two shoot under the merchant and towards the Protector.

End:
The Protector's PD gunners were looking the other way and completely miss the two ork torpedoes closing in on them. The Ork weapons spring from the water and detonate against the escorts hull. The devastation is enough to destroy the little craft instantly.

The PDF guns on one of the Faithful take out a Grot torp, but one sneaks past the screen.

6 wake markers are removed, so all wake is taken from the board.


Turn 3:
Initiative: Orks

Move:
The Faithful mine layers keep on course and cross towards the Southern side of the battlespace as a Sneaky Gitz sub appeared at firing depth in that direction, their target the Transports on the south side of the convoy.

Meanwhile, the North merchants are left unprotected due to the unexpected loss of the Protector escort. The ork Sneaky Gitz moved in. The Grot subz also come to firing depth, but the Constants move to intercept them.

Battle:
The Sneaky Git Reloads Ordinance and fires four torpedoes into the rear of the fleeing merchant ship. One sinks home and detonates, causing the ship to shake; but it keeps floating. Three others scoot past towards the Constants.

A Grot sub fails to Reload Ordinance, and is attacked by a Constant Torpedo attack. The Imperial torpedoes miss the the mark.

The second Grot Sub Reloads and fires at the lead Northern merchant ship. The Torpedo strikes home and damages the ship.

The Sneaky Gitz to the South fires his torps at the Protector, who easily smashes them. The Traktor Kannonz fire at the Merchants and misses.

The second Constant fires at a Grot sub and misses due to distance.

End:
The Imperial torpedoes miss the Grot sub and flash past.


Turn 4:
Initiative: Orks

Move:
The Sneaky Gitz with the Traktor Kannonz Runs Silent, Runs Deep and leaves the board as the Imperial Protector closes in on him. The Southern Transports keep going with the faithful leading the way.

Meanwhile, the Sneaky Gitz pursue the Northern transports. The Constants try to circle back. One Grot Sub tries to Run Silent, Run Deep and fails. The other closes in for the kill.

The ANS Hunter comes to firing depth to defend the Northern Merchant ships.

Battle:
A Grot Sub sinks a torpedo into the bow of the first transport which cripples it.

The AN Hunter sinks two torpedoes into the side of the Sneaky Gitz.

The Sneaky Gitz fails to Reload Ordinance.

End:
Remaining torps streak around and leave the board. The exception are a set of 3 that streak across the center of the battle space.


Turn 5:
Initiative: PDF

Move:
The center torpedoes disrupt the Faithfuls and their charge. The transport needs to turn to avoid them. That is when a Sneaky Gitz comes to firing depth behind them. The Protector leads the second transport towards safety.

To the North, the AN Hunter moves in for the kill on the Ork subz. A Grot sub fails to Run Silent, Run Deep a second time and picks up a Constant tail. The other Grot sub manages to Run Silent, Run Deep and leaves the board.

Battle:
The Northern Sneaky Gitz is crippled, but manages to fire a few torpedoes at the fleeing Transports. The crippled one is hit again, but does not sink. Meanwhile, the AN Hunter Reloads Ordinance and unloads a salvo at the Ork sub and destroys her.
The Southern Sneaky Gitz hits the fleeing sub with a Torpedo and damages it. Plus, the Traktor Kannonz hit it and pull it back towards the Ork sub. The Faithfuls see a group of torpedoes chasing them and drop a minefield to screen their sterns.

A Constant chases down a fleeing Grot Sub and sinks her with a pair of precision torpedo shots.

End:
The Torpedoes chasing the Faithfuls hit the Torpedo screen and start to detonate. 3 of the 4 are stopped, but one manages to bounce of one of the escorts and explode harmlessly.

Then the Mines drift.

There are 8 wake markers on the board, but the wake removal roll is 6 and 5 so all wake is removed.

Turn 6: Final Turn
Initiative: PDF

Move:
The last Grot Sub comes to firing depth on the most heavily damaged Transport. The Constants tr to come around, but are out of position. The AN Hunter Runs Silent, Runs Depp and dives away from the battle.

The Protector leads her transport to safety, while the Faithfuls try to come around and get a bead on the Grot Sub. They are out of position as well.

Finally, the Sneaky Git surfaces and rams into the last Transport in a bid to sink her. It is a dramtic and desperate act, but ultimately successful. However, the Sub is destroyed as well as the Oomie transport.

Battle:
It all comes down to this. The last Grot sub needs to Reload ordinance, hit, and sink the heavily damaged Human transport ship.


The Runtherdz managed to get the torpedo tube reloaded. The spotterz line up the shot and fire. The Runtherd Kaptin orders the krew to fire. With a whoosh the torpedo leaves the tubes and streaks towards the transport. It fails to lock on an plows through the water under the target.

End:
Mines drift

Conclusion:
It went down to the last torpedo shot, as a good game should. The Human PDF managed to fend off the Ork sub pack attack and get the transports to Da Deff Islands. Valuable food, las packs, and fuel to keep the war effort moving arrived to cheers from the troops. The Ammoriss Naval PDF did their job.

Warboss Skarbash slammed his fist down into the table. It splintered into a hundred pieces as grot slaves and Oomiez scattered. His pirate fleetz had been decimated and yet they still failed to stop the flow of war material.

Kaptin Krumprukk, tell your boyz to find their own way back to the Tradin' Post. They can swim if they need to!”

The Deffskull knew that the attack on Baron's Rest was doomed. There was no need to waste further resources there. Instead, they had to find another way to stop the Oomie war machine.

Snazgob, get your Air Boyz ready. We are going to have to hit those boats a different way.”


You can follow Blood and Spectacles Facebook page for more fun: https://m.facebook.com/pg/BloodandSpectacles/posts/?ref=bookmarks&mt_nav=0

Or our website:

Or our Messageboard:

Or our Wargames Vault Page: