This is a first attempt at a Blood Bowl match report. I wanted it to read like a Cabalvision Broadcast of a game on the radio or television. Let me know if you like this format or would prefer another.
I have been playing Blood Bowl for a long time, and got the new edition when it came out. You can read my review here. Since then, my daughter has been learning to play using the boxset. We have managed to play a handful of halfs and games here and there. However, this was our first attempt to document a full game.
For this exhibition game, we stuck to the models in the box. In addition, we decided to not use Fame or Team Re-rolls. Just straight skill re-rolls only. This is a standa alone game. My daughter took the Ork team, and I took the coaching role for the Humans.
Enough talk! Let's play some Blood Bowl.
* * * *
Blood Bowl Exhibition: Deep North League- Southern Regional Conference
Lord Summervale: Welcome ladies, gentleman, peasants, and beasts to Cabalvision IV’s regional coverage of the Deep North- Southern Regional Blood Bowl Conference. After the break-up of the NAF, small local leagues like this have been popping up across the Old World. Today’s coverage is a hyper-local affair and we at Cabalvision IV are glad to bring you coverage of the game no matter how insignificant it is!
I, Lord Summervale, will be today’s announcer. I am joined at Citadel Arena in the booth with my faithful comrades Mad Johan for commentary, and thrower for the Rat Packers Favre Da’ Cheesemonger.
Mad Johan: Great to be here today Summervale, no matter where here is. It looks to be perfect weather for Blood Bowl.
Favre: Squeak, squeak.
Summervale: Today is an exhibition match…
Mad Johan: So even less important than usual.
Summervale:… between the Nottingham Nobles human team and the Skullsmash Reeverz ork team. It is great to be here at the Nottingham Nobles new turf that their fans affectionately call the Citadel.
With that, let’s take look at our starting line-ups for today’s match.
The Nottingham Nobles will be….
….led by their starting Thrower Rick Priestley.
Mad Johan: Rick is apparently also a major player in the formation of the Nobles team.
Summervale: He will be accompanied on the pitch by two Blitzers: Matt Ward and Jervis Johnson. In addition, the Nobles are fielding two Catchers; Alessio Cavatorre and Gav Thorpe. Then the rest of the line-up is made up of their trusty team of lineman.
Mad Johan: No point in namin’ them till they do something useful.
Summervale: Right oh old chum. Onto the Skullsmash Reeverz. They will be led by their infamous team Kaptin Grimgrod Rotgut as the Thrower. He will be accompanied by 2 blitzers; Ruk Ruk and Gobsmacka. In the line-up are also a pair of Black Ork Blockers, Da’ Big Smacka and Bad Ammer. The rest of the line-up is filled up with line orks.
Mad Johan: I have never heard of any of these guys. What league are we in again?
Favre: Squeak, Squeak.
Summervale: With that, since these are new expansion teams in an exhibition match each team is relatively new to the game. They have elected to play an open and fair game of Blood Bowl with no Team re-rolls in place.
Mad Johan: A team what?
Summervale: Both teams will be using the bog standard rules for Blood Bowl found in Nuffle’s main handbook. Nothing fancy here.
Mad Johan: Let’s get on with it then!
Favre: Squeak, squeak.
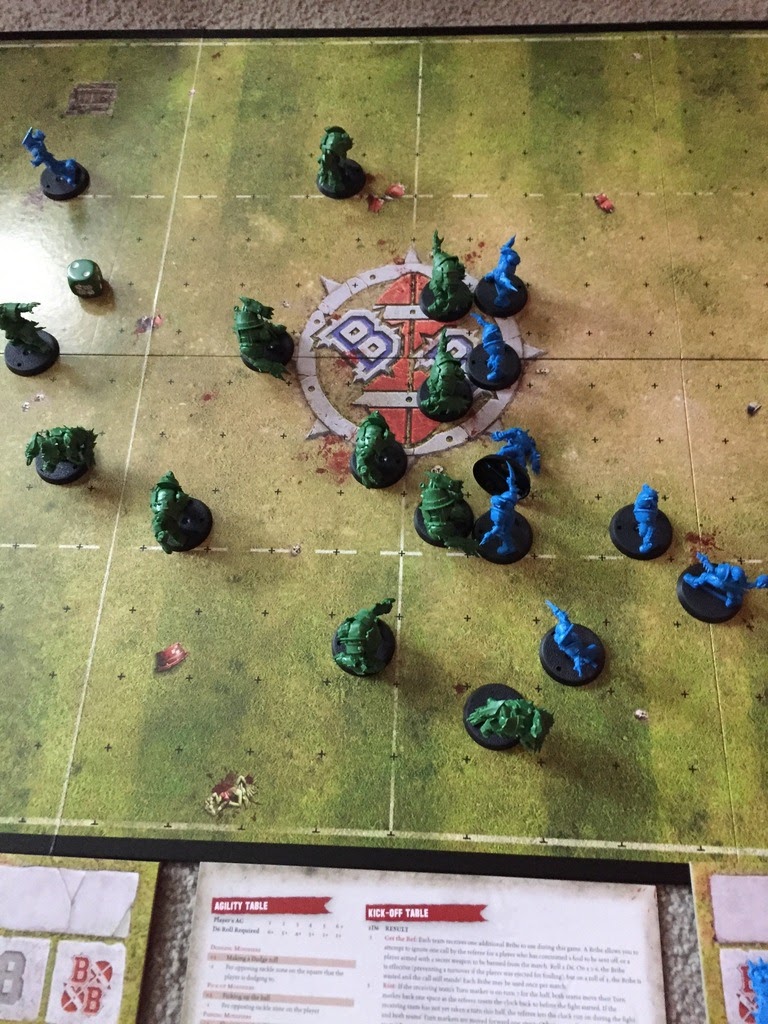
Summervale: After the coin toss, the Skullsmash Reeverz have elected to kick to the Nobles. Both teams take to the pitch and get ready to play. The Orks are unsubtle and stack the line, while the Humans play a bit back with most of their team.

Mad Johan: Are you ready for some Blood Bowl!?!
Favre: SQUEAK, SQUEAK!
Summervale: The kick-off is up and lands straight in the hands of the Nobles catcher Gav Thorpe (#4)! The nobles advance with a blitz by Mat Ward (#2) assisted by a trusty Lineman. However, Ruk Ruk (#2) stands Mat up, and no progress is made.
Mad Johan: Blitzer on blitzer means no one can get the skill advantage.
Summervale: On the other side of the line, Jervis Johnson (#3) and a Lineman manage knock down Da’ Big Smacka (#5).
Mad Johan: What a great assist by Jervis!
Summervale: The Nobles begin to get some penetration at the line, but a missed block sends an ork and human to the ground. From there the Skullsmash Reeverz start flooding across the line of scrimmage in a gap. Bad Ammer (#4) leads the way and gets in Thorpe’s face! A Nobles lineman tries to knock Bad Ammer aside with Thorpe’s help, but only succeeds in landing on his own face.
Mad Johan: That is going be in tomorrow’s highlight reels, what a flop!
Summervale: Bad Ammer smashes Thorpe into the turf and the ball goes shooting out onto the field. Priestley scrambles over and tries to grab the ball, he has it for a few moments before he is tripped up by Bad Ammer and falls to the turf the ball shooting free near the sidelines.
Ruk Ruk pushes a Noble into the frenzied crowd to clear the lane. An Ork lineman (#9) scuttles forward, scoops up the ball and makes for the end zone. His fellow Skullsmash Reeverz stream behind him. It does not look good for the Nobles. Plus, Gobsmacka puts a punishing hit on Alessio.
Mad Johan: He will feel that in the morning!
Summervale: Priestley desperately blitzes the line ork, and the two crash down in a tumble. However, the line orks (#9) stiff arm sneds Priestley to the dug-out Knocked Out. However, the ball bounces loose again! This time, the Ork Blitzer Ruk Ruk (#2) scoops up the ball and goes for the end zone, his fellow Orks clear a path and no Nobles are in position to stop the Ork blitzer.
Thorpe tries to get close to Ruk Ruk but can only slow him down. Alessio tries to break away from Gobsmacka, but is sent to the dug-out unconscious for his troubles.
Ruk Ruk steam rollers Thorpe and waltzs into the end zone for the score! Skullsmash Reeverz are up one!
Mad Johan: What a debacle for the Nobles. One missed assignment early in the half by the Nobles led to this Ork drive. That entire drive by the Reeverz made the Nobles look like a bunch of expansion league amateurs.
Favre: Squeak?
Mad Johan: I guess they are expansion league amateurs aren’t they?
Summervale: The Nobles positional players look like they are staying in the Dug-out as they set-up for the kick-off. However, the back-up Thrower Andy Chambers (#12) is get onto the pitch.
Mad Johan: Without their catchers, it will be hard to have a quick score before the half.
Summervale: The Skullsmash Reeverz look to have the advantage in manpower, as the Humans set-up to receive. The Orks look like they are planning on stacking the box again.
Mad Johan: It worked last time so why stop?
Sumervale: The Orks start smashing through the Human line as the Nobles start to set-up a cage around Chmabers with the ball. Big Smacka lands a brutal block on a Noble Lineman. The clock is winding down for the half, and the Nobles do not look like they have anywhere to go.
Mad Johan: Wow, did you see that pass! That is one of the longest completions I have ever seen!
Favre: SQUEAK, SQUEAK, SQQQQUUUUEEEEAAAAKKK!
Summervale: Chambers (#12) has managed to connect with Ward (#2) deep in ork territory! What a pass! But it doesn’t look like enough to make it to the endzone before the half is over. Ward manages to stiff arm a Line Ork to the ground but the Half ends with the Nobles outside of the Endzone.
Mad Johan: To win, the Nobles will have to score more touchdowns than the Orks.
Favre: Squeak?
Summervale: This brings us to half time, and word from our sponsors.
***** ***** *****
Summervale: Welcome back to the second half of our Deep North- Southern Conference Exhibition Blood Bowl game between the Nottingham Nobles and the Ork Skullsmash Reeverz. The Orks are up 1-0 after the first half.
Mad Johan: The Nobles are going to need to play much better than we saw in the first half if they want any chance at winning.
Favre: Squeak, Squeak, squeak.
Mad Johan: That’s right Favre. The Nobles will need to force the ball out early since the Reeverz are going to be receiving this half.
Summervale: Well there is still a lot of Blood Bowl left to play. Interestingly, the Nobles Thrower Preistley is still out of the game, and Chambers is in. In addition, the Orks are going with two throwers as Runthugga (#12) is in the back field.

Mad Johan: I expect they will want to play a game of ball control, but with two throwers we they might be going for a dagger strike to finish the match.
Summervale: Maybe a literal dagger strike! The Nobles have kicked it off! Runthugga (#12) bobbles it a bit but manages to pick up the ball. He approaches the line and Grimgrod Rotgut and Gobsmacka join him. Two line orks try to blitz the edge of the Noble line, but Ward (#2) manages to block his opponent down!
Mad Johan: This looks like a repeat of what happened to the Nobles, but to the Reeverz!
Summervale: Well the momentum for the Nobles shifted fast as Jervis Johnson is flattened in his blitz attempt by a Line ork (#9) and sent to the dug-out unconscious!
Mad Johan: That was unexpected.
Favre: Squeak.
Summervale: The Orks start to do their thing and begin to pound through the Nobles line. Ruk Ruk smashes a human lineman into the dug-out unconscious.
Mad Johan: That is what Blood Bowl is all about. The Nobles might not have enough players left at the end of the game to keep playing!
Summervale: The Orks look like they are going to flood the Nobles flank again. However, the Nobles are putting up some fight. Runthugga puts on some moves to avoid Ward scrambles behind the line, and finds Lineork (#9) deep in Ork territory!
Mad Johan: Alessio Cavatorre narrowly missed a pick on that one.
Favre: Squeak.
Summervale: Thorpe and Cavatore drop back and try to gang tackle the Lineork, but fail miserably.
Mad Johan: That is not what Catchers are good at.
Summervale: Lineork #9 walks into the end zone to score the Orks their second touch down.
Mad Johan: This leaves the Nobles in a tight spot, they may not have the skill to score two quick touchdowns with the time remaining.
Summervale: Preistley is back on the pitch as Chambers takes to the dug-out. However, the rest of the team is back on the field. The Reeverz are set-up in a different defensive formation, and the Humans are spread out wide as well. And the Reeverz kick it off.
Mad Johan: The Catchers are going deep. That is what it takes to win!
Summervale: Ruk Ruk knocks down Cavatorre, while Rotgut and Bobsmacka cover Thorpe. Big Smacka tries to rush the passer, but stumbles on the way and falls. There is a lot of jostling for position on the line…
Mad Johan: The clock is ticking for the Nobles, they need to score fast!
Summervale: Preistley easily bypasses the rushing Black Orc and steps up. He makes a long pass to Thorpe who catches it despite being covered by Gobsmacka. He makes a move and dodges away and easily runs into the endzone for a Nobles touchdown!
Mad Johan: Now comes the hard part, getting the ball back and scoring again!
Summervale: The two teams come back out for the kick-off. They both load the line. Runthugga is back in. It barely gets behind the line of scrimmage. Gibsmacka runs up and retrieves the ball. His Orks smash the Human line down, but the collision between the Human Lineman and Big Ammer causes the Black Ork to leave the game.
The Human Blitzer Mat Ward rushes Gobsmacka, but can’t get there. The Ork line keeps smashing and pushing its way slowly forward, and Gobsmacka tries to carry the ball around the edge. However, he stumbles and fumbles the ball!
Mad Johan: This could be the Nobles chance!
Favre: Squeak, Squeak!
Summervale: Priestley scrambles over and picks up the ball. He connects with Thorpe, and he tries to stretch the field. He is half-way to the end zone…..
Mad Johan: … and that is the game! Time has run out for the second half!
Favre: Squeak, squeak!
Mad Johan: Agreed, what an exciting close to the game. I have a feeling there is a growing rivalry between these two teams.
Summervale: That’s the game folks. The Skullsmash Reeverz have defeated the Nottingham Nobles 2 -1. What a hard fought exhibition game. We at Cabalvision IV would like to thank you for joining us today. See you next time for more exciting Blood Bowl action from the Deep North- Southern Conference.
Good-bye.
This battle took place as part of the Curse of the White Wyrm campaign in 2014. It uses custom aircraft and rules from the campaign that can be found in my Aeronautica Imperialis review here.
********************************************************************
Bug Hunt
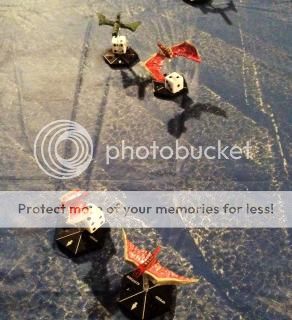
A swarm of Tyranid bio-constructs was traveling across the Sea of Sorrow on a patrol for bio-mass. They were approaching the Harkmaann's Fisheries. However, a patrol of Dark Eldar Raven's decided to indulge in a bit of sport and attacked the Tyranids from behind.
Bandits over the Sea of Sorrow
Warzone: 2- Sea of Sorrow
Swarm of the White Wyrm
4 Hags
10 points each
2 Virago with Synapse Link
19 Points each
Total= 78 points
Cabal of the Broken Blade
Raven 1- Lilex
24 points
Raven 2- Hamri
24 Points
Raven 3- Hasdrubel
24 Points
Total= 72 Points
Set-up:
My wife was interested in the Tyranid swarm because they were pink. However, I advised her that they were slow and I had no idea how competitive they were and that I wanted to test them out. She agreed to and told me she wanted to fly the Dark Eldar against them. Well, this should be a HUGE challenge.
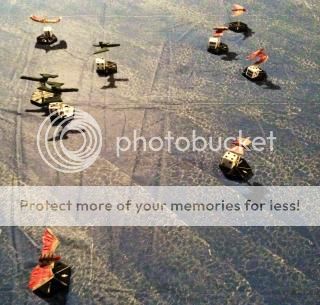
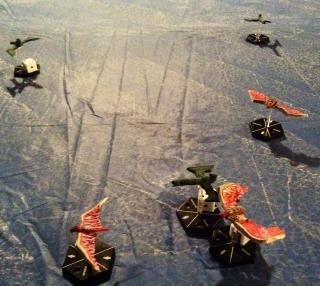
Per the rules for Bandits of the Karsundi River, the Tyranids were placed in the center of the board heading South. The Hags were at Altitude 6, and the Virago were at Altitude 7. They were at speed 3. The Dark Eldar Ravens came in on the North board edge at full speed and staggered high altitudes.
There is no way the Tyranids can outrun their pursuers and they are caught in the open over the ocean. This will be a huge test for the Nids. My plan is to use the Hags to try and lure the Dark Eldar Ravens into predictable attack lanes, and use the Very High maneuverability of the Virago to get a shot at them. They only have 1 hit after all.... and a Shadow fields. Gulp.
Turn 1:
Initiative: Per the rules the Dark Eldar get initiative.
Moving:
The Dark Eldar raced in at max speed! Dang they are fast. The Tyranids try to scatter but the abilities of the Ravens still leave many of them in danger.
Shooting:
Raven 3 took a snap shot at Virago 1 with his Dark Lance, but missed.
Everyone else was out of range.
Turn 2:
Initiative: Tyranids
Moving:
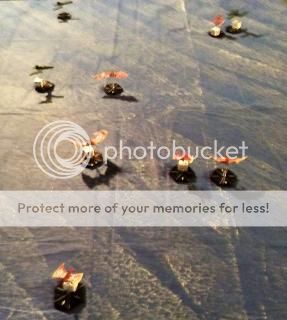
The Dark Eldar race forward. Raven 2 gets a bead on Hag 3 as it tries to scramble away. Raven 3 drops low to snag any potential power dives, while Raven 1 spirals and goes high to protect the rear.
Meanwhile, the Hags just scramble to stay out of the way. I'm honestly not sure if they will be able to turn around before the board edge or if they will simply disengage.
Virago 1 takes a High G turn to parallel the attacking Dark Eldar. Virago 1 spirals back into the action and gains altitude. This will give him a shot at Raven 1. The outnumbering is helping so far. I can see exactly where the DE will end up before moving my Virago.
Shooting:
Raven 2 opens fire at Hag 3, but misses completely.
Virago 2 fires on Raven 1 with his Devourers. The Devourer beetles bounce harmlessly off the Raven's armor, their kinetic energy spent.
Turn 3:
Initiative: Dark Eldar
Moving:
The Dark Eldar try to pin down the Hags fleeing to the East. However, despite being close, they are at the wrong altitude to intercept. The hags' are at their Max Altitude of 7 while Raven 2 and 3 are at 5.
Raven 3 is attempting to get into position and is way outside the furball. Virago 1 and 2 and attempting to home in on Raven 3, but only Virago 2 has the angle.
Shooting:
Raven 2 takes a long range Dark Lance shot at Virago 2 and hits! The shot sears across bone and sinews and the Virago's body begins to drip ichor and tissue. The damage causes Virago 2 to miss his shots on Raven 3.
Turn 3:
Initiative: Tyranids
Moving:
Hag 3 tries to avoid the oncoming Raven 1, but Raven 2 races ahead of him and spirals into close range. The other Hags continue to scatter, but it is unclear if Hag 4 will be able to turn enough to stay on the board. Raven 2 spirals into the center of the action and forces the Virago to scatter away from his guns.

Shooting:
The Tyranids have the initiative so Hag 3 fires on Raven 3. The Hag has its most firepower at close range, so maybe he has a chance? 2 Hits, but no damage. Raven 3 returns the favor and blasts the Hag out of the sky with Splinter and Dark Lance fire.
First blood to the Dark Eldar! Only three more to go!
Turn 4:
Initiative: Tyranid
Moving:
The remaining Hags try to swing around and stay on the board, while the Dark Eldar try to swoop in behind. Virago 2 comes about and is heading straight for Raven 2, while Virago 1 spirals and swoops down onto Raven 1.


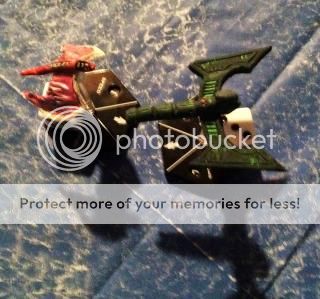
Talon Attack!
Shooting:
Virago 2 fires a burst of Devourers at Raven 2, but the Dark Eldar craft flies right through with no damage. In return, Raven 2 targets Hag 2 and opens fire. The Dark Lance sears right through Hag 2 and the creature plummets from the sky.
Virago 1 peppers Raven 1 as it closes in and for a rake attack. The Devourer beetles all fly wide of the mark. The talons get two solid hits, but fail to cause any serious damage. That was probably my best chance to take out a Raven and I just blew it. 
Raven 3 targets Virago 2 and opens fire. The splinter cannons fail to find their mark, while expending the last of his Dark Lance ammo for no effect.
Turn 5:
Initiative: Tyranids
Tailing Fire:
Virago 1 fires on Raven 1 with Tailing Fire. The Devourers miss, but the Talons get two solid striking hits. However, the Ravens Night Shield deflects the blows. Dang it!
Moving:
The two Hags skate the edge of the board and avoid disengaging while Raven 2 and 3 leisurely fall into firing positions. Virago 2 moves to attack Raven 2 and Virago 1 tries to catch up with Raven 3. Raven 1 is content to spiral and shake the Virago that was attacking him.
Shooting:
Virago 2 fires the last of his living ammo at Raven 2, but misses all of his shots. Raven 2 fires on Hag 4 and blasts him from the sky.
Virago 1 takes a mid-range desperate shot at Raven 3 and hits twice! However, he fails to cause any damage. Raven 3 is out of Dark Lance ammo so fires his Splinter Cannons at Hag 1 but misses.
Turn 6:
Initiative: Dark Eldar
Moving:
Raven 1 spirals and races back towards the fray, looking to get a kill. Hag 1 traces the edge of the board while Raven 3 follows slowly behind. Virago 2, out of ammo, dives onto the pursuing Raven 3 for a claw attack! Virago 1 tries to get an angle on Raven 3 as well. Raven 2 breaks hard away and rockets away from the action.
Shooting:
Raven 3 fires the last of his ammo on Hag 1. He hits but fails to finish off the critter! Virago 1 uses the last of his ammo to attack Raven 3, but misses.
Raven 1 coming up from behind fires on Virago 1. The Dark Lances blasts a deep wound across the Viragos body. Now both have been injured.
Virago 2 attacks Raven 3 with his Talons. He gets two damaging Hits and the Night Field saves 1. The Viragos blade slices through the cockpit and decapitates the Dark Eldar pilot!
Turn 7:
Initiative: Dark Eldar
Moving:
The Tyranids disengage off the board while the Dark Eldar move in for the final kill.
Shooting:
None
Conclusion:
Well, my plan almost worked! The Hags were nice fat and slow targets that the Dark Eldar couldn't resist going for. Due to the outnumbering, they were the only targets she could reliably get a bead on. That allowed my Virago to move into attack.
The Virago's slow movement wasn't terrible. It actually helped them get into position for Talon attacks. However, the Low maneuver of the Hags was a huge problem. They could barely stay on the board. However, they are low cost and ensure you can outnumber your foes and gain an advantage that way.
It didn't necessarily feel like it, but the game was relatively close. The Dark Eldar were downing my low points craft, so even destroying one of theirs was equal to two of my Hags.
However, in the final analysis, the Dark Eldar won this round!
Just Some Random Pictures that I don't recall where they go...


This battle took place as part of the Curse of the White Wyrm campaign in 2014. It uses custom aircraft and rules from the campaign that can be found in my Aeronautica Imperialis review here.
**********************************************************************

Tau forces have begun to try and perform aerial scans of the planet in order to locate salvageable parts of the White Wyrm. To accomplish this Tigersharks have been outfitted with sophisticated sensor arrays.
Just such a craft and its escorts from The Graceful Hunters were on a routine patrol near the coast of St. Thaddayus Island. They were set upon by a roving intercept squadron from the Cabal of the World Walkers.
Flight of the Vigilant
Warzone: St. Thaddayus Island
Cabal of the World Walkers
1 Hell Blade- Styl'Byk
12 points
1 Hell Blade- Ga'Ven
12 Points
1 Hell Blade- E'gal
12 Points
Hell Blade- D'rkroe
12 Points
Total= 48 points
The Graceful Hunters
Barracuda- H'deo
18 points
Barracuda- Se'rah
18 Points
Tigershark- G'en
Detection Gear
20 Points
Total= 56 Points
Set-up:
My wife wasn't happy with our last battle and wanted a rematch. This time she wanted to fly one of her big birds, and have me to try and shoot it down. I was happy to oblige.
The Flight of the Vigilant mission the attacker tries to fly their bomber off the opposite board edge to win the scenario.
The Tau came on together as a group at Max speed and Alt 7 towards the center of the board. The Tigershark was in the center, flanked by both Barracuda. The Hell Blades came in on the opposite board corners in pairs. They were at speed 8 and Alt 3 and 5 on the East and 7 and 9 on the West. I wanted to cover the board as best I could.
Turn 1:
Initiative: Chaos
Moving:
Both sides raced forward towards contact. The Tigershark and Barracuda 2 turned to the East while Barracuda 1 side slipped towards the west. The Hell Blades did not change altitude or speed and angled towards the center of the board.
Shooting:
None
Turn 2:
Initiative: Tau
Moving:
Barracuda 1 moves up the center of the board to act as bait, and Hellblade 3 goes for it. They are going head-to-head. Barracuda 2 and the Tigershark shrewdly stay to the Eastern side of the board. Hellblade 1 and 2 move to intercept, but don't have the right altitude to engage the Tigershark. Hellblade 4 mistimes his turn in and is out of position.... for now.

Shooting:
Barracuda 2 opens fire on Hellblade 2 who is the closet to closing in on the Tigershark. His aim is true and Hellblade 2 is vaporized and the pilot incinerated in the blast.
Seeing his Cabal brother go down, Hell Blade 3 viffs and fires a strafing burst on Barracuda 1. Shells tear into the Tau machine and cause it to blow smoke. The Tau pilot returns fire and vaporizes the petulant Hellblade in a storm of Ion and Smart Missiles. The pilot's ashes are scattered across the ocean of Arbos.
Turn 3:- Disengagement Turn
Initiative: Chaos
Moving:
Hell Blade 1 has had enough and shoots away from the furball. Hell Blade 4 tries to anticipate and get behind the Tigershark, but instead ends up in the sights of Barracuda 2. The Tigershark easily eludes him with a Power Dive away from his position.
Shooting:
Barracuda 2 opens fire on Hellblade 4, but his shots go wide of the mark.
With that, the Chaos forces peel off and bug out. The Tigershark is free to continue its mission.
Conclusion:
Well, lesson learned. Don't try to take Hellblades head-to-head against Barracudas again. I forget how fragile they can be sometimes. This time I got a bit cocky, and paid a heavy price. No need to add up the points again. The Tau won easily.