Monday, April 29, 2019

Battle Report: Operation: Hemlock- Rampant Stars


Today we will be playing a game of Rampant Stars set in the Operation: Hemlock setting I devised for the Warhammer 40K universe.

Colonel Brusilov, the commander of Taskforce: Sword; has ordered the Ammoriss PDF forces to help secure the refugee camps on Baron's Rest. Ork land forces have been spotted in the area of Camp Hope(Less). The Colonel has ordered a general levee of refugees to help in the camp's defense. This has led to a mixed force of PDF forces and local militia.

The Orks have been attracted to the region due to the flat, dessert region making a great place to race their Truks and karts. They see the refugee camp as an easy source of slaves to nick to take to Skarbashz Fort to trade. As such, the appearance of the PDF and militia has put a small wrinkle in their plans, but an enjoyable. They are eager for a good scrap!

Forces

Ammoriss PDF Forces:
Regular Mounted Command- PDF Command Squad
Regular Mounted Effectiveness Rating: 5 Points: 5 (6)
Move Command Assault Defense Shoot Armor
10      3+              3+         5+          4+       2
Traits:
Blast- +1 Reduces cover from shooting by 1
Leader- Free

Ragnarok Tank
Regular Infantry Effectiveness Rating: 10 Points: 3 (10)
Move Command Assault Defense Shoot Armor
1d3+3 3+            3+         4+          3+       4
Traits:
Big Brute- +4 
Heavy Weapons- +4 Each hit causes potential 3 hits
Slow- -1 

PDF Troopers
Regular Infantry Effectiveness Rating: 10 Points: 3
Move Command Assault Defense Shoot Armor
6           3+           3+          4+         3+       1
Traits:
None

PDF Troopers
Regular Infantry Effectiveness Rating: 10 Points: 3
Move Command Assault Defense Shoot Armor
6         3+             3+          4+         3+      1
Traits:
None

Refugee Militia
Irregular Infantry Effectiveness Rating: 10 Points: 2
Move Command Assault Defense Shoot Armor
6        4+              4+         5+          4+     1
Traits:
None

Total Points= 24

Ork Hooligans
Regular Mounted Commander- Trukkerz
Regular Mounted            Effectiveness rating:  5(10)                          Points: 5 (9)
Move    Command           Assault                 Defense               Shoot    Armor 
10           3+                           4+                           5+                           4+           2
Traits:
Big Unit (+4)- Double Units initial Effectiveness Rating
Leader (Free)

Hooligan Band- Stomperz
Irregular Infantry             Effectiveness rating:  10                                Points: 2
Move    Command           Assault                 Defense               Shoot    Armor 
6              4+                           4+                           5+                           4+           1
Traits:
None

Hooligan Band- Romperz
Irregular Infantry             Effectiveness rating:  10                                Points: 2
Move    Command           Assault                 Defense               Shoot    Armor 
6              4+                           4+                           5+                           4+           1
Traits:
None

Hooligan Band- Basherz
Irregular Infantry             Effectiveness rating:  10                                Points: 2 (5)
Move    Command           Assault                 Defense               Shoot    Armor 
6              4+                           4+                           5+                           4+           1
Traits:
Fierce (+2)- Re-roll misses in an assault
Combat weapons (+1)- Shoot close only, double dice for assaults

Hooligan Band- Big Bang-Bang
Irregular Infantry             Effectiveness rating:  10                                Points: 2 (6)
Move    Command           Assault                 Defense               Shoot    Armor 
6              4+                           4+                           5+                           4+           1
Traits:
Armor Piercing (+2)- Shooting reduces armor rating of target by 1
Rapid Fire (+2)- Short range double shots, long 1.5. No move or shoot.

Total Points= 24


Mission:
Rampant Stars uses a a random mission generation system rolling a 2d6. Today we got, Control the Terrain.

However, missions also have complications and locations. These can also be randomly chosen or picked. Today we got: Heat and Dessert/Ice World

This will impact the play of the game Heat reduces the number of times you can Move/Double Time in a row.
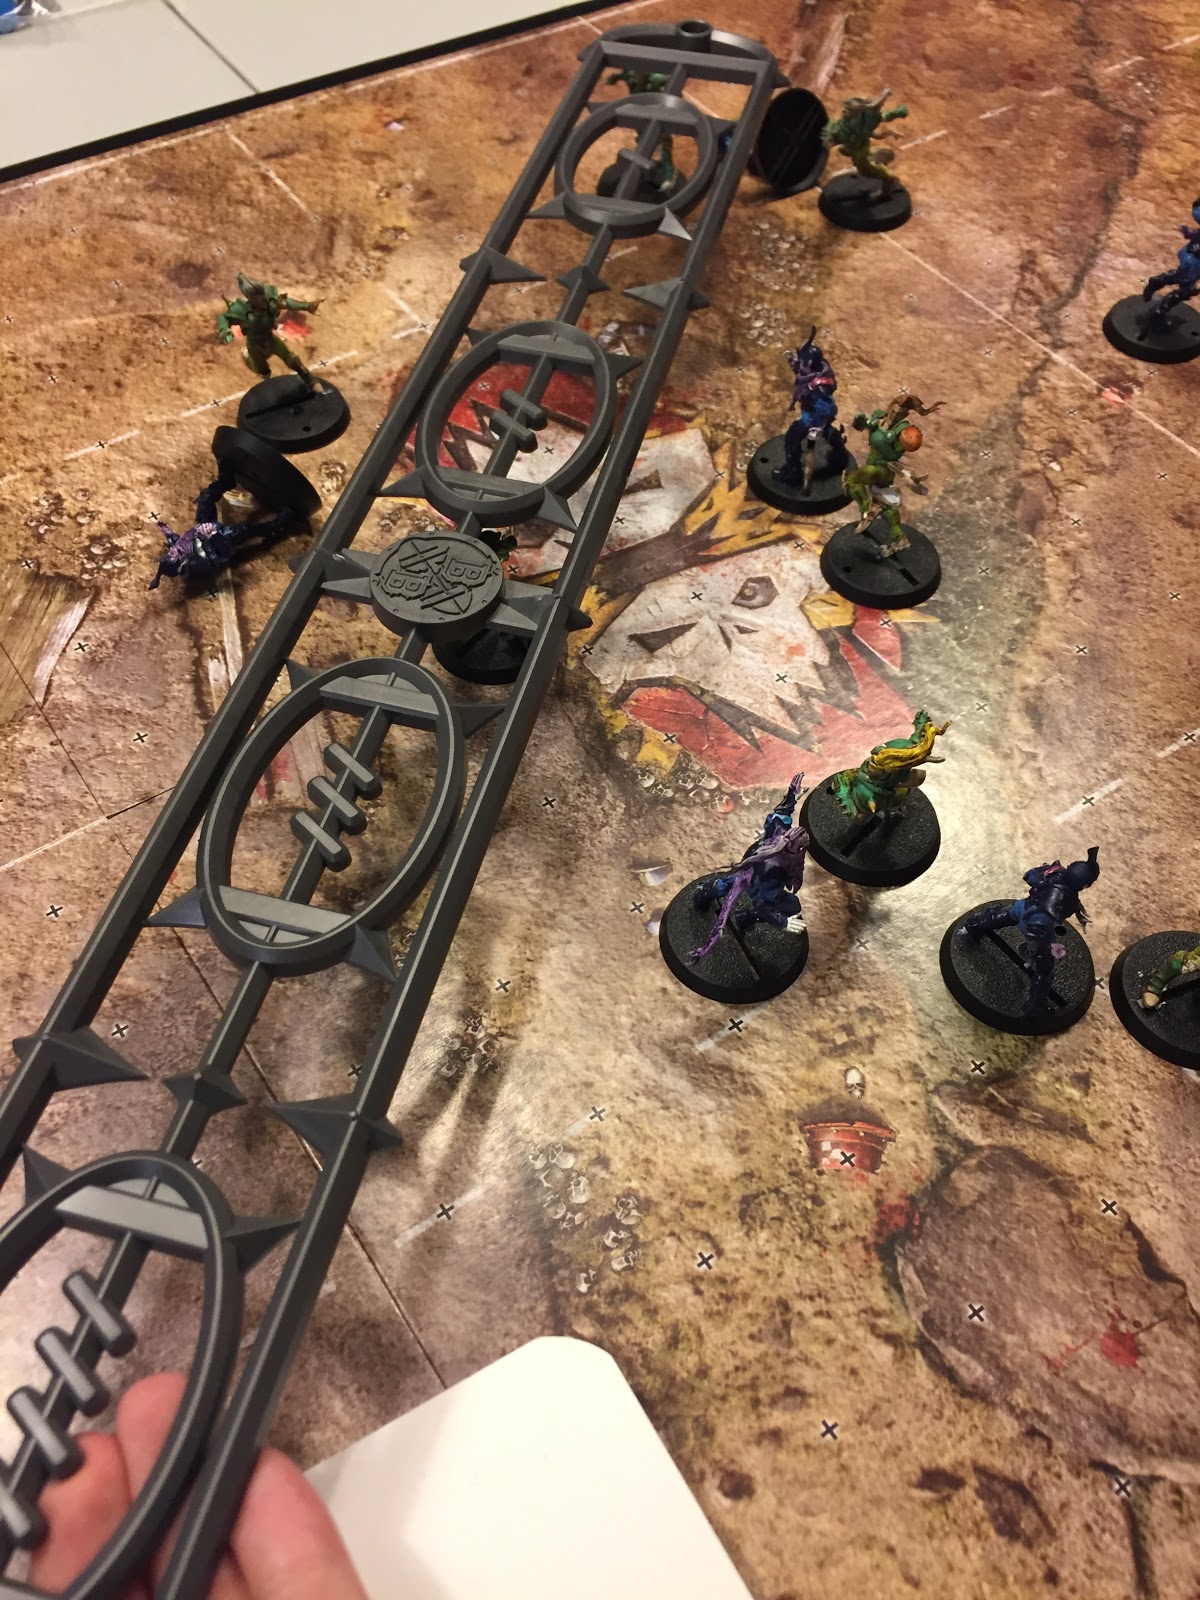
Set-up:
The board will be a 6 by 4 board for today's battle. Per the rules for the battle, there are four difficult terrain locations scattered roughly across the center of the board. The force that holds the most Difficult terrain is at the end of the game is the winner. The game lasts 8 turns, 1 hour, or until one army is routed/destroyed.


Turn 1:
The Orks surge forward across the board towards the objectives. However, the Romperz are confused and hold position on the baseline.

Only half of the PDF on the right flank respond and move forward. One trooper squad and the command squad move up.

Turn 2:
The Romperz stay confused. However, the Stomperz climb an objective and take aim at the Militia and reduce them three men. 

The Basherz climb into the trench and shoot at the PDF commanders, reducing them 2 effectiveness. The Big Bangerz take aim at the PDF troopers to the right and wipe them out in a barrage of firepower!

The PDF are stunned, and fail to rally. However, the Command squad approaches the Basherz and flames them in the trench for 3 Effectiveness loss.

Turn 3:
The Basherz charge into the PDF Command and tear them into shredded beef. 


The Big Bangerz fail to activate, but have an objective. Finally, the Stomperz fire on the militia and reduce them 4 more effectiveness, and down to 3 militiamen left.

The Tank and the PDF Troopers rally.

Turn 4:
The Stomperz got tired of shooting the scared Militia, and changed to the left flank PDF troopers. They took out two. The Basherz failed to activate. 

 The Ragnarok finally rallied, and fired on the Basherz, wiping them out.


Turn 5:
The Orks fail to activate most units or are busy Rallying. However, the human Militia finally decides to move into cover and take a few pot shots, killing an Ork from the Stomperz. Meanwhile, the Ragnarok starts to move towards his biggest threat, the Big Bangerz.


Turn 6:
The Big Bangerz manage to activate and move across and fire on the Ragnarok. However, they fail to hurt the big brute. In the meantime, the Romperz activate and take an objective.


In return, the Milita ping off another Ork from the Stomperz. However, the Ragnarok targets them and wipes them out in a fury of heavy Bolter fire and battle cannon blasts.

Turn 7:
The Romperz fire at the PDF Troopers and reduce them to only 2 troopers left! Meanwhile, the Big Bangerz fail to activate!

In response, the Militia move into cover behind a dune. The Ragnarok and PDF Troopers fail to activate!

Turn 8:
The Romperz and Trukkerz combine their firepower to eliminate the last PDF Troopers. The Trukkerz also take another objective.


In response, the Ragnarok fails to rally and the Milita fail to activate.

Conclusion:
The Orks end the game holding 3 of the 4 objectives. The Orks thrashed the PDF troopers and easily won the game.


Rumors quickly spread around Camp Hope(Less) that the Orks were coming. The refugees began to pack up and prepared to leave the area. PDF Troopers from Taskforce: Sword were soon displacing them as reinforcements moved into the area. Baron's Rest was the Orks' first push out of the Green Zone and into Human controlled territory. It would be up to the men and women of Taskforce: Sword to stop them in their tracks.

Skarbash and his boyz couldn't help but expand as more Orks flooded into the region from across Ammoriss. The refugees from Warlord Gark's forces were overwhelming the resources of the Green Zone on the Deff Islands. Expansion to Baron's Rest was a requirement.

As far as thoughts on the game, the rules for Rampant Stars are as quick and easy as ever. My wife picked them up in no time. The hardest part was getting the models out of the tackle boxes and setting up/taking down the table. The random mission was great, and the rules worked fine in making Tanks as well as infantry units.

Monday, April 22, 2019

Wargame Design: In Defense of the Humble D6


Many budding war game designers spend a great deal of time talking about mechanics, especially using dice.  It is only natural since dice mechanics are the “crunchy” part of war game design.  The only other topic that can compare in the “crunch” department are points cost or balancing mechanics.  Therefore, it is an easy topic to discuss.  This is not the first time I have tackled it on the blog.

The “Best Type of Dice” to use is a frequent conversation piece.  Lately, the humble d6 has fallen out of favor with many designers.  The main reason is the available range of numbers that a d6 can generate, and the probabilities it can simulate are limited.  Keep in mind as we proceed that I am not a mathematical genius or expert on probability.  In fact, I am just a humble war game blogger….. pretty unexciting expertise. 


Cons
So, let’s start by talking about the Cons of the d6.  As mentioned it can generate only 6 actual results.  This is much lower than a d10 or a d12, or even a d20.  Therefore, there is a much smaller range of numbers to work with and this makes differentiating of success and failure much harder. 

Essentially, you have a 16.67% chance of getting any individual result.  Therefore, if you need a 6 to do something, you will only score that 6 16.67% of the time.  If you need a 4, 5, or 6 you have a 50.01% probability.  16.67% is not very fun to calculate with, but 50% is fine.  What about 5+ then?  33.34%.  Compared to the d10 and their 10% increments, the d6 is far inferior for calculating outcomes and running the numbers quickly.  The same can also be said about a d20 AND it adds more possible outcomes.

Every modifier of + or – 1 adds a 16.67% variability in the outcome.  That is a big swing between potential outcomes made by relatively simple modifiers.  This means a -1 penalty is a big reduction in efficiency for a dice roll and a +1 is a huge gain.  Those large swings can be hard to moderate for. 


Pros
With those clear deficiencies, why would anyone want to continue using a d6 as their primary dice?  Are they insane or just stupid?  Neither, as the humble d6 also has its benefits. 

The first is that they are common and easy to get.  Custom dice or other polyhedron dice raise the barrier of entry for a game.  Granted, if your core audience is “experienced” gamers only then this does not matter.  However, most games are trying to appeal to the widest audience possible to garner use.  Everyone can get or has access to the humble d6.  I see that for sale in packs of 5 at the local gas station for less than $1 USD.  They are ubiquitous and have been in use for centuries. 

Once you start adding multiple d6 together, you have a very nice and simple bell curve of likely results.  Rolling two single pips has only a 2.78% chance, while rolling a combination that adds up to 7 is a 16.67% chance.  16.67% is actually the highest result you can get on 2d6 so you are statistically most likely to roll a 7.  This bell curve allows a designer to accurately predict outcomes than any single dice. 

Combined 2d6 also gives you same amount of potential results as a d10, without the “randomness” of any 10% option coming up.  You know a 7+ combination will come up more often than a 10+ combination on 2d6.  7+ is 58.34% on a 2d6, while 10+ is 16.67%   Meanwhile, on a d10 a 7+ is ~40% and a 10 is 10%.  Curves provide more predictability than a straight line chance, which allows a designer to “stack the deck” with modifiers to create tactical play in a more meaningful way. 

What happens when you start adding multiple dice to d10’s or d20”?  The more numbers you add, the flatter the curve, and you the less predictability it adds to the curve.  For example, 2d10’s most common result is an 11 at 10% and the equivalent roll on a 2d6 is 16.67%.  2d20 is 21 at only 5% which is the same as a single d20 result, so why roll 2 d20?  2d6 gives you the most “dramatic” bell curve. 

There is a reason d6 have been the most common types of dice for centuries.  They provide a dramatic and interesting probability curve that other dice can not match in groups.  The closest is the d12, and I can only think of one designer who really stresses the use of a d12.  Even that is just a derivative of a d6. 


Why So Many Single D6 Games Then?
Okay, so maybe I have convinced you that 2d6 is the ultimate dice to roll for your mechanics.  Then why do so many games use a single d6 resolution mechanic?  I would argue that very few of them actually do use a single d6 resolution mechanic.  They almost all temper it with some sort of multiplier….. let’s take a closer look at some mechanics in games. 

Arguably, the most familiar of the game systems that is based on a single d6.  However, to determine a hit from shooting you take a model’s shooting skill and subtract it from 7 to get the target number needed to hit.  If you have a shooting skill of 4, you need a 3+ to hit.  If you have a shooting skill of 3 you need a 4+ to hit.  Therefore, a shooting skill of 4 vs. 3 is 16.67% better and more “lethal”. 

However, you will notice that it takes more to incapacitate your target in Warhammer 40K than a shooting roll.  They mitigate the odds by adding two additional rolls for wounding and a potential saving throw made by the defender.  Therefore, to remove a single model, you are really rolling 3d6 looking for a series of target numbers.  It is not resolved by a simple d6 roll at all.  AS the probability for each roll result is added in, the likely outcome from the series is reduced. 


In Lion Rampant, they use a single d6 per model compared to a stat to determine if a “hit” is caused.  Therefore, a model with a shoot skill of 5+ will “hit” a target with a 33.34% likelihood of causing a hit.  However, when you look closely at the rules, you will see you roll a d6 per model so you are typically rolling multiple dice at a time.  In addition, the number of hits are compared against a units’ armor to remove targets.  Armor can be modified by range and terrain.  Therefore, the key arbiter of lethality is armor rating and not just a single d6 roll.


This game also only uses the humble d6.  However, it uses them in opposed dice pools.  The target number is always 4+ on a dice to get a success and then you compare successes to determine opposed tests.  In addition, the game has no negative modifiers.  Instead, extra dice are added as a bonus. 

For example, if a hero is behind a wall, their is no reduction in dice for the villain shooting at them.  Instead, the hero gets extra dice to resist or dodge the attack.  The probabilities come from the number of d6 rolled against each other, minimizing unknown outcomes with the more dice that are rolled.  However, the small element of chance is still in play.    


Final Thoughts
The humble d6 has been the dice of choice for centuries because it offers the most dramatic, yet predictable probability curves for game designers to play with.  Combine various mechanics to group dice and combine probability curves from a d6 results allows for a wide variety of game play options. 

Ultimately, very few people play a game because of its dice mechanics.  Instead, they play games that set out to model or do certain things that the players find appealing.  As a designer, the dice mechanics are simply a tool to try and reflect the “reality” of your game and accomplish the goals you have set out for the game itself.  The specifics of the dice mechanics are secondary to that goal.  As a designer, you need to use the tool that meets the games goals whether that be d6, d10, d12, or d20s.  Mechanics for the sake of mechanics are an empty and hollow exercise.          

Monday, April 15, 2019

Blood Bowl: Match Report- Dark Elves vs. Elf Union


Lord Summervale: Welcome Blood Bowl fans! I am pleased to have you join us for Cabalvision IV's coverage of the Deep North- Southern Regional conference. I am your host Lord Summervale and as always I am joined in the booth by the great Blood Bowl mind and Hall of Fame player Mad Johan.

Mad Johan: In addition, we are joined in the booth today by the captain of the Chaos Goat Herders, Asquith Kneecapper.; fresh off their win in the Princess Owayanna Bottled Spring Healing Waters tournament win! Congratulations!

Asquith Kneecapper: Thank you, I would just like to say all praise to the Chaos Gods and Nuffle.

Lord Sumervale: Well said. Today's match we are glad to bring you a long-awaited premier between two new teams to the Conference, the Black Guards from Nagarroth and the Elf Union Superiors.

Mad Johan: Indeed, the two elf teams bring two different play styles to this conference. It is said that Mora-Thai and her team were exiled from the Blood Bowl pitches of Naggaroth for an undisclosed infraction. They were sailing to join the Princess Owayanna tournament but were detained at the coast by some..... um.... slave raiding?

Asquith Kneecapper: A noble past-time! Almost as fun as playing Blood Bowl!

Lord Summervale: I'll take your word for it.

Mad Johan: Meanwhile, this Elf Union team is captained by Legolan the Highborn. His team has been active in some of the minor leagues and decided to make the jump to this level of play. We will see how they handle it.

Asquith Kneecapper: Fresh meat! I think they will find the game plays much faster at this level.

Lord Summervale: Perhaps. We are about to find out. The two captains have come out of their dug-outs and approached the grot refs. The two shake hands, and seem to exchange some.... refined.... banter in elvish. It looks like the Black Guards have elected to receive the ball.

Mad Johan: A good strategy. They might be able to put some of those Elf Union players out of the game before they even get the ball. Asquith, what do you think the keys of the game are?

Asquith Kneecapper: Clearly Nuffle and the gods will favor the team that has sacrificed more virgins prior to the first snap. I believe the Dark Elves have the advantage.

Mad Johan: Ummmmmm..... sure. I'm sure that will matter. For Mora-Thai her team will want to stretch out their scoring drives. The best defense is to keep the Superiors from even having the ball at all. For the Black Guards, they need to use their possessions to also take out the key positionals on the Elf Union team.

Asquith Kneecapper: What you say makes sense.... but I am sure it will come down to the sacrifices.

Mad Johan: For the Superiors, they are going to have to stretch the field and force the Black Guard to cover deep and thin their defense in other areas. The Superiors have the ability to score early and often. They need to put the Black Guards into a deficit early and force them to play catch-up.

Asquith Kneecapper: I suppose they could also just smash the other team into little chunks of meat. It makes it easier to score AND prepares them for the victory feast!

Lord Summervale: Clearly, you are both brilliant Blood Bowl minds. The Dark Elves have their runners Raz-Al-Slam and Urleith Van Drakken back to receive.

Boom! The kick is up!

Raz-Al-Slam easily picks up the ball deep in the backfield in the nearside field.

Mad Johan: Kurounus the Dreaded, the Dark Elf blitzer races up the edge of the farside wing and unloads a davastating blitz on TheonaStarstrike and send shim the dug-out. Ouch!


Lord Summervale: The Black Guards begin to form a cage and head to the line, with Mora-Thai the Witch Elf leading the way. Jaq the Knife knocks out the Elf Union blitzer, Gloire as the Dark Elves approach.

Mad Johan: It's not all going the Black Guards' way as Fiendahl Stormwind, the Blitzer stiff arms the Dark Elf lineman Morathian and takes him out. Brutal for elves.

Lord Summervale: The Black Guard move to break through the Superiors line. Darveck the Flayer blitzes an opening by taking out the Elf Union blocker, Snowrabbit. Mora-thai moves to expnad the gap, but is taken out by a rejuvenated Gloire the Seeker. He sends the Witch Elf to the dug-out!

Asquith Kneecapper: That was unexpected!


Mad Johan: The Superiors decide to try to capitalize on and start dishing out punichment across the line! 1 Black Guard is Koed, while Legolan the High-born himself stuns another Dark Elf blocker.

Asquith Kneecapper: I like these Elves style.

Lord Summervale: The path to the runner is open, and the Superior Blitzer takes his shot. He turns the end of the line and manages to Blitz Raz-Al-Slam. The Dark Elf is flattened to the turf, and coughs up the ball. The nearby Superior Blocker..... Chalaon Stormbreaker manages to scoop it up.


Mad Johan: The scrum is not over yet!

Lord Summervale: Indeed! Both teams push and shove each other around. Chalaon tries to break out, but is tripped up and sent sprawling by Al-Slam. The ball keeps being kicked around the field as the two teams scuffle over it.

Somehow, Chalaon finds the ball in his hands again, and he dumps it downfield to a fellow blocker, Arleith Starleif.


Asquith Kneecapper: Is this some of that “Finesse” game I hear fans of elf teams talk about?

Mad Johan: The Superior's drive is short lived as Black Ivenoth of the Black Guards knocks the ball loose again, putting Starleaf to the dug-out in the process. However, Black Ivenoth's run of luck ends quickly, as the Superior Lineman Calaughn Riverbend puts him in the dug-out with a punishing hit!


Asquith Kneecapper: This is a very hard hitting game!

Lord Summervale: Indeed! The referee blows the whistle for the half. Each team only has about 5 players left on the pitch!

Asquith Kneecapper: No love lost between these teams!

Mad Johan: You know what I say Summervale, it is hard to win a Blood Bowl match if half your team is in the box. However, it looks like I might be wrong this time. If you look closely at the casualty report, you will see that the Black Guard mostly have Knock Outs, while the Superiors have injuries. That means we could see the Black Guard have a slight numbers advantage in the second half.

Lord Summervale: That's why you are here Johan. Indeed, a great detail from a great Blood Bowl mind. Now, let's send the viewers back to Cabalvision IV's home tower for a breakdown of Blood Bowl action around the Olde World. Remember, Guillotine Razor; everytime you use them it is a close shave!

** ** ** ** **

Lord Summervale: Welcome back to the second half of our match-up between the Dark Elf Black Guards, and the Elf Union Superiors. The score is 0-0 in a surprisingly hard hitting game. I am joined int eh booth today by my regular color commentator Mad Johan. However, we also have Chaos Goat Herder Captain, Asquith Kneecapper.

Asquith, what do you think will be the key strategy for the second half?

Asquith: Well, both teams have been doing a good job smashing the other team. Eventually, one of these teams will have to score a touchdown. I think it might be the team with a player left standing.

Mad Johan: Elf teams get a lot of schtick for being all pouncy and finesse. Today, these teams are not living up to those expectations. I did not expect them to get into my Ard Hitz Highlight reel. So far, they have been brutal to each other.

However, Asquith is right. Eventually, someone is going to have to stop killing the other team and just score. I think the Black Guards have a bit of an edge in players returning to the game. I expect to see this difference matter.

Lord Summervale: Well, the Superiors get start with the ball this half. Let's see if they can do better than the Black Guards did. The Black Guards kick is up..... Boom! That gets the second half started.

Legolan the High-Born gets the ball after the touchback. He scrambles forward to the Elf Union line.

Mad Johan: The blitzer Kurounus the Dreaded is in hot pursuir. He easily penetrates the Superior back field and levels Chalaon Cloudbreak who was foolish enough to get in that guys way! Krunch!

Lord Summervale: Due to the pressure, Legolan passes it back to his fellow passer Chronus the Masked.

Mad Johan: That doesn't fool Korounus, who sniffs out the play and homes in on Chronus. The blitzer stretches the field and unloads on the Elf Union Thrower. He sends Chronus to the casualty box, and the ball goes loose deep in Elf Union territory.


Lord Summervale: Raz-Al-Slam manages to scoop up the ball and run it in for an easy touchdwon! The Black Guards are up by 1.

Asquith Kneecapper: That Black Guard Blitzer stepped up and made the key play. Slaanesh msut be with him!

Mad Johan: As I predicted, the Black Guards small numbers advantage left Korounus unblocked on the outside and Raz-Al-Slam in a position to scoop up the ball and score.

Lord Summervale: More Black Guard players return to the field as they kick it to the Superiors. The Elf Union team valiantly tries to move it up field, but the Dark Elves seem to be wherever they try to go.


Mad Johan: Another big hit from Darveck the Flayer sends Theona Starstrike stunned to the ground. The numbers do not add up for the Superiors this time.

Lord Summervale: Despite a valiant attempt to drive up field, the Black Guards hold out until the whistle. The Black Guards have bested the Elf Union Superiors 1 to 0.

That was a surprisingly hard hitting game!

Mad Johan: Yes, but I think the Black Guards managed to take the game because they hit just that much harder than the Superiors. Just look at the casualty results to verify. Sure Mora-Thai the Black Guard team captain is leaving the game with a niggling injury, but the Superiors took it much harder. 4 players ended up in the casualty dug-out. Thankfully for the Superiors, two will be ready to play next game, but Elra Snowrabbit will have to miss the next match. Worse, blocker Galathia Sunstreak will never play at the same level again.

Asquith Kneecapper: I sense an upcoming sacrifice to Nuffle.

Lord Summervale: I don't think that is how the Superiors “retire” players?

Mad Johan: With such a new team to the conference, they just have to make do.

Lord Summervale: Well, that is interesting and all, but who do you think were the Bloodweiser Stars of the game? Asquith, I will let you decide today.

Asquith Kneecapper: Oh... let me consult my game notes..... for the Black Guards, you have to consider Korounus the Dreaded who lived up to his name with 4 casualties! That is the type of player I want on my team! However, Raz-Al-Slam actually scored the winning touch down, and ultimately that is what counts. Darveck the Flayer also had a strong game. Ultimately, I think it will have to go to Raz-Al-Slam though.

Mad Johan: A solid choice.

Asquith Kneecapper: It is always tougher to pick a star on the losing team. Ultimately, they lost and have no favor with the Chaos Gods. Who cares about such lowlings?

Mad Johan: Agreed, but we have to pick. For the Superiors, I think Fiendahl Stromwind the Blitzer was doing what they needed him to do, hitting people. Chalaon Stormbreaker needs a shout out for being in the middle of key plays and trying to keep the Superior drive alive int eh first half. Then, Legolan the team captain didn't disappoint and tried to keep his team in the game. Ultimately, I am going with Chalaon Stormbreak for the Superiors.

Lord Summervale: Well, that wraps things up here. Thanks to Asquith Kneecapper from the Chaos Goatherders for joining us in the booth. We will now return you back to the Cabalvision IV studio for continuing coverage of a match all ready in progress. Join us next time for more exciting Blood Bowl in the Deep North League- Southern Regional Conference. Until then, try Guillotine Razors- a nick in time saves nine!

Ta-ta!

Monday, April 8, 2019

Review: Rebels and Patriots- Osprey Wargame Series


Rebels and Patriots is number 23 in the Osprey Wargaming Series. The focus of this game is battles in North America from the Colonial Period up to the Civil War. Basically, it is Black Powder or Horse and Musket for the New World. Since I live in the New World I was interested.

I had intended to use Chosen Men to play games set in Wisconsin during the War of 1812. However, I have never really gotten that project off the ground. I had gotten distracted by Greek Hoplites and Men of Bronze instead. Now I have even more reason to getting going on the 1812 in Wisconsin project with more rules to try out! I have also always wanted to do a Dakota War project and these rules may help out there as well.

The first thing you will notice, is that these rules are by Michael Leck and Daniel Mersey. Of course, those familiar with the Osprey Wargaming Series will recognize that Mr. Mersey has written, co-written and inspired many rules sets in the Osprey Wargaming Series line. I tend to think of these rule sets as the “Rampant” Series* of rules as they frequently have certain similarities in the core rules. I think it could be said that Mr. Mersey is the “Godfather of the Osprey Wargame Series”. He wasn't the first author in the series, but he maybe the most influential to other authors in the series. I know I found a lot of inspiration in Mr. Mersey's work.

This is also not the first collaboration of Mr. Mersey and Mr. Leck. Daniel Leck was the co-author of Pikeman's Lament as well. He also is a popular wargames blogger. I have a feeling this is not the last collaboration between these two, and look forward to see what they come up with next. They claim this is the “final” expansion, but I doubt it. The system still can easily be applied to other eras and wargame styles such as Sci-fi, Bronze Age, Mythical Age, etc. They probably just have not come up with the next concept yet!

As always, the game begins with Designer's Notes in the introduction. I love this aspect of the rules as it allows a glimpse into the process. In addition, it gives me clear criteria for determining if a writer was successful in their goals. In Rebels and Patriots, the goals were comparable to others in the Rampant series of games:

  • Model and scale neutral
  • Focus on North America
  • Company sized engagements
  • Officers matter
  • Hollywoodized version of History
  • Easy to remember and consistent rules

Well Let's see how they did! It might help if you have read some of my previous reviews of the Rampant series to get a better feel for my thoughts on this game.


*= In my mind, the Rampant Series includes:

Even though he wrote Dux Bellorum, I think the mechanics diverge enough to not be part of the “Rampant” Series.

Things I Liked
As with other rulesets in the Rampant series, the Company creation process is easy, intuitive, and quick. Unit types are grouped into broad categories. Most infantry is Line infantry that you can apply simple traits to to match historical or unique units. However, you can have Light, Skirmishers, Natives, Shock infantry. Cavalry has Light or Shock. Then there are basic artillery units from light, medium, to heavy.

Once a unit is activated, you can only choose one action from a list of actions. This is a great way to force Tactical Play on a player. A player must choose what is important and the troops can not do everything you want, equally well. You have to make a choice about what matters.

I was happy to see that this game also uses a Group Leader for movement, facing, etc and other measurements where models are then placed within 4 inches of the Group Leader. The idea is similar to Chosen Men and Menof Bronze. However, unlike those other rulesets, who the player uses as their Group Leader can change from turn to turn.

The actions are easy to follow and generally follow the same basic rules. They are consistent and easy to follow. These will make for a good, simple to resolve game. There is not too much If This/Than That style rules. In addition, the terrain effects are relatively uniform and common sense. These rules do a good job of streamlining play like many in the “Rampant” family of games.


Things I Did Not Like
The rules as written use model removal for casualties, which I am not a fan of anymore. After spending lots of time painting the models, I want them on the board the whole game! However, it is easy enough to make a few changes to use counters or casualty tokens instead of model removal.

The game essentially uses I-GO-U-Go method. To act, each unit must pass an activation test. However, if failed, play does not immediately go to the opponent. You can continue to try to activate other units. This removes one of the biggest criticisms of Lion Rampant. However, I preferred The Men Who Would Be Kings method where there were certain actions a unit could ALWAYS take without testing to activate based on the unit type. I also kind of like failed activation causing play to turn over to the other player as a form of “friction” that a general had to try to overcome. In this current system, I am unsure if an activation test does anything more than just add a needless dice roll as a half-way point between previous activation methods.

The game also adds a very Black Powder like critical success/failure type mechanic on the activation tests. If you roll double 1s on activation, you roll on a chart and consult what terrible thing happens. If you roll double 6's, you do the same. I am not a huge fan of the “blunder” system in Black Powder as I do not think it really adds anything of value to the game play except another chart to roll-on and look up in the middle of the game. However, other players love this type of thing, so your mileage may vary.

I am not a huge fan of random charge distances for close combat/attack actions. This rule sets uses the activation roll as the distance moved in the charge. At larger scale games, I could see this working better to represent terrain that can not be seen/detected at the scale but at this smaller scale I am not sure I am a fan. The uncertainty of the activation roll is friction enough for me. I do like that there are some actions a charge unit can try to take depending on the unit type such as evade or counter-charge. 

Meh and Other Uncertainties
The game continues to expand on the Officer ides introduced in The Men Who Would beKing and expanded on in Pikeman's Lament. This is an easy way to add some narrative and campaign elements to the game that has little impact on the actual game play itself. However, it can be distressingly easy for your one officer to start with a very bad trait. Thankfully, after various games he could get promoted or even killed so even a bad trait won't last forever.

Like other games in the Rampant series, the unit sizes are relatively static at 6 or 12 models. For example, light cavalry is 6 models, while infantry units are 12. Each company typically has 24 points to it, or about 4-6 units. That is about 72 models or so. Not bad. There are various traits you can give the units as well to match “historical” units. Some are downgrades and others are upgrades, but impact the abilities of your troops.

The game comes with 12 scenarios, which is more than the other game books if I recall correctly. One of the more innovative ones is the Great River Chase scenario. Essentially, your troops are attacking or defending three supply rafts coming down the river. Retreat tot eh Sunken Road is also interesting as the outnumbered Defender is trying to hold onto a road for 5 turns with no casualties in a row to win. Overall, there are some interesting scenarios that feel like they were culled from actual historical events.

Finally, the game has some example 24-point starter armies to choose from based on the North American war from the period. It covers the French-Indian Wars, American War of Independence, Northwest Indian War, War of 1812, Mexican War of Independence, Mexican American War, Mexican Adventure, the Civil War and many more. Overall, a pretty nice selection of armies for a diverse array of models.

Conclusion
Ultimately, if you enjoy the “Rampant” series of games, I see no reason why you will not like this latest edition. It has many of the strengths of the series and worked hard to minimize some of the criticism of the earlier works. I liked that failed activation turns over play, but many players do not like that model; and this version of the rules makes the necessary changes. Overall, I think the designers accomplished what they set out to do, and I would call this another success for the “Rampant” series of games.

Overall, I am now torn on what to play my War of 1812 in Wisconsin and Minnesota-Dakota War of 1862 with? Should I use these rules, Chosen Men, or The Men Who Would Be Kings? There is only 1 way to find out! I will need to play them all!