Monday, June 26, 2023

Battle Report: Restless Sun - Raid on Drill Rig Oscar 678-H


Restless Sun is my model vs model skirmish using the general rules of the "Restless" series of games.  They are designed so each each model is an individual combatant.  Therefore, results are determined on a model-by-model basis.  

Submarine insertions were exactly what they had been trained for.  Lt. Meyers watched with a diligent eye as his North Ammoriss Naval PDF Commandoes prepared.  Unlike most of the North Ammoriss PDF, his men weren't a bunch of conscripts.  They had been recruited and chosen from some of the best soldier in the PDF and were considered to be the best native troops on Ammoriss.  A raid on a drill rig from a submarine deployment was exactly the type of mission his troops had been trained for.

Taskforce: Thorn under Vice-Admiral Travers had done their job and mostly wiped the Ork forces from the sea lanes, and put in a over-the-horizon blockade of the Deff Islands.  However, despite the set back in the Approaches, they didn't know how to quit.  They counter-attacked with a series of air assaults that managed to re-take several of the Drill Rigs in the Approaches.  Using these stations as staging points they had successfully managed to harass the supply lines the Imperial forces were sending from North Ammoriss to the Warzone.  That put the entire campaign in jeopardy.  

It was up to Lt. Meyers, and similar troops across the Approaches to put an end to these staging points.  Their mission was to re-take the Drill Rig Oscar678-H.  It was a simple mission to sweep the target, kill any greenskin that gets in the way, and re-take the control room of the drill rig.  From there the commandoes could de-activate the power plant running the Ork defenses and allow follow-on troops to take the rig.  Simple, but not easy. 

Forces:

North Ammoriss Naval Commando    

Lt. Meyers - Trained Infantry
- Combat Weapons, Commander, Enhanced Senses

1 Specialist - Trained Infantry
Indirect Fire, Blast, Enhanced Senses

1 Specialist- Trained Infantry
- Squad Support Weapon, Blast, Enhanced Senses

5 Commandoes- Trained Infantry
- Enhanced Senses

Ork Mob

1 Nob- Regular Infantry
-- Combat Weapon, Fierce, Armored, Commander

4 Boyz-- Irregular Infantry
-- Fierce, Combat Weapons

2 Boyz- Irregular Infantry
-- Fierce, 

5 Grotz- Irregular Infantry      

Mission: 
We are using the Forced Entry scenario from the main rulebook.  The objective is a control room for the drill rig.  The Commandoes have 8 turns to get a single unshaken model into the control room for the Rig. 

As a complication, this battle is taking place at night.  However, the North Ammoriss Naval Commandoes came prepared with some Enhanced Senses.  They are immune to the darkness, but the Orks are not.  

Set-up: 
This battle is being played  out on a 36x36 MU board to represent the drill rig's main command platform. 1MU with equal 1 inch.   The terrain is being placed by the defender, but the attacker gets to choose the board edge to deploy from.  Therefore, it is in the defenders best interest to make it work.  Once the terrain and sides are picked, the objective is placed and the terrain adjusted as needed.  

The Orks are placed within 6 MU of their board edge.  The Commandoes are placed anywhere, but must be at least 12 MU away from any defender. 


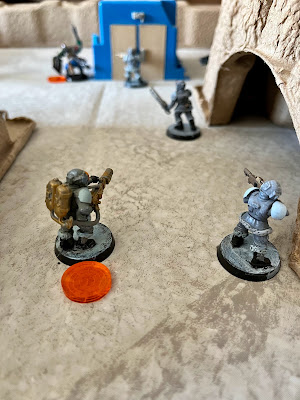
You can see the Orks using their Gretchin to pushback the attackers by deploying as far away from the objective as they can.  They are then using the Combat oriented Boyz and Nob as a reserve force behind the objective.  Meanwhile, the Imperial Attackers seem like they are stacking up to go down the center, with the Flamer leading the way, and the Grenade Launcher as support on the North edge of the board. 

For this battle, I won't be going over it turn-by-turn.  I have found this method to be too time consuming and difficult to play and record.  Instead, I will break it down into three sections; the Maneuvers, the Battle, and the End Game.  The Maneuver section is the opening parts of the battle, the Battle phase is when the main engagement is taking place, the End Game is the final key parts of the game.  I will wrap up the game with a conclusion and some thoughts on how the game went.  Let me know what you think of this approach.  I know it is easier on me!  :) 

Maneuver Phase:
The battle opens with a volley of aimed fire coming from the darkness and blasting the Gretchin in front of the main building in the head.  This catches the Orks off guard, and they mostly fail to respond to the attack!  Lt. Meyers makes for the objective in the confusion.

An Ork and a Gretchin round a corner and come face-to-face with a Commando, but they are all too stunned to act. The Ork Nob comes running out from his position bellowing orders, but aimed fire from Lt. Meyers sends him scurrying back into cover. 

The Orks are starting to shake off their surprise and respond.  However, their shooting and the Imperial shooting is largely ineffective this turn.  However, Lt. Meyers assaults and kills a Gretchin up-close and personal.  


Battle Phase:
We are entering Turn 4, and half-way to the end of the battle.  Lt. Meyers is attacked by a Choppa Boy, and barely manages to fend him off.  A nearby trooper than blasts into pushed back Ork and causes him to rout from the battle.  Lt. Meyers than assaults and Ork near the entrance to the control building, and forces him back with close range pistol fire and wildly swinging his chainsword.  This victory is short lived, as a slugga boy pops out from behind the bunker and the shooting forces Lt. Meyers back.  The Ork Nob gets himself in front of the control building.  


Lt. Meyers shakes off being shot at, just in time for the Ork Nob to charge into him swinging his choppa and shooting.  However, the impetuous charge causes the Ork to lodge his Choppa into some machinery, leaving him wide open for the Lt.  This forces the Ork back away from Lt. Meyers.  


A Commando gets the doorway to the Control Center amidst a hail of enemy shooting.  However, he stays in place and ready to go in next turn.  A precise shot from a commando kills another Gretchin. 


A Commando makes it into the control center, but an Ork boy chases him inside and kills him with a choppa swing.  Seeing his trooper go down, Lt. Meyers rushes in and finishes the Ork that killed his friend. Another nearby Ork rushes in, and the Lt. and the Ork come tumbling out in a rolling, spitting fight.  An Ork Shoota boy manages to gun down one of the flanking commandoes.  Finally, the Grenadier gets his gun going, and an indirect shot forces a Gretchin and an Ork Shoota boy into the drink with its blast wave.  


The Commandoes are down 2, and the Orks have lost 4 Gretchin, 2 Slugga boys, and a shoota boy.  

The End Game: 
The Ork Nob picks up a Choppa from a fallen boy, and rushes the shaken Lt. Meyers.  This time, his aim is true and the Commando officer is killed. The death of their leader stuns the Commandoes, and they seem unable to respond.  

A Flamer blast forces back the Ork Nob, and a trooper runs for the Control Room, however he is flying tackled by an Ork Slugga boy and the two bash each others brains out.  The Grenadier forces the Ork Nob off the side of the rig (Forced a retreat off the board edge) with a well placed grenade shot.  


With that, the automated defenses open fire in the approaching Imperial aircraft, and they are forced to abort from their attack runs.  The Commandoes failed to secure the objective in time. 


Conclusion: 
Orks win in a squeaker.  

The Imperials managed to get into the control room but they couldn't stay in it.  Then, after the death of Lt. Meyer, they had a tough time activating on their own.  This was late in the game, so that left that too far away to get there in the end.  Of course, the Orks only had an Ork and 2 Grots left to oppose them. 

Vice Admiral Travers saluted General Kurtz as the Cadian marched into the command center on Admiral Traver's flagship.  He and several aides marched crisply in behind him.  The off-worlder looked comfortable onboard ship, even though he was an Imperial Guardsmen.  General Kurtz returned the salute with the precision that Vice-Admiral Travers had learned to expect.  

"Our Naval Commandoes were unable to secure the defense, so the follow-on attacks were aborted General," Vice-Admiral Travers reported matter-of-factly.  The commander of Taskforce: Thorn was pretty sure that the General was well aware of what had happened. "Perhaps, if your connections in the Panther's Claws Space Marine Chapter would have better luck?" 

The General waved off the suggestion, "No need for that.  The Drill Rigs are just a diversion from the main theatre.  The challenge is the Ork air assets.  Therefore, if Battlegroup Hemlock is going to succeed we will need to put a dent in their air power."

Vice-admiral Travers nodded, "I see.  Well, I am sure Commodore Miles has a plan of action."

"You have read the reports. Taskforce: Chalice is struggling and the air crews are reaching a breaking point.  The pilots are not the issue, but I have doubts that the mainline PDF aircraft are a match for the Ork Fighta, and there are not enough Imperial Navy can't be everywhere. 

Taskforce: Thorn has been successful in sweeping the seas clear of the Ork fleets.  They have been bottled up and pose little threat.  Therefore, if we want to make a dent in the Ork air power we need to leverage the successes you have had Vice-admiral Travers."   

Vice-admiral Travers kept a stern military face on the outside, but on the inside he was reeling, "I will do what is necessary, General Kurtz." 

Before playing this game, My skumgrod and I had a long talk about which game system we wanted to use.  We had been playing a lot of Kill Team and this seemed like a perfect mission for the system.  However, we ultimately dismissed it because we had been playing it a lot at the club so decided to try something different.  We also considered Black Ops but ultimately decided that the board space might not work out for this mission.  We also dismissed Stargrave and Rogue Stars quickly.  The first was ill-suited for what we wanted, and the second took too long to stat up the models. 

We settled on Restless Suns because my Skumgrod was confident that there would be no rules questions, or if their were, we could at least comfortably make them up on the fly.  Overall, I think it worked well enough BUT the arbitrary time limit ended up with a bit of an abrupt ending.  Secondly, Ork ferociousness in hand-to-hand does not translate 1:1 in the system.  The game also introduces a lot of friction for a commander, as troops often do not do what they are supposed to be doing.  It can also be tough to outright kill a foe, and indeed about 4 of the casualties in this game were due to retreat moves. Still, quick fun with plenty of killy-ness and some a lot of surprises during game play! 


Become a Patron and get access to all the cool stuff, a peak behind the curtain of Blood and Spectacles, and early-access to playtest games!  


You can follow Blood and Spectacles Facebook page or Instagram for more fun! 

Check out the latest publications and contact me at our Blood and Spectacles website

Or purchase all out games at the Blood and Spectacles Publishing Wargames Vault Page!          


Monday, June 19, 2023

Battle Report- Men of Bronze: Re-taking the Propontis in the Ionian Revolt


This is the continuing recreation of the Ionian Revolt.  The Ionian Revolt was a revolt against the Persian Empire by the Ionian Greeks and their allies prior to the Greco-Persian War.  It took place from 499 to 493 BCE.  It was a land and sea affair, so I am using a combination of Poseidon's Warriors and Men of Bronze to re-create the campaign.  Both are from the Osprey Wargaming Series.  In addition, Men of Bronze has a specific supplement for the conflict called The Ionian Revolt. 


The details of the campaigns in this region are sparse. According to Herodotus, the Persians divided the campaign up between three generals.  The first went to Cyprus, the other dealt with Caria, and the third moved into the Hellespont on Propontis to regain control of the region.  We must assume that their were a series of sieges and negotiated surrenders after symbolic resistance.  The re-taking of the area was relatively swift and appears to have taken place prior to the attacks on Caria.  Once the General Daurises turned his attention to the Carians, a new Persian general came to the region to finish the job. 

 Due to the speed of the campaign, we can only assume that the majority of the sieges were symbolic in nature, or we resolved as soon as the Persian army showed up.  For today's battle, we will assume that the Persians have managed to "trick" the Ionians out from behind their walls to defend their fields from being ravaged.  If the Persians manage to ravage the fields, the Ionians would quickly fold.  However, if their logistics could be saved then perhaps the city could hold out a bit longer!  

Forces:
The rebellious Greeks will use a relatively standard Hoplite force to defend the city:

Ionian Greeks
1 Drilled Hoplite - 1 General
2 Militia Hoplites
3 Peltast Hoplites

The Persians are using a fast moving siege force.  Therefore, the cavalry has been left back at camp:

Persians
2 Archers
1 Drilled Infantry - 1 General
2 Warband Infantry
1 Psiloi

Set-up:
Today's game is set-up on a 72MU by 48MU board.  The Greek side of the board is the long wall of their city, with the city gates on the left side of their deployment zone.  They have a small area to deploy, and have three Peltast units and a Militia Hoplite unit ready to move out.  The rest are still in reserve.  The field is under the protection of their wall on the opposite short board edge, about 48 MU away.  A road leads from the gates of the city, to the Persian deployment zone.  


On the opposite side, the Persians deploy across the board.  They have the Drilled Infantry spread out near the road, screening the two archer units.  Next to them are the two Warband infantry and the Psiloi.  


Mission: 
This battle uses the Reserves special rules and follows the format of the Ravage the Fields scenario from the Men of Bronze rulebook. 


For this battle, I will not be following every detail.  I have found this method really hampers and slows down the game play!  Instead, I will be covering the action in three main phases; the Maneuver phase, the Battle phase, and the End Game.  The Maneuver phase is where the armies are mostly closing the gap and set-up their attack plans and is typically turns 1-3.  The Battle Phase is typically where most of the fighting occurs and normally falls in turn 4-6, and the End Game is the final moves to determine the ultimate victor and often are turns 7-8.  

The Maneuver Phase:   
The Persians won the initiative during the opening three turns of the game.  With that, they pushed forward and managed to get troops into the old ruins before the walls.  The former villa of the landlord of the fields was overrun with Persian troops. 

Reserve Greek troops deploy from the City

The Greek Peltasts rushed across in front of the wall towards the fields backed up by a Militia Hoplite unit.  The Drilled and second Militia Hoplite unit tried to pin the main Persian body on the Greek left, close to the gate.  However, the Persians used their mobility to provide a refused flank.  

Greek Peltasts rush to stop the Persian raid

In the beginning of the 4th turn, a Persian Peltast managed to get to the fields.  The rolled poorly and it would take another 2 turns for them to wreck the field there.  A Persian warband infantry unit stood by to try to hold off the Greeks.  

Persian light troops get to the fields and start ravaging them

Battle Phase: 
The Persians bid high enough to win initiative again!  They peppered the foremost Peltast unit with a barrage of arrows from the ruins, causing some courage loss.  This was followed up with the Persian Warband near the fields charging the same unit.  In fierce fighting the Persians were pushed back with heavy losses and began to waver.  The Peltasts were down to 1 courage as well.  

The Peltast unit closest to the wall dug deep into Arete Points, and managed to come to grips with the Peltasts in the fields.  The combat there was indecisive as both sides lost 1 courage.  Peltasts tried to hold back the Persians in the ruins with a Javelin barrage, to no avail.    

The Greeks try to repel the Persian troops

The Greek Militia Hoplites on the Greek left managed to chase down and charge into the Persian Drilled Infantry.  The Persians did not have enough Arete Points to counter-charge and they lost two Courage in the fight.  The Greeks pushed the Persians back.  

Greek Hoplites manage to bring the Persian infantry to battle on the Greek left

Despite being caught on the Greek left, the Persian had all ready successfully shifted their archers tot he opposite flank under the cover of their infantry screen. 

As Turn 6 began, the Greeks had to make sure those Persian Peltasts were pushed out of the fields before the end of the turn.  It did not look like they could get additional troops into the fight there, but they threw almost all of their Arete Points into going first.  The Persians saved them for re-rolls in the combat.  The Greeks started things off with the Peltasts and the Warband infantry, if they won there they perhaps could push back far enough to help with the Psiloi battle.  Precious re-rolls were used, and both sides ended up routing. 


With that, the Greeks moved to the decisive Psiloi fight, with both sides unable to get any reinforcements over to that side of the board.  The Greeks were clearly victorious, and forced the Persians to waver and pushed them back.  The Greeks best chance was for the wavering Persians to fail a Discipline check in the End Phase from seeing their fellows run for it! 


The Greeks decided to try to break the Persian army, and threw a Peltast into the ruins to try and root out the Warband Infantry there.  The Persian Archers supported their fellows, and with the help of some re-rolls managed to push the Peltasts back 2 MU.  


The last Militia Hoplite unit legged it for the fields, hoping they could keep any other marauding Persians from getting there, as the second Persian Archer unit was threatening a run. 

End Game: 
The Persian Psiloi managed to stay in the fields for three turns.  However, the Greeks still had a chance if they could cause my army to Collapse!  

Realizing this, the Militia Hoplites by the wall decided to charge into the fight into the fight in the Ruins!  Despite the help, both sides still lose 2 Courage and reduce them to 1 courage.  Nether side is wavering.    

The Drilled Hoplite rush into to support the Militia Hoplites against the Persian Drilled Infantry.  It is too much for the Persians, and they are sent packing.  With the backbone of their army fleeing, The Persian army starts to collapse. 


However, it is too little, too late as the Persians fighting in the ruins hold it together to finish off turn 8.  

Conclusion: 
Wow, that was a fight to the finish.  One more turn and my army would have folded like a paper napkin. The Greeks had the advantage at the end, but time was against them.  My Psiloi earned their pay ravaging the fields for the win, but the rest of the army did its part holding together.  

The Persian armies mobility allowed them to have a refused flank that drew the Greek heavy infantry out.  In addition, it allowed me to threaten the fields early, with multiple units and occupy the ruins.  Being in the ruins helped stiffen my weak warband infantry units. 

That was the 4th win for the Persians in the Revolt.  They have been victorious on land and sea.  However, each game has been a close run thing.  Now, they have their biggest challenge, the Carians ahead of them.  Can the Persians keep this win streak going?  

Despite the Greek forces managing to push the attackers back, the damage had been done.  The city could not maintain itself for a the rest of the season.  The destruction of their fields forced them to the bargaining table.  Thankfully, the Persians were magnanimous in victory.  They only forced the rebel leaders to be taken captive, and then tortured to death.  The city and its inhabitants were spared the sword.  They appointed a new Persian friendly tyrant, and moved onto the next city in the region. 


Become a Patron and get access to all the cool stuff, a peak behind the curtain of Blood and Spectacles, and early-access to playtest games!  


You can follow Blood and Spectacles Facebook page or Instagram for more fun! 

Check out the latest publications and contact me at our Blood and Spectacles website

Or purchase all out games at the Blood and Spectacles Publishing Wargames Vault Page!         


Monday, June 12, 2023

Battle Report: Aeronautica Imperialis - Operation: Hemlock


This is a game using the Forgeworld Version of the Aeronautica Imperialis rules. 

Warboss Skarbash looked across the crude map of Da' Deff Islands, and he did not like what he saw.  The Imperium was closing in on the last island he possessed.  More and more of his materials were being cut-off, more of his boyz were not coming back, and the Oomiez kept getting more loot to keep fighting.  

He had managed to break out of the bubble and regain some control of the Approaches.  This gave him and his Nobz some breathing room.  It was a long way from pushing the Oomiez out of the way though.  His submersible fleet had mostly been sunk, his wet navy was thwarted.  The only thing keeping the Oomiez from attacking him now was his Air Boyz.  

He had to put a stranglehold on Imperial logistics.  That was where the Oomiez were winning.  The only way he could strike at them was air power.  He had all ready started attacking the Oomie shipping with his fighters, now he needed to neutralize their air re-supply. 

The Orks are trying to intercept and destroy incoming Imperial supplies by interdicting them in the air.  As a result, the air craft have been placed into a convoy system where Imperial interceptors could act as their protectors.  

Forces:

Ammoriss Air PDF
4 Thunderhead Airships
3 Arvus Landers
2 Sentry
+ Skystrike Missiles
1 Sentry Eyes

Ork Air Waaaagh!
3 Ork Fightaz
1 Fighta- Bomma
1 Dakka Jet

Mission:
This is a Convoy Raid mission per the rules found in the Airspace Compilation. The Defender earns VP for every transport that manages to escape the board edge.  

Set-Up:
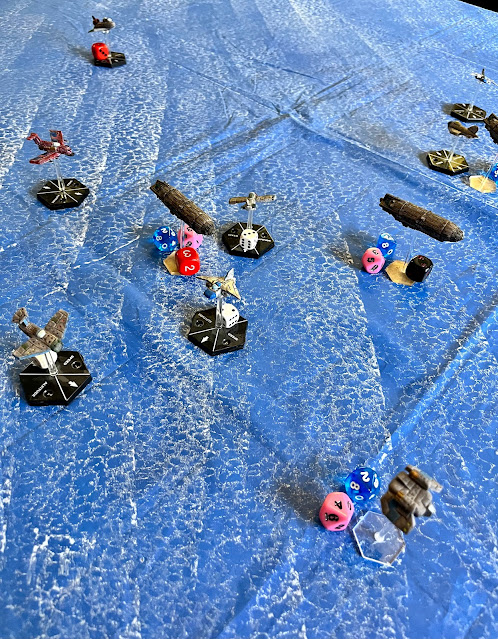
The game is played on a 6x4 board.  The Convoy is set-up in the center of the board.  The Arvus are in front, followed by the Thunderheads in a diamond pattern.  They are flanked by Sentry's and the Eyes is tailing.  They are at low-altitude around 2 to 3 and speed 3.  The Sentry's are flying top cover at Alt 5.   

The Orks can come in from any board edge.  They choose to clump up the fightas and Dakkajet one of the long edges, coming in fast, at mid-altitude 3 and 4.  The Fighta-Bomma is coming head on from the escaping short edge at slow speed and mid-altitude 2.   


I am breaking up the game into three phases, rather than discussing each turn.  The Maneuver phase is the actions leading up the engagement.  The Combat Phases are when the shooting is going strong.  The End Game are the turns that lead to the key conclusion of the battle.   

Maneuver Phases: 
The order to "Break, Break, Break!" comes over the Imperial Vox, and all the aircraft start to break up.  The Ork fightas curve in on the convoy and it is all too easy to catch them.  Big Dakka rounds start spraying the air.  The Sentry's arc in to intercept and they trade shots ineffectively with the Ork aircraft.  Arvus designated green goes down into the ocean below trailing fire, but a chute is spotted. 


As the Imperial craft continue to scatter, Fighta 1 catches up to Arvus: Red and knocks him out of the sky at close range, the pilot is killed in the barrage.  The Ork Fighta-Bomma is tagged and starts to smoke while one of the Thunderhead Airships also looks worse for wear.  The Sentry Eyes also manages to snap a Pict of Fighta 1 to help I.D. where the Orks sortied from.  However, the initial assaults is over, and now the Ork planes will need to maneuver to get back into the scrap. 


Battle Phase: 
It looks like the Imperials may have busted past the Ork trap, but Fighta 2 leans into his guns and blasts Arvus : Blue into a fireball.  No survivors.  Sentry 2 tries to get revenge, but fails to hit the Ork craft.  


The End Game:
Imperial forces are almost to their air defense umbrella.  

Fighta 2 swoops in on the damaged Thunderhead and leans into the triggers.  The blimp crumples in on itself and falls straight into the ocean below. The crew manage to bail-out before it is too late. The Orks desperately swarm the Thunderheads, and manage to riddle them with shells, but the big airships manage to keep going.  


With there last desperate effort spent, the Orks peel off and head for base.  


Conclusion: 
Let's go to the VP board.  I had three Thunderheads escape and damaged a Fighta-Bomma for 24 points, and I lost 3 Arvus and a Thunderhead, with two more damaged for 31 VP.  Orks win!  

"Colonel Brusilov, a report from Commdore Miles of Taskforce: Chalice," the adjunct saluted smartly as he handed Colonel Brusilov a data-slate.  If Miles sent an official Data-slate it was not good news.  The Colonel absently saluted back and opened the key messages

++++Code Level: Magenta++++

Colonel Brusilov,

Ork air activity has been increasing, and the Ammoriss PDF has been unable to quell them.  Re-supply to Baron's Rest can not be guaranteed.  

Orks are staging out of forward positions in the Approaches from captured Drill Rigs in the Ammoriss Sea.  I am co-ordinating with Vice Admiral Travers from Taskforce: Thorn to re-take these Rigs.  Once secured, we will be able to commence with re-supply as planned.  Until this is complete, re-supply can only be conducting via surface Naval convoy.  

This will impact your ground offensive on Baron's Rest.  With the Emperor's Will, we shall prevail. 

Respectfully, 
Commodore Miles

++++++

The rest of the attachment was the hard equation of logistics matched with the facts of war.  The Colonel had been in service to the Throne long enough to keep his composure in front of the soldiery.  He signaled for an adjunct, and handed them the data-slate.  

"Please be sure to forward this to the Office of Strategic Intelligence at Imperial Tower.  Please have it marked 'Urgent'," He tried to turn his attention to the coming offensive, but the lack of re-supply and the growing loss of air superiority made focusing on the coming thrusts difficult.  

See you at the next Operation: Hemlock battle report! 


Become a Patron and get access to all the cool stuff, a peak behind the curtain of Blood and Spectacles, and early-access to playtest games!  


You can follow Blood and Spectacles Facebook page or Instagram for more fun! 

Check out the latest publications and contact me at our Blood and Spectacles website

Or purchase all out games at the Blood and Spectacles Publishing Wargames Vault Page!    


Monday, June 5, 2023

Battle Report- Men of Bronze: Ionian Revolt on Cyprus


This is the continuing recreation of the Ionian Revolt.  The Ionian Revolt was a revolt against the Persian Empire by the Ionian Greeks and their allies prior to the Greco-Persian War.  It took place from 499 to 493 BCE.  It was a land and sea affair, so I am using a combination of Poseidon's Warriors and Men of Bronze to re-create the campaign.  Both are from the Osprey Wargaming Series.  In addition, Men of Bronze has a specific supplement for the conflict called The Ionian Revolt. 


Despite the loss at the Battle of Ephesus, the Ionian Revolt spread.  The Ionians managed to gain the support of the Carians, and many other cities in the region.  They all rose up against the Persians.  The island of Cyprus also decided to rise up.  All the cities except for one decided to rebel.  The other cities laid siege to the lone loyalist city.  However, the Persians sent aid tot he island, supported by a Phoenician fleet.  The rebels reached out to the Ionians for help.  They also responded with a fleet and an army.  

Earlier, we played the sea battle off the coast near Salamis.  In that battle, the Persians were victorious which was an ahistorical outcome.  Supposedly, on the same day as the sea battle there was also a land battle. Today, we are going to be playing the land battle as presented in the Ionian Revolt supplement.  There are some special rules regarding Cypriotes changing sides in the battle, and due to the loss during the sea battle, we will be making it easier for Cypriote forces to change sides. 


Forces: 

The Cypriotes
Militia Hoplites - Ionians
3 Peltasts - Cypriotes
1 Drilled Infantry - Cypriotes and General

The Persians
2 Drilled Infantry - 1 with General
2 Archers
2 Psiloi

Mission:
This is a Decisive Battle scenario as found in the main Men of Bronze rulebook. 

There is a complication that involves the potential for Cypriotes to desert to the Persian side of the battle. 

Set-up: 
Behind the Persian deployment zone is a coastline, and on the Persian left leading into the ocean.  The table itself is 48 MU by 72 MU.  The rest of the terrain on the board is scattered foliage, a rock outcropping or two, and a lone tree or two.

The Persians deploy in front of the shoreline.  This represents them deploying from their troop transports or Triremes.  The Psiloi take each flank with the Infantry and archers alternating in the center.   

The Cypriotes are on the opposite long table edge.  The Ionians are on the right flank along the river edge.  The Phalanx is in Open Order to get us started.     


I am going to avoid turn by turn descriptions for this battle report.  I have found them a bit cumbersome to put together, and they were distracting me from actually playing the game.  Therefore, I am going to divide the report into three segments; the Maneuver Phase, the Battle Phase, and the End Game.  Hopefully, this will give you a good feel for the battle without me wasting a bunch of time on and energy on less relevant moves, Arete Point usage, and the dice results.  Let me know if you like this approach better in the comments section. 

Maneuver Phase: 
Both sides seemed to move forward with purpose.  The Persians moved away from their landing points, and began to from a bulge away from the Greek Hoplites.  They let their line open a bit between the Infantry and the Psiloi, as it to draw the Greeks in, while refusing the flank against the Greeks best troops.  


They used Arete points to trade-off initiative as the Persians tried to jockey a sneak their archers into range without getting a retaliatory charge to wipe them out.  It was a game of cat and mouse, as they were trying to get the drop on other fast moving light troops like the Cypriote Peltasts.  


None of the Cypriote units had defected yet.

The Battle Phase:    
The Persians win initiative to start the 4th turn, when things look like they are about to get interesting.  Persian archers start off the battle by inflicting heavy casualties on the Cypriote core of the army.  On the Persian left, the Infantry charge the Hoplites and are counter-charged in return.  The Persians manage to push the Hoplites back 1 MU, causing them to waver and loose formation!  


The Cypriote Drilled Infantry slam into the Persian center, who are supported by Archers.  Both sides take casualties, but it seems to be a bloody draw.  A follow-up wave of Cypriote peltasts cause further damage, and the Persian center starts to bend.  

It is during this moment of the battle, that the Cypriote Peltasts lurking in the rocks, decide to switch sides to the Persians.  With the right flank secured by the defection, the Persian Psiloi entrench on the dune and throw their javelins at the weakened Cypriote Peltasts closing in on the archers.  It is enough to rout the Cypriotes there.  The rebel left has collapsed.  


Greek attempts to seize the initiative fail, as the Persian onslaught continues.  Persian Psiloi charge into the wavering hoplites on the rebel right, and with the help of some re-rolls break the Ionians and scatter them tot he winds.  Despite the losses on the flanks, the Cypriotes manage to push through the Persian center and route the troops there.  


With all the casualties, the two armies start to make Collapse tests.  Despite their victory in the center, the Cypriote Drilled infantry call it a day and withdraw back to the city.  Only the Cypriote Peltasts remains, with serious casualties.  The Persians have a Drilled Infantry unit withdraw, and their right flank Psiloi fall back to the beach to be withdrawn.  

The End Game:
With three Persian units lefts against a heavily battered Cypriote Peltast unit, the final phase of the game was here.  The Persians outbid the Cypriotes 2 to 0 and take initiative.  


The Persian archers use the last Arete point for a re-roll and blast the Peltasts off the beach.  With a victory secured, the Persians begin to reform and prepare to lay siege to Salamis.  


Conclusion:
The Persians win, helped out a lot by the rebel left flank switching sides mid-way through the battle.  Another historically accurate battle.  Our next battle will represent the Persians moving into the Propontis and Hellespont regions to re-take and pacify them.      

Against Peltasts, you can see why the Persian archers were such a feared force, they were very effective against the lightly armored foes.  Using Psiloi as support units and flankers worked really well for me in this battle as the Persians. I started with a relatively hot hand on the dice, but it fell off in time for the Cypriotes to break through my center.  Thankfully, I had decided to keep my second archery unit out of the fight there, and instead establish a second line of reserves.  That decision probably won my the battle. 


Become a Patron and get access to all the cool stuff, a peak behind the curtain of Blood and Spectacles, and early-access to playtest games!  


You can follow Blood and Spectacles Facebook page or Instagram for more fun! 

Check out the latest publications and contact me at our Blood and Spectacles website

Or purchase all out games at the Blood and Spectacles Publishing Wargames Vault Page!