Showing posts with label Campaign. Show all posts

Monday, July 21, 2025

Battle Report: Operation Hemlock- Restless Sun


Operation Hemlock has been a long running semi-narrative campaign m Skumgrod have been playing.  It is set in our corner of the Warhammer 40K universe but uses a variety of games to play.  Sometimes we use GW games, sometimes we use my games, and sometimes we use other, third party games.  Today, we elected to play Restless Sun which is my model-vs-model sci-fi game.  

Colonel Brusilov had Taskforce: Sword pounding the ork encampment for days now.  He could hear the rhythmic cycle of the Earthshakers just outside of his command chimera.  His command holo-display lit up with indications and assessments of where the great shells were striking in the Ork camp.    

His artillery were running out of shells.  Ork air attacks had weakened his supply lines back to North Ammoriss and his fellow Taskforce commanders had been unable to stop the greenskin raids.  He was very close to breaking the Ork toe-hold on Grig's Rest, but his supplies had to hold out long enough for him to push them off the island once and for all.  

Before he could launch his assault, he needed better intel.  The Office of Strategic Intelligence was sending him streams of information but they were back at Northcomm, miles away.  They couldn't tell him where the orks were hiding in their dug-outs, where they had hidden their traks, and where their gun emplacements were.  Before he could order an assault into the ruins of the Ork camp he needed intel.  

Brusilov tapped some controls, and a vox-channel opened to his adjunct at the front lines.  The hiss of static filled the air, before it stabilized and toned clear.  

"Major, gather scouts from each Company and send them forward.  We need to know where to strike." 

Forces:


Our Imperial Troops will be represented by my Death Korp Kill Team.  They are all going to be Regular Infantry units.  

Sergeant - Combat Weapons
Gunners - Squad Support Weapons
Sniper- Marksman


For the Orks, we are using Irregular Infantry however the Orks will all have the Fierce rules.  

Nob- Regular Infantry- Combat Weapons
Sniper Boy- Marksman
Shoota Boy - Rapid Fire
Rokit - Blast, Long Range
Bomb Squig- Rapid movement, Blast
Gretchin- Jump Gear

Mission:

To match the situation, we decided to use the Control Terrain scenario for our battle report today.  Models gain points for being in Difficult terrain at the end of the game.  

For complications, we went with Minefield.  Therefore, if you fail a movement roll you will lose Effectiveness from artillery, wild fire, or a mines.  I mean, they are trying to scout an active warzone!  

This scenario will last 8 turns. 

Set-up:

We will be using a 36 x 36 inch board for this.  Plus, since Difficult terrain is important, we will be putting 5 pieces of it out on the table.  1 near each deployment zone and three along the rough center line.   

Both sides are deploying about 6 MU in from their own table edge.  


The Ork side of the table.....

As usual, this will not be a turn by turn break down of the game.  This game went 8 turns.  Instead, I will cover it in broad strokes for the Maneuver phases, the Battle, and the End Phases.  

Maneuver Phase:  

The Artillery barrage and mines made it hard to move forward.  Some of the shells were landing dangerously close, disrupting maneuver by both sides.  However, those that could pressed forward, with the two sides trading ineffective shots.  The PDF troopers manage to force some of the leading elements of the Ork thrust with suppressive rifle fire.  


However, an Ork manages to sneak around the edge and attack a pair of Guardsman, forcing them to retreat from the onslaught.  The better training of the Troopers appears to be paying off! 

Battle Phase: 

A PDF Trooper with a support weapon flees from the board thanks to the ferocious Ork Assault.  However, it does not go all the Orks way as concentrated rifle fire sees three Orks forced off the board and into retreat as well.  The PDF have dug in at two buildings, while the Orks have 1 building and a Grot in a ruin.


The PDF Troopers manage to leap-frog forward, with mines hampering their movement.  As a Guardsman makes the ruins, a startled Gretchin leaps out and forces him back with a flurry of vicious stabs.  Meanwhile, fighting is house-to-house and at close range! 

The Trooper with the Squad Support Plasma Gun manages to drive the Gretchin out of the cover of the ruins and forces him to retreat.  The Orks manage to counter-attack and push the PDF troopers back, but it might not be enough as their momentum is quickly spent.  Both sides still hold two objectives each.


 End Phase

The Ork assault is blunted by accurate rifle fire as the Ork Nob is forced back, as is an ork by the house.  However, the Bomb squig re-orients itself and charges towards the PDF lines.  


The PDF Sniper finally manages to outright kill an Ork with a shot to the head.  Bam!  Headshot! 

However the Bomb Squig gets to the PDF positions and detonates.  The blast outright kills 1 trooper and sends the other one scurrying away in shock.  

A trooper scrambles into the ruins to contest it from the Ork hiding inside of it.  With that, the Ork Nobs hears a distant horn blast, signaling for his Boyz to fall back and cover the final withdrawal back to the Green Zone from Grig's Island. 


Conclusion

This was a hotly contested battle between the PDF and Orks.  However, the PDF managed to score 2 objectives, while the Orks only had 1.  The PDF lost 1 KIA and 2 MIA from the squad, while the Orks had 2 killed outright, while 3 Orks and a Grot were unaccounted for during the retreat.     

It is hard to outright kill folks in this game, but you are constantly pushing them around the battlefield as they retreat, get Shaken, and Rally.  Probably a bit more realistic in that sense, as you could see momentum shift when friction did its thing during game play.  

I wanted to do one big Grig's Island showdown with Restless Galaxies, but I am not getting my Ork forces printed up for it.  Challenges, challenges.  Perhaps I will need to play a Aquanautica Imperialis Naval or even a Aeronautica Imperialis game to represent the Orks trying to flee the island, or even just a big Restless Stars or Xenos Rampant game instead? 

It might be a while until my Skumgrod is available for another game.  This one was on the books for a few months before we got it done.  We will see what happens in Operation: Hemlock next! 

Until next time! 


Become a Patron and get access to all the cool stuff, a peak behind the curtain of Blood and Spectacles, and early-access to playtest games!  


You can follow Blood and Spectacles Facebook page or Instagram for more fun! 

Check out the latest publications and contact me at our Blood and Spectacles website

Or purchase all out games at the Blood and Spectacles Publishing Wargames Vault Page!      


Monday, June 23, 2025

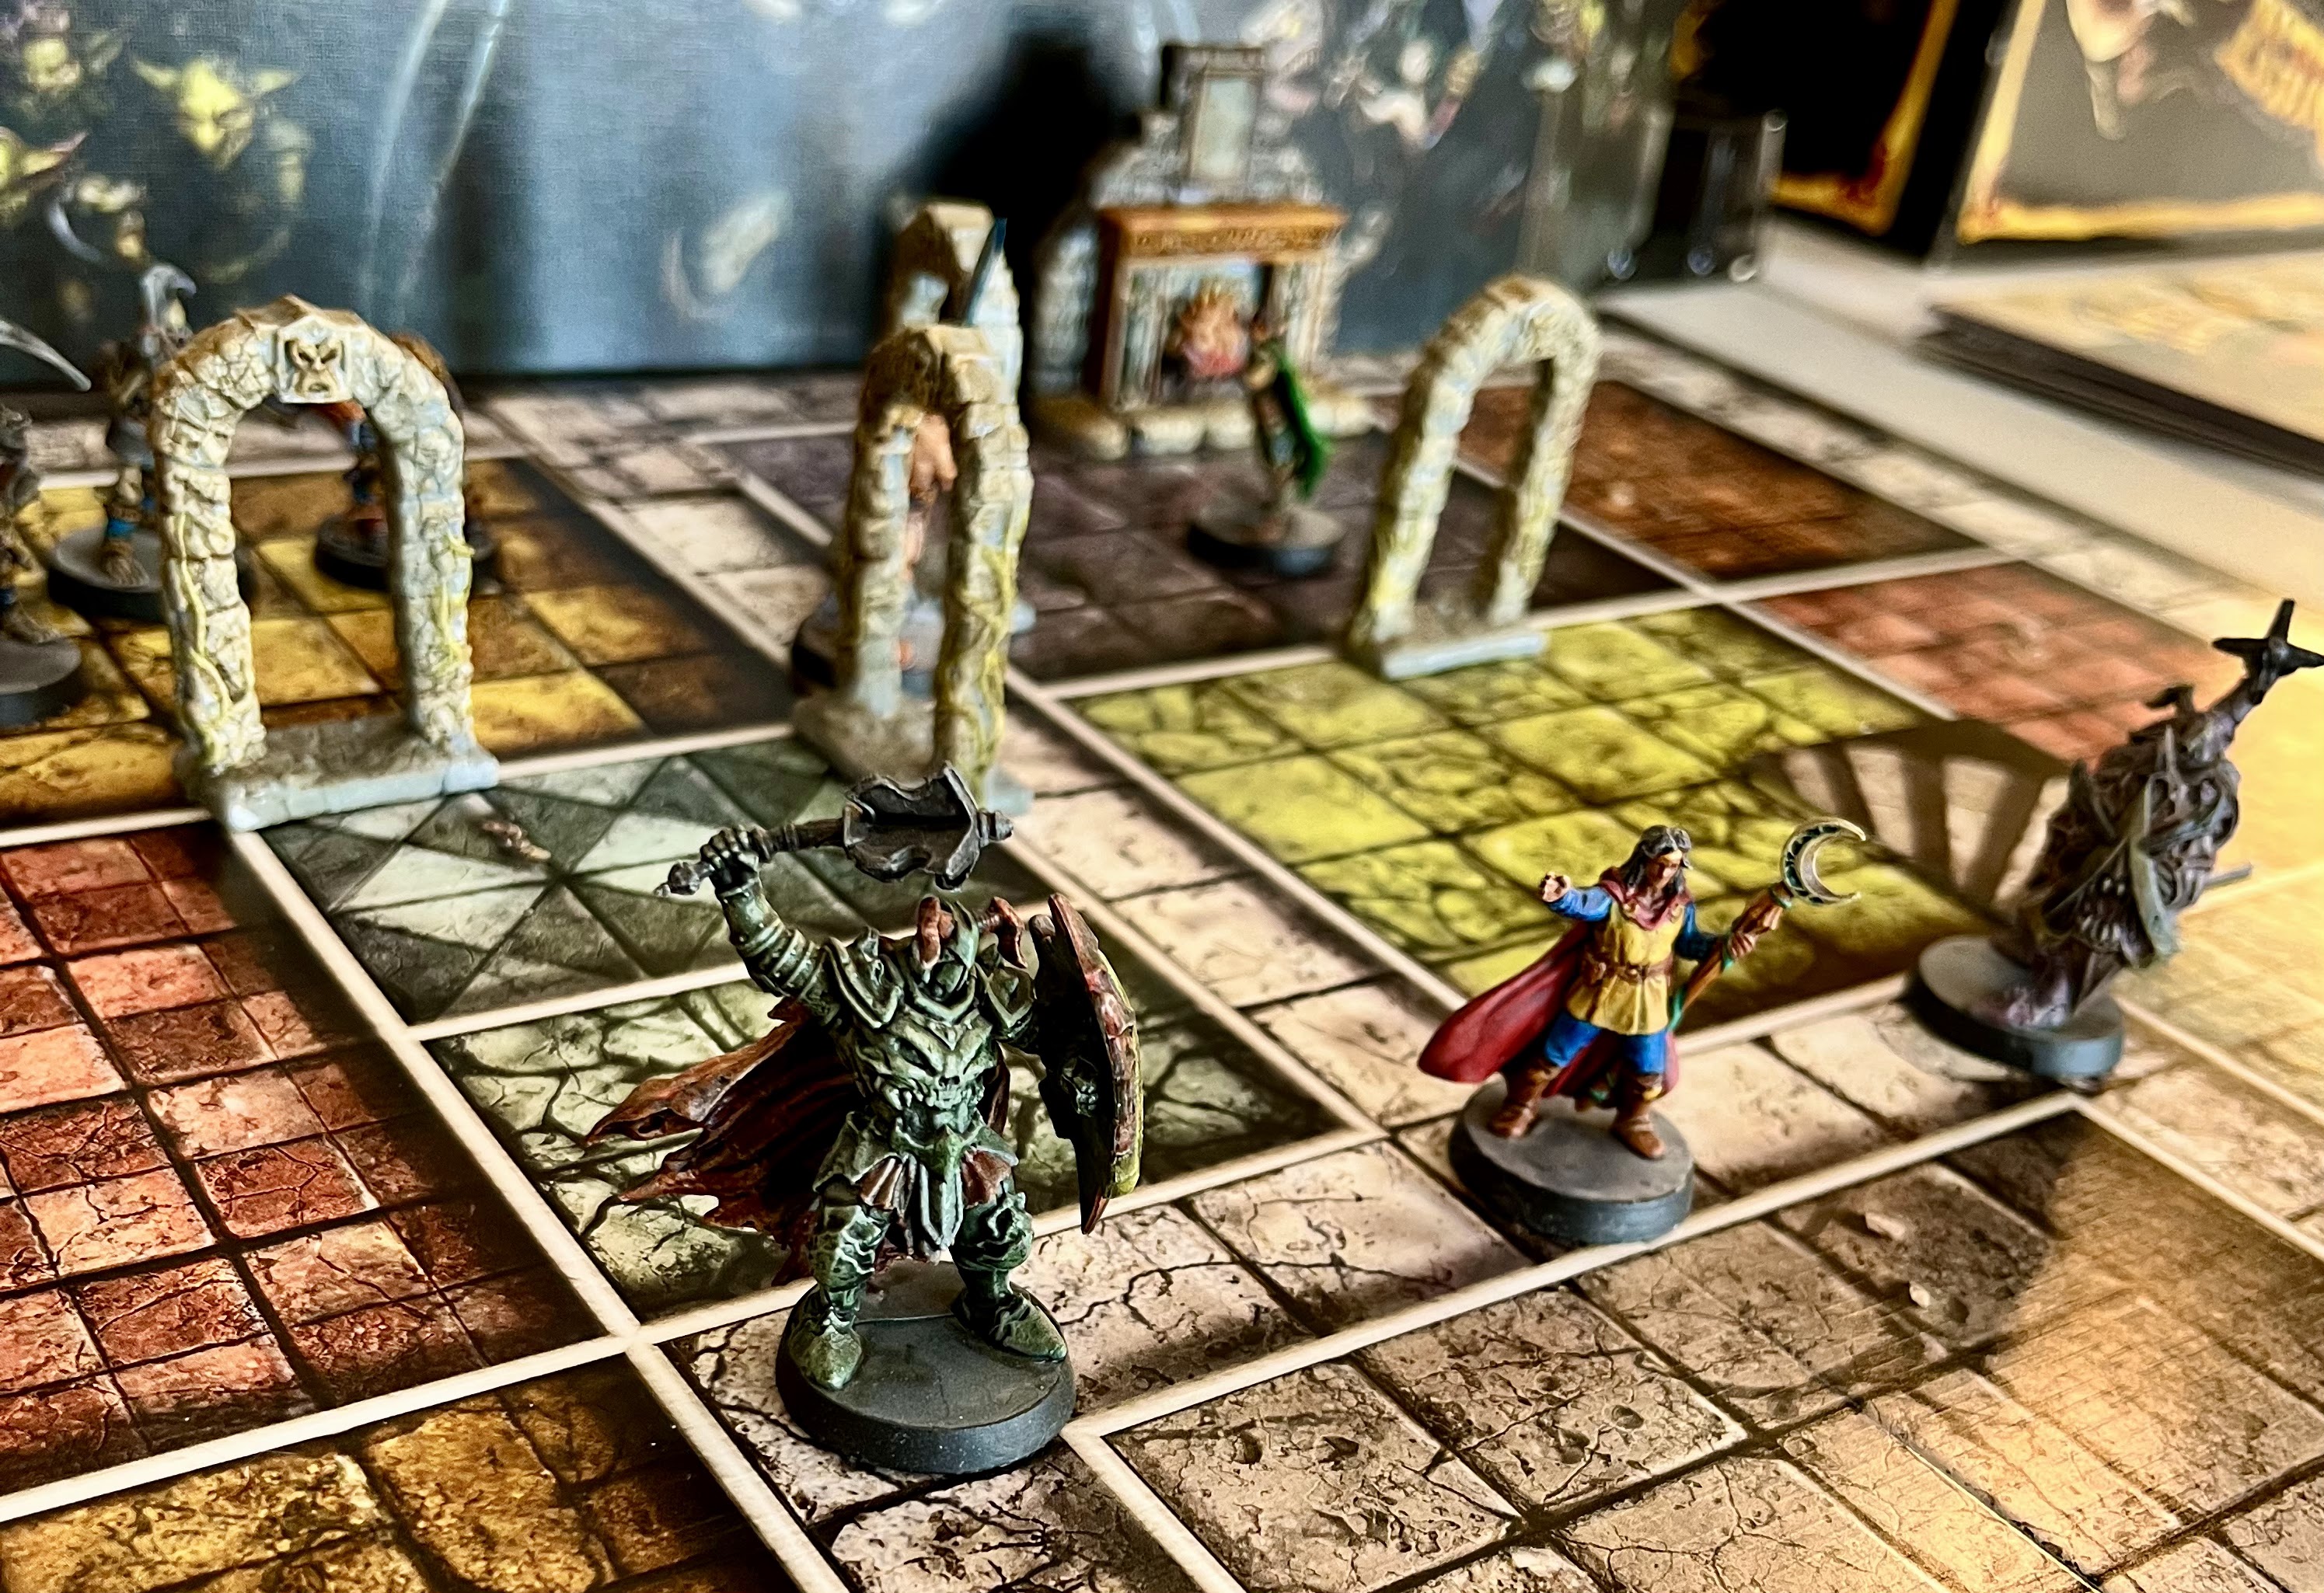
Heroquest: The Lost Wizard


Quest, quest, quest!  The Fellowship of Destiny returns to delve in dungeons deep and full of dread.  Allathura of the Green has taken up the charge of leading this bold band of adventurers at the behest of Mentor.  She is joined by Hamilcar Margos from the mountain strongholds of the Dwarves who has a knack for the mechanical.  Alongside him, is Aerlin the Wizard a young and powerful disciple of Mentor himself.  The last member is Neo-Wulf of the North Lands, a mighty and impetuous warrior from the Northern Tribes.  Alone, they could not stand against the forces of Dread, but together they form the mighty Fellowship of Destiny!  

The last two quest had drained the Fellowship of their potions.  However, they were much better protected than they have been in the past.  Hamilcar and Allthusa are kitted out like tanks with shields and helmets.  Even Neo-wulf has a helmet.  The Barbarian and Aerlin also have staves to help with support attacks when needed.  So armed, they are summoned again by Mentor.  


Prince Magnus is once again in need of the Fellowship's aid.  The king's wizard, Wardoz; has gone missing.  It is feared that Zargon has had the wizard kidnapped or worse yet, corrupted him with Dread magic.  The Prince needs the Fellowship to determine the fate of Wardoz.  If successful, each hero that survives will be rewarded with 100 gold!  

Mentor has used Loretome to give him an idea of where Wardoz maybe located.  Allathura leads the Fellowship to the area and begin their search.  Soon, Hamilcar uncovers an obscured entrance to a dungeon below.  The Fellowship exchange knowing looks and prepare to plunge into the dungeon below. The search of the Lost Wizard has begun. 

The Lost Wizard

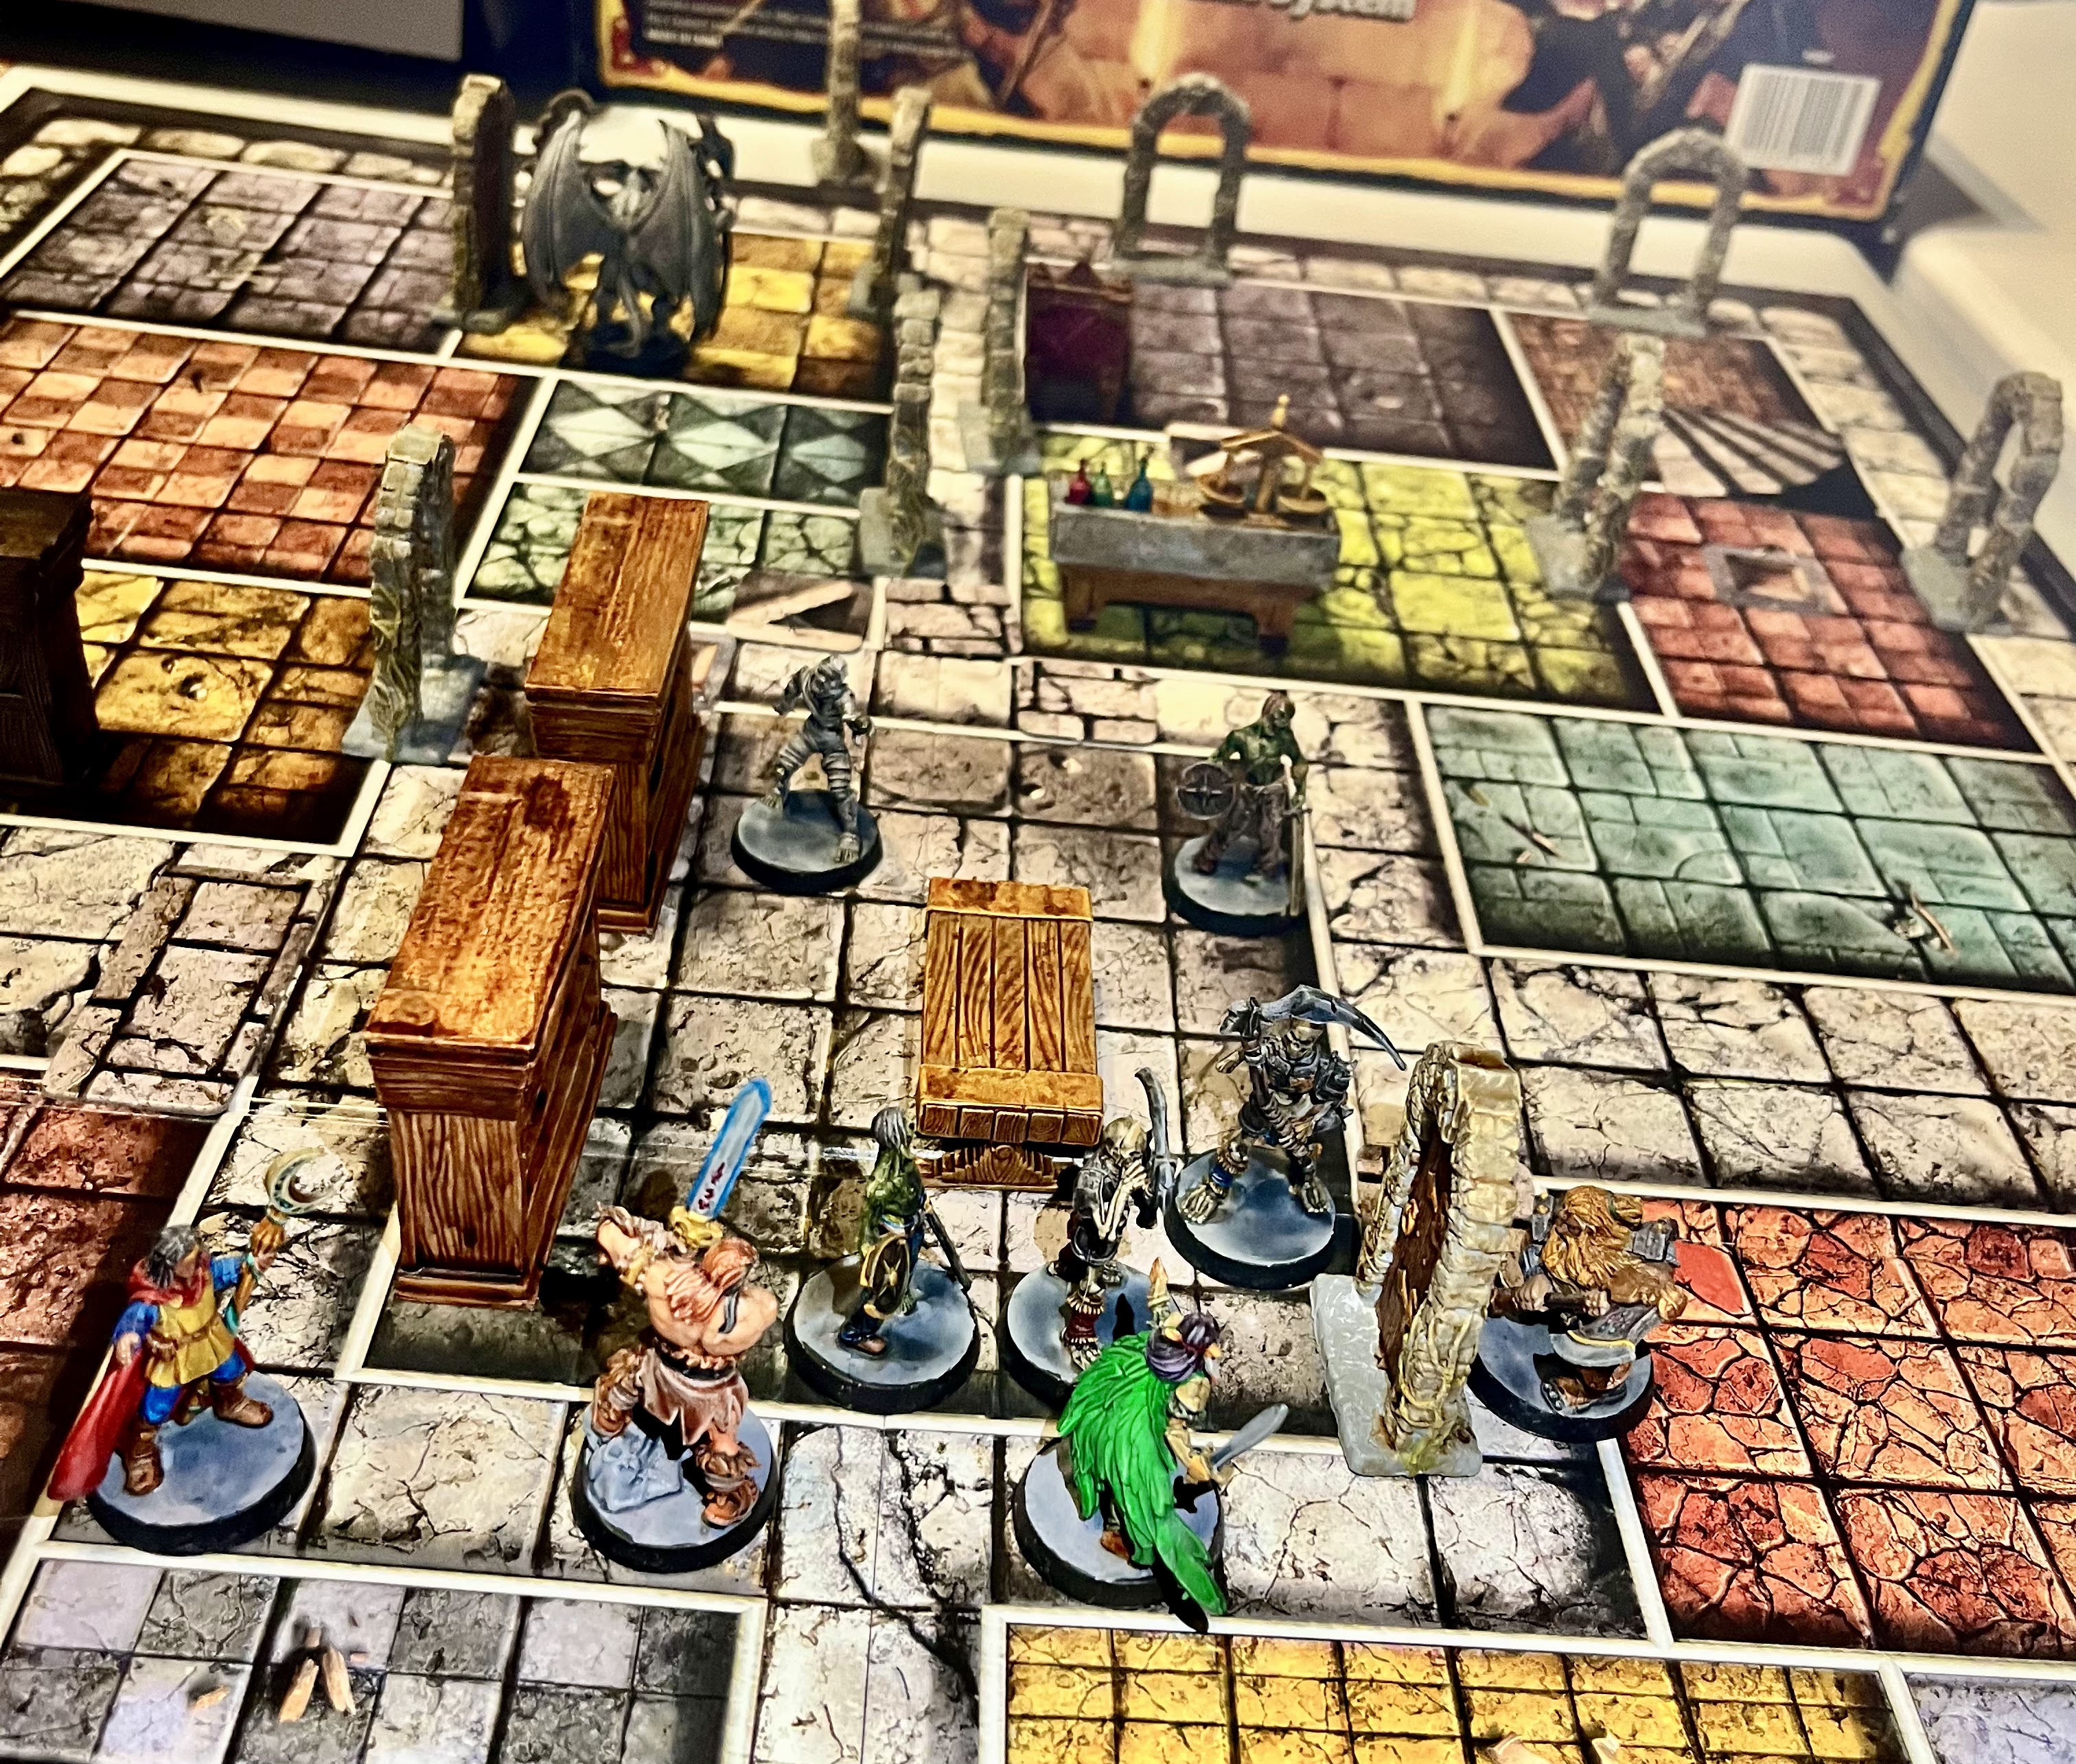
The Fellowship descends the stairway, and Neo-wolf eagerly takes point.  He smashes through the first door and quickly downs the first foe he sees, a skeleton.  Hamilcar follows and finishes off the second skellie.  They take a moment, and realize that this dungeon is older than they thought, and was probably crawling with the undead.  Hamilcar wished he had brought some Holy Water.

Allathura and Aerlin follow the other two.  As Neo-wulf begins searching for treasure, a Mummy stumbles from the shadows cast by the fireplace and attacks him!  However, Allathura suspected an ambush and made short work of the beast.  

The party pressed onwards and found Hamilcar as the lead element tangling with some Skeletons.  However, as Aerlin approached a T-intersection he accidentally stumbled too far.  A pair of Stone Golems were activated and moved in on the incautious wizard.  They caught up to him and punished him for his carelessness.  However, his Wizard Cloak allowed him to escape mostly unharmed.... mostly.         

Now, they were fighting on two fronts, between a room full of Skeletons and the pair of Stone Dread Golems.  Thankfully, Allathura managed to hold-off the Golems long enough for Hamilcar and Neo-Wulf to clean out the Skeletons.  This allowed them to face the Golems as a united front.  A Rock Skin spell on Hamilcar proved useful as he was able to absorb much of the Golem's attacks.  However, Neo-wulf was badly bruised from the encounter.  

Sometimes, I forget how cruel Heroquest can be.  The Fellowship battled their way through a wave of Skeletons.  Aerlin found himself exposed and took several hits from the undead fiends.  He was forced to use a Healing spell on himself!  

The Fellowship then fell into a pit trap that was right behind a door.  They all fell into and failed to jump over it, except the Elf.  This led to a chest behind another trap that Hamilcar disarmed.  However, when Neo-wulf opened the chest, he was struck by a poisoned needle!  Inside was a Purple liquid that he drank..... which turned him into stone.  The Fellowship took a moment to mourn their friend, assuming he was dead!  Then, leaving the room, they all fell into the pit again.... except the Elf.  This room caused more carnage than any monsters had! 

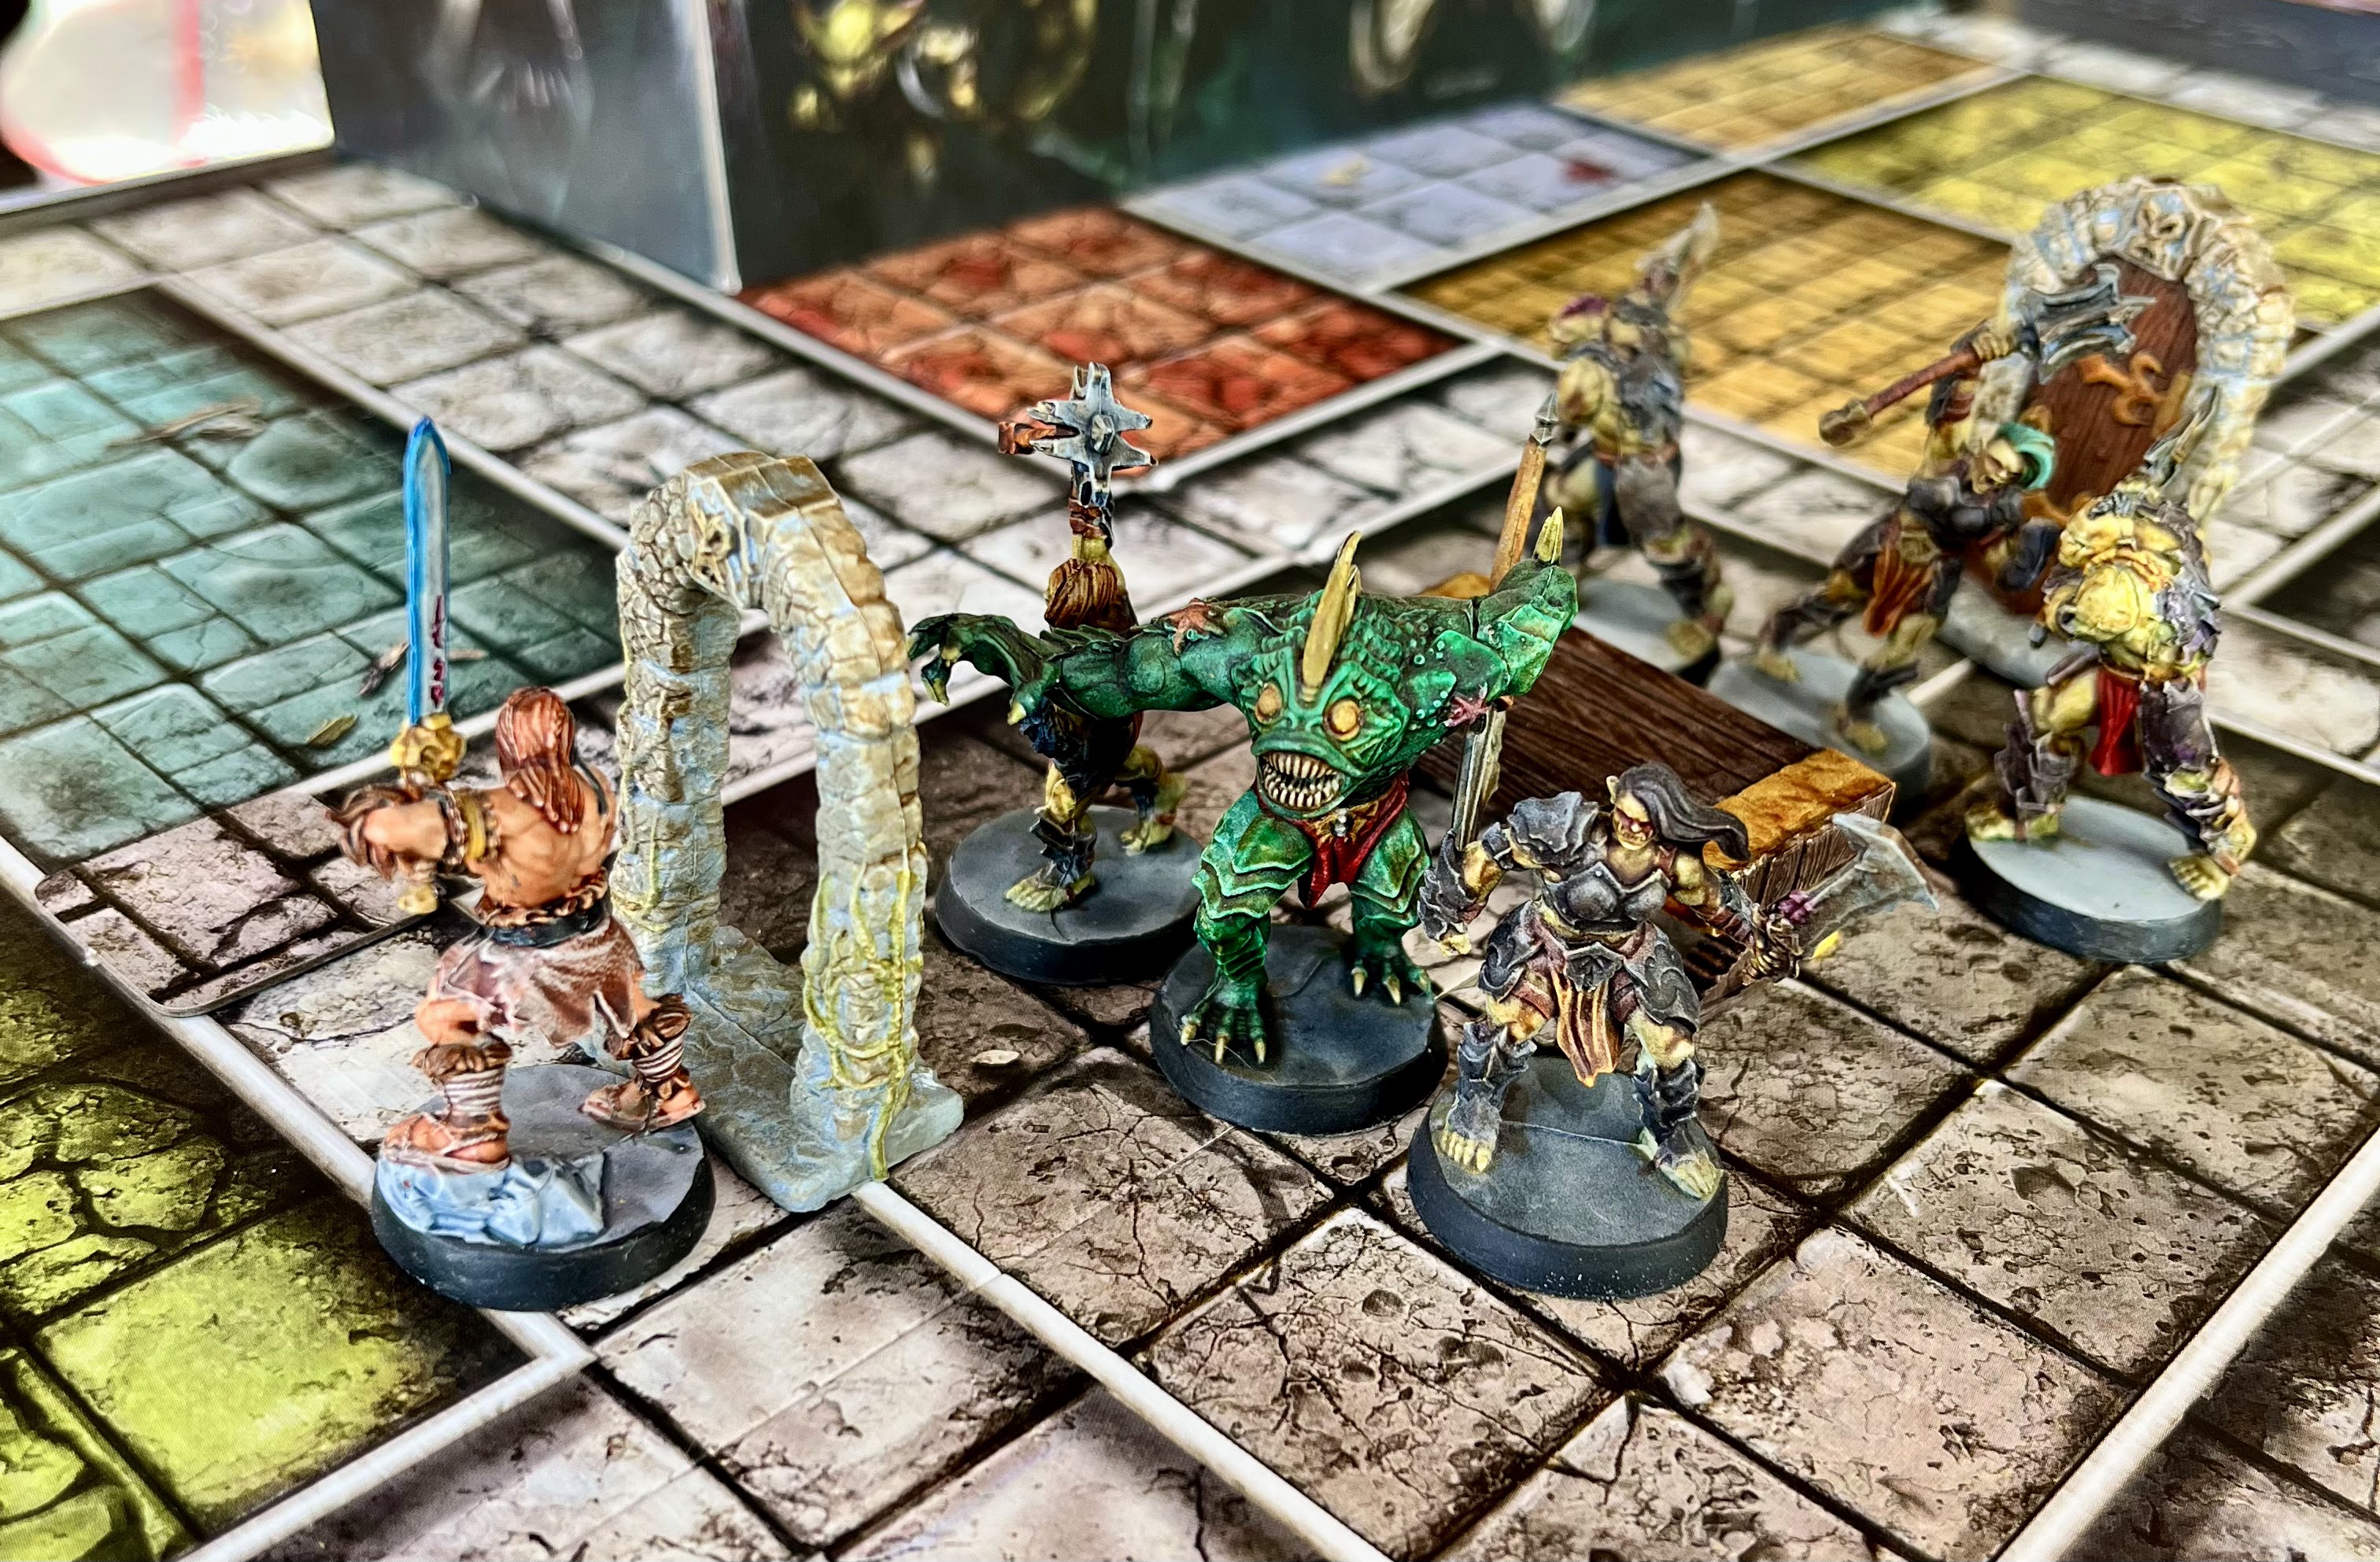
Pressing on with their quest, the remaining Fellowship activated another Dread Golem.  This one was just as stubborn as the last, almost killing Hamilcar!  Only the timely drinking of a Potion of Defense helped him out.  Then Aerlin used Courage on the Dwarf and he smashed the Dread Golem in a rage! 


The Fellowship cautiously moved forward, bruised and battered.  A fourth Dread Golem was awaiting them around the next corridor.  Arathusa used her Veil of Mist to get past the beast and search for a another doorway, however she did not go fast enough.  Aerlin summoned a Genie, that barely managed to crack the Golem.  Hamilcar and Aerlin tried to move away and attract the Golem's attention and try to flank it.  However, the magical beast was not fooled.  It quickly homed in on Arathusa, who was trapped by a locked door and a stone wall.  She was not nimble enough and the Dread Golem managed to smash her into paste.... tastefully done off-screen.  The Talisman of Lore slipped from her broken body and slipped across the floor, falling into an aged and ancient crack.... perhaps never to be seen again?   

Hamilcar and Aerlin were unaware of Allathusa's death.  They crept forward, and as they rounded the corner were greeted by a blood-splattered Dread Golem approaching.  Aerlin leapt forward and launched a fireball that exploded harmlessly across the Golem's chest.  Hamilcar fell back to a more defensible position, his heart racing.  Aerlin cast Pass through Earth and fled away from the Golem and back into the fireplace room.  

Despite Hamilcar falling back, the Golem caught up to him.  The Dwarf made a desperate lunge, but the Golem snatched him from the air and smashed him against the wall and then finished him off with a stone mace to his face.  Everything went dark, and then Hamilcar saw Allathura beckoning him towards a doorway surrounded by light.  He followed her....


Hearing the stomping footsteps of the approaching Dread Golem, Aerlin's nerve cracked and he fled back to the surface.  Allathura was probably dead, Neo-wulf had been turned to stone, and Aerlin had heard Hamilcar's scream suddenly get cut-off.  The Fellowship was shattered, never to be re-forged.  The young wizard fled in terror back to Mentor. 

The End?

Well, that sucked.  The Fellowship of Destiny has been undone!  I better get that B-team moving through First Light to get them up to speed!  Afterall, Wardoz is not going to find himself.  

Those Stone Dread Warriors absolutely wrecked me!  There were several times where they rolled Max hits on me.  Ouch.    

Pretty sure there was a bug with the Purple Liquid in the App, as Neo-Wulf was supposed to be Petrified for 5 turns, but I could never get him un-petrified and the last Dread Golem just walked up to him and smashed him into paste too.   

I guess I better read the rules on what to do when you fail a quest...... until next time?  


Become a Patron and get access to all the cool stuff, a peak behind the curtain of Blood and Spectacles, and early-access to playtest games!  


You can follow Blood and Spectacles Facebook page or Instagram for more fun! 

Check out the latest publications and contact me at our Blood and Spectacles website

Or purchase all out games at the Blood and Spectacles Publishing Wargames Vault Page!                               


Monday, April 14, 2025

Heroquest: The Maze of Melar and Legacy of an Orc Warlord


Keep on questing heroes!  The Fellowship of Destiny; Allathura of the Green, Hamilcar Margos, Aerlin the Wizard, and Neo-wulf are back on the Quest.  Last time, they managed to defeat the Orc warlord Ulag and retrieve Prince Magnus' gold from the bandit Gulthor.  It was a tough fight with many wounds and scars taken.  However, everyone made it through alive... if only just barely!  

In fact, the warriors managed to get enough gold for Allathura to buy a shield and Neo-wulf a Helmet to boost their defenses.  Hamilcar was all ready kitted out like a tank, so he was good.  In addition, Neo-wulf had found a Potion of Strength, and Allathura was packing a Potion of Healing after the two quests.  Not a bad round of goodies!   


Today, Mentor approaches the heroes with dire news.  Loretome has alerted Mentor to the fact that Zargon's forces have been searching Melar's Maze in an effort to locate the Talisman of Lore.  This precious artifact can not be allowed to fall into the wrong hands.  He has put his faith and trust in the Fellowship of Destiny to retrieve it and return it to his safe keeping.  With that, the Fellowship take up their arms and make their way to the entrance of the dreaded Maze.  They descend into the dungeon, prepared to face Zargon's troops once more.  

The Maze of Melar

Immediately, they realize that it is not just the forces of Zargon they will encounter in the Maze.  The Maze itself is protected by the undead minions of Melar too!  The Fellowship spy a Mummy down a distant corridor, and opt to avoid it by going the other way!  

However, they soon run into Zargon's search party as a group of Orcs was found rummaging through Melar's study!  They set upon the Fellowship, but are soon dispatched.  Allathura led the charge and took the brunt of the fighting.  Neo-wulf and Aerlin tried to use their staves for some diagonal attacks, but it was ultimately cold steel that won the day.  

The group continued, and Allathura was reminded about the dangers of traps the hard way.  She stumbled into a pit trap.  As she climbed out, the Mummy they had been avoiding set upon the party!  However, Aerlin made short work of it with a Ball of Fire.  Mummies and fire do not mix.  

Hamilcar detected a trap in a long corridor and moved to disarm it.  However, he foolishly triggered it instead blocking the corridor and injuring himself badly in the process!  Woops.  The Fellowship was forced to go another route.  

They stumbled upon a room with a stone gargoyle statue, but were suspicious of it.  They endeavored to try to find a way around it and split up to cover more ground.  

Hamilcar and Allathura went the long way around, and found a zombie and some traps.  This time, Hamilcar had better luck disarming it.  Meanwhile, Neo-wulf and Aerlin found a secret door and went through.  Neo-wulf was attacked by a deadly accurate skeleton, and took 4 body from it before he was able to send it clattering back to the ground.  A healing spell from Aerlin got him feeling better, but then he stumbled into a pit trap, and soon found an arrow trap while searching for treasure.  Ouch! 


The Fellowship met up again and bypassed two rooms of the Maze at this point.  Hamilcar got jumped by a zombie when he went to search a pantry, and a Zombie popped out!  It was like something out of a movie!  The group rallied and made their way to the center room.  On the way they took out another Mummy.  In the center room, they found Melar's library and it was full of undead patrons!  


Instead of charging in, the Fellowship fell back to a more defensible location in the hallway.  Undead are not smart, and they dutifully shuffled into the kill zone.  Hamilcar and Allathura did most of the dirty work, with the occasional assist from the others.  It did not take long to kill all the foes.  

The group cautiously approached the center room again and carefully search it.  Allathura found the Talisman of Lore and carefully put it around her neck for safe keeping.  The group then beat a careful retreat back to the stairway.  They avoided the Gargoyle room and the door beyond in the process.  

Upon returning to the surface, the Fellowship made contact with Mentor.  There the old wizard said, "The safest place for the Talisman of Lore is with you Allathusa of the Green.  Zargon's forces would be foolish to try to take it from the leader of the Fellowship of Destiny!"  

Post-Battle

This one was not as savage on the Fellowship as previous dungeon crawls.  We played it much safer, and did a much better job searching for traps and treasure.  The Fellowship was much more patient and coordinated, despite Neo-wulf running off ahead again.  This time, the Fellowship comfortably defeated the undead foes with the help of their improved armor. 

Despite the victory, there was far less loot to deal with.  Aerlin got a half-healing potion with Allathura and Neo-wulf coming away with a few bits and bobs.  However, the real prize was the Talisman of Lore itself!     

Legacy of an Orc Warlord

The Fellowship of Destiny was feeling strong and untouchable.  They had bested Varag, they had freed Sir Ragnar, killed Ulag, and retrieved the Talisman of Lore.  They were well-armed and well armored.  That felt confident they could handle what Zargon could throw at them.  However, they underestimated their foes.  Grak, the son of Ulag; was bent on vengeance.  

As the Fellowship had their guard down, Grak struck.  His forces were able to capture the Fellowship and take them to his secret lair.  They were thrown in a cell and left to rot, while Grak determined their fate.  Hamilcar managed to find a chicken bone, and set to work freeing his comrades.  With an audible click, the lock popped.  The Fellowship was free, but unarmed and without their potions. 

The Legacy of an Orc Warlord

Right away, the Fellowship had a choice to go left or right.  Neowulf impulsively went on his own towards the center room. Hamilcar and the rest went the opposite way looking for their gear.  Almost immediately, Neowulf ran into some trouble as the main room was full of guards, including an Abomination!  That would be hard to stop with just his fists! 


 Hamilcar and the others came to another T-intersection, with doors at the far end of both hallways.  However, the one to the left looked suspicious to the Dwarfs trained eye.  Therefore, the small group went the other way.  A shout of warning from Neowulf warned them that company was on the way as the Barbarian tried a rear-guard action against the crowd of enemies chasing them.  

Hamilcar and Aerlin managed to get into the room, as Allathura scouted around the corner.  They took out a lone goblin guard, and Aerlin quickly found the Fellowships gear.  Just in time, as an Abomination leapt from hiding and attacked!  The group was caught between the pursuing forces of Zargon and this new threat in the room with them! 


 The Fellowship of Desting managed to gear up, and fend of Grak's troops.  However, it was a tough fight and Neowulf and Hamilcar were already in rough shape.  Aerlin's and Allathura's healing spells were quickly used up.   

The group slowly made their way down some long, corridors.  Neowulf was soon left behind as he cautiously crept along the corridor's while Allathusa led the way.  The Elf managed a stealth kill as she snuck up on an Orc guard at an intersection and killed him before he could raise an alarm.  

After a long, slow crawl the group started to run into Goblin sentries and some doorways.  


The Goblin sentries proved surprisingly tough.  Grak got his money's worth with those hires!  Hamilcar was reduced to 1 wound left by the little git! Allathusa had to give him her Potion of Healing to keep the Dwarf in the fight.  Just in time too as the next room had another deadly encounter with an Abomination!  This dungeon was crawling with the beasties.  


 Neowulf supported by Aerlin the Mage managed to fend off the most recent beast.  However, Goblin sentries again tied up the group as they continued to explore.  They needed to find the stairs to escape from Grak's clutches.


 Once again, the Fellowship was jumped by a pair of Abominations!  The fights were very tough, and the party was all on less than half wounds.  Neowulf, in desperation; took his Potion of Strength and laid one of the Abominations low with a single powerful strike from his Broadsword.  Hamilcar eventually wore down the other and was able to best the beast.  However, the cost had been great, as the Fellowship had used all their potions up!

After Hamilcar managed to disarm a trap, the Fellowship of Destiny found the stairway out.  However, it was well guarded by Grak and his loyal servants.  There the Fellowship got a surprise as Grak hurled several spells at them!  Tempest managed to impede Neowulf, while a Sleep spell took Hamilcar down.  Thankfully, Grak's minions had been over eager and the Fellowship was able to best them at a doorway with teamwork.  

Aerlin was shocked as Grak was hit by a fireball spell but managed to keep fighting.  There was still plenty of fight in the Orc Warlord yet.  As Hamilcar slept, his companions fought on.  The decisive moment came when Grak's Fear spell was reflected back at him thanks to the Talisman of Lore.  This gave Neowulf the opening he needed to finish off the Grak once and for all; or so the Fellowship hoped.  

With the way clear, the Fellowship of Destiny made their way to the light of the surface once more.  They were initially disoriented, but it did not take Allathusa of the Green long to get her bearings and lead them all back to the Safety of the King's lands.  They had a tale to share with Mentor about their capture by the Orc Warlord Grak.  Perhaps, they had learned a valuable lesson about the nature of Zargon's forces?  

Until next time! 


Become a Patron and get access to all the cool stuff, a peak behind the curtain of Blood and Spectacles, and early-access to playtest games!  


You can follow Blood and Spectacles Facebook page or Instagram for more fun! 

Check out the latest publications and contact me at our Blood and Spectacles website

Or purchase all out games at the Blood and Spectacles Publishing Wargames Vault Page!                               


Monday, March 17, 2025

Heroquest: The Lair of the Orc Warlord and Prince Magnus' Gold


Back on the Quest with the further adventures of the Fellowship of Destiny!  You may recall that the fellowship did not have an auspicious start!  Their Barbarian Nonak was killed by Varag during the Trial!  However, Mentor was able to locate a replacement in Neo-wulf.  With the Fellowship reforged, the Fellowship was entreated by Prince Magnus to rescue his advisor Sir Ragnar.  Ragnar had been kidnapped by the foul Orc warlord Ulag.  Led by Allathusa of the Green, and joined by Hamilcar Margos, Aerlin and Neo-wulf the adventurers managed to free Sir Ragnar and battle their way through the horde of greenskins to safety.  The Fellowhip was handsomely rewarded for their efforts.  

The Fellowship of Destiny! I decided to go with the Classics 

 After freeing Sir Ragnar, the Fellowship had enough gold to update their equipment.  Hamilcar and Allathusa picked up some helmets to help protect themselves from harm.  Aerlin had a fine staff crafted for him, giving him enough reach to support his fellows with more than just magic! Thus equipped, they received word from Mentor.  A new challenge awaited them.  Price Magnus had deemed the kidnapping of Sir Ragnar a great offense.  He offered a reward for Ulag's head!  Using Loretome, Mentor was able to divine the location of the warlord's stronghold.  Thus armed, the Fellowship of Destiny made haste to smite Ulag and recover the reward.  

The Lair of the Orc Warlord

Our heroes descended into the Orc Warlord's stronghold.  They set-up a kill zone at the first door, and were aghast to find it heavily guarded by Goblin sentries.  Despite the tactical advantage the goblins were able to apply serious damage to Neowulf and Hamilcar with some lucky hits as they stormed into the fortified room.  1 room down and the Fellowship was all ready in rough shape!  

Before the Fellowship even made it to the first hallway, Hamilcar and Neo-wulf were down to half wounds.  Despite the injuries, the party split up with Neo-wulf and  Aerlin going one way, while Hamilcar and Allathusa went the other.  The Elf advised against such a strategy, but Neo-wulf wrecklessly pushed forward, heedless of the Elf's words.    

Aerlin used his magic to heal just as Neo-wulf was jumped by an Abomination in a weapon's room!  That was close!  However, the pair did find a trusty wooden staff there.  It was not as nice as the one Aerlin had commissioned, so Neo-wulf kept it incase it was needed.    

Meanwhile Hamilcar and Allathusa battled their way through a few Orc guards.  Again, the Orcs were able to leave Hamilcar heavily wounded, and Allthusa and Aerlin were out of spells to help!  Allathusa's helmet had paid off, as she blocked multiple crude orc sword blows with her head!  However, the battle had taken a long time, and Neo-wulf and Aerlin were able to return to help, their scouting leading to a dead end. 

Despite his injuries, Hamilcar barreled ahead and slew goblin warriors guarding a cupboard.  There he found a health potion and eagerly gulped it down.  His wounds slowly closed and the severe bleeding stopped as the magic coursed through his veins and knitted damaged tissue back together.  That was just what Hamilcar needed to keep going!  

As the leader,  Allathusa took the lead.  Her efforts led the Fellowship right into a room full of danger.  Orcs and Abominations filled the room.  

Hamilcar, reinvigorated; leapt into danger and attacked.  However, it was all the others could do to keep Zargon's forces from overwhelming them.  Aerlin's Ball of Fire hit the Abomination but the magical flames seemed to have no effect on the beast.  However, Allathusa's Tempest spell held him up long enough for Neo-wulf to arrive and help out.  It was a tough fight, but the Fellowship pulled through.  

However, what they found in the next room was even worse!  There, they found Ulag in counsel with a vile Dread Warrior in ancient and corrupted armor, a foul stench emanating from his bloated form.  Hamilcar was enraged by the foul beast and attacked, while Neo-wulf tried to thin Ulag's goblin guards.  Allathusa took on Ulag in a duel, but her skills with a sword were sorely tested by the Orc Warlord.  

Things were looking perilous for Allathusa, and she used her magic to escape; only to fall into a pit trap protecting a treasure chest in the other room.  Apparently, Ulag had yet to be paid by the Dread forces of Zargon as the chest was empty!  

Neo-wulf mopped up the Goblin guards and roared a challenge to Ulag!  The Orc Warlord could not turn down such a fierce opponent and squared up.  The Dwarf and Dread Warrior's duel was also an epic battle, with both exchanging punishing hits.  However, the Dread Warrior seemed to shake-off the hits with ease!  He even managed to tank one of Aerlin's spells!    

Finally, Neo-wulf managed to off-balance his foe.  As Ulag over-corrected the barbarian spun is sword in a wide arc and lopped his head from his body.  Aerlin blessed Hamilcar with Courage and the Dwarf managed to dodge beneath the Dread Warriors' blow and strike him a fierce blow beneath the arm of his armor.  Aided by Aerlin's magic, the blow was fatal!  

The forces of Zargon had been bested once more.  The bruised and battered Fellowship managed to reach the surface once more, and collect the reward from Mentor on their return.  Ulag's head was all the proof Mentor needed to convince Prince Magnus that the deed was done. 

Post- Battle

Wow!  Zargon's forces were rolling really well this game.  I was taking triple hits from Orcs pretty regularly.  The Elf's helmet paid off in spades, and the Dwarf's extra armor was enough to keep him alive.  To make it worse, the forces of Zargon did pretty good rolling black shields as well, so the battles were hard fought.  I think the Fellowship took something like 20+ wounds in this dungeon.  Everyone made it back in one piece, but only by the skin of their teeth! 

With our gold, I was looking to see if we could get a few Potions before going to the next Quest.  However, I am only finding a Potion of Speed available, as well as armor and weapons.  I think other Quest packs expand the offering, but I am going to keep it to the core rules for now and not offering any others yet.             

Prince Magnus' Gold      

Having proven themselves useful to Prince Magnus, the royal lord has reached out to Mentor to help him with another problem.  Royal gold was stolen by a group of marauding orcs and their Dread Warrior master, Gulthor.  Mentor has offered the services of the Fellowship of Destiny to help retrieve it.  With a reward being offered, the Fellowship strap on their arms once more and make their way to the bandits hide-out.  Before heading out, Hamilcar picked up a shield to boost his Defense to 4.  

The Fellowship entered the catacombs with care, and were confronted by Orc and Goblin sentries.  One tied them up in a long hallway, and Allathusa used her magic to get past him, while Hamilcar shrugged off the Orcs attacks.  However, the dwarf could not finish the enemy.  


After finally besting the Orc savage in the hallway, the Fellowship continued their search.  The long hallways and spread out lay-out of the bandits stronghold was stringing the Fellowship out.  They were becoming separated, as the labyrinth was probably designed to do.  As Aerlin the Wizard searched a room for treasure he was ambushed by an Abomination!  Thankfully he was able to fend off the creature long enough for Neo-wulf and Hamilcar to finish it off.  However, the Wizard did not escape unscathed.  


From there, traps took a toll on our intrepid Fellowship.  Neo-wulf and Hamilcar both fell victim to Pit traps, learning the hard way.  Neo-wulf also fell victim to a trap while searching for treasure alone.  The monsters had failed to hurt them too much, but the traps were hurting.  As they explored another long hallway, Hamilcar took the lead and put his learnings to use.  He detected and disarmed a trap.    

From there, Neo-wulf flew into a rage at the dishonor of all the traps and went storming far ahead of his companions, who failed to catch-up.  He burst through a door to face several Orcs.  He tore into them, and by the time the rest of the Fellowship caught up, the Orcs were in disarray.  A final shot from Aerlin through the doorway with his staff finished the last of them.  Neo-wulf failed to learn his lesson and stormed off again with Aerlin barely keeping pace.  Allathusa and Hamilcar were trailing far behind! 

Neo-wulf sighted an orc guard and cut it down in moments.  He then impetuously stormed into the center room with a roar of defiance!  There, he found Prince Magnus' gold, as well as the vile Dread Warrior and his gang!  The bandits grabbed their weapons, and attacked  but not before Neo-wulf and Aerlin stormed the room and killed a Goblin guard.  

They were quickly surrounded!  An Orc warrior guarded the door as his friends attacked the impetuous invaders, Neo-wulf and Aerlin.  Aerlin found himself faced with the Dread Warrior, Galthor.  He smashed the poor wizard with his shield.  However, the Wizard kept his wits around himself enough to heal Neo-wulf.      

Hamilcar fought valiantly at the doorway, trying to break through the Orc defender.  However, the Orc held long enough to keep reinforcements from arriving.  Allathusa managed to cast sleep on one of the attackers through the doorway, relieving some of the pressure.  Seeing Gulthor bear down on him again. Aerlin used Pass Through Rock to escape the Dread Warrior and the room of death.  

Neo-wulf hacked down more of the gang in his battle rage, but was taking damage at an alarming rate.  Hamilcar defeated the Orc at the door, and he and Allathusa rushed in to aid their companion.  A Rock Skin spell helped keep Neo-wulf going, but the Abomination and Gulthor were slowly tearing him apart.  

Finally, Hamilcar was able to get the drop on Gulthor and sink his short sword into a soft spot in the Dread Warrior's armor.  The Dwarf claimed a second Dread Warrior kill!  Neo-wulf and Allathusa managed to clean-up the rest of the bandits after that.  

From there, the heroes managed to lug the treasure chests to the stairs and escape.  There Sir Ragnar's men meet the heroes, and gathered the gold to take to Prince Magnus. They compensated the Fellowship with their reward as promised.   

Post-Battle

This was a close run thing.  Neo-wulf had been reduced to 1 Body after healing once. Hamilcar to 2 Body after being healed once,  Allathusa also down to 2, and Aerlin was also down to 1.  The Pass Through Rock spell had kept him alive!  Thankfully, I had enough spells at the end to keep me going.  

The monsters were not getting triple hits like last time, and I was rolling pretty well for defense the first half of the game.  The second half..... not so well.  The traps really took a toll on my team.  It seemed like the order of operations kept having me fall into traps as I was moving into new areas, beyond where I had all ready searched for traps.  I am still getting the hang of how to make sure traps do not whittle my Fellowship down early. 

The quest has a cool, carrying mechanic; but by the time it comes into play; it is mostly useless.  It just makes it take longer for pointless rolling to escape the dungeon and it takes twice as long now.  However, if we took the chests and scattered them around the dungeon, this could have made things more exciting as there would still be foes to face off against.  

When all was said and done, I did manage to walk out of the dungeon with a Potion of Strength and a reserve Healing potion for Allathusa.  We also had enough gold to buy some more defensive equipment for Neo-wulf and Allathusa going forward.  

Until next time as the Fellowship of Destiny continues their quest.       


Become a Patron and get access to all the cool stuff, a peak behind the curtain of Blood and Spectacles, and early-access to playtest games!  


You can follow Blood and Spectacles Facebook page or Instagram for more fun! 

Check out the latest publications and contact me at our Blood and Spectacles website

Or purchase all out games at the Blood and Spectacles Publishing Wargames Vault Page!    


Monday, February 17, 2025

Battle Report: Heroquest- The Trial and The Rescue of Sir Ragnar

It is time to embark on a great quest, a quest for Heroes!  A Heroquest!  

I packed up my Core Set of Heroquest and took it to my families' for the Holidays.  However, it never got put on the table.  We were too busy and never got to play it.  It happens.  However, when I got home I figured it was about time for the game to hit the table.  I had downloaded the App, and decided to give it a whirl solo.  I think you lose a lot when you do it solo, as some of the "RPG-Lite" gets left behind.  However, I tried to inject a bit of it into my gameplay where I could.  

My Heroes!  

Speaking of that, I decided to use the Original Heroes for my warband.  I could have added the Druid but I chose not to.  Maybe next playthrough?  They call themselves The Fellowship of Destiny.    

They are ostensibly led by Allathura of the Green.  An Elf from the ancient kingdoms, her people have stood against evil countless times before.  Now, her people have sent her to defend the realms of the freefolk once more.  

From the ancient Dwarf halls comes Hamilcar Margos.  A fierce warrior and renowned tinkerer.  The cousin of the son-in-law of the Thane, he has been tasked with upholding the honor of his people.  His task is to cut down his foes and make sure that foul machines and traps do not harm his fellows.  

The wizard Aerlin of the Moonlight is said to possess a natural talent for elemental magic that could one day rival Mentor himself.  However, Aerlin is patient, and cautious in his ways.  Mentor has the utmost faith in the lad when it comes to defending the realm from magical threats and Dread magic.  

Lastly, the Fellowship is joined by No-nak from the North.  His people owe fealty to the King, and have defended the Northern Approaches for decades.  He is strong of back and swole of arm.  No-nak often solves his problems with violence!  

Together, Mentor has dubbed them the Fellowship of Destiny.  After years of training, Mentor has one final task for his students.  They must hunt down the foul Gargoyle Varag in Fellmarg's Tomb.  

The Trial

The first quest is a bit notorious for being difficult because it uses ALL the monsters and the heroes only have their starting gear.  It is so notorious, that Avalon Hill/Hasbro released a new beginning quest.  However, the App just starts with The Trial, so I did too!  In my review, I also talked a bit about using some House Rules for movement, but I just decided to play it straight.  

Right away, in the first room Allathura ran into a wandering monster!  It leapt from the shadows and attacked!  However, after an initial surprise she was quickly able to dispatch the foul minion of Varag! 


The App is kind of fun, because it keeps the surprise of what is behind various doors or pathways a surprise as you explore.  The enemies are not that smart though, and it is easy to trap them behind a doorway, or in a corner.  However, they do like to hit and run, so that is something you need to think about.  Plus, with starting equipment you do not have any diagonal attacks, and that can be tough as monsters will block doorways too.  It was a bit of a learning experience on the best ways to approach doors and exploring.  


Despite the lack of traps or secret doors in the first dungeon, I liked to keep Hamilcar in the lead.  He is resilient enough to handle most things, and then No-nak could maneuver tactically to deal with it.  I made the right choices and found Fellmarg's tomb pretty quickly.  However, the Mummies protecting the tomb and Fellmarg's undead spirit really were a tough nut for me to crack.  A powerful fire ball from Aerlin was needed to finish the job.  Afterwards, I needed to boost up Hamilcar and No-Nak with magic from the others.  

Thankfully, we found a Potion of Defense.  We opened a door and ran into an Abomination.  This thing was a tough nut to crack as well.  Hamilcar and No-Nak had it boxed in, but were failing to put it down.  Thankfully, No-nak had Rock Skin and the Potion of Defense so managed to avoid further serious injury despite the prolonged combat.


 Allathusa of the Green led the way to the center room.  There, the Fellowship of Destiny discovered Varag!  However, he was not alone!  A powerful Dread Warrior was in counsel with him!  Allathusa quickly hit the armored monster with a Sleep spell and then she and Hamilcar closed in.  No-nak took out one of Varag's orc Henchman, but only after a devastating flurry of attacks injured him.  

Varag sensed weakness and pressed in on No-nak.  Allathura and Hamilcar looked on in horror as the Gargoyle tore into No-nak with fury.  A fatal bite to the jugular from the Gargoyle finished off the barbarian hero.  HIs body fell, his sword slipping from his hand.  

Per the rules, when a hero falls with a fellow hero in the room the equipment goes to the other heroes.  However, I was unsure if that meant that Hamilcar could use the Barbarians broadsword or not.  I decided that he could not use it. 

A summoned Genie from Aerlin dealt a vital blow to Varag, but the beast yet lived.  Enraged by the death of his comrade, Hamilcar threw himself at the Gargoyle with a rage.  His short sword stabbing and probing into the cracks of the beast.  Varag bellowed a last time before cracking and crumbling into pieces.

With that, Allathura led Hamilcar and Aerlin back to the surface and safety.  There Mentor listened to the tale of the death of No-nak and shook his head with grief.  Perhaps he had been too hasty in sending the Fellowship of Destiny into Fellmarg's Tomb.  Thankfully, there was another warrior Mentor knew he could call on to help the Fellowship.       

Since I had heard how difficult this dungeon could be, I did not open every door, or try to find every treasure chest.  After getting jumped by wandering monsters twice in a row, I became a bit more careful about how I searched for treasure too.  Therefore, I don't think I found everything or recovered all the loot that I could have.  After killing Varag, I pretty much just hoofed it out.  Hamilcar was low on health, as was Allathura.  The Fellowship did not have enough left in the tank to keep exploring.  


The Rescue of Sir Ragnar? 

After the disappointing results of the Trial, Mentor searched the land and found another who could replace No-nak.  In the North Tribes, he discovered another champion, Neowulf..... just Neowulf.  He was a man of action, and skilled with a blade.  Mentor gifted him No-nak's Broadsword so he could carry on the fallen champions legacy.  

After several weeks of training with Allathura, Hamilcar, and Aerlin a messenger came to Mentor.  Sir Ragnar, an old friend of Mentor's and an advisor to Prince Magnus; had been kidnapped by an Ork warlord; Ulag.  There was a reward for finding and freeing Sir Ragmar.  Mentor's magic led him to the man's where-abouts, and the Fellowship of Destiny was ready to descend into the dungeons to free Sir. Ragnar and claim the reward! 


Soon after entering Ulag's prison, the Fellowship was confronted by Goblin sentries.  Aerlin was caught out in the open by a pair, and used Move Through Rock to escape back to the safety of his sword wielding friends.  

I made the right choices in which way to go, and soon found myself looking through a secret door that was guarded by an Abomination!  It struck hard and fast, causing some serious damage and refusing to be killed.  However, it didn't have much room to maneuver and eventually the Fellowship's numbers proved decisive.  


Oh boy!  Our first secret door!  I kept Hamilcar looking for Traps pretty regularly, and Allathursa found the secret door.  I also had better luck with Treasure this round, finding a few coins and gems here and there.  It did not take us long to find Sir Ragnar.  

What I did not expect was that to trigger every Orc and Gobbo in the place to come running for us!  The Fellowship quickly set-up a defensive perimeter at a doorway.  It was sort of like the battle of Balin's Tomb as Goblins and Orcs pressed forward only to be cut down by the Fellowship waiting on the other side.  The Rock Skin spell paid off again, making Beowulf tough to injure in the initial waves of attackers.  Neowulf tended to soak the attack, while Allathura dealt the killing blow.  A few times Aerlin had to step in and clear out an Ork or two with a spell.  


I think this encountered showed some of the limitations of the Apps AI.  The greenskins pretty much just kept trying to walk into my meatgrinder.  Then, they got ground up!  I think if I was playing Zargon, I would have made a checker board up the double wide hallway, where I could maybe let my numbers play to an advantage.  I mean, the Fellowship had to get Sir Ragnar up those stairs!  If you let them get closer to the center room, you can also attack from both sides.  

Anyway, I mistimed the end a bit.  I let Sir Ragnar get off the board before I opened a chest or two.  Hopefully not getting some of the loot on this board won't be too much of a hinderance.  The reward from Prince Magnus will help my guys become a bit more survivable or murderous next adventure!  

Despite the meatgrinder at the end, this adventure was not as dangerous or deadly.  Neowulf needed a healing spell, but he was also taking the brunt of the attack waves.  I still had one in reserve, even though a lot of my Fellowship was down 2 to 3 Body points from starting.  

Sir Ragnar embraced his old friend Mentor when the Fellowship led him back into the world of the light.  Mentor escorted him back to Prince Magnus' court, and returned with the reward for the Fellowship.  

Final Thoughts

Well, it was great fun getting the game I have painstakingly been painting out on the table.  That is always good for the motivation.  The App has some pluses and minus' to using for solo-play.  The exploration is maintained, it is easy to track, and it automates enemy attacks.  However, the AI component is not amazing.  However, I will give it credit that the enemies do use hit-and-run attacks and are not afraid to maneuver, I just don't think its post deployment moves are always great and it can be baited. 

We will have to see how my own Solo-campaign progresses.  I don't think this will stop me from trying to find a few folks to play a campaign with.  You just lose some of the charm of a game like this via solo-play.  Half the fun is how the players react, what they say, their attempts at role-play, and listening to them strategize how to open a door.  

Until next time! 


Become a Patron and get access to all the cool stuff, a peak behind the curtain of Blood and Spectacles, and early-access to playtest games!  


You can follow Blood and Spectacles Facebook page or Instagram for more fun! 

Check out the latest publications and contact me at our Blood and Spectacles website

Or purchase all out games at the Blood and Spectacles Publishing Wargames Vault Page!