Sunday, October 29, 2023

Battle Report: White Star/Red Star - CAP July 29, 1950


Dateline: June 29th, 1950
Location: Suwon Airfield, Republic of Korea

On June 27th, an attack by the North Korean KPAF 1st Air Division on Suwon Airfield had been thwarted by F-90 Shooting Stars.  Despite this loss, the KPAF returned to the attack on the 29th.  This time, the American defenders were a group of F-51 Mustangs.  US Military leaders were on hand at the nearby town as part of a conference.  They were able to witness the defense of the base first hand.  

These attacks led to Gen, MacArthur to authorize air sorties to attack North Korean targets in order to establish air superiority.  

This will be a classic engagement from early in the war.  I could not really find any information on the North Korean attackers, but knew that the objective was to attack ground targets and that the North Koreans were equipped with a lot of IL-10's.  Those would be of little value in a CAP.  Therefore, I decided to use more "fighter" oriented planes for this sortie. 

Forces: 

USAF
4 F-51 Mustangs with Experienced Pilots


North Koreans
2 Yak- 9 with Rookie Pilots
2 La-9 Fritz with Experienced Pilots

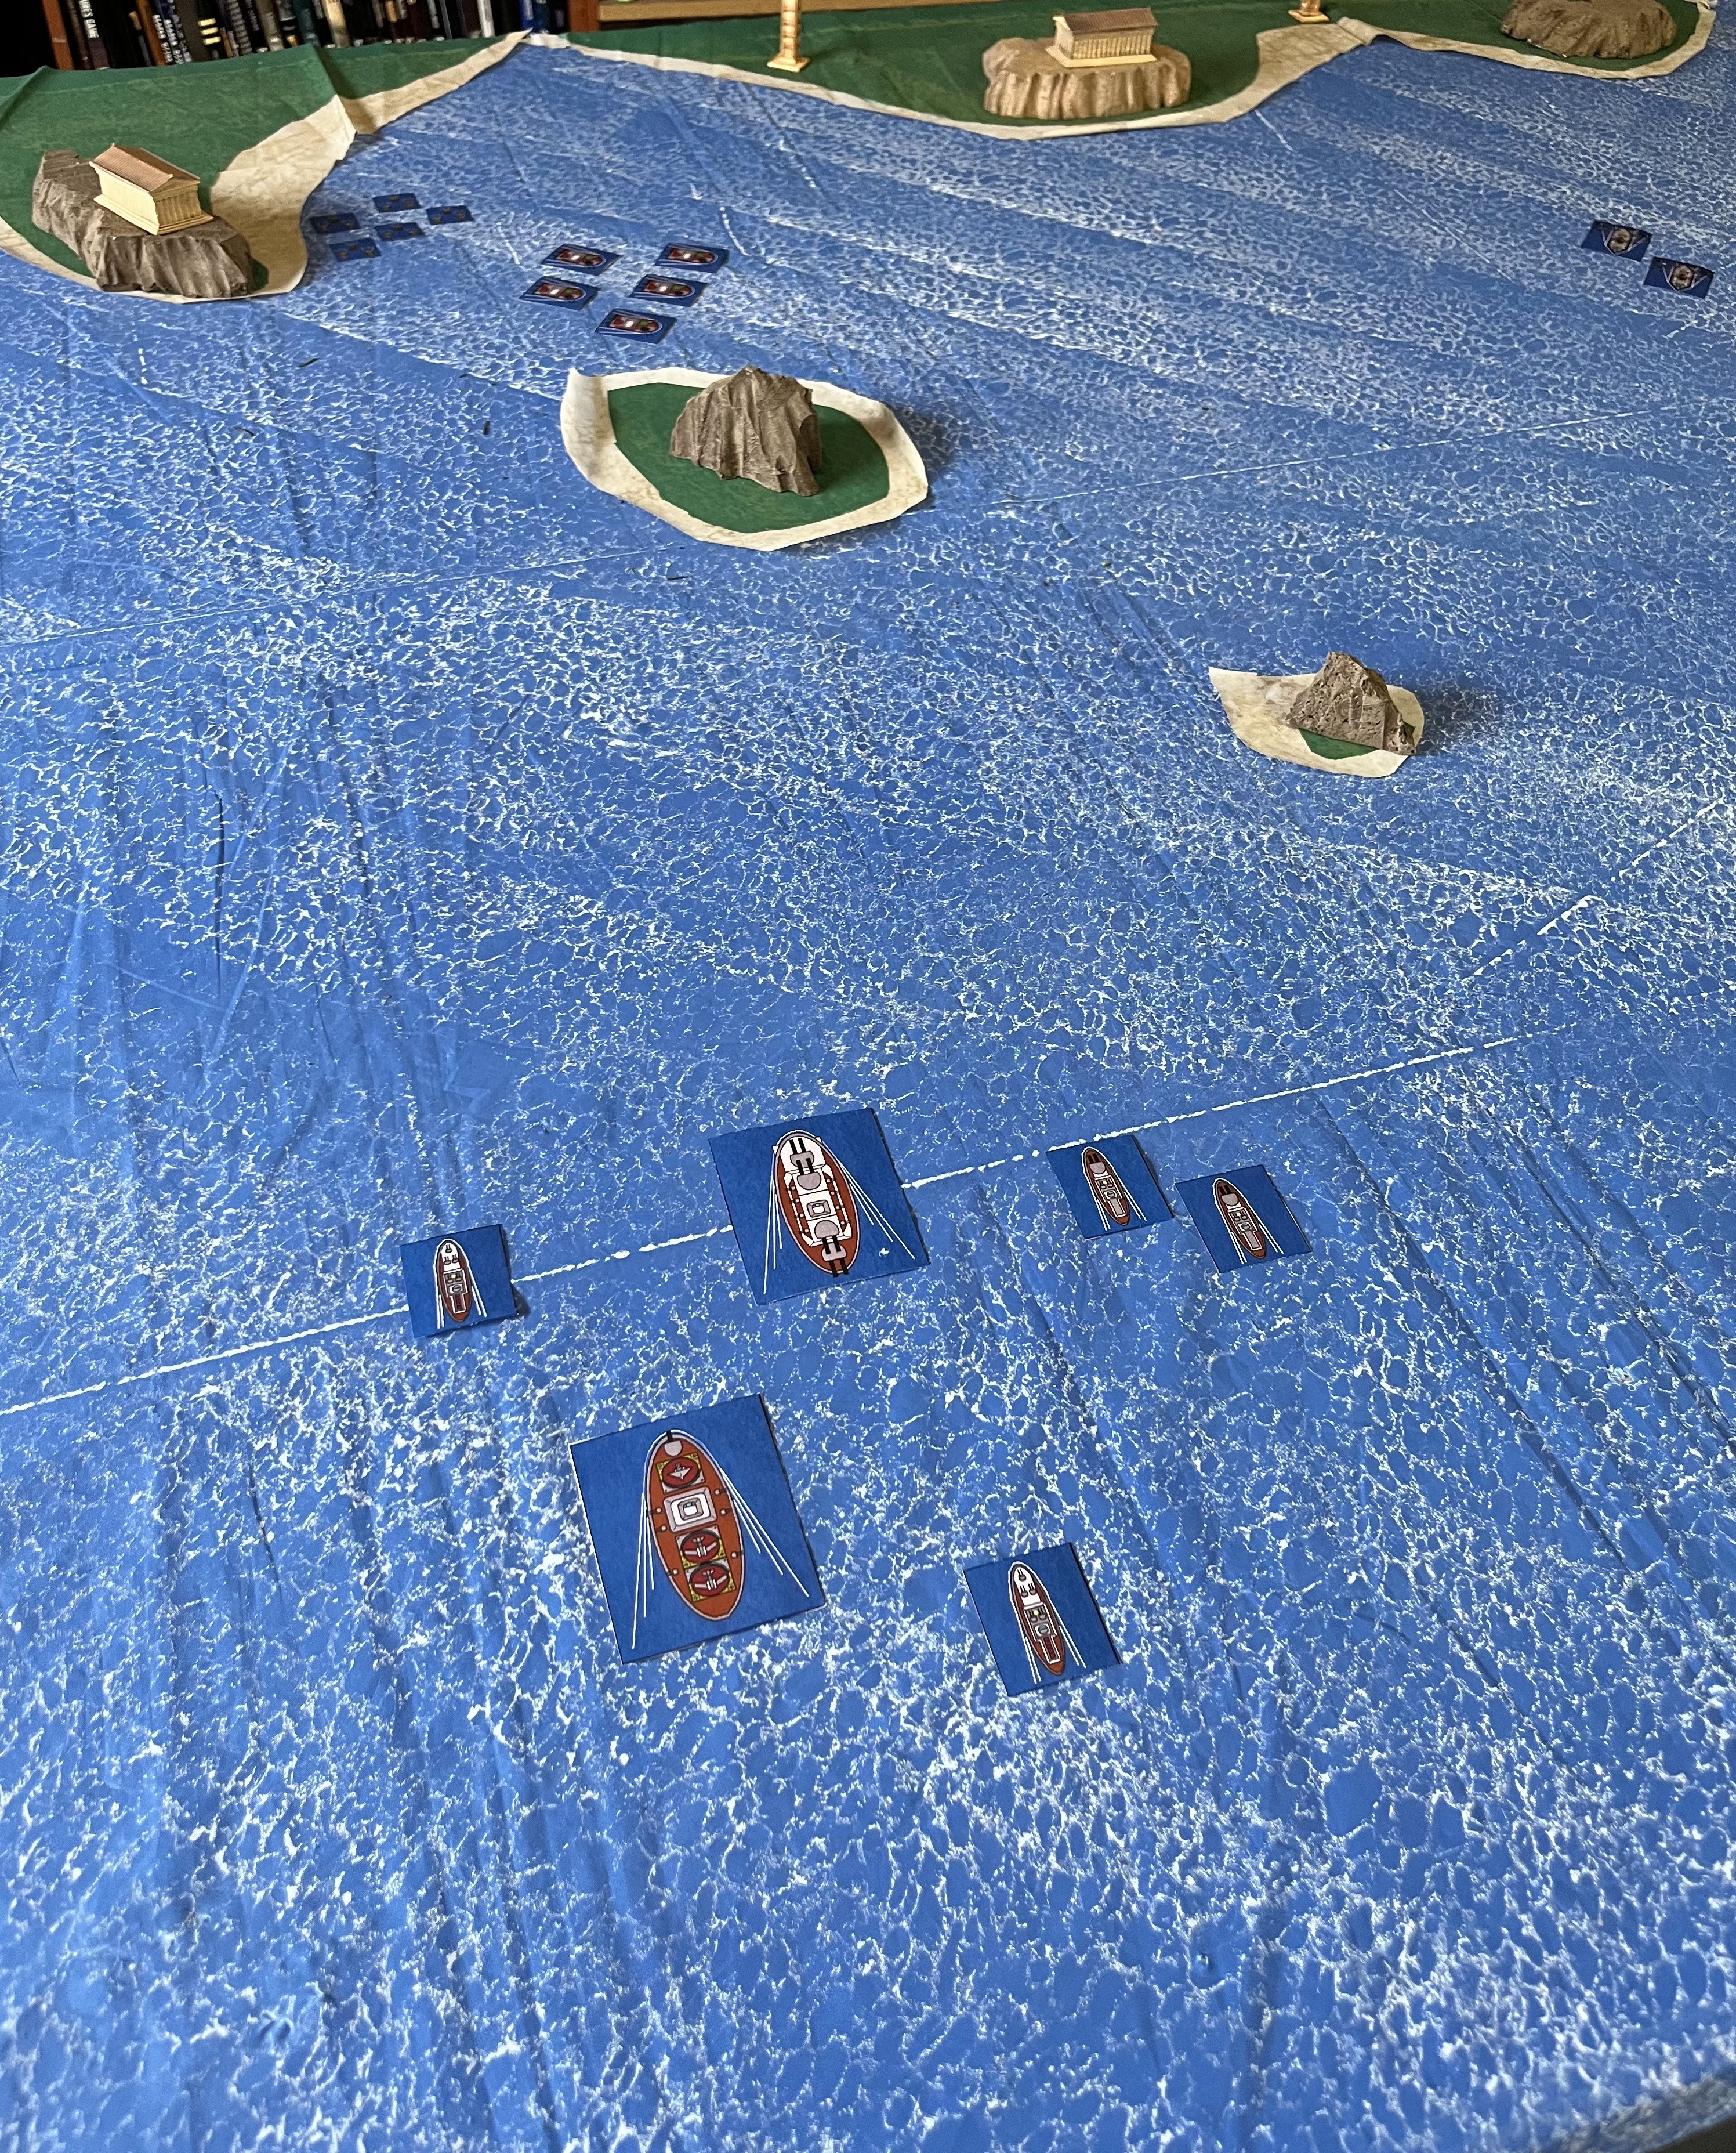
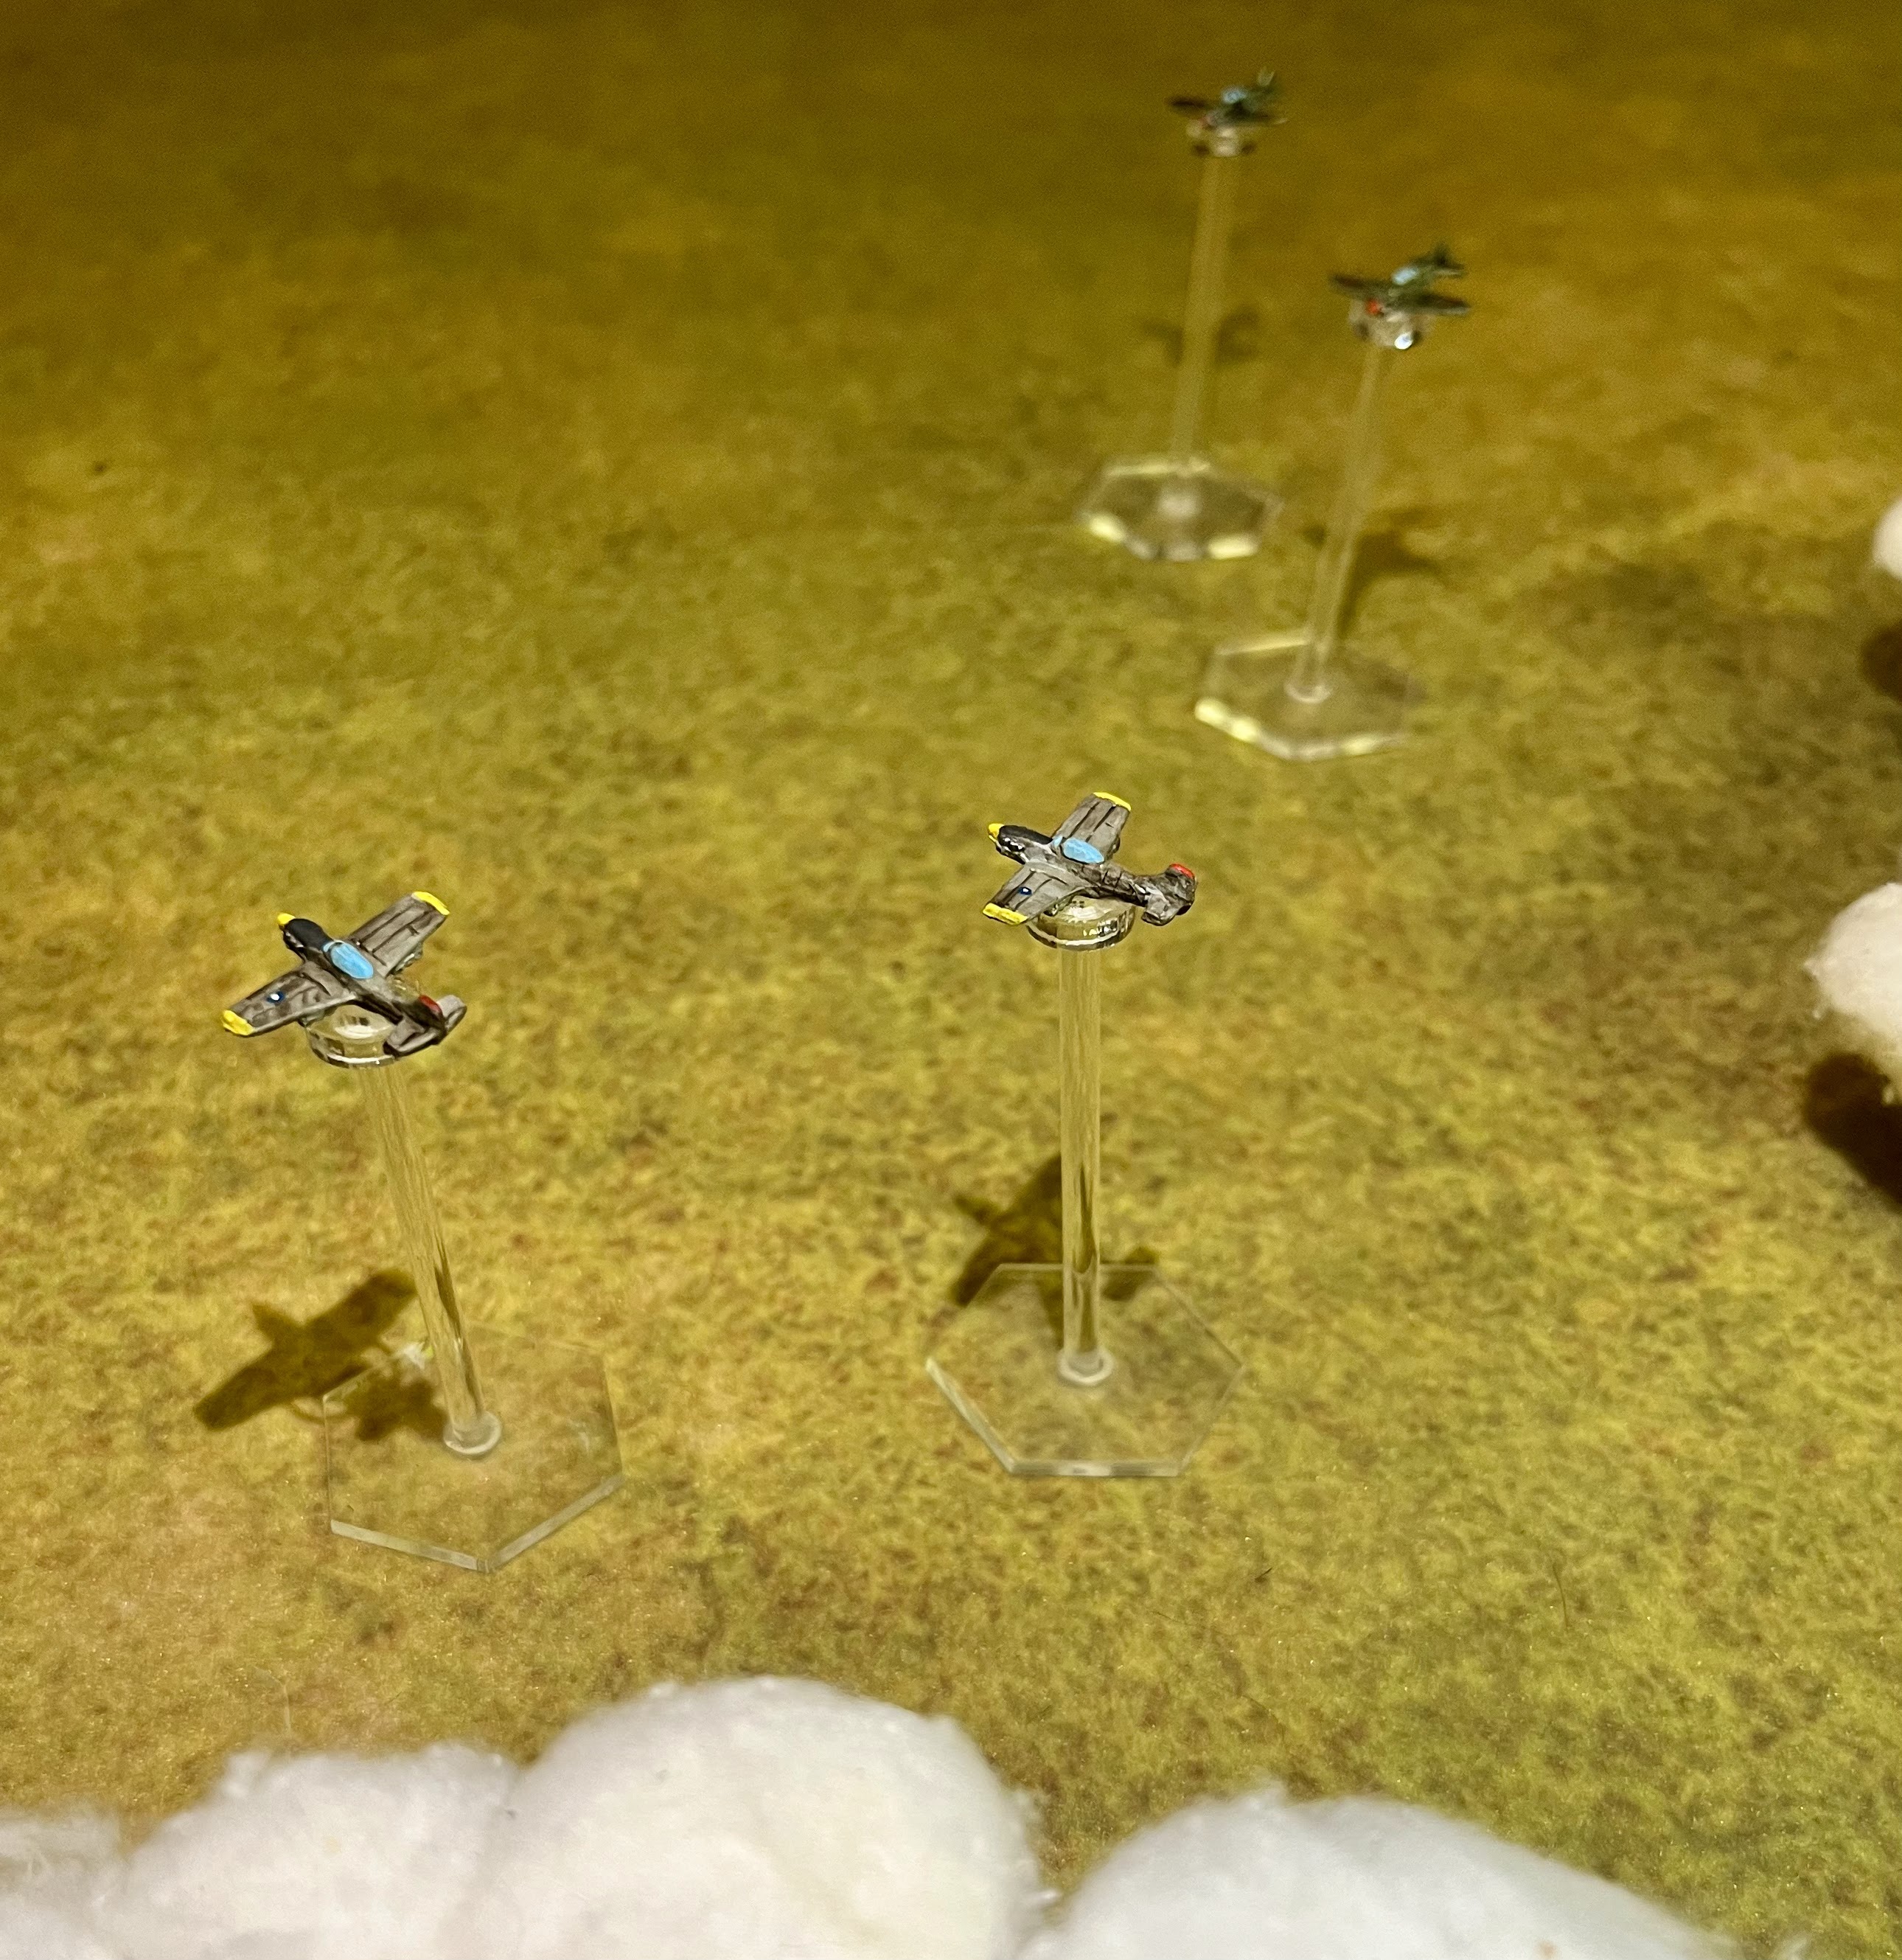
Yaks on the left, Lavochkin's on the right

Mission: 
A simple Combat Air Patrol.

Set-up:
1 MU will equal 1 inch and the board will be 48 by 48MU.  

There is no difficult terrain on the board.  However, there are 4 cloud banks.  There are 3 cloud banks jumbled together at High altitude, and 1 smaller cloud bank at Combat altitude.  

In this case, the USAF is the Attacker.  The North Koreans are focused on getting to the air field to strafe targets.  The Mustangs arriving lead to a dogfight instead. 

Weather, sortie type, and Attacker were all determined using the methods found in the main White Star/Red Star rulebook.  

If an aircraft is off the base, it is at Low altitude, on the base is combat altitude, and on a dice is High altitude. I won't be following the details on a turn by turn basis.  Instead, I will break it down into three broad phrases; Maneuver Phase, Battle Phase, and Endgame and try to cover the battle in broad strokes rather than turn-by-turn, aircraft by aircraft detail. 

Maneuver Phase:
The first three turns go by fast as no planes are detected.  However, the North Koreans spot the Mustangs on Turn 3, and the USAF player has to place his planes up to 18 MU in.  Two Mustangs are at High Altitude near the edge of the board, while the other two are at Combat Altitude going into the cloud banks.  


The next turn, the Mustangs spot the Yak-9s coming in hot on the Mustangs at Combat altitude!  Since the USAF has more planes, they get to move first.  The two forward Mustangs decide to turn into the oncoming North Koreans to try to get in under the guns.  The Yaks fire a burst and then buzz past, the deflection angle was too much for them to score a hit. 


The next turn, the LA-9s are also detected, and they are also coming in hot on the Mustangs. Now, both sides have equal numbers and the Attacker goes first, the USAF.  The Mustangs try to maneuver, but the Experienced LA-9 pilots zoom in for the kill on the wingman of the first squadron. The Lead Fang pilots scores a hit and downs the Mustang! 

Now the real furball is getting started!

Battle Phase;
Now, the North Koreans have more planes, but choose to let the USAF go first. 

The Mustangs at High altitude manage to get in behind the Rookie Yak pilots thanks to their higher experience, and swat them out of the sky!  

However, that Maneuver put them into the sights of the La-9 pilots.  The wing leader manages to blast the Mustang wingman out of they sky, his second kill for the day!  However, he also uses the last of his ammo in the process.  


End Phase:
With both sides at half, this forces a disengagement turn.  It is the final turn of the game.  The USAF can choose to go first or second, and decide to go first. 

The Mustang in danger just throttles it and heads for home, breaking off.  The LA-9's try to maneuver back around, but the last Mustang out-maneuvers them and opens up on the lead aircraft. The USAF Mustang runs out of ammo trying to down the North Korean craft.  However, it is to no effect as the North Korean pilots weaves and dodges his way through the incoming fire.  


Conclusion: 
The battle ended in a draw, and a non-historical outcome!  So, what happened! 

The big sticking point was that the North Koreans managed to see the USAF before the USAF saw them!  This allowed them to get into a good firing position right away, and the Mustangs had a tough time shaking them.  The USAF had a chance for a win on the last attack run, but alas it was not to be! 

It was fun seeing the two players try to do the "Thatch Weave" and end up keeping the engagement close.  The Experienced USAF pilots easily downed the rookie North Koreans in the newer Yak-9s.  However, Experience paid off for the La-9 pilots, in worse aircraft.  

From here, I think I want to run a few games in the various segments of the war until the end.  Of course, this would represent the Air Battle of Korea, which lasted only a few weeks before the UN had gained air superiority over North Korea.  The North Korean offensive lasted until about September 1950.  The next phase of the war was the Chinese Counter-attack from October to January 1951.  This would be the introduction of the Mig-15 as they strove to bring down the day light bombers of the USAF.  

Onto the next battle!  


Become a Patron and get access to all the cool stuff, a peak behind the curtain of Blood and Spectacles, and early-access to playtest games!  


You can follow Blood and Spectacles Facebook page or Instagram for more fun! 

Check out the latest publications and contact me at our Blood and Spectacles website

Or purchase all out games at the Blood and Spectacles Publishing Wargames Vault Page!  


Monday, October 23, 2023

Wargame Design: Having a POV


POV.  I see this acronym I see all over the world of Social Media and the Internet.  It usually sets-up a joke with a funny image.  However, when it comes to Wargame Design POV is more than a punchline.  

So, what does POV even mean? POV is short-hand for Point of View.  You may hear this term related to the role a player plays in the military structure of the game they are playing.  I.e. a Corp commander or Divisional Quartermaster is the POV of the game.   However, that is not what I want to address in this post.  In the case of Wargame Design and the theory related to it, POV pertains to the Point of View a designer brings to how the game they are building should be played.  It is through this lens that a designer makes decisions about the nature of the game, what it is trying to do on the table, and what "reality" the rules are trying to reflect.


POV: What Would You Say You Do Here?
A designer's POV helps them align on their Design Goals.  Design Goals are the parameters that a designer has when they make a game.  These act as guard rails so that a design stays on course for what the maker intended.  However, the Designer's POV is the key inputs into what these guard rails should be.

The Designer's POV is how the designer envisions the warfare that is going to be going on the tabletop.  It is the "spirit" of the game and the reality the designer imagines the game is reflecting in the mechanics and the design goals.  The Designer's POV will inflect the game in all of the mechanical interactions of the game, because this is how the designer themselves reflect on the key nature of tabletop warfare itself.  

A game with a strong POV can take a variety of mechanics and bend them to their will and create an outcome.  The players will know and understand what the designer was intended to simulate or recreate on the table.  A game with a weak POV will take a variety of mechanics and the player will be left feeling like they are just a jumble.  It will feel unguided and not clear in the execution.  The tone and feel of the game will not be consistent and have a ton of If-This-Than-That style rules, edge cases, and one-offs that make no sense.


POV: An Example If You Please
This is an esoteric concept, so I will try to illustrate it with some examples.  

I am currently working on the design for a game in which I can play the Battle of Kadesh.  This is a Bronze-Age battle where chariots were considered the highest form of military might.  The problem is, no one is 100% sure how Chariot warfare actually worked!  No chariots are really left from this period, the ancient writers do not talk much about how they were used, and various historians have a variety of theories on how this type of warfare worked.  There is no definitive answer to "This is how Chariot battles were fought".  This is a very common problem with historical wargames, and even well documented periods will have key areas where opinions differ on just how exactly warfare was waged. 

In a place with a grey area like this, it is very important that the Designer have a POV of how they want to answer the question of "How did they fight?".  In chariot warfare, there are several options to choose from!  

1. Chariots rolled around and the crew fired arrows or speared people as they cruised around at high speeds!  Maneuver and speed were the key, and the ability to "reach out and touch" someone with archery fire.

2. Chariots moved fast to an area, stopped and the crew either fought on foot or shot arrows from a stand-still.  They were essentially battle taxis as they moved up and unloaded their crew to fight, or fired and a stand-off distance. 

3. They moved in huge formations and wheeled and maneuvered together to form a large, fast moving force that got there the "fastest with the mostest".  They were used to exploit gaps and flank pinned enemy forces. 

4. They engaged only other chariots in shoot-outs and raced around each other, leaving the infantry to stand around and wait until the chariots needed a place to recover before doing it all again.  

Heck, there are more theories about Chariot Warfare than I can put on paper, and if you read enough books on the topic you will realize that everyone has an opinion!   As the Wargame Designer, you have to decide which theory you want to lean into and your POV about Chariot Warfare.  


POV: But the Emperor Protects!
That's nice and all, but what about games that are not historical?  You know, games that are pure Fantasy or Sci-fi?  Well, these too need a strong POV about how warfare in this game will work so the rules can reflect it. 

Think about Warhammer 40K.  There are some core assumptions built into the game.  The first is that ground warfare and personal combat still matters.... a lot.  In modern warfare, you try and hit your enemy with an artillery barrage where they can not return fire.  Close-combat is not really a thing.  No one runs up and tries to hit the other guy holding a gun with a sword.  However, in Warhammer 40K they can and do!  Why?  Because the game has a POV on how warfare in the 40K universe works, and it is not the same POV as other Sci-Fi universes.  Tomorrow's War imagines the future to be Vietnam in Space!  No swords at all, but it is still a strong POV.     


POV: Your POV Sucks and You Should Feel Bad! 
The sad truth is, you will choose a POV and build your game around it.  This will be a labor of love in which your pour hours, days, and years of your life too.  Ultimately, someone will completely disagree with the entire POV of your game.  Even better, they will be more than happy to tell you all about why your POV is bad and you should feel bad for having it.  

If you get this far!  Congratulations!  Remember, to be a game game designer, you need two things.  A completed game, and people who are willing to play it.  If someone tells you your POV is wrong and you should feel bad, chances are you have: 

1. Completed a game!  Great work! 
2. Someone played it! 

They may not agree with your POV, and that's fine.  You are a game designer now! Congrats! 

People will disagree with your POV and that is fine.  You saw how scholars are deeply divided about the nature of Chariot Warfare.  That applies just as much to wargamers as well.  However, the game can not appeal to all potential POVs for a period or type.  It is more important for a Wargame Designer to have a strong POV and carry it through the game, than a weak POV that tries to appeal to all POVs unsuccessfully, because many POVs are diametrically opposed.  


Final Thoughts

POV: It's no joke.   

A strong POV is the Wargame Designer making a statement about how the game is intended to model warfare in their game.  This may not be aligned with how everyone sees it, but this strong POV will influence the Design Goals and therefore permeate the entire game.  If a Designer does not have a strong POV they will water down their own content and end up with strange mechanical choices, If-This-Than-That rules, and unsatisfying outcomes on the tabletop. 

Therefore, have a strong POV about your game. 

Bonus Content
My local club has been starting to come together a bit more.  We are actually putting together a name, some branding and regular club nights.  It is almost like a real thing now.  Considering it started as literal nothing, this is a big deal to me.  I am immensely happy with the progress and success we have had recruiting folks to play.  

Now, the main game that has driven a lot of the growth of our local group is public and semi-frequent games of GW's Kill Team as well as a monthly mini-painting class.  These in tandem have really been helpful in growing our little game group. 

So, today I am bringing a bit more Kill Team to the table.  This battle was my Eldar Harlequins from 1988 vs some of the new Ork Kommandoes.  Suffice to say that the 3AP of the Harlie's was super helpful.  


I was able to rush out early and grab all three objectives for a strong early lead.  From there it was a matter of contesting and holding as the game went on.  Some careful target selection of key enemy units and some good rolls when I needed them helped me survive the counter-attack.  The Prismatic Colors Strategic Ploy, the Death Jester, and the 4+ Invulnerable saves helped alot! 


By the end of the 4th Turning Point, Ork numbers told.  My Harlie's were in a rough place and had lost two of the three objectives.  However, it was just enough to barely hold on for a 1 VP win!  One more Turning Point and I would have been toast. 

My models were all Citadel Miniatures from 1988 that I repainted earlier this year using Army Painter Speedpaints V1.

I hope you enjoyed the extra content!      


Become a Patron and get access to all the cool stuff, a peak behind the curtain of Blood and Spectacles, and early-access to playtest games!  


You can follow Blood and Spectacles Facebook page or Instagram for more fun! 

Check out the latest publications and contact me at our Blood and Spectacles Website

Or purchase all out games at the Blood and Spectacles Publishing Wargames Vault Page! 


Sunday, October 15, 2023

On The Painting Desk: Battle of Kadesh Project- Walk like an Egyptian


What's a nice reader like you, doing in a blog like this?  

Faithful readers know I have been working on an Egyptian army for a Battle of Kadesh scenario.  This army is 6mm miniatures, with units on 60mm x 60mm bases.  Therefore, it is a bit unconventional BUT the units look like proper blocks of troops on the board.  The Egyptian army has 22 bases with something like 30-54 models per base.  Therefore, the army will have something like 880+ little soldiers in it!  

I have been continuing the project using my traditional method for painting 6mm models.  I go into some detail on it in the Project Launch entry.  I won't bother repeating it here.  Instead, let's take a look at what I got painted for the army since we last talked about it.  

First up is some Bow armed skirmishers to scout and screen for the Egyptians forces.  You may notice that they are two different skin tones.  This represents a mix of native born Egyptians and mercenary/vassal Nubians for the army.  In a pinch I could also use the Nubians in a Kingdom of Kush army if I wanted to as well.  

Skirmishers screen the Levy troops as they advance across the desert

Then, after a long delay due to summer heat; I turned my attention to some of the main infantry units for the Egyptians.  These are spearmen with bow support.  These were some of the bigger units with 13 or so strips of 4 minis per strip.  I guess each base is about 52 minis or so.  There are four of these units in total to represent regulars with bows.  This is the bulk of the melee infantry for the Egyptian side of the scenario.  However, you have to recall that the main "killing" weapon of the time was not melee but the ranged bow.  Therefore, the army still has a lot of infantry and archers to paint up. 

The next soldiers I tackled were the Spearmen with Bow support.  These guys were going to represent the Professional Soldiers with attached Bowmen.  They are the main elements of the Egyptian force, but they are also big units!  They have something like 7 rows of spearmen (4 figs each) and 6 rows of bowmen (4 figs) each.  That is about 52 figs per base and their are 4 units of these guys.  That was a lot of batch painting.  

Egyptian Infantry WIP

Actually, painting all the 6mm soldiers isn't too bad.  The hardest part of 6mm models really is the bases!  There are always little gaps between strips that you have to go back and paint, between your rows of troopers.  Not an easy fit at all!  Then, there is the task of painting ground across the rest of the base.  Ugh.  Probably my least favorite part of 6mm models, too much base!  

Anyway, here are the 4 Egyptian Auxiliary Infantry with bow support.  These guys are soldiers regularly called up to duty, not just locals gathered up to fight. Therefore, they are more proper soldiers than the Militia or Skirmisher units.  They will form the backbone of the fighting force, but you can see that bows are still really an important part of this time period and geographies fighting style. 


These units are proper chonky!  That makes 10 of the 20+ bases for the Egyptians complete.  I have a feeling the Hittites may get delayed into a 2024 project! 

I would love to say that is the last of the "big units" but next on my list is a lot of Archer units in ranks.  Those guys have a lot of rows of archers on them, and they will be a chore to work through.  

The army approaches an oasis

Batch painting ahoy! 


Become a Patron and get access to all the cool stuff, a peak behind the curtain of Blood and Spectacles, and early-access to playtest games!  


You can follow Blood and Spectacles Facebook page or Instagram for more fun! 

Check out the latest publications and contact me at our Blood and Spectacles website

Or purchase all out games at the Blood and Spectacles Publishing Wargames Vault Page!  


Monday, October 9, 2023

Battle Report: Men of Bronze - Before the Walls of Miletus


This is the continuing recreation of the Ionian Revolt.  The Ionian Revolt was a revolt against the Persian Empire by the Ionian Greeks and their allies prior to the Greco-Persian War.  It took place from 499 to 493 BCE.  It was a land and sea affair, so I am using a combination of Poseidon's Warriors and Men of Bronze to re-create the campaign.  Both are from the Osprey Wargaming Series.  In addition, Men of Bronze has a specific supplement for the conflict called The Ionian Revolt. 


Miletus was the Ionian city that instigated the Ionian Revolt.  As the Persians closed the noose on the revolt they decided to target the source.  The Ionian Greeks decided to try to face the Persians at Sea instead of on land.  This culminated in the Naval battle at Lade.  This battle was a Persian victory and the various factions of Greeks scurried back to defend their respective city-states.  This gave the Persians the space and opportunity to move in and place Miletus under siege. 

Victory there was expected to end the Ionian Revolt.  Ironically, Aristagoras the Greek who instigated the revolt in Miletus had left the city to campaign in Thrace and to start a colony.  He died during that campaign.         

One of the Optional Scenarios in the Ionian Revolt supplement is rules for a siege game.  This is an area that Men of Bronze shied away from previously.  They were represented by the Ravage the Countryside scenario or a Race to the Gates style scenario.  Siege warfare was common in the period, but did not seem that exciting to actually game.  Many of the ancient siege were probably resolved due to logistics, disease, betrayal, or simply negotiated to a conclusion.  However, with a closer look at the Ionian Revolt, it made sense to try to build some sort of scenario.  The supplement also has two other alternate scenarios, one for the burning of Sardis at the start of the Revolt, and the other for Naval battles like Lade.  Today, we are going to give the Siege scenario a shot.
  
Forces: 
We have no real historical information about what the Persian siege army looks like or what the defenders were composed of. 

Greeks of Miletus
1 Militia Hoplites - General
2 Peltasts
1 Psiloi
2 Archers/Slingers

The Persians
2 Drilled Infantry
2 Psiloi
2 Warband Infantry
3 Archers - 1 with General

Set-up:
The board will be 72MU by 48 MU with 1 MU to equal 1 inch.  

The Defenders have a wall that crosses across their deployment zone.  The details of how this wall works is in the Ionian Revolt supplement.   Terrain placement on the rest of the board is per the normal rules. 

The Ionians have a speed bump force of Peltasts at the gate, perhaps trying to break-out and disrupt the Persian advance?  They are back-stopped by the Milita Hoplites in Phalanx.  Behind them a unit of Psiloi prepares to support them.  The flanks of the gate are covered by Greek archers and slingers to concentrate fire at the gates.  The last Peltast unit is out wide, perhaps hoping to add firepower, or sally forth when the time is right? 

Ionians prepare to defend the city!

The Persian assault force is set-up 12 MU in from their board edge.  They deploy with their warband infantry leading the way towards the gate, followed up by Drilled Sparabara.  

The main Persian assault force

The rest of the force spreads out to attack along the wall and try to use their firepower to suppress the defenders.  The Psiloi are approaching in the cover of the fields.  The attack is well-supported by Persian archers across the battle line.  

The Persians look to have the defenders outnumbered!

The two forces are deployed and ready to fight.  The Persians have an advantage starting with 9 Arete Points to the Ionian Greeks 6 points.  We will have to see if this imbalance makes the difference. 


Mission: 
Persian troops will be allowed up to 3 gaps in the wall based on a pre-game mechanic.  Per the rules, we established that the Attackers have managed to get one opening in the wall.  In this case, we decide that traitorous pro-Tyrant and pro-Persian forces have managed to open one of the many gates into the city.  Persian troops and Ionian defenders have rushed to the gate for the decisive battle.  

The mission objective is to try and force the opposing forces to collapse. 

Maneuver Phase:   
The Ionians pay enough Arete points to go first, hoping to use their peltasts in a spoiling attack.  They break from the gates and are quickly peppered with Persian archer fire.  However, their shields protect them well-enough and they press the attack.  

The Persians simply outbid the Greeks for initiative and the Persian archers quickly send the Greek spoiling attack fleeing back to the "safety" of the city.  The Persians press forward.  As the Persian Psiloi move towards the Walls, the Greeks try and fail to interrupt. 

Greek missile troops try to force back the Persian Archers in the village by the gate, but a horrendous roll and no Arete points stops them from having any effect.  The rest of the Persian host is just outside of the killzone.  The Ionian Militia falls back a step, hoping to lure the Persians into the kill zone before the decisive combat happens at the gates.  However, the fleeing Peltasts cause the Militia to start wavering. 


Battle Phase: 
The Persians again just bid more than the Greeks can manage.  However, this time the Greeks hold back and save the Arete Points for re-rolls and other commands. The Persian counter-battery fire is also ineffective from their archers, as most of them are still moving into position.  

The Persian Vanguard of warband infantry see the Militia wavering and try to charge them.  The Greeks try to interrupt, but fail.  This leads to a melee, where the Persians lose 3 to the Greeks losing 2.  However, the Militia troops fail their discipline check while wavering and end up losing another Courage. Neither side can gain the upper hand at the gates.  


The Persian Psiloi also launch an attack at the Greeks defending the wall, but the Greeks strong position leaves the attack thwarted. 

The Greeks fight back with a barrage of their own.  The Persian Archers in the village are reduced to 1 Courage and start to Waiver.  The Psiloi at the wall lose 1 Courage.  The Persian Archers screening the Drilled Infantry also take a Courage loss from the Greek archers in the city.   


The Psiloi in reserve behind the gate charge in and easily help the Militia Hoplites clear the Persians out there.  The way is clear.... for now.  The Ionian Psiloi let the Hoplites push back the foe, and separate again as a reserve.  The Persian follow-up forces watch the vanguard stream past in disarray, but they are unmoved by the plight of their comrades. 


The Persian Archers and Psiloi again rain arrows and Javelins on the Greeks, who respond in kind.  The Ionian Archers are reduced to 1 Courage and are wavering, the Peltasts on the opposite side of the wall also lose a Courage.  However, the Persians moving to the gate are not close enough to charge and keep closing in. 

This gives the Greek commander enough time to harangue and re-group is Militia hoplites into a Phalanx.  He reminds them of what they are fighting for and the soldiers steal themselves for battle and redress their lines.  The Greek archers also Rally.  The Greek missile troops rain hell on the approaching Persians.  However, the Persians were prepared and only lose 1 Courage.       


The Persians Drilled Infantry charge for the gate and the Greeks meet them half-way, a counter-charge of their own.  The two sides clash with the roar of war shouts and the crash of metal on metal.  The fighting is fierce, but the Greeks hold and push the Persians back a step or two.  The Persians are down to 2 Courage, as are the Greek defenders.  


Despite the noble defense at the gates, the Greek defenders take hits all along the walls from the full press of the Persian attack!  The Ionian archers are forced from the walls from combined Persian Archer fire.  However, the Persian Archers in the village are forced back as well.  


Greek losses force a collapse test across the line.  It is not good for the Ionians as the Psiloi reserve and the slingers both flee the field.  

End Phase: 
The Persian Warband Infantry charged in to support their brothers at the gate.  It was a close run and fierce battle, but the Persian ability to dump in re-rolls proved the difference and the gallant Hoplite defenders at the gates broke and fled to save their families and try to escape the city. 
 

The Peltasts began to re-deploy to try and hold the gate a moment longer, to try and buy time for residents to flee.  However, they took more Courage loss for the Persian Psiloi trying to force the wall.  

The Ionian Peltasts avoid a barrage of Persian Javelins as they redeploy.  They get the gate just in time to see the Persian Drilled Infantry storming through.  They set their feet and throw, causing enough damage to reduce the Persians to 0 Courage.  They turn and flee.  This triggers Persian collapse tests.  


The Persian Warband Infantry and a battered Psiloi unit decide that the battle is won and fall back to camp.  It is a token victory that buys the city folks a bit more time to flee, but the outcome of the battle is clear.  

Conclusion: 
The Persians have won and the Fall of Miletus has begun.  The Ionian Revolt has been squashed by the Persian forces. 

In the Ionian Revolt Supplement, the final battle is a different scenario than the one we played today.  It is one that does not require specialized terrain like walls.  However, my opponent and I are satisfied that this siege scenario is an appropriate end to the campaign.  The optional siege scenario was a success!  That will be a great addition to a number of Men of Bronze campaigns!  

In the course of seven battles, the Ionians won 1, compared to the Persian 6.  A decisive defeat on land and sea for the Ionians.     


Become a Patron and get access to all the cool stuff, a peak behind the curtain of Blood and Spectacles, and early-access to playtest games!  


You can follow Blood and Spectacles Facebook page or Instagram for more fun! 

Check out the latest publications and contact me at our Blood and Spectacles website

Or purchase all out games at the Blood and Spectacles Publishing Wargames Vault Page!        

Monday, October 2, 2023

Battle Report: Aquanautica Imperialis - Operation: Hemlock


This game will be using the Aquanautica Imperialis rules in the Operation: Hemlock setting. 

The Ammoriss Naval PDF cruiser Saint's Shield steamed ahead with her taskforce arrayed across the Ammoriss Ocean behind her. Their bows cut through the deep blue, cresting the waters into a white spray.  Their wake leaving a wide trail behind.  Sea birds swirled around the Vox and Augur masts along the bridge of each ship.  

Taskforce: Chalice had managed to pen up the Ork fleets sending those foolish enough to leave port to the bottom.  However, the Ork air force was still active and a danger to the Ammoriss Navy.  Her augurs stretched out looking for just such a threat.  The Ammoriss Air PDF had been unsuccessful in shutting down the enemy fliers.  Therefore, battle line Guiding Light led by Saint's Shield; was being sent into harm's way to the edge of Ork controlled territory in an effort to stem the Ork air forces ability to hamper Imperial supply lines. 

The Captain of Saint's Shield opened his sealed orders and read them to the X.O.  As expected, the battle line Guiding Light was to steam to the Green Zone and silence Ork airfields along the coast.  The intent was to take the pressure off Imperial Supply Lines from the Ork air boyz.  Of course, by attacking the air fields, they would be painting a big bulls-eye on themselves.  

Forces: 
The forces will be made up of the paper templates I made in MS Paint for the game. 

Guiding Light
ANS Saint's Shield - Reliable Cruiser

ANS Divine Right - Stalwart Cruiser

Spearpoint 345 - 3 Assured Escorts

Buckler 14 - 2 Protector Escorts

Hunter 878- Hunter Submersible

Green Zone Defense Forces
Big Mekz Boatz- 2 Boiler Boatz - Nobz

Slottaz Tubz- 5 Gun Tubz

Waaagh! Gorgbog - 5 Mob Boatz

Shush-Shush - Sneaky Gitz Submersible

Redtop- Grot Sub

Defgrin- Grot Sub

Squint Eye - Grot Sub

2 Shore Batteries (Weapon Battery, Range 24", Firepower 4, Armor 5+, Hits 4)

2 Fighta-Bommerz sites (Bays 6, Armor 5+, Hits 4) 

Mission: 
The Imperial forces have 6 turns to move in and cause as many hits on the Fighta-Bommer Sites as possible.  They score additional Victory Points for each hit removed from the Fighta-Bommer sites. 

The Orks are trying to protect the sites. 

Set-up: 
The table is a 4x4 play area on my ocean mat.  There is a coastline on the north side of the board where the Orks will deploy their shore battery and Fighta-Bomma sites.  The Orks can deploy up to 6 inches in from the shoreline.  

The Imperial forces will be coming in from the opposite board edge and are deployed up to 12 inches in. 

This game, I am using my paper templates as I do not have model versions of all the ship types in use. 

Turn 1: 
The Imperial forces move to the attack, and the Orks in their small escorts rush to meet them.  The channel between the two outlying islands seems like it will be a choke point, and the Assured escorts are outgunned there.  However, one of the Gun Tubz strays too close and runs aground in the shallow water near the island.  In addition, Ork subs come to fire depth a safe distance away from the Ammoriss Naval PDF taskforce. 

At the Chokepoint, the Assureds open fire and sink a pair of Gun Tubz.  However, they weather a withering amount of return fire and escape unscathed! 

The Saint's Shield trades fire with the Heavy Shore Battery.  Even with Bracing the Cruiser takes the worst of it, losing 2 hits to the Batteries 1.  The other Shore Battery manages to destroy one of the Assured escorts with a well placed shot. 

The Ork subs put fish in the water.  The Grot subs attempts are swatted away by PD, while the further away shots keep cruising.  However, a flight of Ammoriss bombers from the Stalwart send the Squint Eye to the bottom with precision bombing. 1 flight needs to retrun home to re-arm, but three others are still out there hunting.  Clouds of Ork fighta-Bommerz take off from their bases and head towards the PDF ships. 


Turn 2:
The Redtop tries to Run Silent, Run Deep but fails and collides with the Protector escort.  The two sink to the bottom. However, that is not the last navigation woe for the turn! 


The Saint's Shield moves up too close to the island and also runs aground.  The Assured rushes past the Ork escorts, while they turn and head throught he chokepoint after the ANS Divine Right.  In the process, one of the Boiler Boatz runs aground in shallow water as well! 


The Gun Tubz Heavy Kannonz turn the last Protector into a lifeless wreck! A lone bomber squadron swoops in on the Tubz but fails to strike home.  

The Saint's Shield and the Heavy Battery trade shots again, with the Battery taking two hits and the armor of the Reliable cruiser shrugging off the attack.  The Stalwart, ANS Divine Right is hit by the Boiler Boatz and loses a hit.  

Mob Boatz and Fighta-Bommerz swarm the beached Cruiser.  She decides to Brace for Impact to weather the storm. PD takes out one squadron of aircraft.  Fierce fighting breaks out and 2 Mob Boats are removed from play, but in return the Crew of the Reliable is devastated and reduced to 0.  Orks are still swarming their ship. 


Ork Torps hit their own Gun Tub and overkill one and send it to the bottom.  Fighta-Bommerz swarm the Assured and a bomb turns it into a flaming wreck.  Several squadrons need to turn around a re-arm, leaving 4 total in play. 

  
Turn 3: 
The ANS Divine Right scoots forward and sends a squadron of Interceptors to clear out a Fighta-bomma over the Saint's Shield. The Reliable cruiser manages to get free of the grounding, but is still being swarmed by Ork Mob Boats and Fighta-Bommaz.  

The last Boiler Boat comes up on the Reliable's stern and trades shots with her.  The result is a crippled ANS cruiser.  The bow of the Reliable fires on the Heavy Shore Battery and destroys it!  The crew manages to fend off the last Ork attackers, but not before they wreck the ship's rudder.   

Swarms of Ork Fighta-Bommaz again take-off from their bases and head-out to sea looking for the Imperial Carrier.  Meanwhile, the Ammoriss Bombers still in the air target the last Gun Tubz and manage to hulk her. One more Squadron heads for home. 


Turn 4: 
The Divine Right moves towards the coastline.  However, Ork Fighta-Bommaz are swarming the area.  The Saint's Shield limps away from the island coastline, and towards the Ork beaches.  The Ork Shush-Shush moves between the two islands and tries to get a bead on the Carrier. 

The crippled cruiser fires a weakened broadside at the first Ork airbase, but fails to land a hit.  Being just too far for Bombs, the Carrier launches a sortie of Interceptors that clears the air around the ship of Ork aircraft.  Only 1 squadron remains. However, the other squadrons are radioed in and 5 squadrons attack.  Three are splashed by PD and two attack but fail to penetrate the Carrier's armor.  Only 1 remains in service after the attack. 


The last Boiler Boat stalks the Saint's Shield and hits her again for a damaging hit!  Several of the hulked ships sink or explode.  

Turn 5: 
The last Boiler Boat continues to be a nuisance and hits the Divine Right for two hits.  However, her bombers take-off and destroy the first of the Ork airbases with an air raid.  The Ork planes were busy on the ground re-arming and reloading.  


However, heavy fire from the Ork Shore Battery causes 1 more hit, crippling her.  Ouch, no more reloading.  However, there are still three active bombers out and operational.

The Shush-Shush fires a spread of torpedoes to finish off the Carrier, but they fall just short. 


Turn 6: 
The cover of night and a chance to escape is fast approaching.  

The last Grot Sub comes to firing depth behind the Naval PDF Cruiser.  The ANS Divine Right evades the oncoming torpedoes.  

The Boiler Boat and the Saint's Shield line up.  However, as the two exchange fire, it is the Boiler Boat who wins the engagement.  The Saint's Shield is reduced to 0 armor and begins to sink.  

The Divine Right and the Shire Battery exchange fire, with the ship taking a hit.  The last Ork Air base manages to get a screen of fighta-bommaz up over the battery.  

The Shush-Shush reloads her torpedoes and fires again.  The Carrier's PD takes out 1, but three get through.  However, the ship's armored belt holds up against the onslaught.  

See the Ork swarm over the battery, the remaining planes target the Boiler Boat.  However, the escort manages to survive the air attack unscathed!  With that, the bombers return to their battered carrier.  

Conclusion: 
Night falls and the ANS Divine Right manages to limb away into the night, badly damaged.  Despite wiping out the Ork blue-water Navy, they have proven to still have formidable shore defenses.  

The Ammoriss Naval PDF lost 15 Hull points, to the Orks losing 16.  A narrow win for the Naval PDF, but I think it is more accurate to call the result indecisive.  

The grot squealed as Ripsnogga poked it with the business end of his Herding stick.  It looked up with its soft, weak Oomie eyes.  The critter was sopping wet from his little swim to the beach.  The Ork runtherd saw several more of them flopping through the waves and to the beach.  The ship that they came from had heeled over, and settled on the bottom of the bay with part of her hide sticking out.  Even from here he could see some figures moving about on the things hull. 

He cuffed the wretched cur at his feet, and it squealed again.  He grabbed it by the arm and pulled it roughly to its feet and tossed him back to the Gretchin horde behind him.  The Grots were glad to see someone joining their ranks that was of lower rank than them!  They cackled gleefully and some even did little dances of joy.  

Ripsnogga waved his arms around, encompassing the whole beach, "Gather up these little fish!  There is work for them to be doing!"  He whacked a nearby Grot with his stick for good measure.  The little blighters rushed off, eager to grab more Oomiez to their work crews.  Finally, someone they could push around!        


Become a Patron and get access to all the cool stuff, a peak behind the curtain of Blood and Spectacles, and early-access to playtest games!  


You can follow Blood and Spectacles Facebook page or Instagram for more fun! 

Check out the latest publications and contact me at our Blood and Spectacles website

Or purchase all out games at the Blood and Spectacles Publishing Wargames Vault Page!          


Become a Patron and get access to all the cool stuff, a peak behind the curtain of Blood and Spectacles, and early-access to playtest games!  


You can follow Blood and Spectacles Facebook page or Instagram for more fun! 

Check out the latest publications and contact me at our Blood and Spectacles website

Or purchase all out games at the Blood and Spectacles Publishing Wargames Vault Page!