Showing posts with label Crusader Models. Show all posts

Monday, November 29, 2021

Battle Report: Wars of the Republic - Romans vs Slaves


The Wars of the Republic rulebook has some army lists for the Late Republican Romans to take on various slave revolts.  Of course, the most famous is the 3rd Servile War against Spartacus.  The book has a scenario for the Battle of Vesuvius.  Today, we are going to continue the theme of Romans vs. Slaves but we are going to be playing a different scenario then the one in the book. The Battle of Vesuvius has some strange circumstances that made the scenario a bit unique.  Instead, we are going to play a much more straight forward, ahistorical battle.  

In the winter of 72-71 BC Crassus had assembled his army.  He marched out to face Spartacus and his army.  It is not entirely clear, but some scholars believe that the two armies met.  In the ensuing skirmish, Crassus won and this was what caused Spartacus to turn Southward.  

This turn is often seen as the beginning of the end for Spartacus and his army.  It led to the failed attempt to leave Italy to Sicily.  Then, the Slave army was hemmed in at Bruttium and only managed to escape after breaking out of a costly siege.  

There is no clear, definitive record of this battle.  In fact, it may just be local myth.  This will give us as wargamers some space to play a game where the outcome is unclear.  We only know that this "skirmish" took place after Crassus had ordered a "Decimation" of  his own men to "boost morale" of his troops. Spartacus had opted not to cross the Alps and leave Italy earlier in 72BCE.  

If you have further interest in playing out this conflict beyond what is in the Wars of the Republic rulebook, my first supplement for the game is available on the Wargame VaultThis supplement is called Revolt!  and details the Spartacus' campaign including 15 new scenarios, more historical details, and appropriate army Lines of Battle for different phases of the campaign.  

Forces

We know a bit about how a Late Republican Roman force was outfitted.  We also know that Crassus recruited veteran troops back to the Eagles for this campaign.  Velites and Cavalry had been phased out of the legion and instead replaced mostly with auxiliary troops.  The main body was made up of cohorts instead of maniples now.  

Crassus
1 Veteran Legion - Crassus
1 Legion Regulars
1 Militia Legion
2 Light Infantry

The Slave Army was made up of mostly escaped slaves.  They were using looted weaponry and gear.  Most had little or no combat experience, and non-combatants had to move with the army.  It is estimated to be an army around 70K+ people.  Of course, many of them would not be engaged in the fighting. 

Spartacus     
1 Elite Infantry with Pila - Spartacus
1 Drilled Infantry with Pila
2 Light Infantry
1 Archers/Slingers

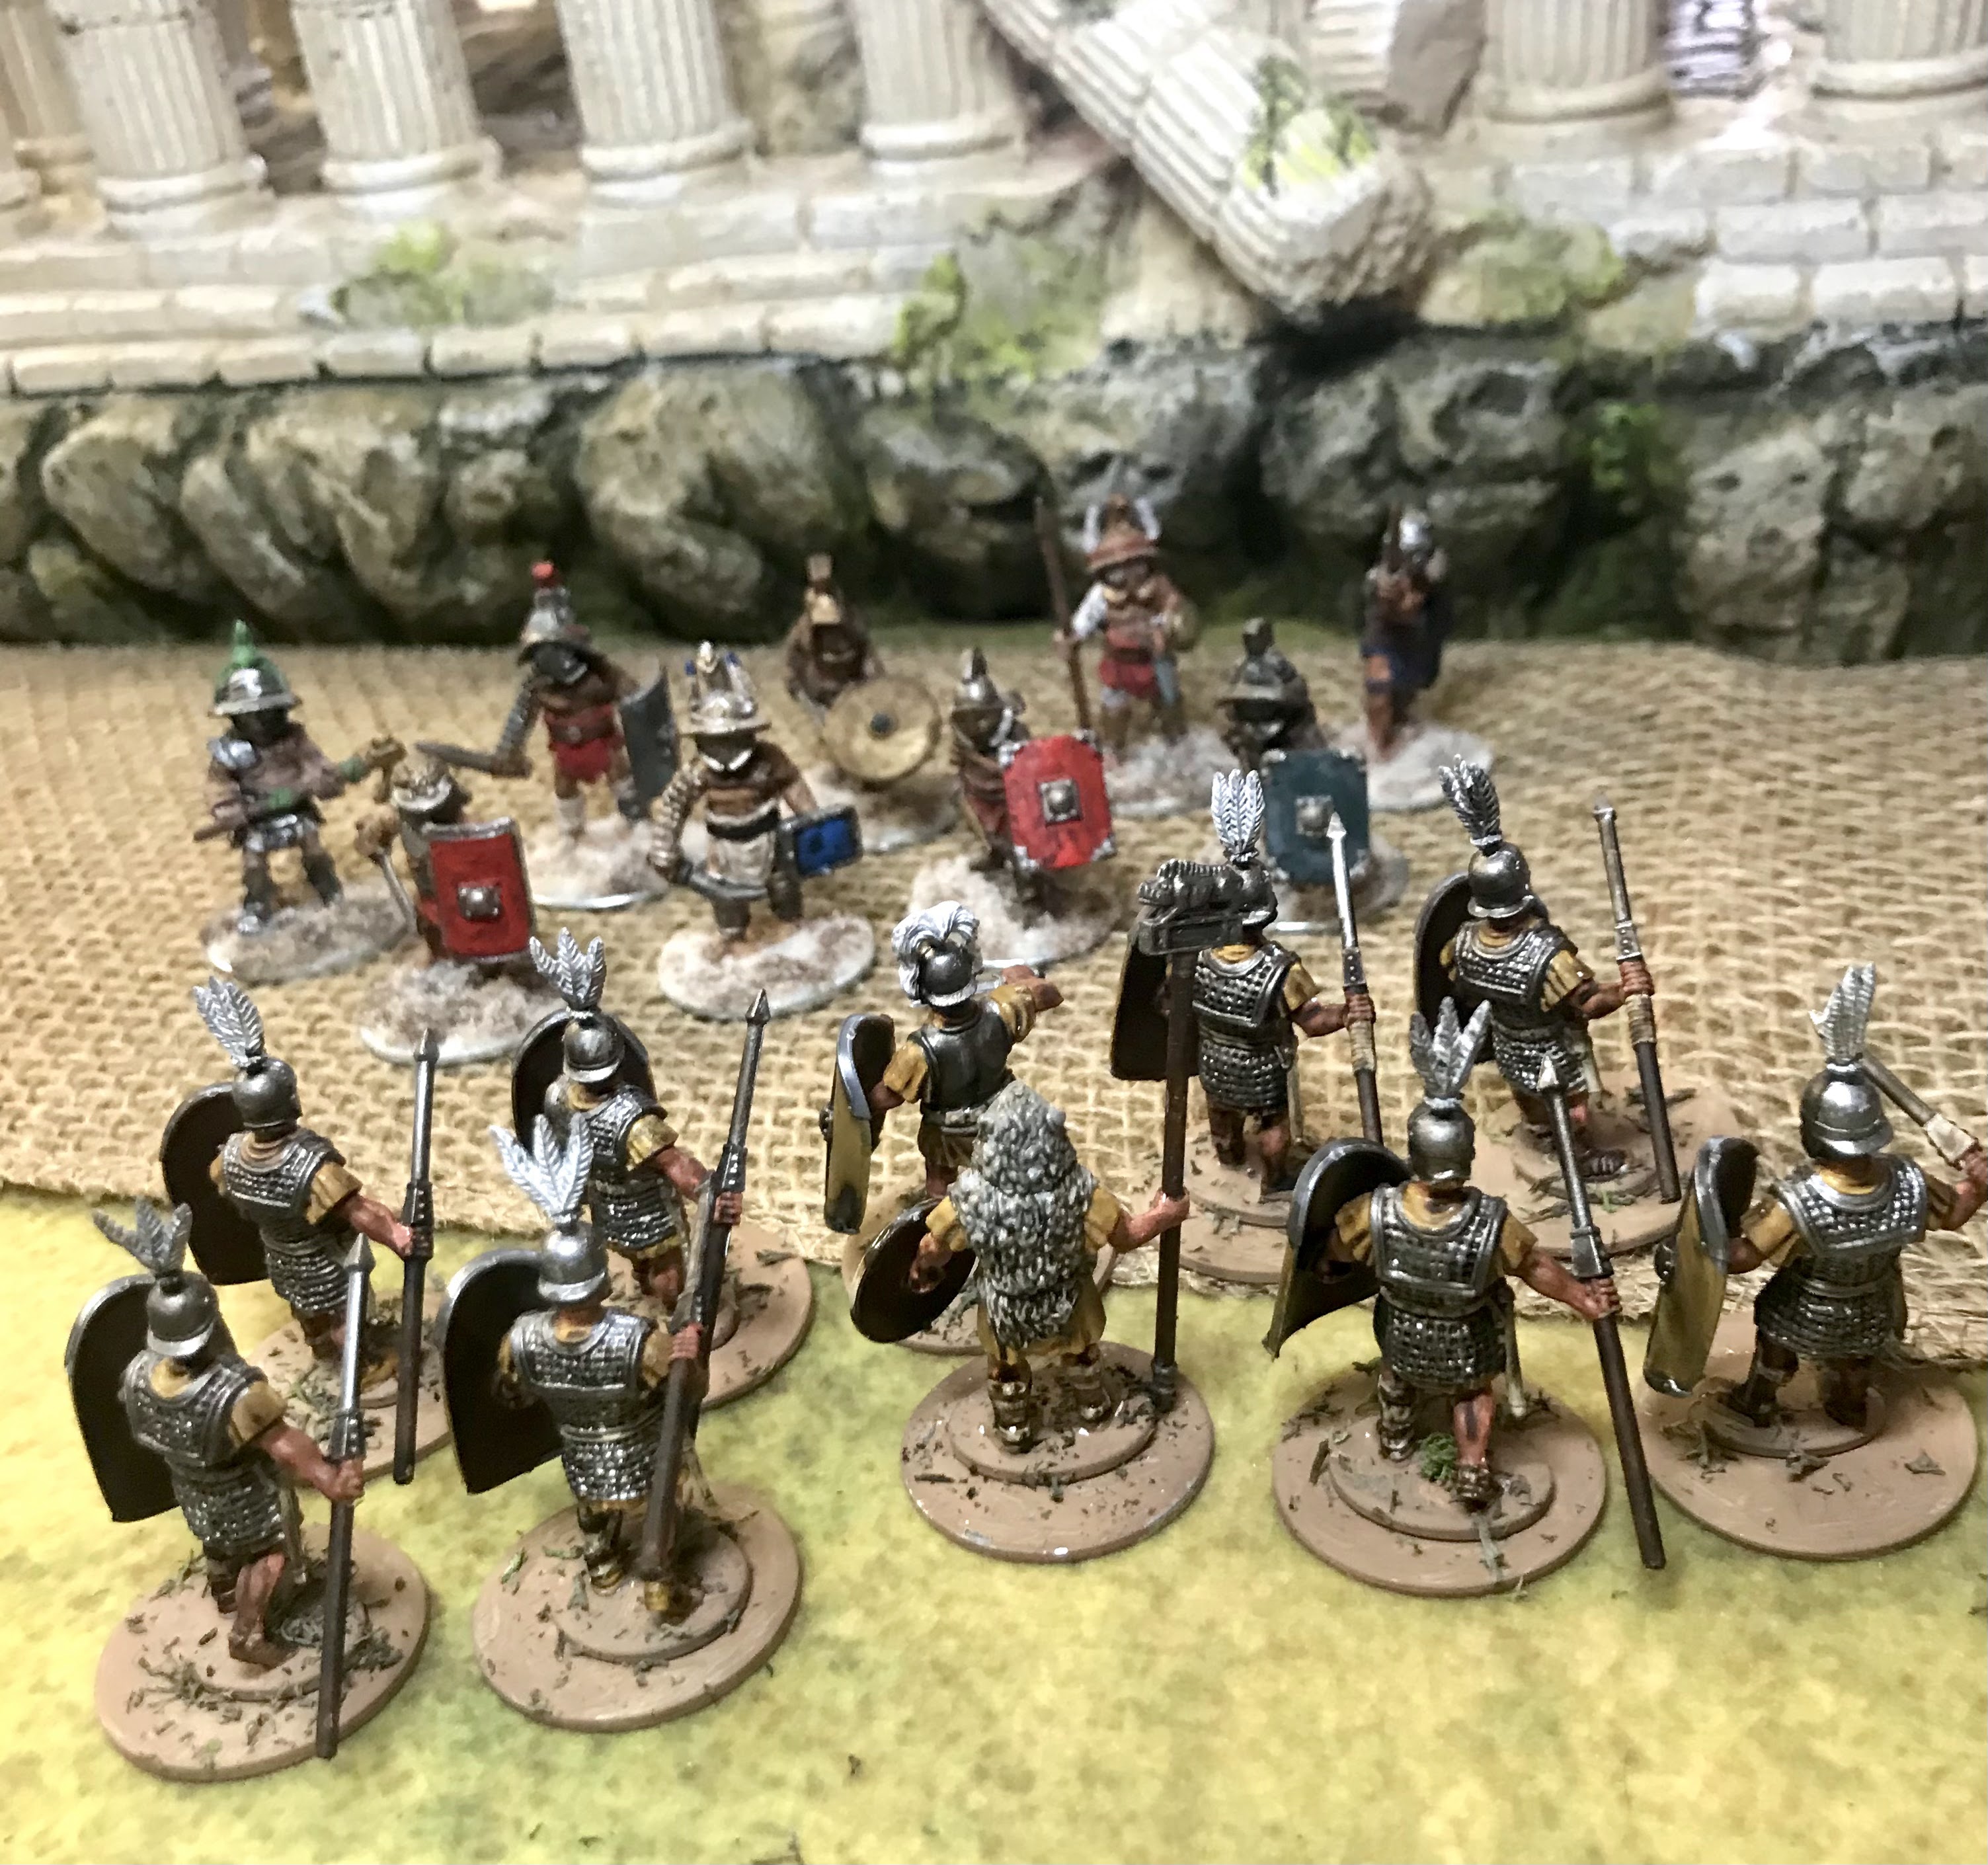
At this point, it is VERY unlikely anyone was still armed as a gladiator.  However, the Elite infantry will be composed of Gladiator models, and I will be using gladiator models as leaders of the other units. This is purely for flavor and one of my favorite things about the Third Servile War, I can use some of my Gladiator minis! 


Mission
We rolled for the mission and scored Recon in Force.  The Romans are the Attackers as they try to get the position of the Slave army.  In this mission 6 numbered tokens are placed face down.  The Romans need to reveal 2 Even tokens to win.  The game will last 8 turns or until 2 even tokens are revealed, or one of the opposing armies collapses. 

Set-up
Again, we used the rulebook to determine the set-up.  We are playing on a 72MU x 48MU board.  1 MU equals 1 inch.  We are using the grid system to lay out the board and randomly determined the terrain.  1-3 is the Roman side, and 4-6 is the Slave side. 

1= Walls - We used a temple
2= Swamp, Spring, Water
3= Walls- We used a temple
4= 1 level hill
5= Swamp, Spring, Water
6= Swamp, Spring, Water

We decide to connect 2,4, and 5 with a river moving through the table.  The river is fordable, but considered dangerous terrain.  There is one ford which is just difficult terrain, but not dangerous between 3 and 6.   The defenders place the tokens around the board.  We decide not to use any other complication for this battle.    

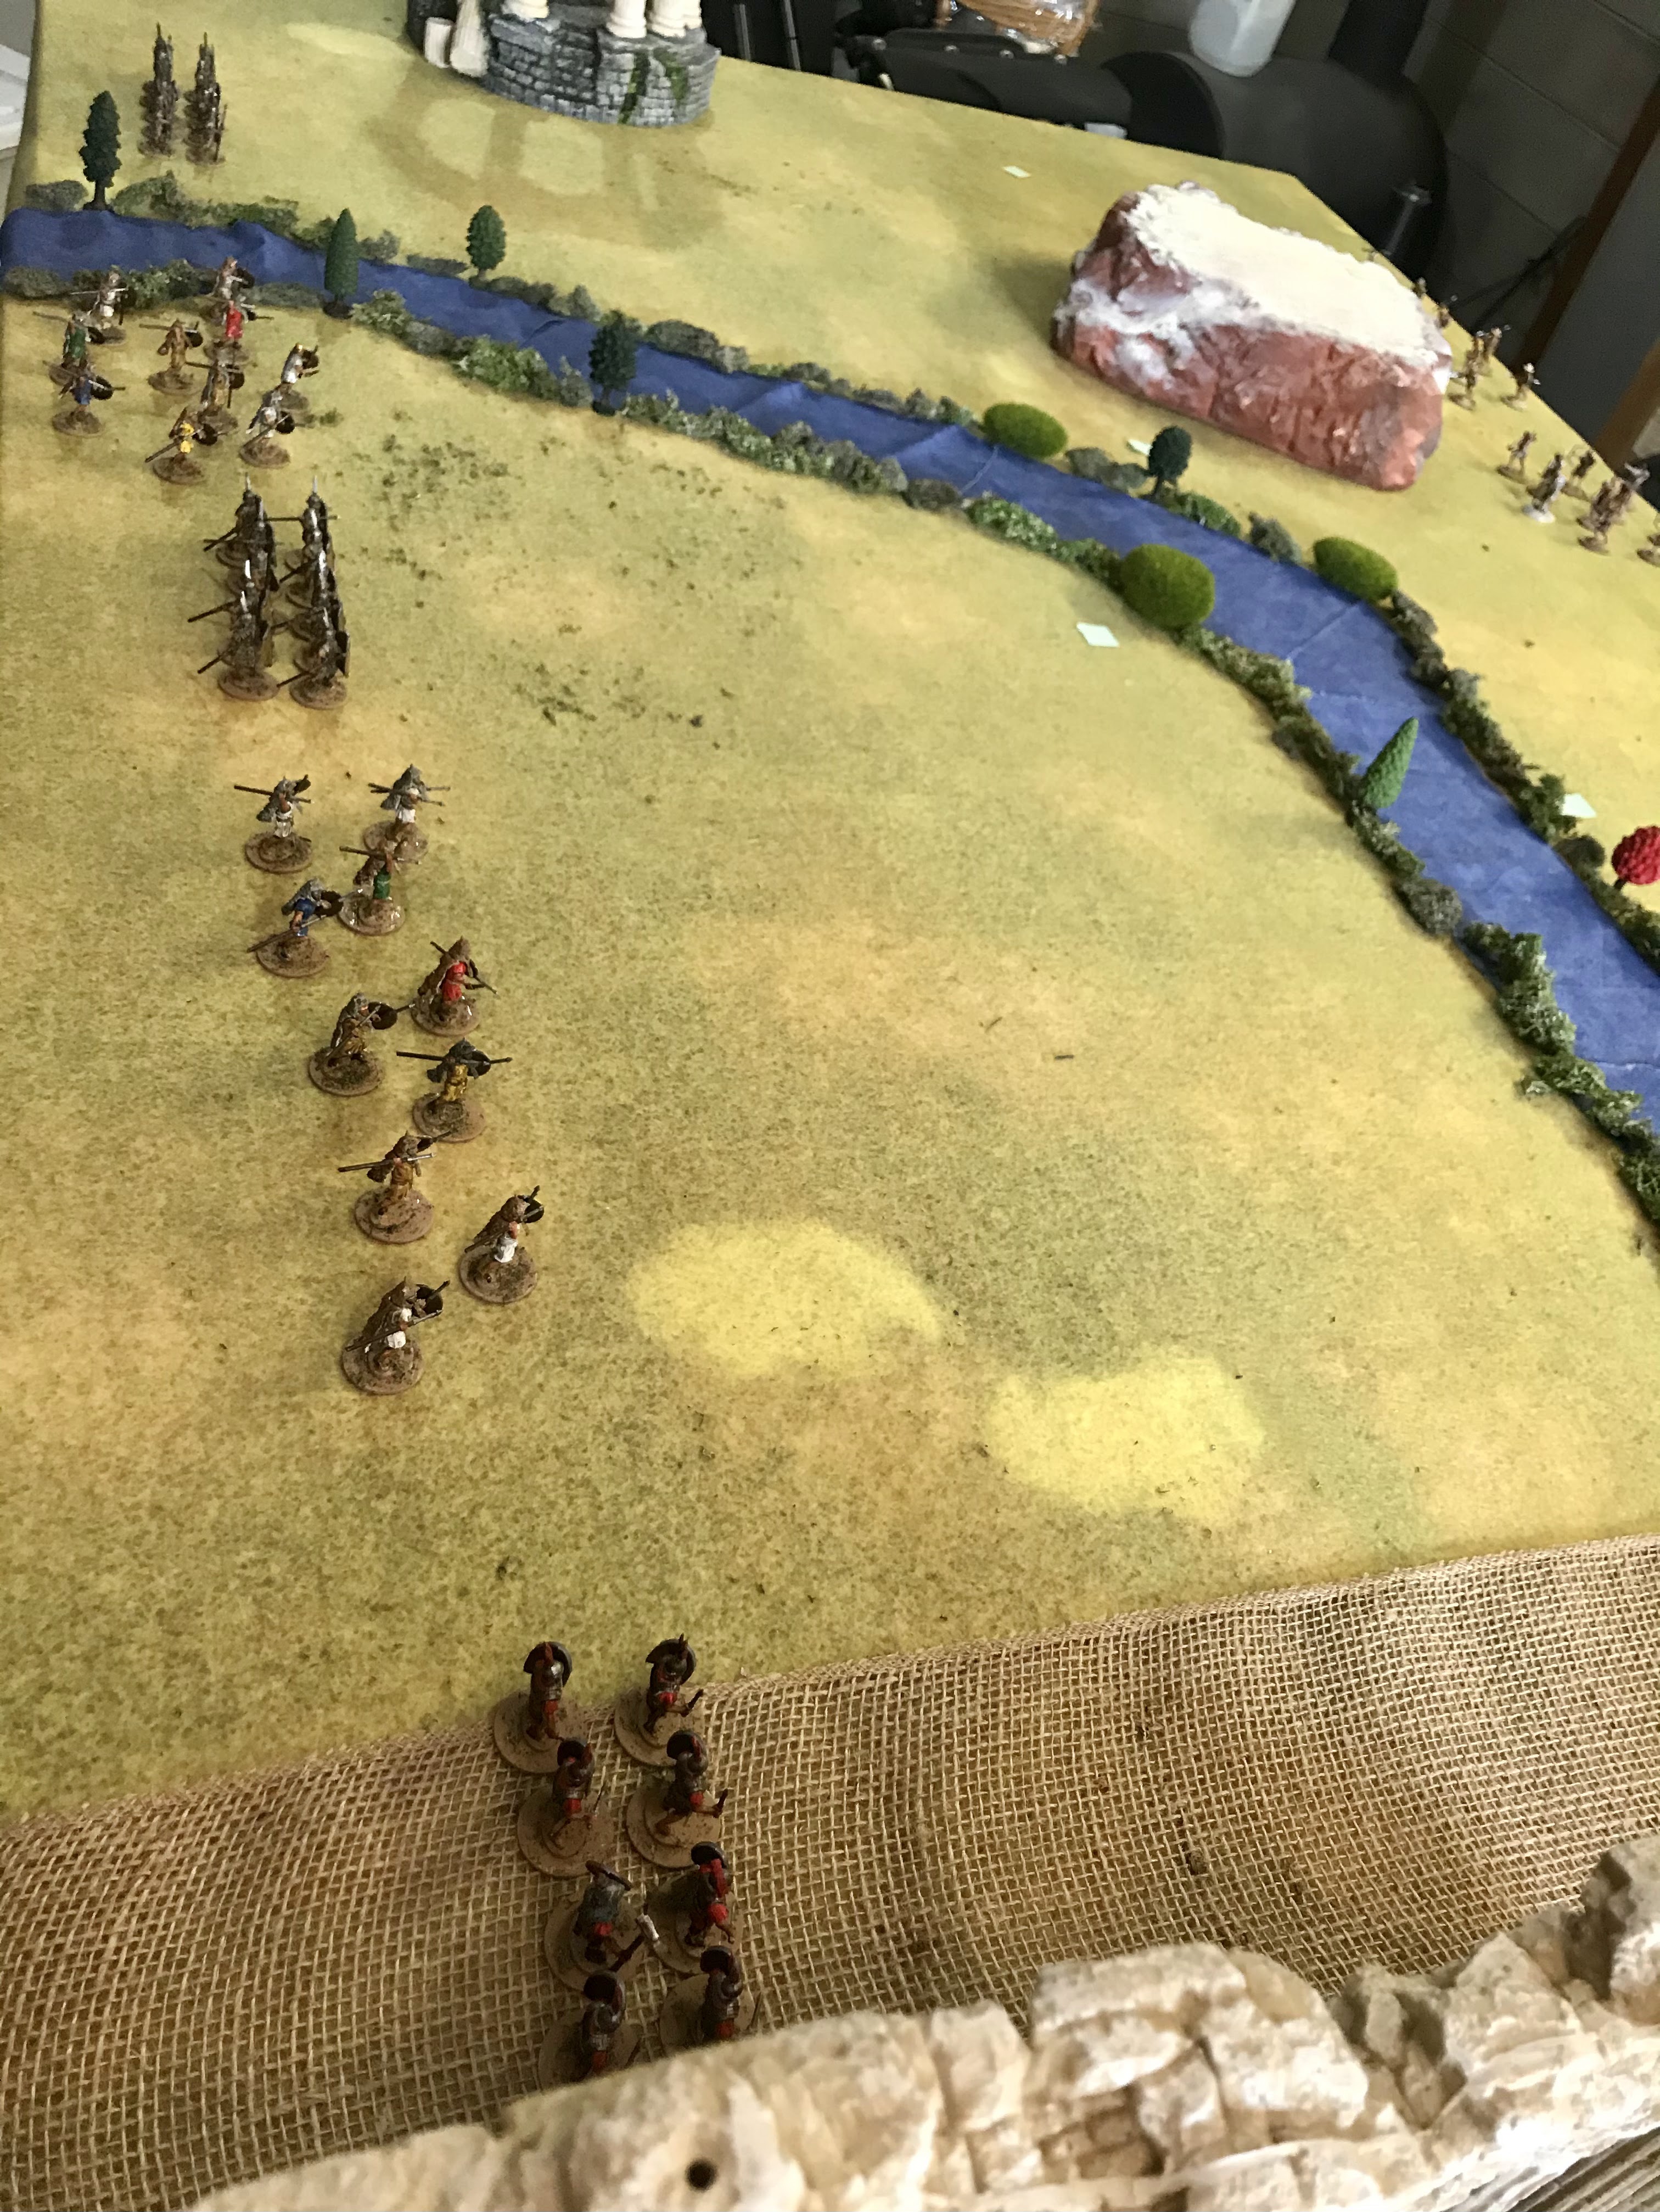
The Romans deploy from their left to right the following: The Legion Regulars are near the temple and along the road to the ford.  Next to them is light infantry, then Militia Legion, and light infantry by the riverside.  On the opposite side of the river by the circular shrine is the Veteran legion.
Romans on the left of the photo

The Slaves deploy opposite them and left to right is Light Infantry on the flank on the road to the ford.  Next to them is drilled infantry, then Spartacus and his elite infantry, archers in the shadow of the hill, and light infantry on the right flank.   
Slaves to the right

Turn 1:
Crassus and Spartacus collect their Commander's Gaze.  They both get 6 Gaze tokens, 1 for each unit and 1 for themselves as commander.  They bid for initiative.  Crassus bids 6, while Spartacus bids 3.  The Legion goes first. 

The light infantry on the river bank moves forward, and Spartacus tries to steal the initiative. The slaves do so successfully.  The light infantry on the left flank move to the ford and take cover in the underbrush of the far bank.  


The rest of the army moves forward, with the infantry closing in on the shoreline.  The archers nestle beneath the hill, and the right flank light infantry skirt along the base of it towards the edge of the board.  

Crassus is surprised by the speed in which the slave army moves into position, but he is undeterred as his Romans move up in a slow and disciplined fashion.  

Turn 2: 
Crassus again bids all 6, to the Slaves bid of 2.  Crassus gets initiative.... for now. 

The center Light Infantry moves up first and stays spread wide to cover their Legion comrades flanks.  The Militia moves forward in formation next, making way to the river bank and one of their recon points.  The Legion Regulars also march confidently down the road towards the lightly defended ford. 


Spartacus tries to interrupt, but fails. The rest of the Romans move forward, with the Light Infantry on the river side.  Crassus and his Veterans confidently move up unsupported in their Legion formation.  Their exposed flank makes a tempting target to the slave forces, but that side is only held together by Light Infantry and Archers.  

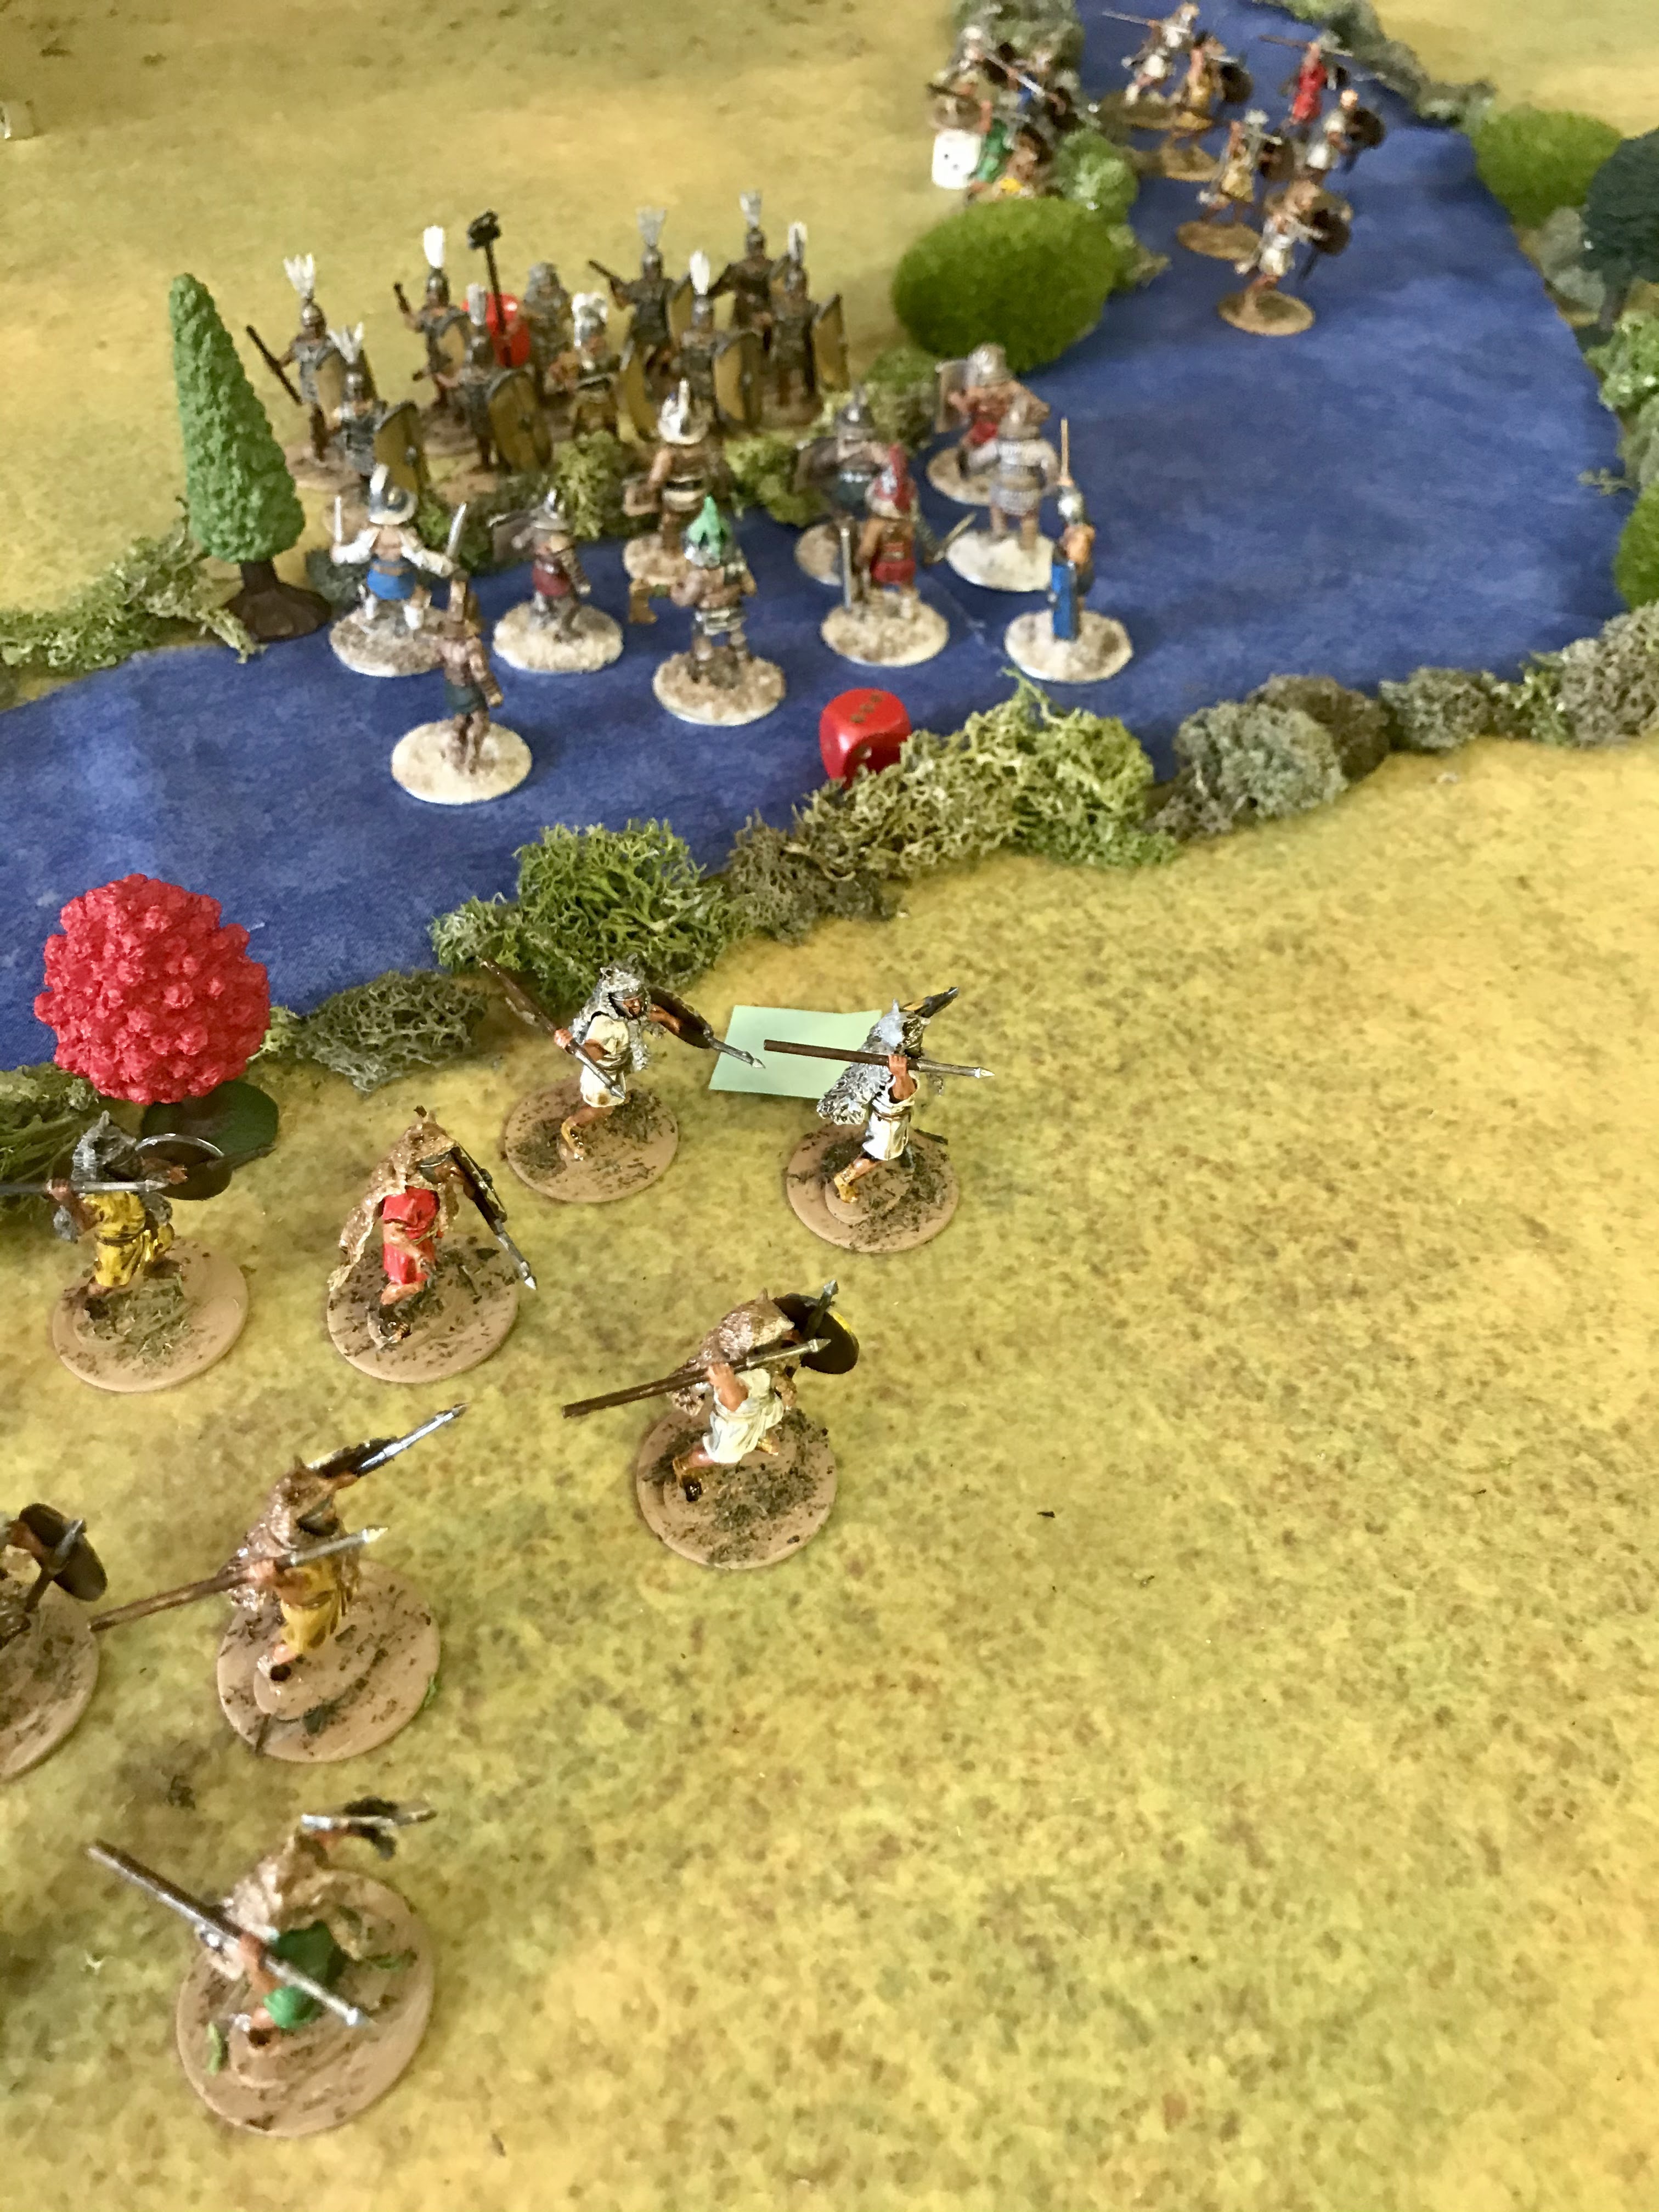
Spartacus and his troops take over.  The Slave army begins to shift towards the left flank.  The Archers move to cover the objective and pass between the hill and the river side.  The right flank Light Infantry moves to the top of the hill.  Meanwhile, on the left flank, the Light Infantry begins to cross the river at the ford, while the Drilled Infantry moves to support their crossing.  Finally, Spartacus himself moves to the river bank and on an Objective. 
Spartacus leads the way, a Thracian style Gladiator


Turn 3:
This time, Crassus has to consider his bid a bit more carefully. Spartacus bids 0, while Crassus bids 2. Crassus goes first again.  

The Light Infantry along the river bank rush forward and secure an objective marker.  They move it to Crassus' side of the board.  They then use a Commander's Gaze to throw Javelins at Spartacus' men but fall short.  Spartacus attempts to interrupt, but is unsuccessful. 

Crassus and his Veterans break into open order and re-align on the far objective, they re-form and move out.  Reforming Legion costs 1 Commander's Gaze.    Spartacus again tries to interrupt, and is successful this time.

The Slave archers pull back and fire at the Light Infantry.  The Romans take cover behind the underbrush at the river bank, but still lose 1 Courage!  However, they do not waver.  Spartacus and his Elite Infantry comrades begin to charge across the river.  The Light Infantry decides to Evade, and they drop back 2 MU.  It was unnecessary as the Gladiator's could not make it across due to the dangerous terrain.  They begin to waver, but do not loose any courage due to the difficult terrain.  A big gamble that does not look like it paid off! 

The Slaves on the right flank consolidate their position on top of the hill.  They decide they do not have the range or power to hit Crassus' Legion with javelins effectively. 


The slave light infantry on the left makes it across the ford, as the Drilled Infantry moves up behind and takes their position on the opposite bank of the river.  

The Romans take over, and the center Light Infantry rushes to the river bank and uses their last Commander's Gaze to throw Javelins at Spartacus and his men in the river.  They fail to cause any Courage loss.  

The Legion Regulars hold position by the temple, covering their flank from the Slave Light Infantry. The Militia Legion also has to hold position due to the traffic jam in front of them.    

Turn 4:
Both commander's bid 2 Commander's Gaze.  After a moment of hesitation, Spartacus decides to up his bid to 3 and wins initiative.  

Spartacus starts by moving his left flank Light Infantry away from the ford, and in a position to harass the Legion regulars if they try to force the ford.  


Next, his Elite Infantry tries to finish crossing the river.  This would bring them in contact but the Light Infantry evades away.  The Drilled Infantry move into the ford and protect the objective there.  The archers also move up to provide covering fire to Spartacus next turn.  The Light Infantry on the hill hold position.  

Crassus takes over.  The injured Light Infantry get out of the way and head to the river bank opposite the archers.  The Militia Legion than declare a charge on Spartacus and his troops.  Spartacus's troops are unable to use their Pila or counter-charge as they are wavering, but the Militia Legion have no such limitation.     

Instead of supporting their Militia Legion friends, the Roman Light Infantry begins to cross the river to try and snag the objective on the other side.  


Melee:
Spartacus and his troops are wavering, so could not use Counter-charge or Pila.  The Militia Legion did the charge and could use their Pila.  Therefore, the Gladiator's are at armor 2, as they are in difficult terrain.  The Legion is not, but is in formation. 

Spartacus uses his re-rolls and manages to inflict 1 Courage loss, and force the Militia to waver.  However, they also lose 2 Courage and are pushed back into the river with the Romans right behind them!   The Militia also used the Roman's last two re-rolls from Commander's Gaze.  

Turn 5: 
 Crassus again bids 2, and Spartacus bids 0.  Crassus goes first.  

Crassus and his veteran's march and collect the far objective.  They again break into open order, pivot to a new direction and re-form up.  


The Roman Light Infantry both jump into the river.  The right flank Light infantry are nearly across, while the left flank starts in.  They screen their crossing with a barrage of Javelins on the Slave archers, but fail to cause any disruption. 

The Legion Regulars move up and reform their position using the last Commander's Gaze.  They are out enough to tempt the Slaves into an advantageous combat, but then they can not react to the Light Infantry crossing the river. 

With that, Spartacus takes over, and is in a bit of a rough spot.  The Romans have 2 objectives.  A third will likely give them the win.  He needs to act fast to disrupt their plan.  

On the Slave left, they decide to take the bait and try to crush the Legion Regulars there.  The Drilled Infantry cross the ford, and then charge home.  The Romans have no Gaze to counter-charge or throw Pila.  The Drilled Infantry are also supported by the Light Infantry who also spend a point to charge in.

The Slave Archers use Gaze re-rolls and fire into the oncoming Light Infantry and reduce them 2 Courage, but not enough to cause them to waver.  

Melee:
Crassus decides to start with the Militia Legion in the center fighting Spartacus and his men.  Neither side makes any headway. The slaves suffer no courage loss for fighting in the river either. 

On the other side, the Slaves managed to charge and throw Pila, while the Romans could not counter-charge or throw their own Pila due to lack of Gaze.   Despite the lop-sided attack dice, both sides only lose 1 Courage.  However, the Legion begins to waver, which forces them to lose their formation.  

Turn 6: 
Neither side has lost a unit yet!  Therefore, they both have 6 Commander's Gaze. Crassus bids 2 to go first, while Spartacus bids 0. Crassus has the initiative.  

Roman Light Infantry manage to get behind Spartacus and his men and secure an objective.  With that, Crassus reveals that he has a 4 and a 6 which gives him two even numbered tokens...... and the game!  


Conclusion: 
Crassus and the Romans win. This aligns nicely with the unknown skirmish we were fighting.  In the history, this skirmish between Crassus and Spartacus is what convinced the rebel general to turn and head south again.  Therefore, a defeat like the one we saw above aligns with what may have happened in real life.  An indecisive battle that the Romans won. 

That was a great game!  It went 6 turns and no one had the clear upper hand combat wise.  However, careful maneuver, deployment, and deciding when and how to engage won the day.  In fact, no one even lost a unit before the game was done. 


My plan was to use them to rip the heart out of the weaker Roman center, while the Drilled and Light Infantry held the left flank, and the right side just stayed alive as a threat/speed bump to getting the objectives there.  The plan worked "okay"ish.  I misjudged the move across the river with Spartacus and his Elite Infantry and it was a bit too slow to stop the Romans from getting the objective on the opposite side of the board.  The rest of the plan was working as intended, but my weak center push cost me the game as my momentum was spent and I got bogged down.  From then on the Slaves and I were just reacting to Crassus' moves.  Not a great place to be. 

Despite losing, I had a great time playing this battle.  It was really fun putting the Gladiator models from Crusader on the table as my Elite Infantry and Unit leaders.  I also enjoyed the challenge of the river and ford.  This was one of my favorite tables we have fought on with Wars of the Republic  yet.    

You can pre-order the rules for Wars of the Republic from Osprey/Bloomsbury Publishing here.


Become a Patron and get access to all the cool stuff, a peak behind the curtain of Blood and Spectacles, and early-access to playtest games!  


You can follow Blood and Spectacles Facebook page or Instagram for more fun! 

Check out the latest publications and contact me at our Blood and Spectacles website

Or purchase all out games at the Blood and Spectacles Publishing Wargames Vault Page!

Thursday, May 4, 2017

The Games: Blood and Spectalce- Battle Report- Munera in Subhartha


Edit: The Photos for this report were swallowed by Photobucket and are not currently retrievable.  I apologize for the inconvenience. 

Many of the gladiator troupes in Subhartha moved on after the city wide Games. However, after the showing of House Quintillius and the House of Lupti Minoris they were retained by an up-an-coming local noble. Their father had recently passed, and Munera (Funeral Games) was needed to celebrate the man’s achievements in life. The fact that they would support the young noble’s political ambitions was simply a happy side effect.

Since these games were a Munera, the grieving family rented out a small arena on the edge of the city. The location was suitably close to the cemetery to provide for a quick post-munera processional and internment. With the details planned, bulletins were sent out into Subhartha, and the local people gathered on the appointed day to celebrate and bear witness.


Event 1: Single Combat
The crowd came prepared for bloodshed, and started the day off violent!
Weather is normal

House Quintillius
- Haram the Barber a Desserter Arbelas

House of Lupti Minoris
- Plano the slave `Retarius

The crowd gathered to commemorate the death of one of their betters is raucous and violent. They chant for blood and are eager to see death. They stamp their feet and chant for it. The Gladiators of both houses exchange nervous glances with each other. They can sense that the crowd is hungry for merciless bloodshed.

The young editor makes a short speech about the valor of his late father, but cuts it short as he is drowned out by the howl of the crowd. He quickly pivots and announces the first match and the crowd roars in approval!


Turn 1
Haram quickly tries to close the distance, while Plano attempts to maneuver to avoid a charge.

Turn 2
Haram continues across the arena, but Plano avoids him and moves to one of the nearby pillars. 

Turn 3
The two continue to maneuver around, trying to get into position. 

Turn 4
More maneuver, as each Gladiator jockeys for a first strike. Haram runs up to get the drop on Plano, but he turns and backpedals away. The Retarius throws his net and manages to entangle the other Gladiator. Haram fails to remove the Net in the End phase. 

Turn 5
Posted Image

Plano sees his chance, grips his Trident with both hands, and charges in. His opponent is Entangled, so has half CP to defend. Plano puts 2 CP in, and adds 1 for charging. Haram defends with his 2 entangles CP. Plano fails to strike home, and Haram uses the Retarius’ momentum to try and knock him down with a striking Success. Haram is successful and Plano falls down. 

In the End Phase, Plano tries to get up and fails. Haram tears the net off and tosses it aside with a snarl. 

Turn 6
Plano scrambles away two inches and gets back to his feet. He holds onto his Trident, and readies himself. 

This time, Haram charges into the Retarius. Haram uses 3 CP and adds +1 for charging. Plano defends with all 3 CP. There is a push, and no one gains the advantage.

Turn 7
Haram keeps up the pressure and again attacks with 3 CP, but holds 1 for reserves. Plano defends with 2 this time. Another Push. 

Plano decides to stay close and counter-attacks with his Trident at 1 CP, and Haram defends with 1. The swing goes wide, and Haram again tries to knock down the Retarius, but Plano quickly regains his footing. 

Turn 8
Haram attacks again with his swinging blade. 3 CP vs. 2 CP again. This time, Plano puts his shoulder into it and the Arbelas blade pings loudly off his shoulder guard! The crowd gasps in excitement. 

This time, Plano disengages and puts some space between himself and the Arbelas. He darts across the arena. 

Turn 9
However, Haram is not thwarted, he manages to nimbly turn and charge down the scampering gladiator. 3CP+1 to charging vs. 3 cp. The Trident thankfully allows a 360 degree combat arc or Plano would have no parries or Striking Success options. 

Oh no, Plano whiffs and gets 0 successes to Haram’s 3! This could be the end! Plano is reduced to 0 Pain and Downed! 

Posted Image

Plano raises the 2 fingers of the Missio and throws himself at the Mercy of the violent crowd. There are none of the normal modifiers, and the Retarius must roll 10+on a 2d6. Gulp. The dice roll result is….

Haram raises his dagger and ceremonially dispatches the downed Plano. Victory for Quintillius and a rough start for House Lupti Minoris.

Event 2- Tertiarri
Plano’s blood streaks the sand as his lifeless corpse is pulled from the arena on great metal hooks. His fellows of the House of Lupti Minoris give him a final salute. They then turn their attention back to the days work with a simmering anger.

The crowd has retaken their seats and seems to be less crazed now. The editor again rises and this time his speech is politely applauded as he wraps up the eulogy. He then announces the next match and the crowd cheers heartily. 


The crowds bloodlust was satiated, and they return to a normal mood. 
The sun has reached its peak, and a bright glare fills the arena. 

House Quintillius
- Primus- Juggartha- Desserter Murmillo
- Marcomanni- Barbarian Gaulus

House of Lupti Minoris
- Primus- Everus Mannus-Slave Provacteur
- Ordinarri- Slave Secutor

Turn 1
The two opponents rush forward. Juggartha’s limp slows him down considerably. 

Turn 2
Juggartha limps forward. 

Everus Mannus charges straight in to attack, to deprive the fearsome Murmillo of his berserker charge. He puts in 3 +1 for charging and holds two back for parries and defense. Juggartha puts in 4 CP to defend and saves 2 for parries. He uses them but an attack still strikes home from Everus Mannus. 

Posted Image

Turn 3
Juggartha attacks with three and holds onto 3. Everus defends with three as well, and holds 2 to defend. Everus tries to do some fancy sword work to disarm Juggartha of his Gladius, but the Nubian keeps his grip firmly in place. 

Everus attacks back, and after a parry Juggartha knocks back his opponent 2 inches, and does not follow-up. He is gambling he will win initiative and be able to charge in using Berserker Charge for extra dice and put an end to this upstart. 

Turn 4
Juggartha wins initiative, and charges back in and attacks with Berzerker fury. He is putting 8 dice of CP into the attack against Everus, who will defend with 4, and hold back 1 for parries. Juggartha gets 2 successes, and Everus 1. The Provocateur attempts to parry a success away, but instead a Striking Success is rolled. Juggartha converts it to 2 hits. 

Everus manages to get his manica up and blocks the two hits with his armor. 

Everus has nothing to fight back with as he used all his CP.

Turn 5
Juggartha is back to using 4 CP to attack and holding 2 to defend. Everus defends with 2 and holds 3 to counter and parry. Juggartha is having no luck with the dice and gets 0 successes. 

Everus gets two striking Successes to 1 success from the Murmillo. One hit slips past Juggartha’s armor reducing him to 0 Pain. Everus again tries to disarm the Gladiator. However, Juggartha has a vice like grip on his Gladius. 

Turn 6
Juggartha switches dice and goes with a 3 CP attack and holds 3, while Everus goes with 2 defense and holds 3. The new dice roll better, but not good enough. Nothing gets through Everus Mannus’ defenses. However, Everus fails to get a counter-attack through and the two beat feverishly at each other’s shields. The crowd is excited by the banging and swinging, but ultimately they are futile gestures. 

Turn 7
This time, Juggartha manages 2 more hits. After a parry attempt from Everus. 1 hit is absorbed by his breastplate, but the other gouges a bleeding wound in Everus’ thigh. The Murmillo swats away the counter-attack and again pushes his rival away from him with a push back. 

Posted Image

Turn 8
Juggartha charge back in with his 8 dice and holds onto 2 for defense. Everus decides to defend with 4, and holds only 1 back. Everus uses a parry to force Juggartha to re-roll a 6, but things still look bad for the Provocateur. 5(!) Hits get through and force him to take armor tests and Juggartha uses a Striking success to get Past His Guard.

Everus rolls and manages to defend against 3 of the 5 with his manica and greave, but he is reduced to Pain 0, and Knocked Down and Dazed by the hit. 

In his turn, Everus Mannus manages to get up, but he is still Dazed. 

Turn 9
Everus manages to go first, but does not shake off his Dazed state. He prepares to defend himself. Juggartha, no longer needing to hold back for defense puts all 6 CP into his attack. Everus defends with all 5 CP. 

Juggartha again manages to go Past His Guard, and lands 3 blows on his opponent. This is enough to send Everus Mannus reeling and put him Out-of-the-Fight. The crowd grants Mercy to Everus for his efforts, however he is still potentially seriously injured. 

Turn 10
Ordinarri enters the arena. The crowd goes wild since Juggartha and Ordinarri are old rivals. Juggartha passes a fatigue test and jogs towards his opponent. 

Ordinarri charges across and meets his fellow Nubian head-to-head! He puts 6 CP into the attack, and Juggartha puts in 4 and holds 2 to parry. Juggartha uses both parries to re-roll successes, however it is not enough. 1 Striking Success gets through, and Ordinarri decides to use them as 2 hits. 

Posted Image

Juggartha fails to block either hit. Instead, the Nubian is Downed. Juggartha just squeaks past the Mercy roll.

Lupti Minoris is declared the winner by the Editor! 

Event 3- Tertiarri
The sun rises high in the sky and beats down into the arena, causing metal to shine and glare and forcing the spectators to shield their eyes with their hands to see the action. They grumble and complain, but are eager to see the rest of the days Games. So far the spectacle had been excellent, and they were interested in seeing more.

This time, the deceased man’s wife gave a eulogy, which the crowd tolerated in the rising heat. They understood this was a Munera, so politely listened. Only scattered murmuring betrayed their interest in the next event. At the end of her eulogy, the editor announced the final match of the day.

It was greeted warmly.


The crowd remains normal and the weather is still sunny and bright. 

House Quintillius
- Primus- Longinus- Desserter Hoplomacchus
- Priapus- Barbarian Retarius

House of Lupti Minoris
- Primus- Minoris- Slave Murmillo
- Mediocrates- Slave Samnite

Turn 1
Minoris charges forward and Longinus obliges him by doing the same. 

Turn 2
Longinus steps forward and throws his spear at Minoris using 2 CP. Minoris wants to charge in his turn so uses 2 to defend and holds onto 3. Minoris bats the spear away. He then charges in and Longinus draws his Gladius to meet him. 

Posted Image

Longinus parries with his shield saving a Striking Success, but Minoris still gets 1 potential hit. However, the hit slides of the Hoplomacchus’ shoulder guard. 

Turn 3
Longinus attacks with 2 and holds onto 3, while Minoris does the same on the defense. Minoris uses a parry to nullify a striking success. He attacks back with 2 and Longinus defends with 3. A push and no one gains the upper hand. 

Turn 4
This time, Longinus attacks with 3 and holds 2, while Minoris defends with 2 and holds 3. Neither side manages to do much and the sound of metal on metal rings across the arena as the two Gladiators battle away at each other, equally matched. 

Turn 5
Longinus fails to find a mark again. However, this time, Minoris strikes home! He strikes twice and attempts to Knock Down his foe. 

Longinus is reduced to 0 Pain, Knocked Down, and wounded. In his turn, he raises the two fingers of the Missio. However, the crowd is not amused, and Longinus is killed in the sands of the arena.

Posted Image 

Turn 6
Minoris dashes across the arena towards his new foe. However, Priapus steps to the side to avoid a charge. He tosses his net at the Murmillo. However, the throw misses the target. Priapus is heard to curse the bright sun. 

Turn 7
The Retarius nimbly runs past the Murmillo who slowly turns to give chase. 

Posted Image

Turn 8
The Retarius rushes across the arena with the Murmillo in pursuit. This causes the crowd to laugh at the scene. 

Turn 9
Priapus opens the distance and turns to face his foe. Minoris only plods after him. 

Posted Image

Turn 10
Priapus throws his trident and Minoris easily avoids it. Priapus then turns and runs for Longinus spear in the sands. Minoris runs after him, but can not reach the Retarius. 

Turn 11
Minoris fights off a fatigue test. 

The Retarius picks up the spear and scampers away. Minoris places himself in the center of the arena and roars out a challenge to the fleet footed gladiator.

Turn 12
Minoris again avoids Fatigue. 

Priapus turns and charges back into the Murmillo to accept his challenge. 

He puts 2 CP +1 for charging into the attack and holds 2 to defend. Minoris defends with 2 and holds 3. After a skillful parry with his shield, the Retarius’ attack fails. 

Minoris counters, but the wily Retarius pushes him back and knocks him down. 

In the end phase, Minoris rises to his feet. 

Turn 13
Minoris fails his Fatigue test and is reduced 1 CP. 

Priapus runs forward and regains his Trident. Minoris simply turns to face him. Np fatigue next turn from that. 

Turn 14
Priapus throws the Hoplomacchus spear at Minoris. The Murmillo again ducks it as it passes by. 

Minoris stands his ground to catch his breath. 

Turn 15
Priapus charges in again on the tired Murmillo. He again uses 2 CP +1 for charging and holds 2 to defend. Minoris defends with 2 and holds 2 for defense. This time, the Murmillo is ready and uses his shield to try and knock the Retarius down. However, the barbarian is too quick and avoids the sweep. 

Minoris counters and manages to draw blood! The Barbarian is reduce to 1 Pain. 

Turn 16
Minoris again feels the effects of fatigue and can barely hold his weapons upright. However, he uses a last reserve of energy to strike first.

He puts in 2 to attack and holds 1 to defend. Priapus defends with 2 and holds 2. Minoris manages to knock past the Barbarians defenses with brute force and physically smash the Retarius to the ground. He is reduced to 0 Pain and wounded. 

Posted Image

With that, the Retarius raises the two fingers of the Missio. The crowd approves of the entertainment provided by Priapus and grant him mercy. 

House Lupti Minoris win the event, and with that the Games! 

**************************************
House of Lupti Minoris is the victor of the Games!

Post-Game

KIA
House Quintillius- Longinus the Hopplomacchus
House of Lupti Minoris- Plano the Retarius 

Serious Injury
Everus Mannus ends up dead from his injuries in the Arena! (Man! I just painted that guy too!)

Experience
No underdog bonus as the difference is less than 50 rating

House Quintillius
Haram- + 7 XP = +1 CP
Marcomanni- +1 XP
Juggartha- +6 XP
Priapus- +1 XP

House of Lupti Minoris
Ordinarri- +7 XP = +1 I
Minoris- +12 XP = +1 CP
Mediocrates- +1 XP

Income
House Quintillius earned 30
House of Lupti Monoris earned 60

New Recruits
House Qunitillius hired a Barbarian Secutor
House of Lupti Minoris hired a slave Dimachareus and a Slave Thraex

Troupe Ratings
House Quintillus- Rating of 688
House of Lupti Minoris- Rating of 750

Looks like Quintillus is the underdogs now!


****************************************

Feel free to download and try The Games: Blood and Spectacle here.