The Wars of the Republic rulebook has some army lists for the Late Republican Romans to take on various slave revolts. Of course, the most famous is the 3rd Servile War against Spartacus. The book has a scenario for the Battle of Vesuvius. Today, we are going to continue the theme of Romans vs. Slaves but we are going to be playing a different scenario then the one in the book. The Battle of Vesuvius has some strange circumstances that made the scenario a bit unique. Instead, we are going to play a much more straight forward, ahistorical battle.
In the winter of 72-71 BC Crassus had assembled his army. He marched out to face Spartacus and his army. It is not entirely clear, but some scholars believe that the two armies met. In the ensuing skirmish, Crassus won and this was what caused Spartacus to turn Southward.
This turn is often seen as the beginning of the end for Spartacus and his army. It led to the failed attempt to leave Italy to Sicily. Then, the Slave army was hemmed in at Bruttium and only managed to escape after breaking out of a costly siege.
There is no clear, definitive record of this battle. In fact, it may just be local myth. This will give us as wargamers some space to play a game where the outcome is unclear. We only know that this "skirmish" took place after Crassus had ordered a "Decimation" of his own men to "boost morale" of his troops. Spartacus had opted not to cross the Alps and leave Italy earlier in 72BCE.
If you have further interest in playing out this conflict beyond what is in the Wars of the Republic rulebook, my first supplement for the game is available on the Wargame Vault. This supplement is called Revolt! and details the Spartacus' campaign including 15 new scenarios, more historical details, and appropriate army Lines of Battle for different phases of the campaign.
Forces
We know a bit about how a Late Republican Roman force was outfitted. We also know that Crassus recruited veteran troops back to the Eagles for this campaign. Velites and Cavalry had been phased out of the legion and instead replaced mostly with auxiliary troops. The main body was made up of cohorts instead of maniples now.
Crassus
1 Veteran Legion - Crassus
1 Legion Regulars
1 Militia Legion
2 Light Infantry
The Slave Army was made up of mostly escaped slaves. They were using looted weaponry and gear. Most had little or no combat experience, and non-combatants had to move with the army. It is estimated to be an army around 70K+ people. Of course, many of them would not be engaged in the fighting.
Spartacus
1 Elite Infantry with Pila - Spartacus
1 Drilled Infantry with Pila
2 Light Infantry
1 Archers/Slingers
At this point, it is VERY unlikely anyone was still armed as a gladiator. However, the Elite infantry will be composed of Gladiator models, and I will be using gladiator models as leaders of the other units. This is purely for flavor and one of my favorite things about the Third Servile War, I can use some of my Gladiator minis!
Mission
We rolled for the mission and scored Recon in Force. The Romans are the Attackers as they try to get the position of the Slave army. In this mission 6 numbered tokens are placed face down. The Romans need to reveal 2 Even tokens to win. The game will last 8 turns or until 2 even tokens are revealed, or one of the opposing armies collapses.
Set-up
Again, we used the rulebook to determine the set-up. We are playing on a 72MU x 48MU board. 1 MU equals 1 inch. We are using the grid system to lay out the board and randomly determined the terrain. 1-3 is the Roman side, and 4-6 is the Slave side.
1= Walls - We used a temple
2= Swamp, Spring, Water
3= Walls- We used a temple
4= 1 level hill
5= Swamp, Spring, Water
6= Swamp, Spring, Water
We decide to connect 2,4, and 5 with a river moving through the table. The river is fordable, but considered dangerous terrain. There is one ford which is just difficult terrain, but not dangerous between 3 and 6. The defenders place the tokens around the board. We decide not to use any other complication for this battle.
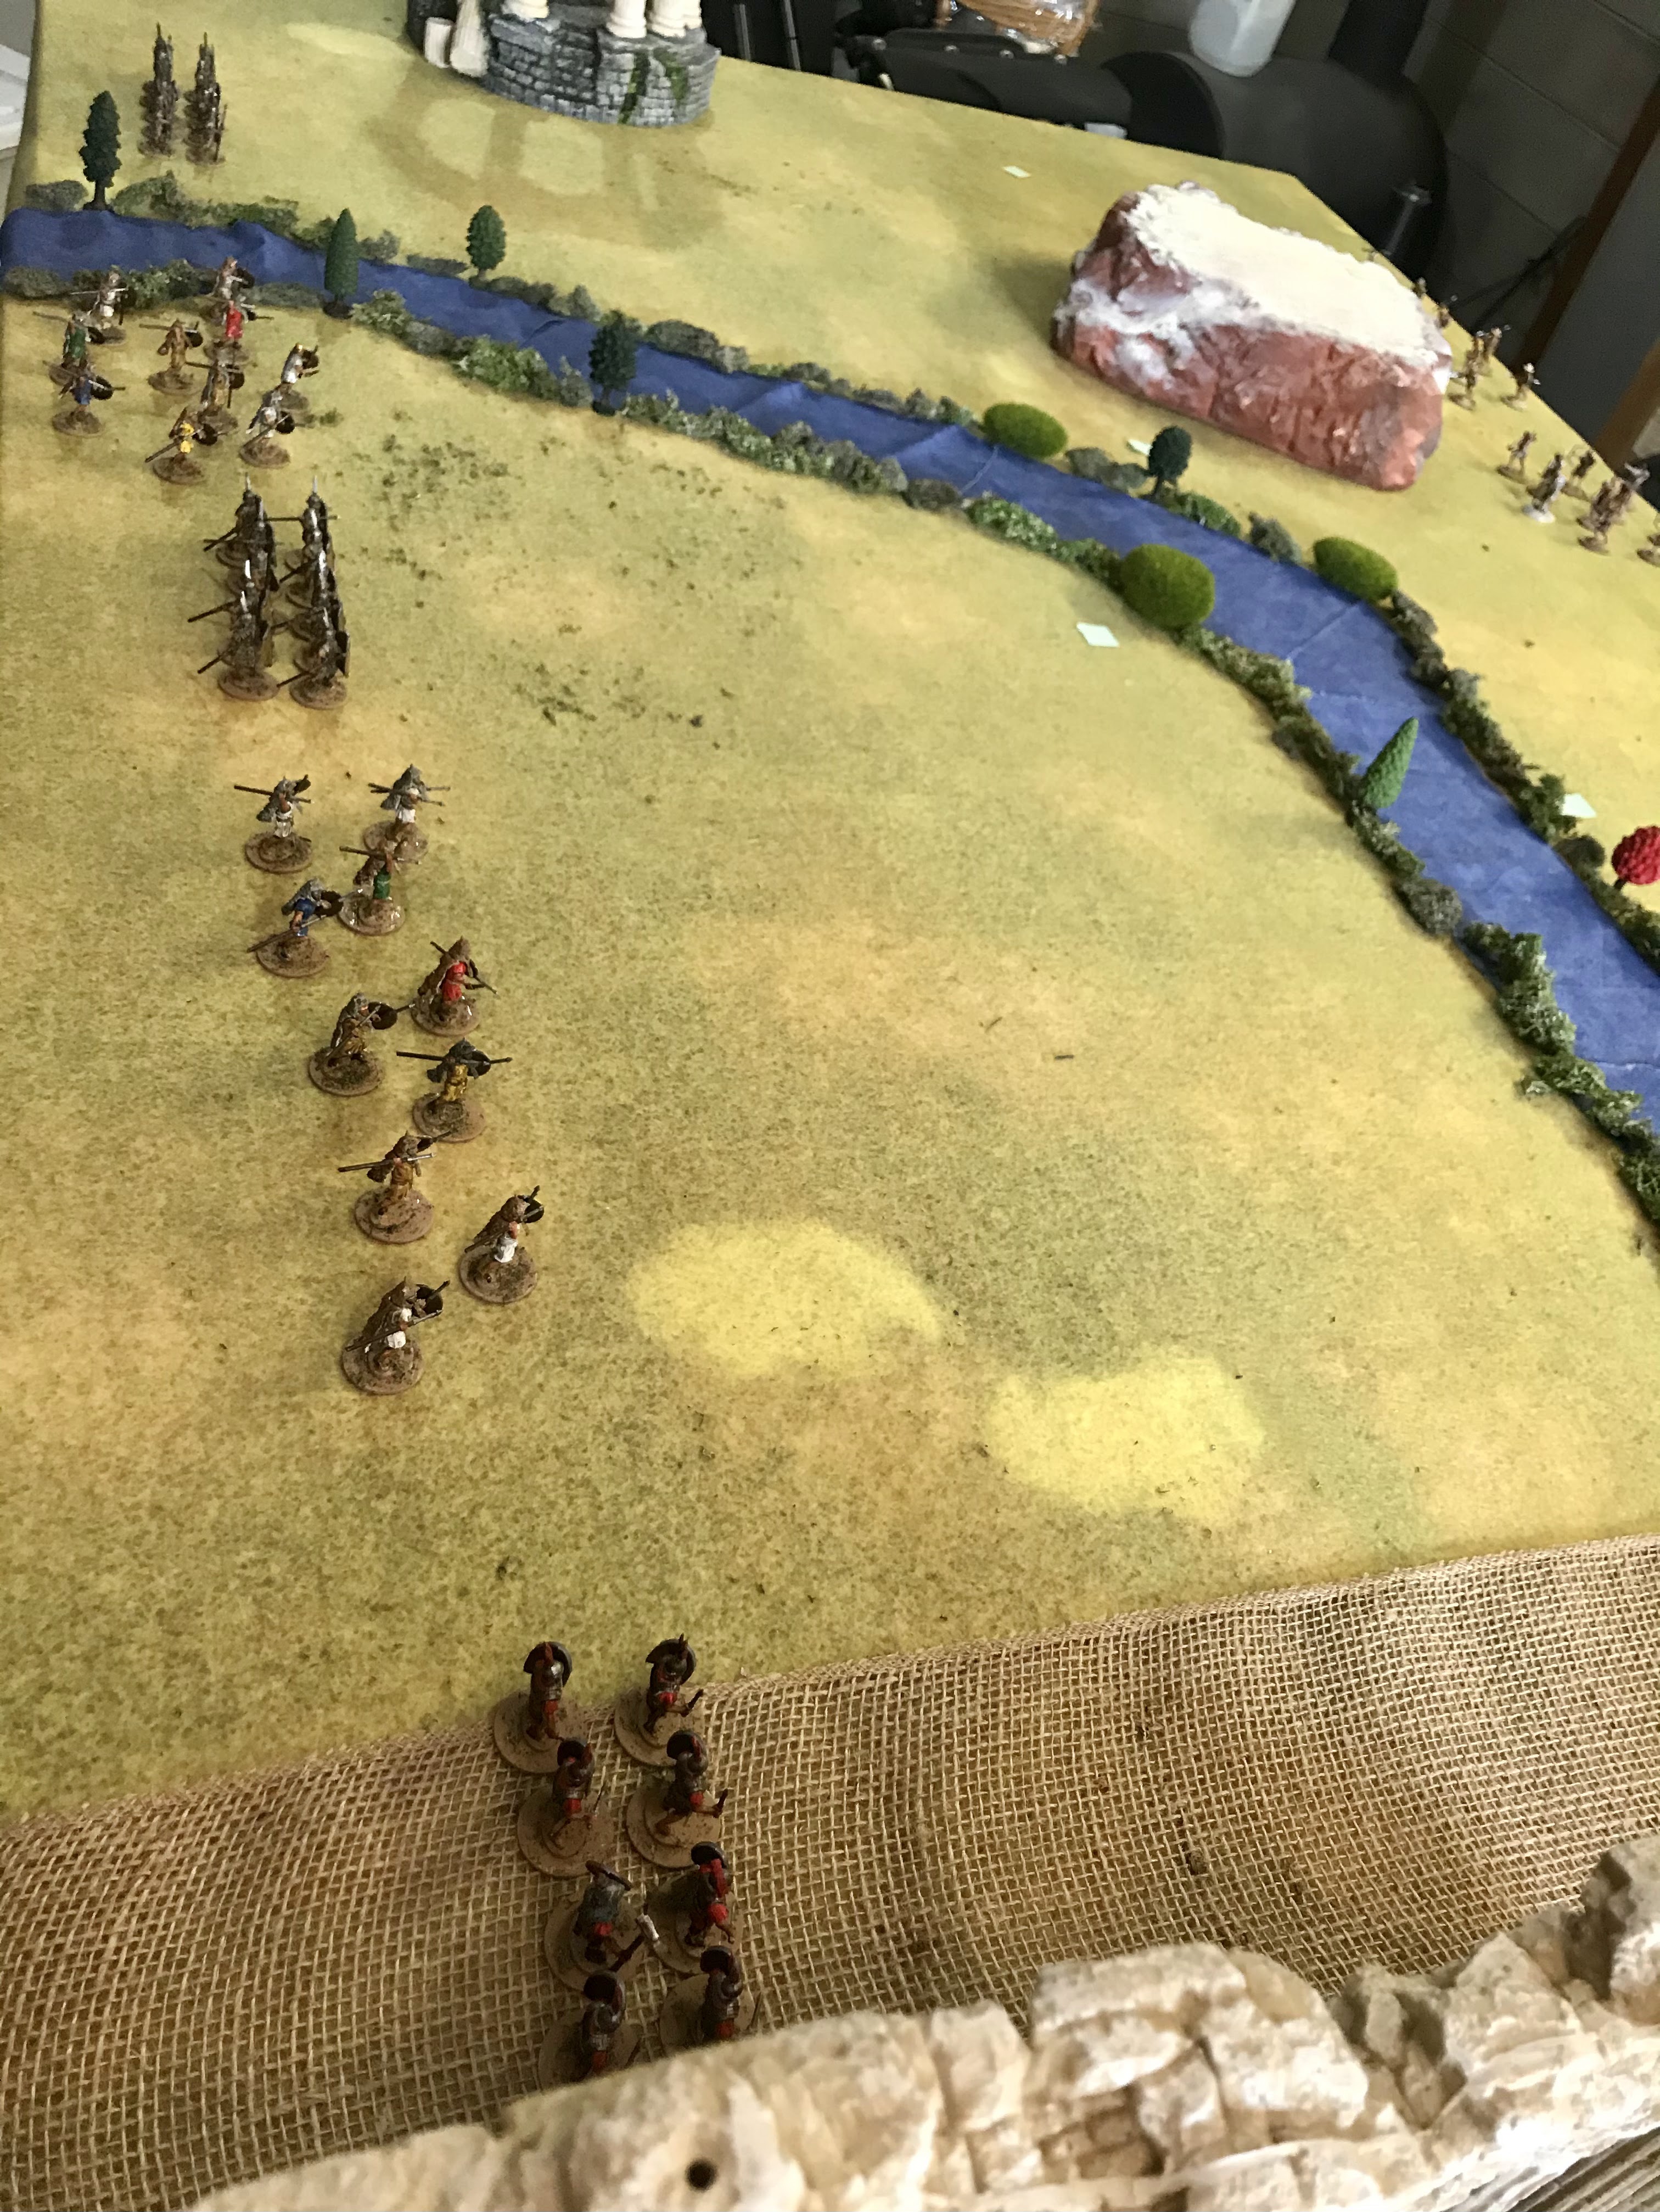
The Romans deploy from their left to right the following: The Legion Regulars are near the temple and along the road to the ford. Next to them is light infantry, then Militia Legion, and light infantry by the riverside. On the opposite side of the river by the circular shrine is the Veteran legion.
 |
| Romans on the left of the photo |
The Slaves deploy opposite them and left to right is Light Infantry on the flank on the road to the ford. Next to them is drilled infantry, then Spartacus and his elite infantry, archers in the shadow of the hill, and light infantry on the right flank.
 |
| Slaves to the right |
Turn 1:
Crassus and Spartacus collect their Commander's Gaze. They both get 6 Gaze tokens, 1 for each unit and 1 for themselves as commander. They bid for initiative. Crassus bids 6, while Spartacus bids 3. The Legion goes first.
The light infantry on the river bank moves forward, and Spartacus tries to steal the initiative. The slaves do so successfully. The light infantry on the left flank move to the ford and take cover in the underbrush of the far bank.
The rest of the army moves forward, with the infantry closing in on the shoreline. The archers nestle beneath the hill, and the right flank light infantry skirt along the base of it towards the edge of the board.
Crassus is surprised by the speed in which the slave army moves into position, but he is undeterred as his Romans move up in a slow and disciplined fashion.
Crassus again bids all 6, to the Slaves bid of 2. Crassus gets initiative.... for now.
The center Light Infantry moves up first and stays spread wide to cover their Legion comrades flanks. The Militia moves forward in formation next, making way to the river bank and one of their recon points. The Legion Regulars also march confidently down the road towards the lightly defended ford.
Spartacus tries to interrupt, but fails. The rest of the Romans move forward, with the Light Infantry on the river side. Crassus and his Veterans confidently move up unsupported in their Legion formation. Their exposed flank makes a tempting target to the slave forces, but that side is only held together by Light Infantry and Archers.
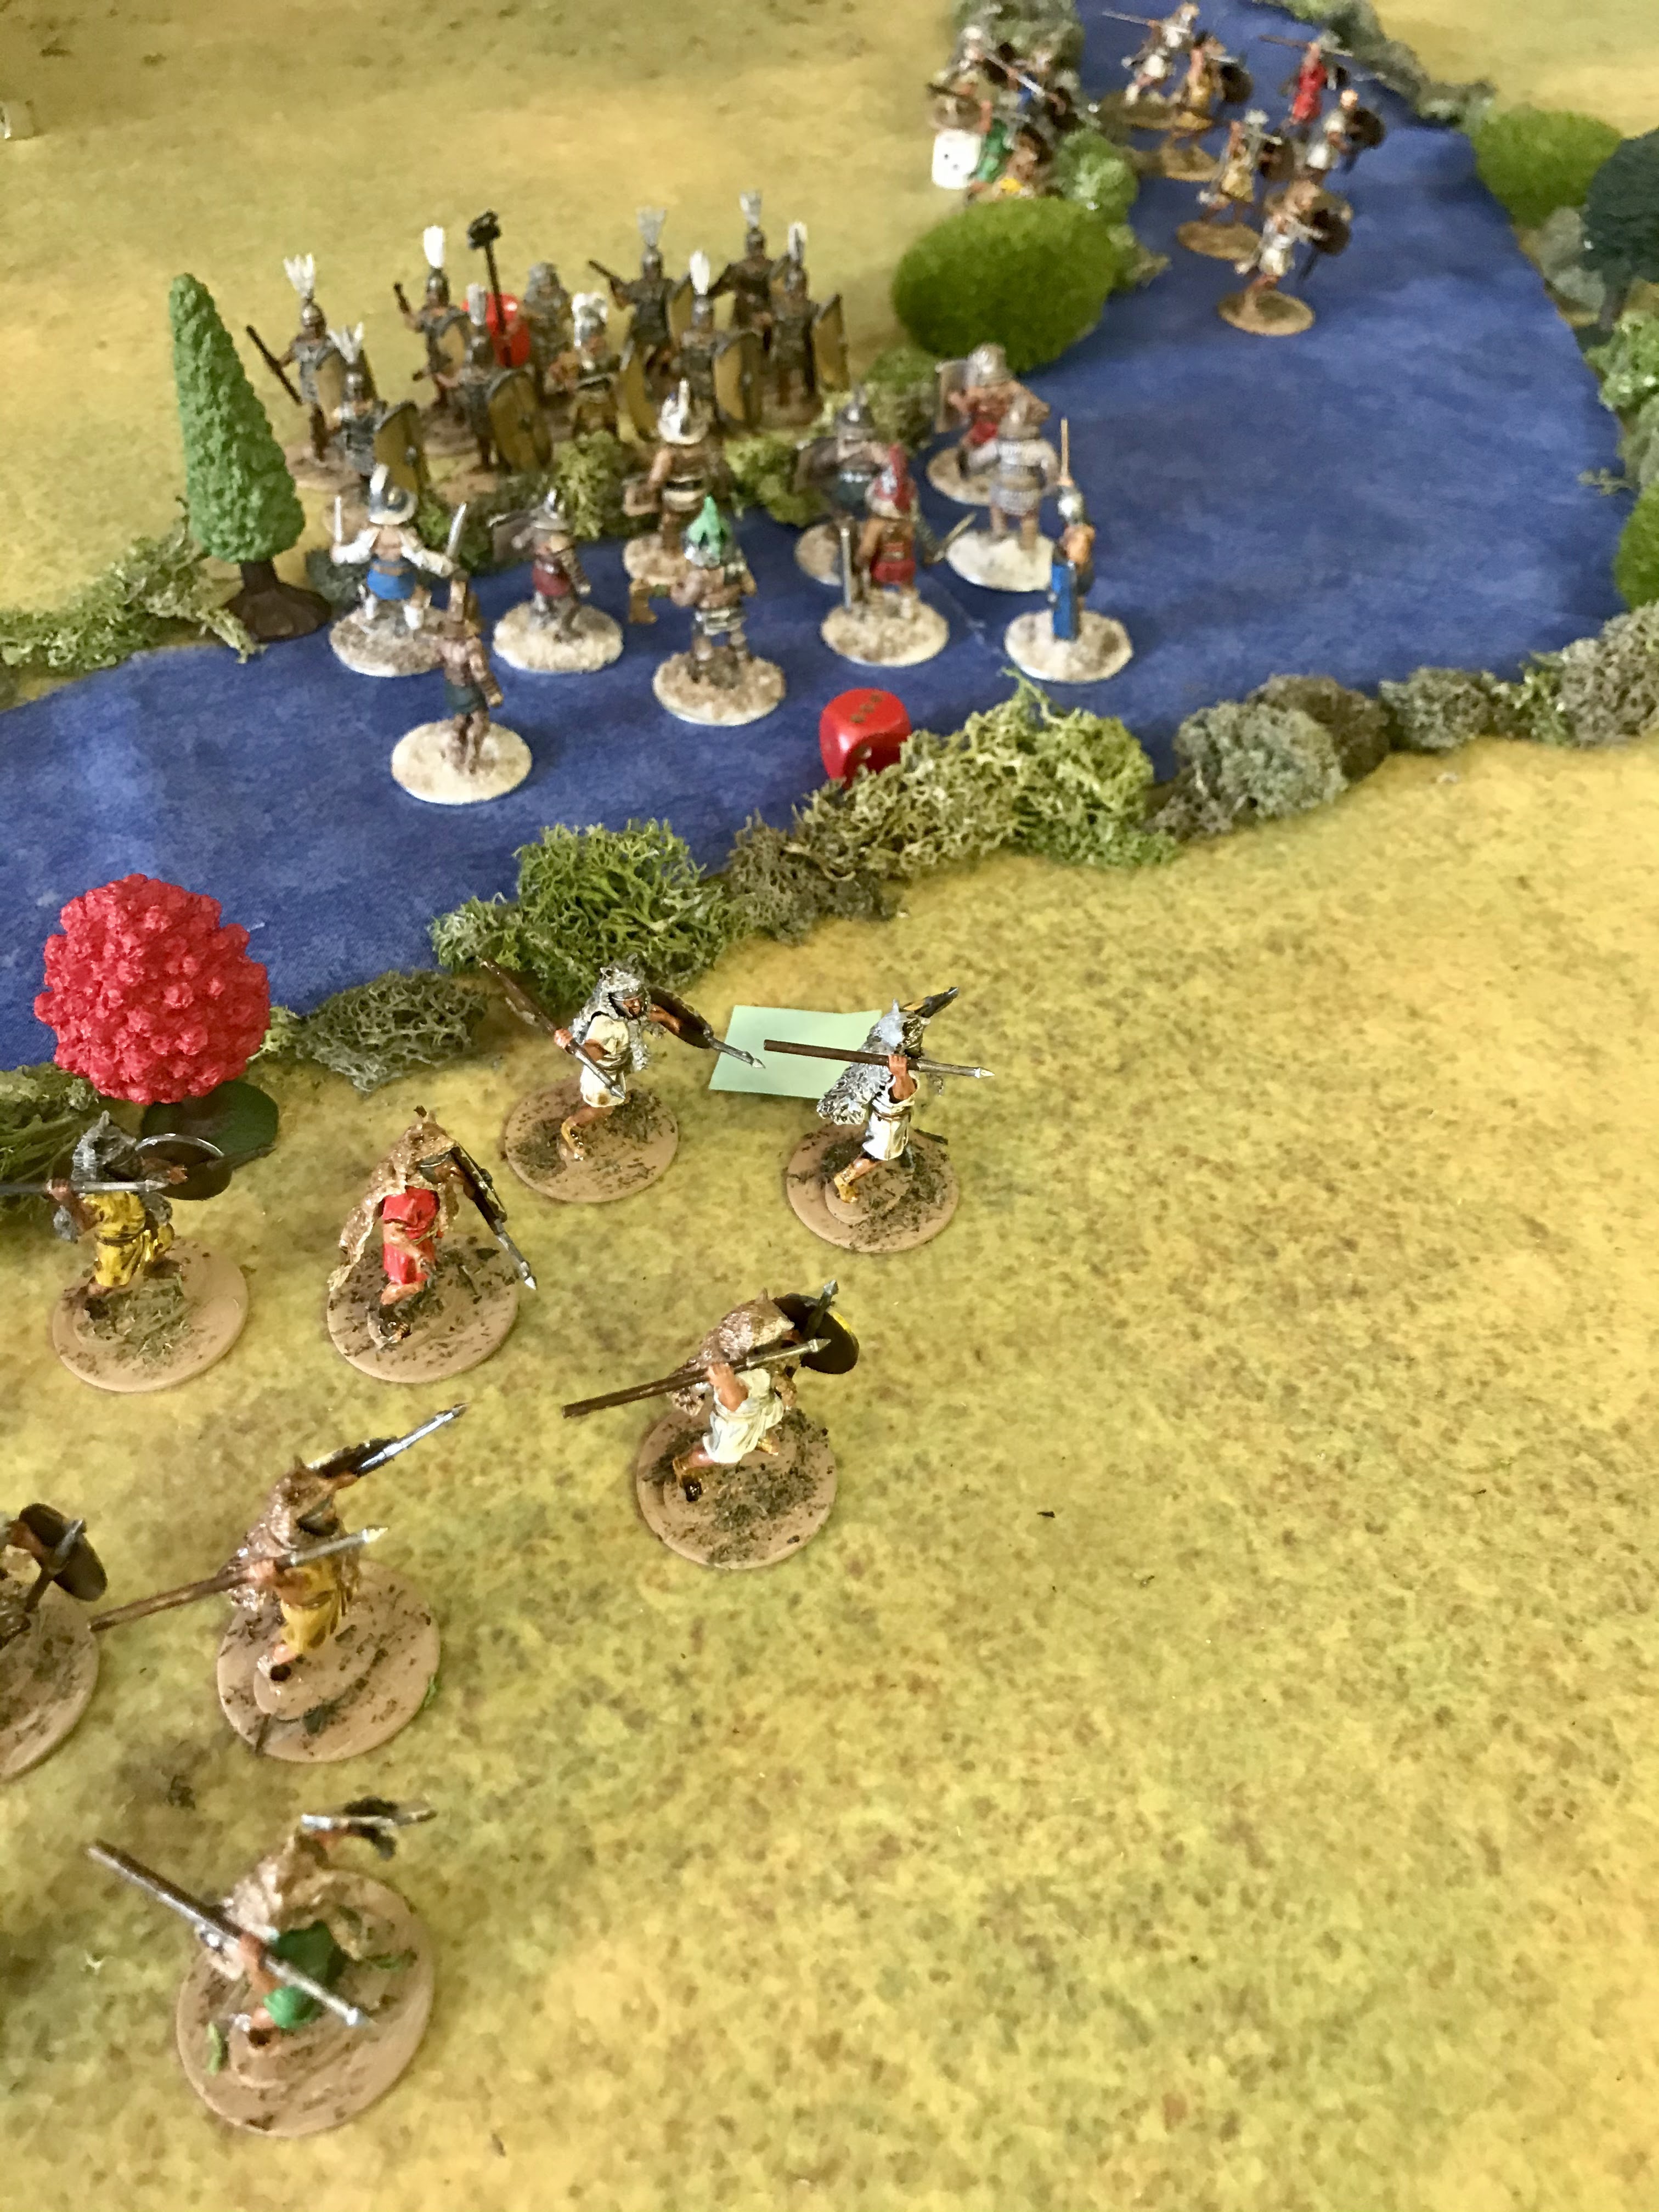
Spartacus and his troops take over. The Slave army begins to shift towards the left flank. The Archers move to cover the objective and pass between the hill and the river side. The right flank Light Infantry moves to the top of the hill. Meanwhile, on the left flank, the Light Infantry begins to cross the river at the ford, while the Drilled Infantry moves to support their crossing. Finally, Spartacus himself moves to the river bank and on an Objective.
 |
| Spartacus leads the way, a Thracian style Gladiator |
Turn 3:
This time, Crassus has to consider his bid a bit more carefully. Spartacus bids 0, while Crassus bids 2. Crassus goes first again.
The Light Infantry along the river bank rush forward and secure an objective marker. They move it to Crassus' side of the board. They then use a Commander's Gaze to throw Javelins at Spartacus' men but fall short. Spartacus attempts to interrupt, but is unsuccessful.
Crassus and his Veterans break into open order and re-align on the far objective, they re-form and move out. Reforming Legion costs 1 Commander's Gaze. Spartacus again tries to interrupt, and is successful this time.
The Slave archers pull back and fire at the Light Infantry. The Romans take cover behind the underbrush at the river bank, but still lose 1 Courage! However, they do not waver. Spartacus and his Elite Infantry comrades begin to charge across the river. The Light Infantry decides to Evade, and they drop back 2 MU. It was unnecessary as the Gladiator's could not make it across due to the dangerous terrain. They begin to waver, but do not loose any courage due to the difficult terrain. A big gamble that does not look like it paid off!
The Slaves on the right flank consolidate their position on top of the hill. They decide they do not have the range or power to hit Crassus' Legion with javelins effectively.
The slave light infantry on the left makes it across the ford, as the Drilled Infantry moves up behind and takes their position on the opposite bank of the river.
The Romans take over, and the center Light Infantry rushes to the river bank and uses their last Commander's Gaze to throw Javelins at Spartacus and his men in the river. They fail to cause any Courage loss.
The Legion Regulars hold position by the temple, covering their flank from the Slave Light Infantry. The Militia Legion also has to hold position due to the traffic jam in front of them.
Turn 4:
Both commander's bid 2 Commander's Gaze. After a moment of hesitation, Spartacus decides to up his bid to 3 and wins initiative.
Spartacus starts by moving his left flank Light Infantry away from the ford, and in a position to harass the Legion regulars if they try to force the ford.
Next, his Elite Infantry tries to finish crossing the river. This would bring them in contact but the Light Infantry evades away. The Drilled Infantry move into the ford and protect the objective there. The archers also move up to provide covering fire to Spartacus next turn. The Light Infantry on the hill hold position.
Crassus takes over. The injured Light Infantry get out of the way and head to the river bank opposite the archers. The Militia Legion than declare a charge on Spartacus and his troops. Spartacus's troops are unable to use their Pila or counter-charge as they are wavering, but the Militia Legion have no such limitation.
Instead of supporting their Militia Legion friends, the Roman Light Infantry begins to cross the river to try and snag the objective on the other side.
Melee:
Spartacus and his troops are wavering, so could not use Counter-charge or Pila. The Militia Legion did the charge and could use their Pila. Therefore, the Gladiator's are at armor 2, as they are in difficult terrain. The Legion is not, but is in formation.
Spartacus uses his re-rolls and manages to inflict 1 Courage loss, and force the Militia to waver. However, they also lose 2 Courage and are pushed back into the river with the Romans right behind them! The Militia also used the Roman's last two re-rolls from Commander's Gaze.
Turn 5:
Crassus again bids 2, and Spartacus bids 0. Crassus goes first.
Crassus and his veteran's march and collect the far objective. They again break into open order, pivot to a new direction and re-form up.
The Roman Light Infantry both jump into the river. The right flank Light infantry are nearly across, while the left flank starts in. They screen their crossing with a barrage of Javelins on the Slave archers, but fail to cause any disruption.
The Legion Regulars move up and reform their position using the last Commander's Gaze. They are out enough to tempt the Slaves into an advantageous combat, but then they can not react to the Light Infantry crossing the river.
With that, Spartacus takes over, and is in a bit of a rough spot. The Romans have 2 objectives. A third will likely give them the win. He needs to act fast to disrupt their plan.
On the Slave left, they decide to take the bait and try to crush the Legion Regulars there. The Drilled Infantry cross the ford, and then charge home. The Romans have no Gaze to counter-charge or throw Pila. The Drilled Infantry are also supported by the Light Infantry who also spend a point to charge in.
The Slave Archers use Gaze re-rolls and fire into the oncoming Light Infantry and reduce them 2 Courage, but not enough to cause them to waver.
Melee:
Crassus decides to start with the Militia Legion in the center fighting Spartacus and his men. Neither side makes any headway. The slaves suffer no courage loss for fighting in the river either.
On the other side, the Slaves managed to charge and throw Pila, while the Romans could not counter-charge or throw their own Pila due to lack of Gaze. Despite the lop-sided attack dice, both sides only lose 1 Courage. However, the Legion begins to waver, which forces them to lose their formation.
Turn 6:
Neither side has lost a unit yet! Therefore, they both have 6 Commander's Gaze. Crassus bids 2 to go first, while Spartacus bids 0. Crassus has the initiative.
Roman Light Infantry manage to get behind Spartacus and his men and secure an objective. With that, Crassus reveals that he has a 4 and a 6 which gives him two even numbered tokens...... and the game!
Conclusion:
Crassus and the Romans win. This aligns nicely with the unknown skirmish we were fighting. In the history, this skirmish between Crassus and Spartacus is what convinced the rebel general to turn and head south again. Therefore, a defeat like the one we saw above aligns with what may have happened in real life. An indecisive battle that the Romans won.
That was a great game! It went 6 turns and no one had the clear upper hand combat wise. However, careful maneuver, deployment, and deciding when and how to engage won the day. In fact, no one even lost a unit before the game was done.
My plan was to use them to rip the heart out of the weaker Roman center, while the Drilled and Light Infantry held the left flank, and the right side just stayed alive as a threat/speed bump to getting the objectives there. The plan worked "okay"ish. I misjudged the move across the river with Spartacus and his Elite Infantry and it was a bit too slow to stop the Romans from getting the objective on the opposite side of the board. The rest of the plan was working as intended, but my weak center push cost me the game as my momentum was spent and I got bogged down. From then on the Slaves and I were just reacting to Crassus' moves. Not a great place to be.
Despite losing, I had a great time playing this battle. It was really fun putting the Gladiator models from Crusader on the table as my Elite Infantry and Unit leaders. I also enjoyed the challenge of the river and ford. This was one of my favorite tables we have fought on with
Wars of the Republic yet.
Become a Patron and get access to all the cool stuff, a peak behind the curtain of Blood and Spectacles, and early-access to playtest games!
Check out the latest publications and contact me at our
Blood and Spectacles website


No comments:
Post a Comment