Monday, August 20, 2018

The Games: Blood and Spectacle- The Games of Leptis Magna


After the conclusion of the Munera games in Subhartha, Metallus was pleased to be booked in Leptis Magna. The consul of the city had heard of the exploits of the men from the colony of Leptis Magna and was curious to see them in action. Metallus booked passage on a coastal galley and quickly made way from Subhartha to Leptis Magna in the province of Africa.

Once there, he was greeted warmly by the cities council and treated as a bit of a celebrity. This pleased Metallus greatly. However, his pleasure led to caution. The Consul wanted the men of Leptis Minoris for their ampitheatre. However, they were to test their metal against the Consul's own Gladiators from the Gladiator school the Consul had invested in..

This made Metallus' politic instincts twitch. His men needed to be skilled in the arena, but was it better to let the Consul's Gladiators win the day? How would the Consul react if his own Gladiator's lost? How would the crowd react to the show? Caution would need to be the order of the day.
House of Letpis Minoris

For this series of The Games, I thought it would be fun to have a different set of rivals than the usual Picked Men of Quintillius. As much as I love to see Juggartha tear up his opponents, the world was starting to feel too small with only two Gladiator troupes constantly squaring off. I have enough Gladiators painted now for more than one Troupe, so this seemed like a good time to try them out.

This School in Leptis Magna would be called the Ludus Massinissa after the pre-Roman ruler of the area. The Ludus would include only Barbarian warriors of the following types:

2 Heavy- Murmillo and Hoplomachus
2 Medium- Provacatur and Dimechaerus
2 Light- Both Retarius
- In addition, I would start them with the “Baths” Professional servants. This would allow the Ludus Massinissa to re-roll a gate dice.
Ludus Massinissa
That should give a good show. The Ludus Massinissa (642 Troupe Rating) would enter the arena as Underdogs to the Ludus of Leptis Minor (750 Troupe Rating).

The day of the games, the people of Leptis Magna eagerly bought tickets for the event between the cities' consul and these men of the colony. The Consul himself was to be the editor of the games in honor of the grand history of the town and their loyalty to Caesar in Rome. It was a day that would surely be spoken about before the upcoming elections.

Event 1: Tertiarri

The Consul and Editor gave a short speech about the importance of the city, and the brotherly love it had for its former colony in Roman Spain of Leptis Minor. Metallus paid little attention as he measured the mood of the crowd. He knew it was to be a Tertiarri up first, which was a grueling event. They seemed good natured and the weather seemed perfect for the event.

Metallus looked over his men and decided who to send out. He decided to send out Normallus his new Thraex and Alexander the Eldar. Normallus would be the Primus. He noticed that his opponets would be a Murmillo and a Retarius. Good match-ups that the crowd should enjoy.

House of Leptis Minoris
  • Normallus a slave thraex
  • Alexander the Elder a slave Laquierious
    Ludus Massinissa
  • Brutus a barbarian murmillo
  • Ahenobarbus a barbarian retarius

In a Tertiarri, both sides select a Primus to fight. If he defeats his foe, he must then face off and defeat the second gladiator as well. If he does so, his Ludus wins. If he fails, the other Ludus wins.

Turn 1:
Both gladiators simply jog forward, eager to fight.

Turn 2:
Brutus walks forward, and the eager Normallus charges straight in to fight. The Thraex puts 3 CP in and holds one back to defend. Brutus defends with 4 and holds 2. Brutus rolls terrible and uses his last two to parry. However, it is not enough and Normallus gets a hit through. However, the curved blade can not find a weak spot in the Murmillo's armor this time.


Turn 3:
Locked into combat, Normallus attacks again this time with 2 and holds 1 to defend. Brutus does 4 and 2 respectively as he gets the measure of his foe. Again, Normallus' curved blade sneaks in under the murmillo's guard and this time reduces him 1 pain. The crowd cheers the display of swordsmanship, especially as Normallus uses his small shield to push Brutus away.

The Thraex used a striking success to push back his foe.

Turn 4:
After the push back, Normallus charges back in with a leaping attack. He uses 3 and holds back 1. Despite being injured, Brutus stays with 4 and 2. This time, Brutus gets the advantage on the thraex and twists his large shield to try and knock the blade from his foes hand. The small curved blade goes flying and lands in the dirt.

Brutus follows up with some savage close quarter jabs. Normallus knocks one away, but is forced to rely on his manica to defend. One gets through and reduces him to 1 Pain.

Turn 5:
Brutus senses his advantage and takes over. He presses the attack. He uses 5 dice to attack and holds 1, Normallus defends with 2 and holds 1 to parry with his shield. The Thraex's parry does little, and the Gladius of Brutus begins to do its work. The Thraex is reduced to 0 Pain.

Normallus sees the danger he is in and tries to back away, but Brutus keeps him locked.

Turn 6:
Normallus tries to break away again, but fails. Instead, he tries to use his shield to bash his way out of close combat with 2 dice, while Brutus defends with 3. The Murmillo easily avoids the attack and counters with his own, but the Thraex manages to avoid the jab and slash combination.

Turn 7:
With an eye towards the Tertiarri in the corner, Brutus wants to finish Normallus. The Thraex again fails to break away and his awkward attacks are easily. Brutus manages to wrench Normallus' shield away and toss it aside. However, the Thraex ducks and weaves away from Brutus' attacks.


Turn 8:
Brutus puts 5 dice into his attacks and holds only 1 back. Normallus desperately defends with all 3 dice. The Thraex blocks or dodges away from a flurry of blows, but it isn't enough and he is taken out of the fight. The crowd is suitably amused by the Thraex, and allow him to live, however he may still have serious injuries.


Turn 9:
Alexander the Elder hefts his spear and jogs into the arena. Brutus simply waits.

Turn 10:
The older gladiator maneuvers to stay out of charge range of the Murmillo. Again, Brutus waits to avoid fatigue.

Turn 11:
Alexander swings his lasso around his head while the crowd chants. He tosses it towards Brutus. The Murmillo tries to swat it away, but misses the timing and is entangled! However, before the Laquerious can capitalize, the Murmillo manages to cut his way free.


Turn 12:
This time, Brutus turns towards Alexander and moves slowly towards him. Alexander tries to lasso his opponent again, but this time is unsuccessful.

Turn 13:
Brutus can feel the fatigue spreading through his body. Again, he swats away the lasso as it lashes out for him. However, he is now close enough and charges the older Gladiator. A darting sword reduces the old man 1 Pain.


Turn 14:
Brutus passes his fatigue test as he sense victory. He attacks with 4 and holds 1, while Alexander uses 2 and holds 2. The Murmillo is too much for the Laquerious and knocks him down, reduces him below Pain 0, and Dazes him. The old man raises his two fingers in the missio. The crowd grants him mercy as well, but he was not taken out of action.

With pride, the editor announces the Ludus Massinissa the winner of the first event!

Event 2: Pairs

The crowd roared their approval and lauded Brutus' victory against his two foes! The crowd had been entertained, but Metallus could see that their blood lust had been roused. They wanted more from this event. He would need to choose his fighters wisely.

House of Leptis Minor
  • Minoris the slave Murmillo
  • Janus the slave dimachaerus

Ludus Massinassa
  • Gallus the Barbarian Provactur
  • Petronius the barbarian Dimachaerus
Minoris is paired against Gallus, while Janus will face Petronius. It is considered bad form for a gladiator to interfere with a fight until the pairs each have a victor.

Turn 1:
Gallus rushes forward bellowing a challenge in his barbarian language. He beats his sword against his breastplate to arouse the crowd. Petronius dashes to the side and behind a pillar. Minoris saunters forwad and takes huge leap to show off his ability, to great cheers. Janus moves out behind him and much slower.

Turn 2:
Minoris misjudges the distance and his charged by the bellowing Provacatur. Gallus puts 5 into the attack and holds back 1, while Minoris puts 6 in defense since he all ready acted this turn.. Their blades ring off each other.

The other two stalk around the arena.


Turn 3:
Petronius charges in and attacks Janus. Petronius puts 4 and holds back 2. Janus uses all 3 to defend. The barbarians blade slips by and reduces Janus 1 Pain.

Minoris puts 5 into his attack, and holds back 1. Gallus uses 3 to defend and holds back 2 to counter-attack. 2 hits ring off the Provocatur's armor. Gallus returns the favor and attacks back, but no connections occur.

Turn 4:
Minoris again leads off with 5 dice and holds 1 to try and finish Gallus off quicker. He defends with 4 this time. Again, a sword blow rings off of Gallus' armor. Gallus counter-attacks, but Minoris dodges and begins to circle his prey.

Petronius puts 4 into attacking, while Janus defends with 2. Both hold back 1. There fight is inconclusive as no one finds an opening.


Turn 5:
Minoris keeps up his offensive, determined to strike flesh. Gallus defends with 4 again. The barbarian is wise to the Murmillo's circling technique and follows him with a striking success of his own.

Janus attacks with 2, while Petronius counters with 2 and holds 3 for his own attack. The barbarian outmaneuvers his foe and sends him off-balance and sprawling into the dirt. He quickly attacks. This reduces Janus to Pain 0.

Turn 6:
Petronius sense victory and puts all 5 dice into his attack. Janus tries to defend with all of his own. Janus manages to block the hit with his shoulder guard, and the crowd cheers in approval. He then manages to clamber to his feet.

Gallus attacks Minoris with 4 dice and holds 1, and this time Minoris defends with 4 and holds 2. Minoris uses 1 to parry. This keeps him from having to make a save. Then, he counters with his 1 vs. 1, with no impact.

Turn 7:
Gallus again gets the drop on Minoris and attacks with 4 and Minoris defends with 4. Gallus has a strong roll and uses a stiking success to Go Past His Guard. The Murmillo's armor blocks two, but a third gets by and reduces him to 1 Pain. However, his counter attack is solid, but bounces off the barbarian's armored chest plate.

Janus senses the bloodlust of the crowd and puts 3 dice into his attack. His only chance is to defeat his foe. No Missio will probably be given. Petronius defends with 3. With a ferocity, Janus reduces his foe to 0 Pain as well.


Turn 8:
Gallus senses victory and presses his attack on Minoris. However, he is over eager, and poor foot work allows Minoris to circle him outside of his combat arc. Gallus will not be able to parry or use striking successes, unless he breaks off and re-centers himself. Minoris then follows up with a fierce attack of his own that reduces Gallus to 0 Pain.


Petronius is now feeling the desperation of the crowd chanting for blood too. He attacks with 4 dice and holds only 1. Janus defends with 3. However, it doesn't look good as Petronius has 2 potential hits. Janus' armor fails and he is taken Out of Action.

The Mercy roll for Janus can not have any modifiers. He needs a 7+ to survive. Janus is killed in the arena by Petronius. The crowd roars in approval!


Turn 9:
Petronius turns to face his next potential opponent.

Gallus gets desperate and puts it all into an awkward attack on Minoris. He defends with 4 again. The attack reduces Minoris to 0 pain as a sword strike gets past him. The Murmillo responds with a savage blow to Gallus' helmet that knocks him flat and dazes him.

Turn 10:
Petronius gets ready to fight Minoris, and saves his strength from fatigue.

The dazed Gallus fails to get up, and tries to crawl away as fatigue saps his strength. Minoris also feels fatigue. Minoris moves in for the kill, but manages to put the Gladiator down but not OOA.

Turn 11:
Minoris passes his fatigue test while Petronius waits for him to finish off Gallus. Before the Provocatur can raise the two fingers, Minoris smashes him senseless with his shield. He turns to the crowd who chant for blood. Minoris kills Gallus in the arena.


Turn 12:
Minoris fails another fatigue test, reducing his CP 2.

Petronius has been patiently waiting, and charge the Murmillo. He attacks with 4 and holds 1 while Minoris defends with 3. Minoris uses his last CP to force a parry. However, the medium gladiator uses a striking success to go past the Murmillo's guard. However, it was not enough Minoris blocks the hit with the brim of his helmet. The Dimachaerus rushes past the Murmillo after completing the charge.

He is hoping that by the time the Murmillo can turn around, he will be exhausted.

Turn 13:
Both gladiators fail a fatigue test. Petronius moves away and begins to turn, while Minoris pivots in place.

Turn 14:
This time, they both pass their fatigue test.

Petronius stumbles in to attack with 3 dice and holds 1, while Minoris defends with 2 and holds 1. Minoris uses his last CP to parry, but the blade slides harmlessly across his manica.

Turn 15:
Both again pass their fatigue tests. This time Minoris successfully blocks Petronius attack and tries to knock him down, but the other gladiator stays upright. It serves as distraction enough as Minoris downs Petronius with a hit across the side of his helmet.

Turn 16:
Minoris fails his fatigue test and collapses to the floor of the arena next to the body of his foe.

The crowd rises to their feet in honor of the hard fought battle and the two Gladiators. Thunderous applause fill the amphitheatre. The editor looks on with a huge smile on his face. Such a contest is the stuff of legends and election victories!

Both Ludus are declared victorious!


Event 3: Single Combat

The editor rises to his feet to give a stir speech in honor of Minoris and Petronius and how they overcame their foes and fought to an honorable stalemate. The excitement of the crowd is halted as a heavy downpour stirs up suddenly and forces everyone to seek shelter, much to the Counsels chagrin. When the weather clears and the games can continue, the crowd is much smaller and the arena is filled with mud.

House of Leptis Minor
  • Ordinarri the slave secutor

Ludus Massinissa
  • Domitius the barbarian Hoplomachus

Turn 1-3:
Ordinarri slogged through the mud forward, while Domitius made his way behind a pillar.

Turn 4:
Ordinarri turned and moved towards Domitius. The secutor moved so close that the Hoplomachus decided to charge him instead of throwing his spear. He used 4 dice while Ordinarri used 3 to counter. Domitius used a single striking success to try and knock down the Secutor. With a sweep of his spear, he sent Ordinarri into the mud.

He manages to crawl away, before pulling himself upright.


Turn 5:
Ordinarri reacted quickly and charged back into fight. He put 5 into the attack, while this time Domitius used 3 to defend. He used his skilled swordsmanship to get 4 potential hits, but 3 just clanged off the Hoplomachus' heavy armor. However, he was reduced 1 Pain.

However, the return attacks from Domitius were just as fierce! He used a striking success to go past his guard, and a second one to try to knock him down again! The attacks did not get through to cause pain, but Ordinarri landed in the mud again! He was unable to get up in the recovery phase.

Turn 6:
Domitius went to work attacking the downed gladiator. He used 3 to attack, while Ordinarri used all 5 to defend. Again, Domitius goes past his guard but fails to find a weak spot.

Ordinarri again crawls away in the mud, but this time is too mired to rise.

Turn 7:
Ordinarri manages to hustle back to his feet, and again charge back into the fight. The fighting is inconclusive, but this time Ordinarri manages to knock the Hoplomachus into the mud. However, Domitius jumps back up to continue the fight.


Turn 8:
Ordinarri goes back into the attack with 4 dice. This time, the Hoplomacchus forces Ordinarri into poor footing with a striking success. He loses his last banked CP. However, Domitius can not capitalize on it.

Turn 9:
Ordinarri wades in again. A loud pair of clangs fill the arena as Domitius blocks the swings with his shoulder guard. Neither warrior seems to be getting the upper hand.

Turn 10:
With the encouragement of his servant, Ordinarri passes a fatigue test. Domitius does as well.

Domitius comes in with his spear whistling and going wide and then with a tight thrust. This time, it is Ordinarri's turn to deflect them with his armor. However, it is a feint as the haft of the spear ends up between Ordinarri's legs and he is toppled into the mud again!

Turn 11:
Ordinarri fails a fatigue test, but Domitius passes.

Ordinarri again scrambles back to his feet quickly, not allowing the other gladiator a chance to capitalize on downing him. This time, his sword work pays off as he manages to find a weak spot in Domitius's armor and wounds him, bringing him to pain 0.

Turn 12:
Ordinarri fails another fatigue test that Domitius passes.

The secutor sense his limbs weakening and judges the time is now to end this battle. He puts everything he has left into the attack. He manages to get past Domitius' guard and downs the Hoplomachus.

Domitius raises his two fingers in the missio. The crowd was amused by his ability to throw his opponent into the mud, and grants him mercy.


The Ludus of Leptis Minor is the winner of the event.

At the end of the games, the Editor grudgingly rose and awarded the laurel's of victory to Metallus and the gladiator's of Leptis Minor. He then transitioned into a speech about the grandeur of Leptis Magna being evident in its Spanish colonies valor in the arena.

Metallus tuned the rest out. He was more interested in counting the gate. After all, he had to replace Janus some how.

* * * * *

Campaign Stuff

Dead:
Janus from Leptis Minor
Gallus from Ludus Missanissa

Serious Injury:
Normallus from Leptis Minor- However, he has a full recovery.

Experience:
Ludus Massinissa get +3 XP for underdogs

Brutus= +15- Earned a Chariot Skill- Emergency Stop
Ahernobarbus= +4
Petronius= +9- Earned a Chariot Skill- Stand Aside
Domitius= +4- Earned a Ferocity Skill- Throw Sand

Normallus= +1
Alexander the Eldar= +1
Minoris= +12- Earned +1 Combat Pool
Ordinnarri= +7

Denarri
The House of Leptis Minoris earned 40 coin, while the Ludus Massinissa earned 30 coins.

Metallus purchased a new Dimachaerus gladiator to replace Janus.

Reputation
The Reputation of Ludus Massinissa went up 1 despite their loss in the games. There performance even as underdogs spurred much pre-election talk, much to the consuls delight!

Troupe Rating
Both Troupes lost rating due to the death of Gladiators.
Ludus Massinissa is at 572 Rating
House of Leptis Minor is at 681 Rating
* * * * * * 

Final Thoughts
Wow, a Tertiarri and Pairs in the same Games!  What a slug fest.  The Bloodthirsty crowd during the Pairs was especially dangerous.  Neither Lanista could gamble on asking for the Missio and had to fight on until they could not fight anymore, which is what ended up happening!  Due to the documenting, this may have been one of the longest Games we have played yet!  I think it took about 2 and a half hours, but without documenting and some rules review probably would have been closer to 2.  Still, a brutal match. 

You can check out these rules here: http://www.wargamevault.com/product/210557/The-Games-Blood-and-Spectacles


Monday, August 13, 2018

Blood Bowl: Match Report- Dwarf vs. Ork- Exhibition Play


Catastrophe! I had this report all written up as we played th4e game, but then I lost it do to being an idiot. Therefore, this match report will not be as detailed as some of the other Blood Bowl matches I have had. However, since it was the first use of my Dwarf team I figured I might as well try to put in some of the highlights.


* * * * * *

Lord Summervale: Welcome to the half-time report! Cabalvision IV's continuing coverage of the Deep North League continues as we take look at the Southern Regional Conference action. It is still pre-season as new teams enter the conference. Let's see how they stack up!

Mad Johan: After the loss of teams from last season due to contract disputes, attrition, murder, and jail sentences there has been an influx of new teams into the Southern Regional Conference.

Lord Summervale: Indeed. The three remaining teams are the Forever Jackals from Khemri, Skaven Da' Rat Packers, and fromt eh Chaos Wastes come the Gridiron Gravediggers. However, this season they are going to be joined by the expansion Nottingham Nobles human team, Ork Skulsmash Reeverz, Skaven Cheeze-Ballerz, Dwarf Rock-N-Rollers, and the Chaos Goat Herders.

Mad Johan: With so many inexperienced rookies, the casualties should be record setting this year!

Lord Summervale: The Skulsmash Reeverz under their Kaptin Grimgrod Rotgut clashed with the Dwarf Rock-N-Rollers earlier today. Here are the highlights of the match.

Mad Johan: With Dwarf teams the highlight reel is always short......

Lord Summervale: …. um, yeah.... moving on. The first half saw the Orks kick the Rock-N-Rollers into terrible field position. It took them half of the first half just to get to mid-field. Sadly, the Skulsmash Reeverz were there waiting for them. The Ork team smashed open the Dwarf cage and forced the ball loose.


It was a mad scrum, but eventually Kaptin Rotgut himself emerged with the ball. A short pass up the middle found the blitzer Ruk-Ruk. He hauled it in and that led to a score at the end of the first half. Things looked bad for the Rock-N-Rollers as they were down by 1 and kicking to the Orks.

Mad Johan: The Dwarf team made good use of sideline pushes to eliminate a few Ork players. The Slayers frenzy ability helped out.


Lord Summervale: In the second half, the Dwarf team had to act fast....

Mad Johan: …. which is really hard when you are a dwarf!

Lord Summervale: The opening kick was short, and a missed block up front left the Ork line open. A few dwarf blockers desperately trundle through and forced the ball loose from back-up Ork thrower Runthugga.

This also led to a scrum where possession went back and forth between the two teams. The Orks tried to throw it down field, but the Rock-N-Rollers were all over it and stuffed the receiver quickly.


Mad Johan: One of the great moments of Blood Bowl is watching dwarf blockers try to intercept a pass. Hilarious!

Lord Summervale: The Rock-N-Rollers managed to push the ball down the field as their line play began to tell on the Skulsmash Reeverz.

Mad Johan: This game featured some eye-popping hits between players that left players down across the board. I was shocked to see half of the Ork team knocked-out and in the dug-out at one point!

Lord Summervale: It was this punishment that allowed the Dwarf runner Harry Harrison finally cross into the end zone to tie up the game. The fans at Freeboota Field booed and hissed, but the refs let the score stand.


From there, the Orks did not have enough time to complete a scoring drive despite a successful pass down field. Time ran out.

Mad Johan: Since the refs were hungry, they decided to call the game a tie and go grab some grub. It was only pre-season. They were hangry so called the game despite the jeers of the crowd.

Lord Summervale: We will now return you to your regularly scheduled match after a word from our Sponsors; Guillotine Razors- Maybe the best a human can get! Thanks for tuning into Cabalvision IV. Nuffle be praised!

Sunday, August 12, 2018

Heirs to Empire: First War of the Diadoch- Eumenes vs. Craterus


Craterus vs. Eumenes of Cardia
Here is another Heirs to Empire battle report featuring the armies of Eumenes of Cardia vs. his rival Successor’s in Anatolia.  These battles took place early in the Diadochi wars between Alexander’s successors, and helped shape the political map of the wars to come.  As such, the armies were probably similar to those that Alexander himself used in his great campaigns. 

After Neoptolemus’ defeat by Eumenes, he fled and joined up with Craterus.  Craterus was crossing the Dardennelles from Greece to pressure Eumenes and force the Pro-Perdiccan loyalists out of Turkey.  Meanwhile, Perdiccas himself was assembling and leading an army to face off against Ptolemy in Egypt after Ptolemy stole the body of Alexander. 

Most of what remained of Neoptolemus’army from his Satrapy in Armenia was easily absorbed into Eumenes’ army to absorb losses.  However, Craterus’ force had much greater numbers than Eumenes could muster.  In addition, the core Phalanx was made up of reliable Macedonians from Europe. 

The two forces faced off.  The details of the battle have been lost to ages.  We only know the outcome.  In a daring attack, the outnumbered Eumenes managed to smash the larger army of Craterus.  Craterus himself was killed in the battle.  Neoptolemus was also killed in a duel between himself and Eumenes.  It is said that Eumenes and his cavalry unit squared off against Neoptolemus’ cavalry on purpose to face the treacherous enemy general personally. 

The Forces:
The forces are pulled from the sample armies in the rules.  They are both 54 points.

Craterus’ Army
Center
2 Bronze Shields- 1 Led by Craterus
2 Irregular Peltasts
1 Thureophoroi

Right Wing
Asphract Cavalry- Neoptolemus
Asphract Cavalry (Javelin)

Left Wing
Archers- General
Skirmishers
Skirmishers

Eumenes of Cardia
Center
Silver Shields- General
Bronze Shields
2 Thureophoroi

Right Wing
Epilektoi Cavalry

Left Wing
Companion Cavalry- Eumenes

During this battle, it is probable that the Silver Shields were probably deployed with Perdiccas for the Egyptian campaign, and not with Eumenes of Cardia.  However, for simplicity and uniformity of the campaign I am going to keep them with Eumenes. 

In addition, it is likely that Thureophoroi were not a distinct and established part of the army.  Such troops played a role of that of the Hypaspists in Alexander’s army.  Since the main difference between these troop types is the Hoplon versus an oval shield they are interchangeable this early in the Diadochi period.   

Mission:
It is unclear how this battle actually took place.  Some scholars believe it must have occurred during a river crossing or similar situation for the victory to have occurred as described in the sources.  It is unclear as the sources that remain spend little time on the actual battle, only the aftermath.  To that end, we rolled a random scenario and came up with Raze and Loot. 

In this scenario there are 5 markers placed on the board to represent valuable items such as wells, supplies, sacred sites, etc.  The Defender tries to protect them while the attacker tries to destroy them by attacking them in melee.  Craterus was determined to be the defender. 

Set-up:
To match the situation, we changed he deployment a bit.  We made sure that Craterus and his army was by the river, to help match the potential historical match-up.  Also, this scenario allows Craterus to deploy a bit seperated based on the location of the objective counters.  This also probably helps match the situation Eumenes and Craterus faced. 

The objectives were watering holes spread across the desert, and the river crossing Craterus and his army used.  Eumenes’s deployment was pretty standard.  He was on the right flank with his Companions.   The center was his phalanx flanked by Thureophoroi on each side.  The Epilektoi were on the left.  Nothing fancy and fairly compact and in a straight line. 

The Left wing (of Archers and Skirmishers) deployed forward to protect the watering hole, but also potentially harass the main advance of Eumenes army.  The Center was deployed just past the river ford in an arrowhead formation.  The right flank was the Asphract cavalry units and they deployed out near another watering hole. 


Turn 1:
Both sides determined their Commander’s Gaze.  7 for Eumenes and 7 for Craterus.  Craterus bids 5 while Eumenes bids 0.  Craterus goes first. 

His Left Wing and Right wing stays put, while the center moves up to join them and try to form some sort of battle line.  The center jostles around abit to try and let the Peltasts move slightly ahead of the phalanx units.  Eumenes does not try to interrupt at all. 

Eumenes’ has his Epilektoi pivot and race towards the farthest objective over the ridge line.  He also turns his Companion cavalry and rides closer to his center.  Meanwhile, the center forces move towards the center objective.  The Bronze Shields are lined up to run over it. 

Turn 2:
Both sides determine their Commander’s Gaze for their wings.  Eumenes has 7 and Craterus has 9, he has the advantage in Commander’s Gaze.  Craterus bids 3, while Eumenes bids 1. 

Craterus’ forces move forward and form a battleline with their left wing.  Neoptolemus uses his Javelin Asphracts to ride forward and throw their Javelins at the Epilektoi, but they are just out of range!  The other Asphracts follow suit.  Eumenes does not interrupt.

Eumenes forces respond by moving forward steadily and confidently.  His Companion Cavalry moves up to be next to his main battleline.  The Epilektoi ride up the ridgeline towards their objective.  Will the Asphracts pursue them? 

Turn 3:
Craterus has 7 Commander’s Gaze across his front, compared to Eumenes’ 7.  Eumenes bids 1 and Craterus bids 0. 

Eumenes’ Epilektoi continue to move down the ridge towards the watering hole.  Craterus does not interrupt.  Then, the Companion Cavalry go into open order and head towards Neoptolemus.  No enemy interruption.  Finally, the center moves up.  The Bronze Shields secure the objective while the rest of the army moves to support. 

Craterus waits patiently to respond, allowing his opponent into his kill zone.  The Left wing starts the fighting.  The Archers open fire on the Thureophoroi.  In addition, the skirmishers move up and move and shoot.  One is out of range.  However, the Thureophori are reduced two armor. 

From Crateru’s center the Thureophoroi move up and hurl their javelin’s as well. Eumenes’ Thureophoroi are reduced to two Courage and start to waver.  One of Craterus’ Irregular Peltast units move up and reign Javelins on Eumenes’ Bronze Shields. To soften them up.  A Commander’s Gaze re-roll forces them to lose one courage.  This is followed up by a charge from Craterus’ Bronze Shields, with the second unit supporting the attack.  Eumenes troops counter-charge with a Commander’s Gaze.  This reduces Eumenes’ Bronze Shields to wavering.  However, with the counter-charge the Craterus’ troops are reduced 1 Courage. 

Turn 4:
Craterus earns 9 Commadner’s gaze, while Eumenes has 6.  Craterus then bids 5 Gaze compared to Eumenes 2. 

Archers hit Eumenes’ Thureophoroi for another Courage loss.  Eumenes’ center general tries to interrupt with his last Commander’s Gaze, but he fails.  This is followed up by a charge from Craterus’ Thureophoroi into Eumenes troops. It is enough to break them.  Meanwhile, The Skirmishers move up.  Craterus’ Irregular Peltasts charge into the main center melee.  ON the other side. The irregular Peltast move up and shoot Eumenes other Thureophoroi for 2 courage loss. 

The javelin Asphracts move up and attack the Open Order Companion Cavalry, but fails to cause any courage loss.  Eumenes manages to interrupt then.  He charges into the horseman using a last Commander’s Gaze.  The weaker Asphracts are easily shattered! 

Eumenes Thureophoroi charge the Irregular Peltasts.  No one has any Commander’s Gaze left to try and evade or pursue.  They just start fighting.  The damage is pretty catasprophic as both side fight ferociously!  Both are now wavering! 

Meanwhile, the Epilektoi storm a well.  They change to open order and start heading over the ridge towards the next marker.  Eumenes’ troops just need to hang on long enough for them to get to it.  However, in the center Craterus and his Bronze Shields manage to smash through Eumenes’ Bronze Shields and force them to rout. 

At the end, Eumenes’ army takes a Collapse check after losing two major units.  However, they all pass.  In addition, Neoptolemus’ and his Asphracts take are disordered after seeing their friends get smashed by the Companions.        

Turn 6:
Thinks look bad for Eumenes and his army.  Eumenes earns 8 Commander’s Gaze, while Craterus has only 6.  Eumenes bids 4.  Craterus bids 5 in an effort to win his first turn. 

Craterus uses the first turn to dangerously charges his injured Bronze Shields into the Silver Shields supported by his other Phalanx and Peltasts.  They hit hard, but ineffectively only reducing them 1 Courage.  The return push by the Silver Shields is enough to rout the rest of Craterus’ main infantry force!  Meanwhile, the Irregular Peltasts rout Eumenes’ last Thureophoroi unit.    

The Companion Cavalry with Eumenes charges headlong into Neoptolemus and his Asphract unit.  It is completely obliterated, leaving the way clear for the final well.  Meanwhile, the Epilektoi climb over the ridge. 

Seeing Craterus’ unit collapse, one of the Skirmisher units breaks up and runs for it as well. 

Turn 7:
Craterus has 5 Commander’s Gaze and Eumenes gets 8.  Eumenes bids 5 and Craterus bids 0. 

The Epilektoi and Companions meet on the third watering hole.  With that, Craterus army sees that all is lost and falls back. 

Conclusion:
Things looked bad for Eumenes there, but he managed to pull it out in the end.  Again, the Companion Cavalry and Silver Shields lived up to their reputation.  In hindsight, Craterus gambled big by charging with his injured Bronze shields, but his dice failed him in the critical charge and only caused 1 Courage loss.  He should have held back and used his uninjured units as a second wave.  Ultimately, it might not have mattered as Eumenes’ superior cavalry allowed him to win the day.

Ultimately, another historical outcome.  Both Neoptolemus and  Craterus’ units were overwhelmed.  We do not know how Craterus died, but in the main infantry push seems appropriate to me.  We do know that Eumenes killed Neoptolmus in a duel after crushing his cavalry unit with his own, which is what happened here too!  In addition, Craterus had Eumenes outnumbered just like in the Historical battle. 

Overall, a fun scenario and a fun little battle.             

Monday, August 6, 2018

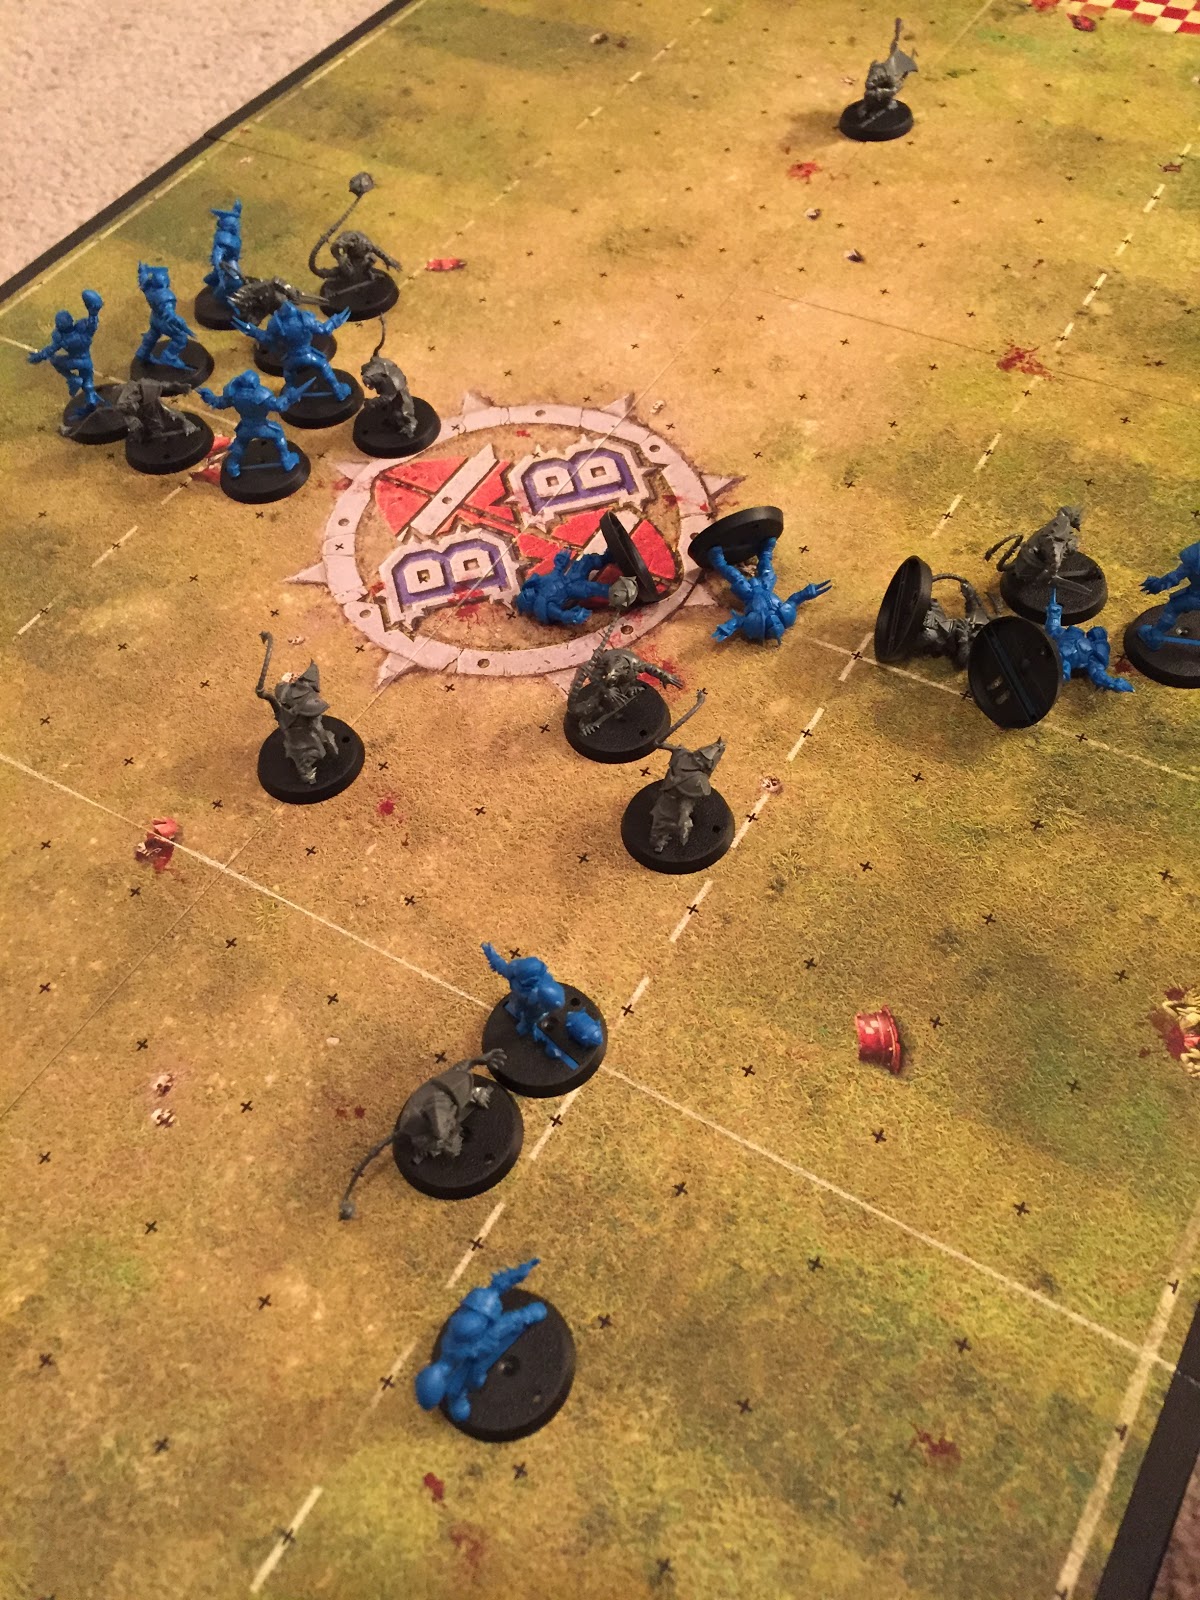
Blood Bowl: Match Report- Humans vs. Skaven- Exhibition Play


I all ready had a Chaos, Khemri, and Skaven Blood Bowl team when the new version came out. I had never had the templates of a pitch of my own though. Therefore, I got the new boxset, and was a bit disgruntled to see that the new minis were a bit bigger. I was unsure if I wanted to get new teams to match up.

Then, a new FLGS opened in my town and they had good prices on the new Blood Bowl boxed teams and I soon found myself with new Dwarfs, Skaven, and Chaos. Ostensibly, my wife encouraged my to buy them as she wanted a few teams to play with me and my daughter. How could I refuse?

The Dwarf teams and the Skaven teams went together great and pretty much needed little or no glue. The Chaos team.... not so much. The poses were great and dynamic, but putting them together was a chore. However, now that they are all assembled, they are ready for the pitch. Maybe I can even convince myself or my wife to paint them one day..... maybe.....

At least I was able to convince her to play. I took the Skaven per the rules in the box for the Skavenblight Scramblers and she took the human Nottingham Nobles. This should be a good match-up.

* * * * * *


Lord Summervale: Thanks for watching Cabalvision IV and their ongoing coverage of Blood Bowl post- NAF and the outgrowth of smaller leagues.  

Mad Johan: We know it is only the pre-season but there is still plenty of mayhem to dish out! It may not count on the record books, but you can still see a a skaven get punched in the face. That is worth the price of admission right there!

Lord Summervale: Indeed Johan. Today is another exhibition match featuring the Nottingham Nobles and their team captain Rick Priestly in the lovely Citadel arena. Their opponent was a new Skaven team calling themselves the Cheese-Ballerz, led by their captain King Chedda'.

Mad Johan: The Deep North League- Southern Regional Conference has two Skaven teams this season. Favre' Da Cheese Monger leads a high powered offense with three gutter-runners on Da' Rat Packers. However, these ratmen seem to have a more traditional offense with two Storm Vermin blockers and two Gutter Runners. These Cheese-Ballerz will pack a bit more punch, but it might hurt their scoring ability.

Lord Summervale: Well, the Nobles haven't exactly been scoring power houses in their last two exhibition matches. After the coin flip, King Chedda' has won the toss and elected to kick-off to the Nobles. The Nobles set-up with Priestley ready to receive. A missed block up front by Adrian Wood let the Cheese-Ballerz front line stream through towards the Noble's thrower.

Mad Johan: They are coming through like a rat.... urr.... ummm.... chasing after.... oh nevermind.....


Lord Summervale: Priestly manages to dump it off to Gav Thorpe who is rushing around the edge of the Skaven line. However, the Skaven see it coming and chop him down at mid-field. He coughs up the ball, and it is scooped up by the Feta Fiend, a line rat who makes a break for the end zone.

Mad Johan: Down field his fellow clan rats seem to have Priestly covered, and on the ground.


Lord Summervale: Holy cats! Somehow Priestly broke loose and managed to knock the ball free from the Feta Fiend! That just saved a score! That was enough and the Nobles have somehow recovered it!

Priestley manages to dump it to Gav Thorpe again, and this time, he is being escorted by Jervis Johnson and Paul Sawyer to the end zone. The Cheese-Ballerz fail to respond, stunned by the sudden turn of events.

Mad Johan: Looks like Priestly and Thorpe are going to try to be star players this season!


Lord Summervale: That puts the Nobles up by 1 late in the half. They set-up for a deep defense against the speedy Cheese-Ballerz. Both of their Gutter Runners are out on the field for the kick-off; Horrible Havarti and Rotten Rochefort.

Mad Johan: Boom! There is the kick!


Lord Summervale: King Chedda' collects the ball while his line rats push the line back. Horrible Havarti goes deep, and the Nobles move to intercept him. Meanwhile, Rotten Rochefort goes on a crossing route escorted by the Munster of the Midway storm vermin. They are wide open after some blown coverage by Warwick Kinrade.

Mad Johan: That looks like a touchdown right there.....

Lord Summervale: King Chedda' drops to pass and launches a nice tight spiral to the streaking Rotten Rochefort. However, the Gutter Runner turns up field too early and drops the pass!

Mad Johan: That was all on Rochefort.... I guess they do not call him rotten for nothing.

Lord Summervale: Well, with that we end the half with the Nobles up 1 to nothing. The first half was pretty back-and-forth but the Nobles have a well deserved lead. Now... let's go to the Cabalvision IV half-time report brought to you by Wierdstone Sasparilla....it is the Wierdstone that gives it kick!

* * * * * * *

Lord Summervale: Welcome back to Cabalvision IV's coverage of the Nottingham Nobles versus the Skaven Cheese-Ballerz in the Deep North League- Southern Regional Conference pre-season play. Today's game is brought to you by our sponsors at Bloodweisser- We are O Positive that you will love it!

The Nobles have taken the lead with 1 touch down. However, the Cheese-ballerz team captain, King Chedda'; wisely elected to receive in the opening of the second half.

Mad Johan: Skaven teams are well known for being able to score quickly, so they are not out of the game yet. Both of their Gutter Runners are on the field.

Lord Summervale: Indeed. The kick is up, and King Chedda scrambles to receive it. The Nobles lined up for the deep defense again, trying to space out and stop the deep strike. However, their plan does not work to plan as the Cheese-ballerz managed to overwhelm the line and break out on the flanks.

Mad Johan: Wow, a punishing hit as both the Munster of the Midway and Space McQuirk go down!

Lord Summervale: That was enough. A super accurate strike from King Chedda' to Horrible Havarti gives the speedy rodent more than enough time to run into the end zone and tie the game up!

Mad Johan: I told you these vermin were fast!


Lord Summervale: This time, the Cheese-Ballerz send a high short kick to Priestly in the backfield. His fellow Noble smash through a flank and surge across mid-field. Priestly looks to pass.

Mad Johan: Look at the nice cage they have started to form around Jervis Johnson. I would expect to see the pass go there.


Lord Summervale: Hold on Johan. It looks like those line rats have other ideas! They have easily managed to bust through the line and are swarming Priestly. They knock it loose and there is a mad scramble for the ball.

Mad Johan: Those rats were eager to get there, but they can't seem to come to grips with the ball.

Lord Summervale: Indeed, for the second time in the game Rick Priestly has managed to recover the ball and unloads it quickly. This time he finds Jervis Johnson.

Mad Johan: Some great blocking downfield allows J.J. To scamper into the endzone.


Lord Summervale: Looks like The Nobles are up by 1 again.

Mad Johan: The team that is going to win this game has to score more points than the other....

Lord Summervale:... um, yeah.... The Nobles kick-it off back to the Cheese-Ballerz. This time, it is the Nobles who smash through the line and get some quick penetration. King Chedda' dumps it off to a Gutter Runner in the back field, but it isn't enough and the Nobles pop it loose. Gav Thorpe scoops up the ball and dashes it into the endzone.

Mad Johan: It looks like the Cheese-Ballerz are not the only team that score quickly.

Lord Summervale: The Skaven line-up to try again. This time, King Chedda' squeaks some encouragement and threats to his line rats. He does not want to see the Nobles get through so fast again. The kick is short, and Horrible Havarti catches the kick and begins to move it up field.

Mad Johan; Look at that Summervale! The Skaven are actually running a cage right through the teeth of the Nobles line!


Lord Summervale: You do not see that everyday! The Nobles line was spread to prevent a quick strike, and the Cheese-ballerz led by the Munster of the Midway and Pepper Jack; the Storm Vermin have slammed it up the gut!

Mad Johan: It looks like the cage is starting to collapse, that is why Skaven teams are better at the quick strike game....

Lord Summervale: Not so fast Johan. Horrible Havarti has flicked it out Rotten Rochefort. He has found the flat and easily runs in for the score!


Mad Johan: ...those dirty rats!

Lord Summervale: It is late in the second half and the Cheese-Ballerz are kicking it to the Nobles. The kick is short, but Gav Thorpe manages to recover it. He and Jervis take it deep into their territory. The rats desperately try to break through, but it doesn't look like they will be able to get there in time.

With that, time runs out and the Nottingham Nobles have won their first match! The crowd goes wild.


Mad Johan: It just goes to show, if half your team isn't in the injury box, it helps you win!

Lord Summervale: Thanks for watching this exhibition match between the Nottingham Nobles and the Skaven Cheese-ballerz on Cabalvision IV. The Nobles have their first win of the pre-season by a score of 3-2. Nuffle be praised.

We now turn you over to the final moments between the Dwarf Rock-N-Rollers and the Chaos Goat Herders all ready in progress.... bye-bye!