Monday, December 10, 2018

Heirs to Empire: Battle Report- Perdiccas at the Nile

After Alexander's Death, a dispute broke out between the foot officers and the cavalry officers over who should rule the Macedonian Empire. The officers of the infantry wished it to be Alexander's half-brother who was rumored to be an imbecile. The Cavalry officers supported the unborn child of Alexander's Persian wife, Roxanne. Through treachery, the Cavalry officers were victorious int eh dispute. This led to the raising of Perdiccas to regent.

As regent, Perdiccas ruled on behalf of Alexander's infant son. In theory, he ruled the Diadochi. However, many of the most powerful men across the new Hellenistic world would not settle for anything less than total power of their own. In a bid to seal his own power base, Ptolemy stole Alexander's body and spirited it away to Egypt. This was a great affront to the regent's power and Perdiccas prepared to march.

However, he could not leave the rest of the Empire undefended. In Turkey, he appointed Eumenes of Cardia to defend the region with the help of Neoptolemus the Satrap of Armenia. This was to protect the fertile heartland of the empire from the scheming and violent Craterus and Antipater in Europe. The results of his efforts can be seen in the battle reports here and here.

Perdiccas himself raised an army and marched for Egypt. Ptolemy drew up his army on the opposite side of the Nile and waited to face his foe. The Nile had traditional been a key strategic asset in protecting Egypt and Ptolemy banked on its help once more. The Nile was prone to flooding and had a strong current. Perdiccas tried to use his elephants as breakwaters in the waterway to allow his troops to cross. However, the footing was unstable. The fording of the river failed and a considerable number of lives were lost.

Angry at this unnecessary loss of life, Perdiccas was approached by a delegation of his officers in his tent. What exactly transpired is unclear, but Perdiccas himself was killed. Soon the invasion of Egypt was canceled and the attempt recover Alexander's body abandoned. Today's battle is an attempt to “re-fight” the battle that never happened between Perdiccas and Ptolemy. It is a great 'What-If” scenario as the following 6 Wars of the Diadochi may have been very different if the official regent of Alexander had lived, Alexander's body restored to Macedon, and the Silver Shields stayed within the loyalist camp.

This battle is a “What if” battle. This assumes that Perdiccas and Ptolemy did have a battle at the banks of the Nile. Instead of a failed crossing, this battle will be a forced crossing where Perdiccas is trying to force his army across the Nile in the face of Ptolemy's resistance. The winner will earn the right to keep Alexander's body as a talisman of legitimacy of rule.

The Forces:

Perdiccas-
Left Wing:
Epilektoi Cavalry- Seleceus

Center:
Silver Shields- Antigenes
Elephants
Bronze Shields

Right Wing:
Companion Cavalry- Perdiccas

Total Point- 54

Ptolemy-

Left Wing:
3 Archers

Center:
Bronze Shield
2 White Shields

Right Wing:
Epilektoi Cavalry- Ptolemy
Asphract Cavalry

Total Points- 54

Mission:
This will be a Forced Crossing by Perdiccas against Ptolemy. The objective is for Perdiccas to get 10 points off the opposite board edge in 8 turns. To make the game more like the historical situation, we will be placing a river down the middle of the board. It will be considered dangerous terrain. Nearby are various fields since the Nile valley was a fertile farm land.

Set-up:
For this battle, I am sure that the Silver Shields were in fact with Perdiccas. We know this since one of the officers, Antigenes; that helped assassinate Perdiccas. Therefore, I am 100% sure that the Silver Shields were there with him. We also know for a fact that Perdiccas had War Elephants with him as they were a key component of his plan to ford the Nile.


Beyond the details above, we have no idea what either army was composed of. Since no battle actually occurred, no one bothered writing it down. Therefore, we will need to guess at the organization of the rest of the armies. Since Phalanxes are the core of Macedonian and Successor armies, we can assume they were the core of these armies as well. Ptolemaic Egypt was known for their efforts to raise a native Phalanx, although the White Shields here are probably too soon. In addition, ancient Egyptian armies were well known for their archers so it makes sense that Ptolemy's force would have a strong archer contingent. Finally, all early Hellenistic armies also relied heavily on cavalry to try to mimic Alexander's successes, so both armies need a strong cavalry element.
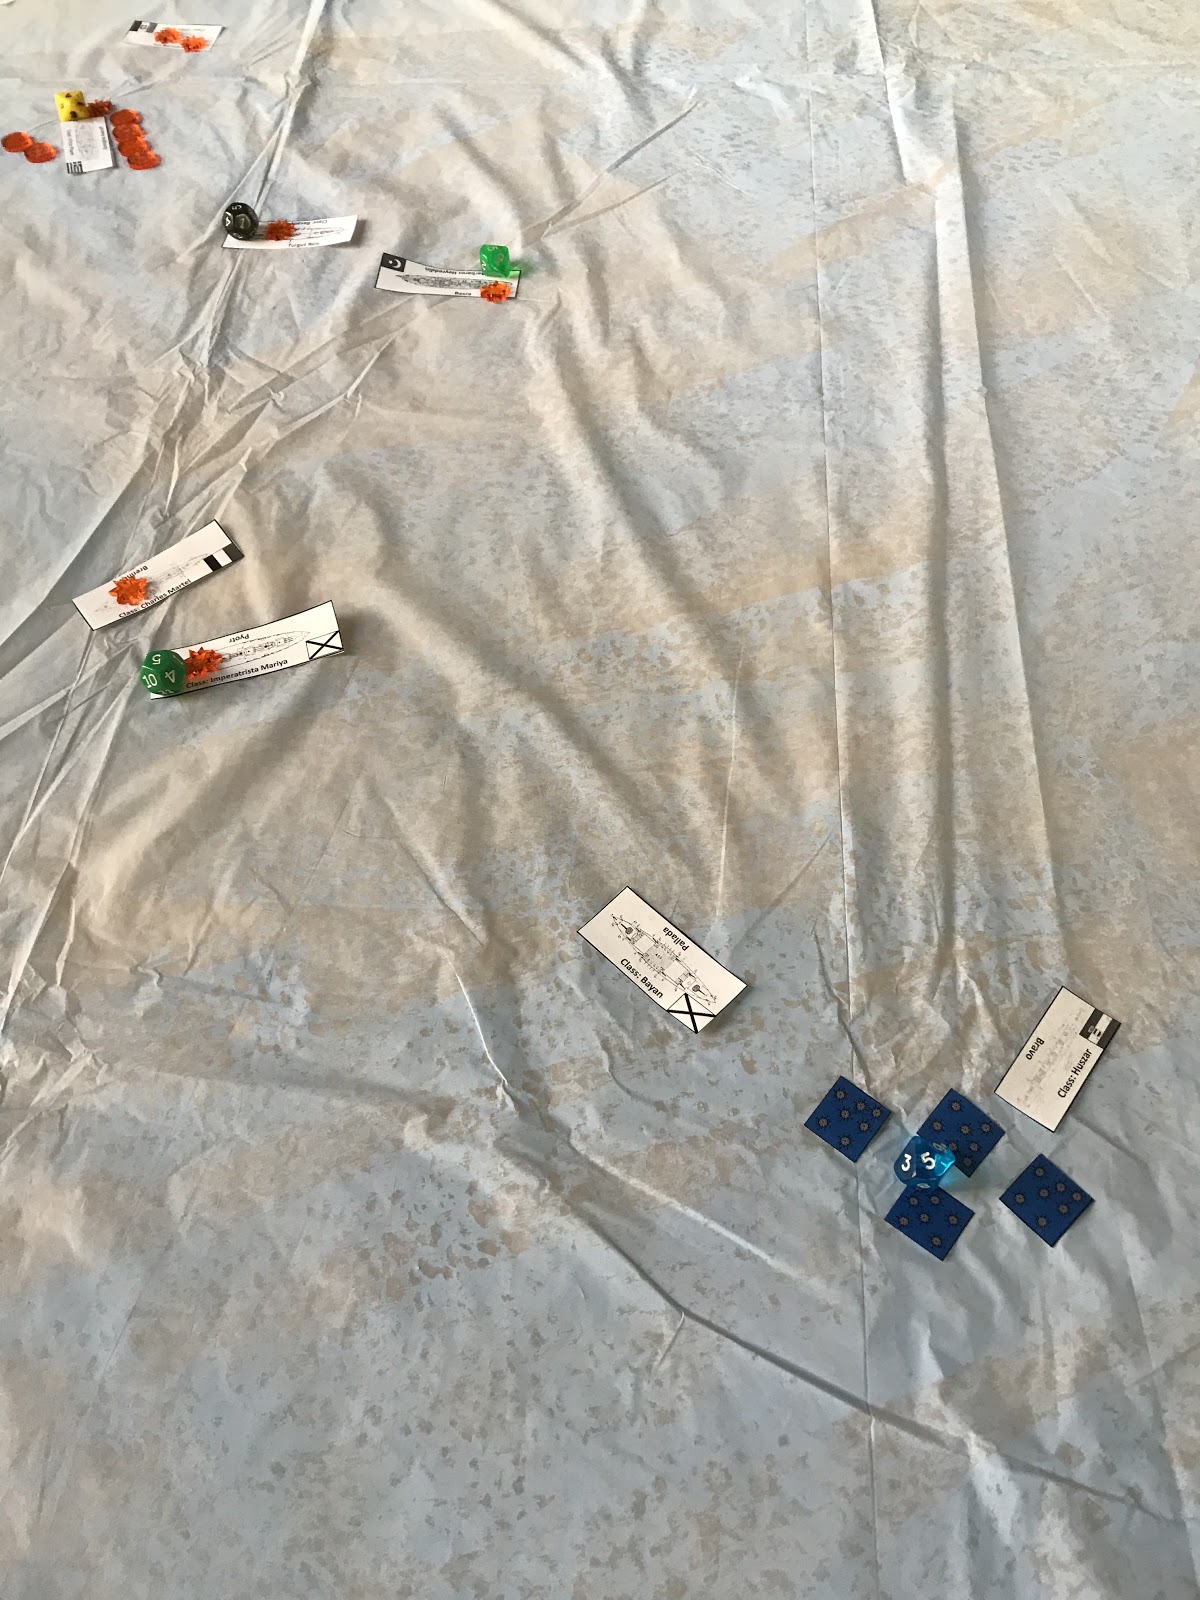

In this case, the Ptolemaic are on the right side of the river. The Perdiccans are on the left side of the river.

Turn 1:
Ptolemy and Perdiccas both get their Commander's Gaze tokens for each wing. Ptolemy has the advantage, but his strategy is to deny the river crossing. Ptolemy bids all of his Commander's Gaze to go first and beats Perdiccas for Initiative.

Ptolemy's army moves up to contest the potential crossing points. Perdiccas' force also moves forward, with the right wing Epilektoi cavalry holding back.


Turn 2:
No one bids any Commander's Gaze, and the roll off has Ptolemy win.

The Archers move up to take position on the Ptolemiac left to cover the crossing with firepower. On the Ptolemaic right, the Asphract Cavalry get aggressive break into open order and cross the Nile. The Epilektoi move up to support them. However, Perdiccas with his Companion Cavalry successfully interripts and manages to charge the Light horseman with his Companions. The Companions make short work of the light cavalry and send them packing back to Egypt. However, the Ptolemaic Asphracts do cause 1 courage loss to Perdiccas and his bodyguards. The troops of the Epilektoi cavalry sees the Asphracts routed and are Disordered.


The rest of Perdiccas army moves up, with the War Elephants taking the lead. The remainder if the Ptolemaic army stays in place, ready to push back any enemy unit that tries to cross the Nile. The right side White Shields pivot in case they need to repel the Companion Cavalry.


Turn 3:
Both Commander's bid 3 Commander's Gaze tokens to try to win the initiative. Perdiccas opts to increase his bid 1, and Ptolemy declines to match it. The Perdiccans go first.

The Regent harangues his troops to increase them back to 5 Courage. He then declares a charge across the Nile at Ptolemy's Epilektoi on the other side of the river. He uses all of his Commander's Gaze to get the charge off, and the enemy cavalry can not counter-charge due to disorder. A swirling cavalry combat erupts on the far side of the Nile, where the Companions get the upperhand and cause 1 Courage loss.

The rest of the Perdiccan army begins to move up to the river bank. The Elephants begin to cross, but the rushing river quickly disorders them and causes them to lose 1 Courage. Seleceus Epilektoi Cavalry rushes across the river with a charge and is also disordered, but they engage a unit of archers. They impact them heavily, but the archers hold.


The remaining archers open fire and pin cushion the War elephants in the river, causing 4 hits and reducing them to 3 Courage left.

Meanwhile, a unit of White Shields moves tie up the Companions if they break through the Epilektoi cavalry.

Turn 4:
Perdiccas has the advantage in Commander's Gaze and uses it to guarantee he gets initiative by bidding 5, to 0. Perdiccas begins to activate first.

With the help of Commander's Gaze, Seleceus routes the first Archer unit. However, he is too far away to push back into the next unit.

Ptolemy uses a Commander's Gaze to try to interrupt, and is successful! A Ptolemiac White Shield Unit charges in and joins the battle against the Companion Cavalry on the Perdiccan Left. The battle is still not decisive even with the help, and the Ptolemaic forces are forced back, with both sides on the edge of defeat.


The Archers that remain open fire on the War Elephants and reduce it to a single Courage point left. The rest of the Perdiccan center rushes across the Nile with no further casualties, but they are all disordered.

The Archers engaged by Seleucus rout, and one of the remaining ones is shaken.


Turn 5:
This time Ptolemy wins 4 to 2 on the bid for Initiative.

Winning is critical for Ptolemy as his Bronze shields rush into the flank of the disordered Silver Shields supported by their White Shield allies. They hit hard, and the Silver Shields are pushed back into the river with 2 Courage left, and the Ptolemaic units are down to 4.

Seleucus tries to interrupt, but fails the roll-off. The disordered Archer unit rallies. They then take aim and fire at Seleucus' unit. The Archers open fire and rout the War Elephants and reduce the Epilektoi Cavalry 1 Courage to 3 total left.


The fight on the Perdiccan left has bogged down as the Cavalry and Pikeman duke it out. The fighting is pushed back into the Nile. Both units are on the brink of exhaustion.

Seleucus and his Epilektoi charge into an Archer unit, and the second unit decides to support. They reduce the Archers 1 Courage, but they all hold.


Turn 6:
Perdiccas wins the Initiative bid and hopes to use his Bronze Shields to save his Silver Shields in the center. It is a risky move, but winning initiative allows him to get in a flank charge on the big melee.

Decisive battle is raging across the board. Perdiccas decides to start with the center melee. The combat in the center is less than decisive as both sides only lose 1 Courage in the swirling battle.

On the Perdiccan left, the battle comes to a close as both the Ptolemaic and Perdiccan forces are exhausted and break away. Both sides retreat away from the battle, taking their Diadochi with them.

The Archers and Seluceus combat is also indecisive as both units lose 1 Courage.

With the loss of the Diadochi's, both sides take a collapse test.

Turn 7:
Neither sides bids, saving the Gaze for re-rolls of combat. Ptolemy wins the roll-off and decides to start in the middle.

In the center, the Ptolemaic Bronze Shields supported by the White Shields manage to see off the Silver and Bronze Shields of Perdiccas and cause them to withdraw from the battle and back across the Nile.


The Archer and Epilektoi battle remains indecisive as both sides again lose 1 Courage.

Turn 8:
It is clear the Perdiccans have lost, but we decide to finish off the battle between Seleucus and the Archers on the right flank. Since the Archers are now disordered, they lose the combat but remain unbroken.

Surveying the rest of the battlefield, Seleucus withdraws back to the Perdiccan camp.


Conclusion:
Well, Egypt always was a tough nut to crack. Historically, Perdiccas' army never made it across the Nile, and it looks like if Ptolemy challenged the Perdiccan forces at the crossing they wouldn't have made it anyway. I think we can assume that after the results of this “What If” battle, Perdiccas would still have been assassinated at the edge of the Nile and history would have carried on as it did.

The decisive component of this battle was trying to cross the dangerous river itself. The War Elephants and the Asphracts both lost Courage in the process, making them less effect fighting units. In addition, once troops got into the river they became disordered. The troops never got a chance to re-group and the 5+ Target Numbers started to tell in the combats. Companions, Silver Shields, and other elite units struggled.

In addition, I lost track of the objective. I needed those mobile cavalry units free to get across the board, but instead I let the Companions and Epilektoi get dragged into costly combats on the fringes instead of maneuvering around or away from them. I should have let the push in the center start and then swung Seleucus cavalry around the archers and towards the back of the board and tied up his cavalry with my Companions. Oh well, my opponent baited me with “weak” units and I ended up getting tar pitted when I needed speed to win. My strength was speed and elite units, but I did not play up to their strengths. The Perdiccan/Eumenes forces have won most of the battles they have fought as an elite force, but it shows that playing to the objectives is the key to victory more than army builds. That is a good thing in my mind.

With Perdiccas the regent of the Macedonian Royal family dead, is their any hope to rebuilding Alexander's Empire once more? Is there no legitimacy any longer or is it only a battle between strongmen?

Monday, December 3, 2018

Battle Report: Castles in the Sky- Balkan Uprisings Campaign- The Second Battle of Salonica


The Ottoman ground forces have been pushing their way back into Europe. They have planned an offensive to re-take the Greek city of Salonica. The generals had requested the aid of Admiral Al-Reis to support the attack with a heavy bombardment of the Balkan lines. Admiral Al-Reis was reluctant to help, but an order from the Sultan overrode his objections.

In the meantime, the Balkan League fleet was also assembling near the city. With the Balkan ground troops being slowly pushed back, Capt. Aube counselled Admiral Ivanov that the next obvious objective for the Ottoman’s would be Salonica. Therefore, Admiral Ivanov began to mass nearby to help repel the ground offensive and attempt to smash the Ottoman League forces in a decisive battle.

The stage was set for one of the largest air clashes of the Uprising.

The Ottoman League has seen their lead slip in the last battle, but they are one decisive victory away from winning the campaign. They still have a strong lead and seem to have the edge in resources. Admiral Ivanov of the Balkan League has been given clear instructions by the Tsar to try and achieve the Russian dream of access to the Mediterranean via the Dardanelles at any cost. Both Admirals reveal their strategy for the turn, and the Balkan League is Offensive, while the Ottoman’s switch to the Defensive.

Forces

Balkan League: 48 Armor Points
Russian
Imperator Pyotr Captain: Pavel Ivanov Command: Flagship- 1
Class: Imperatrista Mariya Category: Battleship Armor: 8
Experience: 6

Pallada Captain: Matija Yumashez Command: 1
Class: Bayan Category: Cruiser Armor: 7
Experience: 2

Albatros Captain: Feliks Golokov Command: 3
Class: Krasnoye Category: Gunboat Armor: 5
Experience: 5

Kondor Captain: Nikolay Konovalov Command: 3
Class: Krasnoye Category: Gunboat Armor: 5
Experience: 4

French
Brennus Captain: Theo Aube Command: 4
Class: Charles Martel Category: Heavy Cruiser Armor: 8
Experience: 13- Blow Smoke

Primauguet Captain: Jean de Vienne Command: 4
Class: D’iberville Category: Cruiser Armor: 7
Experience: 13- Marksmen

Greek
Georgios Averoff Captain:  Sofoklis Dousmanis Command: 3
Class: Vettor Pisani Category: Armored Cruiser Armor: 8
Experience: 5

Ottoman League: 48 Armor Points
Ottoman Empire:
Sultan Mehmed II- Fatih Captain: Seyid Al Reis Command: 3- Flagship
Class: Sultan Osman-I Evvel Category: Battleship Armor: 9
Experience: 13- Disciplined Crew

Basra Captain: Hasan Rami Pasha Command: 2
Class: Barbarous Heyreddin Category: Heavy Cruiser Armor: 8
Experience: 6

Turgut Reis Captain: Abdul Kadir Command: 1
Class: Resadye Category: Battleship Armor: 8
Experience:

Austro-Hungarians:
Prince Eugen Captain: Anton von Sterneck Command: 2
Class: Tegethoff Category: Battleship Armor: 9
Experience: 8

Bravo Captain: Anton Pock Command: 4
Class: Huszar Category: Destroyer Armor: 6
Experience: 5

Italians:
San Bartolomeo Captain: Paolo Revel Command: 1
Class: Vettor Pisani Category: Armored Cruiser Armor: 8
Experience: 13- Airship Handling

Mission:
The Balkan League will be the attacker in a Fleet Action between the two fleets near Salonica. The board is covered by a layer of clouds at Altitude 3. This battle will last 8 turns, and then the fleet with the highest remaining Armor points is the winner. Severe damage counts as a -1 to armor points.

Set-up:
Both fleets are set-up on opposite board edges. The Balkan League is to the west, while the Ottoman’s are arriving from the East. These are the long board edges respectively. The Ottoman League has brought a number of their heavy hitters to the party, including their latest reinforcements in the form of the Turgut Reis a Resadye class battleship.

The Russian gunboats, the French cruiser, and the Greek cruiser are on the extreme left flank of the Russian force, acting as a smaller flotilla. The Greek, Captain Dousmanis is placed in command of that wing of the fleet. They are moving at altitude 3 for stealth. Meanwhile, the rest of the fleet is center right on the board, and arriving in echelon with the Imperator Pyotr leading the way. Their slanted approach should allow them to get broadsides in early. They are at Altitude 5 and Speed 4.

The Ottoman force is stretched across the board with the battleships anchoring their right steaming forward, and looking for the right time to make the turn into line of battle or alternatively use their better armor and guns to simply close and Melee with the Balkan Fleet.


Turn 1:
Unsurprisingly the Ottoman's win initiative and have the Balkan fleet act first. Admiral Al-Reis is eager to see how the Balkan attack unfolds. The Ottoman's have 3 orders, with the Balkan fleet 1.

Movement:
The Balkan fleet maintains its speed and altitude as the battle approaches. The smaller flotilla stays in the clouds for cover. Meanwhile, The Ottoman's also steam forward, trying not to let the enemy in on their plan to early. Admiral Al-Reis orders the Sultan and Princ Eugen to go All Ahea Full but the Austro-Hungarian ship fails its command roll and does not respond. However, the Sultan surges ahead to speed 7. In addition, the Austro-hungarian destroyer dives into the cloud cover and breaks for the main Balkan fleet using its greater speed and maneuver ability.

Shooting:
The fleets are still closing and not in range.

End:
No action.

Turn 2:
Admiral Al-Reis again beats Admiral Ivanov. The Ottoman's get 2 Commands to 0 for the Balkan fleet. They elect to allow the Balkan fleet to go first again.

Move:
The Balkan main battleship line begins to turn to the west. The Pallada speeds up to potentially chase off the Austro-Hungarian destroyer. Meanwhile, their smaller flotilla forces are still approaching the Ottoman's in the clouds to limit the enemy firepower, a trick that they learned from the Ottoman League.

This time, the Prinz Eugen gets the order and the stoke the boilers. The ship jumps forward to keep up with the Turkish battleship. The Turkish Heavy Cruiser's begin to slow to straggle out a battleline, while the Italian cruiser speeds up to try and get across their bow and out of the way of the Balkan big ships.

Shoot:
The Balkan League can shoot first. However, the Ottoman League fleet is out of range still of the main heavy battleline. The smaller flotilla are still in the clouds so their shooting is also limited.

Ottoman's knowing they are out of range, the Ottoman fleet is content to hold fire and prepare for the big battle to come.

End:
None

Turn 3:
Both fleets score 1 Command each. This time the Ottoman League decides to move (and then shoot) first.

Move:
This time, the Ottoman center (Turgut Reis and Basra) proceed forward leisurely, allowing the Italian Cruiser to pass in front of them towards the small flotilla. Meanwhile, the Ottoman League battleships drop into the clouds and turn into the flotilla of oncoming smaller ships. The Destroyer continues to go very wide of the Balkan heavies.

The sudden interest from the Ottoman heavies cause the Balkan flotilla to suddenly scatter! The French Primaguet dives down below the clouds to Alt 1 and readies her air torpedo launchers. The two Russian gunboats try to veer way from the Ottoman flagship. Meanwhile, the Greek Armored Cruiser speeds up and heads for the center. The Balkan Flotilla looks pretty broken up.

Shooting:
Despite the aggressive maneuvering the Ottoman and Austro-Hungarian Battleships do not have a clear line-of-sight or altitude on the Balkan targets. Admiral Al-Reis curses in frustration as the smaller and lighter craft evade his big guns. Meanwhile, the heavy guns of his core ships are out of range of the oncoming Balkan League heavies.

Frightened by the sudden interest of the enemy Battleships, Captain de Vienne of the Primaguet to open fire with the full battery of Air Torpedoes at the Ottoman flagship. The Sultan plows through the incoming ordinance with a combination of armor and point defense. Two strays even make their way to the Prinz Eugene, but they are batted away by point defense weapons.


End:
All friction is removed in the end phase.

Turn 4:
The Ottoman League earns 1 Command to the Balkan 0. This time, the Ottoman's decide to let the Balkan League go first.

Move:
The Balkan Flotilla is still desperately scattering with the Krasnoye gunboats dropping to 1 and the Primaugaut trying to steam away at low altitude. Their flight brings them into clear view of the troops on the ground as they are below the cloud banks. The Georgio Averhoff breaks for the center and a possible chance to use her broadsides to help the Balkan Heavy line which is turned back and heading towards the Ottoman Center as fast as possible.


The Sultan Il-Fatih drops to altitude 2 in pursuit of the smaller Balkan ships. Admiral Al-Reis orders his crews to clear for action and Lock-on to the French cruiser. Captain von Sternek follows close behind and drops into the cloud cover. His spotters call-out the position of the Greek cruiser astern. The Italian San Bartolomeo also drops into the clouds to engage the Greek ship.

Meanwhile, the Ottoman Turgut Reis and Basra slowly steam forward and prepare to engage and delay the Balkan big ships. The Bravo Destroyer turns about and prepares to harass the Balkan big ships with a mine run.


Shooting:
In desperation, the French Cruiser and Russian gunboats open fire on the Ottoman Flagship causing three bursts of friction. The lack of Commands means the Primaugaut can not reload ordinance.

The Georgios Averhoff fires on the closing Italian Armored Cruiser and manages to find her with several shells, but fails to cause serious damage. Instead, the ship takes 2 friction tokens.

Long range fire from the Brennus and Imperista Pyotr manage to cause friction on the Basra, but no true damage. Return fire from the two Ottoman ship's hit nothing and fell harmlessly to the earth below.

The Prinz Eugen and San Bartolomeo had the poor Georgio Averhoff caught between them They opened fire with their cannons. Even through the cloud cover and altitude difference many shells found their mark. The Armored Cruiser took 6 friction markers and 3 hits.

Finally, the Locked-On Sultan fired at the Primaugaut at close range and with 1 altitude difference. The Sultan needed 6 to hits, but the Locked-On Command paid off. The weaker cruiser took 3 friction hits and 3 real hits.

End:
Resolve Hits-
The Georgios Averhoff lost 3 armor points (to 5) and her Starboard light batteries
The Primaguaet lost 3 armor points taking her to 4. Ouch!

Remove friction the Ottoman's remove 1 from the Sultan il-Fatih. The Balkan League removes 3 from the Primaugaut.

Turn 5:
The Ottoman admiral Al-Reis cotinues to out command Ivanov with 2 success to 0. No commands for the Balkan League again! The Ottoman's again allow the Balkan forces to move and then shoot first.

Move:
Damaged French Cruiser uses her speed to try and escape the Ottoman ship and circle back on the tail of the Ottoman forces fleet, however she is unable to reload her torpedo tubes as no commands are available. The two Krasnoye gunboats try to cover her escape. The Georgios Averoff is stalled due to friction. Meanwhile, the Balkan heavies begin to form up to batter the Turgut Reis and Basra.

The Ottoman center continues slowly trudging forward, ready to duke it out with the Russian and French ships. The San Bartolomeo moves in to trade broadside fire with the Georgios Averoff while the Prinz Eugen begins to turn to get behind the Greek ship and possibly back into the fight.

The Sultan il-Fatih swings around after the French Primaugaut and Russian gunboats. However, friction slows her pursuit. The Friction markers make it unable for her to take Commands.

Shooting:
The Balkan League gets to fire first. The Krasnoye gunboats fire off their Air Mines at Altitude 2 to try and dissuade the Ottoman Flagship from chasing them.

The duel between the Italian and Greek Armored Cruiser has the Georgios Averoff miss all their shots due to friction and combat damage.

The Pytor and Brennus fire on the Turgut Reis. The Russian flagship manages to land 2 friction markers. The Brennus' forward guns also manage to cause another friction marker. Admiral Ivanov had been hoping for better results from his big guns.

The Ottoman League decided to start their shooting with the San Bartolomeo. The fusillade of broadsides causes the Greek Cruiser to take 2 more friction markers and 1 more hit. The Georgios Averoff is in rough shape.

Unfortunately the Prinz Eugen is out of range or altitude of the Greek Cruiser or Russian Gunboats. However, the Sultan fires on the Kondor with her broadsides. The Russian takes 3 friction markers and 2 hits.

Now the Ottoman Turgut Reis and Basra get to respond. The Basra fires on the Russian Flagship. The main bow heavy battery had a problem with the firing mechanism and is out of action due to a failed ammo roll. The Port light battery also suffers a malfunction. The Turgut Reis manages to land 3 more friction markers on the Russian Flag to give her 5 total friction markers.


End:
Resolve Hits:
The Kondor loses 2 armor, has its Point defenses destroyed, and the rudder jammed.
The Georgios Averoff loses another armor point to 4.

Stalls/Sinking:
Georgios Averhoff drops 1 altitude due to stall from friction.

Remove Friction:
The Ottoman League removes two from the Basra, while the Balkan League removes 4 from the Georgios Averoff to avoid losing altitude due to stalling.

Turn 6:
Ottoman's score 2 Commands to the Balkan 1. The Ottoman's decide to let the Balkan League go first again.

Move:
The Primaugaut manages to reload ordinance and raises back up into the cloud banks for cover. The Albatros follows into the clouds, but the friction and damage to the Kondor keep her flying more limited.

The Georgios Averoff manages to limp forward, but can not regain the cloud bank for cover.

The Pallada breaks off to deal with the stalking Austro-Hungarian destroyer. Meanwhile, the Brennus overtakes the Imperator Pyotr who is floundering with Friction markers.
The Prinz Eugen uses a command to Come to a New Heading and swings around back to pursue the Greek Cruiser. The San Bartolomeo also pursues and begins to circle her.

The Turgut Reis and Basra continue to face-off with the Brennus and Pyotr.

Shooting:
The Pirmaguat does not have LOS to the Basra or Turgut Reis due to the cloud bank it is in. Therefore, it can not fire its torpedo barrage.... yet. The Georgios Averoff also does not have a shot due to fire arcs and altitude. The Kondor does get an unexpected popshot at the San Bartolomeo but misses.

The Imperator Pyotr fires at the Basra. Again, she does not land a telling hit and instead only gets three friction markers. The Brennus fires her bow Air Torpedoes at the Basra, but her PD takes them out easily. The rest of the Brennus' guns add 2 more friction markers on the Turgut Reis.

The Pallada can't get a bead on the Austro-Hungarian destroyer as it gained too much height too fast.

The Bravo Destroyer launches a bunch of air mines behind it at alt 5 to dissuade the Pallada from pursuing it further.


The Sultan Mehmed Il-Fatih's broadsides cause three more hits on the stricken Kondor. That should reduce her to 0 armor.

The San Bartolomeo manages to hit the Georgios Averoff with another broadside and causes 1 hit and 2 friction markers. The forward battery of the Prinz Eugen also manages to sink a shot into the heavily damaged Georgios Averoff.

The Turgut Reis stern battery is out-of-ammo due to a failed ammo check. However, it does land another friction marker on the Brennus. The Basra's port medium battery also runs out-of-ammo and fails to hit the Brennus.

End:
Resolve Hits:
Kondor the armor is reduce to 0, the bridge is destroyed, and ultimately it explodes.
Georgios Averoff loses two more armor points to bring her to 2.

Stalls/Sinking:
The Pyotr sinks into the clouds at altitude 3 due to a friction stall.

Repairs:
None

Friction:
Both sides roll a 6 for friction. The Ottoman's reduce the Friction on Turgut Reis and Basra by two to avoid stalling. Two are also removed from the San Bartolomeo to bring it back to normal.

The Balkan League removes it completely from the Brennus and Pyotr essentially writing off the Georgios Averoff as lost.


Turn 7:
Ottoman's score 2 Commands to the Balkan 1. This time the Ottoman's will go first.

Move:
The Bravo destroyer fails to reload ordinance as it moves forward. The San Bartolomeo and Prinz Eugen circle the stricken Georgios Averoff. The Basra and Turgut Reis keep plodding across the sky. Admiral Al-Reis and his flagship are out of the fight for now on the far edges of the battle.

However, the Brennus, Primagaut and Pyotr all move in to barrage the Basra with firepower. In addition, the Pallada chases down the Bravo.

Shoot:
Prinz Eugen fails to lock-on to the Georgios Averoff. Combined fire from the Prinz Eugen and the San Bartolomeo blow the Georgios Averoff sky high. The captain had begun evacuating the ship, so some sailors escaped, but most were killed in the massive explosion.


The Basra sees the Primaguet try to get the drop on her. Her port weapons may mostly be out of ammo, but not the starboard yet. She fires them.  This causes 2 friction markers and spares her from the Torpedo barrage.

The Turgut Reis targets the Brennus and fires. Several shells smash into the ship to cause friction, but no damage.

The return fire from the Brennus and the Pyotr manages to inflict 6 friction markers on the Basra and 1 actual hit. The majority of the damage coming from Admiral Ivanov and his flagship.

The Pallada also chase down the Bravo and puts a couple shells on target. The Destroyer takes 1 hit and 1 friction marker.


End:
Resolve Hits:
Georgios Averoff is overkilled and explodes killing the majority of the crew.
Basra is crippled and begins to sink from a single well placed hit!
Bravo loses 1 armor.

Stalling:
Basra drops 1 altitude into the cloud banks.

Repair:
None

Friction:
Ottoman's get 5 and Balkans get 2. Turgut Reis removes all her friction markers, 1 from Bravo, and 1 from the Sultan. The Balkan League removes 1 from the Primaguet.

Turn 8- Final Turn
Both sides score 0 Commands for the final turn. Ottoman's choose to let the Balkan League move and shoot first.

Move:
The Pallada tries to cut-off the Bravo, but it easily out maneuvers the cruiser and drops below firing range.

The Brennus and the Pyotr look set to pour fire into the crippled Basra. The Primaguet tries to get the torpedo drop on the Turgut Reis.

The Prinz Eugen and San Bartolomeo seem out of the fight, while the Sultan moves to try and get some long range pot shots at the French Cruiser.

Shoot:
The Primaugaut's torpedo attack pays off with one shot getting through and causing a damaging hit and landing three friction markers.

The Brennus fires at short range on the Basra. Since she is in the cloud bank at 3 from stalling, only short range shooting is effective. The French manage to land a good hit.

The Ottoman Turgut Reis returns fire on the French Cruiser. The return fire only causes friction markers. The Sultan uses her last main gun ammo on the French Primagaut cruiser but misses. Her light batteries manage to strike home and cause 1 damage.


End:
Resolve Damage:
Primagaut loses an armor point down to 3
Turgut Reis loses a single armor point
Basra loses another armor point to 6

The rest is unimportant since this was final turn.

Conclusion
The decisive battle of the war was fought above Salonica. With the Ottoman League's convincing defeat of the Balkan League fleet, the Czar's support for the Balkan Uprising collapsed. Too many Russian volunteers had been lost and it was clear that the Ottoman's were only growing in strength in Europe. The Russians were not the only ones to lose heart, for the Greeks themselves began to see the effort as hopeless for the same reasons. Admiral Al-Reis and the Ottoman propaganda ministry made great use of the destruction of the Georgios Averoff.

Days after the fleet battle above Salonica, the Concert of Europe led by Sir Edward Grey of Great Britain pushed for peace. The Russians and the other Balkan powers were glad to attend. An armistice immediately went into effect. With the help of their temporary allies in Italy and Austro-Hungary the Ottoman's were able to have the borders of their empire restored to where they had been previously. This was a great victory of the “Sick Man” of Europe. The Peace of Salonica was signed a mere month after the decisive battle.

Almost as soon as the ink dried on the document, the Ottoman League collapsed from internal disputes. Italy and Austro-Hungary had too much to gain by antagonizing the Ottomans and nibbling at the edges of their empire. Soon, the Ottoman's, Italians, and Austro-Hungarians were back to their old tricks in the Mediterranean. The Balkan League managed to last beyond the defeat, as the need to expand pan-slavism and the Russian/French entente were too great. Admiral Ivanov was recalled back to St. Petersburg in disgrace, the Russian ambitions to reach the Mediterranean were squashed. Admiral Al-Reis soon fell afoul of the politics of the Sultan's court and was assigned to Libya. Almost immediately, he came into conflict with the Italian forces and colonials in the region. The Balkan people themselves were not happy with the status quo, and it was only a matter of time before they would try to rise up again to throw off the Ottoman's control.

Well, the new Friction rules worked better. The adding of Friction became even more important as you could potentially stall an enemy and force them to lose altitude. If they lost enough altitude you could force a tough ship out of the battle. It did not happen this battle BUT it was a consideration when choosing when and where to remove Friction in the end phase.

I had hoped to complete the campaign before the end of the year. With this decisive victory by the Ottoman League 17 Armor to 4 we can call it a campaign. The campaign total ends at 7 to 2. The big turning point of the campaign was the decisive win in the initial battle and the loss of the Russian Admiral when his battleship exploded under him! From there, the Balkan forces were in a tough place.

You can read the rest of the campaign reports here: 


For this last battle, the Balkan League deployed particularly poorly. The Balkan Commander was hoping to distract me with his main line units and then snipe me with air torpedoes from the flotilla. He did not seem to consider that I would go for the Flotilla of light ships with my heavies instead of trying to go after his big ships. I guess it was a blind spot in his plan.

It might not have mattered. The Ottoman's had the upper hand in the campaign in heavy units, and I knew Admiral Al-Reis would consistently beat Admiral Ivanov in initiative. I could dictate the terms of the battle.

Going into this battle, I had an idea to change the activation method and create a chaining activation method to allow more uncertainty in activation and play to flow between players freely. However, after playing again, I realized that this new system I devised was over-engineering the whole experience. I think I will scrap the idea for this game.

One big mystery still remaining is how to make light units useful and not just a waste of armor points? I have not cracked that nut yet. Perhaps different scenarios that emphasize speed or allowing lighter units to add to a Admiral's Command rating for Initiative and Commands? I am not sure but am open to other people's thoughts on the matter.

Cross another 2018 goal off the list!