

The squad had landed from orbit via Storm Eagle less than 48 hours ago. They quickly set off from Imperial territory and crossed Baron's Rest on foot. They did not eat. They did not sleep. Their only focus was on avoiding the enemy, and closing on the target. They had made the journey at an incredible and unbelievable pace. Unbelievable to those who were not Astartes.
They bypassed the wreckage and destruction of the Ork camps in the plains below. They waited concealed until night fall, and they began their ascent. The light of Bunkra II's rising had all ready found them half way to the top of the Pointe.
Imperial Command had known for some time that Ork forces atop Look-out Pointe had been sighting and locating Imperial artillery, troop movements, air traffic, and naval traffic and reporting it back to their bosses. Using this intel, the Orks had been able to respond to operations carried out by Imperial forces. Their greatest successes being in countering anti-sub operations launched by Taskforce: Chalice. General Kurtz could not tolerate this Ork location to stay in operation, especially as Imperial Forces of Taskforce: Sword prepared to push south on Baron's Rest and push the Orks off the island for good. This early warning station had to be destroyed.
General Kurtz needed the best. General Kurtz had asked for Inquisitor Xanatos help, and together they petitioned the Adeptus Astartes, Space Marines; for aid. The Chaptermaster of the Panther's Claws was a personal friend of the Inquistors. A squad was assigned, deployed, and arrived within days. They had studied the intel en route, they came prepared. They deployed as soon as the Chartered Freighter carrying them arrived in Ammoriss near space.
Now, they were approaching the Ork observation camp on Look-Out Pointe. The squad took positions and waited. The Sergeant had clicked his comm to Taskforce: Sword's command frequency, and signaled they were in position with a series of clicks and static bursts. Within minutes, the reply came back in the same strange series of clicks and static.
"Execute."
This will be a game of Rampant Sun featuring the Imperial Space Marines vs. Skarbashz Boyz on Look-Out Pointe.
Forces
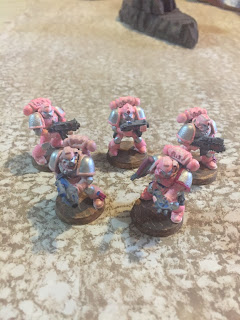
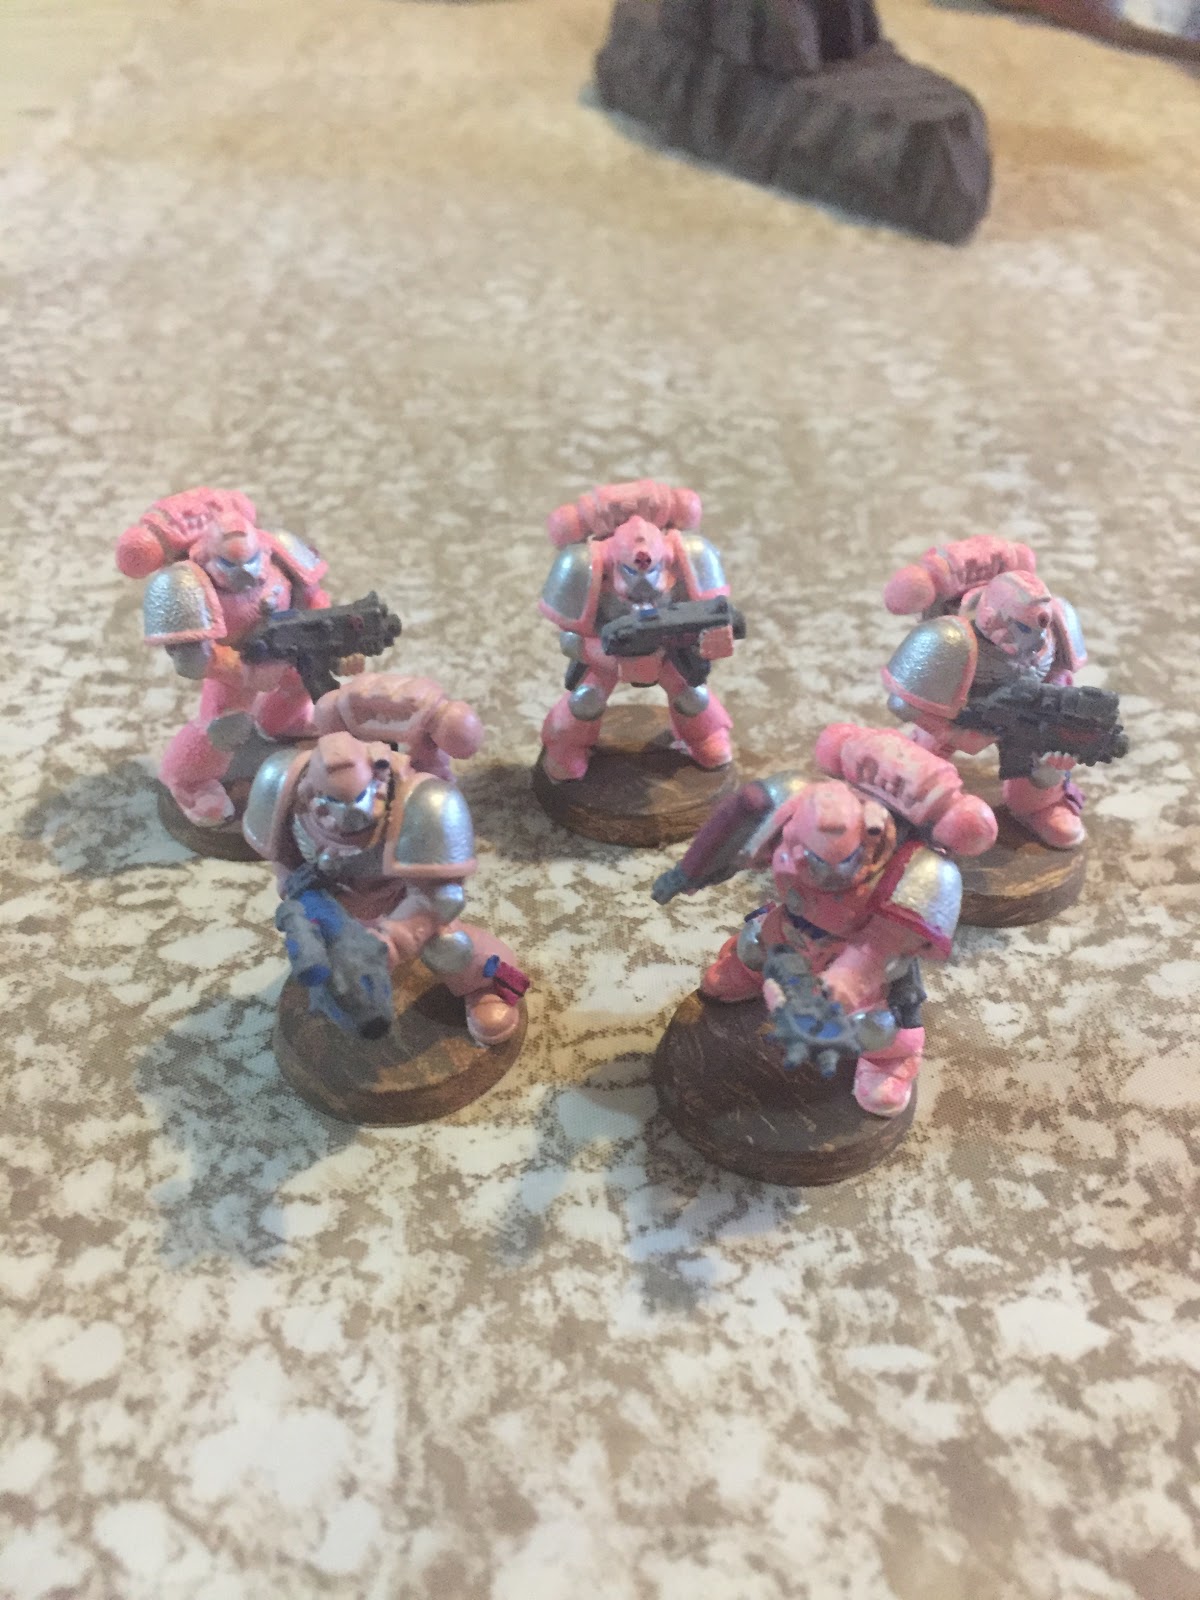
Panther's Claws
Sergeant- Elite infantry
--Combat Weapon, Enhanced Senses, Armored, Commander
4 Marines- Elite Infantry
--Enhanced Senses, Armored (1 w/Marksman, 1 w/Blast Weapon)
Ork Spotterz Mob
1 Nob- Regular Infantry
-- Combat Weapon, Fierce, Armored, Commander
4 Boyz-- Irregular Infantry
-- Fierce, Combat Weapons
2 Boyz- Irregular Infantry
-- Fierce,
5 Grotz- Irregular Infantry
Mission
This is an Ambush scenario. The Panther's Claws are trying to eliminate the Ork Spotterz squad and secure the top of Look-Out Pointe. The Orks are trying to get one or more of their number off the top of the Pointe and back to the Orks down below to raise the alarm.
This scenario has the following complications:
-Night Time
-Difficult Terrain- Moving between levels is Difficult Terrain
- Uphill Battle- To fire up at models above causes a -1 dice modifier to shoot.
Set-up
This battle is being fought on a 4x4 board. The table features several different terrain heights. The center is three layers of rocky terrain. The base of the board is one level, then there is a large hill, a second level to it, and then finally a peak to Look-out Pointe. Scattered rock outcropping dot the board.
The Panther's Claws can set-up on any table edge, and do so. The Ork Mob is placed on the third and second level clustered around the top of Look-Out Pointe.


Turn 1:
Keep in mind, it is night time. The Space Marines have gear that off sets the night time disadvantage, but the Orks do not. However, they have way more bodies.
Brother-Sergeant Tumas moves forward toward the orks. His auto-senses in his Power Armor easily illuminating them. He is accompanied by Brother-Specialist Maxim with his Plasma Gun. Brother Lucas on the eastern flank has a garbled command to move up, and is shaken while he tries to clear the comms. Play goes to the Orks.
An Ork Choppa boy moves off the peak and towards the Sergeant. However, his compatriot is confused in the darkness and is shaken. Play goes back to the Panther's Claws. However, it doesn't last long as Brother Cirus has comm issues as well and is shaken in the night. The darkness is playing tricks on both forces as the Orks are shaken again as well.
Brother Cassius is a marksmen, and he moves forward and fires on the closest Ork. The shots land close, but the Ork passes a morale check. All Marines have gone, so the Orks take over, now alerted to the enemy nearby.
Despite their Nob shouting orders to head for the South path down Look-Out Pointe, most of the Grots and several Orks were to confused by the sudden attack and shouting to do much of anything. Those that could tried to head south. The darkness and difficult terrain made the going slow.

Turn 2:
Both of the shaken Panther's Claws cleared their comms and readied themselves for battle. Brother Cirus has the Orks coming towards his position.

Brother Cassius is the closest available to respond to the Ork threat. He pivots and pulls the scope to his eye to make an aimed shot at the Slugga Boy moving towards Brother Cirus. The shots are enough to drive the Ork boy into retreat and shake him.
A few other Orks manage to move towards the South path as well, but most remain disoriented in the night. Even the bellowing Nob is momentarily confused. In addition to Orks heading towards Brother Crius, a Slugga boy makes his way towards Sergeant Tumas and Maxim. Maxim fires but fails to find the mark at the onrushing Ork.
Tumas pauses to decipher a garbled message from command. It sounded like Ork aircraft would be entering the combat zone soon. It was unclear if they had detected the attack as of yet. Time was of the essence.
Turn 3
The Panther's Claws did not have much time left to act. They needed to clean up the kill zone quickly. Brother Lucas began to move closer to the Ork camp, even though his way was blocked by high cliffs.
Orks were closing in on Brother Crius so he opened fire with his Bolter. His aim is true and the oncoming Ork boy is killed as a Bolter round explodes his head.

Sergeant Tumas relays the new orders to his troops, refocusing on the battle around him. Maxim also fires at the onrushing Ork with his Plasma gun. This time, the shots are enough to force the oncoming Ork to be shaken and forces him to retreat back towards his Mob.

Brother Cassius begins to move in to support Brother Crius as the Orks are clearly going to be heading his way.
Since the Marines all passed their command checks, play never moved to the Orks. It was their turn and they spent most of it re-organizing and pulling themselves together. That included the Nob who had gotten confused in the darkness. No one had a clear view of the attackers, so Orks started shooting wildly into the night. Those that could moved towards the South board edge.
Turn 4:
Brother Crius, Brother Lucas, and Brother Cassius all moved up to tighten the noose. That way, they would not be forced to retreat off the plateau due to enemy fire.
Brother Maxim finally took out Ork he had been shooting at with a direct hit. Th Ork was brought low. This gave Sergeant Tumas time to approach the base of the next cliff face to begin his assent towards the enemy commander.

Play did not revert to the Orks due to a Command failure, so they are all going now. Several orks and Grots continue their rush towards the South side of Look-Out Pointe. However, a few particularly stupid Grots are caught up on the top of the Pointe scurrying around for cover instead of following orders.
One of the Sharp-eyed Shoota Boyz at the top of the Pointe catches sight of Sergeant Tumas moving in. He yanks up his Shoota and unloads in a very bright and very noisy burst of shoota fire. Enough lead falls around the Sergeant that he falls back into cover, shaken.

Another Slugga Boy at the base of the rocks sees Brother Cassius and charges him with a ferocious roar. He wildly swing his chainsaw like blade!

The Marine easily side steps it and slams the butt of his bolter into the Ork's face. The Ork re-thinks his attack and stumbles back, shaken as well.

Turn 5:
Brother Cassius quickly pulls his bolter back to his shoulder, aims and fires at the Slugga Boy that attacked him. As he is a Marksman, the shots find their mark and splatter the Ork's head across the rocks behind him. Another target down!

Heartened by the support on his flank, Brother Crius fires a hip burst at the oncoming Ork Shoota and forces him to scamp back into cover. The Ork is shaken as he takes cover in the rock of the higher ledge.
Brother Maxim sees Sergeant Tumas retreat from enemy fire, so he approaches the next rocky ridge of Look-Out Pointe intent on gaining position there. Tumas readies himself to follow his comrade up to the rocky ridge line. Finally, Brother Lucas makes for the South edge of the board, convinced that his area is secure.
The Shaken Orks and Grots rally. Satisfied, the Nob starts to climb down the Southern ridge line. There he meets up with a shaken Slugga Boy and a grot. Perhaps they can use the Grot and Slugga to shield his escape?
The sharp eyed Shoota boy on the top of Looke-out Pointe sees Brother Maxim approach and sprays the area with more gunfire. ONly a pair of Suppression hits, but Maxim rolls snake-eyes on his Morale roll! That was close, 1 more Suppression hit and Maxim would have fallen back out of the battle. For now he merely retreats his full move and is Shaken, just as his Sergeant had been the turn before.

Turn 6:
Seeing the Ork Shoota distracted by Maxim, Tumas sprints into cover at the base of the Ridge. He is in cover, so is confident of his position. Maxim recovers and shoulders his weapon to provide covering fire.
Brother Lucas comes around the edge of the Southern ridge to provide a bit of help to Brother Cassius and Crius. He arrives in time to see Crius fire a burst at the Orks at the base of the ridge, but they seem unphased. Cassius tries to take aim through his scope, but the capering of a grot gripped in fear eludes his aim.
The Grots on the second ridge tremble in fear as the Shoota boy nearby opens fire on Crius. His Nob shouting encouragement at him to blast that Beakie! However, the Marines doesn't even flinch as a few stray shots ricochet around him.
With that cover fire, the Nob and one of the Grots make a bee line for the Board edge. They might make it to cover and escape next turn!

A Grot jumps down to the second ridge close as Brother Lucas approaches. The last grot curls up in a ball at the top of the Pointe, shivering in fear! The last Shoota boy who had held off Maxim and Tumas decides to change position and moves to Cover the South Side escape attempt from his perch atop Look-Out Pointe.
Turn 7:
Crius turns and sprays fire at the running Ork Nob. However, his bolter rounds explode rock and earth around the fast moving Ork. His fire does not dissuade the Nob. long range shooting from Lucas also fails to cause the Nob to re-think his wild rush.
Tumas bolts up onto the first ridge line and moves to secure the Ork hut. No xeno stands to oppose his rush, and he is not met by a spray of shots. Maxim takes a long range potshot at the last Grot in view, nad forces him to retreat down into a better bolt hole.

The Nob and his Grot screen run like the wind and easily get off the top of Look-out Pointe. They do not stop running until they get all the way back to the rubble that is the Ork base below. The marines have failed to stop the Orks from escaping and warning the troops below.
With their boss off the board, the remaining Ork boys and Grots are unsure what to do. They try to huddle up into their own cover and prepare for more boyz to show up. You see, Orks are never beaten' in battle. If you kill them, they are dead so that doesn't count. If they run away, they are just going to get more boyz to come back and krump ya'!
Turn 8: Final Turn
For fun, we decide to complet ethe last turn to see what happens and who does what.
Lucas and maxim decide to camp out and wait for further orders from Tumas. Crius and Cassius open fire on Orks at the base of the Ridge line and force one of the Slugga Boyz back up into cover by the hut.
Tumas enters the hut and places demolition charges to destroy the observation point once and for all.
The Orks for the most part try to castle up and prepare to defend the area. They are all rallying from being shaken in Turn 7. 1 Grot ventures down to the bottom of the ridge as a decoy/scout for the other boyz.

Conclusion:
Orks win! The Marines fail to control the top of Look-out Pointe.
The radio squaled as Snaz Boomgod roared out fromt he speaker. it was hard for the Ork pilots to believe, but Beakies had been sighted on the top of Looke-out Pointe. Boss Boomgob was clear, drop every bomb they had on top of the observation post on the mountain. A propa' Ork did not argue with his boss, so for the next hour or so the Ork pilots gleefully dropped bomb after bomb on the area! Part way through, they were even joined by artillery from the remnants of the Ork camp at the Pointe's base. When they Orks were done, they had taken the top of the mountain off! It was doubtful anything could have survived such a barrage.
*****************
Commander Brusilov received the news in his command bunker. Taskforce: Swords Master of Logistics visibly blanched at the news. Look-out Pointe had been leveled by the Orks. The Office fo Strategic Intelligence estimated that no one could have survived. He nodded in shock and cancelled the rest of the meeting, he had to report to General Kurtz.
As the Vox line lit up Brusilov composed himself to deliver the horrifying news to the General. The battle-scarred Cadian responded in his usual kurt tone, "Sir, I regret to inform you of the loss of the Panther's Claws squad on the summit of Look-out Pointe on Baron's Rest. However, their mission....."
General Kurtz cut him off, "Impossible. I just had a debrief with Brother Sergeant Tumas himself minutes ago. His squad will need to requisition a Valkyrie back to my command station for immediate evacuation off planet. Give it to him. His men are worse for wear, but expected to be on location in 5 hours. Understood Commander?"
Brusilov had a hard time masking his shock, "....but Look-out Pointe was bombed for hours..... I...."
"You don;t know Space Marines like I do. It is not only possible, it has happened. Good day Commander. i have pressing matters to attend to."
With that the Vox channel clicked closed.
************************
Orks win, and they will be ready for the Imperial assault to dislodge them from Baron's rest. Sure, their camp was destroyed but the Observation Post can be remanned. From there, they can see the oncoming Imperial counter-attack.
As for the the game itself. The marines only killed 3 Orks, but lost none in return. However, the Orks did manage to slow them down and win the actual objective. Therefore numbers paid off against skill in this battle. We saw a similar outcome last time the Marines took the field in Rampant Sun. They had no losses, but lost the battle. The inferior skill force did well enough to force Shaken results and retreats to keep them at bay.
The Darkness Complication also played a part as the Orks were able to focus on their objective. Instead of wasting time shooting or trying to get into close combat, they could focus on activating and getting off the board. This focus helps them use their numbers to good effect.
A fun game that did not take long to complete. I think all said and done it was done and documented in about 1 hour. That is exactly as the rules intended.
Until next time in Operation: Hemlock.


