Welcome back to the Castles in the Sky Indo-China campaign between the British and the French. When we last left off, the campaign was tied 5 to 5. The campaign ends when one player gets to 7, and is ahead by at least 2. That triggers a "final battle" scenario. This could be the decisive battle to get to 7, but it would require a decisive victory. Last time, the two forces met in a Patrol mission with the French Fabian strategy getting the best of the aggressive British commander. However, no lasting damage was done and both fleets are coming into this battle at full strength! With that in mind, British Commodore Duckworth of the Royal Navy of Siam is taking an Offensive strategy, while Commodore Aubre is staying on the Defensive.
Commodore Duckworth wanted those French ships removed from the vicinity of Siam. They had all ready caused issues as the French backed rebels had briefly taken over the Kra Isthmus. Thankfully, aggressive action of his own had allowed the rightful government to regain control. However, if the French were a force in being, they would continue to hamper his efforts to bring Siam under permanent British rule.
Therefore, he sent out a strong force of picket ships to locate the enemy. He was keeping the rest of his forces in reserve. Once the French were sighted, he would bring in the rest of his fleet. However, to avoid suspicion, he scattered them on routine patrol, waiting for the signal once the enemy force had been fixed. They would then all converge on and overwhelm the opponent.
Despite Commodore Duckworth's attempts at subterfuge, the French officer Commodore Aubre was wise to the British plan. He was under increasing pressure from Paris to neutralize the threat of the British fleet in the region. They endangered the French supply routes through the South China Sea, and access to the critical rubber plantations in Indo-china. They were pressing him for a decisive engagement and to go on the attack. As a result, Aubre sent out his own picket ships as the rest of his force took off from their bases around Indo-china.
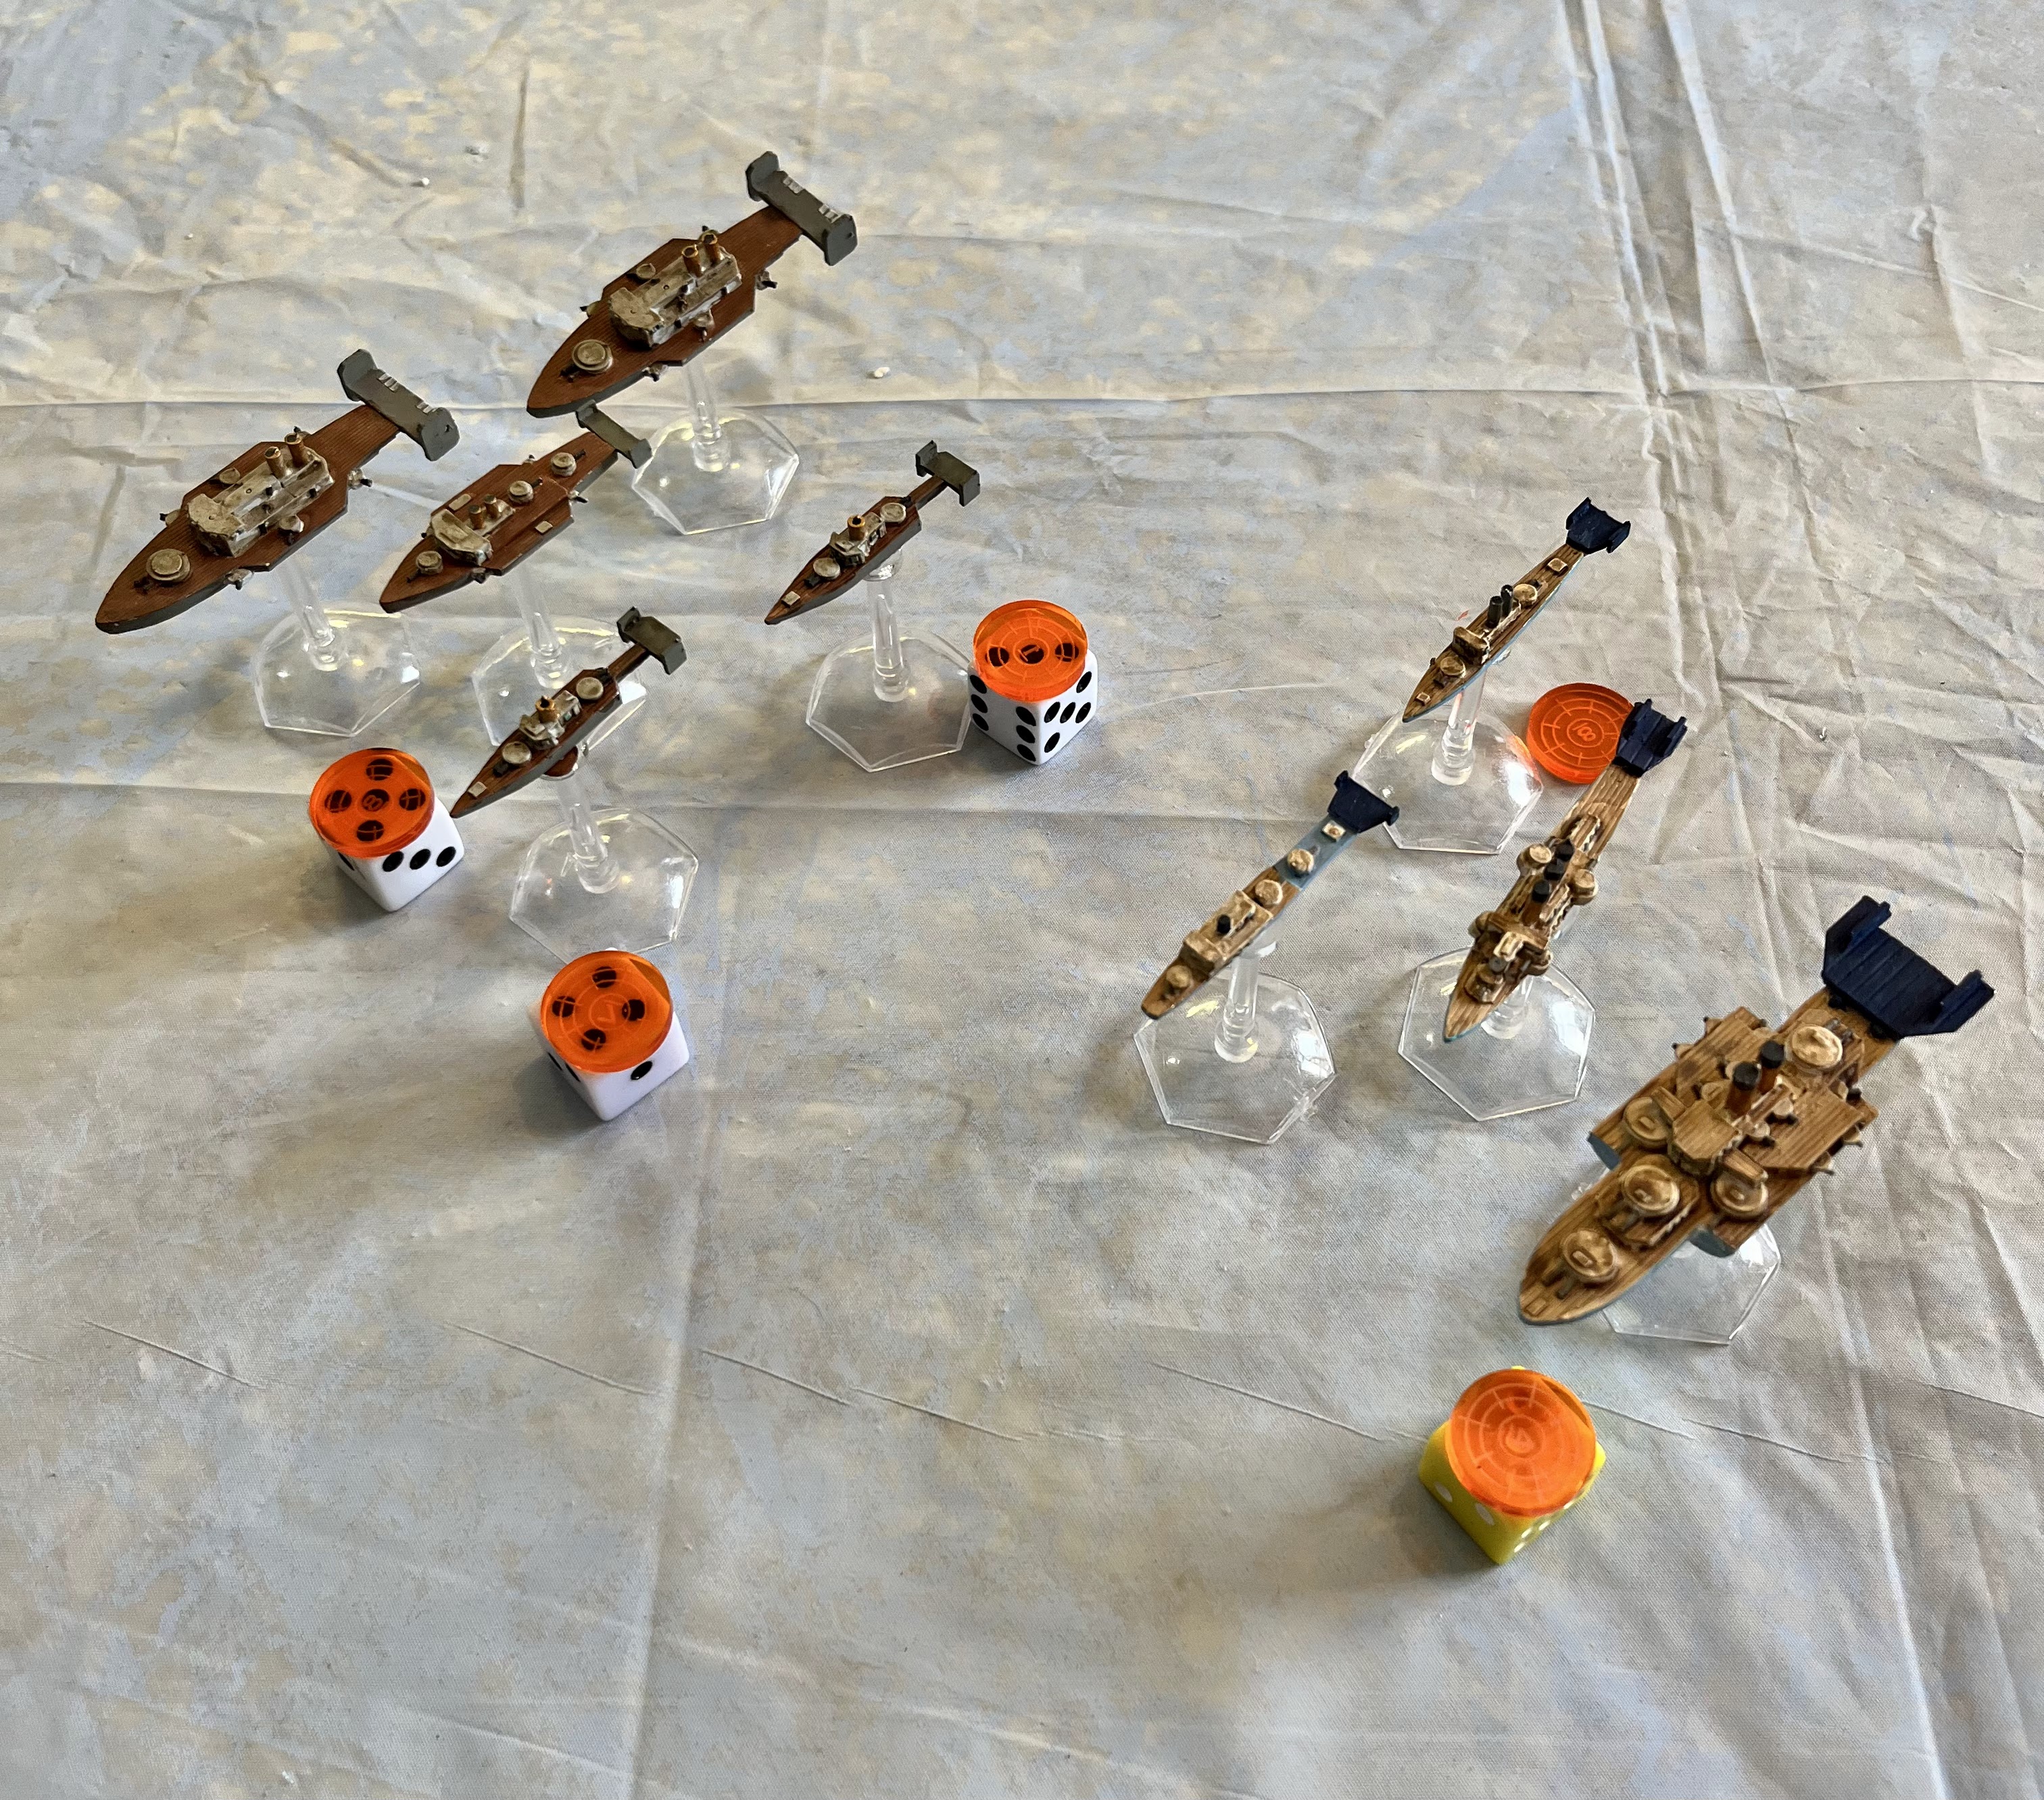
Forces:
Both the British and the French are mobilizing their full fleets today for an outright battle.
L'Aire National
Camot- Commodore Aubre- Command 4
Charles Martel Class Heavy Cruiser (Battleship)
Cuchinchina - Captain Gourdon- Command 2
Gloire Armored Cruiser
Tourane- Captain de Genouilily- Command 2
Descartes Class Cruiser
Tonkin- Captain de Vence- Command 2
D'Iberville Class Cruiser
Hue- Captain Senez- Command 2
D'Iberville Class Cruiser
Fantassin- Captain Valjean - Command 4
Chasseur Class Destroyer- Torpedo
Tromblom- Commander Morice- Command 2
Chasseur Class Destroyer - Sky Mines
Their picket force will be the Fantassin, Tonkin, and Hue led by Captain de Vence of the Tonkin
The Royal Navy (of Siam)
HMS Malaya- Commodore Duckworth- Command 2
Queen Elizabeth Class Battleship
HMS Archeron- Captain Manby- Command 3
Duke of Edinburgh Class Cruiser
HMS Achilles- Captain Durham- Command 4
Warrior Class Cruiser
HMS Arrogant- Captain Knowles- Command 2
Arethusa Class Light Cruiser
HMS Medusa- Captain Butler- Command 2
Active Class Light Cruiser
HMS Corsair- Commander Montgomery- Command 4
Bull Finch Class Destroyer- Torpedo
HMS Hasty- Commander Rawley- Command 2
Bull Finch Class Destroyer- Sky Mines
The British picket force will be the HMS Corsair, HMS Arrogant, and the HMS Hasty led by Captain Knowles of the Arrogant.
Mission:
Today is an Escalation battle with the French as the attackers! Each force has a small 15 Operational Value picket force that will start on the table up to 12 MU in. Follow-on forces will need to make a command roll after turn 2 on a ship by ship basis to enter the table.
In addition, cloud cover is impacting the board at altitude 4.
Set-up:
This is a full fledged battle, so it will take place on a 72MU by 48MU board. The British are coming on above the cloud cover, and spaced out to try and track down and engage the French fleet.
 |
| HMS Hasty at top, Arrogant center, and Corsair at bottom |
The French are coming in on the corner, and clumped together in the cloud bank, but at high speed.
 |
| The Fantassin, Hue, and Tonkin steam through the clouds |
For this battle, we are using a standing white board to track the key details of the battle like ship speed, altitude, Command, damage, and special effects.
In addition, I am not going to be detailing every move and shot like previous game reports. Instead, I am going to give some high level details. The battle will be broken down by stage. These will be the Maneuver Phase, Battle Phase, and the End Phase.
Maneuver Phase
The British picket ships are spread across the board just above the cloud banks. They start to move towards the opposite board corner, where they suspect the French are located. The French stay in the cloud bank and vector in on the lead British ship. The British HMS Corsair seems to be going out wide.
The rest of the French fleet receives the wireless communication from their pickets and converge on the scene. The Camot arrives supported by the Tromblom, while the Tourane follows the vanguard. The French stay in the clouds.
For their part, the British pickets move in with the HMS Hasty taking the lead, perhaps to unload their mines in the path of the enemy ships? The Corsair goes out wider, trying to turn back in for a torpedo attack run later in the battle.
The Archeron and the Achilles enter the battle and are on course to cross the path of the French fleet and catch them between the passing Pickets and the oncoming cruisers. Notably, the British flagship is not on the table.
The Fantassin manages to cause some Friction on the HMS Hasty with a torp, her plan to disrupt the oncoming French with Sky Mines is thwarted.
Battle Phase
The battle begins in earnest as Commodore Duckworth arrives with the HMS Malayan. The Hue and Tonkin pepper the approaching British cruisers and the flanking HMS Hasty with Air Torpedoes. The Cruisers shrug it off and return fire gamely. The Hue getting pounded but avoiding damage. However, the HMS Hasty takes two torpedoes and takes significant damage to the Rudder. The Fantassin manages to pop a Torp into the HMS Arrogant as well, causing damage. The opening salvo goes to the French!
Finally, the Gloire arrives at the scene of the battle. The British Cruisers move in as the French Torpedo Cruisers try to break away. The French ships blow smoke to cover their movement and try to protect themselves from the British Salvoes.
The British lights take a beating from the French fleet. The HMS Corsair flew into a deftly launched swarm of mines and took a hit and a lot of friction. The HMS Arrogant got caught in the open in front of the French flagship, got rocked and started on fire! The HMS Hasty deployed her mines, but the Tourane was there and deft gunnery blasted the British ship into bits and cripples her, forcing it to strike her colors. The Smoke on the D'Ibervilles paid off as the British cruisers pounded on them, but they escaped with only one hit on the Hue.
However, that hit proved true as Hue exploded! The cargo of Air Torpedoes goes up in a spectacular blast that catches the Tonkin and the HMS Achilles in the blast. The Tonkin manages to ride it out, while the Achilles loses more armor, and the Port Light Battery.
The French regain intiative, and use the Camot's escort to fake the British into thinking the French Battleship is going one way, but then it veers the other to engage the British Cruiser line. The HMS Archeron tries to make a Fire for Effect order on the Camot, but fails. A shot from the rear of the HMS Achilles on the Tonkin adds Friction and keeps its Torpedoes in their tubes. However, the HMS Corsair is not so lucky as the Fantassin manages to get a bead and pepper the Destroyer with Torpedoes. The HMS Corsair strikes her colors thanks to a damaged rudder.
The HMS Medusa finally joins the battle! The Tromblom failed to re-load her mines. The HMS Corsair leaves the board. The French Fleet managed to isolate the HMS Achilles and pound it with close range firepower, reducing her to 1 armor left. However, the Tromblom was caught out as well, and pummeled by the British in return, for three hits. The Tonkin and the HMS Arrogant traded shots, causing another hit on the damaged Arrogant.
The Tromblom blows up, a heavy shell finding her mine bay. However, the explosion is not enough to catch the trailing HMS Archeron. The HMS Arrogant is also crippled from the last shot from the Tonkin and the British ship strikes her colors. The HMS Achilles keeps fighting even at 1 armor left.
End Phase
The French maintain the Initiative and that allows them to keep the HMS Achilles in danger, while avoiding the British guns while in the clouds. The Cuchinchina can barely make out the damaged British cruiser, and the Captain orders the gunners to fire for effect. The barrage is devastating and the British cruiser explodes from the Overkill. The explosion causes 1 friction on the HMS Malayan, and hits the HMS Archeron for 3 friction and 2 hits.
The Malayan can barely see the Cuchinchina when she opens up, and Commodore Duckworth has his gunners fire for effect in return. The French cruiser takes three hits in return. The HMS Archeron also explodes from the damage caused by the HMS Achilles explosion! This causes friction on the HMS Malayan.
The two fleets begin to part ways as dusk settles in. Parting shots from the Cuchinchina and the HMS Malayan amount to nothing thanks to a Brace! save by the Cuchinchina.
Conclusion
It feels like a French victory with 2 British ships striking their colors, 1 crippled, and two exploding. However, the French also lost two ships to explosions. Going to the big board we have:
French lost 17 Armor points
British lost 26 Armor points
That puts the French at 7 to 5 in the Campaign and triggers the Final Battle. As they got their first, they can choose the scenario for the fight.
The French strategy in this battle, and the campaign; has been to duck and weave! The cloud cover at altitude 4 across the board helped me a great deal keep the British guns at a distance. They had to get close, and I just needed to keep them isolated at 8+ MU away minimize their shooting. I managed to do that in this battle. Once again my significantly weaker battleship survived unscathed against the very impressive British battleship. When that thing fired it always caused havoc!
Campaign Stuff
The key point now is repairs to the damaged ships. The HMS Corsair managed to repair her 3 damage, the Arrogant failed to fix any, and the Hasty fixed 1. The British use their Strategic assets to repair the Corsairs rudder. The Hasty and the Arrogant are put in dry dock for repairs, essentially removing them from the Final battle roster. That leaves them without their cruisers, a light cruiser, and a Destroyer. Yikes!
The French also make repairs. The Fantassin is returned to full health by the crew. The French Strategic assets are used to fully repair the Cuchinchina. The French will be down a Destroyer and a Torpedo Cruiser.
Since we are going into the Final Battle, we decided to skip ship Experience. We keep forgetting to use the bonuses anyway!
Admiral Aubre was satisfied that the Navy of Siam was on the ropes. The French diplomatic efforts were beginning to bear fruit in Siam, supported by their successes in the air. Thanks to this progress, the British Foreign Office decide to replace the ambassador for Siam with a fresh hand. Commodore Duckworth was to meet the incoming ambassador and escort him safely to port. However, the French government had other plans. Commodore Aubre was to intercept the ambassador and make sure he never arrived on station in Siam.
Become a Patron and get access to all the cool stuff, a peak behind the curtain of Blood and Spectacles, and early-access to playtest games!
Check out the latest publications and contact me at our
Blood and Spectacles website


No comments:
Post a Comment