

Per the campaign rules, the Ottoman Empire has chosen
Defensive while the Balkan League chooses Offensive to start the campaign
with. The Balkan League will be the
attackers in the Raid scenario after the scenario was determined per the campaign
rules. A raid scenario does not allow
Battleships for the Attackers. The
Attackers get 25 Armor points, and Defenders get up to 50 armor points.
The Balkan League
has tasked Captain Rozhestvensky with the Oleg to lead the assault force to
attack an Ottoman force led by Captain Hassan Rami Pasha in his Heavy
Cruiser. The Ottomans are moving their
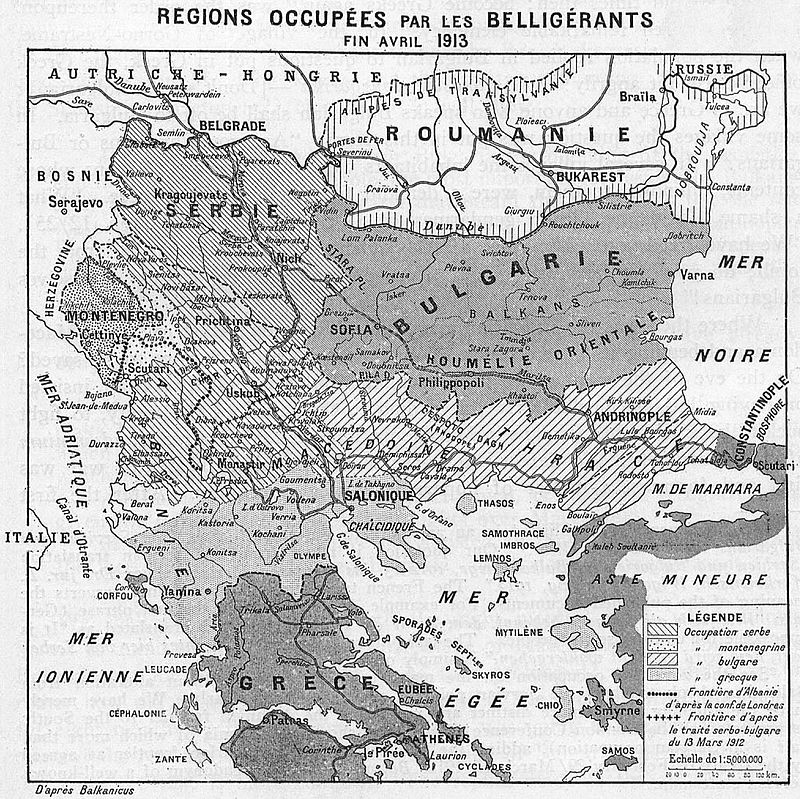
airships away from being in the pocket dividing Montenegro and Serbia. With the outbreak of the Balkan Uprising the
Balkan League allied force on the Raid sortied out from Montenegro to engage
the Ottoman airships.
The Russian ships
in the Balkan League managed to get the drop on the Ottoman Forces as
Montenegro had only recently declared war and word had not been officially
communicated to the Ottoman fleet.
Therefore the initial sighting of the Russian ships did not immediately
raise the alert with the Ottoman fleet.
However, as the Russians moved closer Captain Hassan Rami Pasha became
suspicious and ordered his crews to prepare.
The Balkan League Raiders- 24 Armor pts
·
Oleg Captain:
Aleksey Rozhestvensky Command:
2
Class: Bogatyr Category:
Cruiser Armor:
7
·
Rurik Captain:
Nikolai Ushakov Command: 1
Class: Azova Category:
Cruiser Armor:
7
·
Kondor Captain:
Nikolay Konovalov Command: 3
Class: Krasnoye Category:
Gunboat Armor: 5
·
Sova Captain:
Vladimir Greig Command: 1
Class: Krasnoye Category:
Gunboat Armor: 5
The Ottoman Forces- 27 Armor Points
·
Basra Captain:
Hasan Rami Pasha Command:
2
Class: Barbarous Heyreddin Category: Heavy Cruiser Armor:
8
·
Mecidiye Captain:
Medvid Reis Command:
1
Class: Hamidiye Category: Cruiser Armor:
8
·
Trakya Captain: Piri Pasha Command:
2
Class: Midilli Category:
Light Cruiser Armor:
7
·
Barbaros Captain: Murat Pasha Command:
2
Class: Berk Efsan Category:
Torpedo Boat Armor:
4
Based on the scenario, I chose to limit the Ottoman
Alliance force to Ottoman only units and did not deploy the Battleship for the
defenders. This will limit the chance
for Experience for the Defenders, but also reduce the number of ships that can
be damaged.
Mission
This is a straight up battle where both sides are trying
to cripple the other fleet. It will last
6 turns, and then the attackers that are still able to will immediately
disengage. The force that has the
highest remaining armor value at the end of the battle will win.
Set-up
This battle will take place in the air over an ottoman
pocket of territory near Novi Bazar. This
is represented by a 6x4 table. The brown
hills are Altitude 1 while the grey hills are Altitude 2. Airships at that altitude or lower will crash
into these hills if they attempt to move over them. The hills also block LOS at those
altitudes. There is no cloud cover.
The Ottoman’s are moving at mid-speed at Altitude 3 and
4. Their column is led by the Trakya,
followed by the Basra, and then the Mecidiye.
The Barbarous is shadowing the column to the port side of the
Basra.
The Russians are in two columns approaching from the
west. They are the Kondor and the Oleg
and then the Sova and Rurik. They are at
full steam and altitude 4.

Turn 1
Initiative: Russians decide to go first
Move:
The Russians press forward at full steam of 6. They stay in formation as they approach the
Turkish column from the rear. They are
intending to try and get on both sides of an Ottoman ship and pummel it into
scrap.
The lighter Ottoman craft could outrun the Russian
raiders, but the Basra would not be able to.
Hasan Rami Pasha decides to engage instead of abandoning the Basra to
the chasing Russian cruisers. The Basra
slows, while the lighter craft begin a turn to the right. His intention is to draw the Russians to his
heaviest ship, and then catch one of the columns between the Basra and his
lighter cruisers in a crossfire.
Battle:
None, the range is still too far.

Turn 2:
Initiative: Ottoman’s decide to let the Russians go
first.
Move:
The Russians continue to move in on the Ottoman
fleet. The Ottoman’s continue their
turn, and try to time it correctly for maximum effect.
Battle:
Both fleets hold their fire. The range does not appear to be right….
Yet.

Turn 3:
Initiative: Ottoman’s again let the Russians move first.
Move:
The Russian Krasnoye gunboats lose their nerve
approaching the Basra’s big guns and break off the approach and head for the
lighter Turkish elements. The Russian
cruisers stay on course for the Ottoman trailing ships, but it looks less
likely they will get the situation they were hoping for.
Battle:
The Kondor wisely dropped altitude to avoid the Trakya
and Mecidiye’s guns. However, now she
can’t get a good shot at them either, but her light batteries are likely no
match for the bigger ship’s armor at long range.
The Basra is able to get a long range set of shots at the
Sova. The big cannons in the stern boom
out, but they fail to find their mark.
Worse, a failed ammo roll means that the shell loading mechanism has
jammed! The gun is out of
operation.
End:
In the Repair phase, the ship’s engineers manage to unjam
the loading mechanism and repair the stern guns for future action.

Turn 4:
Initiative: The
Ottoman’s again let he Russians move first.
Move:
The Russian Gunboats try to set-up a battle line at
Altitude 4, backed up by the approaching Rurik.
The Oleg is out of position and turns towards where the battle is
developing.
The Turkish torpedo boat tries to sneak around the front
of the Russian fleet at high altitude.
The Trakya and Mecidiye move to engage the Russians in a duel at
different altitudes. The Basra moves up
behind them.
Shooting:
The Russian gunboats try to fire on the Ottoman light
cruiser. The Kondor’s light battery
misses, and the gun turret mechanism jams up after a failed ammo check. The Sova also misses. The torpedo Boat goes on Brace orders after
firing.
The Rurik fires its bow torpedoes at the Trakya, and the
Point defense gunners take one out.
However, the other torpedo streaks by overhead, and locks onto the
Mecidiye instead. The point defense
gunners miss it, and it explodes along the armored belt of the ship for no
damage. Both Ottoman ships get a burst. After firing the Rurik braces.
The crew of the Trakya fail to lock-on and open fire at
the Kondor. Two shells hit the Russian gunboat,
but it only loses 1 armor point. A
broadside from the Mecidiye also pings a shell of the Kondor’s armor. The little Russian craft was probably saved
by the bursts and the altitude differences.
The Ottoman Barbaros torpedo boat launches a barrage at the
Rurik, but the torpedoes have to go by the Kondor first. The torpedo hits the gunboat, causing it to
lose another point of armor, bringing it to 2 armor.

End:
The bursts are dissipated as both sides roll 3 for burst
removal.
Turn 5:
Initiative: The
Russians win, and decide to let the Ottoman’s go first.
Move:
The Ottoman’s continue to turn into the oncoming Russian
forces. The Barbaros manages to reload
ordinance but stays high above the fight.
The Trakya goes low and moves to cut under the Russian line, while the
Mecidyie moves to cross it. The Basra
slowly speeds up and moves to follow her smaller cousins.
The Kondor drops altitude and tries to move away from the
battle. Meanwhile, the Sova goes up and
tries to chase down the Barbaros torpedo boat.
The Oleg and Rurik both try to slow and drop altitude to try to pin the
Trakya between their broadsides. They are
still a bit high, but in range!
Shooting:
The only Ottoman shooting is from the Trakya. She sees the Russian ships trying to bracket
her, and responds with broadsides on each one.
The Rurik is hit 4 times, but the shots ping off her armor. The Oleg is hit twice, but a lucky hit peels
off a point of armor. The crew then race
to batten down the hatches and brace on the Trakya successfully.

The Sova manages a starboard shot from her deck gun, and
hits the Barbaros and peels off a point of armor from the Ottoman torpedo
boat.
The Oleg and Rurik open fire on the Trakya slightly below
and between them with their full firepower.
After the barrage, only a sinlge shell managed to strike home. The captain of the Oleg realizes that his
current stock of shells are duds, after failing an ammo roll for all of his
batteries! He immediately sends his
officers to re-assess the armory and get him working shells! The bursts on each ship and the altitude difference
saved the Ottoman ship from being pummeled.
End:
Damage is applied.
The Ottoman’s remove bursts from the Barbaros and Trakya. The Russians remove them from the Oleg, and
also 1 from the Rurik. She still has 3
on her.
The Oleg manages to get new shells to their broadside and
rear turrets, but not the bow turret.
The Kondor also unjams her turret with Repair rolls.
Turn 5:
Initiative: Russians win and elect to go second
again.
Move:
Things are turning into a general melee and not a fleet
action as each ship tries to gain position on the enemy. The Barbaros kicks in the turbines and dashes
away from her pursuers. The Trakya and
Mecidyie turn towards each other and level off at Altitude 4 to support each
other from the attackers. The Basra
moves straight towards the starboard of the Mecidiye to try and pin the
Rurik.
The Russians respond with the gunboats moving up out of
range of the Trakya and to safety. The
Rurik tries to slowly dive away from the Ottoman pursuers, but her crew is
still shaken from the bursts and her speed is reduced. The Oleg turns into the battle, eager to use
her superior firepower on the Ottoman light cruiser.
Shooting:
The Trakya and Mecidiye try to light up the Oleg but only
land two bursts on her. After their barrage,
the Trakya braces, and the Mecidiye fails.
The Oleg manages to lock-on to the Mecidiye, and fires a
broadside, along with the stern turret.
One shell manages to damage the Ottoman cruiser. The Starboard broadside fires on the Traky
and lands a burst on her.

End:
Damage is applied.
The Ottoman’s remove 3 bursts from their vessels, while
the Russians remove 4, leaving the Rurik with 1.
The Russians still can not find good shells for the Oleg’s
forward turret.
Turn 6:
Initiative: The Russians choose to go second.
Move:
The Trakya turns towards the safety of the guns of the
Basra, while the Mecidiye slows and turns to escort the larger ship as
well. The Basra moves closer and drops
altitude. The Barbaros turns back into
the battle, but is far, far away.
Seeing the Heavy Cruiser’s approach, the Oleg and Rurik
turn away from the battle, but get the Trakya bracketed in their broadsides
again. The two gunboats also turn to
away from the battle.
Shooting:
The Mecidiye fails to lock-on to the Oleg, and opens fire
with a full broadside. The put two
bursts on her. The Trakya uses her rear
turret and port broadside on the Russian ship.
Two shells strike home.
The front turret of the Trakya fires on the Rurik and
scores two hits as well! The Basra also
fired a broadside at the Rurik, She managed to land three bursts on the Russian
cruiser.
The Russians return fire!
The Rurik lands two hits and two bursts on the Trakya. The Oleg lands another two bursts on the
light cruiser.
End:
Damage is applied.
The Oleg takes serious damage from her two hits. The Oleg’s rudder is jammed and a nearby
shell explosion blasts shrapnel into the command towe knocking Captain Rozhestvensky
out!
The Rurik also suffers serious damage! This time the shells smash into something combustible
and the entire Rurik Explodes in a fiery ball with a deafening roar and a
blinding flash! The Trakya and Basra are
both rocked by the blast but come through unscathed!
The Russians manage to remove all Bursts from the Oleg,
and the Ottoman’s remove 1 from the Basra and 5 from the Trakya. The light cruiser still has 2.
The Oleg manages to repair its rudder, but the Captain
and force commander is still out cold and the forward turret still has no
shells.

Conclusion
With the destruction
of the Rurik, the Russian raiders break off the attack. The Gunboats stoke their boilers are race
away at full speed. The Oleg dives to
the hard deck and also stokes her boiler to maximum speed. The Ottoman fleet is content to let them
flee. Captain Hassan Rami Pasha is eager
to get his force out of the pocket between Montenegro and Serbia and back into
safer territory.
Campaign Results
The Russians lost 12 Armor, while the Ottomans lost
4. That is a Massacre and the Ottoman’s
earn 3 Campaign Points off the bat. The
first to 7 is the winner. This could be
a short campaign!
The Oleg’s Command Check scores 2 successes so the Bridge
is repaired, the Captain recovers, and one Armor point is restored back to
5. The Kondor manages to fix 2 armor points
with 2 command test successes.
The Ottoman’s also try to repair their vessels. The Trakya repairs 1 Armor Point back to
6. The Mecidiye repairs itself 1 back to
7. Finally, the Barbaros repairs 1 armor
point and back to 4.
The Balkan League uses 2 Strategic Assets to bring the
Oleg back to 7 Armor. The other 2 Assets
are banks for reinforcements later. The
Ottoman’s use 1 asset to bring the Trakya back to 7 armor points, and bank the
other 3 for later use as reinforcements.
Experience:
Oleg- +2
Kondor- +1
Savos- +2
Basra- +2
Trakya- +7
Mecidiye - +3
Barbaros- +3
The Ottoman’s manage to steal a Strategic Asset from the
Balkan League.
The Balkan Alliance
Naval command is horrified to hear of the loss of the Rurik. Captain Theo Aube of the French contingent
strongly criticizes Captain Rozhestvensky’s
conduct of the raid. However, word of
the captain’s injury in the battle quickly silences the criticism. In addition, word of the Montenegro and
Serbian ground forces victories allows the Balkan Command to overlook the naval
setbacks. However, the armies advance
was slowed by bombardment from enemy airships as they approached Salonica.
The Basra manages
to rendezvous with the rest of the Ottoman air fleet gathering near Dardenelles. Admiral Seydi Al Reis was enthused to hear of
the Rurik’s destruction. However, his
primary concern was going to be defending troop movements into the European theatre
by the Turkish army. However, the Austrian
and token Italian vessels had managed to link up with the Ottoman forces. This gave them the firepower to help thwart
the Balkan League’s attacks towards Salonica and to hold it from them.
Final Thoughts
A second play through for the Raid scenario and another
defeat for the Attacker. I think I
played this one on too big of a table at 6x4.
On a 4x4 the actual fighting would have gotten started earlier. That would have left the Ottoman’s less time
to react. However, the Russian fleet is
a bit slow and this also hampered their efforts. The only ship in the Ottoman fleet that could
not simply out run the Russians was the Basra.
That being said, the Russians had some terrible luck. The Trakya was the ship of the game as it
simple smashed the Russian fleet with its medium batteries over and over
again. Meanwhile, the Russians had some
good chances and set-up the right tactical scenarios, but couldn’t land the
telling blows. Such is warfare.
Things look tough for the Balkan League now as the
Ottoman’s lead this campaign to 7 at 3 points to 0.
Great battle report - it has me itching to dig out my nefs (which DID all get painted at Christmas...)
ReplyDeleteNice simple and effective terrain, too!
ReplyDeleteWELCOME! Thanks for the kind comments.
ReplyDeleteI am a big believer in "Budget Gaming" and hope to devote some posts to it in the future.