Dateline: June 30th, 1950
Location: ON approach to Suwon Airfield
UN aligned countries were busily attempting to evacuate using the Suwon Airfield. Meanwhile, North Korean forces were steadily advancing. The Air Force strategy was to gain air superiority, interdict North Korean forces, and then engage in strategic bombing. The North Koreans wished to support their ground advances.
To this end, a CAP of Yak-9's and La-11 Fangs were loitering near the advance forces. USAF on patrol to defend the Suwon Airfield were also in the area. The North Koreans were routed to the area to try and drive the USAF aircraft off and clear the path for the ground forces to surge forward.
I have been playing around with the core rules for Detection and the Action Economy for the game. This is a V3 of the rules that I will be testing today. The updates to Detection involve using the turn to influence the results of the detection. The changes to the action economy are intended to keep game play dynamic like V1, but avoid the strange game play lags from that same version. It also maintains the enhanced maneuverability and wingman rules from V2.
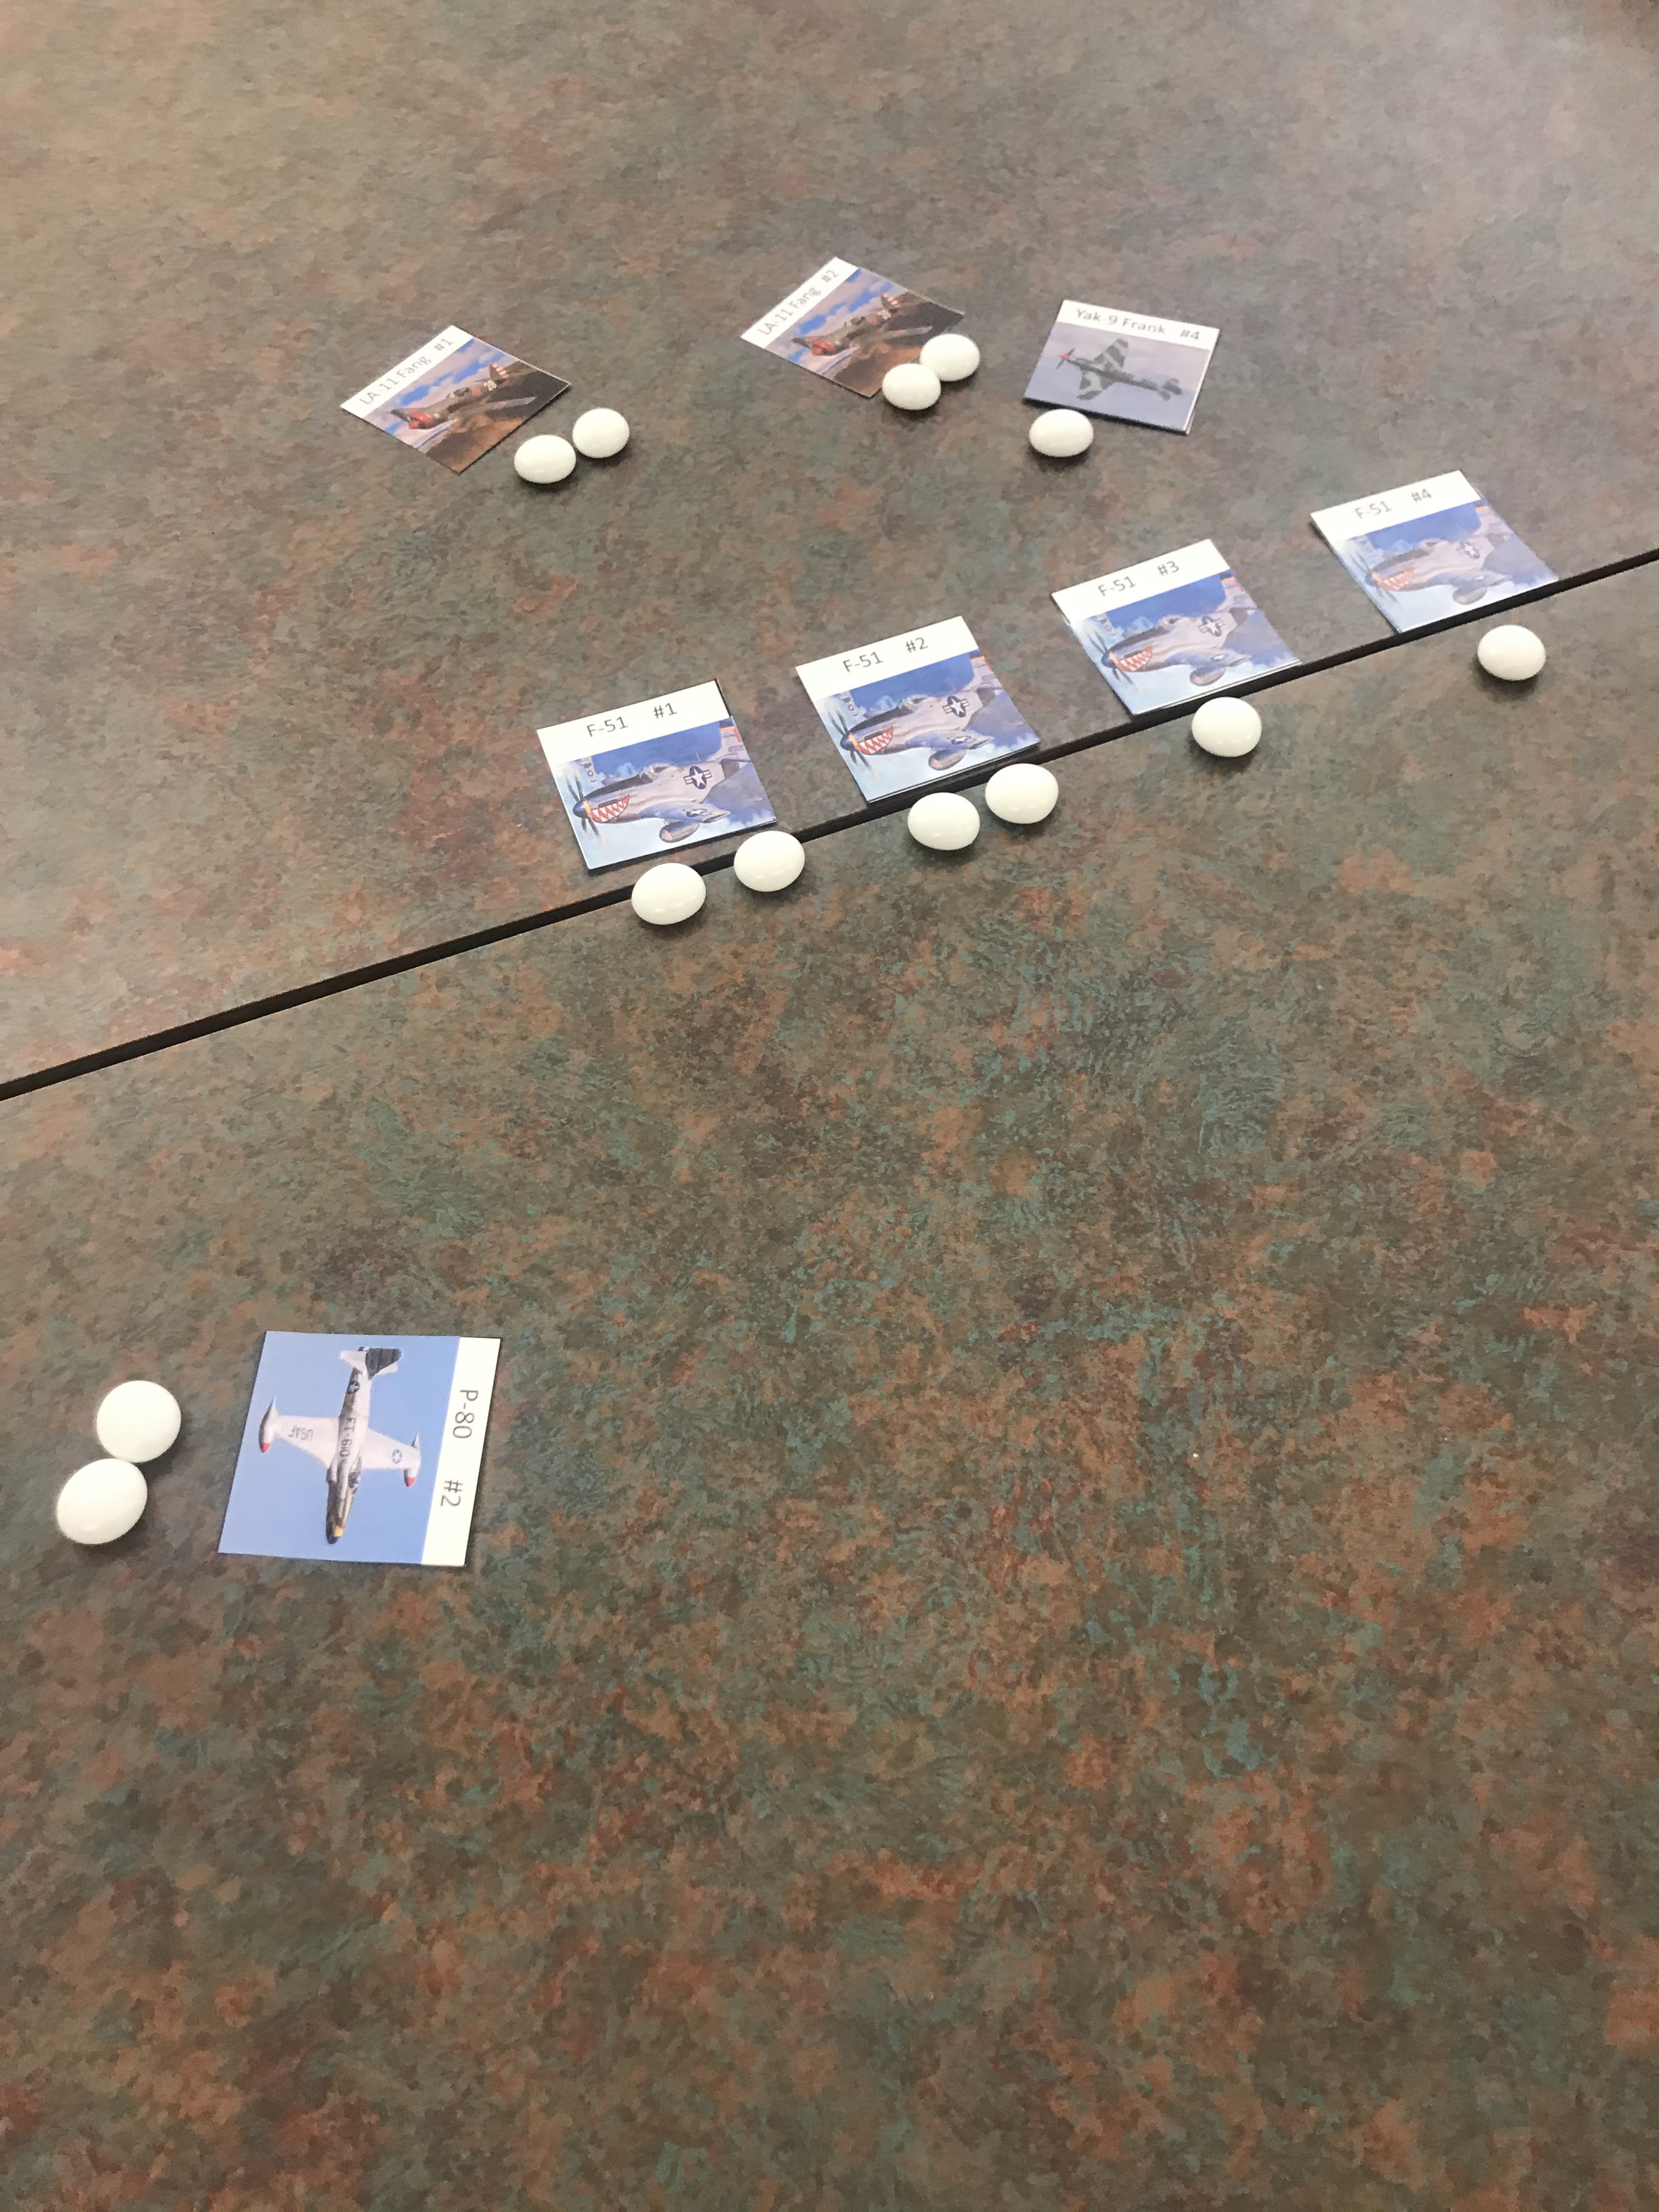
As usual, I am using my paper templates again. Altitude will be dictated by beads. 0= low, 1=combat altitude, and 2 = high altitude.
Forces:
USAF
4 P-51 Mustangs- Experienced Pilots
2 P-80 Shooting Stars- Experienced Pilots
North Koreans
4 La-11 Fangs- Rookie Pilots
2 Yak-9 Fritz- Experienced Pilots
Sortie
This is a Combat Air Patrol.
Set-up
The game uses Measurement Units instead of a fixed measurement system. This allows players to match their models and boards. Today I will be using a 48 x 48 MU board, with an MU being 1 inch. We rolled for weather and found it to be clear. No terrain is placed.
The North Korean forces are the attackers.
The Sortie, Weather, and Attacker were all determined via the rules in the White Star/Red Star rules.
Turn 1:
Detection Phase:
No one is detected, so we quickly move onto turn 2.
Turn 2:
Detection Phase: Again, no one is detected, so we move onto turn 3!
Turn 3:
Detection Phase: This time, the Communist forces are detected. Since it is Turn 3, they can deploy anywhere on the board up to 18 MU in. The Fangs are placed in two groups as wingmen on each side of the board and angling in. They have bad climb rates, so start at high altitude. The Yaks are set up as separate planes in the center at combat altitude. No USAF planes are detected yet.
 |
Yes, that is a SPAM tape measure.
I got it from the SPAM museum in Austin, MN |
Rookie:
The Fangs are all rookies. They can turn or change altitude, but with no enemy targets, they stay on target for now and move straight. The Yaks do the same.
Experienced:
The Yaks can maneuver around if they wish, as they are experienced pilots they can maneuver, but opt to go straight. The Fangs are rookies, so must go straight.
Ace:
Everyone must go straight. The lead Yak hits the center line of the board.
Turn 4:
Detection Phase: This time, the Communists detect the oncoming USAF Shooting Star jets! They can deploy up to 24 MU in, and the USAF commander opts to keep them as singles. They are at high altitude and are angling in on the rookie Fangs on the communist left.
Rookie:
The Communists have more planes, so can choose to go first. The Rookies in the Fangs are set-up as wingmen so will move together.
The Rookies bank hard into the oncoming Jets, which kills their speed. However, they might get a shot off! The lead plane opens fire, and futilely drains their ammo. No hits. The Shooting Star also fires as he closes, but fails to score any hits. However, he still has ammo in the hoppers.
The lead Yak #3, turns at 45 degrees towards the American planes, but is too low to engage. The second Shooting Star closes in on the rookie Fangs, and his shots are true as he downs the wingman. He also has ammo left.
The remaining Yak and Fangs fly forward.
Experienced:
The Communists have more planes on the board so get to go first. Fang #3 is out of ammo and lost his wingman, he elects to disengage as best as he can. He flies into and past the USAF Jets, who try to turn back into the enemy formation. Yak #3 tries to chase them down, but may not have the angle.
Yak #4 turns away, while the two Fang rookies go straight.
Ace:
Everyone flies forward.
Turn 5:
Detection: This time, the Mustangs are also detected and they deploy anywhere up to 30 MU in on the board. The Jets had done their job and distracted the Communists, and now the Mustangs buzzed into firing position on the Communist planes. Now the USAF has the most planes.
Rookie:
Mustang #1 and #2 move in as a wingman pair up close to Fang #1 and #2. They are very close and start peppering the Communist planes. The lead Mustang misses, while the Fang evades from the second ones fire. Neither Mustang is out of ammo.
Yak #4 break away hard from his pursuers. The maneuver helps him avoid one, but the lead Mustang opens fire. The Communist pilot evades the incoming fire. The USAF still has ammo left.
Fang #1 and #2 dive away from their pursuers to Combat altitude.
Shooting Star #2 drops altitude to Combat altitude. Yak #3 turns to try to spin back into the dogfight with the Mustangs. Shooting Star #1 also banks back towards the fight, but is too high. Fang #1 goes straight trying to disengage.
Experienced:
Mustang #1 and #2 chase after their prey, right on their sixes. Since they are tailing, Mustang #1 blows Fang #1 out of the sky. However, Fang #2 manages to evade a similar fate! The Mustangs still have ammo.
Yak-9 #4 manages to bank away from his pursuers! Instead, Mustang #3 and #4 try to set up to support their fellow Mustangs after Fang #2.
Everyone else tries to maneuver back into combat, except Fang #3 who is still trying to bug out!
Ace:
Everyone goes straight. This time, Fang #4 manages to disengage, which triggers the disengagement turn.
Turn 6- Disengagement Turn
Rookie:
Mustang #1 and #2 try to get the angle back on Fang #4. However, Yak #3 gets the angle and distance on them and manages to snag Mustang #1 with a burst of machine guns! He still has ammo left.
 |
| Blurry Gun Cam footage! |
Fang #4 drops to low altitude and flies towards cover beneath the Yak-9. The other mustangs follow Mustang #2, hoping to turn in at the enemy and overwhelm them with firepower. The Shooting Star #2 turns to stay in the fight, while the #1 flies above the communists at High altitude.
Experienced:
Shooting Star #1 stays high, while Fang #4 tries to get away at low altitude. Mustang #3 and #4 turn into the Yak and the lead plane fires. However, the Yak manages to evade.
The Yak returns fire, and downs Mustang #3 with a barrage of machine guns! However, this time he is out of ammo. Shooting Star #2 turns into the scrap, but is probably out of position.
Fang #4 disengages. Mustang #2 also turns towards the Yak, but does not have the angle.
Ace:
Everyone goes straight. However, Mustang #4 takes a closing head-to-head shot on Yak #3. He peppers the plane, and it goes crashing down in flames!
Conclusion:
That one went down to the wire! 3 USAF kills to 2 Communist Kills. USAF scrapes a win! It ended up closer than I expected after the USAF got deadly positioning thanks to avoiding detection until late in the game!
The new process provides the advantage to the more experienced pilots, and still keeps the action moving fast! The previous V2 action economy seemed like everything was moving very slowly and sluggishly. This new version feels pretty fast, even for the slower planes. The jets were clearly faster!
Shooting and evading still worked as intended. Detection is better than it was before. The Wingmen rules worked well, and provided an interesting decision point at deployment. Later, there were clear advantages and disadvantages to being in a wingman formation. That is good, as it gives more decision points.
I think I need to go through a few more Bomber Intercept scenarios with the new V3, as well as a ground attack scenario or two and these rules will be ready for Post-production.
Become a Patron and get access to all the cool stuff, a peak behind the curtain of Blood and Spectacles, and early-access to playtest games!
Check out the latest publications and contact me at our
Blood and Spectacles website


No comments:
Post a Comment