Showing posts with label Osprey Games. Show all posts

Monday, April 27, 2026

Review: Hide, Stone, and Bone - Osprey Games


GOOOOOAAAAALLLLLL!!!!!!!!

Well, at least the start of one.  One of my goals that pre-dates this blog is to own all the Osprey Blue Books.  I guess you could say, it was a goal from my own pre-history?  Huh?  Huh?  Anyway.... I have every single, currently published Blue Book and have reviewed all of them.  I have even played a few!  

It took me a bit to get my hands on a copy of Hide, Bone, and Stone due to some changes going on in my personal life at the time of publication.  I had to hunt a copy down and gather it up into my collection.  However, I have it now and am eager to take a look. This is not the only Stone-Age book by Osprey in my game collection.  I also have the RPG PaleoMythic on my shelf.  However, I am not sure I ever wrote a RPG Review of that one.  Those cam a bit later in my blogging career.  If you are interested in my thoughts on that one, drop me a comment and I will see what I can do.  

In Hide, Stone and Bone you are the leader of a tribe of early human ancestors.  You are attempting to survive the perils of the Ice Age.  The game represents the "Big Days" of a tribes life, while the campaign represents more of the day-to-day life of the tribe.  This game has options for solo, coop, and versus play.  I have to admit, I do not have any miniatures for this period but I might have some plastic critters and maybe even some cave men from a by-gone age in a pinch.  

So, let's get into the <ahem> meat of this book!   

Things I Liked

The currency in this game is not like what you see in other games.  Instead of a "cost" in resources, it is a cost in time.  This is called Moons.... i.e. how long it takes to get things done.  

You can be a tribe of Cro-Magnun Humans OR Neanderthals.  "Modern" humans are represented by two different stat lines for some variability in "tribal" lists.  No word on mixed tribes Clan of the Cave Bear style.  

To add tactical gameplay, their are combat arcs.  180 degrees for tribesman, and 270 for predator beasts!  This is for line-of-sight, but also used to determine if a model can try to "dodge" an attack.  Combat arcs like this are a simple and effective way to add Tactical Gameplay.  

There is a limited form of Pre-measuring in the game. When a model first activates, the player may measure 12 inches out from the model.  This represents what they can see clearly from their position.  After this initial measurement, no pre-measuring is allowed.  A nice hybrid version I had not encountered before.  This is another simple way to allow for Tactical Gameplay and to force a player to make Meaningful Choices on limited information.  

The game does a good job making a variety of different animals to inhabit this world from predators to prey.  They are run by a simple table-based AI using their instincts.  Predators will act differently than prey, and even herd/pack animals act different than lonely singles. This leads to different instinct tables.  Animals also can have a variety of traits to make encountering them unique to other Hominid bands.  


 Things I Do Not Like

The game tries to move away from Melee Yahtzee because you can choose to Fight, Grapple, or Throw.  Fight is a pretty standard opposed dice test with the winner causing a potential hit.  Throwing is also an opposed test but with more modifiers on both sides.  However, Grapple gets interesting as you can inflict a wound, Throw your foe 3 inches away in any direction (like off a cliff), or move out of combat.  However, I am not sure why someone would choose to grapple rather than just Fight.  It will only come up in certain situations.  However, unlike fighting, grappling does not always end decisively with a winner or loser and can go on for multiple turns. 

Toughness related tests, are the only time you roll low in the game.  Every other test is roll high.  I prefer when rolling high is always the preference.  However, based on how they use Toughness, I understand why they went low.  It can be tough to balance out all your stats to be high vs low intuitively.  However, failing to do so leads to If This/Than That rules. 

The game uses Stress Tokens that add up from various actions.  These act as modifiers to a Stress test that can impact if a model will activate appropriately.  I like the Concept, BUT the stress tokens are an unnecessary board clutter and mechanic as you could just have the model take tests as they are acted upon, and failures cause an effect, represented by facing or immediate movement instead.  Less rules and less table clutter in that scenario. 

The game uses alternate activations based on the winner of a roll-off.  However, the game uses something I hate; Action Points.  Some moves use more action points than others.  For example, most movement type actions are 1 point, so you can move multiple times an activation.  Basic combat is typically two actions so fight, grapple, throw, etc.  There are a few complex actions that take 3 such as a charge.  The game does cover a wide variety of actions with this system such as yelling at a foe, going prone, or even certain shamanic acts.  Yuck to action points!  I do not want to track action points during a game.  Hate action points.  However, others love them so now you get to see my preferences!  


Meh and Other Uncertainties

This game is written by a chap names Austin Hunt.  That seems very appropriate for the subject matter.  A Nom de Plume?  LOL

Casualties are placed face down.  There is a one turn to try to help them, but a turn they are considered dead.  They have crawled away to die in a hole or ditch somewhere and can not be found or helped further.  Now, casualties and how to treat them has become a choice.

The game uses a combination of d10s with a few d6s.  The game has Natural 1 Crit Failures for all tests.  A Natural 10 is only useful as a Critical Success for combat situations.    

The core rules are about 15 pages of how to play.  Overall pretty simple rules with enough meat to force some interesting decision making.  However, like many of these small skirmish games the focus is on the campaign.  The campaign details are the bulk of the 60 pages!  Therefore, if campaign and story-telling skirmish games are not your thing.... well..... I am not sure what to tell you. 

The campaign covers all the things you have come to expect such as injuries, experience, skills, and gearing up.  Success is based on something called "Extinction Points and when or if they run down to Zero, your band is assumed to have been scattered, disbanded, or left the area.  They have lost. Success of Failure on "Big Days" (Scenarios) leads to gains and loses of Extinction Points.  The campaign is pretty straight forward but notable absences are Base Building and story-telling events between "Big Days".     

There are additional rules to play games set in a "Pulp" Hollow Earth type setting with Dinosaurs and Pulp Adventurers interacting with your tribe.  This also includes being able to add the Pulp Adventurers to your bands as NPCs.  

The book has several scenarios with a variety of Objectives and complications to allow for a great deal of replayability.  This range from battling other tribes, hunting beasts, or gathering supplies while under duress.  A decent assortment of things to do but nothing outside of what you would expect from a game like this.    

The game does not go too in depth on solo, coop, or versus game play.  However, the rules are self-evident based on how the instinct tables for animals work.  However, facing against rival tribes in solo is not clear to me. 


Final Thoughts

This is a straight-forward and well-themed skirmish game.  It makes some efforts to add choice and tactical decision making than many skirmish games.  However, it is still a bit under-baked "on the table".  The focus is mostly on the campaign and linked games.  That is where most of the ink is spilled.  The Campaign follows the tried-and-true pattern of a solid campaign and it has a clear win/lose state.  The campaign is missing some story-beats that focuses the events to what happens on the table.  

I am sure this would be a fun game for short, club campaigns and the occasional "Big Day" or convention game.  It is well suited to multi-player scenarios.  Overall, a nice little addition to the Osprey stable and does what it says on the tin.    


Become a Patron and get access to all the cool stuff, a peak behind the curtain of Blood and Spectacles, and early-access to playtest games!  


You can follow Blood and Spectacles Facebook page or Instagram for more fun! 

Check out the latest publications and contact me at our Blood and Spectacles website

Or purchase all out games at the Blood and Spectacles Publishing Wargames Vault Page!      


Monday, April 13, 2026

Wargame Design: The Osprey Wargaming Series Strikes Again!


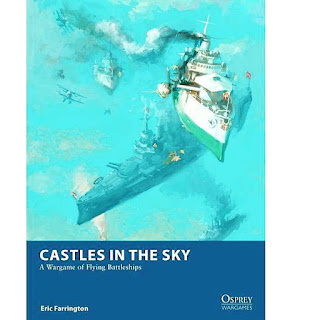
Hello faithful readers.  I have some MOAR news to share with you all.  I know, you are still reeling from last weeks reveal.... but wait..... there is more! Most of you probably follow me because I have published a few books in the Osprey Wargaming Series.  Those books were Men of Bronze, Wars of the Republic, and Castles in the SkyOf course, I have also released several wargames and RPGs independently as well.  That includes supplements to those Osprey Games and original works too.  


Drumroll please.......

.... Osprey Games has decided to contract me to write a set of game rules for Late Roman Warfare from 240 CE to 480 CE.  That is the Crisis of the Third Century through the Fall of the West.  These will be part of the Osprey Wargame Series so about 28,000 words. 

These rules will feature core rules based o refinements to the nWars of the Republic which is built on the Men of Bronze engine.  Unique, period specific lines-of-battle, new special rules, new campaign rules, period specific Historical scenarios, and new Advanced/Optional rules.  If I am really lucky I can add some Solo-rules to it as well?  With the added word count, I also look forward to adding some historical detail and a Quick Reference Guide in the book.  

I need these rules completed and sent to Osprey by May of 2028.  Therefore, we have plenty of time to Playtest and develop these rules.  My Patrons have a copy of the draft rules at their fingertips.  

Going into these rules, I have some simple Design Goals that are aligned with what I have done with my Historical works in the past: 

  1. Scale and Model Agnostic
  2. Large Battles with Small Model Counts
  3. Keep Players Engaged Through Out the Game
  4. Unit vs Unit Gameplay
  5. Balance between the War and the Game
  6. Historical-esque Outcomes
With some added page count, I am hoping to make the design goals and objectives more explicit at the beginning of the game.  Men of Bronze and Wars of the Republic both suffered a bit from mis-alignment between expectations and the experience the rules delivered.  Therefore, I want to be as clear as possible in the opening pages about the design goals and what they mean in this book.  

Of course, if I do not need to deliver the final draft until 2028 that means this book is still a long ways off.  I do not know the exact release date, but I would think late 2029 is realistic.  That is a long time away still.  

In the meantime, I need to track down 30 pictures of Late Roman miniatures in action.  If you have a favorite range, some figures you are very proud of and want to share, etc. please let me know in the comments.  I plan on getting at least two forces painted up myself in the meantime but I would love to feature YOUR work with full attributes or at least showcase the miniatures you want to see in the book.  I am tentatively planning on 28mm Victrix and Gripping Beast plastics for my own forces but am open to suggestions. 


I plan on keeping most of the Development content on my Patreon for this one.  Therefore, if you want to follow along with the Development, try it out early, give playtest feedback, etc.  that is the place to be.  Here, I expect to keep going with my normal painting, reviews, bat reps for games and other unrelated content for these Late Roman rules going forward.  

Therefore, I will be returning to my normally scheduled content.  

Until next time! 


Become a Patron and get access to all the cool stuff, a peak behind the curtain of Blood and Spectacles, and early-access to playtest games!  


You can follow Blood and Spectacles Facebook page or Instagram for more fun! 

Check out the latest publications and contact me at our Blood and Spectacles Website

Or purchase all out games at the Blood and Spectacles Publishing Wargames Vault Page!   

No comme       


Monday, February 2, 2026

Battle Report: Castles in the Sky: Mirror Match


It is winter time here, and that is not a great time to be outside in my area.  However, it is a good time to be indoors playing miniature wargames!  Today I was teaching someone how to play Castles in the Sky.  Therefore, we used a simple Mirror Match between my Austro-Hungarian force and the Royal Navy.  This would give them a good feel for how the game was played.

Forces:

Dual Monarchy

Tegethoff Class- Com 3

Zenta Class- Com 3

Huszar- Com 2

Royal Navy

Queen Elizabeth Class- Com 3

Warrior Class - Com 3

Bullfunch class - Com 3

I didn't even bother giving the ships names or Captain names today, just went by the class to make it easier for them to find it in the book.  

Mission

A simple Patrol mission.  We would use Armor Loss to determine the winner.  The Fleet that lost more Armor would be the loser.   

Set-up:

We played on a 36MU by 36 MU board.  1MU was 1 inch.  For terrain we had three random cloud banks at altitudes 1, 2, and 5 respectively.  I used my ocean mat because it is easy to transport and looks good.  

The two fleets were on a crossing pattern both coming from the North side.  The Brits were up high and mid speed, with the A-H at Mid-speed and mid-altitude.    


Maneuver

As is normal for new players, they turned their Destroyer and came straight at me as fast as they could get it to go.  The British try to turn into Melee up close, while the Dual Monarchy try to lure them away with their cruiser, but it fails to draw them out.  Air torpedo attacks prove ineffective from long-range.


Battle

The British fleet closes the gap fast.  They tank heavy fire from the Tegethoff and the Queen Elizabeth bears down on her prey.  Her forward guns spew fire thanks to a good command roll that let's them go first, and a poor one from the Dual Monarchy deprives them of any Orders.  The Tegethoff is damaged in the exchange.  


The next round, the Tegethoff tries to duck under the guns, but it is not enough.  A full Fire for Effect Broadside plows into her stern, but the Austro-Hungarian captain used a Brace Order to avoid the worst of it.   However, the trailing Destroyer also manages to sink a hit into the Tegethoff.  

There is a very close range gun duel between the Warrior and the Zenta and Huszar.  The British cruiser takes the worst of it, taking a real hit.   

Both the Tegethoff and the Warrior explode!  They are packed in close to the enemy ships.  The Zenta and the Huszar manage to weather the explosions without damage, only Friction.  

End Phase

The Zenta moves to evade the British.  However, the Bullfinch is all over him.  The Huszar moves to protect their cruiser.  However, a torpedo still gets through and hits the Zenta for 1 damage and jamming her rudder.  

With that, we called it a game.

Conclusion:

British Victory!  10 AV to 8 AV

Well, the Queen Elizabeth came out the better Battleship this round.  That +5 at close range for Power.... yikes.  However, I made the mistake of trying to go toe-to-toe with it.  Once I was in the kill zone, realized the mistake; I could not get out of it in a timely way.  

Secondly, usually when someone sends their Destroyer way out ahead I easily focus fire on it and kill it.  I was not able to do that this time because it got behind me and I had to keep my guns focused elsewhere.  Normally, the Destroyer charge never works, but this time it did!  It was a thorn in my back all game.  

I only managed as well as I did because of a lucky strike from my Zenta.  That was a desperation move to bracket the Warrior with Cruiser and the Escort that could have easily backfired on me.  I know from experience that the Warrior can dish out a lot of pain on an enemy Cruiser.  

A relatively quick, fun game as I tried to get some new blood into the game.  With chit-chat, set-up, and take down this one lasted about two hours.  Enough time to drink a warm cup of tea, too.    

The biggest problem is the difficulty of getting models here in the states.  It can be a chore to track down a US distributor with stock.  I usually use Scale Creep Miniatures and have had good success.  There are not even a ton of 3D print options out there either.  The best bet is probably to use Dystopian Wars models or scratchbuilds.  This issue is also slowing down my development of the follow-on game; Mobile Fortress: Verdun.  

Until next time!                  


Become a Patron and get access to all the cool stuff, a peak behind the curtain of Blood and Spectacles, and early-access to playtest games!  


You can follow Blood and Spectacles Facebook page or Instagram for more fun! 

Check out the latest publications and contact me at our Blood and Spectacles website

Or purchase all out games at the Blood and Spectacles Publishing Wargames Vault Page!               


Monday, December 22, 2025

Men of Bronze- Italiotes


The information below is an extract from the Hercules Abroad supplement that can be found on the Wargame Vault.  This post has been sitting in my draft box for a long time, but as I have been working on the Carthaginian supplement Rise and Fall I might as well send it out into the wild now.  Merry Christmas!  

***********************************  

As we continue to expand the world of the Ancient Greeks, it is natural to expand westward into Magna Graecia.  This was a series of loosely affiliated Greek colonies located in Sicily and southern Italy.  This Diaspora was often attributed to the Greeks following in the footsteps of the "Journeys of Hercules".  This mythology was used to justify their expansion, colonization, and infringing on indigenous people's territory.  

We all ready have a list for Syracuse and the City-States of Sicily.  However, Magna Graecia had a vague definition and also included the Southern coastal regions of Italy.  These colonies existed before and during the rise of Rome on the Peninsula, and eventually were rivals to her growth.  The area of Southern Italy was ill suited for traditional Greek hoplite battle, so local variations were required in the military habits of the Greeks who found themselves there.  


This area began to see extensive Greek settlement in the 8th and 7th centuries BCE.  These colonists brought their Greek culture with them such as the idea of an independent City-state, religious traditions, and trade with their homeland.  These Hellenic cities became vital power houses in the region and began to fuse the native Italic cultures with Greek cultural practices as well.  

These Italic-Greek city-states eventually formed their own league for mutual support, trade, and protection against the neighboring Oscan tribes and other Greek rivals in 430 BCE.  This was known as the Italiote League and was controlled by the city of Tarentine in the late 5th century.  

How They Fought

As usual, nothing is known precisely about how the City-States of the Italiote League fought.  We can make some assumption based on how their founding city-states fought, and how rival Italic tribes fought as well.  In addition, there were some military trends in the Hellenistic World that would impact the Italiotes as well.     

Of course, the foundational unit of any Greek city-state army was going to be the Phalanx composed of the land-owning freemen farmers of the nearby lands.  They had the status to buy their own equipment and assemble for drill with their peers.  The Hoplite warriors in Magna Graecia was similar to their brothers elsewhere.  However, the terrain and conditions of Southern Italy were not conducive to the normal Hoplite tactics.  

Native Italic tribes tended to be lighter armored and more mobile than their Hoplite neighbors.  Hit-and-Run attacks and cattle raids were the de facto fighting style of the local tribes.  In this fighting style, speed, mobility, and lighter weapons were critical.  Distance fighting with Javelins was also a common feature.  

Therefore, the Greek colonists to the region needed to meet these needs of warfare.  To do so, Hoplites tended to avoid the use of the panoply and instead used a lighter, native garb that featured bronze pectoral armor plates in the front and rear.  In addition, their head ware tended to be open in the front allowing greater visibility and allow a greater field of vision.  Greaves were often reduced to a single leg or discarded to reduce weight and increase the soldiers ability to pursue or evade.  Indeed, the Hoplite of Italian Magna Graecia was a much lighter and nimbler foe than the heavily armed shock troops of the Greek Peninsula.    


In addition to the lighter hoplites the Italic Greeks made extensive use of Peltasts and Psiloi. These were used to supplement the infantry.  They could provide covering fire for the advance, or screen the other troops.  These were frequently mercenaries or poorer members of the city-state, much like Greece. The javelin was the favored missile weapon of the region.    

The Italiotes made great use of Light Cavalry.   These were designed as a skirmisher based force that utilized javelins and missile weapons, but also had small shields and curved swords for melee combat.  They were an excellent pursuit and scouting force.  This type of light cavalry was frequently referred to as Tarentine Cavalry, even though they were not necessarily native to the city of Tarentum.  It was in reference to the style of skirmish cavalry that was being referenced.  

The final element of an Italiote force would also be made up of Greek mercenaries.  These would fit the more standard Hoplite, heavy infantry role in an Italiote force.  They could form a solid core of heavy infantry.  

Italiote Army List

Armed with the information above, we can start to piece together an army list for the soldiers of the Italiote League or its member city-states.  The bulk of the infantry will most likely be composed of Light Hoplites to represent their lighter panoply and more mobile style of fighting.  This will be supplemented by good Peltast and Psiloi options as the Javelin was a popular weapon in Italian conflicts.

The Cavalry should be Light Cavalry, but the melee ability and skirmisher nature can not be discounted.  Therefore, I am going to add the following Option for the Tarentine Cavalry forces.  

Tarentine Cavalry - 8 Points

Move    Attack    Armor    Courage    Discipline

12BW    4            1            4                2

Shoot: 2 (6BW) 

Special: Evade, Pursue, Move and Shoot

This differentiates them from standard Greek Light Cavalry that focused more on skirmishing, missile fire, and pursuit.  Now, you have a Light Cavalry unit that had enough Melee capability to challenge other Light Cavalry, Peltasts, Warband Infantry, and Psiloi.  However, they are still no match for dedicated Heavy Cavalry, Elites, or Drilled units.  


Italiote Line of Battle

Use the following lists to build your historical forces for the Italiote League or other Itallic-Greek forces. The Lines of Battle help to choose the appropriate units for your historical forces. These are sample lists and there to provide a flavor of potential forces. Players can always modify these lists as they see fit

Each Line of Battle will have an entry with a number. The number indicates the limit of that Unit you can take in the army. If an entry says 1+ your army must have at least one of these units in it. If it is 0+ any number of that unit may be taken. If a Unit is not on the list, it can not be chosen.

Italiotes

1+ Light Hoplites

0+ Peltasts

0-4 Psiloi

0-4 Tarentine or Cavalry

0-1 Drilled Hoplites

0-1 Archers/Slingers

The list above gives access to regular Light Cavalry or you can use the upgraded Tarentine Cavalry provided in the rules.  In addition, the bulk of the force will be Light Hoplites to match the subtle differences between mainland Greece and their Italic colonies on the table.  

Sample Army Lists

Below you can see an example force for the Italiote Greek City-States.  It is built to the 38 point standard and is composed of 6 units.  

2 Light Hoplites

2 Tarentine Cavalry

1 Peltast

1 Psiloi 


Battle of the Elloporus

Most of the warfare of the Italiote League was between fellow Greek City-states and the nearby Latin, Oscan, and Samnite tribes.  However, the threat from Sicily by the Tyrant Dionysus I was a primary concern.  Some scholars speculate that the rise of Dionysus the I of Syracuse was the prime motivation for creating the Italiote League.  Therefore, eventually the rivalry between Syracuse and the Italiote League would come to a head.  This inevitable clash happened in 389 BCE.  

Unsurprisingly, we know little of the actual events of the battle.  We know that it was fought, and that Syracuse won the battle.  The armies were probably in the 15 to 25K range on both sides.  Sources also indicate the battle was fought in the toe of Italy near the Stilaro River.  That pretty much summarizes what little we know of the battle.  

To put it in perspective, this battle took place during the 3rd Sicilian War.  In the same year, the Spartan King Aegislaus II was crossing the Gulf of Corinth to attack the Arcananians.  Athens is getting involved with Rhodes and taking control of the Hellespont under the command of Thrasybulus.  Military activity across Greece and Sicily was common during this time period.    

Of course, situations like these allow for a wargame to fill in the blanks.  We don't know much about the battle strategy, tactics, or terrain.  We also know next to nothing about the forces involved.  Therefore, whatever we choose to do is as accurate as anyone else chooses to do! 

Forces

For this battle, we will be using the Syracuse list and the Italiote League Lists.  Neither of these can be found in the Men of Bronze rulebook itself.  Both lists can be found in the Hercules Abroad supplement on the Wargame Vault.

Italiote League    

2 Light Hoplites

2 Tarentine Cavalry

1 Peltast

1 Psiloi 

Syracuse of Dionysus I

2 Militia Hoplites

1 Cavalry

2 Archers

1 Peltast

Since we know nothing about this battle, we can safely use any lists we want.  I have opted to use the sample Lines of Battle provided for both forces up to 38 points.  

Set-up

We know so little about the Battle of Elleporus, that it seems like just about ANY scenario from the main Men of Bronze rulebook could be used.  However, I feel that the Set Piece Battle scenario maybe the best and safest option.  

The game should take place on a 72 BW by 48 BW board.  The only set feature would be a river traveling along one flank of the battle, probably with the deepest edge being no more than 8 BW in from either short edge.  This could be Difficult, Dangerous, or Impassable terrain depending on how restricting you want the terrain to be.  After placing the river,  I would recommend deploying terrain in the remaining sections of the board and rolling for complications as normal.  The Set-Piece Battle scenario should be a good guide.  

Special Rules

Again, since we know so little about the battle, its prelude, and what occurred we can use any complications that we wish!  No special rules are needed for this battle and the normal process for generating Complications should be sufficient. 

Victory

Again, we know so little that special Victory conditions do not seem to be necessary.  Instead, the Victory Conditions for a Set-Piece Battle should be sufficient.  

However, feel free to add any spice you want to the battle.  For example, the Italiotes could be trying to kill Dionysus I once and for all, and their Victory Condition could be routing the Unit he is in.  If successful, the Italiote wins.  If Dionysus I unit is not routed, then the Syracusans win.  Your choice really! 


Final Thoughts

The Italiote Greek City-States act as an interesting bridge between the world of the Romans and the world of the Greeks.  Since the Italic-Greek City-States began their life in the 8th and 7th Centuries that leaves a lot of time for them to clash with their fellow Greeks such as Athenian Marines or colonists new to the region.  They can also clash with the Barbarian tribe lists, or some of the lists from Hercules Abroad such as the Carthaginians, Syracusan/Sicilian Greeks, or the Etruscans.  There are always no shortage of opponents to fight in the ancient world! 

I think I am starting to wrap-up the world of the Greeks for Men of Bronze.  I have covered a variety of different regions and cultures far beyond Mainland Greece now.  The full list can be found below.  If I go too much further and deeper, I will be into the Roman period which will be covered in Osprey's  Wars of the RepublicNo need to to do that, since it is fully compatible with Men of Bronze

You can get all of the updated materials including a FAQ, Campaign rules, and Lines-of-Battle in the Men of Bronze Supplement: Hercules Abroad.


You can follow Blood and Spectacles Facebook page for more fun: https://m.facebook.com/pg/BloodandSpectacles/posts/?ref=bookmarks&mt_nav=0

Or our website:

Or our Messageboard:

Or our Wargames Vault Page:


Monday, December 8, 2025

Battle Report: Castles in the Sky - Club Med Adventures


The Austro-Hungarians are back and looking to blow-up some more British ships!  Their last face off had the Austro-Hungarians defend their borders against a British attack.  I am not sure they still count as freshly painted, but the Dual Monarchy is looking to see what their bigger ships can manage! 

After the Sudova Riviera Incident, the Royal Navy still had a bad taste left in their British mouths.  They had paid reparations, but it was the HMS New Zealand that had been lost with all hands.  This distaste made some captains in the Air Navy Service look for the chances to make the Austro-Hungarians pay.  

The Austro-Hungarian fleet was on maneuvers above the Mediterranean, clearly in international airspace, far enough away from any shores.  They had been careful to chart their path to avoid any international incidents.  However, the British Navy heard about these maneuvers and moved to shadow the Hapsburg fleet.  

On the third week of maneuvers, the British used a squall as cover to move close to the Austrian fleet.  The British ignored all attempts to communicate, and their ensigns signaled that they were intent on battle.  The Austrian admiral decided to indulge them.  

The Forces

The British

Queen Elizabeth class- Battleship - HMS Valiant- Comm 4

Duke of Edinburgh class - Cruiser - HMS Black Prince - Comm 4

Warrior class - Cruiser - HMS Ajax the Greater - Comm 3 (Green Die) 

Shah Class - Escort - HMS Trout - Comm 2


Austro-Hungarians

Erzhog Karl Class - Battleship- SMS Kaiser Max - Comm 3

Novarra Class - Cruiser - SMS Custoza  - Comm 4

Novarra Class - Cruiser - SMS Schwartzenberg  - Comm 3 (Red Die)

Zenta Class - Cruiser - SMS Spalato - Comm 4

Huszar Class - Escort - SMS Leopard   - Comm 1

Huszar Class - Escort - SMS Panther   - Comm 3 (Red Die)


Mission

This is a standard Patrol mission from the main rulebook.  Therefore, it will be 6 turns and use Armor Loss as the victory conditions.  

Set-up

The table is a 48 x 48 MU board with 1 MU equal to 1 inch.  This battle takes place far out over the Mediterranean.  Therefore, there is no ground-based terrain.   However, there is one large cloud bank, a left-over from the squall between the two fleets at Altitude 6.  

The Dual Monarchy is moving at an angle across the board in a general Line Astern formation between 3-6 altitude and 4 speed.  The British are coming in Line Abreast in the center of their deployment at Altitude 6 and Speed 5.  

As usual, I will be splitting the battle report into three broad sections to give an overview of the game, and not every detail and altitude and speed change.  This division will be the Maneuver Phase, the Combat Phase, and the End Phase of the overall battle.  

In addition, this will be my first game using my snazzy new Cigar Box Battles mat #105 Ocean.  I have 1-inch hexes put on it in case I use it for other games that may need them.  However, this game does NOT use the hexes for play.  This is my fourth mat I have gotten from Cigar Box Battles and I really love my fleece mats.  I have a general ground mat, a space mat, and an urban mat.  They are easy to fold up and store, light for easy transport, and stand-up to wear and tear really well.  Plus, I am in a cold region and in a pinch you can use these fleece mats as an emergency blanket!            

Maneuver Phase   

The Austro-Hungarian fleet had solid command and control.  They were able to dictate the operational pace during this phase of the battle. 

The Royal Navy eschewed subtlety in their approach and barreled forward just under the cloud heights.  The HMS Trout moved to try and get in front of the Dual Monarchy battle line.  The forward guns of the British fired at the enemy fleet ineffectively as they closed. 


The Austro-Hungarians were less eager to mix it up and tried to get the British to close into their broadsides.  However, return fire from the SMS Kaiser Max went catastrophically wrong when both main batteries jammed!  

The SMS Schwartzenburg also rocked the HMS Ajax the Greater with a barrage of torpedoes early in the maneuver phase, causing two serious hits.   

Battle Phase

The two fleets get to the action surprisingly quickly.  The HMS Valiant manages to get the SMS Schwartzenburg into her port arc.  The admiral gives the order to Fire for Effect, and the Austro-Hungarian cruiser is pounded by the big guns of the battleship for 1 hit and 5 friction.  

This means the Schwartzenburg can not fire her Torpedoes.  However, her sister ship the SMS Custoza has the HMS Ajax the Greater all lined up and fires away.  The Warrior manages to avoid the worst of it, but still is hit by three, and one finds a home.  Thankfully, they had prepared for impact and the damage was minor.


The British frigate blasted through the squall and fired her two torpedoes at the trailing SMS Spalato.  Eagle-eyed gunners manage to take out one, while the armored belt absorbs the follow-up shot.  In a similar fashion, the SMS Panther manages to hit the HMS Black Prince with a torpedo as the Austro-Hungarian escort manages to maneuver around the British fleet.   

The SMS Spalato and the SMS Kaiser Max pour damage into the little HMS Trout causing the ship to rock and flounder from friction.  In the exchange, her Rudder is jammed.  The Kaiser Max manages to clear the jam from her main guns. 

It is clear that the British are trying to cut-off the Austro-Hungarian command ship, so the admiral makes a decision and decides to Come About and plow into the Squall.  However, the British ships are able to close the gap and get into short range and line-of-sight.  

 In desperation, the Kaiser Max splits her fire between the HMS Valiant and the HMS Black Prince.  The Valiant absorbs the hits on her armor but takes Friction.  The Black Prince tries to Prepare for Impact but fails!  She takes friction and two more penetrating hits.   The British Admiral smiles wickedly, but the grin is wiped away as his command ship is rocked by the desperate Austro-Hungarian fire.  He can not Fire for Effect, but he is still confident his battleship outmatches his foe.  The big guns roar out and riddle the Austro-Hungarian command ship causing 6 friction and 4 hits.  

The SMS Leopard fires on the HMS Ajax the Greater, but the PD takes out two and the last torp misses.  The Ajax adds more to the Kaiser Max damage with two more real hits and additional friction.  The SMS Spalato targets the Ajax in retaliation but only causes friction.  The Austro-Hungarian Air Torpedoes had trouble hitting anything due to the winds from the squall. 

The fire from the Kaiser Max managed to unseat the forward Medium Battery of the HMS Black Prince, making the forward main gun inoperable.  In return, the Kaiser Max blew-up completely from the furious firepower from the Valiant and Ajax the Greater!  The detonation of her magazine is enough to engulf the three main British ships, and the SMS Leopard and Spalato.  The HMS Black Prince is damaged from the blast and has her screw fouled, however her captain decides to stay in the fight.  The HMS Ajax the Greater's bridge was destroyed in the blast as well.  The SMS Leopard caught on fire, and her bridge was also destroyed.  The HMS Valiant and SMS Spalato weather the blast unscathed.  

The HMS Trout manages to repair her rudder.  The Captain of the SMS Spalato takes command. 

End Phase   

Despite the loss of the command ship, it is still a close game based on Armor loss.  However, the Austro-Hungarian fleet is out of position, while the British are still in a solid formation.  Many of the Dual Monarchy's ships reload their Torpedoes, while the SMS Spalato Crash Dives to try and get out of the kill zone of the British fleet's guns.  

The SMS Panther drives straight for the HMS Trout and fires its bow battery at it, causing a hit.  Meanwhile, the British Admiral again fires for effect on the diving SMS Spalato and manages to tag it with a hit.  The SMS Custoza manages to sink a few long range air torpedoes into the HMS Trout as well.  However, the HMS Ajax the Greater also manages to hit the diving Spalato, but jammed her forward battery in the process.  

The SMS Spalato had its screw fouled, slowing it in its sprint to escape.  Meanwhile, the HMS Trout was crippled from the Torpedo and gunfire.  The Captain strikes her colors to avoid destruction.    The Leopard fails to put out the Fire on board.  

The SMS Schwarzenburg and the Custoza decide they are not done with the British just yet, and line up for an Air Torpedo attack.  The British HMS Valiant decides to Prepare for Impact.  The two cruisers launch a withering barrage that manage to overwhelm the point defenses of the British and hit the Battleship and the Cruiser.  The damage is enough for the HMS Ajax the Greater to Strike her Colors.  

With that, the Captain of the SMS Spalato signals for his ships to scatter and return to base.  

Conclusion

The British were left with the field of battle but took some serious damage in the process.  Let's go to the big board.  It looks like the British lost 17 Armor, to the Austro-Hungarian 13 Armor loss.  Technically, a win for the Austro-Hungarian forces.  However, the British can take some solace in destroying the Dual Monarchy Flagship and Battleship.  The late "loss" of the HMS Ajax the Greater and HMS Trout shifted the balance.  

Once again, the value of Air Torpedoes pays off.  Their ability to snipe from lower or higher altitudes is great.  The pair of Novarra class cruisers paid-off, and the Escorts were not bad either.  Too bad the SMS Leopard had a command rating of 1, so I had them on Battleship escort duty.  The SMS Panther worked great though.  The rest of the ships in the Dual Monarchy did their job but were not nearly as useful.  

The Queen Ellizabeth class battleship is terrifying to face.  Those powerful main batteries combined with the almost automatic ability to Fire for Effect can ruin any ships day.  It basically one-shotted the Kaiser Max!  If the British have one, eventually it is going to get a powerful broadside off.  It the HMS Ajax the Greater had not have struck their colors, it would have been a tie.  

The Royal Navy sense of pride had been satisfied as they sent the Austro-Hungarian fleet scurrying back to port.  Their control of the skies over the Mediterranean was confirmed for all to see.  However, close analysis by the Admiralty after the fact revealed the truth.  The Royal Navy had not covered itself in as much glory as they had hoped.  

At the Concert of Europe, the other powers looked upon them as the aggressors.  The Italians in particular were displeased with this show of forces in their desired sphere of influence.  The Foreign Office had hoped to pry them from the Triple Alliance by humiliating their traditional foe the Austro-Hungarians, but doing so over the Mediterranean only made the Italians suspicious of British intentions in the region.  

For the Austro-Hungarian point-of-view, this helped rally their balkanized people behind a united front.  National pride had been hurt by the aggressive British moves towards them.  The Dual Monarchy was more united than ever, and their ties with the Italians actually improved, despite territorial disputes between them.  The loss of the Kaiser Max had been a terrible loss of life and air naval power, but the boost in unity may have been a fair trade.  The crew became post-humous National heroes.

Until next time!


Become a Patron and get access to all the cool stuff, a peak behind the curtain of Blood and Spectacles, and early-access to playtest games!  


You can follow Blood and Spectacles Facebook page or Instagram for more fun! 

Check out the latest publications and contact me at our Blood and Spectacles website

Or purchase all out games at the Blood and Spectacles Publishing Wargames Vault Page!           

Monday, October 13, 2025

Review: Voidfighter- Osprey Games


 Osprey Games latest is a starfighter game.  This should be right up my alley as I love a good dogfighting game of air or space combat.  I have some experience with playing and designing this type of game so I am really looking forward to this one.  

My pedigree in flying games goes way back to Aeronautica Imperialis (V1) from Forgeworld and Warwick Kinrade.  I was a bit late to the party but have many fun games since.  I spent a lot of time hand-making planes, making modifications to the rules, new aircraft, and new missions.  On the old Airspace Forums I even ran several annual narrative campaigns.  Since then, I tried several other aircraft and starfighter games with varying degrees of success/interest.  I still have those PDFs somewhere, I should make them available somewhere.  Maybe for Patreon Patrons?      

As an added bonus the writer of Voidfighter, Casey Garske; is a fellow Minnesotan.  For those who do not know, Minnesota is a frozen wasteland just south of Canada in the top middle of the United States.  If you have seen the movie or TV show Fargo it is that area.  The motel scene at the very end of the film was filmed right outside the town I grew up in.  White Bear Lake, "Go Bears" was just south of my hometown.  I wonder if he and I have ever crossed paths over a gaming table or in a FLGS?  If so, it would have been some time ago as I no longer live in the area. 

Final note, this game is 80 pages long.  Since Castles in the Sky I think Osprey has increased the length of their Blue Books from 62 to 80 pages.  I think this is a good idea as it allows the games to breath a bit more and add in some of the stuff that allows a designer to go beyond the 4Ms. I like to think my work helped pave the way for this change. 

Anyway, enough waffling about.  It is time to kick the tires and light the fires! 

Things I Liked

I always love a model and scale agnostic game, and this fits the bill.  I was also happy to see the game uses facings for various rules which helps add to the tactical game play.  Even though there is no real basing or scale, the rules do have three sizes of ships from Snub Fighters, to Gunships, to Corvettes.  There is no real need to base or even use minis, as flats would work just fine too.  If you have old X-wing, Aeronautica Imperialis, Battlestar Galactica, Micro Machine toys, or Armored Clash aircraft you should be just fine to play.  The typical game is between 4 to 16 per side. 

This game uses stander RPG polyhedrons with dice shifting.  I.e. instead of adding or subtracting modifiers, you move from one type of dice to roll to the higher or lower dice rolling. In addition, all dice rolls are 2dX.  You roll two dice and add them together.  This makes a nice curve of results that savvy players can use to their advantage and allows a bit of predictability in dice results that single dice do not have.   

The heart of the game is opposed rolls, but there are unopposed rolls for certain actions and pilot checks.  Opposed rolls are a nice feature as it keeps both players in the game and rolling simultaneously for speed of resolution.  In a dogfight game you want to keep things moving quickly to keep the speed of the game up to match the action. Unusually, in the Unopposed rolls your opponent also rolls to represent the "Uncaring Universe".  This allows players to avoid looking up target numbers for speed of game play, but means that the Player has more randomness in their calculation.    

I am very happy to see so many modern games using command points to perform special actions.  This game is no exception.  You get a set amount per round, with limitations if you lose your flight leader.  These allow you to perform special actions like the famous Cobra Maneuver, fire torpedoes, Re-group, etc.  It can also be used to modify rolls.  It you have seen it in a movie you will find it here.   

There are a decent amount of movement and gunnery actions that you can take, even before you go into using command points.  Unlike most Osprey books, the extra size allows a roster and Quick Reference sheet in the back.  However, it doesn't really cover these maneuvers.  Ships can do a Manuever or Medium move once per speed of the Voidfighter, so a Voidfighter with a speed of 3 can do any combination of Moves or Maneuvers up to 3.   


Things I Did Not Like

Measuring sticks.  Not a huge fan of these, but I know several game systems that make use of them.  To me they are just another barrier to entry, similar to templates.  They should be 2.5 inches, 5 inches, and 10 inches respectively.  Seeing these stick reminded me a bit the rules for Of Gods and Mortals also from the Osprey Wargaming Series.  These sizes are referred to as Short, Medium, and Long in the rules.        

In addition to dice shifting, there are the occasional actual modifiers.  I am not a fan of this as it goes against the Universal Mechanics established earlier for the game.  However, it does add a bit of granularity where it maybe needed that dice shifting does not allow. 

Interestingly, in a sci-fi game there is NO pre-measuring allowed.  This promotes mistakes in gameplay and also keeps the speed up as players have to commit to an action instead of hee-hawing around.  However, I am not 100% sure it fits a far future sci-fi setting where such technology would be easy to acquire.    

It looks like Initiative for this game is all or nothing.  The winner moves second and shoots first.  Activation is in groups, with a quarter moving at a time and then the opponent moving.  This is not an intuitive approach as there is a chart to help you figure our how many ships to activate.  I think it would have been better to use a Frostgrave style approach where the Flight Leader activates with 3 others, then the XO Activates with up to three others, and then everyone else.  That is if you wanted alternate group activation.  The easiest solution may have simply been a wingman/Squadron system where they have alternate activations for movement. 

There is a hit location table for each fighter, and I am not sure I like this level of detail for snubfighters.  I think I prefer a 1 or 2 hit removal rather than the attritional type of fighting we see here.  The level of detail maybe too much for the scale of the game?    

Loved the artwork in the book, but I was less thrilled with the miniature images.  It was not that the miniatures looked bad, but it was hard to see them on the space backdrops.  A hazard of space games.  In addition, the miniature photos had to be made smaller to fit all the text for the game into 80 pages.   

Meh and Other Uncertainties

Of note, this is designed to be a "kitchen table" game.  Therefore, it can play on a 3 x4 or even slightly smaller space.  These have become popular as the hobby of wargaming has grown.  Space and time seem to be in limited supply, so it makes sense that players would gravitate into games that can fit in smaller spaces and quicker matches.  There is nothing that would keep this game from being playable on a larger space either.     

There is a nice selection of space terrain for the game from asteroids, to turrets, to gravity anomalies, to space creatures.  Enough to keep any board interesting.  

There is also some pre-made factions and ships for the built-in setting of the game.  However, this game also has about 4 and a half pages on designing your own ships.  I am torn because there is no system of designing that someone can not break, but players love to have this feature to make their own corner of the universe or fit some existing sci-fi franchise.  Here you can have it both ways.  

There are rules for recruiting your squadrons and giving them Traits as well.  Again, this allows players to customize their experience with the game.  However, there are a lot of moving parts in this game with maneuvers, traits, command points, etc.  This may lead to some cognitive load, so it might be best to decide what you are going to use or not use with your opponent before play.  

There are 12 scenarios and rules for campaigns.  This helps with the replayability of the game.  


Final Thoughts

For those real old timers, this made me want to track down and get some Wing Commander themed 3D prints.  If you know where a guy can get some, please, please, please leave a comment. I would be very happy!  

If you have a ton of starship/future/alternate history aircraft sitting around, this would be a nice little pick-up.  Since it is miniature agnostic you could even make die cast or film licensed themed toys work if you really wanted to.  

This is a solid set of core rules with all the things you need for a good old fashioned space dogfighting game.  There are also enough bells and whistles to keep it engaging.  I am probably in the minority when I say I would love a 3D layer added to the rules to add to the tactical play.  Most games of this type do not get that ambitious and this is no exception.  Adding a 3rd dimension can make game play much more cumbersome, increase the cognitive load, and just add something else to track.  However, it adds such a great layer of tactical play to the game.  The game all ready probably has too many options and maneuvers as is, so a 3D element would be too much.   

This would make a fine club night game or even a campaign game.  I could see really inventive players tying this in with large land and space campaigns as well.  You can see the core inspirations on the tin, and that is just fine! Innovation is over-rated.  This game gets the right mix of new mechanics in with solid and familiar aircraft flying game rules.  Most of my complaints are simply quibbles and preferences.     

Hopefully I will have this out on the table soon.  Until next time!


Become a Patron and get access to all the cool stuff, a peak behind the curtain of Blood and Spectacles, and early-access to playtest games!  


You can follow Blood and Spectacles Facebook page or Instagram for more fun! 

Check out the latest publications and contact me at our Blood and Spectacles website

Or purchase all out games at the Blood and Spectacles Publishing Wargames Vault Page!