Showing posts with label brigade models. Show all posts

Monday, December 8, 2025

Battle Report: Castles in the Sky - Club Med Adventures


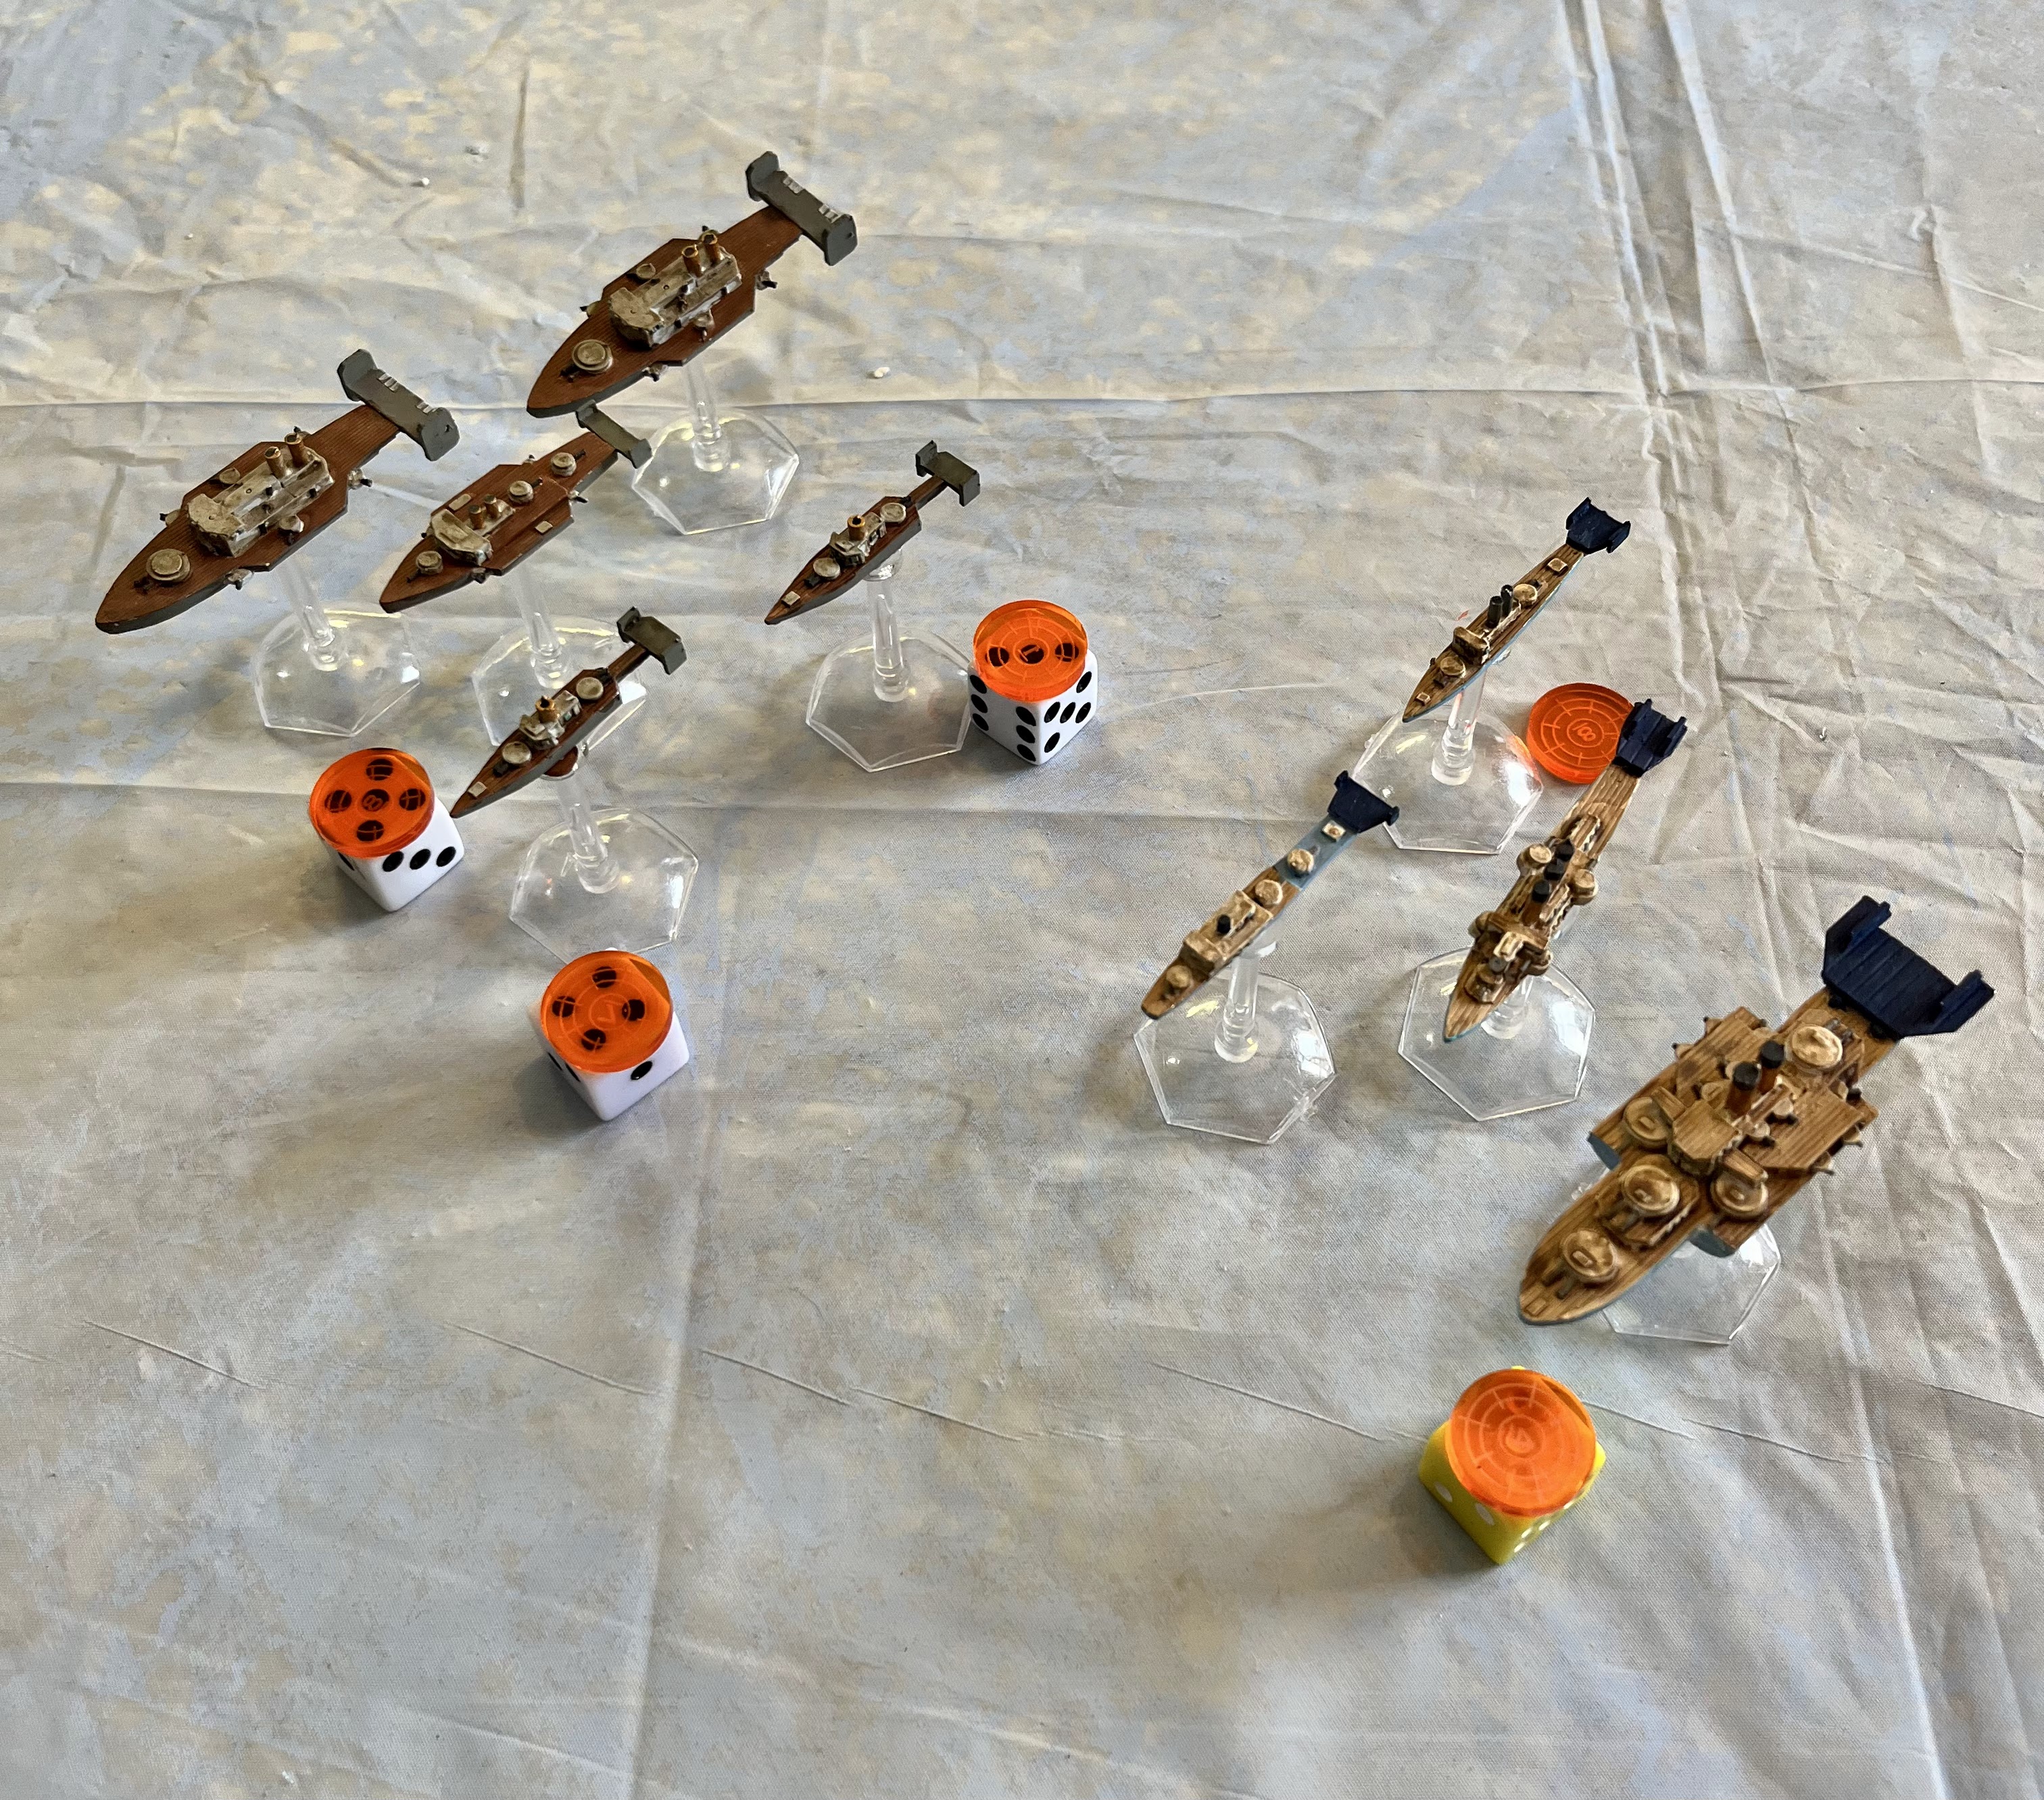
The Austro-Hungarians are back and looking to blow-up some more British ships!  Their last face off had the Austro-Hungarians defend their borders against a British attack.  I am not sure they still count as freshly painted, but the Dual Monarchy is looking to see what their bigger ships can manage! 

After the Sudova Riviera Incident, the Royal Navy still had a bad taste left in their British mouths.  They had paid reparations, but it was the HMS New Zealand that had been lost with all hands.  This distaste made some captains in the Air Navy Service look for the chances to make the Austro-Hungarians pay.  

The Austro-Hungarian fleet was on maneuvers above the Mediterranean, clearly in international airspace, far enough away from any shores.  They had been careful to chart their path to avoid any international incidents.  However, the British Navy heard about these maneuvers and moved to shadow the Hapsburg fleet.  

On the third week of maneuvers, the British used a squall as cover to move close to the Austrian fleet.  The British ignored all attempts to communicate, and their ensigns signaled that they were intent on battle.  The Austrian admiral decided to indulge them.  

The Forces

The British

Queen Elizabeth class- Battleship - HMS Valiant- Comm 4

Duke of Edinburgh class - Cruiser - HMS Black Prince - Comm 4

Warrior class - Cruiser - HMS Ajax the Greater - Comm 3 (Green Die) 

Shah Class - Escort - HMS Trout - Comm 2


Austro-Hungarians

Erzhog Karl Class - Battleship- SMS Kaiser Max - Comm 3

Novarra Class - Cruiser - SMS Custoza  - Comm 4

Novarra Class - Cruiser - SMS Schwartzenberg  - Comm 3 (Red Die)

Zenta Class - Cruiser - SMS Spalato - Comm 4

Huszar Class - Escort - SMS Leopard   - Comm 1

Huszar Class - Escort - SMS Panther   - Comm 3 (Red Die)


Mission

This is a standard Patrol mission from the main rulebook.  Therefore, it will be 6 turns and use Armor Loss as the victory conditions.  

Set-up

The table is a 48 x 48 MU board with 1 MU equal to 1 inch.  This battle takes place far out over the Mediterranean.  Therefore, there is no ground-based terrain.   However, there is one large cloud bank, a left-over from the squall between the two fleets at Altitude 6.  

The Dual Monarchy is moving at an angle across the board in a general Line Astern formation between 3-6 altitude and 4 speed.  The British are coming in Line Abreast in the center of their deployment at Altitude 6 and Speed 5.  

As usual, I will be splitting the battle report into three broad sections to give an overview of the game, and not every detail and altitude and speed change.  This division will be the Maneuver Phase, the Combat Phase, and the End Phase of the overall battle.  

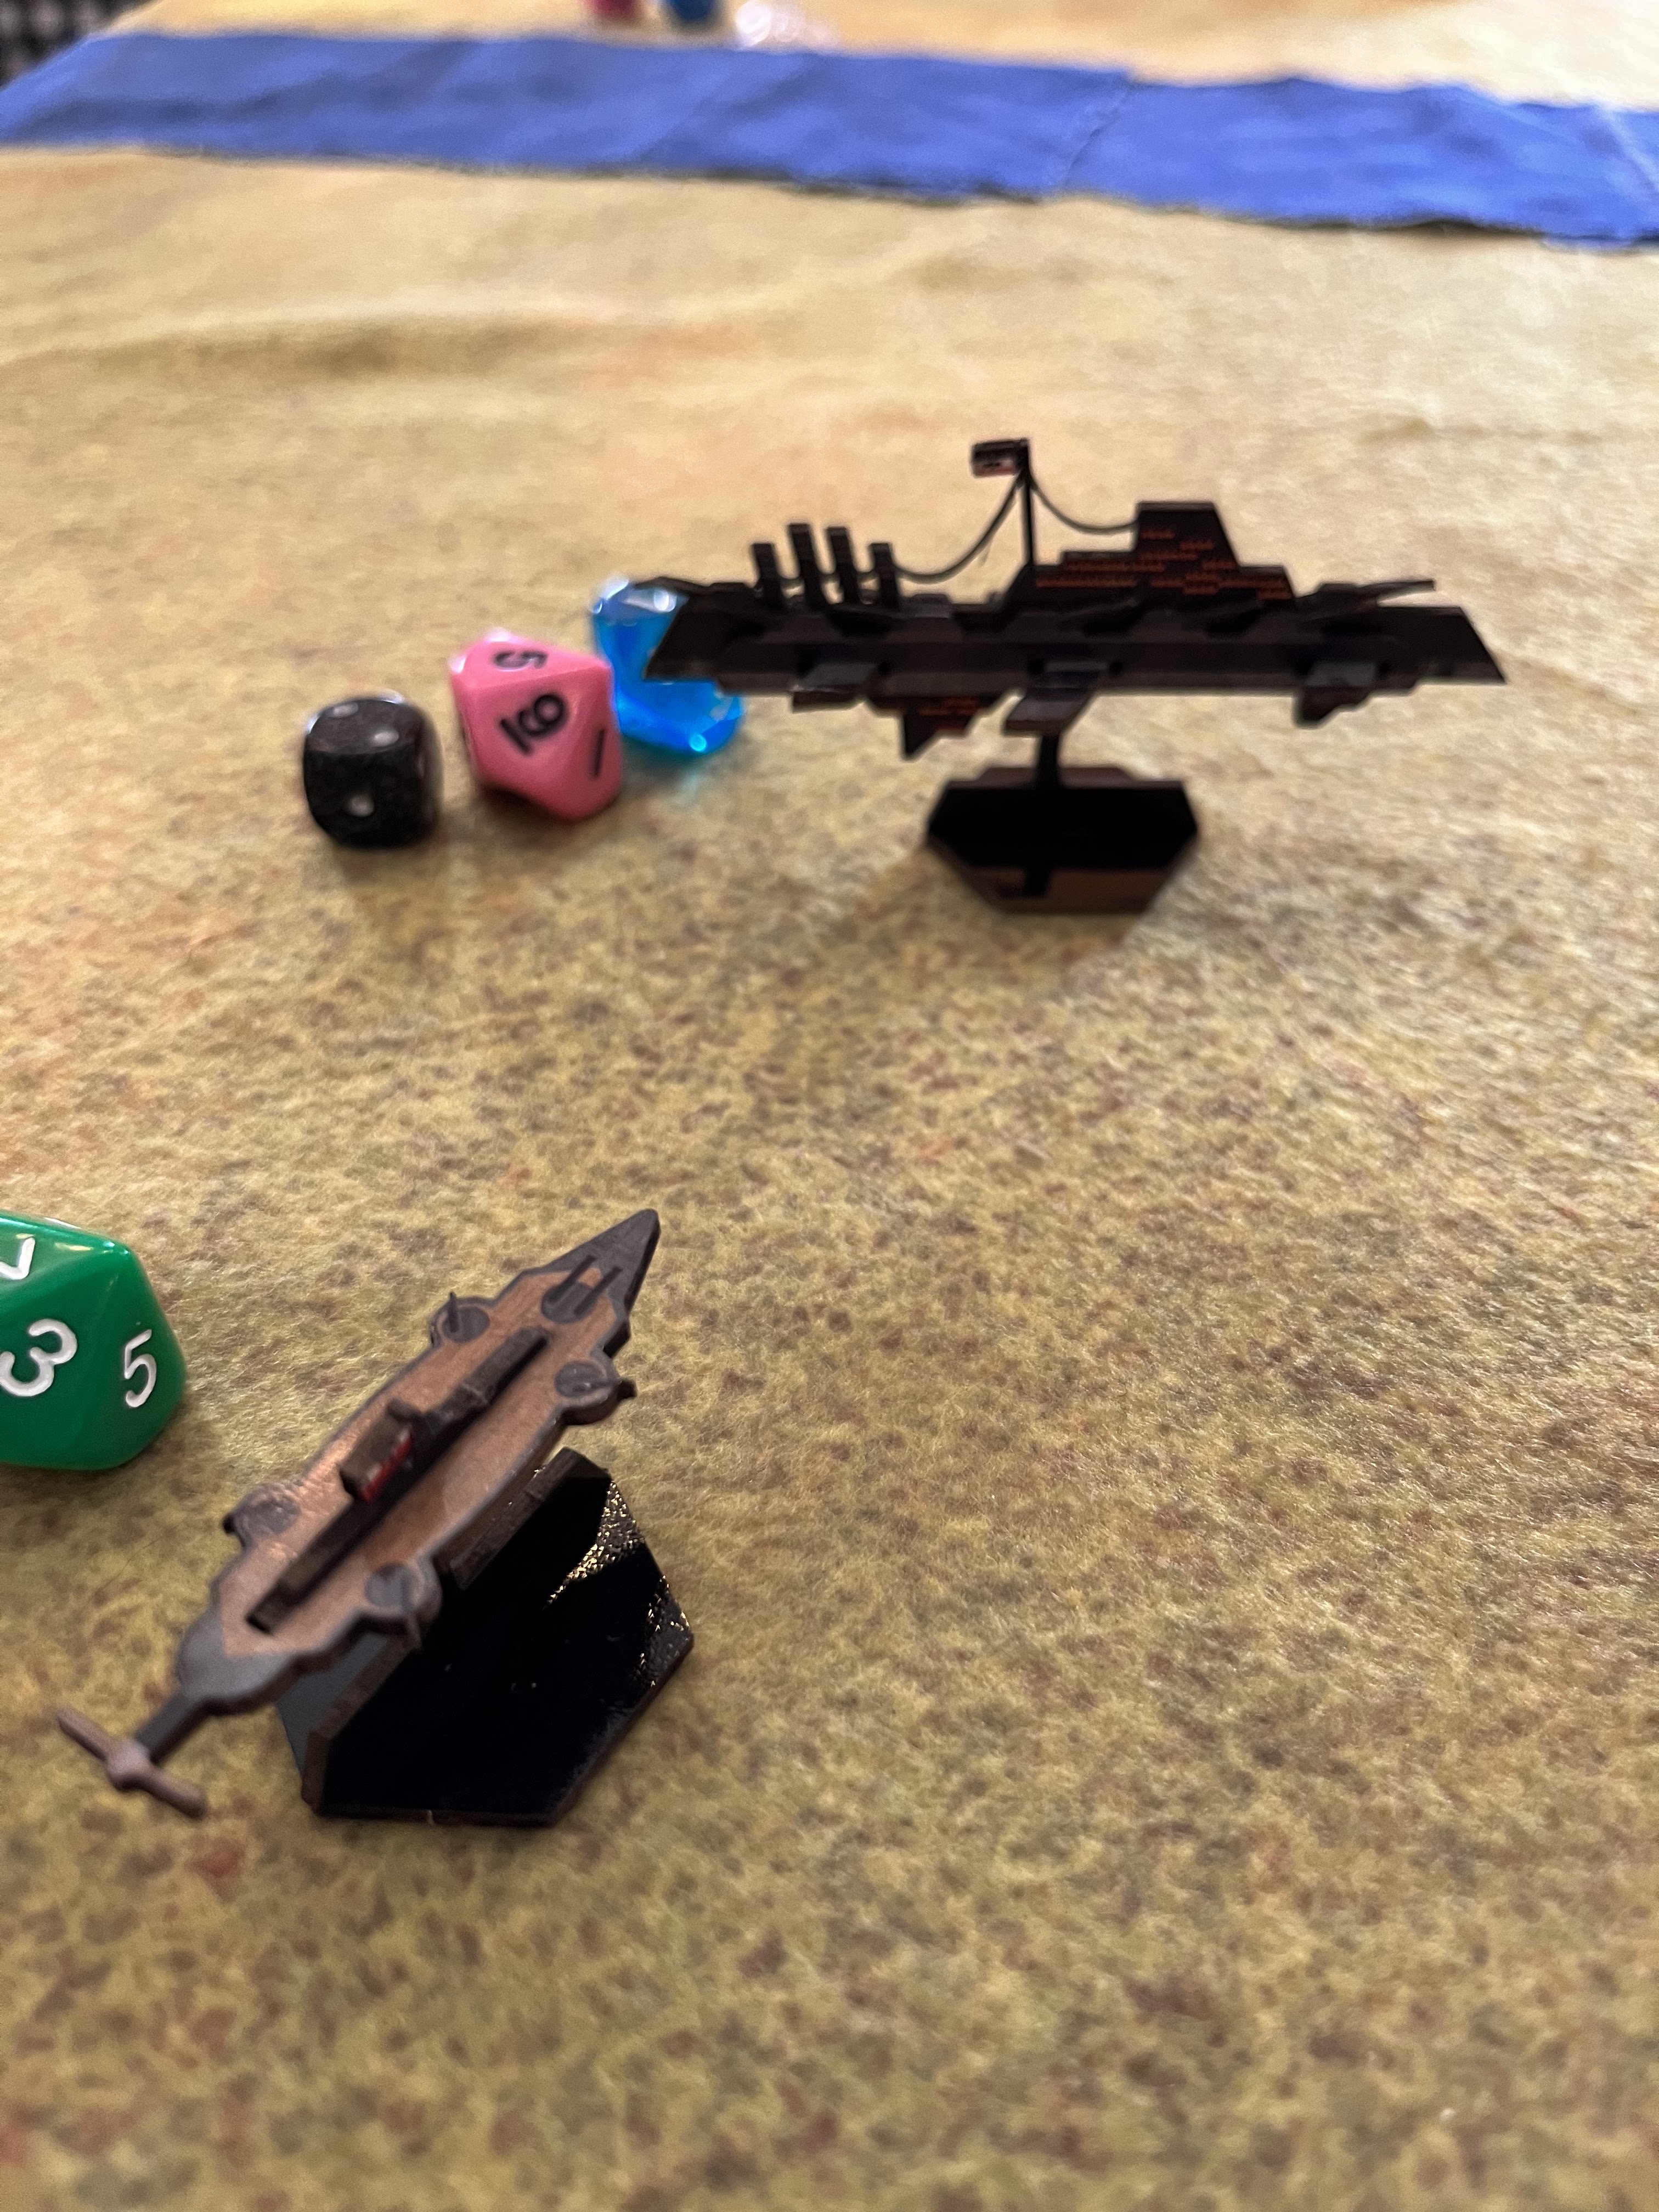
In addition, this will be my first game using my snazzy new Cigar Box Battles mat #105 Ocean.  I have 1-inch hexes put on it in case I use it for other games that may need them.  However, this game does NOT use the hexes for play.  This is my fourth mat I have gotten from Cigar Box Battles and I really love my fleece mats.  I have a general ground mat, a space mat, and an urban mat.  They are easy to fold up and store, light for easy transport, and stand-up to wear and tear really well.  Plus, I am in a cold region and in a pinch you can use these fleece mats as an emergency blanket!            

Maneuver Phase   

The Austro-Hungarian fleet had solid command and control.  They were able to dictate the operational pace during this phase of the battle. 

The Royal Navy eschewed subtlety in their approach and barreled forward just under the cloud heights.  The HMS Trout moved to try and get in front of the Dual Monarchy battle line.  The forward guns of the British fired at the enemy fleet ineffectively as they closed. 


The Austro-Hungarians were less eager to mix it up and tried to get the British to close into their broadsides.  However, return fire from the SMS Kaiser Max went catastrophically wrong when both main batteries jammed!  

The SMS Schwartzenburg also rocked the HMS Ajax the Greater with a barrage of torpedoes early in the maneuver phase, causing two serious hits.   

Battle Phase

The two fleets get to the action surprisingly quickly.  The HMS Valiant manages to get the SMS Schwartzenburg into her port arc.  The admiral gives the order to Fire for Effect, and the Austro-Hungarian cruiser is pounded by the big guns of the battleship for 1 hit and 5 friction.  

This means the Schwartzenburg can not fire her Torpedoes.  However, her sister ship the SMS Custoza has the HMS Ajax the Greater all lined up and fires away.  The Warrior manages to avoid the worst of it, but still is hit by three, and one finds a home.  Thankfully, they had prepared for impact and the damage was minor.


The British frigate blasted through the squall and fired her two torpedoes at the trailing SMS Spalato.  Eagle-eyed gunners manage to take out one, while the armored belt absorbs the follow-up shot.  In a similar fashion, the SMS Panther manages to hit the HMS Black Prince with a torpedo as the Austro-Hungarian escort manages to maneuver around the British fleet.   

The SMS Spalato and the SMS Kaiser Max pour damage into the little HMS Trout causing the ship to rock and flounder from friction.  In the exchange, her Rudder is jammed.  The Kaiser Max manages to clear the jam from her main guns. 

It is clear that the British are trying to cut-off the Austro-Hungarian command ship, so the admiral makes a decision and decides to Come About and plow into the Squall.  However, the British ships are able to close the gap and get into short range and line-of-sight.  

 In desperation, the Kaiser Max splits her fire between the HMS Valiant and the HMS Black Prince.  The Valiant absorbs the hits on her armor but takes Friction.  The Black Prince tries to Prepare for Impact but fails!  She takes friction and two more penetrating hits.   The British Admiral smiles wickedly, but the grin is wiped away as his command ship is rocked by the desperate Austro-Hungarian fire.  He can not Fire for Effect, but he is still confident his battleship outmatches his foe.  The big guns roar out and riddle the Austro-Hungarian command ship causing 6 friction and 4 hits.  

The SMS Leopard fires on the HMS Ajax the Greater, but the PD takes out two and the last torp misses.  The Ajax adds more to the Kaiser Max damage with two more real hits and additional friction.  The SMS Spalato targets the Ajax in retaliation but only causes friction.  The Austro-Hungarian Air Torpedoes had trouble hitting anything due to the winds from the squall. 

The fire from the Kaiser Max managed to unseat the forward Medium Battery of the HMS Black Prince, making the forward main gun inoperable.  In return, the Kaiser Max blew-up completely from the furious firepower from the Valiant and Ajax the Greater!  The detonation of her magazine is enough to engulf the three main British ships, and the SMS Leopard and Spalato.  The HMS Black Prince is damaged from the blast and has her screw fouled, however her captain decides to stay in the fight.  The HMS Ajax the Greater's bridge was destroyed in the blast as well.  The SMS Leopard caught on fire, and her bridge was also destroyed.  The HMS Valiant and SMS Spalato weather the blast unscathed.  

The HMS Trout manages to repair her rudder.  The Captain of the SMS Spalato takes command. 

End Phase   

Despite the loss of the command ship, it is still a close game based on Armor loss.  However, the Austro-Hungarian fleet is out of position, while the British are still in a solid formation.  Many of the Dual Monarchy's ships reload their Torpedoes, while the SMS Spalato Crash Dives to try and get out of the kill zone of the British fleet's guns.  

The SMS Panther drives straight for the HMS Trout and fires its bow battery at it, causing a hit.  Meanwhile, the British Admiral again fires for effect on the diving SMS Spalato and manages to tag it with a hit.  The SMS Custoza manages to sink a few long range air torpedoes into the HMS Trout as well.  However, the HMS Ajax the Greater also manages to hit the diving Spalato, but jammed her forward battery in the process.  

The SMS Spalato had its screw fouled, slowing it in its sprint to escape.  Meanwhile, the HMS Trout was crippled from the Torpedo and gunfire.  The Captain strikes her colors to avoid destruction.    The Leopard fails to put out the Fire on board.  

The SMS Schwarzenburg and the Custoza decide they are not done with the British just yet, and line up for an Air Torpedo attack.  The British HMS Valiant decides to Prepare for Impact.  The two cruisers launch a withering barrage that manage to overwhelm the point defenses of the British and hit the Battleship and the Cruiser.  The damage is enough for the HMS Ajax the Greater to Strike her Colors.  

With that, the Captain of the SMS Spalato signals for his ships to scatter and return to base.  

Conclusion

The British were left with the field of battle but took some serious damage in the process.  Let's go to the big board.  It looks like the British lost 17 Armor, to the Austro-Hungarian 13 Armor loss.  Technically, a win for the Austro-Hungarian forces.  However, the British can take some solace in destroying the Dual Monarchy Flagship and Battleship.  The late "loss" of the HMS Ajax the Greater and HMS Trout shifted the balance.  

Once again, the value of Air Torpedoes pays off.  Their ability to snipe from lower or higher altitudes is great.  The pair of Novarra class cruisers paid-off, and the Escorts were not bad either.  Too bad the SMS Leopard had a command rating of 1, so I had them on Battleship escort duty.  The SMS Panther worked great though.  The rest of the ships in the Dual Monarchy did their job but were not nearly as useful.  

The Queen Ellizabeth class battleship is terrifying to face.  Those powerful main batteries combined with the almost automatic ability to Fire for Effect can ruin any ships day.  It basically one-shotted the Kaiser Max!  If the British have one, eventually it is going to get a powerful broadside off.  It the HMS Ajax the Greater had not have struck their colors, it would have been a tie.  

The Royal Navy sense of pride had been satisfied as they sent the Austro-Hungarian fleet scurrying back to port.  Their control of the skies over the Mediterranean was confirmed for all to see.  However, close analysis by the Admiralty after the fact revealed the truth.  The Royal Navy had not covered itself in as much glory as they had hoped.  

At the Concert of Europe, the other powers looked upon them as the aggressors.  The Italians in particular were displeased with this show of forces in their desired sphere of influence.  The Foreign Office had hoped to pry them from the Triple Alliance by humiliating their traditional foe the Austro-Hungarians, but doing so over the Mediterranean only made the Italians suspicious of British intentions in the region.  

For the Austro-Hungarian point-of-view, this helped rally their balkanized people behind a united front.  National pride had been hurt by the aggressive British moves towards them.  The Dual Monarchy was more united than ever, and their ties with the Italians actually improved, despite territorial disputes between them.  The loss of the Kaiser Max had been a terrible loss of life and air naval power, but the boost in unity may have been a fair trade.  The crew became post-humous National heroes.

Until next time!


Become a Patron and get access to all the cool stuff, a peak behind the curtain of Blood and Spectacles, and early-access to playtest games!  


You can follow Blood and Spectacles Facebook page or Instagram for more fun! 

Check out the latest publications and contact me at our Blood and Spectacles website

Or purchase all out games at the Blood and Spectacles Publishing Wargames Vault Page!           

Monday, August 18, 2025

Battle Report: Castles in the Sky - Visiting the Sudova Riviera!


Oh boy, after painting up the Austro-Hungarian Fleet that I picked up from Scale Creep Miniatures, it was time for them to hit the table.  Freshly painted miniatures are always a joy to take to the field, even if they often get hammered on the table.  

The Dual Monarchy of the Austro-Hungarian Empire often treated the Balkans as their Sphere of Influence.  The Dalmatian Coast and the Sudova Riviera in Montenegro were both claimed to be their own airspace.  The Concert of Europe never officially agreed to this, but it was a defacto Fait Accompli.  Therefore, it was not unusual for airships from the Dual Monarchy to be found patrolling the area.  

However, the British Empire had been toying diplomatically with an Entente Alliance with Italy.  The Italians and the Austrians were part of the Triple Alliance along with Germany.  However, Italy craved the Dalmatian coast and the territory on the other side of the Adriatic.  In order to curry favor and potentially cause a rift in the Triple Alliance, the British decided to test the Austrian resolve above the Sudova Riviera. This area is well known for its beaches and tourism, rather than its military importance.

The Forces: 

Austro-Hungarian Empire

Kaiserin Class Armored Cruiser- SMS Maria Theresa - Command 3

Zenta Class Cruiser - SMS Aspern - Command 1

Novara Class Cruiser - SMS  Saida - Command 3

Huzsar Destroyer- SMS Salamander  - Command 2, Air Torpedo


British Empire

Indefatigable Battle Cruiser- HMS New Zealand - Command 4

Warrior Class Cruiser - HMS Armstrong - Command 3

Duke of Edinburgh Class Cruiser- HMS Regent - Command 2

Active Class Light Cruiser- HMS Antigone - Command 3


Mission

Today we will be playing a Patrol mission per the rules in the main rulebook.  There will be no Complications.  

Set-up

Today, we will be fighting on a 48 MU by 48 MU table.  1 MU will equal 1 inch.  

The British are the Attackers and will be deploying approaching the coast.  The Austro-Hungarians will deploy on the opposite board edge.  Both sides are up to 12 MU in from their board edge. 

The terrain is a coastline cutting across at an angle.  The coastline has some cliffs and mountains of various heights of 1-3 at the coast, with two larger mountains at 4 and 6.

The British are coming in at an angle, looking to cut across from Southwest to the Northeast.  They are at speed 5 and altitudes between 4-6.  The Battle Cruiser is leading the way.   

The Austro-Hungarians are coming in from the same edge but moving Northwest to Southeast.  If no one changes course, the two sides will cross paths in the center of the board.  They are at altitudes 5-7 and at speed 4 across the fleet.       

As usual, I will be breaking the game down into three general phases to make it easier to document and follow the battle.  I won't be detailing every ships movement or altitude change.  The first two turns are the Maneuver phase, the middle turns are the Battle phase, and the final two turns are the End Phase.  This is a 6-turn game.

Maneuver Phase

The HMS New Zealand picked up speed and moved to cut off the Austrian ships, while the rest of the squadron turned towards the enemy.  The Austria-Hungarians turned away and stayed tight, with their Destroyer shooting out ahead and starting to turn back into the fray to snipe.  

The HMS Regent opened the battle with some bow shots that rang off the hull off the SMS Maria Theresa, leaving three friction.  The Maria Theresa returned fire and clanged a shell off the British cruiser as a warning. 

Battle Phase

The British aggressively press forward, with the HMS New Zealand dropping to the same altitude as the Maria Theresa to attack.  However, the Austro-Hungarians make an aggressive turn into the oncoming British and manage to Cross the T of the Cruiser squadron.  

The HMS New Zealand and Regent Fire for Effect and rock the Austro-Hungarian flagship with 8 friction and 2 hits.  The HMS Armstrong and Antigone fire at the SMS Saida, but their bow guns only manage to cause some friction.  The Austrian command ship's rudder is jammed from the barrage.   

The Austrians give as good as they get, with the Maria Theresa and Saida returning fire on the HMS Regent and landing two hits and some friction.  The Regent's Air Screw is fouled and her Rudder jammed in the exchange.  Air torpedoes from the Dual Monarchies flagship manage to strike home on the HMS New Zealand as well, causing a hit.  

The shot was a lucky one as the New Zealand explodes in a cataclysmic chain of explosions!  The explosion is so large that it hits the SMS Salamander and causes her screw to be fouled.  It also further damages the HMS Regent!  Promising careers are cut short as the New Zealand goes down with all hands! 

The Captain of the HMS Regent takes command of the fleet, despite having his own issues.       

With the British Flag gone, the battle quickly devolves into a general melee.  The British elect the Austro-Hungarians to go first.  The Maria Theresa is stricken and flies straight her rudder jammed.  The SMS Saida uses a Command to Come About and turns to go straight down the throat of the British fleet, who scramble to get out of the way.  Meanwhile, the Aspern and Salamander try to get into the fight.  The HMS Regent is stricken to move slowly forward due to a jammed rudder of her own.  The HMS Armstrong moves to engage the SMS Saida on equal terms.      

The Captain of the Saida lets loose amongst the British cruisers with disappointing results.  He manages to cause a hit on the HMS Regent, which damages the Bridge!  Fire from the Aspern misses the Armstrong, but the Maria Theresa has better luck putting shells on target.  The HMS Armstrong takes two hits and is Crippled in the exchange!  The Captain calls for all hands to abandon ship as she starts to sink.  The Salamander misses the HMS Antigone or has her Air Torpedoes swatted away.   

Things look rough for the Brits, but it didn't go all the Austrians way as the Saida is pounded in her position between the two British ships.  In return she is also Crippled and has her screw fouled.  The SMS Saida is also sinking.  

For their troubles, the SMS Saida and the HMS Regent strike their colors.  They are too busy managing their damaged and sinking ships to keep going.  However, the HMS Armstrong refuses to strike.  At the end of the turn, their is still Friction on the HMS Armstrong and the HMS Antigone.  

End Phase

In an attempt to cut-off the SMS Aspern, the HMS Antigone collides with the Austrian ship.  the two ships become entangled.  They are both stricken with 3 and 1 friction respectively.   The Maria Theresa is content to gain altitude and try to move away from the battle, while the Salamander re-loads Torpedoes and moves in towards the last British ship.  

Nobody has any shooting due to being entangled.  Friction clears, but the HMS Armstrong was immobilized and stalled due to Friction last turn. This time, the captain strikes the Armstrong's colors. 

The Antigone and the Aspern trade fire, with the Aspern getting the worst of it and losing some armor.  However, the SMS Salamander manages to sink two Air Torpedoes into the stern of the HMS Antigone and causes her to lose armor and her rudder to jam.  The Maria Theresa also fires a parting shot with her stern battery, but fails to cause further damage.  

With that, the battle comes to an end. 

Conclusion 

Of course, the British Foreign Office quickly condemned the attack on the Sudova Riviera at the Concert of Europe.  It was easy to blame it on a rogue Captain.  Afterall, he was dead.  He could not defend himself or claim otherwise.  His ship and all its records were destroyed and lost.   

The HMS Regent managed to limp back to British Egypt, but it was touch and go.  The crew's effort was immortalized in harrowing ballad by some country wag.  The crew of the HMS Armstrong were detained and the remains of the ship impounded by the Hapsburg government.  However, SMS Saida ended up ditching in the Adriatic just off the coast, attempts to refloat it would be impossible.  The crew of mixed ethnicities mostly survived, and the families of those who did not were given a pension in their post-humous honor.  The Dual Monarchy pressed for the SMS Saida's replacement costs plus a ransom for their crew and the British gladly turned it over.

The Italians were not swayed to leave the Triple Alliance.    

The Austro-Hungarians managed to defend their shores admirably.  The British lost 21 Armor to the Austro-Hungarian 10.  The British had their Flagship blow up, a Cruiser sink, and a second cruiser sent scurrying with her Colors struck.  The Austro-Hungarians had 1 cruiser start to sink and strike her colors.  

For the Austro-Hungarians, the star of the battle was the Maria Theresa who blew up the HMS New Zealand and did severe damage to the HMS Regent.  The Saida deserves honorable mention as well.  For the British?  Well, something was wrong with their bloody ships today!  

The key moment was when the Austrians managed to Cross the T of the British cruiser squadron while the New Zealand tried to cut them off.  Instead, they turned into the attack at the last moment.  Good show! 

This battle had a lot of fun!  Disentangling, Commands, Sinking, and Striking of Colors!  There was so much Friction at a couple of points that it was not all cleared in the End Phase, which is unusual in a battle of this size.   

Until next time. 


Become a Patron and get access to all the cool stuff, a peak behind the curtain of Blood and Spectacles, and early-access to playtest games!  


You can follow Blood and Spectacles Facebook page or Instagram for more fun! 

Check out the latest publications and contact me at our Blood and Spectacles website

Or purchase all out games at the Blood and Spectacles Publishing Wargames Vault Page!     


Monday, August 4, 2025

On the Painting Desk: Castles in the Sky- Austro-Hungarian Fleet


Castles in the Sky is model agnostic, but the minis in the book are all from Brigade.  My existing fleets are also from Brigade and I like the look of them. Therefore, "Liberation Day" Tariffs were announced I moved quickly to secure a new fleet from Scale Creep Games before the new Tariff pricing took effect.  I might not have been the only one with that idea, because the site didn't have much left on it.  Quantities were so low, that I emailed Scale Creep before I ordered to make sure that the volumes on the site were correct. 


Scale Creep got me my order right quick, and before Tariff pricing kicked in.  I was thankful.  This time I picked up two fleet packs of Austro-Hungarian ships.  I was surprised when I got them that they were Resin/Metal hybrids for the big boys.  I am not going to lie, I am not a fan of that. 

Despite being metal/resin hybrids it didn't take me long to get them assembled with Super-Glue and Greenstuff.  Flash was minimal, and the hardest part was getting the smokestacks off the sprue and somewhat lined up right!  

Oh boy!  Look at those beauties.  I have a few different makes and models there.  Look at those mid-size wedge shaped darlings.  They look like a Star Destroyer had a baby with the Titanic.  Ahhhh..... so cute.  I also really like the look of those metal ships on the left.  The only downside, is I am not sure which of these cool little guys will be the Austro-Hungarian escorts?  They all look a little beefy and well-armed for escorts.  

From there, I got them outside and gave them a Seer Grey undercoat.  Next, I gave them all a dark grey wash and then I dry-brushed with cheap, white-acrylic paint.  They were now ready for some paint.  I took some time and thought a bit about the color schemes.  I took a close look at the sky around me and my existing fleets.  I decided that I was going to use Graveyard Grey as the "hull", Sand Golem for the wooden decks, and Runic Grey for the super-structures.  These colors will give the ship a "camouflage" look in the sky from either the top or bottom as clouds are often grey as well.  Plus, they will still look like World War One warships.  

I decided to take a few of each ship type and give it a quick test run..... 

As a quick test of the color scheme, I was happy with the results and decided to keep going with that color scheme.  From there, it was a just a few touches here and there to make the ships "Pop" a bit.  For windows I used Voidshield Blue from the regular Armypainter range of paints.  I also gave them some markings on their "fins" where is made sense in Red and White.  These also came from the main Armypainter range.  Finally I painted the inside of the stacks with Grim Black speedpaint.   

The last step on these test models was to mount them on some bases.  I typically used a Litko flying stand ring on the base of the ship.  Then, I would insert the bases that I got from Brigade.  This gives them that flying feel and is very sturdy.  Lastly, I tried to cut-out an Austro-Hungarian flag I got with the ships using an X-acto knife and mounted it on the biggest ship's observation mast.  

This gave me a workable fleet for any games that were going to come up.  However, what if I needed a bigger fleet?  Good thing I still had several ships to get painted up! 


Satisfied with the test ships, I decided to move on and paint the rest using the same general scheme.  The only challenge was that I did not have enough Litko flying base rings for all of them.  I only had enough for about 5 more airships.  Oh well. I went ahead and painted them all anyway and decided which ones got to fly later.     

Then, here is the ships on patrol somewhere over Bosnia, patrolling the border with Serbia.  This show of force should deter any Nationalist sentiment from those regional upstarts!  


This gives our local Castles in the Sky players 2 British fleets, a French Fleet, an American Fleet, a German fleet, and now this Austro-Hungarian Fleet.   A good mix of fleets and ships for us to choose from.  

Until next time! 


Become a Patron and get access to all the cool stuff, a peak behind the curtain of Blood and Spectacles, and early-access to playtest games!  


You can follow Blood and Spectacles Facebook page or Instagram for more fun! 

Check out the latest publications and contact me at our Blood and Spectacles website

Or purchase all out games at the Blood and Spectacles Publishing Wargames Vault Page!        

Monday, August 21, 2023

Castles in the Sky: Indo-China Campaign VII - French vs British


Welcome back to the Castles in the Sky Indo-China campaign between the British and the French.  When we last left off, the campaign was tied 5 to 5.  The campaign ends when one player gets to 7, and is ahead by at least 2.  That triggers a "final battle" scenario.  This could be the decisive battle to get to 7, but it would require a decisive victory.  Last time, the two forces met in a Patrol mission with the French Fabian strategy getting the best of the aggressive British commander.  However, no lasting damage was done and both fleets are coming into this battle at full strength! With that in mind, British Commodore Duckworth of the Royal Navy of Siam is taking an Offensive strategy, while Commodore Aubre is staying on the Defensive.  

Commodore Duckworth wanted those French ships removed from the vicinity of Siam.  They had all ready caused issues as the French backed rebels had briefly taken over the Kra Isthmus.  Thankfully, aggressive action of his own had allowed the rightful government to regain control.  However, if the French were a force  in being, they would continue to hamper his efforts to bring Siam under permanent British rule.  

Therefore, he sent out a strong force of picket ships to locate the enemy.  He was keeping the rest of his forces in reserve.  Once the French were sighted, he would bring in the rest of his fleet.  However, to avoid suspicion, he scattered them on routine patrol, waiting for the signal once the enemy force had been fixed.  They would then all converge on and overwhelm the opponent.  

Despite Commodore Duckworth's attempts at subterfuge, the French officer Commodore Aubre was wise to the British plan.  He was under increasing pressure from Paris to neutralize the threat of the British fleet in the region.  They endangered the French supply routes through the South China Sea, and access to the critical rubber plantations in Indo-china.  They were pressing him for a decisive engagement and to go on the attack.  As a result, Aubre sent out his own picket ships as the rest of his force took off from their bases around Indo-china.

Forces: 
Both the British and the French are mobilizing their full fleets today for an outright battle. 

L'Aire National

Camot- Commodore Aubre- Command 4
Charles Martel Class Heavy Cruiser (Battleship)   

Cuchinchina - Captain Gourdon- Command 2
Gloire Armored Cruiser

Tourane- Captain de Genouilily- Command 2
Descartes Class Cruiser

Tonkin- Captain de Vence- Command 2
D'Iberville Class Cruiser

Hue- Captain Senez- Command 2
D'Iberville Class Cruiser

Fantassin- Captain Valjean  - Command 4
Chasseur Class Destroyer- Torpedo  

Tromblom- Commander Morice- Command 2 
Chasseur Class Destroyer - Sky Mines     

Their picket force will be the Fantassin, Tonkin, and Hue led by Captain de Vence of the Tonkin

The Royal Navy (of Siam) 

HMS Malaya- Commodore Duckworth- Command 2
Queen Elizabeth Class Battleship

HMS Archeron- Captain Manby- Command 3
Duke of Edinburgh Class Cruiser

HMS Achilles- Captain Durham- Command 4
Warrior Class Cruiser

HMS Arrogant- Captain Knowles- Command 2
Arethusa Class Light Cruiser

HMS Medusa- Captain Butler- Command 2
Active Class Light Cruiser

HMS Corsair- Commander Montgomery- Command 4
Bull Finch Class Destroyer- Torpedo

HMS Hasty- Commander Rawley- Command 2
Bull Finch Class Destroyer- Sky Mines 

The British picket force will be the HMS Corsair, HMS Arrogant, and the HMS Hasty led by Captain Knowles of the Arrogant. 

Mission:
Today is an Escalation battle with the French as the attackers!  Each force has a small 15 Operational Value picket force that will start on the table up to 12 MU in.  Follow-on forces will need to make a command roll after turn 2 on a ship by ship basis to enter the table.

In addition, cloud cover is impacting the board at altitude 4.  

Set-up: 
This is a full fledged battle, so it will take place  on a 72MU by 48MU board.   The British are coming on above the cloud cover, and spaced out to try and track down and engage the French fleet.  

HMS Hasty at top, Arrogant center, and Corsair at bottom

The French are coming in on the corner, and clumped together in the cloud bank, but at high speed.  

The Fantassin, Hue, and Tonkin steam through the clouds

For this battle, we are using a standing white board to track the key details of the battle like ship speed, altitude, Command, damage, and special effects.  


In addition, I am not going to be detailing every move and shot like previous game reports. Instead, I am going to give some high level details.  The battle will be broken down by stage.  These will be the Maneuver Phase, Battle Phase, and the End Phase.   

Maneuver Phase

The British picket ships are spread across the board just above the cloud banks.  They start to move towards the opposite board corner, where they suspect the French are located.  The French stay in the cloud bank and vector in on the lead British ship.  The British HMS Corsair seems to be going out wide.  

The rest of the French fleet receives the wireless communication from their pickets and converge on the scene.  The Camot arrives supported by the Tromblom, while the Tourane follows the vanguard.  The French stay in the clouds.  


For their part, the British pickets move in with the HMS Hasty taking the lead, perhaps to unload their mines in the path of the enemy ships?  The Corsair goes out wider, trying to turn back in for a torpedo attack run later in the battle.  

The Archeron and the Achilles enter the battle and are on course to cross the path of the French fleet and catch them between the passing Pickets and the oncoming cruisers. Notably, the British flagship is not on the table. 


The Fantassin manages to cause some Friction on the HMS Hasty with a torp, her plan to disrupt the oncoming French with Sky Mines is thwarted.        

Battle Phase

The battle begins in earnest as Commodore Duckworth arrives with the HMS Malayan.  The Hue and Tonkin pepper the approaching British cruisers and the flanking HMS Hasty with Air Torpedoes.  The Cruisers shrug it off and return fire gamely.  The Hue getting pounded but avoiding damage.  However, the HMS Hasty takes two torpedoes and takes significant damage to the Rudder. The Fantassin manages to pop a Torp into the HMS Arrogant as well, causing damage.  The opening salvo goes to the French! 


Finally, the Gloire arrives at the scene of the battle. The British Cruisers move in as the French Torpedo Cruisers try to break away.  The French ships blow smoke to cover their movement and try to protect themselves from the British Salvoes.  


The British lights take a beating from the French fleet.  The HMS Corsair flew into a deftly launched swarm of mines and took a hit and a lot of friction. The HMS Arrogant got caught in the open in front of the French flagship, got rocked and started on fire!  The HMS Hasty deployed her mines, but the Tourane was there and deft gunnery blasted the British ship into bits and cripples her, forcing it to strike her colors.  The Smoke on the D'Ibervilles paid off as the British cruisers pounded on them, but they escaped with only one hit on the Hue.  

However, that hit proved true as Hue exploded!  The cargo of Air Torpedoes goes up in a spectacular blast that catches the Tonkin and the HMS Achilles in the blast.  The Tonkin manages to ride it out, while the Achilles loses more armor, and the Port Light Battery.     

The French regain intiative, and use the Camot's escort to fake the British into thinking the French Battleship is going one way, but then it veers the other to engage the British Cruiser line.  The HMS Archeron tries to make a Fire for Effect order on the Camot, but fails.  A shot from the rear of the HMS Achilles on the Tonkin adds Friction and keeps its Torpedoes in their tubes. However, the HMS Corsair is not so lucky as the Fantassin manages to get a bead and pepper the Destroyer with Torpedoes.  The HMS Corsair strikes her colors thanks to a damaged rudder. 

The HMS Medusa finally joins the battle!  The Tromblom failed to re-load her mines.  The HMS Corsair leaves the board.  The French Fleet managed to isolate the HMS Achilles and pound it with close range firepower, reducing her to 1 armor left.  However, the Tromblom was caught out as well, and pummeled by the British in return, for three hits.  The Tonkin and the HMS Arrogant traded shots, causing another hit on the damaged Arrogant. 

The Tromblom blows up, a heavy shell finding her mine bay.  However, the explosion is not enough to catch the trailing HMS Archeron.  The HMS Arrogant is also crippled from the last shot from the Tonkin and the British ship strikes her colors. The HMS Achilles keeps fighting even at 1 armor left. 


End Phase
The French maintain the Initiative and that allows them to keep the HMS Achilles in danger, while avoiding the British guns while in the clouds.  The Cuchinchina can barely make out the damaged British cruiser, and the Captain orders the gunners to fire for effect.  The barrage is devastating and the British cruiser explodes from the Overkill. The explosion causes 1 friction on the HMS Malayan, and hits the HMS Archeron for 3 friction and 2 hits.  


The Malayan can barely see the Cuchinchina when she opens up, and Commodore Duckworth has his gunners fire for effect in return. The French cruiser takes three hits in return.  The HMS Archeron also explodes from the damage caused by the HMS Achilles explosion!  This causes friction on the HMS Malayan.  


The two fleets begin to part ways as dusk settles in.  Parting shots from the Cuchinchina and the HMS Malayan amount to nothing thanks to a Brace! save by the Cuchinchina.  

Conclusion
It feels like a French victory with 2 British ships striking their colors, 1 crippled, and two exploding.  However, the French also lost two ships to explosions.  Going to the big board we have:


French lost  17 Armor points
British lost 26 Armor points

That puts the French at 7 to 5 in the Campaign and triggers the Final Battle.  As they got their first, they can choose the scenario for the fight. 

The French strategy in this battle, and the campaign; has been to duck and weave!  The cloud cover at altitude 4 across the board helped me a great deal keep the British guns at a distance.  They had to get close, and I just needed to keep them isolated at 8+ MU away minimize their shooting.  I managed to do that in this battle.  Once again my significantly weaker battleship survived unscathed against the very impressive British battleship.  When that thing fired it always caused havoc!  

Campaign Stuff
The key point now is repairs to the damaged ships.  The HMS Corsair managed to repair her 3 damage, the Arrogant failed to fix any, and the Hasty fixed 1.  The British use their Strategic assets to repair the Corsairs rudder.  The Hasty and the Arrogant are put in dry dock for repairs, essentially removing them from the Final battle roster.  That leaves them without their cruisers, a light cruiser, and a Destroyer.  Yikes! 

The French also make repairs.  The Fantassin is returned to full health by the crew.  The French Strategic assets are used to fully repair the Cuchinchina.  The French will be down a Destroyer and a Torpedo Cruiser.  

Since we are going into the Final Battle, we decided to skip ship Experience.  We keep forgetting to use the bonuses anyway! 

Admiral Aubre was satisfied that the Navy of Siam was on the ropes.  The French diplomatic efforts were beginning to bear fruit in Siam, supported by their successes in the air.  Thanks to this progress, the British Foreign Office decide to replace the ambassador for Siam with a fresh hand.  Commodore Duckworth was to meet the incoming ambassador and escort him safely to port.  However, the French government had other plans.  Commodore Aubre was to intercept the ambassador and make sure he never arrived on station in Siam.       


Become a Patron and get access to all the cool stuff, a peak behind the curtain of Blood and Spectacles, and early-access to playtest games!  


You can follow Blood and Spectacles Facebook page or Instagram for more fun! 

Check out the latest publications and contact me at our Blood and Spectacles website

Or purchase all out games at the Blood and Spectacles Publishing Wargames Vault Page!      

Monday, August 1, 2022

Battle Report: Castles in the Sky- Book Launch Demo


We had a nice Book Launch party at Gestalt Studios in Powell, Wyoming on 7/23/2022.  Thanks to everyone who was able to make it!  We managed to keep the Demo table full, founds some new recruits for our wargaming group, sold some books, supported a local business, and had an all around blast!  

I did not get to play in the Demo game, as I was busy trying to circulate around, chat up the visitors, and be a good host.  Therefore, I do not have a play-by play of the game.  However, I do have some random photos and I know some of the outcome.  

The battle itself was the British Royal Navy defending a radio station from being bombarded a strange alliance between the French L'Aire National, and the German Empire's navy.  We hade four players each with a Battleship, a cruiser, and an escort.  We had an American Fleet and a second British fleet in reserve if needed, but we were able to keep all the action on one table as people came and went.  

Thanks to the following Painters: 

Marc Harrison of The Painted Dwarf in Powell, WY for this great American Fleet from Brigade Models.  It has made an appearance on this blog a few times, most notably in the Pseudo-War posts.  

The Painted Dwarf


The we also had a great Royal Navy fleet from Brigade Models painted by Michael "Misha" Hansen of Lone Wolf Painting out of Rexburg, Idaho.  

Lone Wolf Painting


We also had a French Fleet from Brigade Models painted by me....

And a very cool and unique German Fleet designed and made by John, the creator of the Warcaste TCG. 

Warcaste TCG YouTube and Website


Again, I was not able to give a word for word description of the game, as I mostly just umpired as needed.  However, I know the results.  The French/German alliance was successful in bombarding and destroying the British Radio Tower.  However, there was a heavy butcher's bill, as the French Battleship and command ship exploded in a fireball high in the sky, and damaged the nearby Gloire cruiser.  In addition, the British also had a Warrior cruiser explode, and a Shah Frigate crippled in the action. 

Here are some photos to wet your appetite.  


 This was the table set-up for the start of the game.  You can see a variety of terrain, including some cloud banks, and some level 1 hills along the river.  Each player had a QRS, a laminated ship stat card, and a ruler.  You can see off to the side we had a side board that held extra dice and such.  I also used a white board to help us track Command ratings, Altitude, Speed, and Damage during play.  Some players opted to use the dice on the table method as we played as well as the white board to track ship status.  


Here the game is well underway, with the British closing in on the target to help defend it.  The French are in the upper left and coming in hot!  The French used their Battleship as a high altitude distraction, while the rest of the German/French fleet went in low.  This worked surprisingly well, as the British got distracted by the high flying French ship, and did not fully concentrate on stopping the lower level attackers.  

At this point, the British Radio Tower has been destroyed, and the Alliance is turning away from the battle to escape.  However, the British are still going to try and exact a heavy toll!  Of note, you can see Air Mines were deployed near the center of the board.  


Here, you can see where the British Warrior-class airship exploded while in pursuit of the German Nassau-class Battleship.  Ka-boom!  Perhaps that was the Warrior trying to punch above its weight class?  The French Courbet class Battleship as all ready been removed at this point of the battle thanks to the fire of a Queen Elizabeth class British dreadnought.  It also went Ka-boom!   

You can see the QRS I used for this battle on the Message Board here.  There are other useful resources and tokens you can use here

Overall, another fun book launch at Gestalt Studios in Powell.  Thanks to everyone who came, and thanks to everyone who has purchased a copy of Castles in the Sky from Osprey all ready!  Happy gaming! 


Become a Patron and get access to all the cool stuff, a peak behind the curtain of Blood and Spectacles, and early-access to playtest games!  


You can follow Blood and Spectacles Facebook page or Instagram for more fun! 

Check out the latest publications and contact me at our Blood and Spectacles website

Or purchase all out games at the Blood and Spectacles Publishing Wargames Vault Page!