Monday, May 26, 2025

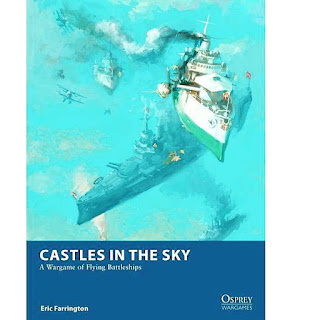
Battle Report: Castles in the Sky - A Clash over South America


For the first time in a bit, the True Crit Gaming Guild busted out Castles in the Sky.  We had a French, British, and American fleet. Since it had been a while since we had played, we decided to keep things simple and stuck with a Battleship, Cruiser, and Escort per side.  That would give us a chance to recall how to play the game.  We didn't even bother with any special mission objectives or anything.  

The Americans had been patrolling near Paramaribo in the territory of the Netherlands, as part of a diplomatic effort to win their support at the Hague.  However, the nearby British and French were not happy to see an American force so close to their Spheres of Influence.  A Fleet for each power was deployed from Georgetown and Cayenne (respectively) as a precaution and a warning.  

However, they did not realize that the American flotilla was commanded by Rear-Admiral Thomas, a notoriously aggressive commander.  As the three fleets began to converge just north of the border with Brazil, the Europeans soon realized their error.  The American commander raised the battle colors and signaled for the other two fleets to stand-down.  The two European commanders declined the offer and battle was soon joined.

The Forces      

Americans

1 Michigan class Battleship - Comm 2

1 Denver Class Cruiser - Comm 3

1 Bainbridge class Destroyer - Comm 2 - Air Torps

The French

1 Charles Martel Class Battleship - Comm 3

1 D'Iberville Torpedo Cruiser - Comm 2

1 Chasseur Destroyer - Comm 1- Air Torps

The British

1 Queen Elizabeth Class Battleship- Comm 3

1 Warrior class Cruiser - Comm 3

1 Bull Finch class Destroyer- Comm 2 - Air Torps

Set-up

Our table was a 4ft-by-4ft board, and each MU was 1 inch.  The Americans and British took opposite corners, and the French were in the center on the far side.  The Americans and British deployed high and fast, with the French going at mid-range and speed.  

There were no clouds or cloud cover.  There were a few rock formations at 1-4 altitude.  

Maneuver Phase  

Despite being aggressive, the American commander was not up to the task of outmaneuvering the European forces.  The other two admirals continuously outperformed the United States on Initiative checks and gaining Commands.  

The French seemed willing to take on the Americans and veered that way, as the other two fleets seemed eager to get to close the range and start pounding on each others ships.  The French manages to strike first blood as an Air Torpedo barrage from the wily French detonated the American Destroyer early in the battle, without the scouting and intelligence gathered by this ship; the Americans struggled with their Command-and-Control.  

Worse, the Destroyer exploded and damaged the US flagship as well in the blast! 

Battle Phase

The French sent their cruiser to try and snipe and distract the British fleet closing in on the main melee.  However, the French captain miscalculated the range and power of the British fleet.  The poor cruiser found itself getting pounded by the British guns at range!  It was soon damaged and stalled.  

The American Cruiser was also eager to mix it up with the British, under-estimating their combined firepower for dealing with cruisers.  The Queen Elizabeth got in close and simply pounded the poor dear with heavy batteries at close range.  The Denver was ripped apart and exploded for her trouble, barely scratching the Queen Elizabeth's paint in the process.  


Meanwhile, the French and US Battleships got in a gunnery duel at mid-altitude and slow speeds.  The two large ships exchanged gunfire.  Neither side seemed to gain the upper-hand.  However, a lucky shell disabled the Michigan's Air Screw, and the ship immediately stalled.  With their airship stalled and sinking fast, the Michigan struck her colors.  This left the US out of the fight.  

End Phase

The French D'Iberville was stalled and taking a beating from the Warrior and Bull Finch.  The crew valiantly tried to get her operational and moving again, but the enemy firepower was too much.  The Warrior raked the poor French ship and she struck her colors as a smoking wreck.  

From there, the damaged French Battleship and Escort played cat-and-mouse with the Queen Elizabeth and her friends.  However, after an exchange that left the Chasseur and the Charles Martel damaged further, they signaled for an end of hostilities.  

The British were gracious in victory.  After all, their ships had barely had their paint scuffed. 


 Conclusion

The British fleet ruled the skies, as is fitting.  They took no damage, while the French lost 12, and the Americans lost 22 Armor.  A clear British victory in a hard-fought battle.  

Anytime I face a Queen Elizabeth Dreadnought, it is a challenging game.  The French Battleships is no match in a one-on-one fight with it.  It requires cunning and guile to win.  The Warrior and Queen Elizabeth co-ordinate their fire very well in this game, and the Americans and French paid the price for it.  Never bring a Cruiser to a Battleship fight!   

We did misplay Friction for a few turns, but we got it figured out by the end.  It would not have made much of a difference in the final result.  However, we did see lots of fun stuff like stalling, Commands, Exploding and Sinking in action!    

Until next time!


Become a Patron and get access to all the cool stuff, a peak behind the curtain of Blood and Spectacles, and early-access to playtest games!  


You can follow Blood and Spectacles Facebook page or Instagram for more fun! 

Check out the latest publications and contact me at our Blood and Spectacles website

Or purchase all out games at the Blood and Spectacles Publishing Wargames Vault Page!                                

Monday, May 19, 2025

Wargame Design: Designing Games is Playing with Legos


For those of you searching for the keyword Lego..... welcome!  Take a look around and I hope you enjoy your stay.  However, as you can see by the image above we are actually going to be talking about wargame design, specifically miniature wargame design.  Thanks for stopping by though!  

There is nothing new under the sun.  Every idea has all ready been thought, and as those of you that have been reading along on this blog, you know that I think Innovation is Over-rated.  However, there is a world of mechanics and design techniques out there just waiting for you to discover them and use them.  Therefore, when I design a wargame I am not staring at a blank page and trying to innovate

Individual mechanics and ideas are building blocks.  Your mind is all ready littered with building blocks.  There are mechanics you have seen in other games, ideas from other genres, and concepts from other media.  Your brain is littered with these blocks, like a toddler's room is littered with Lego. 

Therefore, when it is time to design I am not looking for inspiration.  Instead, I am taking various Lego blocks and putting them together to see what I build.  Sometimes I build something that is functional, but most of the time I build a block of other blocks that doesn't look like anything.  That is not a problem at all!  I can always deconstruct it and start again.  

Restless Sun

Sometimes, I start by just putting random blocks together.  I ask myself, "what if I just combined the Bag Activation of Bolt Action, with the Chit Pulling damage mechanic of Battlegroup, and the card-resolution mechanics of One-Hour Ancient Skirmish?"  Then, I push some tokens around and see what happens.  

However, most of the time I start with what is in the Lego booklet.  I use my design goals, my POV about what I am trying to create, and cross-reference what my idea of Fun is to create a rough idea of what I want the end result to look like.  It is like looking at the instructions or the back of the Lego box where is says "With this set you could also build" and it shows a rabbit made out of Legos.  You are no longer just randomly putting bricks together.  Instead, you are trying to find the right bricks to make your creation look like the rabbit on the back of the box!  

Homer's Heroes

Of course, looking at the image of the rabbit tells you that a brick with goggly-eyes on the side is needed to complete the rabbit.  Therefore, you go digging through all your bricks looking for that one piece to make your Lego creation look like a rabbit.  You could put in another and it would work, but your rabbit look a bit less defined, less like a rabbit.  The right brick in the right place makes the whole concept of the rabbit work better.  

The more you use suboptimal bricks, the less the finished product looks like the rabbit.  If you keep putting in sub-optimal bricks, eventually you might have something that looks more like a goat than rabbit.  Now, when you are done you might look at the goat and decide that is what you actually wanted to make.  You might decide that you like the way the goat looks is better than the rabbit you started with.  However, there is no denying that a goat is not a rabbit.   

My goats!


As the builder, it is your job to figure out which Lego brick does what you want it to do best.  You are focused on the outcomes.  Not all bricks will provide the proper outcomes.  Googly-eye brick provides googly-eyes, a red brick with no googly-eyes does not.  If you want eyes, you need to use the googly-eye brick.  The red will not do the job.  However, it you decide that what you are making does not need eyes, than the red brick can do the job!  

Therefore, as a game designer is not much different than playing with Lego.  Your job is to know your goals, POV, and definitions of Fun.  That is what guides the outcomes you want.  Your second job is to know what bricks you have.  You need to have a feel for an array of game mechanics and how they will work in play.  Then, as the wargame designer you need to pick the right mechanics that will lead to the outcomes you want and drop them into the design. Simple but not easy. 

Men of Bronze

In addition, wargame design is an iterative process.  I.e. each piece builds on the next.  Lego is the same, as each block is needed before you can put the next block in place.  Each game system often builds into the next.  Some core elements can be carried over between designs.  That means, if a designer likes the way terrain works in one game, it may carry-over to the next.  This can lead to a designer having a Type.  Each design builds off the learnings and discoveries from the previous design.

Therefore, if you like building with Lego than you just might like trying your hand at miniature wargame design! Until next time!    


Become a Patron and get access to all the cool stuff, a peak behind the curtain of Blood and Spectacles, and early-access to playtest games!  


You can follow Blood and Spectacles Facebook page or Instagram for more fun! 

Check out the latest publications and contact me at our Blood and Spectacles website

Or purchase all out games at the Blood and Spectacles Publishing Wargames Vault Page!


Monday, May 12, 2025

On The Painting Desk: First Light meets some Wandering Monks


Back to the Painting Desk after batch painting an army of Anglo-Saxons.  This time I wanted to tackle painting some individual models.  Thankfully, I had a few models sitting around.  This was the perfect time to get First Light supplement, a Reaper Storm Giant, and the Path of the Wandering Monk minis on the desk to paint up.  

However, before we get into the painting, let's talk a bit about the Path of the Wandering Monk supplement for Heroquest.   


For two miniatures and some cards, $15 is a lot of money.  At least I think it is.  However, I am old and out-of-touch on modern pricing.  I will say that Avalon Hill tried to go out of their way to package these up like they were worth $15.  The packaging is over-the-top!  

Once inside, there is a nice little promotional scroll that is tied up, a display box, and the cards to play with the two miniatures. The two miniatures are typical Heroquest quality, and they have a Male and Female version of the model.  I like that.  


The new rules are pretty straight forward.  The Monk has a card for each element, so 4 cards.  Of note, you can not use the Fire card unless all the other cards have been used previously.  In addition, the Monk can choose to refresh their cards at any point no monsters are on the table.  I think I will House Rule that where they have to use their turn to Meditate and refresh the cards i.e. No moving or searching.  That makes it a bit of a choice.  

The base stats for the Monk are not over the top.  However, they get additional attack dice for being unarmed, which can be useful in some scenarios.  The Monk looks like a good swap for the Dwarf or Elf from the basic party.  Good defense, some fun abilities, and good-enough in a fight.   


Pallette Cleanser

Before painting up my new Heroes, I needed to do a bit of a palette cleanser.  I had a Reaper Storm Giant that I was going to use in a variety of games or proxy in as Zeus; sitting on my desk.  He was primed and ready for paint.  Therefore, I took a couple hours to clear him from painting desk.  I used all Armypainter Speedpaints and Metallic Speedpaints on this guy.  He was a big boy.  

I used Sand Golem for the flash tone, to give it a more Olive-skinned complexion.  I know traditional Storm Giants have a greyish/Blue tone to their skin, but this was also a Zues stand-in.  That would not do!  The belts are Grim Black with the armor being Golden Armor, Brazen Bronze, or Hoplite Gold depending.  The loin cloth is Stormcloud Blue, which seemed appropriate.  The sword, hair, and base are all Runic Grey.  The strips on the loincloth are Leather Brown and Aztec Gold.  

With this guy done, I was ready to move onto First Light, the Wandering Monks, and the Mage in the Mirror Elf.  

HeroQuest Heroes (and 1 Dragon)

This time, I did not want to batch paint!  I was going to paint each miniature individually.  That is not how I normally paint miniatures at all, so this was a big change of pace for me.  I did spray undercoat them all with GW Grey Seer, then gave them a dark grey wash of cheap Acrylics, and then a drybrush of white.  This is my standard prep for Speedpaints and it works pretty well. 


For no particular reason, I got started on the Dwarf first.  Of note, I used different skin tones for the miniatures.  The Dwarf was Sand Golem, the Barbarian was Barbarian Flesh, the Wizard was Tanned Flesh, and everyone else was Elf Flesh.  This gave them a variety of skin tones.  

After the first night of painting, my first three Heroes were painted up!  These paint up surprisingly fast and are relatively crisp.  They have good detail and the Speedpaints generally go where they are supposed to go.  They finish off really well with a Light Tone brown based wash.  

Of note, I would paint the inset details on the swords, shields, staffs, and other weapons first before giving them a coat of their base color.  This allowed some of that detail to "pop" on the final model.  This also worked well for some of the scarring on the Monk and Barbarian. 


The First Light Barbarian and Dwarf are very different from the Core sets models.  There is no doubt that these are different heroes than the original models.  It could be fun to swap them out if some of the OG Heroes die while on the Quest.  

The next night, I moved onto my next set of heroes.  This would be Ms. Monk, the new Elf, and the First Light Elf.  These all had used the Elven Flesh for the skin tones.  These again took about 1-night to get all painted up and ready for their wash.  Once again, a Light Tone wash is a great finishing step.  

The Monks I used Zealot Yellow and Fiery Orange as key parts of their attire.  The Elves I used Pallid Flesh as a metallic color, which makes them unique from everyone else's metallic choices.  My Core Set elf uses a cloak made of leaves, so for this one I decided that those leaves were instead Raven feathers and went with Graveyard Grey for the cloak.  This makes her very distinct from my other Elf.  The Mage in the Mirror Elf I used a white cloak and made them blonde.  They also have a very distinct look from my other elves and will be easy to tell apart from the other Heroes.    


This left the Dragon and the Wizard.  The Wizard in First Light looks much older and more experienced than the one from the Core set.  That ones looks like a young man, while this one is much more mature and seasoned looking.  His clothes, facial hair, and haircut all look more world-weary than the Core set wizard.  Therefore, I went with a very different look for him as well.  Instead of the bright yellow and reds from the Core model, I chose a dark purple to contrast his moon symbols.  This gave him a much darker and malevolent look, I think this guy could fill in for the Fire Mage or other NPCs at different points.  


That left the big Dragon, which I did not take many pictures of as I painted him.  I decided to go with a Blue color scheme.  His armored chest was Runic Grey, his skin was Stormcloud Blue, and his scaly hide was Magic Blue.  I am not that happy with the dark blue undertone to his skin and wish I would have gone Runic Grey skin, Magic Blue chest, and Stormcloud scales, but oh well.  In addition, I gave this guy a Strong Tone wash which is a black based wash to dirty him up a bit.  That helped the final look a lot.  

This took me about 1 week to paint all the models.  From there, I had to finish basing them and sealing them.  For their bases I used a simple Runic Grey on the tops, and then an Armypainter black around the rims.  This really helps them stand-out in game.  The final step was to wait for a nice day and then give them a heavy protective coat of spray-on Matte Finish.  


 Final Thoughts

Well, after batch-painting 90 models over the course of a few weeks this was a well-earned break!  Each one looks like an individual and it was a nice change of pace to paint one at a time.  

I use one of those fidget popper toys as my palette.  There are about 28 little pockets for paint.  As I went along, I kept track of what color was in each pocket by setting up the paint bottles to mirror the palette lay-out.  That way, I could "re-use" the same pocket for any colors I re-used through-out the week.  That meant there was a lot less cleaning up as I went than usual.  A little tip?  I guess if you have a wet-palette you wouldn't need it.  

Finishing these allowed me to clear my desk and get ready for the next big project.  Right now, that is looking like the Mage in the Mirror boxed set.  

Until next time! 


Become a Patron and get access to all the cool stuff, a peak behind the curtain of Blood and Spectacles, and early-access to playtest games!  


You can follow Blood and Spectacles Facebook page or Instagram for more fun! 

Check out the latest publications and contact me at our Blood and Spectacles website

Or purchase all out games at the Blood and Spectacles Publishing Wargames Vault Page!    

Monday, May 5, 2025

RPG Design: Glittering Void: A Role-Playing Game of Space Mecha Theatre


I first wrote this game at the same time I wrote Hostile Space.  In fact, as I was working on the wargame, I decided that it would be a fun setting to role-play in.  I originally wrote Hostile Space after watching tons of clips from various Mecha shows.  For some reason, they were just coming one after the other on my feed.  I enjoyed watching the Mecha buzz around and fight each other.  Therefore, it seemed like it could make a really fun dogfighting game. 

However, the heart of all good Mecha/Real-Robot stories was not about the dogfighting, it was about the characters and their stories.  Many of them had very spiritual plotlines and focused on romantic love triangles.  They were all about relationships.  The big robot battles were often just metaphors for the spiritual and emotional conflicts that characters were engaging in.  Hostile Space was not going to capture that aspect of Space Mecha.  Wargames were not a good venue for the melodrama and theatre, but it would be perfect fodder in a Role-playing game.

Hence, Glittering Void: A Role-Playing Game of Space Mecha Theatre was born.  


Space Mecha Theatre

What is Space Mecha Theatre?  Despite the trappings of Sci-fi, big robots, and warfare; the genre is not about the flying robots.  Those are just the genre tropes and setting.  The setting tropes should not be confused with what Space Mecha Theatre is about.  Space Mecha Theatre is ultimately about people and their stories.  Most of the drama, melodrama, and tragedy occurs outside of the Mecha.  

Space Mecha Theatre is about how individual people deal with the complexities around them like war, political scheming, and advanced technology while maintaining what quintessentially makes us human.  The common humanity of all the protagonists is the key focus of the story.  There is always "Big Things" going on around the characters like war, economics, and politics but it always comes down to how the individual deals with them and carries on.  The focus is on what makes us humans, and the commonality of emotions and experiences of the human condition.  That is the Theatre.   

Big Robots, spaceships, colonies, and political powers are all just setting conventions for the human theatre to take place in.  Space Mecha Theatre means that this is going to be set in a world where such machines are common.  The focus is human vs. human conflicts in a relatively "real" sci-fi universe within the Solar System.  Travel times are slow, communications are limited, and space is a hostile environment.        

This is not Space Opera.  This is not Hard Sci-Fi.  This is not Space Fantasy.  This is Space Mecha Theatre!               


Game Design Goals

This game took me about 5 years to complete.  It is the crunchiest Role-Playing Game that I have put together.  However, it had many of the same design goals as my other, simpler RPG-Lite games.  The key difference was how I wanted the game to be able to capture the varied and wonderful action that I had found in Space Mecha Theatre content.  

This game had the following design goals: 

  • Give players interesting and meaningful choices
  • Make character creation simple and easy
  • Simple, abstracted, attritional combat, NO HIT POINTS!
  • Hard to outright "fail"
  • Reward Role-play
The Core Unifying Mechanic
This game uses three basic concepts that layer together to create a relatively deep unifying mechanic to the rules.  
  1. The Rule of 4 
  2. Dice Shifting
  3. Level of Success
The Rule of 4 simply means that on any given dice, you want to score a 4 or more for a success.  

Dice-shifting means that all Modifiers are to the size of dice that you roll.  The dice used in this game are standard RPG dice so D4, D6, D8, D10, D12 and D20.    Difficulty changes the dice you roll, not the target number.  The target number is always 4+ per the Rule of 4. 

Level of Success simply means that the higher you roll above 4 on a test, the greater your potential level of success.  These levels of success are compared in opposed rolls to determine outcomes.  To determine a level of success, you simple roll a dice, and subtract 4.  You can then compare the level of success between opponents. 

That's it.  This simple unifying mechanic is the basis of all tests and rolls within Glittering VoidThese rules apply for characters negotiating a Peace Treaty between Great Powers, fights between Combat Suits, and Characters trying to bluff their way past guards.  


The New Age
Man has expanded into the Solar System with the help of the Fold Drives.  They have established themselves across the Solar System.  These colonies fragmented into new alignments and political blocs.  Now, there are four Great Powers that maintain a stable balance of power between themselves using an umbrella organization called the Concert of the Solar System.  Scattered between these Great Powers is a variety of Freeholds; independent colonies that shift their allegiances between Great Powers via proxy contracts and alliances.  The Great Game is the various Great Powers of the Solar System jockeying for spheres of influence with these independently minded Freeholds.  

Characters in Glittering Void can take on a wide variety of roles within the world of the New Age of Mankind.  The default setting is agents of the Concert of the Solar System as Peace Representatives, where their job is to act as roving troubleshooters to maintain the stability and integrity of the Solar System order and avoid an all-out war.  However, there is room for a variety of campaign styles and 1-off adventures such as Scouts, Couriers, Pirates, Businesspeople, and more.  The New Age is full of political intrigue, espionage, and off-book operations that are perfect for various types of games.   

The game has a brief and high-level background that is entirely optional for you to use.  It includes tools about common technologies such as Combat Suits, generators for quickly developing your own Freeholds and colonies, and even a starting adventure to give you a feel for the world of Glittering Void

What is in the Book?
The game book has what you need to get started to play right away including blank character sheets, index, table of contents, Quick Refence Guides, and Appendices with all the common technologies, skills, backgrounds, and gear for the game.  It has a core concepts section to get you started, followed by easy character creation.  There is also a section about how to run the game for the aspiring Comptroller (GM).  There is even a sample scenario to give you a good place to start off in the Glittering Void!  This rulebook is 165 pages long!    


Final Thoughts
I have played this game with people who have never played Role-Playing Games before, as well as veterans to RPGs.  It delivered a satisfying game experience for both groups of players.  The Character creation was easy enough for newbies to wrap their heads around and make strong characters.  The gameplay was crunchy enough for harden veterans to enjoy making tough tactical decisions.  The mechanics are simple but allow for a wide variety of in-game depth and complications.  This game was 5 years in the making!  

You can find it on my Blood and Spectacles website.  I am eager to hear what you think of it in comments, on my Messageboard, my Socials, or directly through the Contact Me page on the website.  

Art by _SpacePossum_


Become a Patron and get access to all the cool stuff, a peak behind the curtain of Blood and Spectacles, and early-access to playtest games!  


You can follow Blood and Spectacles Facebook page or Instagram for more fun! 

Check out the latest publications and contact me at our Blood and Spectacles website

Or purchase all out games at the Blood and Spectacles Publishing Wargames Vault Page!    

Monday, April 28, 2025

Battle Report: Fury of the Northman - Battle at the Pass


After getting those Anglo-Saxons painted, I was eager to get them out on the table!  Therefore, I managed to organize a quick battle versus my Viking

Earl Eirkir received news of a Viking warband moving towards his territory after landing on the coast.  He quickly summoned his Fyrd and Thegns together to face off this threat!  He had heard that these marauders had come across the see from Hibernia and he intended on sending them back the way they had come!  

Erik Greybeard and his men had left Hibernia after a disappointing raiding season.  In fact, many of his men left and went back to their homelands.  However, those that remained were battle hardened.  They also had stout shields, chain mail, and many were equipped with the feared Dane Axe!

Forces:

We are actually using the sample forces right out of the Fury of the Northman main rulebook.  That gives an elite, compact Viking warband versus a numerically superior Anglo-saxon force. 

Anglo-Saxons


Vikings


Mission: 

This is going to be a straight-up Raven Feast, which is a standard battle.  No special objectives. but we do have a Bad Water complication.  Let's see if we remember it on the day of the battle.  

Set-up: 

Again, we used the rules right from the book in order to set-up the table.  This gave us a large single- and double-layer hill on the Viking side of the board to book end their forces.  That naturally made a pass that the Vikings would need to march through to get to Earl Eirkir's lands.  The other side was mostly open, with a forest on the Anglo-Saxon left.  

View from the Viking Deployment zone, through the pass

As usual, I will not be detailing the game turn-by-turn.  Instead, I will have a high-level overview and break it down into three phases, the Maneuver phase, the Battle Phase, and the End Phase.  I find it is much easier to focus on the fun of the game and still get the general idea across to the reader this way.  

Maneuver Phase: 

There is no fancy maneuvers as the two sides close.  

The Anglo-saxons use their superior numbers to maintain the initiative.  The left flank of skirmishers and archers forms a missile line curving towards the hills.  It is anchored by the Earl in the middle in shieldwall, and two Fryd units also in Shieldwall.  The last Fyrd unit stays in open formation on the far right edge, ready to try to flank.  

Anglo-Saxon left flank

The Vikings block up the pass.  Their right flank is their Nobles in shieldwall.  They anchor the warriors in Shieldwall.  The last element blocking the pass is the Boar's Head formation.  The Viking skirmishers are trying to sneak through the forest on the far side of the left flank hill.  

Anglo-saxons on the left, and Vikings on the right  side of the image

Battle Phase: 

The battle proper starts with a hail of arrows clattering loudly off the Viking's Nobles' shields.  Seeing this, the warriors in the Boar's Head seize the initiative from the Anglo-saxons and charge forward with a roar!  They connect with a Fryd unit, that is reinforced by their nearby allies.  There is a ferocious clash, where the Fyrd manages to stand and even repel the Boar's Head, but begins to waiver in the process.  

The Viking command breaks formation and charges the Archers, who are supported by a unit of skirmishers.  They trade blows but are less than successful at routing their lightly armed foes!  

In return, the Anglo-saxon Earl manages to lead a classic shieldwall attack into the Viking warriors, who are also in a shieldwall.  With much pushing, shoving and stabbing the Vikings fall back a few steps.  

Fyrd units by the woods engage the lurking Viking skirmishers in a close quarter fight at the edge of the woods.  It is tough terrain to fight in.  

In the center, despite being outnumbered two-to-one, the Boar's Head and Dane Axe armed Vikings manage to smash through the wavering Fyrd.  The farmers turn and flee, with the savage Vikings in hot pursuit! 

Anglo-saxon Fyrd breaks and runs from the Viking Boar's Head

The Earl continues to wear down the Viking warriors, but it is too little too late as the Viking Nobles smash the archers and skirmishers supporting them apart on their right flank.  The Anglo-saxons flee, with the Nobles in hot pursuit.  The Earl lost half of his army that round.  

The Viking Nobles cease their pursuit at the urging of their Jarl and begin battling up the hillside.  They are harried by Anglo-saxon skirmishers the whole way.  However, they give better than they get and cause the Anglo-saxons to tremble in fear.


End Phase  

The Viking Nobles manage to smash the Anglo-saxon skirmishers off the hill, but in the process, tragedy strikes!  Erik Greybeard is killed in the fighting for the hilltop!  An Anglo-saxon javelin through the eye as he bellowed commands!  

The fighting between the Viking skirmishers in the woods and the Fyrd unit is indecisive.  

Earl Eirkir manages to keep up the attack on the Viking warriors, but when they are attacked in the rear by Vikings with Dane Axes, it is all over.  His unit wavers and then flees for its life!  With that, the Anglo-saxon army breaks!  

Final Thoughts

No need to even count up the points.  My Anglo-saxon army was completely routed, despite some promising points early on.  The Viking units were all battered but none were broken. I have a small morale victory by killing the Viking warlord in battle, and that is about it! 

When the enemy army is injured across the board, but no one is broken that tells me I did a poor job of target prioritization and focusing my units on a single killing blow.  Instead, they got scattered and their hitting power diluted.  They managed to absorb the Viking assault but lost during the subsequent melees.  

Three mistakes I should have done differently.  First, I should have ignored the Viking skirmishers in the woods and used that extra Fyrd unit against the Boar's Head unit to break it early.  It survived the initial attack and was able to turn the tide in the melee.  Second, I should have let the archers go with no support and used the skirmishing units as flank charges the following turn.  Instead, the support did nothing and the second could not get in position fast enough to matter. Third I used my re-roll advantage from Ferocity Points poorly, and I should have used them to finish enemy units off. 

Oh well.  I learned a lot.  There was a reason the Vikings were such a fearsome foe.  

Until next time. 


Become a Patron and get access to all the cool stuff, a peak behind the curtain of Blood and Spectacles, and early-access to playtest games!  


You can follow Blood and Spectacles Facebook page or Instagram for more fun! 

Check out the latest publications and contact me at our Blood and Spectacles website

Or purchase all out games at the Blood and Spectacles Publishing Wargames Vault Page!    


Monday, April 21, 2025

On The Painting Desk- First Big Painting Project for 2025 is Done and Dusted


The first big painting project of the year, was an Anglo-Saxon army for my Fury of the Northman rules.  That was going to be a relatively large force with 1 Thegns unit, 3 Fyrd units, 2 Skirmisher units, and 3 missile units.  I had all ready batch painted the Shieldwall and now it was time for the support units.  

For the Skirmishers and Archers, I was using leftover Victrix kits of Early and Late Saxons.  For the Missile Troops I was using the Dark Age Archers kits.  The great thing about the archers was that I could use them with a variety of Dark Age armies if I wanted, as they were relatively generic.  

When we last left-off on this project, I was batch-painting about 50 models at this phase.  I had managed to paint them up with my standard techniques to about half-done before we left off.  It had taken about three weekends to get that far, thanks to a bad case of Influenza A.  Yuck.  


They all had on pants and basic clothing, but there was still a lot of weapons, hats, helmets, hair, and gear to go.  Therefore, it was time to get started again and finish them off.  Thankfully, my wife is in school so I have most of Saturday open to paint while she does homework.  That has given me plenty of time to paint.  

I went to work on the rest of the models using my standard batch painting techniques.  I worked on belts and pouches next.  Here I used a variety of Armypainter browns such as Skeleton Bone, Desert Yellow, Monster Brown, Leather Brown, and Fur Brown.  I had to make sure that none of the gear matched anyone's tunics either.  Each model tended to get two of the brown colors to create some different colors on the same model.  

I also painted the weapons up.  Here I went with a very different look.  I opted to do all the Bows with Dessert Yellow to give them a yellowish look.  On spear and weapon hafts, I had primarily used Oak Brown and Skeleton Bone, which I did again.  The weapon tips were all Bronze or Gun Metal.  The feathers on the arrows I decided to use Mummy's Robes for a goose-feather look. 


That just left heads and headgear to be finished off.  So close to getting all the base-coating done!  For hair, I used Fur Brown, Monster Brown, Dark Stone, and Uniform Grey.  I avoided any Orange hair and I think only 1 guy had Blonde hair in this group.  A bit unusual for me, but Blonde's and Red-heads did not seem that common for Anglo-Saxons.  It will help the Irish and Vikings pop out a bit. 

For the hats and helmets, I allowed myself to go a bit crazy on the color-schemes.  The majority of these guys had been in browns, greens, and more nature themed colors.  This time, I skipped that and leaned into the brighter colors for headgear, Deep Blue, Pure Red, Daemonic Yellow, Lava Orange, Greenskin, and even Voidshield Blue.  Helmets were Gun Metal and Bronze for the most part.  That gave some of these guys a bit of a "POP" to them too.  

Not a bad looking crew.  That left all the base-coating done after 4 weekends of work.  I was onto Washing and Base-coating.  I had used Strong Tone on the shieldwall due to all their chain mail, and it turned out good, but a bit dark.  I wanted these guys to fit in with those, but I decided to do a test on the Priests with a Lighter tone to see how they fit in first.  I thought that the Strong Tone might be too much for these minis and make them super-dark.  

After looking at the test models, I was happy with the Soft Tone results. It used a black ink base, similar to the Strong Tone.  Therefore, I moved forward with washing all the models with a Soft Tone. Here is what it looked like. 

Well, they look finished now.  All that is left is the basing now.  I used the standard Territorial Brown craft paint with scatter moss sprinkled on to make my bases.  Nothing fancy and it gives a good effect.  It also matches my other Historical armies.  

Here was the final 52 models.  Two units of archers, one unit of slingers, 1 skirmisher with Javelins, and 1 unit that could be skirmishers or Irregulars.  Then, two random priests that are not part of the army but came in the set and I thought they would be cool to have around and painted up for various reasons.    


With that, this batch of 52 is complete!  I went and put them with the rest of the army in order to get a couple full army shots and some unit close-ups.  


  Some Skirmishers.....


Some missile troops....


With that, my first big project for 2025 can be crossed off the list!  92 models done for 2025! Done.  Now, onto the next project, which will probably be some Heroquest heroes from First Light. 

Until next time! 


Become a Patron and get access to all the cool stuff, a peak behind the curtain of Blood and Spectacles, and early-access to playtest games!  


You can follow Blood and Spectacles Facebook page or Instagram for more fun! 

Check out the latest publications and contact me at our Blood and Spectacles website

Or purchase all out games at the Blood and Spectacles Publishing Wargames Vault Page!