Showing posts with label Warlord Games. Show all posts

Monday, October 6, 2025

Review: Victory at Sea - Warlord Games


I think getting these rules have been on my "To-Do" Goal list for the last 3, maybe 4 years or so.  I like Naval wargames but I am more Jutland than Midway.  Therefore, I was hesitant to pull the trigger.  Plus, I was not a huge fan of the Starter Set focusing on the Pacific Theatre, i.e. US vs Japan.  However, I heard good things about the rules and it seemed to have a pretty comprehensive list of ships from all the major nations in it.  

With the tariffs impacting Warlord imports into the US, I decided I better get a copy of the rules before "Tariff-Pricing" went into effect.  I pulled the trigger and picked up a copy from The Miniature Market out of St. Louis.  I opted to just stick with the rules for now for a couple of reasons: 

1. I wanted to see if anyone else at the True Crit Gaming Guild was interested before I dove in with two fleets. 

2. I like GHQ as they were a "local" manufacturer of Naval miniatures and I might want to build my fleets with their range instead.  Also, no "Tariff-pricing" on them either.

3. You don't need miniatures for Naval wargaming.  You can start off with top-side looking paper templates easily enough.  That is what I used to play-test Castles in the Sky and it worked great!       

4. I was not 100% sold on the scale or the basing of the Warlord range.

With all that being said I figured that a copy of the rules would be a good place to start on my journey before I dropped too much money, time, and effort into the game.  I had done a Black Seas demo back in the day and ultimately decided not to follow up on it.  I was unsure if that would be the same with this game.  

Now, let's get the Diesel's powered up, site in the guns, and raise the battle flag!  Off we go, diving into Victory at Sea.....


Things I Liked

The core rules of the game take up a brisk 18 or so pages!  That includes all segments of the Turn, Orders, Aircraft, etc.  There is plenty of white space and pictures too.  There are another 11 or so pages about setting up a game and some advanced rules for Coastal actions and Submarines too.  Therefore, it is an easy read.  The bulk of the book is very detailed ship profiles for the game and by Nation.

The game uses an alternate activation by phase.  Therefore, the player who lost initiative chooses to move a ship, then the opponent, back and forth until all ships move.  Then, you go the shooting phase with the player who won initiative shooting first and alternate shooting with all damage being resolved right away.  The game uses the following phases, Initiative, Movement, Gunnery, and End Phase. 

Light guns and AA guns are able to split their fire between targets based on the number of attack dice they have.  An interesting idea to represent their quick-fire abilities.  You do not have to fire all Torpedoes in an attack, but I am unsure of the advantage of not doing so.  There is a disadvantage in re-loading if you don't.   

Attacking is pretty straight forward.  All weapons have an attack dice.  You roll a d6 for each and look for a 4+ to hit.  However, there are modifiers for shooting such as target size, speed, and other factors that modify the dice roll result up and down.  For each hit, you roll a Damage Dice of d6 to try and equal or exceed the armor rating.  Every hit that does causes damage right away.  A Damage Dice of Nat 1 always is deflected and a Nat 6 you cause a Critical Hit. Re-roll the dice and score a 4+.  A bit clunky with a lot of dice rolling since the sample Northhampton Class- Heavy Cruiser has a broadside with 15 dice, and a closing attack dice of 12.  Then, it has an armor of 2+ so a lot of hits when it takes fire too.  However, it gets the job done and is easy to recall.     

There is a special rule for Plunging Fire that means shots at Long or Extreme range get a +1 damage for armor penetration on their dice.  The Damage Dice incentivizes staying at range, but the to hit dice incentivize getting up close and personal.  Not sure which trumps which without really getting a lot of games in!     

In the End Phase, you can try to repair Critical Damage with a Damage Control check.  Interesting, as ships take Crits in vital areas, the effects multiply upwards.  Therefore, a Crit hit in the Engine reduces speed to -1", a second hit means that a ship needs to go 3" before turning, and a third Crit in engines is another -1" speed and a +1 to Crew Crit rating.  This is a nice attritional effect to Crits.  Damage Control can reduce the number of hits in these areas by 1.  

Each ship can also issue a single Order to augment their abilities in a turn.  Each ship can do this once per turn.  I like the ability to give orders but I do not like that they are infinite.  Most of the orders have an advantage and a disadvantage for performing them.  They are declared before moving a ship.  Therefore, some counters/tracking is helpful to recall which ship has which order

There are some interesting rules for scouting that can then lean into advantages in the early game.  You secretly set aside ships and flights for scouting.  Before deploying you reveal which ships/flights are scouting.  They can not deploy with your fleet, but may rejoin in a later phase.  Each ship/flight you dedicate gives you a Scouting Point, the more Scouting Points the more potential benefits for deployment type and Initiative dice.  Clever and something I will have to think about using at some point.    


Things I Did Not Like

This game uses a turning gauge for movement.  Sadly, I have never been a fan of such things, but I see the necessity in Naval wargaming.  I just do not like them at all.  In truth, the gauge is not really needed as the ship moves forward 2 inches and can then turn up to 45 degrees.  A ship can only turn after every 2 inches movement forward.  There are no turn limits other than the Flank Speed of the ship.  There are no collisions in this game.      

During the Gunnery Phase, when a ship shoots, all damage is resolved immediately.  Therefore the impacts of shooting take effect via alternating activations instead of simultaneously.  This can lead to some gamesmanship with your shooting choices.  

Other ships do not block line of sight, so positioning of your ships does not matter all that much compared to other ships.  The maximum attack distance is 30 inches, everything beyond is considered over the horizon.  This is an interesting idea, and I wish they would have done more with it in the deployment or other parts of the game.  They do have some special rules for using observer aircraft to try to make attacks beyond the horizon, which is cool!     

Big ships can have a lot of hits in this game.  The example Northampton Class Heavy Cruiser has 23!  It can lose up to 16 before being crippled.  

I like the critical hit table except that it uses a d10 instead of a d6.  That means you need a different dice type to deal with the Crits.  Honestly, looking at the crit list, it could have been done with a d6 as well. 

There are a decent amount of special traits to try and capture the uniqueness of various ships and navy doctrines.  You will want to note this on the ship cards.      


Meh and Other Uncertainties

One of the big challenges of Naval Wargaming to me is that.... well.... not much of it actually happened.  Warships are big, expensive, and take a long time to build and man.  They are a huge investment in National resources.  Therefore, you just don't get nearly as much Naval activity as you would expect, because everyone is reluctant to be the Admiral that loses 50 year worth of work in an afternoon!  Therefore, the opening of Victory at Sea spends times talking about Naval activity in WWII and helps set the scene for your games.  I found the couple pages on French efforts to be of particular interest, as I had not heard or read much on the topic.  Of course, the bit of history they give is just a taste as whole sets of books have been written on this topic.   

There are rules for aircraft in this game, and they can play a big part of it.  They can turn as much as they wish but can never perform an order.  In addition, all aircraft are moved at the same time in the fleet.  AA guns automatically fire at any aircraft that come into range of their AA.  They come with about 4 extra pages of rules and add a lot of depth but are almost a different game from the rest of Victory at Sea.  However, that was true in the real-life application of aircraft in Naval battles too!  

Submarines are also practically a different game but are included for completeness' sake.  They have about 4 pages of added rules with three special and unique entire game scenarios for using them as well.  MTBs also have about 3 pages of rules for how to use them.  However, these are much closer to normal rules with some tweaks.  Finally, there are 4 pages of rules on shore batteries and how they work in games too.  

Unsurprisingly, in a Naval wargame they allow Pre-measuring.  That is as it should be as most ships had sophisticated ways to judge distance.  

In the pre-game, both fleets role for their Objectives.  They might not align with each other.  High Priority objectives give a bonus to total mission points, while low priority ones give a deduction to total points played.  These Objectives have different victory conditions.  In addition to these "generic" missions there are 26 historical scenarios in the book too.  

The remaining 145 pages are dedicated to fleet lists that are very detailed.  This includes the Royal Navy, The US Navy, The Marine Nationale, Kriegsmarine, The Imperial Japanese Navy, and the Regia Marina.  These lists includes ships, aircraft, Motor Boat flotillas, auxiliary ships, submarines, and national traits.  These are very well researched, detailed and complete.  I am sure there is some completionist out there that would quibble about this score or that but..... wow..... very detailed.  This is the highlight of these rules.   


Final Thoughts

The basics rules are simple enough and allow for a relatively fast-paced and thorough game.  Of course, the more points the longer to play.  Once you add in all the advanced rules and special rules then you have a very complete look at WWII Naval wargaming.  You should be able to recreate almost any action you can conceive of and use the Fleet lists, rules, and scenarios as a good guide to play it.  

There are a few minor quibbles about some of the design choices here and there, but those are edge cases more than anything else.  Overall, I can see why this is a popular set of rules for Naval wargaming the period. It covers everything you need rules-wise and stays fairly close to is Universal Mechanics throughout the game.  

Until next time!


Become a Patron and get access to all the cool stuff, a peak behind the curtain of Blood and Spectacles, and early-access to playtest games!  


You can follow Blood and Spectacles Facebook page or Instagram for more fun! 

Check out the latest publications and contact me at our Blood and Spectacles website

Or purchase all out games at the Blood and Spectacles Publishing Wargames Vault Page!     


Monday, June 29, 2020

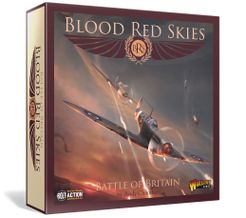
Review: Blood Red Skies- Warlord Games


Via Boardgame Geek

I downloaded the rulebook for Blood Red Skies for free from the Warlord site.  I had been pointed to these rules as I was working on the rules for Glittering Void at the time.  One of my readers thought that my struggles with altitude bands in a space mecha game could benefit from reading these rules and seeing what I learned about air combat rules and how they applied to Space Mecha.  Perhaps they were trolling me because they thought my rules sucked!  Who knows?  I guess I got the last laugh because I downloaded them and have read them.  He who laughs last laughs best!

When I was a wee lad, I used to love to watch a TV show on the Public Broadcasting Station (PBS) called Piece of Cake.  It was a show imported from the BBC to the states and consequently had strange viewing slots, so I often would only catch bits and pieces of it.  The movie was about a British Spitfire Squadron during the Battle of Britain.  I wish I could still find it on YouTube or somewhere as I would gladly watch it again.  I have never been able to see it again so if you know of it, have a link, etc. please leave me a comment!

Piece of Cake kindled an interest in World War II, and the air war in particular.  The jargon, the tactics, the personalities, and of course the amazing planes.  Granted, it is not a topic that I have exhaustive knowledge on, but it is an area of interest to me.

Anyway, this game was written by the (in)famous Andy Chambers.  You may remember him for writing the rules for the Starship Troopers game.... and maybe some other smaller game systems here and there.  He was/is a pretty well known name in the wargame industry and fits pretty well with the stable of ex-Games Workshop writers that freelance with Warlord from time-to-time.

I am a huge fan of Warwick Kinrade's Aeronautica Imperialis rules that were put out by Forgeworld.  He was a near contemporary with Andy at GW.  It is also a fighter plane game, but one using 40K universe aircraft.  Everyone knows that 40K aircraft are basically WWII fighters and bombers... IN SPACE!.... so it will be an interesting contrast.  I am also familiar with Check Your 6, X-wing, and Wings of War to contrast the rules with. 

I only have the core 16 page rulebook and not all the fighter stats and pilot stats.  However, after reading and absorbing the game, I think I have a pretty good feel for the rules and how it plays.

Let's clear the runway and get up and at 'em then!  Piece of Cake!


via Warlord's Site

Things That I Like
The win conditions for this game are not necessarily based on shooting down enemy planes.  Instead, it is based on morale, and morale is recorded using Boom tokens.  A Boom token is given when a plane is shot successfully, even if they are not destroyed or shot down.  Of ocurse, you get more if they are shot down.  If you have more Boom Tokens than planes at any point, you lose.

The core rules are Stat of the Pilot + Features of the plane = how many dice you roll.  You are looking for a Target Number of 6 to earn successes.  The more success the better.  This set-up allows for differentiation between pilot skill and plane features.  Therefore, pilot and machine counts when you play the game and allows you a lot of space in between for customization of aircraft types.  Pilot skill and aircraft performance is also used to determine who can act first.

Shooting attacks allow both players to participate.  The plane shooting makes dice rolls based on pilot skill, and the defender makes dice rolls to avoid getting shot up.  This allows both players to participate instead of one just dying.  This also allows some room to add in special rules for head-to-head shooting and deflection shots.  These rules naturally make these types of attacks less enticing, so you want to try to position your plane to avoid them.  This is a nice bit of design that encourages the right period "tactics" but does not force them on you.

The turn sequence is broken down in a few different ways, but the core is:

1. Shoot
2. Move
3. Take an action

This is nice as the Pilot Actions allow you to make some decisions besides simple move and target priority.  These actions include shooting more, outmaneuvering an opponent which can give them a penalty, or trying to improve your place in the turn sequence later, make a flying maneuver to enhance/change distance moved, etc.  They are nice elements of decision making without giving up core actions like moving and shooting.

Finally, the rules for Tailing are natural and again encourage you to use the proper tactics such as a wingman, without forcing you to do it.

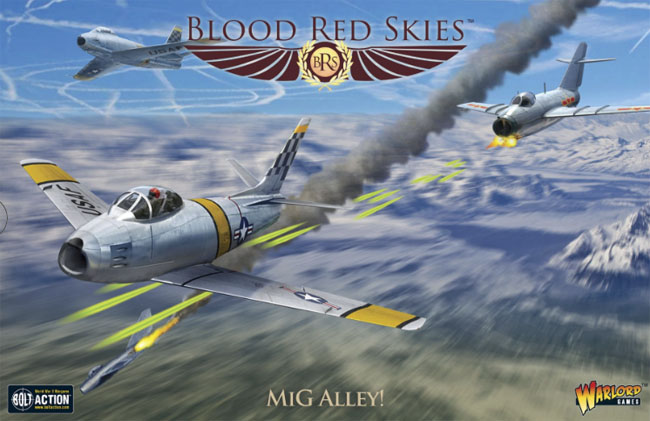
Oh look, a Korean War version!
Via the Warlord Site 
Things I Do Not Like
This game uses a very abstract method of determining energy vs. altitude vis-a-vis maneuver.  Many aircraft games use various height bands, thrust changes, set maneuvers that modify your speed or altitude, etc.  This game dispenses with and abstracts most of this detail using a completely different system referred to as Advantage.

This system is the main gimmick of the game and is integrated very closely into the games workings.  Players are constantly moving or being forced to move between Disadvantaged, Nuetral, or Advantaged states of play.  All planes in the Advantaged state get to move through the turn sequence first by order of pilot/machine performance.  Various maneuvers change the state of the aircraft between these three levels.  Planes can only shoot at planes that are within 1 Advantage level so Disadvantaged planes can never fire on Advantaged planes and vis-versa.  Climbing, Outmaneuvering, Tailing change the Advantage state of the target planes.  Only planes at Disadvantage can be shot down, the rest can be shot at but only to earn Boom Tokens.  Remember, a Boom Token is a morale measurement not actual damage necessarily.

These advantage states greatly streamline play and speed up the game.  However, it also forces the game into a very abstract air battle.  In play, they have some aspects of altitude in other games, but also adds an abstract element of pilot space and timing to the game.  If you can handle/want this level of abstraction then you will be fine.  I had some trouble adapting to it since it is very different mechanically than other aircraft games I have played.

Finally, the game is supposed to use custom dice, but only one facing matters on them in the core rules.  You can use ordinary d6 just fine, but proprietary dice make money so..... let's put them in! 

Meh and Other Uncertainties
Now, I only have the core rulebook.  Therefore, I have no idea about the scenarios, different aircraft stats, pilot upgrades etc.  There is space in the rules for this type of chrome and I am sure it is there, but I can't really review what I can't read/see.  Therefore, I don't have much else to say.  I found the core rules fell into Things I Liked or Things I Did Not Like.

The very PDF I downloaded
Via the Warlord Site
Conclusion
This is an innovative take on aircraft combat.  I am very glad that I downloaded the rulebook and took a look at.  Ultimately, if you can handle the abstraction inherent in the rules then you will probably be all set to enjoy it.  The rules work to foster the proper tactics of the period well.  The mechanics are streamlined, easy to figure out, and intuitive.  Resolution is pretty quick.

Despite all these positives, I am just not ready to buy in to the abstraction of the game.  I LIKE altitude bands, maneuver cards, and thrust ratings!  Why, because it allows you to emphasize maneuver in a way that ground or naval combat just can not bring to the table.  To me what makes air combat interesting is the Maneuver vs Firepower element and the trade-offs you have to make.  The game has abstracted maneuver to such a degree that I am unsure if it will deliver the type of game experience I personally will find satisfying.

I can see the appeal, and recognize the elegance in the design.  It has done a lot to "modernize" the air combat game.  However, I do not think it is for me, and that is okay. 


You can follow Blood and Spectacles Facebook page for more fun: https://m.facebook.com/pg/BloodandSpectacles/posts/?ref=bookmarks&mt_nav=0

Or our website:

Or our Messageboard:

Or our Wargames Vault Page:


Monday, November 11, 2019

Men of Bronze: Thessaly Army List


As I was working on Men of Bronze, I was researching like crazy on Ancient Greek warfare.  I was looking at Herodotus, Xenophone, Thucydides and many, many more.  In addition, there were a ton of secondary sources such as Warry, Hanson, Gaebel and many more.  Through all of this research I ended up focusing on the classic City-States of Athens, Sparta, Thebes, Corinth, and Argo.  I also tried to capture their main enemies the Persians.  However, there was a much larger Greek world to consider. 

Nic at the Irregular Wars blog rightly called me out.  My book was missing details for such places as Pre-Reform Macedonia, Thrace, Magna Graecia, Syracuse, and more.  One of the big call-outs was not including an army list for Thessaly, the home of the best horseman in Greece. 

Since then, I have done research into two areas to create lists for Men of Bronze.  Since then, I have taken a much closer look at Sicily and the war between the Carthaginians and the Greeks there.  It was a fascinating learning curve and I have since been shopping the army lists and Historical scenarios for that period around to various wargames magazines.  The second area I looked at was related to Thessaly, the land of horses. 


Thessaly was an area to the north of what many people refer to as Ancient Greece.  It is often considered to be an outsider of the Greek world.  However, it rose to prominence later in the classical period and became especially important during the early years of the rise of Philip of Macedon and the Sacred Wars.  After Philip's death, they were also key allies of his son Alexander.  However, they were still well known horseman and cavalry troopers before these times.  The earliest reference I could find of Thessaly was in Herodotus before even the Greco-Persian wars.

A Brief History
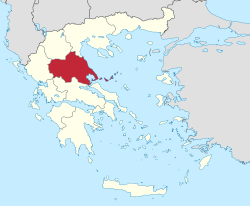
Herodotus tells us a bit about Thessaly through the voice of Xerxes.  It is a broad plain surrounded by mountains in east-central Greece north of the major city-states of classical times.  It is bordered by a broad river called the Pineios River.  Indeed, Xerxes observes that if the river was damned, it would flood all of Thessaly.  This natural basin is a broad and fertile plain and one of the few good places in Greece for raising cows and horses. 

It was the natural landscape for powerful land owning aristocrats to develop.  These land-owners would come to control the regional politics.  This even included the small cities that began to develop in the late 5th century BCE.  In this regions, the horse became a status symbol for the aristocracy.  Under these conditions, horsemanship thrived.  Most athletes in the Olympic games from Thessaly were involved with horse races. 

The famous Thessalian Headwear
The region was divided into 4 Tetrarchies, which were nominally part of the Thessalian League.  These were loosely aligned politically, but in wartime would come together under the military leadership of a single archon or tagos.  Not much is recorded about Thessalian military history until 375 and the rise of Jason of Pharea.  However, we do have some snippets from Herodotus, Xenophon, and Thucydides. 

For example, Herodotus records two engagements between the Thessalians and Spartans.  The first was a Sparta landing force on the beaches near Phalerum.  In this encounter, the Thessalian cavalry managed to route the Spartans before they could form a proper line of battle.  The second engagement between the mercenary Thessalians and the Spartans was a land engagement where the Spartans managed to see the horseman off with little effort.        

Xenophon also offers insight into non-horseman units in the Thessalian armed forces.  During the Persian Expedition under Cyrus, mercenaries are recruited from Thessaly.  Meno commands 1,500 hoplites and 500 peltasts during the campaign.  In addition, Xenophon later tells us in a different text that Thessaly had hoplites, peltasts, and other light troops in addition to the cavalry units. 

Some sources also reference an unknown and ill-described light infantry trooper that was supposed to accompany the cavalry into combat.  It is unclear exactly what this force was, and seem reminiscent of chariot-runners from earlier bronze age battles.  It does not specify what the role of these troops were or their status within Thessaly.  They can be assumed to be a very light and mobile support force, similar to Psiloi.     

Diodorus Siculus and Xenophon also discussed the make-up of the Thessalian military under Jason of Pherae.  It consisted of the noble Thessalian cavalry and mercenary forces for the ground troops.  Again, Xenophon believes that the Thessalians could field up to 20,000 infantry and 8,000 cavalry.  6,000 of these were mercenary troops of the highest quality.

Jason of Pherae? 

Most of our information about Thessaly comes from the later period as Macedonian influence became more relevant to Thessalian politics.  Phillip was elected Archon of the Thessalian league and was reorganized to support the growing military needs of the Macedonian army.  At this point, the Thessalian cavalry became a regular formation in their order of battle and became more of a heavy cavalry formation. 

The Thessaly Army List
As stated, the army of Thessaly was focused around cavalry forces.  Early Thessaly was focused on light cavalry, however later iterations transitioned into a Heavy Cavalry role.  However, as Xenophon tells us other forces were also present in their army.

One of the defining features of the later Thessalian cavalry was a special formation known as the Rhomboid formation.  Essentially, the cavalry formation was a diamond with a  point at each direction.  A leader was place at each point, this formation allowed the cavalry to move quickly in different directions.  In addition, this formation was tasked with protecting the left wing of Alexander's army during his Persian campaign.  There, they held the line in a variety of defensive battles using the Rhomboid formation. 

The Thessalian Cavalry can use the Rhomboid formation as a Special Rule.  The Rhomboid Formation uses the following rules:

Rhombus Formation


Rhombus
The Rhombus was a special cavalry formation used by Hellenistic cavalry forces to help increase their maneuverability on the battlefield.  The unit could quickly change direction and move based on switching the leader of the formation at the tip of any edge.
     Units in the Rhombus formation have the following rules apply: Unit may start the game in Rhombus
     A Rhombus can move straight forward, straight left, straight right, or straight back up to its full move
     If a Rhombus touches difficult terrain it will revert to Open Order
     To change from Open Order to Rhombus requires a Arete Point and can only be done in a Unit’s Activation.
     A Rhombus can change to Open Order at any point during an Activation
     A Rhombus formation provides +1 Armor and +1 Attack Dice
               
Units in Rhombus can be aligned this way.  The center line is 4 models.  On both sides of the center, there is a row of two.  Finally, the tip of both ends is a single model.  The Leader model should be at the forward tip of the Rhombus. 

Thessaly Line of Battle
Use the following lists to build your historical forces for Thessaly. The Lines of Battle help to choose the appropriate units for your historical forces. These are sample lists and there to provide a flavor of potential forces. Players can always modify these lists as they see fit
Each Line of Battle will have an entry with a number. The number indicates the limit of that Unit you can take in the army. If an entry says 1+ your army must have at least one of these units in it. If it is 0+ any number of that unit may be taken. If a Unit is not on the list, it can not be chosen.

Early Thessaly List
1+ Cavalry
0-3 Militia Hoplites
0-2 Peltasts
0+ Psiloi

Jason of Pharea List
0-2 Heavy Cavalry*
1+ Cavalry*
0-1 Elite Hoplites
0-4 Light Hoplites
0-2 Peltasts
0+ Psiloi
  This unit maybe given the Rhombus Special Rule for +2 Points

Late Thessaly List
0-2 Heavy Cavalry*
1+ Cavalry*
0-4 Light Hoplites
0-2 Peltasts
0+ Psiloi
  This unit maybe given the Rhombus Special Rule for +2 Points

Warlord Games Thessalian Light Cavalry- From Warlordgames.com
Sample Armies
Below you can see Sample Armies built from the Lines of Battle provided. They give you an idea of what your force could look like. They are all built to a 38 point force. They range from 5 to 10 Units each.

Early Thessaly
2 Cavalry
2 Peltasts
1 Militia Hoplite
1 Psiloi

Jason of Pharea/Late Thessaly
1 Cavalry with Rhomboid
1 Heavy Cavalry with Rhomboid
1 Light Hoplite
2 Psiloi
Thessalian Heavy Cavalry from Wargamesfoundry.com


Battle of Phalerum
Herodotus tells us a story prior to the Persian-Greek War about a mercenary Thessalian cavalry force meeting a Spartan army on the plains of Phalerum.  During the reign of Cleomenes the “Mad” Spartan king, he and the Tyrant of Athens had a falling out.  The Athenian Tyrant was named Hippias, and in addition to the military forces of Athens, had hired a group of Thessalian mercenaries to help maintain his rule. 

Cleomenes wished to over throw Hippias.  Therefore, he had a force of Spartan soldiers land on the beach near Phalerum.  The plan was to march to Athens and overthrow Hippias.  The Tyrant must have gotten wind of this plan and sent his mercenary horseman to intercept them.  Apparently, the plain of Phalerum had to be specially prepared for cavalry operations so the Thessalians must have know the Spartans were coming.  Herodotus’ account lacks almost any detail, except for one crucial element, the Spartan opponents were attacked and over run before they could form into a proper battle line.   

Despite the set back, the Spartans tried again the following year.  This time, they took an overland route.  They again faced the Thessalian horsemen, but this time the mercenaries were swept aside by a larger and well prepared Spartan force.  The Spartans were well prepared, and probably more numerous than their first encounter with the Thassalian cavalry. 

The following is to help recreate the initial battle of Phalerum vs. the Spartans.  Modern scholars know nothing about the battle and some great liberties must be taken with the force compositions, lay-out, etc. in order to make this into a viable scenario.      

Forces
Herodotus only tells us that the Thessalians were a cavalry force, while the Spartans were foot soldiers. 

Spartans
Elite Hoplites- Spartiates
2 Militia Phalanx- Allies
2 Psiloi- Helots

32 Points

Thessalians
4 Cavalry
2 Psiloi

36 Points      

Records of the Thessalian forces indicate a number of ill-defined and light troops that were sent to fight amongst and with the cavalry forces.  It is not clear how these troops were armed or equipped.  However, they sound similar to Psiloi.  They had no recorded arms or armor and were recorded as more of an afterthought.  Therefore, I have included Psiloi in the Thessalian mercenary list for the Battle of Phalerum to add some flavor and variety. 

Set-up
This scenario is played on a 72 base widths long by 48 base widths across board.  The Spartan side is one of the long board edges and is considered impassable terrain.  It is the sea where the Spartans are deploying from their ships.  The other side is open into the plains of Phalerum.  Instead of the normal 6 grid spaces for terrain placement, this battle only uses 3, all on the Thessalian side of the table.  However, place terrain randomly in these three with the Thessalian deploying first.  This represents the preparation that supposedly occurred before the battle. 

The Thessalians can be placed on the board edge with all the terrain elements anywhere within 12 base widths of their long board edge.

The Spartans are not placed on the table.  They begin the game in reserve.  They deploy as if subject to the Delayed Units complication found in the Men of Bronze rules.  In addition, when deployed on the board, a Spartan unit may not be within 12 base widths of another Spartan Unit.  If a Unit can not deploy anywhere outside of 12 base widths of a Spartan Unit, then it is placed in reserve again.  It may try to enter on a different turn. 

When entering the board from reserve the unit must be placed touching the deployment board edge.  This counts as their action for the turn.

Special Rules
See the section on deployment to see the special rules for this scenario. Other than what is listed in the Deployment section, no other special rules exist. 

Victory
The Spartan mission is to move 1+ unit off the Thessalian board edge.  Alternatively, they can completely rout or destroy the Thessalian forces opposing them.  The Thessalians win if they rout the Spartan forces from the board.  All other outcomes are a draw. 

The game will last 8 turns or until one side is destroyed/collapses. 

Greek Light Cavalry from VictrixLimited.com
Conclusion
Now, we can add one of the Northern territories of Greece to your games of Men of Bronze.  I think the Victrix, Wargames Foundry, Warlord, or any Greek Light Cavalry models will be great for such a force.  They will look very impressive in squads of ten 28 mm models on the table.  Their foot print on the table alone will be a sight to behold!

Keep your eyes on the Blog as I intend to add some more army lists for Men of Bronze such as Pre-Reform Macedon, Syracuse and the Sicilian Greeks, and early Sicilian Wars Carthaginians.  I am having a blast researching these forces. 

Thanks to Ingtaer, Grey Templar, and Duracellrabbit from the Dakka Dakka forums for help with the research.  Also, thanks to Nic at the Irregular Wars for his help with the topic.  These fine folks pointed me to some good resources online and in the primary sources.  Thank you!        

You can get all of the updated materials including a FAQ, Campaign rules, and Lines-of-Battle in the Men of Bronze Supplement: Hercules Abroad.                   

Thursday, May 11, 2017

Wargame Design: Command and Control

You may recall that all wargames must deal with the 4Ms.  For review, those are Movement, Melee, Missiles, and Morale.  The way you solve for those M’s will dictate your game’s core mechanics.  As designers, we must constantly choose what we wish to emphasize in our games, and how we choose to handle the 4Ms will naturally flow from these decisions. 

There are other major components in wargame design to consider outside of the 4Ms.  One of them is Command and Control, or how do you want the player to be able to provide instructions to their little men on the tabletop and how will there soldiers respond to these orders?    

It is common to think of Command and Control as an extension of Morale.  After all, Morale is trying to model how troops in you game will react during combat.  However, Morale tends to focus on how your units respond to actions by the enemy.  For example, it is a Morale situation to determine how your soldiers will respond when the enemy shoots at them, charges them in the flank, moves into their line-of-sight, etc.  Command and Control is not concerned with the enemies actions, it is concerned about how your troopers respond to their own commanders, officers, and staff. 


In many games, this feature is simply glossed over.  Miniature soldiers will always do what they are ordered to do by the player.  They automatically know what is intended and carry out the orders without any hesitation.  It doesn’t matter if it is obviously suicidal they just do it.  This is the easiest solution to Command and Control.

As a designer, I find this solution to be lacking.  Clausewitz often refers to the “Friction” of war.  This is a series of obstacles that make it increasingly difficult for a commander to achieve victory.  This “Friction” takes many forms and can lead to key units not responding appropriately.  Part of what makes war gaming interesting is determining how you are going to overcome this mounting friction of the unanticipated.  Most friction does not come only from enemy action but by the mounting difficulties of enduring operations.  As a war game player, friction forces and creates choice and decision points and that helps make a good game.   

Different genres and different periods will have varying levels or causes of Friction.  For example, in Ancient battles communication was difficult due to space and distance.  Greek commanders were expected to be in the front-line putting themselves in harm’s way with his fellow citizens.  This made Command and Control difficult outside of their own unit.  In the Horse and Musket period, the commanders would send Aide-de-camps riding around with their orders but these brave souls would have their horse shot out from under them, killed, get lost, or captured before the orders could arrive.  In modern skirmish, radios get wrecked, maps turned around, and interference scrambles signals.  In Sci-fi settings, enemy jamming and ECM could be disrupting the signal or units could be operating silently.  You can see the potential obstacles to proper Command and Control are not limited by genre and time period so therefore should not be ignored by a designer either. 

Now that we have established that Command and Control is important for a designer to think about what are some ways to model it in our games?  I am sure there are countless ways to do it, but I can think of a few methods:

1.       Command Checks
2.       Resource Management

Command Checks
A command check is a simple dice roll or card flip with a success number associated with it.  In order for the Unit to do what it is being ordered to do they must first successfully pass this test.  If failed, they will not respond as anticipated. 

The examples I can think of are Hail Caesar/Black Powder, DragonRampant/Lion Rampant, and The MenWho Would Be KingsIn Hail Caesar your commander has a rating and as long as the commander can pass command checks, they can give orders for troops to do stuff.  For Dragon Rampant different unit types have a different success level based on the order and unit type.  In both games, Command failures turn play over to the opponent.  The Men Who Would Be Kings is a bit more complicated as some units can always do certain orders based on their training, but other actions require a test.  Failure means the units becomes confused and must be rallied at a later date. 

As a player, you have to decide which actions are the critical actions that must be done first, or risk losing the initiative and having play go back to your opponent. 

Resource Management
In this scenario, a player may receive a certain number of orders that they can use.  Typically, there are not enough orders to do everything that needs to be done.  Therefore, the commander must decide what actions are going to take place when.  This is the method used in Blucher with a bit of a spin.  Your opponent knows how many actions you can take, the player does not. 

A more common variant is to have the Command Tokens unlock special moves.  All units can do standard orders such as move, shoot, etc.  However, the Command tokens may give bonuses like extra movement, dodging, steal initiative, re-rolls, etc.  However, the key is that these additional actions are limited and the player must choose how and when to use them.  You may have seen this in games such as Robotech: RPG Tactics, DuxBellorum, and All Quiet on theMartian Front
Final Thoughts
I am sure there are many more clever and interesting ways to make Command and Control a vital part of the game.  Some other game examples I can think of but have no personal experience with are Soldiers of God, Saga, and Sword and Spear.  There are probably many other interesting ways to deal with the issue and I encourage you to point me towards more examples in comments. 


Command and Control introduces more “Friction” for a player of war games to overcome.  This in turn forces choice and decision points.  Choice and decision points are vital to make a game fun.  Therefore, as a war designer you will want to strongly consider adding some sort of Command and Control element into you games.   

Wednesday, April 19, 2017

Wargame Design: The Futility of "Realistic" Weapon Ranges

A common complaint I read or hear is that a weapon’s range is not “realistic” in a game.  I myself have felt the same way about some games.  For example, I find the ranges in Bolt Action to be most off putting.  If you read my reviews of A World Aflame or On The Seven Seas I call out weapon ranges as a big dissatisfier as well.  When a man can run almost as far as a pistol can shoot with a single action, it makes me wonder why I would ever stop to shoot with my pistol.  On the other hand, a gun that can fire all the way across the board with no limit can be equally unappealing.  


Melee weapons are easy.  For them to work, you have to be very close, typically base-to-base or some other very close proximity.  That is relatively easy to design for.  Ranged weapons are not as easy.  As a designer, ranged weapons can be a real thorn.  The closer you get to modern weapons the harder it is to get the ranges to be “realistic”. 

What is a “realistic” weapon range anyway?
Great question. 

We have all seen example in wargames that are not “realistic”.  Let’s use an infamous Bolt Action example.  A standard rifle can fire 24 inches in the game.  It is the standard weapon for most infantry units.  Warlord Games makes an awesome Pegasus Bridge kit for Operation: Market Garden.  The problem is that the standard rifle can not fire the span of the bridge which is decidedly not true in real life.  I have seen A Bridge Too Far! Plus, most of us are familiar with the range of a rifle and the width of a river, even a big one and find this unsatisfying.  Clearly, the range of a rifle in Bolt Action is not “realistic”.

Now, let’s go to the other extreme.  I have played some micro-armor games with weapons that have a range measured in thousands of yards.  The only real limitation on the range is if the target can be identified and targeted.  No matter where the enemy goes on the table, they will be in range.  This can be “realistic” but it is also not very fun when all you can do is pray you are not detected.  It makes maneuver on the tabletop useless and the best path forward is always the quickest route.         
  
Many players will tell you that a realistic weapon range is one that matches the ground scale of the game to that of the weapons.  So, if a millimeter equals 1 yard then a weapon that can fire 300 yards accurately (maybe a musket) should be able to fire 300 millimeters.  That is then a “realistic” weapon  range.  Now, imagine trying to apply this standard to a Micro-armor game.  You would need a baseball field to play with 6mm models for Desert Storm/Team Yankee type games.     

It’s A Trap!        
For a game designer, “Realistic” weapon ranges are a trap.  They can not be achieved within the following constraints:

1.       Time Scale
2.       Ground Scale
3.       Fun Scale

Time Scale: Units would need to move unnaturally or unrealisticall fast in order to close distances in modern games.  In essence, they would simply be shooting duels where the main challenge would be creating firing formulas and detection mechanics.  This can sometimes be a dig on modern Naval Wargaming. 

Ground Scale: Most people simply do not have big enough tables or able to manipulate small enough models to make a “realistic” weapon range work.  Of course, the old U.S. Naval War College can make an exception when they are gaming on gymnasium floors.  The rest of us can not typically make that space commitment. 

Fun Scale: “Realistic” weapon ranges for modern weapons simply are not that much fun!  It limits the possibility of maneuver UNLESS the game has strong stealth mechanics.  I once toyed with a game that had unlimited ranges, future tech detection gear, and weapons that were powerful enough to punch through most cover.  The game sucked as it devolved into a simple game of dice throwing because there were not enough variables to make tactical and compelling game play.  “Realistic” ranges limit tactical flexibility unless the game design compensates for it somehow.

What Is The Answer Then Smart Guy?
Sadly, there is no one answer to “realistic” weapon ranges.  The true question is:

“What are you trying to achieve with your game?” 

In my mind there are two things to consider:

1.       Firepower vs. Maneuver

In my mind, range and movement work closely together.  Weapon ranges are a way to limit the maneuver possibilities of the opponent.  As a designer, you need to decide at what point you want enemy firepower to be a consideration in a players movement.  Firepower, and thereby weapon ranges; are simply a factor to limit free maneuver of troops.  If units can not be fired upon they can move freely.  Once they can be fired upon they are subject to additional considerations that limit their movement options.  How soon do you want this to occur in your war game? 

2.       Range vs. Movement

The other key consideration is how far something can move in relation to how far weapons shoot.  If a man can run the range of a machine gun burst in a turn, then what is the point have setting up a machine gun fire arc.  You will never be able to use the machine gun as the enemy will just time their run to move through it immediately.  This means your Range to Movement Ratio is not in sync.  It gives too much benefit to movement.    

The Range to Movement ratio must be in balance to achieve “realism”.  However, some Fantasy and Sci-fi style games can bypass even this ratio through magic and technology.  Other games have to be grounded a bit more. 

What Should I Do?
Keep this rule of thumb in mind while designing.  The longer the weapon ranges, the more static the game will become as movement will be limited by firepower.  The shorter the weapon ranges the more maneuver will play a role in the game. 

There is a reason why 24 inch ranges on 6 foot by 4 foot boards is so popular.  It provides initial movement options without limitation by firepower.  However, as the two enemies close firepower becomes increasingly important.  Essentially, the main theatre of action will be the center two feet of a 4 foot wide board across a three foot frontage. 

In addition, 24 to 6 inches applies a “reasonable Range to Movement ratio of 4:1.  It would take 4 movement actions to reach a man standing still and shooting.  This makes crossing that ground feel suitably deadly unless you do something to stop them from shooting at you in the first place.  This desire to stop the enemy from standing still and shooting you is what leads to tactics and decisions.  Decisions equal fun. 

As we can see, Bolt Action is attempting to create an artificial balance between firepower and Maneuver.  Meanwhile, a game like On the Seven Seas has simply violated Range to Movement Ratios. 

Final Thoughts
Chasing “realistic” weapon ranges in most games is a unicorn.  The more “modern” the game, the harder it is.  Therefore, instead of trying to make “realistic” weapon ranges, focus on what you are trying to emphasize with your rules. 

To give your game the right feel, you need to balance two areas:
1.       Firepower vs. Manuever
2.       Range to Movement Ratio

If you want more maneuvers in your games than shorter ranges will help you achieve that.  If you want to emphasize firepower than longer ranges are better.  If you want more decision making you need to have a good Range to Movement Ratio.