Showing posts with label Steampunk. Show all posts

Monday, February 6, 2017

Resources: Castles in the Sky


As I prepare for the Balkan Uprisings for Castles in theSky I wanted to share some resources that were put together by a fellow gamer.  Robert Kurcina, who I know from the Delta Vector Chat Group, made these resources to help play out test games of Castles in the Sky.

For those who do not know, Castles in the Sky is a game I created to play flying battleship games around 1914 between the "Great Powers" of the time.  After the failed Martian Invasion the left over tripods led to great leaps forward in technology and the invention of the Airship.  Naturally, these flying behemoths became militarized and revolutionized "Great Power" conflict at the edge of empire.  I give the game away for free, so feel free to try it out.  I just ask that you share with me your gaming experience so I can continue to make the game better.    

Feel free to download these resources and use them to try the game for yourself. 

Ship Templates

Record Sheets

Tokens

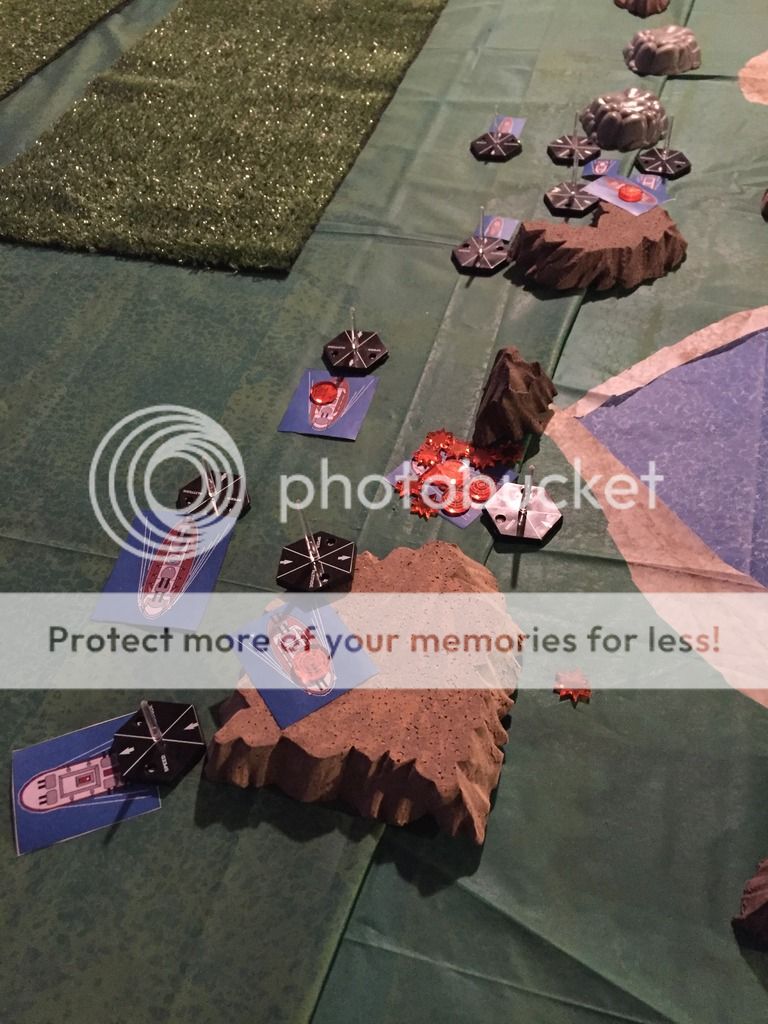
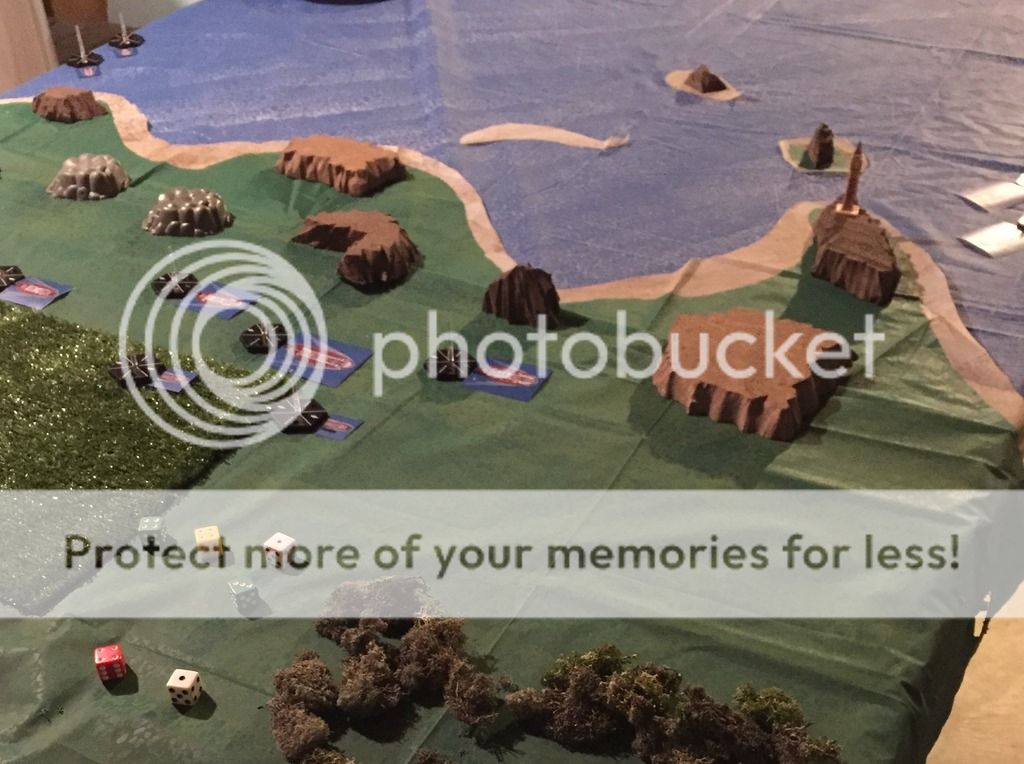
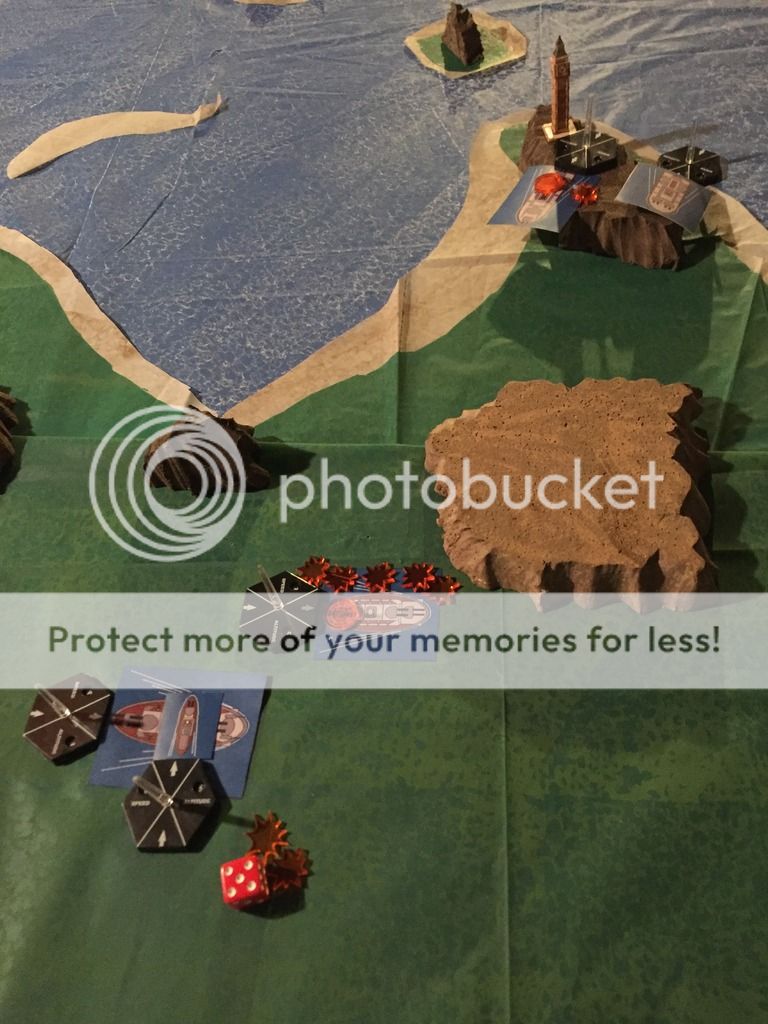
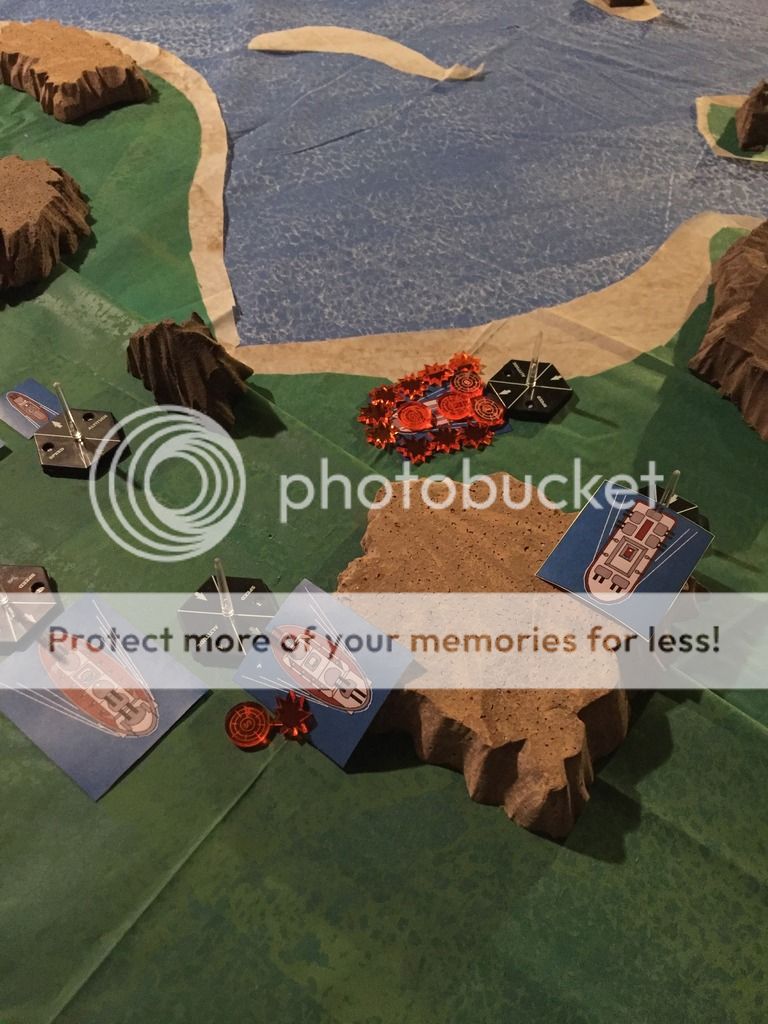
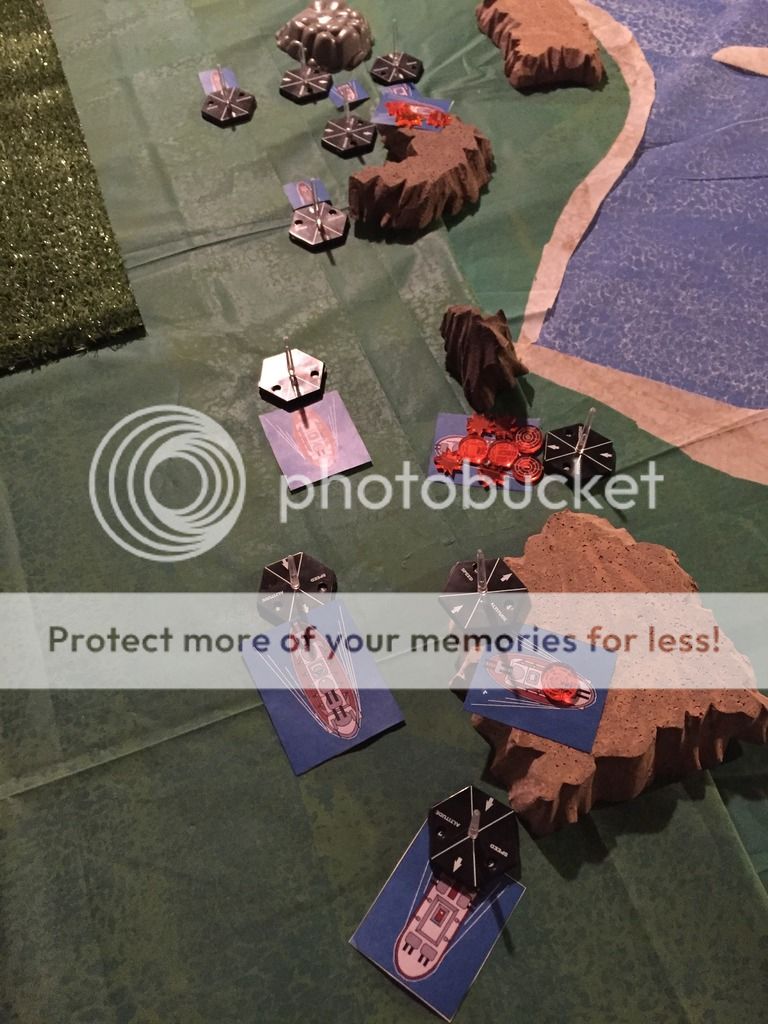
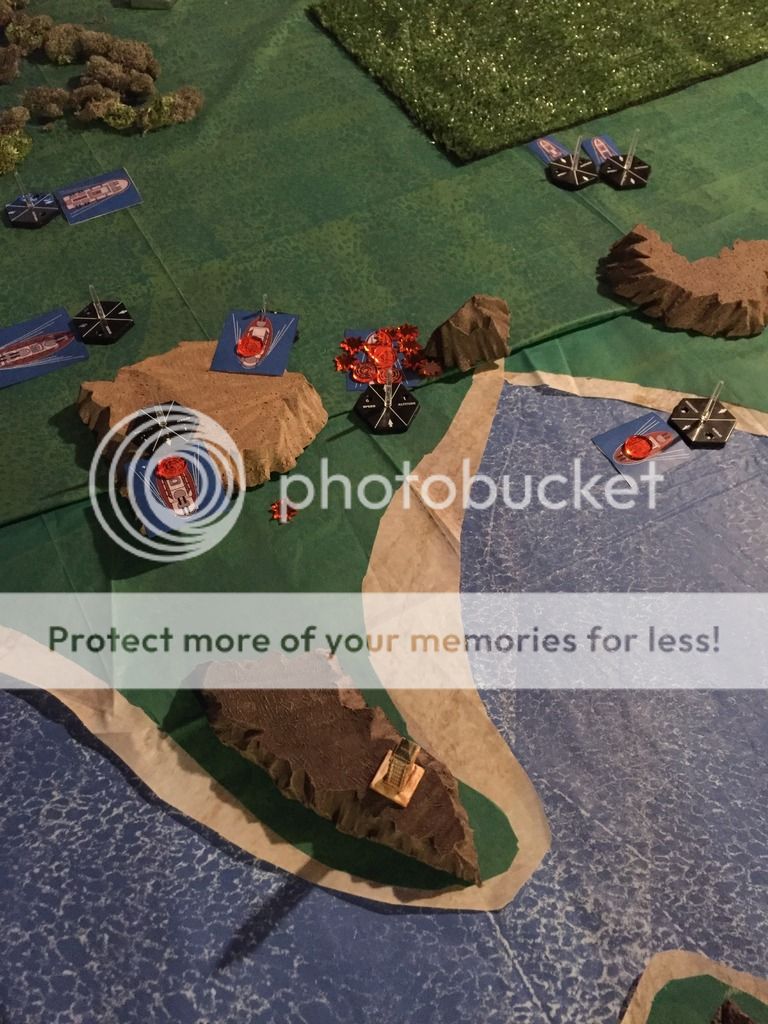
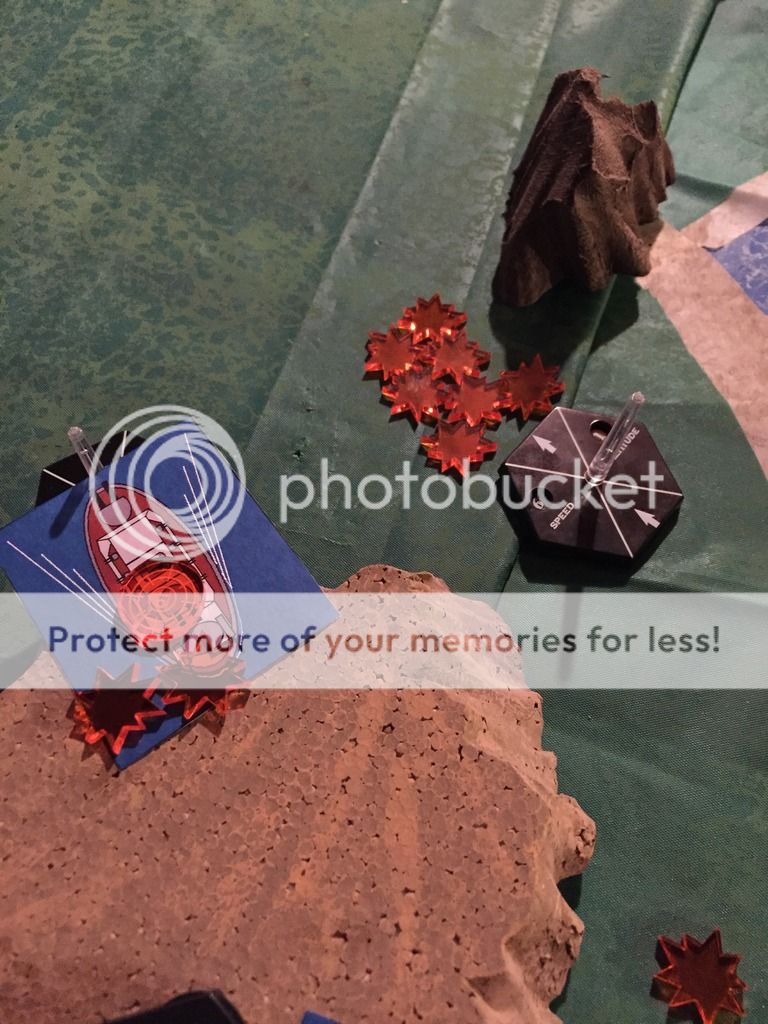
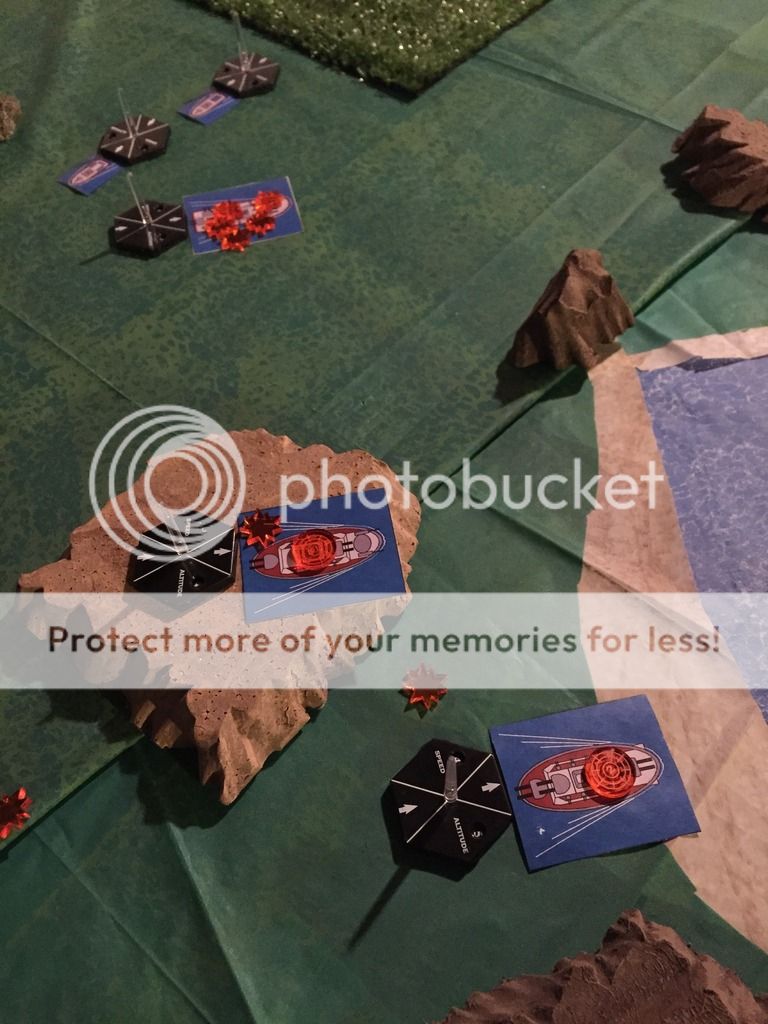
Typically, when I play a game I keep the record sheets on a side board (actually on my computer at the side board) to record each ship since most battles are about 4 or so a side.  I also use Aeronautica Imperialis bases on the board for Altitude and Speed, but you can also use dice, or keep it all on the record sheet.  Any data on the record sheet is public knowledge to all players.  I use All Quiet on the Martian Front hit tokens to represent Bursts on the ship.  You can see some examples during the Raid on Montenegro battle.    

As you know, I am all about wargaming on a budget.  I also created some paper templates for the Balkan Uprising campaign.  I used actual deck plans for the ship classes involved when I could find them to build my templates.  If i couldn;t find the actual deck plans, I tried to find the next best thing.  They aren’t as cool as the ones from Robert, but I think they will work fine.  I just wish I had the time to make them a bit more colorful.  However, feel free to use these templates for your own games too.  


Balkan Uprising Campaign Ship Templates


Someday, I will get some actual Aeronef models from Brigade, Leviathans from Catalyst, French ship models from Spartan, or modify some of the great GHQ Micronauts range to go on flying stands.  I just haven’t gotten there yet.  There are so many projects to put money and time into, and only so much time and money.  For now, paper templates will do the job.    

Monday, January 23, 2017

Castles in the Sky- Campaign Set-up- The Balkan Uprisings

I am setting up and preparing to test the Castles in the Sky campaign rules.  These are included in the main rulebook after the scenario section.  The game uses an alternate timeline where flying battleships exist and a Martian invasion occurred in 1878.  However, much of the "fluff" follows real  world pre-World War I history.  This takes place in an alt-First Balkan Wars scenario.  However, instead of the Greek Navy doing all the work, it will be a coalition of Russian/French airships.  However, when in doubt I will try to weave in some real world history.

For much of the 19th century, the Great Powers of Europe had shared different aims over the resolution of the Eastern Question.  The Eastern Question was the perceived dismantling and break-up of the Ottoman Empire of the Turks.  Each Great Power had their interests and the region was ripe for conflict.    

Russia wanted access to the waters of the Mediterranean Sea via the Dardanelles.  They also believed in the Pan-Slavic ideals of unified Slavic peoples.  As a contingency, the Russians supported an expansion of the Greek nation in case the integrity of the Ottoman Empire collapsed.  France wished to strengthen its position in the Levant, and was a nominal ally of Russia.

Austria-Hungary wished for the continuation of the Ottoman Empire.  Both were troubled multi-national entities and the collapse of the Ottoman’s would de-stabilize them as the various nationalistic groups in her own borders would be agitated for their own homelands.  The Ottoman’s were a counter-weight to the nationalistic tendencies of her own people.  In this she was supported by the Germans who wished to make the Ottomans an intact client state.  Italy made no real claims, but wished to keep the Adriatic clear of other state assets and was part of the Triple Alliance with Germany and Austro-Hungary.

The Ottoman Turks themselves wished to maintain the integrity of their nation.  In fact, they had undergone a revolution in 1908 under the Young Turks and were on a reformist movement for the government, army, and navy.  This progress made the Balkan people restive and a number of illicit organizations were formed with Nationalistic intent. 

After the fall of the Young Turks with their defeat in the Italo-Turkish War, the rebellious Balkan states formed the Balkan League to act against the Ottomans.  If Turkey could bring in troops from Asia, then the Balkans could not hope to win.  Therefore, the Balkan League had to rely on the support of some of the Great Powers if they wished to be free.  However, the existence of the League proved to be a noisy political nuisance to all the great powers.  Only Russia secretly approved and supported their efforts.   

The Balkan League was loosely aligned with the Russo-Frankish alliance, while the Ottomans were aligned with the Triple Alliance.  So the groundwork for hostilities was laid, with the threat of a Great Power war hanging in the balance.   

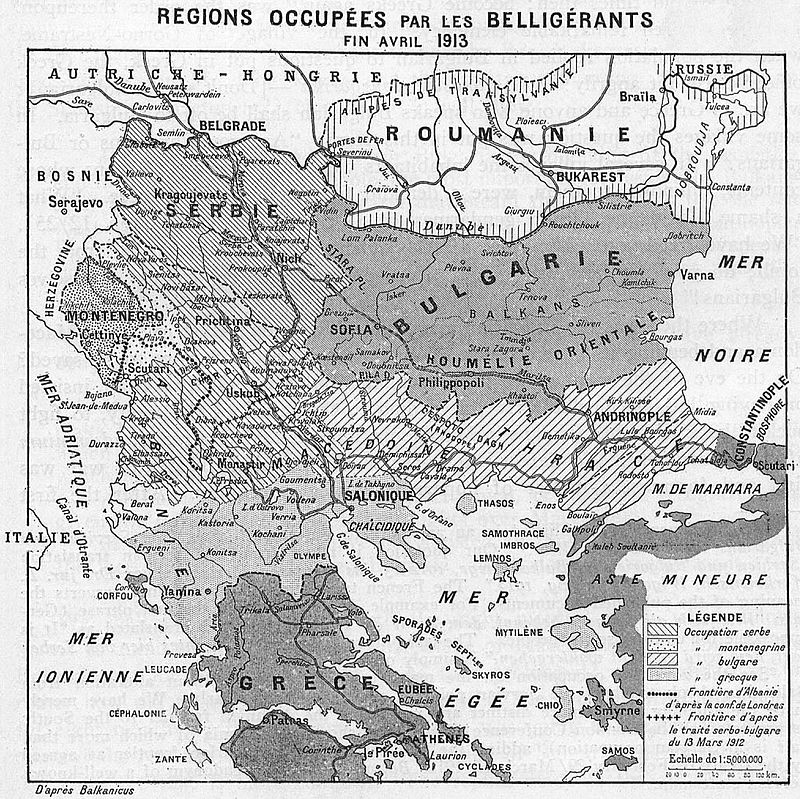
Map of the actual First Balkan War
  
The Balkan Uprisings will be a campaign using the campaign rules found in the Castles in the Sky rulebook.  This will be a medium sized campaign of 75 Armor points per side.  Each faction will be able to choose a percentage of ships from the aligned Fleet Lists at the percentage indicated.  The sides will be:

Balkan League Allies
Russia- Up to 60 Armor Points
France- Up to 20 Armor Points

Ottoman Allies
Ottoman Empire- Up to 35 Armor Points
Austro-Hungary- Up to 35 Armor Points             
Italy- Up to 15 Armor Points

Each fleet must have at least 50% spent on Cruisers or smaller and no more than 25% on battleships.  Each fleet will have 4 Strategic Assets.  Here are my fleet selections....  

Balkan League Forces- 74 Armor Points

Russians:
Poltava                                           Captain:  Pyotr Senyavin                Command: 2 - Flagship
Class: Imperatrista Mariya            Category: Battleship                        Armor: 8

Imperator Pyotr                              Captain: Pavel Ivanov                     Command: 1
Class: Imperatrista Mariya             Category: Battleship                        Armor: 8

Oleg                                                Captain: Aleksey Rozhestvensky    Command: 2
Class: Bogatyr                                 Category: Cruiser                             Armor: 7

Rurik                                                Captain: Nikolai Ushakov              Command: 1
Class: Azova                                    Category: Cruiser                            Armor: 7             

Vityaz                                                Captain: Georgy Vysotskiy           Command: 2
Class: Bogatyr                                   Category: Cruiser                          Armor: 7

Pallada                                               Captain: Matija Yumashez            Command: 1
Class: Bayan                                      Category: Cruiser                          Armor: 7

Albatros                                          Captain: Feliks Golokov                 Command: 3
Class: Krasnoye                              Category: Gunboat                         Armor: 5

Kondor                                            Captain: Nikolay Konovalov         Command: 3
Class: Krasnoye                              Category: Gunboat                         Armor: 5

Sova                                                Captain: Vladimir Greig                  Command: 1
Class: Krasnoye                              Category: Gunboat                         Armor: 5


French:
Brennus                                           Captain: Theo Aube                        Command: 4
Class: Charles Martel                      Category: Heavy Cruiser               Armor: 8

Primauguet                                      Captain: Jean de Vienne                Command: 4
Class: D’iberville                            Category: Cruiser                            Armor: 7


Ottoman Alliance- 73 Armor Points

Ottoman Empire:
Sultan Mehmed II- Fatih                  Captain: Seydi Al Reis                    Command: 3- Flagship
Class: Sultan Osman-I Evvel            Category: Battleship                       Armor: 9

Basra                                                 Captain: Hasan Rami Pasha            Command: 2
Class: Barbarous Heyreddin             Category: Heavy Cruiser                 Armor: 8

Mecidiye                                             Captain: Medvid Reis                    Command: 1
Class: Hamidiye                                 Category: Cruiser                            Armor: 8

Trakya                                               Captain:  Piri Pasha                      Command: 2
Class: Midilli                                    Category: Light Cruiser                 Armor: 7

Barbaros                                            Captain:  Murat Pasha                     Command: 2
Class: Berk Efsan                              Category: Torpedo Boat                    Armor: 4

Austro-Hungarians:
Prince Eugen                                      Captain: Anton von Sterneck             Command: 2
Class: Tegethoff                                  Category: Battleship                          Armor: 9             


Sankt Georg                                       Captain: Rudulf Horthy                      Command: 4
Class: Kaiserin                                    Category: Armored Cruiser               Armor: 8

Bravo                                                  Captain:  Anton Pock                       Command: 4
Class: Huszar                                      Category: Destroyer                            Armor: 6

Volta                                                    Captain: Ludwig Brommy                Command: 1
Class: Huszar                                      Category: Destroyer                           Armor: 6

Italians:
San Bartolomeo                               Captain: Paolo Revel                              Command: 1
Class: Vettor Pisani                          Category: Armored Cruiser                    Armor: 8

The Balkan League is attempting to assist the Balkan forces in driving the Ottoman’s out of Europe.  Meanwhile, the Ottoman Alliance is attempting to maintain possession of European territory and support and protect the ferrying of troops from the Asian part of the Empire across to the European part of the Empire. 

The campaign will last until one side reaches 7 Campaign Points with a victory margin of 2 points.  The winner of a scenario earns 1 campaign point. If they inflict twice as much Armor loss then they gain 2 campaign points, and if the difference is 3 times they score 3 points. 


The normal rules for Campaigns found in the Castles in the Sky rules will be used.  Like my last battle report, I will be using templates from my Aquanautica Imperialis rules for my ships along with Aeronautica Imperialis bases to keep track of altitude and speed.  

I plan on starting this campaign by the end of January.  Stay tuned.         

Sunday, December 18, 2016

Castles in the Sky- Battle Report- Raid off Montenegro

If you look to the right hand side of this blog, you will see several links for Free Wargames.  These are games that I have created for you.  I made them because I like to make games.  I made them for no one else, but myself.  Therefore I give them away to you for free.  I am not trying to make money with these games at the links.  If you play them, I only ask one thing, that you share your experiences so I can make better games in the future!   

Castles in The Sky is a game of ponderous warships of the air; battling on the edges of empire after the Martian Invasion of the 1880’s.  The destruction of the Martian menace by microbes left a number of tripods available to be studied.  From these war machines, great leaps forward in technology were made including the Air Screw.  From these discoveries the great nations of the world built a new kind of war machine; the airship. 

In this blog, I will share adventures with my own games as well as published games.  Today’s battle report features Castles in the Sky using templates created for Aquanautica Imperialis and Forgeworld bases from Aeronautica Imperialis.  Sadly, Forgeworld no longer makes these bases.  In a pinch you can also use Litko flying bases as well or no bases at all.  I also used burst markers from All Quiet on the Martian Front.  Enjoy!         

This game came about when The Evil Monkeigh from DeltaVector started playing around with his own version of Aeronef

Castles in the Sky
Place- Off the coast of Montenegro in the Adriatic Sea circa 1914. 
Scenario- Italians are Raiding the Austro-Hungarians

Nation- Operational Cost- Armor Value
Italy- 24 (24)
Armored Cruiser- Vettor Pisani- 7 (8)- Command: 4- Flagship  
Frigate- Soldato- 5  (5)- Command: 1
Torpedo Boat- Pilo- 8 (4)- Command: 3
Cruiser- Zenta- 4 (7)- Command: 2

Austro-Hungary- 33 (46)
Heavy Cruiser- Radetzky- 6 (8)- Command: 3
Heavy Cruiser- Habsburg- 6 (8) Command: 1
Cruiser- Novara- 4 (7)- Command: 1
2 Destroyers- Huzsar- 6 (12) – Command: 2, and 3
Battleship- Tegetthoff- 11 (9)- Command: 2- Flagship

Operational Costs are an experimental method for determining balance rather than Armor Value.  The current rules call for Armor costs.

None of the vessels are in squadron.  

Set-up
The coast of Austro-Hungarian territory is set-up dividing the board in half.  The Austro-Hungarians are set-up heading north with the coast to their north edge. They are cruising at mid-altitude (3-5) and mid-speeds 3.  The line is led by the Radetzky, followed Tegetthoff, Habsburg, and Novara.  The Huzsars are to the starboard side of the Tegetthoff. 

The Italians are coming in from the Adriatic Sea.  They are coming in at full speed and relatively high altitudes.  The Italian cruisers are trying to attack the front of the Austro-Hungarian battle line, while the frigate and torpedo boat are sneaking up on the rear of the line. 

Any rocks are assumed to be Altitude 1, so a ship must be at Altitude 2 or better to cross over them.  If they are not, they will crash into the rocks.  LOS is also blocked at Altitude 1 by the rocks


Turn 1:
The Italians win the Initiative and elect to go first.

Movement:
All Italian vessels move to drop altitude and pick-up speed.  They are still too high to engage the Austro-Hungarians, unless they choose to rise up to the challenge.  The frigate and torpedo boat move to try to get behind the Austro-Hungarian column. 

The Tegetthoff drops altitude and speeds up.  The Radetzky makes no change, and dares the Italians to attack him, her turrets turning to face the threat.  The Huzsar’s begin to double back towards the other smaller Italian ships, and the Novara moves out of line to try and line up a shot with her air torpedoes. 

Battle:
The Italians open fire at the Radetzky.  The Italian’s are one altitude above, which means they need 5+’s to hit the Austro-Hungarian ship.  The shells from the Zenta ping harmlessly off the heavy cruiser’s armor.  The air torpedoes from the Vettor Pisanti are much more effective and reduce the Radetzky 1 armor point.  The Radetzky is surrounded by blast markers now.  The smaller Italian craft are out of range. 

The captain of the Radetzky prepares to return fire on the impudent Italians.  The heavy batteries target the Zenta.  The captain would love to give a Lock-On order, but the burst have disrupted his attempts.  Instead, he must satisfy himself with the boom of the heavy guns.  Due to the altitude difference and the burst, he will need 6’s to hit.  One shell manages to get through and jams the Zenta’s rudder!


End Phase
All damage is applied to the ships.  7 Burst markers are removed, which leaves one on the Radetzky going into the next turn. 

Turn 2:
The Italians win Initiative again and decide to go first.  

Movement:
The Italian small craft raced up to try and get into position on the trailing Novara cruiser.  Meanwhile, the Armored Cruiser tries to get into a position where her broadsides could come into play.  The poor Zenta moved forward, and tried to drop altitude to avoid getting pummeled by the Radetzky since her rudder was out. 

The Huzsar’s managed to turn about and move towards the smaller Italian craft.  The Novara dropped altitude to avoid the chasers, but it would not be enough.  The main Austro-Hunagarian fleet plowed forward.  The Tegethoff moved up to target the damaged Zenta with her broadsides. 

Battle:
The Zenta knew she was about to get pummeled and went on Brace for Impact orders.  Her shells went wide of the mark.  Thankfully, the captain passed the Ammo check, so the ship still had shots.  The Vettor Pisani Re-loaded Ordinance but was too high to fire on the Austro-Hungarian Radetzky. 

The Soldato and Pilo tried to put air torpedoes into the side of the Novara.  The Austro-Hungarian gunners were ready and took them out with quick-firing deck guns.  However, this put three bursts on the ship.  Not much luck for the Italians with their shooting. 

The Radeztky found the stricken Zenta in its broadside arc.  Bursts kept the crew disrupted, but the heavy cruiser still managed a broadside on the Italian cruiser.  A heavy shell smashes into the Italian ship again reduces its armor.  The crew’s attempt to Brace failed.    

The Habsburg also can target the Zenta with its bow batteries, and opens fire with a salvo.  Three shells hit, and one manages to strip a further armor point off the Italian cruiser. Again, the crew failed to Brace.   In addition, the Habsburg fires a salvo of air torpedoes.  However, Italian point defense destroys both before they reach their target.

Finally, the captain of the Tegethoff ordered his men to Lock-On, it was too bad they did not listen.  3 shells strike, two bounce harmlessly off the armor, and 1 strikes home.  The crew fails to Brace again!  They need better training! Another Armor point will be stripped away! 


End:
All damage is applied, and to the Zenta and is reduced to 3 armor from the battering it took from the Austro-Hungarian fleet.  Plus, it still has a damaged rudder. 

6 total Bursts are removed.  The Zenta still has 4, the Novara has 3, and the Radetzky has none. 

Turn 3:
This time the Italians choose to let the Austro-Hungarians go first!        

Movement:
The vanguard of the Austro-Hungarian fleet moves to engage the Italian cruisers by spreading to cover Altitude 3 through 5 as they steam towards the safety of their air defense zone.  The Huzsar’s race back towards the smaller Italian craft, and the Novara tries to get out of the way. 

The Zenta drops to altitude 2, and speeds up but is hampered by the bursts around her.  The Vettor Pisani moves up to altitude 7 to avoid the Tegethoff and Radetzky, but that also means she is out of range for her own weapons.  The Soldato and Pilo move into attack the exposed side of the Novara. 

Battle:
The second Huzsar fires on the Italian torpedo boat with its forward battery, but misses.  The Novara uses its stern battery on the torpedo boat.  However, a near miss allows the torpedo boat to absorb the shrapnel and keep on course, but she has picked up a burst.     

The Habsburg fails to Lock-On to the Italian Zenta with a command.  However, its gun batteries open up on the Italian craft at close range, with 1 altitude separation.  7 hits on the Italian cruiser!  The ship breaks out in a fire, it’s screw if fouled, and its hull is breached in several places.  The Italian Zenta will be reduced to –3 Armor.  One overkill hit and she will explode.  The crew will need to abandon ship.


The Austro-Hungarians have no other shooting, so the Italians take over.  The crew of the Zenta give a final barrage of fire before abandoning their vessel.   The barrage causes 5 hits on the Hapsburg with one managing to cause a hull breach on the Hapsburg heavy cruiser. 

The Pilo and Soldato both try to Re-load their Ordinance.  They both succeed but the Pilo may not fire as she has picked up a burst.  The Soldato fires at the Novara at close range.  The  deck gun misses.  The Austro-Hungarian gunners fail to hit the incoming torpedoes at close range, and one smashes into the Novara.  The cruiser’s hull is breached. 


End
There are no aeroplanes to move.

The damage is applied, and the Italian Zenta begins to lose lift and sink.  The crew abandons ship as a fire rages across the craft.  Her speed is dropped and she loses 1 altitude band.

There are no repairs to be made.

The Italians roll 4 and the Austro-Hungarians roll a 4.  The bursts are removed from the Pilo and 3 from the stricken Zenta.  The Austro-Hungarians remove all 4 from the Novara. 

Turn 4:
The Italians win initiative.  They choose to go first. 

Move 
The Italian commander realizes they have made a hash of things as he watches the Zenta begin to sink.  At least his countrymen are over land, making them more likely to escape the crashing airship alive.  His command ship stays high, and turns to move along the sides of the Austro-Hungarian fleet, knowing that they do not have the lift to catch him.  Instead, he is hoping to close in on the weaker Navara before the Austro-Hungarians can make it to the safety of their air defense network.

The smaller Italian frigate and torpedo boat break-off from the Novara and head to meet-up with the larger Italian ship. 

The Austro-Hungarian heavy cruisers move to eventually meet-up and support each other.  The Tegethoff speeds up and heads towards the safety of the Austro-Hungarian defense network.   The Huszars begin to come around to escort their larger brothers away. 

Battle
The Italians Re-load Ordinance, but no one has the altitude or range to fire. 

The Austro-Hungarians also do not have the range or altitude. 

Everyone is still maneuvering for round 2… if there is one.


End
The fire aboard the Italian Zenta reaches the combustible gases and magazines of the ship.  She explodes spectacularly.   The explosion catches the nearby Hapsburg and rocks the ship, but fails to cause further damage. 


There is no damage to repair. 

The Italians remove 4 bursts from the explosion from the Zenta, while the Austro-Hungarians roll a 2 and remove the bursts from the Hapsburg.     

Turn 5
The Italians win, and choose to go first. 

Move:
The Italian commander of the Vettor Pisani comes down from his high altitude and offers battle to the maneuvering Austro-Hungarian Heavy Cruisers.  The Soldato and Pilo race up to support and follow their command ship. 

The Tegethoff speeds up and manages to successfully and safely disengage from the battle.  The admiral leaves the captain of the Radeztky in charge of the mopping up operations.  Seeing the Italian come down to a lower altitude, the Radetzky and Hapsburg are happy to oblige the Italian and rise up to meet him.  The Novara drops for cover and speeds up to pass near the lighthouse on the coast. 

Battle:
The Italian commander is confident in his armored cruiser’s abilities, and opens fire on the Austro-Hungarian Hapsburg.  His confidence is misplaced, as the majority of the shells pass over head harmlessly, and a single light shell bounces off the heavy cruiser’s plate with a dull ring.  Seeing the futility of his broadside, the Italian quickly orders his men to Brace for Impact! 

The Hapsburg opens fire at medium range with a 8 firepower barrage.  Only a single shell finds its mark, and the rest fly past underneath.  The single hit clanks dully and careens off into the sky.  At long range, the Radeztky’s heavy guns boom out, and hit the Italian 4 times.  However, the range dulls the impact and no damage is done. 


End
Bursts are removed, with the Italians removing the 5 on the Vettor Pisani and the Austro-Hungarians removing bursts from the Hapsburg and the Zenta explosion. 

Turn 6
The Italian commander wins again, and decides to go second this time. 

Move
The Italians seem to be content to move out of range and try to disengage.  They go to high altitude out of the range of the Austro-Hungarians.  They signal their intent to disengage the Austro-Hungarinas.  The pending twilight makes pursuit difficult, and the captain of the Radetzky is content to let the Italians flee.

End
All remaining bursts are removed. 

Conclusion
The Austro-Hungarian papers are quick to condemn the Italian attack on their fleet.  The Italians, embarrassed by the incident blame the raid on pro-Balkan agitators within the fleet who were incensed by false reports of Austro-Hungarian atrocities in the Balkans.  They mutinied against their officers and coordinated the attack. 

In Rome, a few unfortunate sailors were hung.  In addition, the Italian government quietly paid a hefty indemnity to the Dual Monarchy.  Any surviving Italian sailors found alive in Montenegro were given a brief prison stay before being sent home to Italy. 

Behind closed doors, the Austro-Hungarian admiralty was pleased by the day’s actions.  The Heavy Cruisers’ and Novara had taken only light damage while destroying a rival Cruiser.  The captains of the Hapsburg, Tegethoff and Radetzky were seen as heroes of the Empire.  Their views and opinions were given considerable thought and value in the admiralty going forward. 

Post-game Analysis
Enough with the fluff let’s break down the game play.  As the Italians, I made a huge mistake right off the bat.  The Italian capitals were deployed to go straight into the teeth of the Austro-Hungarian main battle line.  I would have been better to attack from behind and overwhelm the rear ships piece meal, and inviting the heavier classes to try to come about and attack.  I paid a heavy price, with the Zenta being beaten to death with very little to show for it in return.            
      
So, did Castles inthe Sky meet its gameplay objectives?  They were:
1.       Decisions, decisions, decisions
2.       3D gameplay
3.       Tough ships that can take a beating and then suddenly crumple
4.       Individual ships, that can scale up to larger battles
5.       Not a dogfight, but a fleet battle. 
6.       Campaign play

I didn’t try the campaign yet.  However, here is what I found in this playtest. 
1.       Initiative was a tough decision if you won.  Going first allowed you to make orders, put burst on the enemy, etc.  However, the second player was allowed to dictate the terms of the engagements. 
2.       Big ships move and maneuver slowly, so pre-planning matters.  You are trying to guess where your opponents will be, and then slowly get there too.  As intended. 
3.       The engagement envelope is small at only +/-1 altitude difference, so it is easy to avoid fighting if you want to. 
4.       Point Defense can take out most Torpedo attacks
5.       Putting bursts on targets makes a huge difference.  It stopped the Zenta from fixing its damaged rudder, stopped the Pilo from launching a torpedo attack, and kept the Novara from escaping the Italian pursuers.  Putting bursts on opponents is a big part of game play.
6.       The bigger ships were taking multiple hits, and shrugging them off, but once their armor started to peel away, it could suddenly add up quickly.  As intended.
7.       Volume of dice on target makes a big difference.  As intended.

There are still a few things I want to tweak after playing, but overall I am pretty happy with how this game turned out.  The tweaks involve adjusting Air Torpedoes, perhaps opening the engagement envelope a bit more, and clarifying Bursts since they were so critical to the game play/tactics.   


I hope you enjoyed this battle report for Castles in the Sky.  Feel free to try the game for yourself.  It’s free!  If you try it out, let me know what you think.         

Monday, December 12, 2016

Review: In Her Majesty's Name- Osprey Wargame Series


This was one of the earliest books printed by the Osprey Wargaming series.  Unlike other games in the Osprey series, this one has two supplements as well.  I will be reviewing all three of the books in one swoop!  This book was made by the same guys who did In The Emperor’s Name that some of you may be familiar with as it is set in the Warhammer 40K universe.  The writer's have also made a skirmish Samurai game called Daisho, and a dark ages skirmish game called Blood Eagle.  All of these games seem to use very similar mechanics.     

So, this game starts with about a page and a half of background about the world of In Her Majesty’s Name.  It is enough to give you the flavor, but it is just a skeleton for you to build off of.  This is what builds the basics of the setting and your Adventuring Company.  The game is firmly in the Victorian Sci-Fi category also referred to as Steampunk. 

Unlike some of the other Osprey games, it does not begin with or contain any designer’s notes, so it is harder to determine if the game successfully met its objectives.  However, based on the design and mechanics I can make some sweeping assumptions.  For example, this game is a skirmish game with some heroic elements.  I.e. named characters are better than the average dudes.  This tells me the game has some cinematic and pulp elements.  The size of the Adventuring Companies tell me this is supposed to be a skirmish game as the scale is one-for-one.  Etc, etc, etc.       

So, let’s get into the heart of darkness of this review.

Things I Like
The game has a small number of stats such as speed, fighting value, shooting value, etc.  These take the form of modifiers to a d10 dice roll.  However, they are also proto-dice pools.  If you are facing multiple opponents or have certain abilities you can spread those modifiers across multiple opponents. 

For Example, Lt, Napier of the British Rifles is facing two natives.  He can choose to split his Fight Value of +3 across both opponents, or focus all +3 on one guy. 

In addition, there is an interesting mechanic to volley fire or mob up on an opponent to make sure that everyone has a chance to hurt someone else, even if they have a superior value.  Therefore, quantity has a quality all its own, and the characters will not overwhelm the regulars if used appropriately. 

The game also comes with a fun selection of equipment, armor, weapons, mystical powers, abilities, etc.  I could see a close-knit game group having a lot of fun making up new stuff for their own character’s/retinues.  The game has a point system and encourages this approach. 

The initial book has some nice artwork and good mix of pictures.  It is evocative and makes me want to play this game.  Once you get beyond the main rulebook and into the supplements the art drops off considerably and forget pictures of minis and games. 

Things I Do Not Like
Like Ronin/En Garde the game seems interested with resolving all hitting/wounding in a single die roll.  Therefore, you roll the dice, add your stat modifier, add a weapon stat modifier, and subtract defense modifiers, and target armor modifiers.  That means, each shot requires you to know 4 modifiers when you roll the dice.  Good thing that this is a skirmish game as that would be rather cumbersome. 

Here is why I am not a fan of this approach.  The only activity is made by the attacker.  This removes agency from the defender and they basically stand there while the attacker does everything.  I would prefer an opposed dice roll as that requires both players to be engaged in all parts of the action.  Now, one player is active, while the other is passive.  That is not ideal.

Once a hit occurs, the target can make a Pluck save, which if failed equals Out-of-the-Game.  This does allow your opponent to do something in your turn.  

The game also has a basic campaign system and a few simple scenarios.  One critique is that the scenarios are very kill’em all style, which limits their scope for campaign/story play.  I think this is a big flaw, as that should be one of the biggest strengths of this system.  I don’t think this was due to space limitations as In the Name of the Emperor has similar set-up

Meh and Other Uncertainties        
The game has a lot of great ideas for players to build off of.  The supplements cover adventuring companies from Europe, North America, Asia, Africa and India.  There are some gaps as South America had some cool stuff going on at the time, and there is nothing about Australia.  However, the point system means creative players could delve into those areas.  Plus, the retinues and rules cover animals, vehicles, magic, etc.  It actually covers a lot of ground in a few hours reading time, but still leaves room for you as the player to build.  I like that in a game and it leaves scope for some story-telling. 

The rules are alternating activation within each phase.  The first player moves a model, and then the next player moves a model and they trade off back and forth until all movement is done.  Then the group starts shooting, then fighting, etc.   I think this is a good approach as companies tend to act as a unified group.  If it had been alternating activation where each model completes all of their actions before moving on, the Companies would act too independently.  This was a good design choice.    

Final Thoughts
I am a bit disappointed in this game.  There is so much cool flavor and potential, but the mechanics just don’t deliver in a compelling way.  I really, really want to like this game, but ultimately I don’t think I can fully recommend it.  The lack of opposed dice rolls and morale system leave me underwhelmed.  In addition, the strength of this game should be story-telling and campaigns but it just doesn’t deliver.  With the points builder system, you could make some very flavorful and fun Adventuring Companies to have campaigns with, but the weak campaign system leaves me wanting.         

However, with the right group willing to put some time and energy into this system, you could have an awesome series of club games.  If you merged In Her Majesty’s Name with some of the GW Specialist Games campaign systems (probably Mordheim)  you could have a really amazing system.  I am hoping that Osprey releases another supplement for this game that covers campaigns in more detail as that would really help this game a lot.  The current supplements only add more Adventuring Companies and some additional rules around animals/boats, but not much to the core mechanics or campaign system.  I would like to see more leveling up, base-building, an injury chart, resources/clues, and hiring mercenaries.  You could even add Blood Bowl style dirty tricks and the like.    

I want to give this game a good outing with my group, but I doubt I will.  I don't know if I want to devote the time to building the campaign system or painting the miniatures.  As it is, it has some interesting flavor and background, but I need more than just flavor in my games now-a-days.  Despite having three supplements, the game still feels like it is missing some key components.  I could see having a short campaign night or a fun event game, but I don't think it will become a staple of my gaming.        

There is also an additional supplement on the designer's blog for In Her Majesty's Name: Gothic.  You can find out about it here: https://inhermajestysname.wordpress.com/ihmn-gothic/

Saturday, December 10, 2016

Review: All Quiet on the Martian Front- Alien Dungeon/Ironclad Games


Oh what a strange history this game has had.  It started with a big Kickstarter buzz when the Golden Age of Wargaming on Kickstarter was ongoing.  Of course, the Golden Age turned sour quickly when many companies were typing promises that their companies couldn’t deliver on.  Alien Dungeon and All Quiet on the Martian Front were not the only ones to fall into this trap.  The game delivered some, but not all of its promises and even managed to make it into distribution.  Then, disaster struck and Alien Dungeon closed its doors.  All looked lost for All Quiet on the Martian Front.  However, a savior appeared, and the IP was purchased by Ironclad Games and this game has been resurrected from the ashes! 

With such an exciting backstory to the game, what is this game all about?  All Quiet on the Martian Front is premised on the idea that the Martian invasion from H.G. Wells War of the Worlds was just the start of the Martian attacks.  In 1910 they have returned to Earth, and this time they intend on staying.  Much of the U.S., Africa, and the Russian Steppe have fallen to the invaders.  However, the main action is focused around the defense of the Mississippi River Valley in the United States, with the help of the British Expeditionary Force. 

The main rules were written by Cavatore, Baker, and Priestley.  If you have been involved in wargaming over the past few decades, those names should ring a bell.  With those names, come certain expectations around the rules.  Let’s see if those expectations are met. 


What I Liked
I picked this game up at my local FLGS (Friendly Local Game Store).  They had a surprisingly active group of players from the Historical community that bought into the Kickstarter who played it in store.  I won’t lie the visuals of the game drew me in right away.  The towering Tripod models and the WWI aesthetics to the U.S. Troops really hit my model sweet spot.  The game just looks great on the table. 

From there, I dug into the background a bit. I always had a fascination with World War I and the period just before.  The mixing of fact and fiction was just right to keep me interested.  I also liked the idea of hosting a campaign in my own backyard.  I live very close to the Mississippi River Valley.  No other wargame has really let me do that, since my part of the Mississippi has been fairly quiet, well until the Martian Front opened up that is.  So, the visuals and the background drew me into this game big time. 

When it comes to the actual rules mechanisms themselves they are relatively straight forward and simple.  You roll to beat an opponent’s Defense rating to score a hit.  Once scored, you roll to exceed the targets armor rating with a Power bonus based on the weapon being used.  It is very straight forward and quick to resolve.    

Some Tripods are simply invulnerable to small arms, however once Tripods start taking damage it becomes easier to damage them.  I enjoy this degradation aspect because as the game wears on, formerly invincible Tripods start to look worse for wear.  In addition, the U.S. can throw out a lot of firepower, and concentration of fire is critical.

That leads me to another aspect of gameplay that I enjoy.  The forces are not equal and they are not intended to be equal.  There is a point system, but Martians have better technology than the Humans.  Their wargear is tougher, more deadly, and faster.  However, they are limited.  The humans are subject to morale and are squishier.  They make up for it with numbers, sneakiness, and big guns.  Humans can use something called blip markers and ambush to conceal their forces from Martian invaders.  These mechanics allow the Humans to try to get the drop on the Martians and are another way to try to balance the scales.  There is a point system, but the game really excels at scenario play vs. competitive play.


Things I Do Not Like
It saddens me that this game is IGOUGO.  Granted, in the games I have played the turns go relatively quickly.  However, when one side is active there isn’t much for the other player to do except to keep track of what is getting damaged and destroyed.  The game has very little for the non-active player to do.  There is an initiative roll with some mods for results in the past turn, so it is possible that a sides could get a double turn before the opponent can respond.  I would hope that such experienced game designers could have found a better, more dynamic turn sequence. 

The Scenarios provided in the book just are not very good or balanced.  They tend to favor one side over the other, and the humans typically get the short end of the stick.  So, if you play as the Humans and not the Martians then be prepared for an uphill climb. 

The ease of play is both strength and a weakness.  The mechanics are so simple and easy to grasp that non-wargamers can pick them up with ease.  However, after a few games, the gameplay can get a bit “samey”.  Martians do not have morale, are rarely affected by terrain, and have limited options as they may not use Blips or Ambush.  It is pretty clear what they are going to do, bum-rush or the Martian two-step.    

The game tries to add some resource management and depth by using Command tokens.  These can be used to bring in reserves, double move, and other things.  However, the implementation is weak and half-baked.  They could be very versatile and cool, but there just isn’t enough behind the command points to make them add much to the game play. 


Meh and Other Uncertainties
The game currently has three main factions; U.S. Forces, Martian Invaders, and British Expeditionary Force.  U.S. and British forces have a wide range of units and troops types, and the Martians are surprisingly diversified as well.  The background references possible other factions but they have yet to arrive in game.  Supposedly Andy Chambers was working on the rules for Underdwellers as the next faction before Alien Dungeon died.  I have not heard if Ironclad Games intends to revive that work, or do something different.  The background also hints at French, Prussians, Venusians, Texas, and Canadian troops or armies as well. 

Doughboy Infantry can effectively assault Martian tripods using grenades and other gear.  The lowliest U.S. Units still have a chance to damage a towering Martian Tripod, and with the damage table even bring it down.  That makes infantry and infantry screens important which is something that could easily have been overlooked in a game like this. 

With the Move-Shoot-Move sequence of play, Assaults fit in a bit clumsily.  Also the morale rules are extremely simplified and only impact Humans.  Forces tend to fight until destroyed or they reach an arbitrary breakpoint in the rules.      

The background section gives you enough of a feel to put your battles into the larger narrative of the game very easily.  The do just enough name-dropping to make it feel like a “lived in” Universe, but not enough to be eye-rollingly bad.  Some may question why Steam powered tanks became a thing, and there is some handwavium about oil being to dangerous and combustible against Martian Heat Rays.  However, for the most part I enjoy the background.   Your mileage may vary.


Final Thoughts
This is not a game for everyone.  If you enjoy rigidly balanced games so you can see who is the more tactically skilled player, than avoid All Quiet on the Martian Front like the plague.  It does not have what you are looking for.  For the most part, it is a streamlined game but the mechanics lead to a lack of depth in gameplay.  In addition, the IGOUGO turn sequence is atrocious and an unforgivable sin in the game’s design.  For a game of its scale, I have no idea what Cavatore, Baker, and Priestley were thinking on that decision.  I am not sure I can recommend the game unless you valley the look, genre, and style of the game over the specifics of the gameplay. 

Despite what looks like a scathing review, this is one of the games I play the most often.  My family (of all ages) likes to play it with me because of the streamlined mechanics I just bashed.  We can finish a decent sized game relatively quickly.  The straight forward nature of the Martians means that they are easy to pick up and learn so more experienced wargamers can take the U.S. Army and the asymmetrical nature of the game is a feature and not a bug.  Plus, we have been placing the setting locally and that adds to the fun when you are destroying towns we have actually visited. 

This is a great family wargame, but not one that I would take down to the FLGS/club or expect to pick-up a ton of steam competitively.  There just is not enough depth for that type of gaming.  It is a much better campaign/scenario game for close-knit game groups/families to explore the All Quiet on the Martian Front setting.    

You can find out more here: http://quietmartianfront.com/