Showing posts with label Restless Stars. Show all posts

Monday, July 21, 2025

Battle Report: Operation Hemlock- Restless Sun


Operation Hemlock has been a long running semi-narrative campaign m Skumgrod have been playing.  It is set in our corner of the Warhammer 40K universe but uses a variety of games to play.  Sometimes we use GW games, sometimes we use my games, and sometimes we use other, third party games.  Today, we elected to play Restless Sun which is my model-vs-model sci-fi game.  

Colonel Brusilov had Taskforce: Sword pounding the ork encampment for days now.  He could hear the rhythmic cycle of the Earthshakers just outside of his command chimera.  His command holo-display lit up with indications and assessments of where the great shells were striking in the Ork camp.    

His artillery were running out of shells.  Ork air attacks had weakened his supply lines back to North Ammoriss and his fellow Taskforce commanders had been unable to stop the greenskin raids.  He was very close to breaking the Ork toe-hold on Grig's Rest, but his supplies had to hold out long enough for him to push them off the island once and for all.  

Before he could launch his assault, he needed better intel.  The Office of Strategic Intelligence was sending him streams of information but they were back at Northcomm, miles away.  They couldn't tell him where the orks were hiding in their dug-outs, where they had hidden their traks, and where their gun emplacements were.  Before he could order an assault into the ruins of the Ork camp he needed intel.  

Brusilov tapped some controls, and a vox-channel opened to his adjunct at the front lines.  The hiss of static filled the air, before it stabilized and toned clear.  

"Major, gather scouts from each Company and send them forward.  We need to know where to strike." 

Forces:


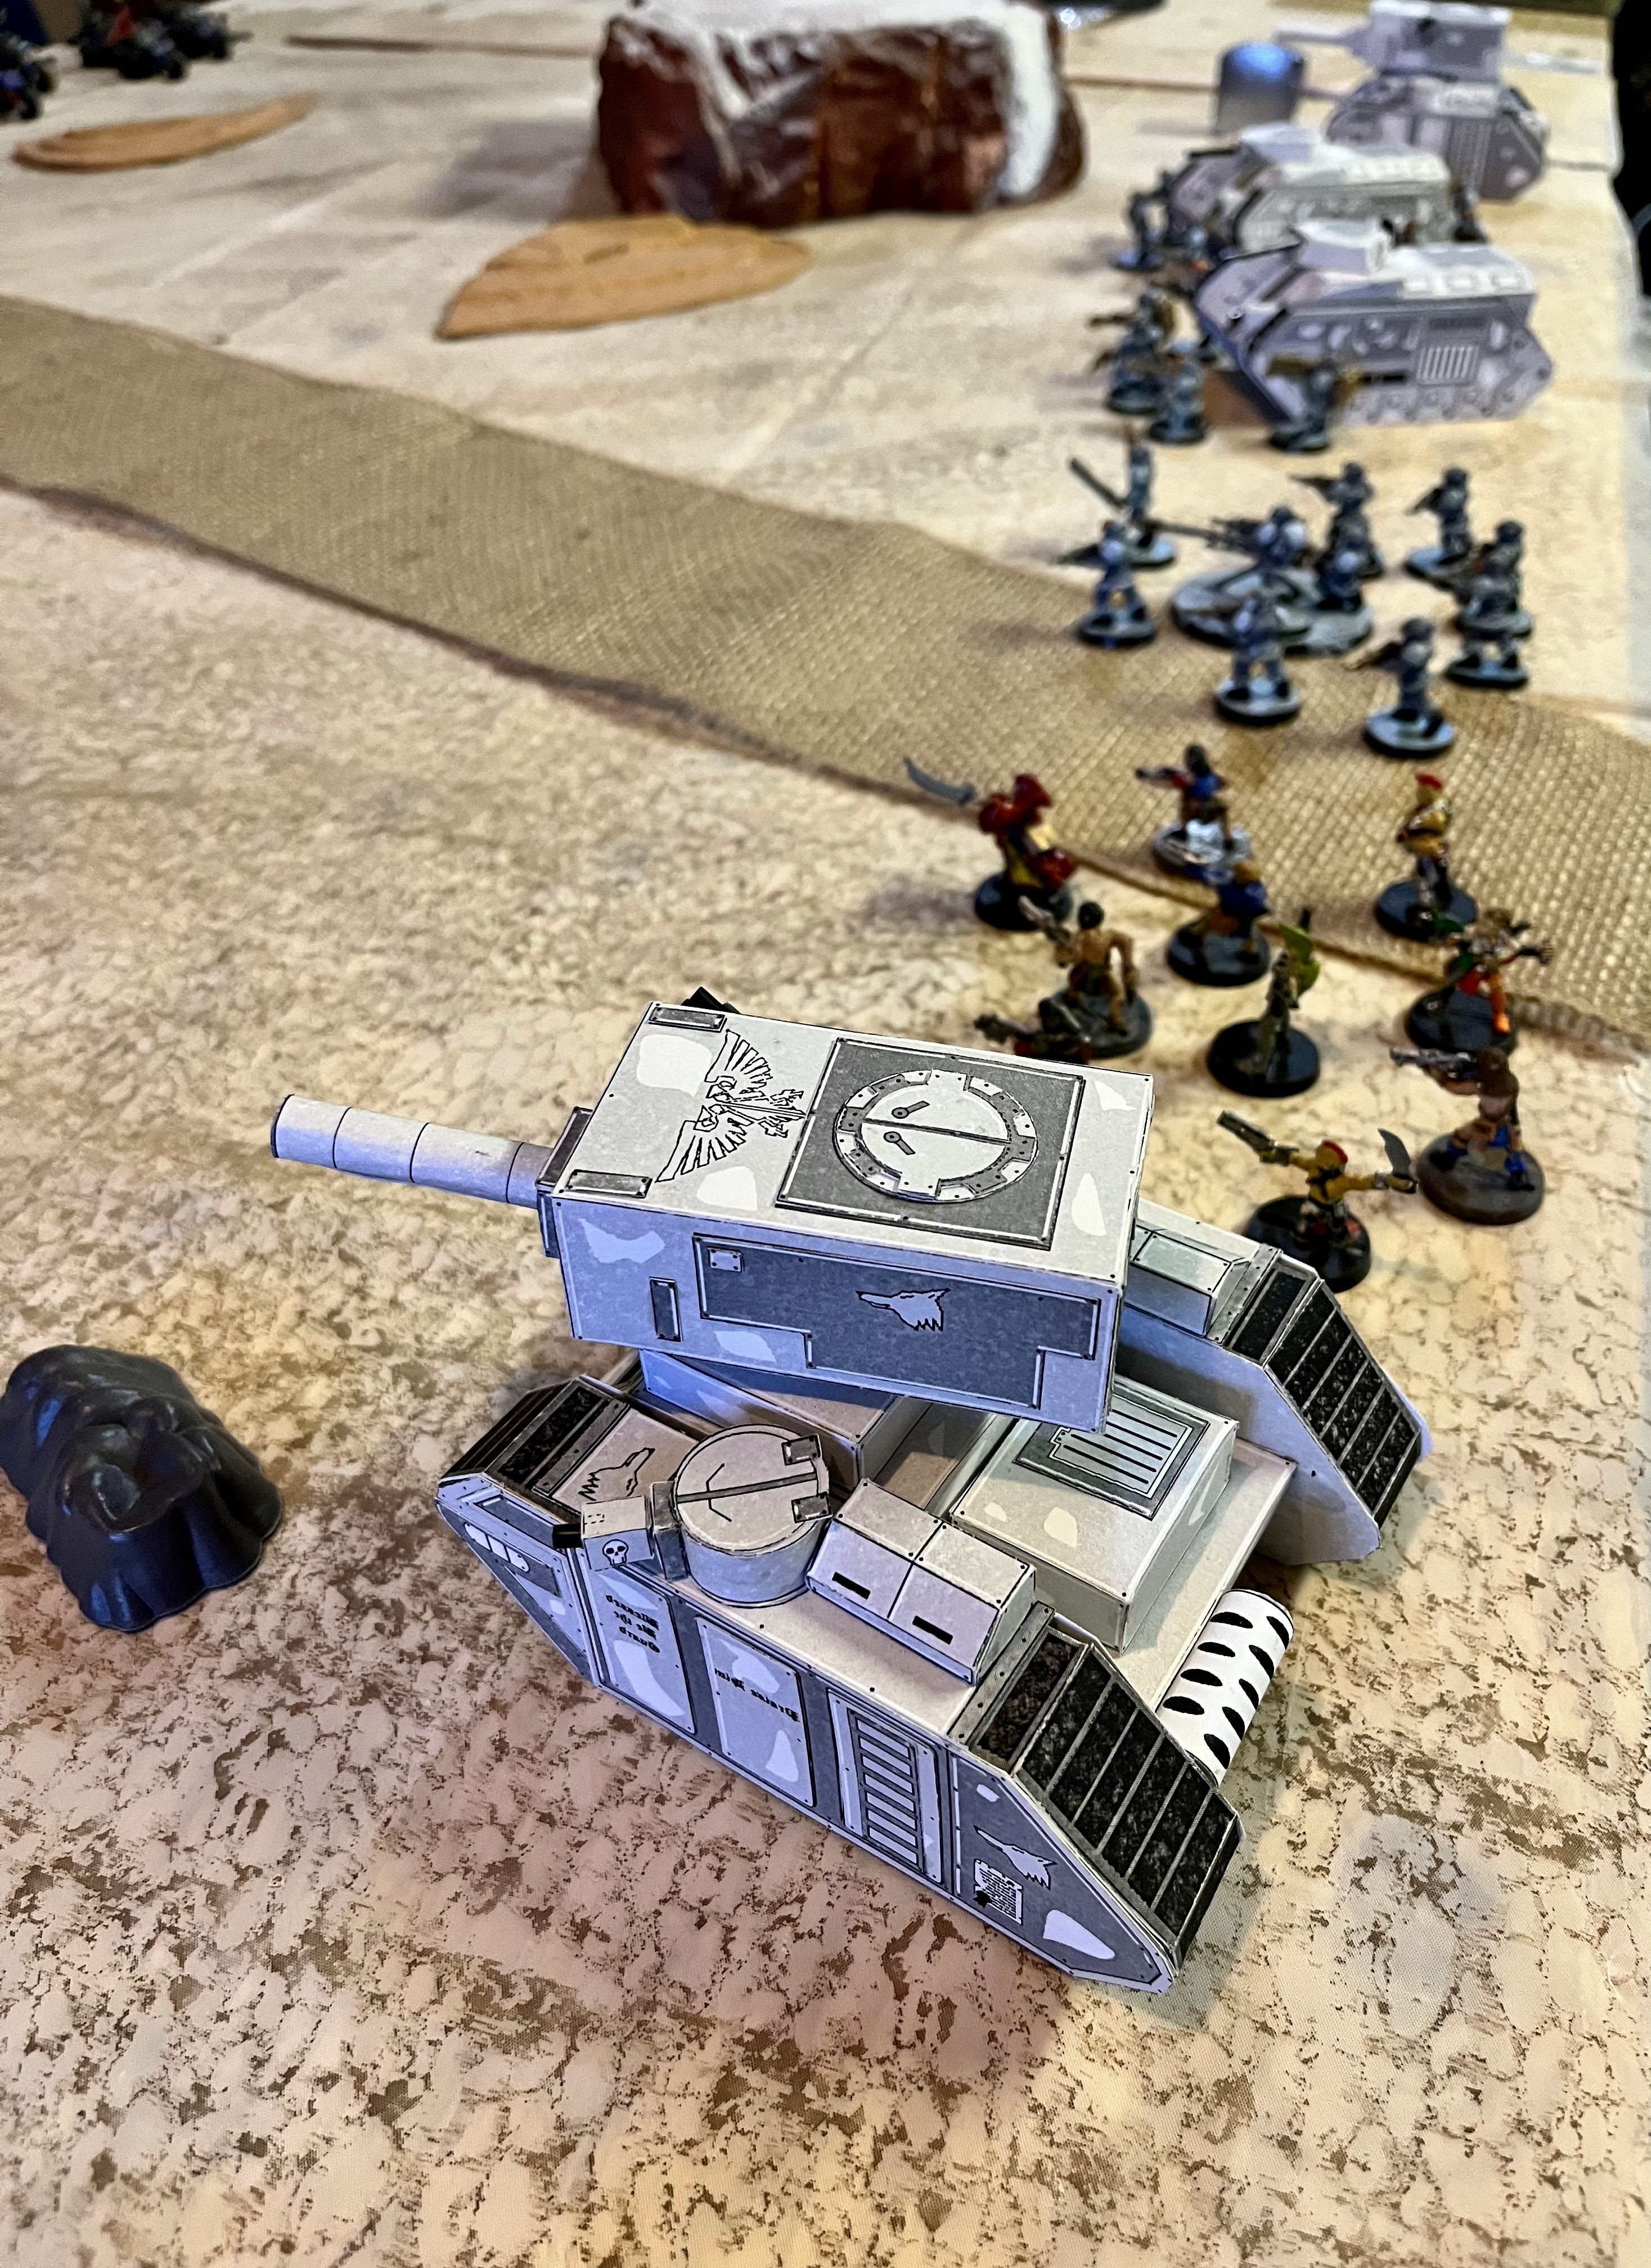
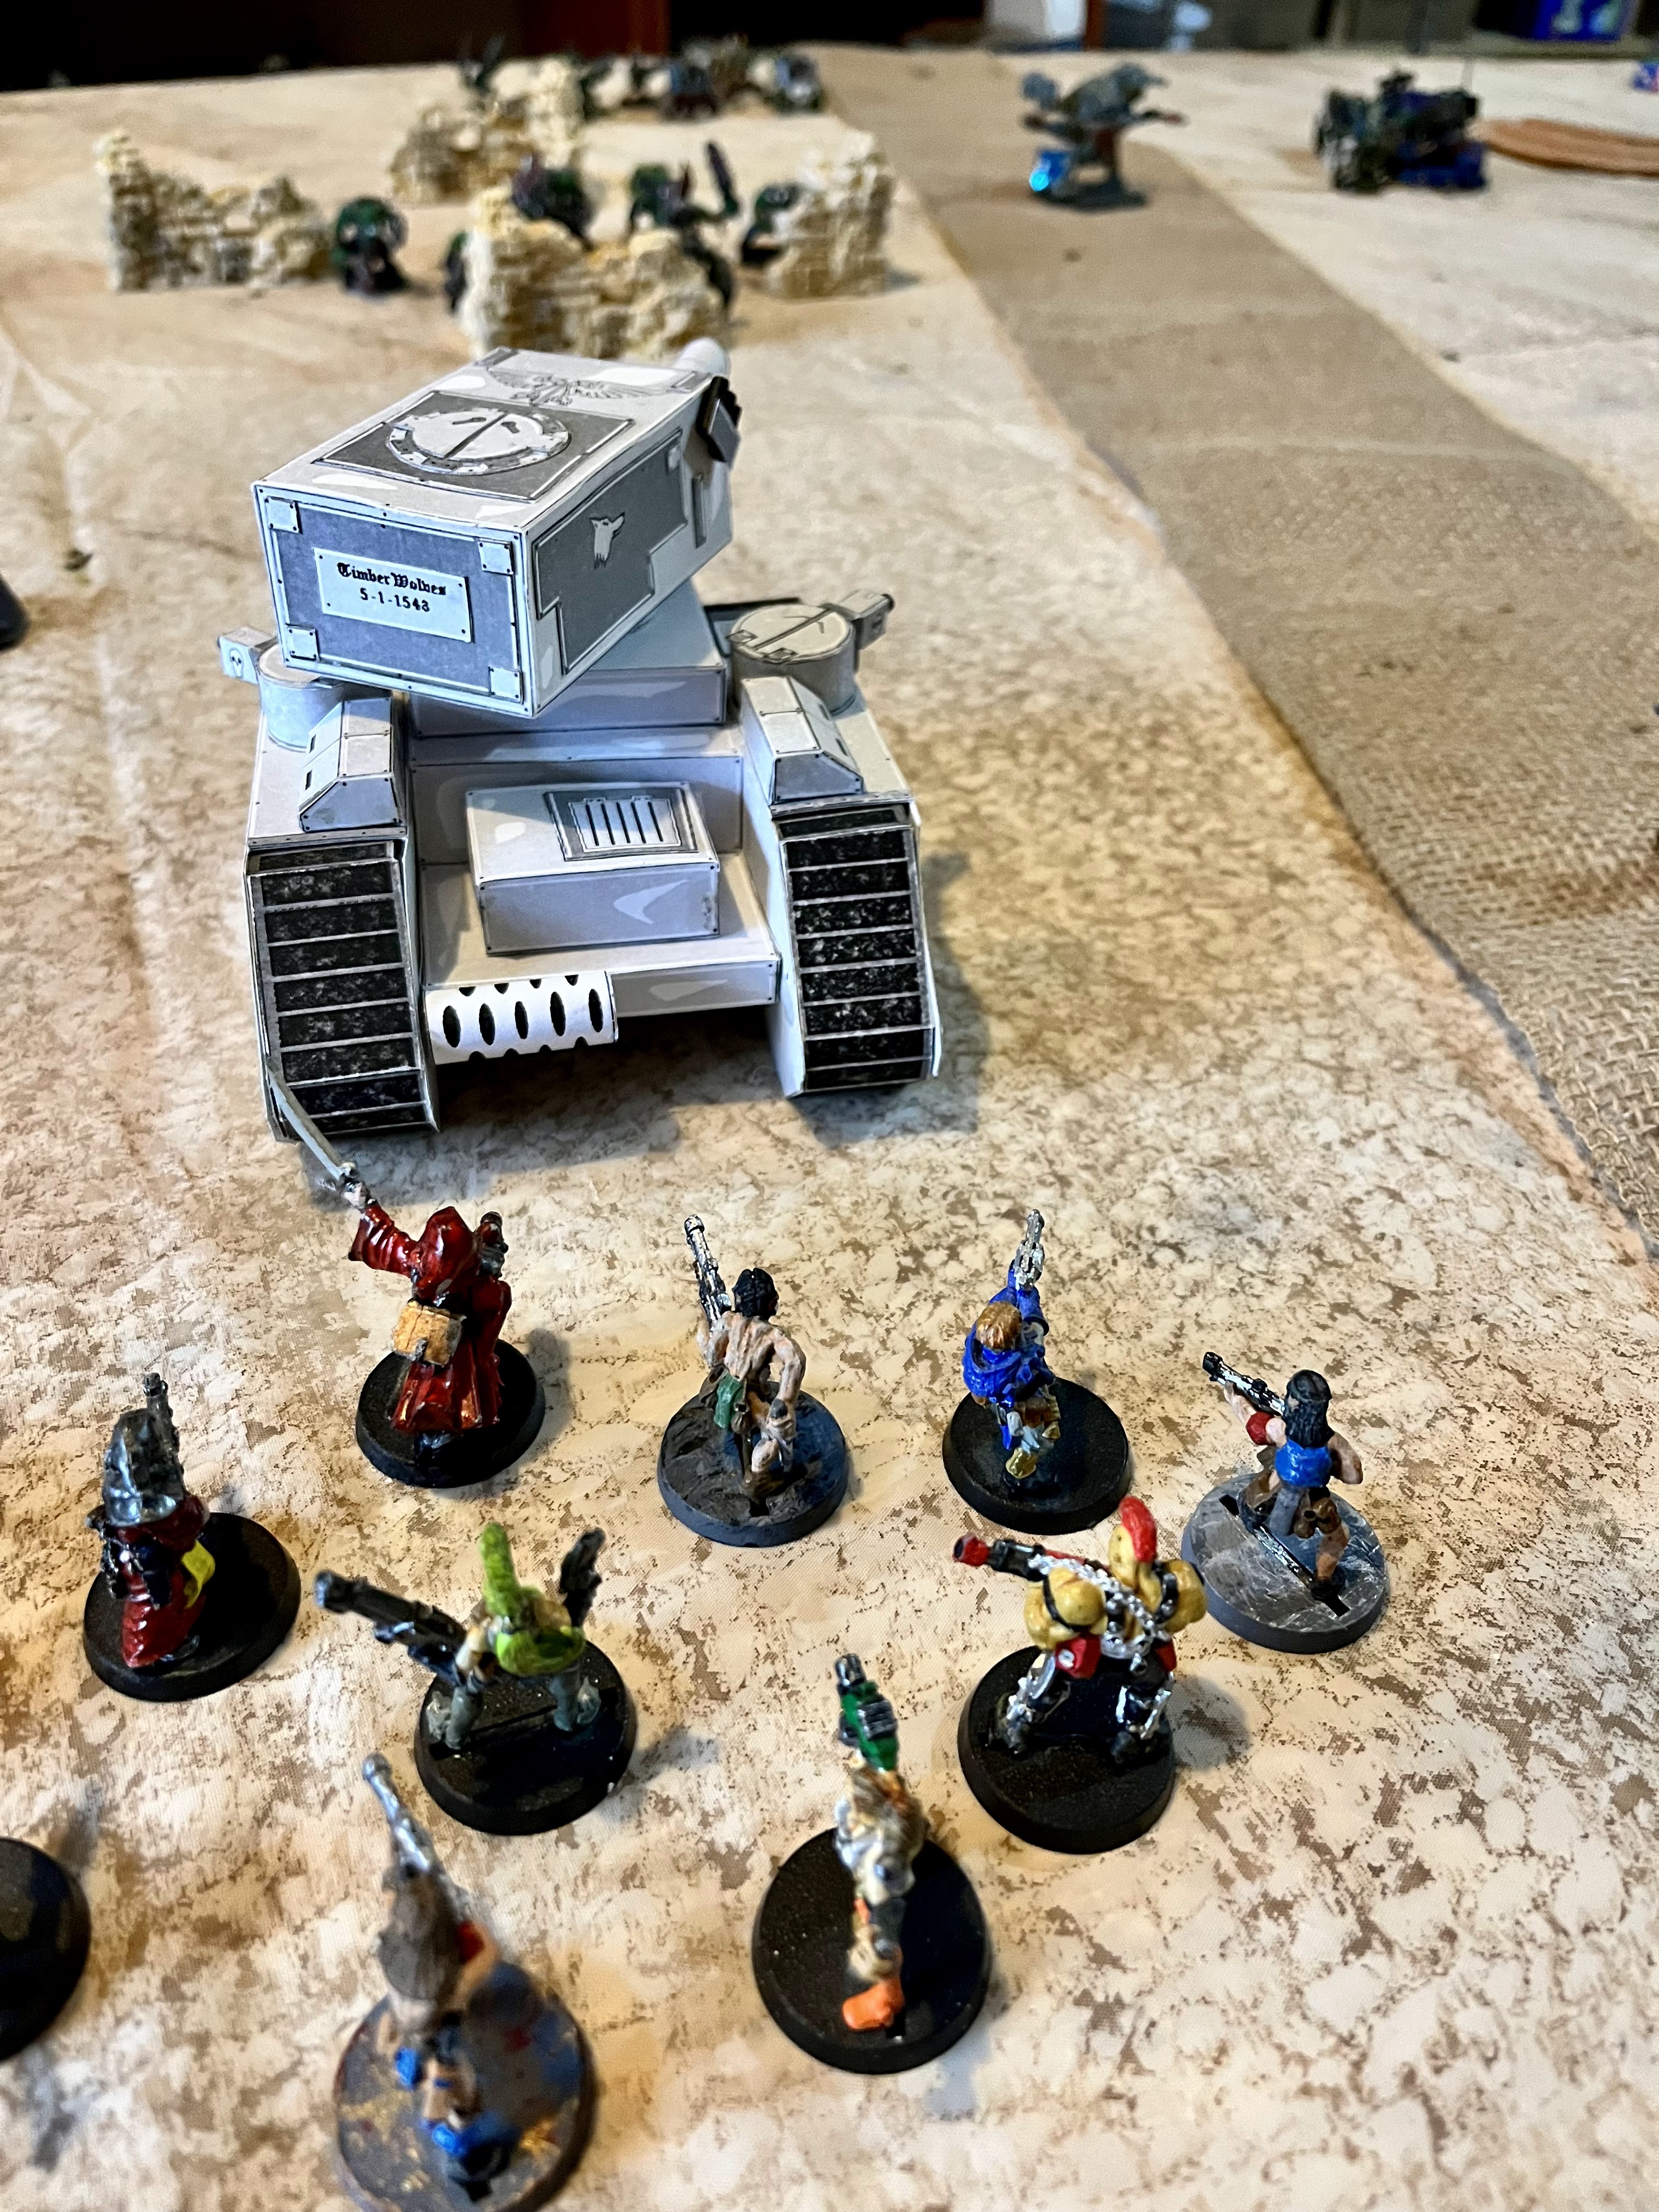
Our Imperial Troops will be represented by my Death Korp Kill Team.  They are all going to be Regular Infantry units.  

Sergeant - Combat Weapons
Gunners - Squad Support Weapons
Sniper- Marksman


For the Orks, we are using Irregular Infantry however the Orks will all have the Fierce rules.  

Nob- Regular Infantry- Combat Weapons
Sniper Boy- Marksman
Shoota Boy - Rapid Fire
Rokit - Blast, Long Range
Bomb Squig- Rapid movement, Blast
Gretchin- Jump Gear

Mission:

To match the situation, we decided to use the Control Terrain scenario for our battle report today.  Models gain points for being in Difficult terrain at the end of the game.  

For complications, we went with Minefield.  Therefore, if you fail a movement roll you will lose Effectiveness from artillery, wild fire, or a mines.  I mean, they are trying to scout an active warzone!  

This scenario will last 8 turns. 

Set-up:

We will be using a 36 x 36 inch board for this.  Plus, since Difficult terrain is important, we will be putting 5 pieces of it out on the table.  1 near each deployment zone and three along the rough center line.   

Both sides are deploying about 6 MU in from their own table edge.  


The Ork side of the table.....

As usual, this will not be a turn by turn break down of the game.  This game went 8 turns.  Instead, I will cover it in broad strokes for the Maneuver phases, the Battle, and the End Phases.  

Maneuver Phase:  

The Artillery barrage and mines made it hard to move forward.  Some of the shells were landing dangerously close, disrupting maneuver by both sides.  However, those that could pressed forward, with the two sides trading ineffective shots.  The PDF troopers manage to force some of the leading elements of the Ork thrust with suppressive rifle fire.  


However, an Ork manages to sneak around the edge and attack a pair of Guardsman, forcing them to retreat from the onslaught.  The better training of the Troopers appears to be paying off! 

Battle Phase: 

A PDF Trooper with a support weapon flees from the board thanks to the ferocious Ork Assault.  However, it does not go all the Orks way as concentrated rifle fire sees three Orks forced off the board and into retreat as well.  The PDF have dug in at two buildings, while the Orks have 1 building and a Grot in a ruin.


The PDF Troopers manage to leap-frog forward, with mines hampering their movement.  As a Guardsman makes the ruins, a startled Gretchin leaps out and forces him back with a flurry of vicious stabs.  Meanwhile, fighting is house-to-house and at close range! 

The Trooper with the Squad Support Plasma Gun manages to drive the Gretchin out of the cover of the ruins and forces him to retreat.  The Orks manage to counter-attack and push the PDF troopers back, but it might not be enough as their momentum is quickly spent.  Both sides still hold two objectives each.


 End Phase

The Ork assault is blunted by accurate rifle fire as the Ork Nob is forced back, as is an ork by the house.  However, the Bomb squig re-orients itself and charges towards the PDF lines.  


The PDF Sniper finally manages to outright kill an Ork with a shot to the head.  Bam!  Headshot! 

However the Bomb Squig gets to the PDF positions and detonates.  The blast outright kills 1 trooper and sends the other one scurrying away in shock.  

A trooper scrambles into the ruins to contest it from the Ork hiding inside of it.  With that, the Ork Nobs hears a distant horn blast, signaling for his Boyz to fall back and cover the final withdrawal back to the Green Zone from Grig's Island. 


Conclusion

This was a hotly contested battle between the PDF and Orks.  However, the PDF managed to score 2 objectives, while the Orks only had 1.  The PDF lost 1 KIA and 2 MIA from the squad, while the Orks had 2 killed outright, while 3 Orks and a Grot were unaccounted for during the retreat.     

It is hard to outright kill folks in this game, but you are constantly pushing them around the battlefield as they retreat, get Shaken, and Rally.  Probably a bit more realistic in that sense, as you could see momentum shift when friction did its thing during game play.  

I wanted to do one big Grig's Island showdown with Restless Galaxies, but I am not getting my Ork forces printed up for it.  Challenges, challenges.  Perhaps I will need to play a Aquanautica Imperialis Naval or even a Aeronautica Imperialis game to represent the Orks trying to flee the island, or even just a big Restless Stars or Xenos Rampant game instead? 

It might be a while until my Skumgrod is available for another game.  This one was on the books for a few months before we got it done.  We will see what happens in Operation: Hemlock next! 

Until next time! 


Become a Patron and get access to all the cool stuff, a peak behind the curtain of Blood and Spectacles, and early-access to playtest games!  


You can follow Blood and Spectacles Facebook page or Instagram for more fun! 

Check out the latest publications and contact me at our Blood and Spectacles website

Or purchase all out games at the Blood and Spectacles Publishing Wargames Vault Page!      


Monday, November 6, 2023

Battle Report: Restless Stars- Operation: Hemlock


Restless Stars is my unit-vs-unit generic sci-fi skirmish game.  Today, my Skumgrod and I are using it to fight a battle in our ongoing and open ended Operation: Hemlock campaign.  This campaign takes place on a homebrew campaign setting in the Warhammer 40K universe circa 5th edition of so.  Despite it taking place in the Warhammer 40K universe, we are using all sorts of games to play-out the campaign.  

Big Boss Nobsplitta peaked out the window of the Mek Shed he was holed up in.  Explosions rocked the area, and the sound of jet engines filled the sky.  Smoke filled the air and made seeing difficult, but he knew the Oomies were coming.  He licked his lips in anticipation of the fight. 

The boyz had landed on this pile of rock and dirt a while ago.  At first, it had been all fun and laughs as they zoomed around on their buggies and Truks just krumpin' all the Oomies they could lay their hands on.  They got all the way to the gates of a big Oomie camp full of slaves for the takin'.  Then, the serious fightin' got started.  Since then, the Oomiez had been the ones having all the laughs.  

Now, he and his fellow Nobz and boyz had been pushed all the way back to the edge of the Big Bloo.  The tin kanz they used to get across from Skarbashz island were no where to be seen.  The only way back there was to swim, and Nobsplitta and his boyz never bothered to learn how.  They had intended to make take over this pile and lord of the Oomie slavez.  It had been a good plan, but Skarbash had failed to deliver on his end of the deal.  Never trust a Morker.  

The Oomiez had hit them with tanks, artillery, bombs, and whatever else they could find.  Most of the ladz had managed to survive holed up in their bunkerz and hutz.  Well, enough had anyway.  The Oomiez had rolled up in their trakz, and now they had to go the rest of the way sloggin'.  This was going to be Nobsplittaz chance to get in some good laughs now.  He and his boyz were still plannin' on rulin' this place, but it might take a bit longer and some 'arder fightin' than he first thought. 

However, there was no place left to fall back to.  It was now or never to show dem Oomiez who was boss of these shakz, and why not now?  

Across the gloom, movement caught his eye.  He squinted and leaned into the peakhole.  Yup, movement across the rubble all right.  Oomiez.  Time for some fun.  He smiled to himself for the carnage ahead. 

Forces: 

For this battle, we changed it up a bit and decided to go more infantry heavy! 

Taskforce: Sword

PDF Command Squad
- Regular Infantry
- Squad Support Weapons     
- Small Size
- Leader

PDF Infantry Squads
- Regular Infantry

Militia Refugees
- Irregular Infantry

Panther's Claws Space Marines
- Elite Infantry
- Armored
- Rapid Fire

Scout Cars x 3
- Regular Mounted
- Squad Support Weapons
- Fast

Ork Defenders

Ork Nobz Squad
- Regular Infantry
- Armored
- Leader
- Combat Weapons

Big Bangerz Mob
- Irregular Infantry
- Armor Piercing
- Rapid Fire

Stomperz X 2
- Irregular Infantry

Basherz x 2
- Irregular Infantry
- Fierce
- Combat Weapons

Killa Kanz x2
- Irregular Infantry
- Armored
- Squad Support Weapons

Dakka Dakka 
- Irregular Infantry
- Rapid Fire

Mission
In the center of the board is a Adaconite spire.  The continued war effort of the Orks on Baron's Rest depends on maintaining access to the Adaconite here.  It is just the tip of the proverbial iceberg, with the Adaconite leading deep beneath the ground.  With this resource, the Orks can continue to build weapons of war and keep their tenacious hold on Baron's Rest.  The force that is touching the Adaconite at the end of the game wins.

In addition, the battlefield is covered in the dense smoke and fog of battle.  LOS is restricted per the rules for this complication. 

Set-up
The terrain is set-up with a scattering of scrap, walls, and buildings.  Both sides set-up 6 inches in from their edge.  

The Imperial forces from their left to right are 1 Scout car, PDF Troops, Command Squad, Militia, PDF Troops, Panther's Claws, 2 Scout Cars.


The Orks on the other side from their own left to right are, Dakka Dakka boyz, Stomperz. Killa Kan, Basherz,  Big Bangerz, Nobz Mob, Stomperz, Killa Kan, and Basherz.  


You can see the Adaconite spire in the center of the board. 

Maneuver Phase: 
Both sides tentatively move up in the smoke, dust, and fog that hangs thickly across the Mek Shedz.  Both sides are hampered by command and control issues.  The Imperial Refugee Militia refuses to move during the opening of the battle.  As the Killer Kanz seem to have trouble on the Ork side. 


The Imperial right flank has some success as the Space Marines and Scout Car manage to eliminate a bold, forward operating mob of Orks with shootas, sending their last scrambling back to safety.  However, the Big Boss starts making his way to the objective under the cover of the Big Bangerz guns.


The Scout car on the Imperial left scoots forward aggressively, but can not see the Killer Kan he his heading straight towards due to the fog.  In addition, the Ork boyz with shootaz on the Ork right have a good firing position on the objective.  


The Imperial Command Squad boldly leads the way and gets to the Adaconite spire first, bravely urging his troops forward.  The Killa Kan on the Ork left sees one of the Scout cars and opens fire, cauing 3 hits.  The Ork Big Boss also manages to get to the Adaconite Spire, but on the opposite side as the Imperial officers.  The Big Boss is followed by a horde of Basher boyz.  

The Ork right flank is hampered by command issues and the fog, failing to do much against the Imperial troops moving in. 

Battle Phase: 
The Panther's Claws open fire on the Ork Big Boss on the Objective and whiddle his forces down.  The Scout Car on the Imperial left manages to see and hit the Killa Kan for serious damage.  In return, the Ork Boss comes around the objective and lights up the scout car for some damage.  The Killa Kan also charges it, but in a fierce close range firefight, the Killa Kan is destroyed when the commander of the Scout Car manages to hit it with a Krak grenade up close.  


On the Ork left, the remaining Killa Kan manages to destroy another Scout Car with accurate fire from it's weaponry.


The remnants of an Ork Basher squad breaks from the objective and attacks an Imperial PDF infantry unit.  The fighting is close and upfront, with 3 Orks taking out 5 PDF troopers.  Firing from the last Killa Kan on the Ork left fails to damage the last Scout Car, while the last Basherz unit surges forward. 


End Phase:
The Last Scout Car devastates the Ork assault on the Imperial right, sending the few Basher survivors fleeing.  The Panther's Claws break cover and try to make for the objective, but they are under the (unreliable) guns of the Big Bangerz.  The Imperial Command Squad at the Objective is reinforced as the Militia finally move up and take positions to defend the Adaconite spire.


The Killa Kan forces the Scout Car on the Ork left to withdraw after damaging it.  On the other side, the Stomperz open fire on the other scout car, but barely scratch it.  The Big Bangerz start chittering excitedly about the enemy Space Marines in front of them and in the open, but fail to fire!  

The Panther's Claws get into position at the base of the Adaconite Spire, but they are exposed.  They trust in their armor.  Imperial PDF troopers on the left fire on the Ork Stomperz, and kill a couple.  


The Ork Killa Kan comes around the corner, and fires into the Space Marines with its big gun and tears the squad up.  In addition, fire from the Ork Dakka Dakka boys put paid to the Space Marines and render them combat non-effective.  The Ork Stomperz also return fire on the PDF troopers and take out a few.  

Finally, the Ork Boss turns the corner and attacks the Imperial Militia up close and personal.  He loses his Painboy, but in exchange he kills three Oomiez and sends them running for safety.  That leaves him and the Imperial Commander holding the Adaconite spire. 


Conclusion: 
The battle for the Adaconite Spire is a draw! 

The squeal of jet engines roars over the battlefield, and both sides have to hastily jump for cover.  Cluster munitions rain down on the field of battle, but when the smoke clears the Adaconite is still standing in No Man's Land between the battling forces.  Neither side was able to successfully take control of the vital resource.   

With heavy fighting in the ruins of the Ork Settlement, Commander Brusilov orders the troopers of Taskforce: Sword back.  He orders the PDF to fall back and encircle the shanty town.  He then calls forward his artillery to begin bombarding the city, and to flatten it.  PDF Heavy Bombers from North Ammoriss proper also join the bombardment, as do local strike fighters.  

The last bastion of the Ork on Baron's Rest was slowly being pounded into a crater. 

Well, the second time I have had a big Restless Stars battle that ended up inconclusive.  Next time, I think we will give Xenos Rampant a go.  Perhaps we can get a more decisive result with those.  I also  printed up a 6mm Imperial force for a big climactic battle, BUT I have been having some issues with the Ork side.  Therefore, the big field battle has been delayed.  I will keep you posted on how that progresses. 


Until next time! 


Become a Patron and get access to all the cool stuff, a peak behind the curtain of Blood and Spectacles, and early-access to playtest games!  


You can follow Blood and Spectacles Facebook page or Instagram for more fun! 

Check out the latest publications and contact me at our Blood and Spectacles website

Or purchase all out games at the Blood and Spectacles Publishing Wargames Vault Page!


Monday, June 26, 2023

Battle Report: Restless Sun - Raid on Drill Rig Oscar 678-H


Restless Sun is my model vs model skirmish using the general rules of the "Restless" series of games.  They are designed so each each model is an individual combatant.  Therefore, results are determined on a model-by-model basis.  

Submarine insertions were exactly what they had been trained for.  Lt. Meyers watched with a diligent eye as his North Ammoriss Naval PDF Commandoes prepared.  Unlike most of the North Ammoriss PDF, his men weren't a bunch of conscripts.  They had been recruited and chosen from some of the best soldier in the PDF and were considered to be the best native troops on Ammoriss.  A raid on a drill rig from a submarine deployment was exactly the type of mission his troops had been trained for.

Taskforce: Thorn under Vice-Admiral Travers had done their job and mostly wiped the Ork forces from the sea lanes, and put in a over-the-horizon blockade of the Deff Islands.  However, despite the set back in the Approaches, they didn't know how to quit.  They counter-attacked with a series of air assaults that managed to re-take several of the Drill Rigs in the Approaches.  Using these stations as staging points they had successfully managed to harass the supply lines the Imperial forces were sending from North Ammoriss to the Warzone.  That put the entire campaign in jeopardy.  

It was up to Lt. Meyers, and similar troops across the Approaches to put an end to these staging points.  Their mission was to re-take the Drill Rig Oscar678-H.  It was a simple mission to sweep the target, kill any greenskin that gets in the way, and re-take the control room of the drill rig.  From there the commandoes could de-activate the power plant running the Ork defenses and allow follow-on troops to take the rig.  Simple, but not easy. 

Forces:

North Ammoriss Naval Commando    

Lt. Meyers - Trained Infantry
- Combat Weapons, Commander, Enhanced Senses

1 Specialist - Trained Infantry
Indirect Fire, Blast, Enhanced Senses

1 Specialist- Trained Infantry
- Squad Support Weapon, Blast, Enhanced Senses

5 Commandoes- Trained Infantry
- Enhanced Senses

Ork Mob

1 Nob- Regular Infantry
-- Combat Weapon, Fierce, Armored, Commander

4 Boyz-- Irregular Infantry
-- Fierce, Combat Weapons

2 Boyz- Irregular Infantry
-- Fierce, 

5 Grotz- Irregular Infantry      

Mission: 
We are using the Forced Entry scenario from the main rulebook.  The objective is a control room for the drill rig.  The Commandoes have 8 turns to get a single unshaken model into the control room for the Rig. 

As a complication, this battle is taking place at night.  However, the North Ammoriss Naval Commandoes came prepared with some Enhanced Senses.  They are immune to the darkness, but the Orks are not.  

Set-up: 
This battle is being played  out on a 36x36 MU board to represent the drill rig's main command platform. 1MU with equal 1 inch.   The terrain is being placed by the defender, but the attacker gets to choose the board edge to deploy from.  Therefore, it is in the defenders best interest to make it work.  Once the terrain and sides are picked, the objective is placed and the terrain adjusted as needed.  

The Orks are placed within 6 MU of their board edge.  The Commandoes are placed anywhere, but must be at least 12 MU away from any defender. 


You can see the Orks using their Gretchin to pushback the attackers by deploying as far away from the objective as they can.  They are then using the Combat oriented Boyz and Nob as a reserve force behind the objective.  Meanwhile, the Imperial Attackers seem like they are stacking up to go down the center, with the Flamer leading the way, and the Grenade Launcher as support on the North edge of the board. 

For this battle, I won't be going over it turn-by-turn.  I have found this method to be too time consuming and difficult to play and record.  Instead, I will break it down into three sections; the Maneuvers, the Battle, and the End Game.  The Maneuver section is the opening parts of the battle, the Battle phase is when the main engagement is taking place, the End Game is the final key parts of the game.  I will wrap up the game with a conclusion and some thoughts on how the game went.  Let me know what you think of this approach.  I know it is easier on me!  :) 

Maneuver Phase:
The battle opens with a volley of aimed fire coming from the darkness and blasting the Gretchin in front of the main building in the head.  This catches the Orks off guard, and they mostly fail to respond to the attack!  Lt. Meyers makes for the objective in the confusion.

An Ork and a Gretchin round a corner and come face-to-face with a Commando, but they are all too stunned to act. The Ork Nob comes running out from his position bellowing orders, but aimed fire from Lt. Meyers sends him scurrying back into cover. 

The Orks are starting to shake off their surprise and respond.  However, their shooting and the Imperial shooting is largely ineffective this turn.  However, Lt. Meyers assaults and kills a Gretchin up-close and personal.  


Battle Phase:
We are entering Turn 4, and half-way to the end of the battle.  Lt. Meyers is attacked by a Choppa Boy, and barely manages to fend him off.  A nearby trooper than blasts into pushed back Ork and causes him to rout from the battle.  Lt. Meyers than assaults and Ork near the entrance to the control building, and forces him back with close range pistol fire and wildly swinging his chainsword.  This victory is short lived, as a slugga boy pops out from behind the bunker and the shooting forces Lt. Meyers back.  The Ork Nob gets himself in front of the control building.  


Lt. Meyers shakes off being shot at, just in time for the Ork Nob to charge into him swinging his choppa and shooting.  However, the impetuous charge causes the Ork to lodge his Choppa into some machinery, leaving him wide open for the Lt.  This forces the Ork back away from Lt. Meyers.  


A Commando gets the doorway to the Control Center amidst a hail of enemy shooting.  However, he stays in place and ready to go in next turn.  A precise shot from a commando kills another Gretchin. 


A Commando makes it into the control center, but an Ork boy chases him inside and kills him with a choppa swing.  Seeing his trooper go down, Lt. Meyers rushes in and finishes the Ork that killed his friend. Another nearby Ork rushes in, and the Lt. and the Ork come tumbling out in a rolling, spitting fight.  An Ork Shoota boy manages to gun down one of the flanking commandoes.  Finally, the Grenadier gets his gun going, and an indirect shot forces a Gretchin and an Ork Shoota boy into the drink with its blast wave.  


The Commandoes are down 2, and the Orks have lost 4 Gretchin, 2 Slugga boys, and a shoota boy.  

The End Game: 
The Ork Nob picks up a Choppa from a fallen boy, and rushes the shaken Lt. Meyers.  This time, his aim is true and the Commando officer is killed. The death of their leader stuns the Commandoes, and they seem unable to respond.  

A Flamer blast forces back the Ork Nob, and a trooper runs for the Control Room, however he is flying tackled by an Ork Slugga boy and the two bash each others brains out.  The Grenadier forces the Ork Nob off the side of the rig (Forced a retreat off the board edge) with a well placed grenade shot.  


With that, the automated defenses open fire in the approaching Imperial aircraft, and they are forced to abort from their attack runs.  The Commandoes failed to secure the objective in time. 


Conclusion: 
Orks win in a squeaker.  

The Imperials managed to get into the control room but they couldn't stay in it.  Then, after the death of Lt. Meyer, they had a tough time activating on their own.  This was late in the game, so that left that too far away to get there in the end.  Of course, the Orks only had an Ork and 2 Grots left to oppose them. 

Vice Admiral Travers saluted General Kurtz as the Cadian marched into the command center on Admiral Traver's flagship.  He and several aides marched crisply in behind him.  The off-worlder looked comfortable onboard ship, even though he was an Imperial Guardsmen.  General Kurtz returned the salute with the precision that Vice-Admiral Travers had learned to expect.  

"Our Naval Commandoes were unable to secure the defense, so the follow-on attacks were aborted General," Vice-Admiral Travers reported matter-of-factly.  The commander of Taskforce: Thorn was pretty sure that the General was well aware of what had happened. "Perhaps, if your connections in the Panther's Claws Space Marine Chapter would have better luck?" 

The General waved off the suggestion, "No need for that.  The Drill Rigs are just a diversion from the main theatre.  The challenge is the Ork air assets.  Therefore, if Battlegroup Hemlock is going to succeed we will need to put a dent in their air power."

Vice-admiral Travers nodded, "I see.  Well, I am sure Commodore Miles has a plan of action."

"You have read the reports. Taskforce: Chalice is struggling and the air crews are reaching a breaking point.  The pilots are not the issue, but I have doubts that the mainline PDF aircraft are a match for the Ork Fighta, and there are not enough Imperial Navy can't be everywhere. 

Taskforce: Thorn has been successful in sweeping the seas clear of the Ork fleets.  They have been bottled up and pose little threat.  Therefore, if we want to make a dent in the Ork air power we need to leverage the successes you have had Vice-admiral Travers."   

Vice-admiral Travers kept a stern military face on the outside, but on the inside he was reeling, "I will do what is necessary, General Kurtz." 

Before playing this game, My skumgrod and I had a long talk about which game system we wanted to use.  We had been playing a lot of Kill Team and this seemed like a perfect mission for the system.  However, we ultimately dismissed it because we had been playing it a lot at the club so decided to try something different.  We also considered Black Ops but ultimately decided that the board space might not work out for this mission.  We also dismissed Stargrave and Rogue Stars quickly.  The first was ill-suited for what we wanted, and the second took too long to stat up the models. 

We settled on Restless Suns because my Skumgrod was confident that there would be no rules questions, or if their were, we could at least comfortably make them up on the fly.  Overall, I think it worked well enough BUT the arbitrary time limit ended up with a bit of an abrupt ending.  Secondly, Ork ferociousness in hand-to-hand does not translate 1:1 in the system.  The game also introduces a lot of friction for a commander, as troops often do not do what they are supposed to be doing.  It can also be tough to outright kill a foe, and indeed about 4 of the casualties in this game were due to retreat moves. Still, quick fun with plenty of killy-ness and some a lot of surprises during game play! 


Become a Patron and get access to all the cool stuff, a peak behind the curtain of Blood and Spectacles, and early-access to playtest games!  


You can follow Blood and Spectacles Facebook page or Instagram for more fun! 

Check out the latest publications and contact me at our Blood and Spectacles website

Or purchase all out games at the Blood and Spectacles Publishing Wargames Vault Page!          


Monday, February 13, 2023

Restless Stars: Operation Hemlock- Pushing back the Greenskin


As part of the ongoing Operation: Hemlock we will be having a big battle between the the Orkz and the North Ammoriss PDF on Baron's rest.  

The Ork gangs had come pouring out of the Green Zone and onto Baron's rest for much of the year.  However, their advance had been halted at the gates of Camp Hope(Less) by the combined Refugee Militia and North Ammoriss PDF.  It had been a hard fought slog, but soon the tables were turning.  The PDF halted the Ork onslaught, slowed the rate of Ork reinforcements using combined arms strategy of Land, Sea, and Air.  Then, they hit the Orks hard!  

Thankfully, the Ork resistance had been mostly scattered, with the Orks infighting with each other almost as much as with the Human defenders.  This allowed the Imperial forces to strike hard at the Ork camp with heavy bombers, off-shore bombardment, and even a Space Marine raid to blind them of the approaching PDF columns.  

Colonel Brusilov looked over the holo-map in the back of his command Chimera.  The ground forces were in place.  A wall of armored steel had been slowly pushing down to Look-Out Pointe, the last bastion of Ork resistance on Baron's Rest.  His line had been encountering scattered Ork mobz out in the deserts, and snapping them up.  Only scattered and disorganized rabble had opposed him.      

He was sure the Orks must have been alerted to his troops' presence.  Despite the mountain top of Look-Out Pointe being several hundred feet lower now, it still commanded the land and Sea approaches.  The dust cloud his armored columns were kicking up alone would be visible for miles.  Brusilov was confident that it didn't matter.  This time, he had the firepower, the armor, and the numbers to push the remaining Orks back into the sea.  The battle for Baron's rest was about to end, and the Battle for the Greenzone was about to begin.  

Forces: 

Taskforce: Chalice

PDF Command  

  • Regular Mounted
  • Traits: Blast, Leader

PDF Troopers

  • Regular Infantry
  • Traits: None   
Refugee Militia

  •  Irregular Infantry
  • Traits: None

PDF Mobile Troopers

  • Regular Mounted
  • Traits: Big Unit

Ragnarok Tank

  • Regular Infantry
  • Traits: Big Brute, Heavy Weapons, Slow

Ragnarok Tank

  • Regular Infantry
  • Traits: Big Brute, Heavy Weapons, Slow
Waaaagh! Skarbash

Ork Nob Trukkerz
  • Regular Mounted
  • Traits: Big Unit, Leader
Ork Basherz
  • Irregular Infantry
  • Traits: Fierce, Combat Weapons
Ork Stomperz
  • Irregular Infantry
  • Traits: None
Ork Big Bangerz
  • Irregular Infantry
  • Traits: Armor Piercing, Rapid Fire
Ork Kartz
  • Irregular Mounted
  • Traits: None
Ork Dread
  • Irregular Infantry
  • Traits: Power Armor, Squad Support Weapons
Ork Bikerz
  • Irregular Mounted
  • Traits: Rapid Movement, Squad Support Weapons
Mission
This will be a simple "Secure the Area" scenario.  Instead of rolling 3d6 on the random scenario generator, we decided to just make this a general smack down.  Winner take all! 

However, we did roll up the "Dawn" complication.  Therefore, as the game moves along, Line-of-Sight will increase.  

The Location is pre-set in these battles to be the Outdoor: Desert World. 

Set-up  
We will be using a full 6 foot by 4 foot table.  

In addition, we are using the normal terrain placement rules.  In this case, the Orks are the defenders so they get to set-up the terrain per the guidelines found in the rules.  Due to the size of the board, we will be using 6 pieces of terrain.  

We divided the board into 6 rough 24 inch by 24 inch areas, and placed the terrain around the board like this: 

1- Large hill
2- Dune
3- Rocky area
4- Dune
5- Ruined Walls
6- Rocky Area

The Imperials choose section 1-3, with the Orks in section 4-6.  


The Imperials anchored each flank with a Ragnarok.  From left to right we have the Ragnarok, Mobile Troopers, Troopers, Commander, Militia, Ragnarok.  The Orks from left to right on their side are Bikerz, Kartz, Trukkerz (Nob), Dread, Basherz, Big Bangerz, and Stomperz. 
 

Turn 1: 
The Orks start activating units.  However, it is still night time, so LOS is only 6 MU.  The Ork Kartz manage to dash forward at full speed and get and early jump to the middle of the board.  The Ork Warboss follows on their flank, but lets them lead the charge.  Ork Foot troopers also surge forward on the right flank.  

Imperial troops also move forward in the center, with the Imperial command squad and Armored Unit taking cover behind the dunes by the hill.  The two Ragnaroks also rumble forward on each flanks, very slowly.  

All other units are rattled or confused with their orders and stay put, shaken. 


Turn 2:
The sun continues to rise, and LOS is now 12.  

Ork kartz move forward and fire at the Armored Fist in cover, but only serve to kick up dirt and debris into the air.  The warboss also drives forward shooting, this time the Imperial command squad takes a hit.  The Ork foot soldiers continue to surge forward, with the  Basherz getting into some cover. The Big Bangerz, Kan and Bikez all rally for next turn.

The Imperial Commanders return fire, and take out 2 Effectiveness Points for the Ork Warboss, but the has a Big Unit with him.  The Armored Fist lay into the Kartz, and take out 4 Effectiveness points, but they avoid being Shaken.  The Ragnarok on the Imperial left trundles forward, but can not see any targets.  The one on the right stops as the commander tries to figure out their orders.  The Troopers rally themselves, but he militia is less lucky.  


Turn 3: 
The sun is still rising, giving 18inches for LOS. 

The Ork Boss crashes his trukk into the enemy Arrmored Fist squad, and piles out into the attack.  Both sides lose two in the attack, and the warboss and his troops fall back.   


The Kart cuts across and tries to screen the Imperial Commander.  Meanwhile, the Bikerz get moving and head up to support the main melee.  The Kan rushes forward, while the Runtherderz yell ineffectually at the Big Bangerz.  The Basherz take cover in the ruins, while the Stomperz get confused and mill about in cover.  

On the Imperial turn, the command squad tank shocks the last Kart, and crushes it beneath their APCs treads.  The foot troopers rally and rush up the road to defend their commanders.  However, the two tank commanders are still unsure of their orders and targets.  The Militia is still milling around their deployment point.  


Turn 4: 
The sun has risen enough to make LOS 24 inches.  

The Warboss shouts to the Kan to take out the Imperial Boss.  The pilot enthusiastically fires his heavy weapons into the exposed APC.  Bolt rounds and rockets lash out and blow the Imperial commander and his squad into atoms.  From there, the Ork warboss moves to take cover behind the hill.  The explosion of the PDF tank causes confusion in the Ork lines, and everyone else is shaken. 

The Imperial Troopers and Armored Fist squad fire at the Ork Dread, recognizing the threat, but its heavy armor shrugs off most of their fire power.  A few auto-cannon rounds damage it reducing it to 8 Effectiveness points. It avoids being shaken.  The rest of the Imperial troops rally at the loss of their officers. 

Turn 5:
The sun has risen enough for a 30 inch LOS.

The Ork warboss again tries to assault the entrenched Armored Fist squad, but the Imperials hold the trenches and force them back, and shaken.  The Orks lost three Effectiveness vs. the Guards 2.  The dread's heavy weapons try to dig them out next, but fails to cause any damage thanks to cover. The Stomperz and the Big Bangerz rally. 

The right most Ragnarok fires on the Dread, and hits it for 3 Effectiveness point loss, but fails to shake it!  The troopers on foot, target the Orks in the ruins, and manage to take out two, despite range and cover.  Fire from the entrenched Armored Fist reduces the Warboss to 1 Effectiveness.  The Ragnarok on the right catches the Bikerz in confusion and opens fire on them, reducing them to 4 effectiveness.  The Militia move up behind the Ragnarok.    


Turn 6: 
LOS is now 36 inches.  

The Big Bangerz move up and fire at the entrenched Armored Fist squad, but fail to cause any damage.  The Dread manages to reduce them 1 more Effectiveness point.  The Stomperz rush out of cover and attack the Ragnarok up close and personal.  They manage to reduce it 3 Effectiveness, but lose 6 in the process.  They fall back from the tank, but are not shaken. 


The Imperial forces are shaken by the ferocity of the Ork attack, and are all shaken! 

Turn 7: 
LOS is now 42 inches. 

The Dread moves forward and fires at the troops in the open, killing 1.  The Big Bangerz open up on the Armored Fist Squad, and their heavier artillery is enough to finally kill the troops dug-in by the hill.  The Stomperz move and shoot ineffectually at the Ragnarok.  The last Basherz rush towards the Imperial lines. 

The Imperial forces see the threat coming, and rally across the line.  Only the Ragnarok on the right flank is still shaken.  

Turn 8: 
The Basherz rush into the Imperial troops, and kill 4 before they are put down with bayonet and las-bursts.  The Dread opens up on the Ragnarok, but the shells bounce harmlessly off its armored hull.  The Big Bangerz are out of range, and try to move up but are shaken.  


The Imperial forces rally and target the Orks coming through the rock field on the flanks.  They unload, and reduce them to 2 effectiveness points and shake them despite the cover and range.  

Conclusion: 
Ultimately, it is a draw on the plains of Baron's Rest, as both sides take heavy casualties, but remain in the fight.   No one is able to secure the area.  However, the Imperial forces held a slight edge in Effectiveness Points remaining 33 to 20.  


Colonel Brusilov watched the battle play out across the southern reaches of Baron's Rest.  His troops engaged across the line, but he was disappointed to see no new break throughs develop.  He had used a mix of Imperial Guard, PDF, and Militia in a combined arms approach.  The losses of PDF and Militia were easily replaced from North Ammoriss.  However, replacing the losses of his experienced Guard troops was another matter.  

In retrospect, his next attack he would use his own Imperial Guard forces as the spearhead, while PDF and Militia forces held the line.  Another possibility was to call on elements of his other Taskforce commanders to help break Ork resistance on Baron's Rest.  That meant using air power or naval bombardment to pin down Ork forces before sending in his troops.  He did not relish sharing the victory with them, but they could not move onto attacking the Ork held Green Zone until they had been expelled from Baron's Rest completely.   

I took command of the Greenskins, and I was very disappointed in the performance of my Bikerz and Big Bangerz.  They kept failing their Command checks.  I tried to use my Boss has a battering ram, but my skumgrod wisely kept them in cover to improve their saves.  I had better luck when I used the Boss as a way to boost key units Command rolls.  However, once I wised up it was too late to make the difference.  The Dread was my star unit, and its heavy armor and squad support weapons were an excellent combination.   

My skumgrod's unit of the match was the Regular Mounted unit that he made a Big Unit.  It dug into the dunes, and that made it hard to dig out of.  The extra armor made a big difference when I tried to kill them.  The Ragnarok's were a bit disappointing due to bad command rolls, but they were hard to hurt and when they passed they dealt out the pain.  My Bikez, Dread, and Big Bangerz were the best antidote to these units, but only the Dread managed to get to a place to engage them.  

Meanwhile..... (Bonus Kill Team Action!) 

While Ork forces were being engaged by elements of Taskforce: Sword, Space Marines from the Panther's Claws deployed from their forward operating position in an attempt to raid the Ork camp for key pieces of intel.  Previously, the marines had successfully raided Look-out Pointe.  They expected only a token force of defenders, while the bulk of the Orks went out to the big scrap.  

However, Boss Skragthumpa was not convinced that everything was as it seemed.  He held his warband back.  Maybe it was because he had a scrap with one of his peers, maybe Mork gave him a vision, or maybe he was just a kunning Blood Axe?  Whatever the reason, he and his boyz were there when the Space Marines came rolling in hot.  

The Ork encampments on Baron's Rest had been turned to scrap and ruins by the Ammoriss Air PDFs heavy bombardment.  In addition, artillery from taskforce: Sword had sighted in on the scrap compounds and been steadily raining shells down on them. The two forces came to blows around the remains of the Mek Shedz, called Skrap Alley.   


This was a Kill Team mission where we had to look for intel in scrap piles.  You one a VP for every pile you searched as an action.  Each of us had a scrap pile in our deployment zone, and there were 4 others outside, going across Skrap Alley.  We had identical terrain, mirroring each other.  

As the orks, I chose the aggressive strategem that let me run a model out ahead.  Therefore, I quickly took got a boy across to one of their scrap piles and looted it before the beakies could get there.  As we traded the targeted my boyz, but I concentrated completely on the objectives, not even bothering to shoot back.  

By the end of the second turn, I had lost three boys, but had a VP lead firmly in hand.  He would have to be very aggressive and lucky to unseat me.  Despite taking a beating, I managed to delay and contest enough objectives that he was unable to catch up to me blitzed lead.  


There was barely any shots fired by my side, and my Big Shoota stayed silent the whole game.  However, in the late game we did get into some close combat, and close firefights.  I wounded Marines enough to keep them from getting to their objectives; but not enough to kill them.  

At the end of the day, Boss Skragthumpa was killed, along with all his boyz.  In return, they killed 1 marine, and wounded two others.  More importantly, the sacrifice kept the Pather's Claws from getting the intel on the Ork war machine they were after.  They withdrew with their mission incomplete, as the alarm rang through the Ork camp, summoning more boyz to Skrap Alley to fight. 


A minor set-back to General Brusilov's plans on Baron's Rest. I hope you enjoyed this snippet of Kill Team action woven into this larger battle report.  

Conclusion: 
In the Kill Team game, it all came down to careful Objective play.  I had it pretty well in hand by the end of the 2nd "turning point" of the battle.  However, my opponent still put up a stiff fight, and it went down to the wire.  There is something strangely dissatisfying about winning a game by losing all of your troops!  

I have been building up some 6mm Forces for a climactic battle for Baron's Rest.  I have also been working on some Imperial Subs for Aquanautica Imperialis and some targets for an Aeronautica Imperialis fight.  Those might help swing the final battle for Baron's Rest.  Afterall, if the Orks can impact the supply lines back to North Ammoriss, they might be able to hold out!  


Become a Patron and get access to all the cool stuff, a peak behind the curtain of Blood and Spectacles, and early-access to playtest games!  


You can follow Blood and Spectacles Facebook page or Instagram for more fun! 

Check out the latest publications and contact me at our Blood and Spectacles website

Or purchase all out games at the Blood and Spectacles Publishing Wargames Vault Page!